
Recomendados
Mais conteúdo relacionado
Mais de CommunicationsTeam
Mais de CommunicationsTeam (20)
Último
Último (20)
Tutorial - Friend or Non-member Parent
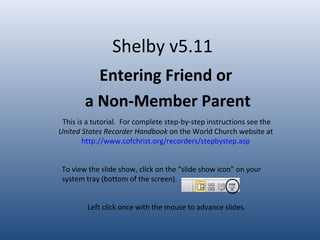
- 1. Shelby v5.11 Entering Friend or a Non-Member Parent This is a tutorial. For complete step-by-step instructions see the United States Recorder Handbook on the World Church website at http://www.cofchrist.org/recorders/stepbystep.asp Left click once with the mouse to advance slides. To view the slide show, click on the “slide show icon” on your system tray (bottom of the screen).
- 2. New — Go to the tool bar and click the “New” tab (first item on the toolbar and looks like a white sheet of paper). — You will get a message that says, “Is this new person to be added to the family of…” If yes, click “yes.” If no, click “no.” 1. To add a Friend or a non-member parent: — First check to see if the person has already been entered as a friend or miscellaneous name. If not, you are ready to enter. If yes, you will use that record to attach the child to, and you do not need to add them again (proceed to step 2).
- 3. – Enter the person’s name in the spaces at the top of the screen (do not add title). – Make sure the dot beside “individual” is filled in (not organization). 2. On the left side of the screen, you will see a list of criteria. By clicking “show all” or “show buttons,” you can decide which criteria you want showing. Click “show all” to see the headings that were once shown on tabs (life events, addresses, phones, etc.)
- 4. —Click once on “Individual Information” on the left side of the screen. This screen should read: • Module: Friend • Record Status: Active • Relationship: Active • How Received: Leave blank • Date Received: Date of Entry
- 5. — Click once on “Addresses” on the left side of the screen. — Double click on the space beside “Home/Main Address.” Enter address.
- 6. — Click once on “Phones” on the left side of the screen, — Double click on the space beside “Main/Home.” Enter the phone number. If there are other phone numbers (cell, business, etc.) add those to the respective fields. Tip: Do not add dashes to phone numbers. Tab three times to the next line and the dashes will automatically be entered.
- 7. — Click once on “Demographics” on the left side of the screen. Add parent’s birth date, gender, and marital status. Change salutation, if needed. For example, if the person’s name is William, but they go by Bill, you would enter “William” as the First Name and “Bill” as the salutation. You may also enter an email address in this section, if known.
- 8. — Click once on “Primary Family” on the left side of the screen. Make sure the parent is listed as “Head of House.” (If only one parent is listed, the system will automatically put each added entry in as a spouse.)
- 9. — Click once on “Miscellaneous” on the left side of the screen. If this is a new entry and not connected to someone already in the system, you will need to add the last four digits of the congregation they are attending. If this is a new entry, and they are connected to someone, this should already be entered. To search for the congregation number, click on the button with three dots beside “Site ID#.” A new box will come up. Type in part or the entire congregation name and press enter. Then choose the correct congregation from the list and click “ok.”
- 10. — At the top left of the screen, click the “save and close” button, which looks like a white sheet of paper with a green check mark.