
Recomendados
Mais conteúdo relacionado
Mais procurados
Mais procurados (20)
Semelhante a Mv4
Semelhante a Mv4 (20)
Mais de Charl234
Último
Último (20)
Mv4
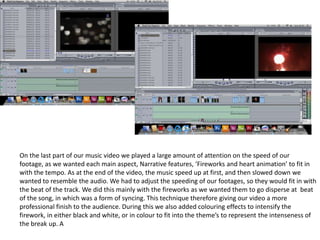
- 1. On the last part of our music video we played a large amount of attention on the speed of our footage, as we wanted each main aspect, Narrative features, ‘Fireworks and heart animation’ to fit in with the tempo. As at the end of the video, the music speed up at first, and then slowed down we wanted to resemble the audio. We had to adjust the speeding of our footages, so they would fit in with the beat of the track. We did this mainly with the fireworks as we wanted them to go disperse at beat of the song, in which was a form of syncing. This technique therefore giving our video a more professional finish to the audience. During this we also added colouring effects to intensify the firework, in either black and white, or in colour to fit into the theme’s to represent the intenseness of the break up. A
- 2. Getting the footage of the heart on the final cut was done through windows movie maker. Firstly , we drew the heart then took pictures of it at each stage of completing it. Then we imported the images onto the programme, and put each individual heart on the storyboard, shown to the right. However, playing the footage we realised that the length of heart was too long so we didn’t get the desired each. To shorten the duration of each heart we had to change the storyboard to timeline, on here we could shorten or widen the clip by moving the arrows.
- 3. At this stage we wanted to test different transitions and effects and see which achieved the best suited look for our music video. The transition that we ended up using was the fade as it connected which image together and made it seem as though the footage was originally that way, to add the fade we had to put it on the arrow. After doing this we added a effect, because in our music video he had fireworks, as well as black and white footage, we trialled greyscale, however the filter did not feel suited to the video, this lead us to finding an effect that emulated the fireworks In order to put the video on final cut it had because of the bright explosion of colours. to be published by clicking this option above.
- 4. After publishing the movie, we had to covert it to an mp4 file in order for us to import it on Final Cut express. When the video was placed on final cut, we cut the footage into different sections to position them in between different clips which included flash backs etc.
- 5. In the last part of our music video we interlink abstract themes to the narrative feature’s to create a more upbeat approach to our video. By this we used different effects to give our video a more up tempo appearance. By this I mean we added, a contrast in colours this was shown through several aspects, 1) the fireworks (representing the girls heart break), Whilst editing this we used the glow effect to intensify the colour of the fireworks, we also slowed down/Speeded up the timing of the fireworks to make them react to the beat of the song giving a connection between the audio and the imagery and also creating a contrast between the past ‘Black and white footage’. 2) We used stop animation to create a heart breaking, on this we edited the image to flash various colours which again contrast on the black and white footage and also with the fireworks as the heart was given the effect on which it continuously changed colour, this also connecting to the tempo of the music.
- 6. The text message saying “it’s over” plays a large role in our music video as it symbols the themes of the break up. As shots of the phone are cleverly plotted amongst several clips of our music video. At the end of the music video, we though we should express the theme head on to the audience, by this we put the phone showing the text message right at the end of our video. Although the shot may have been similar to this featured before in our video we changed the edit so that the zoom was reversed to create a sense of a backwards storyline.