Axa Assurance Maroc - Insurer Innovation Award 2024
Sketchup modul
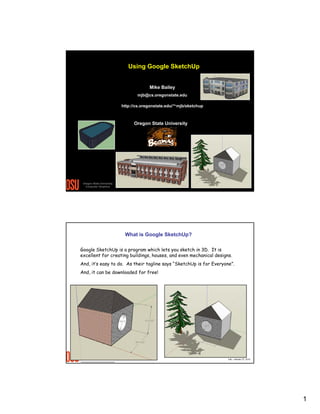
1. Using Google SketchUp
Mike Bailey
mjb@cs.oregonstate.edu
http://cs.oregonstate.edu/~mjb/sketchup
Oregon State University
Oregon State University
Computer Graphics
mjb – January 27, 2010
What is Google SketchUp?
Google SketchUp is a program which lets you sketch in 3D. It is
excellent for creating buildings, houses, and even mechanical designs.
And, it’s easy to do. As their tagline says “SketchUp is for Everyone”.
And, it can be downloaded for free!
Oregon State University
Computer Graphics
mjb – January 27, 2010
1
2. Getting Google SketchUp for Free
Go to:
http://sketchup.google.com
Follow the links to the free download
(see the next page).
There is also a SketchUp Pro which
costs money.
Google SketchUp comes in Windows 2000/XP/Vista and Mac OS X versions.
Oregon State University
Computer Graphics
mjb – January 27, 2010
Getting Google SketchUp for Free
1. Click here
Oregon State University
Computer Graphics
mjb – January 27, 2010
2
3. Getting Google SketchUp for Free
2. Then click here
This one
costs money
This one
is free
Oregon State University
Computer Graphics
mjb – January 27, 2010
Getting Google SketchUp for Free
3. Select the operating system
(Windows or Mac)
4. Then click here
Oregon State University
Computer Graphics
mjb – January 27, 2010
3
4. SketchUp Student Learning Objectives
1. Learn that the computer can be used to enhance creativity. It’s not just
for nerds and gamers!
2. Learn that the computer can be used to design and plan.
3. Learn the basics of 3D interaction. This will have further application in
fields ranging from engineering CAD to art and animation.
Oregon State University
Computer Graphics
mjb – January 27, 2010
Getting Started
Double-click the Google SketchUp icon
or click:
Start →All Programs →Google SketchUp 7 →Google SketchUp
The start screen should look something like this:
This person is 5’ 9”
tall – this sets the
scale for what you are
about to create
Right now, click File→Save As – and hit Save often while you are editing
Oregon State University
Computer Graphics
mjb – January 27, 2010
4
5. Getting Started Toolbar
The icons across the top are really important:
Make
component
Draw a
line
Draw a
circle
Select
something
p
Tape
measure
Push/
pull Rotate Orbit Zoom
Draw a
Erase
Move/ Offset
box
something
Copy
Draw an
Paint
arc
bucket
Pan
Get
current
view
Place
model
Zoom Toggle
extents terrain
Share
model
Get
models
Oregon State University
Computer Graphics
mjb – January 27, 2010
Large Toolset Toolbar
Select View→Toolbars→Large Tool Set
Select something
Paint bucket
Draw a box
Draw a circle
Draw a polygon
Make component
Erase something
Draw a line
Draw an arc
Draw freehand
Move/Copy
Push/pull
Rotate
Follow me
Scale
Tape measure
Protractor
Reset the Axes
Orbit
Zoom
Previous view
Position camera
Oregon State University
Computer Graphics
Walk
Offset
Add dimensions
Add text
Add 3D text
dd
Pan
Zoom extents
Next view
Look around
Section January 27, 2010
plane
mjb –
5
6. The Views Toolbar
Select View→Toolbars→Views
3D
Top
Front Right Back
Left
This is a very handy toolbar to have active
because it lets you change to a specific view of
your scene with one mouse click!
Oregon State University
Computer Graphics
mjb – January 27, 2010
SketchUp “Inferences”
One of SketchUp’s key strengths is that it doesn’t require you to enter
every little piece of information as many 3D computer programs do.
Instead, it tries to infer what you really mean by how you do things.
Oftentimes it uses colors to tell you what it is inferring.
• Green dots = Endpoints
• Red dots = On an edge
• Cyan dots = Midpoints of edges
• Blue dots = On a surface
• Red line = X axis
• Blue line = Y axis
• Green line = Z axis
• Magenta line = something is parallel or
perpendicular to an edge
• Hold SHIFT to capture and lock an
inference
Oregon State University
Computer Graphics
mjb – January 27, 2010
6
7. Axis Coordinate System
Y
This is the 3D coordinate
system that SketchUp uses.
This is referred to as a RightHanded Coordinate S t
H d d C
di t System
This is called
The Origin
Z
X
Oregon State University
Computer Graphics
• Red line = X axis
• Blue line = Y axis
• Green line = Z axis
mjb – January 27, 2010
Drawing a 2D Box
This is called
The Origin
You’ll end up with
something like this:
Oregon State University
Computer Graphics
Click on the Draw-aBox icon, then click on
the origin, and while
holding down the
mouse, drag in this
direction
We are going to build a
house, so make this square
an appropriate size, given
that the person is almost
6 feet tall. Hint: also look
at the box in the lowerright corner.
mjb – January 27, 2010
7
8. Notice the Bottom of the Screen
This is the
Measurement Toolbar, or
MTB
It is used to show you the
dimensions, size, angle, etc. that
you are currently setting
It can also be used to set exact values – just type
into it while you are sizing with the mouse. But, if
inputting length, be sure to use units: ’ for feet
and ” for inches.
Oregon State University
Computer Graphics
mjb – January 27, 2010
Extruding it into a 3D Box
Click on the Push/pull
icon, then click on the
box you just created,
and while holding
down the mouse, drag
in this direction
You’ll end up with
something like this:
Oregon State University
Computer Graphics
We are going to build a
house, so make this height
an appropriate size, given
that the person is almost
6 feet tall. . Hint: also
look at the VCB box in the
lower-right corner.
mjb – January 27, 2010
8
9. Deleting an Object
1. Select the Select icon
2. Select the object to delete by dragging
a box around it with the cursor
3. Hit the Delete key (not Backspace)
Oregon State University
Computer Graphics
mjb – January 27, 2010
Adding more detail to an existing face
Click on the Draw-a-circle icon, then
click on one face of the 3D solid you
just created, and while holding down
the mouse, drag in some direction
Click on the Push/pull
icon, then click on the
circle you just created
created,
and while holding
down the mouse, drag
in this direction
Oregon State University
Computer Graphics
mjb – January 27, 2010
9
10. An outie or an innie :-)
Oregon State University
Computer Graphics
mjb – January 27, 2010
The difference between pushing a hole and cutting a hole
If you push the circle in,
you get a tunnel with
walls and a back face
Oregon State University
Computer Graphics
If you erase the circle by
clicking on the circle, then
hitting Delete (not
Backspace), you get a
window cut in the wall.
mjb – January 27, 2010
10
11. Want to see it from a different view?
Click on the Orbit or Pan icon, then click
in the scene, and while holding down the
mouse, drag in some direction
Oregon State University
Computer Graphics
You can also Orbit by pushing down
on the middle button on the mouse.
On many mice, the middle button is
also the scroll wheel.
mjb – January 27, 2010
Want to zoom in?
The Zoom extents icon will
zoom in as much as possible
without making any of your
object disappear off the
screen
The Zoom icon will allow you
to zoom as much or as little
as you want
You can also Zoom in and out with
the scroll wheel on the mouse
Oregon State University
Computer Graphics
mjb – January 27, 2010
11
12. Controlling the SketchUp Camera with a 3D Input Device
The systems in the Oregon State
University Computer Graphics
Education Lab (CGEL) are each
equipped with a 3D input device
called a S
ll d Space N i t (f
Navigator (from a
company called 3DConnexion).
They come with a SketchUp plug-in
that allows them to be used to move
the camera all around.
Try it! Gently push and twist the black
y
yp
rubber handle and see what happens.
Do it slowly and gently.
Oregon State University
Computer Graphics
mjb – January 27, 2010
Let’s give it a roof
Click the Draw-a-Line icon to
draw a line across the top of the
solid. But, you want the line to
go midpoint-to-midpoint, which is
a good place to raise the roof line
from.
So, before clicking to draw the
line, slide the pencil back and
forth until the cyan dot appears,
indicating that you’ve found this
edge’s midpoint,.
Oregon State University
Computer Graphics
mjb – January 27, 2010
12
13. Let’s give it a roof
Now click on the Move/copy
icon, then click on the line
you just drew, and drag
upwards
Oregon State University
Computer Graphics
mjb – January 27, 2010
Want to bevel the edge of the roof?
1. Draw a line here
2. Move the point at the tip
of the roof
Oregon State University
Computer Graphics
mjb – January 27, 2010
13
14. Want to make it look more interesting?
Click Window→Materials
1. Click on a category
2. Click on a specific color or
pattern
3. Click on the surface(s)
you want to apply it to.
Oregon State University
Computer Graphics
mjb – January 27, 2010
Pure colors are considered Materials too
Click Window→Materials
1. Select Colors
2. Treat the color just like
you did the material
Scroll up and down to
get more colors
Oregon State University
Computer Graphics
mjb – January 27, 2010
14
15. Dimensions
Click Tools→Dimensions
1. Click on an edge
2. Drag where you want the
dimension to be drawn
Dimensions are useful if
you are giving your design
to someone so that they
can build it
1. Click on the
circumference of a circle
2. Drag where you want the
dimension to be drawn
Oregon State University
Computer Graphics
mjb – January 27, 2010
Adding Windows
Click Windows→Components
Click Large Thumbnails
Click Architecture
Click Windows
Oregon State University
Computer Graphics
mjb – January 27, 2010
15
16. Adding Windows
Drag a window type onto a wall of
the house
Oregon State University
Computer Graphics
mjb – January 27, 2010
Adding Landscape Components
Click Window→Components
Click Landscape
Click DC Landscape
Oregon State University
Computer Graphics
mjb – January 27, 2010
16
17. Adding Landscape Components
Click Dynamic Pine Tree
Drag it into the scene where you
want it
To release it, click on the black
Select Arrow icon and then click
in some empty spot in the scene
Oregon State University
Computer Graphics
mjb – January 27, 2010
Moving and Copying
1.
1 Select the Select icon
2. Select the object to move
3. Click the Move icon
4. Move the object
5. Holding down the Control
key will result in a Copy
instead of a Move
Oregon State University
Computer Graphics
mjb – January 27, 2010
17
18. Scaling
1.
1 Select the Select icon
2. Select the object to scale
3. Select Tools→Scale or click
the Scale icon in the Large
Toolset toolbar
4. Grab a grip point and scale
the object
Oregon State University
Computer Graphics
mjb – January 27, 2010
Styles
Click Window→Styles
Select Default Styles
Click on the style you want
Earth Modeling – adds
grass and sky
Shaded with textures
(this one is good)
Wireframe
Simple Style -this one is good
Oregon State University
Computer Graphics
X-ray
The X-ray style is good to use
if you want to see and place
objects inside a structure
mjb – January 27, 2010
18
19. Try Some of the Assorted Styles – They’re Fun!
Oregon State University
Computer Graphics
mjb – January 27, 2010
Tell SketchUp Where in the World you Are
Click Window→Model Info→Location
Wow! SketchUp
even knows about
Corvallis!
This sets your
latitude
You care about setting your latitude because SketchUp also lets you . . .
Oregon State University
Computer Graphics
mjb – January 27, 2010
19
20. Setting Shadows in SketchUp
Click Window→Shadows
Set time of day and day of year
Oregon State University
Computer Graphics
mjb – January 27, 2010
Projections
Click Camera→Perspective
Click Camera→Parallel Projection
In perspective, things get smaller
as they get farther away, which
away
is more realistic. In parallel, they
don’t. But parallel helps you see
if front and back faces line up.
Oregon State University
Computer Graphics
Perspective
“Vanishing Point”
Parallel
mjb – January 27, 2010
20
21. Exporting an Image File
Click File→Export →2D Graphic
Your image can be exported in
one of 4 formats:
1. BMP
2. JPEG
3. TIF
Web browsers all
know about this
format
4. PNG
You would do this, for example, to email
this
example
someone an image of your scene, to import it
into a document, or to put it on your website
Oregon State University
Computer Graphics
You can also export the 3D scene, but in
the free version, only to Google Earth
format. For more 3D formats, you need
the Pro version.
mjb – January 27, 2010
Other Cool Things you can
o
do with SketchUp
Oregon State University
Computer Graphics
mjb – January 27, 2010
21
22. Changing the Person’s Clothing
The person in the default
scene is a SketchUp
“Component”, that is, he is a
group of geometry collected
together. To change his
clothing, you need to first
break, or “Explode”, the
collection apart.
Even easier, right-click on
the person and select
Explode from the pop-up
menu.
After that, you can click on Window→Materials and re-color
or re-pattern the clothing
Oregon State University
Computer Graphics
mjb – January 27, 2010
Creating Groups
Sometimes you would like to collect several pieces of geometry
together and be able to treat them as a single unit. This is
called a SketchUp Group.
Create a SketchUp Group by first clicking on the Select icon.
Then, click on the first object you want in the Group. It will turn
blue.
Then, hold down the Shift key and click on all other objects you
want in the group. They will also turn blue. If you select the
wrong item, just click it again to un-select it.
You can select many things at once by creating a rectangle
around all of them with the Select cursor.
When you are done, right-click and select Make Group from
the pop-up menu.
To ungroup the objects, right click on them and select Explode
from the pop-up menu.
Oregon State University
Computer Graphics
mjb – January 27, 2010
22
23. Hiding Geometry
Sometimes it would be nice to
temporarily eliminate some
geometry so that you could see
inside something. This is referred
to as Hiding.
To hide one or more pieces of
geometry, select all of them as if
you were about to create a group.
Then, right-click and select Hide
from the pop-up menu. The
selected objects look like they are
gone, but they aren’t. They’re just
hidden.
This is useful for putting things into
an object (such as furniture) or for
editing the object (as is needed
here).
Oregon State University
Computer Graphics
mjb – January 27, 2010
Un-Hiding Geometry
There are two ways to bring back hidden
geometry.
The first is to select
Edit→Unhide→All, like this:
The second is to select
View→Hidden Geometry. This will
make hidden geometry show up like this:
From there, you can right-click on it and
select Unhide from the pop-up menu.
Oregon State University
Computer Graphics
mjb – January 27, 2010
23
24. Eliminating Geometry
Sometimes extruding geometry results
in it existing places it shouldn’t.
To eliminate any geometry, take the
Eraser tool and click on the edges of
the geometry you want to eliminate.
As soon as an edge of a surface has
been eliminated, the surface will
disappear too.
Oregon State University
Computer Graphics
mjb – January 27, 2010
Move Tricks
You can turn the Move into a Copy by
holding down the Control key.
You can force the Move/Copy to move along one of the
3 axes (red, green, or blue) by holding down one of the
arrow keys as follows:
Oregon State University
Computer Graphics
mjb – January 27, 2010
24
25. Adding 3D Text
1. Click on Tools→3D Text
2. Type the text into the dialog box
3. Make any text settings you want
4. Place the text by clicking on an object
Oregon State University
Computer Graphics
mjb – January 27, 2010
Rotating an Object
1. Select the entire object
2. Click on the Rotate Tool
3.
3 Click the Protractor onto the object
4. Rotate the Protractor with the mouse
to align it with something (e.g., a key
point) -- click when ready.
5. Rotate the object. Click when done.
Once you’ve started
rotating, you can
also type in an exact
angle into the
Measurement
Toolbar (MTB)
Oregon State University
Computer Graphics
mjb – January 27, 2010
25
26. A Rotation Trick
We want to rotate this group by 180º (i.e., we want to flip it
over). To do this, we want the rotation protractor to be vertical.
But we can’t get this, because the inference engine
can only find a horizontal surface to latch onto
So we move over to another object
that has vertical walls, or we make a
dummy box, and get the inference
engine to latch the protractor onto a
vertical surface, and hold down the
Shift Key to lock it
We then proceed to use the
protractor on the original object.
Oregon State University
Computer Graphics
Now rotate that object 180º, and then
delete the dummy box
mjb – January 27, 2010
An Interesting Use for Rotation -- Building a Real Model from Paper!
Start with a model. “Boxy” models with
flat faces work best.
For each face:
1.
1 Select the face and its edges by double
doubleclicking on the face
2. Right-click the mouse to bring up the
menu and select Make Group
By doing this for each face, you are
separating each face and its edges
from the rest of the model so they
can be rotated independently.
Oregon State University
Computer Graphics
mjb – January 27, 2010
26
27. An Interesting Use for Rotation -- Building a Real Model from Paper!
Now, for each face, select it (and
other unfolded faces attached to it)
and use the Rotate function to
“unfold” it with respect to the face next
to it, or with respect to the ground
At times, you might have to select
multiple faces (hold down the Shift
key and click on each one), so that
they can Rotate together.
This is sometimes easier in a
Parallel view (Camera→Parallel
Oregon )
Projection State University
Computer Graphics
mjb – January 27, 2010
An Interesting Use for Rotation -- Building a Real Model from Paper!
Print the unfolded scene from the
bottom view (you might have to select
all faces and rotate them over
together), and then fold them up into a
real object.
These tabs were added to make the object
easier to glue together.
This Oregona pretty sloppy job, but you get
was State University
Computer
the point… Graphics
mjb – January 27, 2010
27
28. Rotating a Face
Strange as it may seem, you can also
rotate just a face. Follow the same
procedure, but select only the face.
Oregon State University
Computer Graphics
mjb – January 27, 2010
Scaling an Object
1. Select an object
2. Select Tools→Scale
3. Move the grips with the mouse
4. Hold down th C t l k if you
4 H ld d
the Control key
want scaling about the object’s
center
Moving a side grip
will stretch the
object in that
direction. Moving a
diagonal grip will
scale the object
equally in all
directions (“uniform
scaling”)
Oregon State University
Computer Graphics
mjb – January 27, 2010
28
29. You can also scale just a face
1. Select a face
2. Select Tools→Scale
3. Move the grips with the mouse
4. Hold down th C t l k if you
4 H ld d
the Control key
want scaling about the object’s
center
Oregon State University
Computer Graphics
mjb – January 27, 2010
Sectioning an Object
1. Select an object
2. Select Tools→Section Plane
3. Select the section plane
4. Use the Move T l t slide it i t
4 U th M
Tool to lid
into
the object
Oregon State University
Computer Graphics
mjb – January 27, 2010
29
30. Drawing an Arc
1. Click on the Arc Tool
2. Select two points for the chord
3. Select a third point that shows
p
g
SketchUp where to “bulge” the arc
Oregon State University
Computer Graphics
mjb – January 27, 2010
Arcs are Often used to Round Corners
1. Click on both edges
surrounding a corner. The
line will turn purple when you
are the same distance from
the corner.
2. When you place the third
point, the inference engine
will also tell you when the arc
is tangent to (aligned with)
the edges.
Oregon State University
Computer Graphics
mjb – January 27, 2010
30
31. Want to create Crown Molding?
Draw an arc in the corner
Click Tools→Follow Me
Click on the arc area
Move the cursor along the
perimeter – don’t click again
until you are done with the
full path
Oregon State University
Computer Graphics
mjb – January 27, 2010
Another use for Follow Me – make a Sphere
1. Create a circle
2. Copy the circle using the Move Tool with the
Control key held down
3.
3 Rotate the top circle 90º
90
4. Select the bottom circle, select Tools→Follow
Me, and select the top circle
5. Erase the bottom circle and Delete it
Oregon State University
Computer Graphics
mjb – January 27, 2010
31
32. Offsetting a Surface
1. Click on the Offset Tool
2. Select the surface to offset on
3. Move the mouse to show how
y
much to offset – click when ready
4. This only creates offset edges –
you need to use the Push-Pull Tool
to do something with it.
Oregon State University
Computer Graphics
mjb – January 27, 2010
Combining Several Techniques:
Making a Swimming Pool
Start by creating a rectangle on the floor
Oregon State University
Computer Graphics
mjb – January 27, 2010
32
33. Use the Arc Tool and the Erase Tool
to Create 4 Arcs to Round the Corners
Oregon State University
Computer Graphics
mjb – January 27, 2010
Use the Push/Pull Tool to Lift it into 3D
Oregon State University
Computer Graphics
mjb – January 27, 2010
33
34. Use the Offset Tool to Create an Inner Edge
Oregon State University
Computer Graphics
mjb – January 27, 2010
Use the Push/Pull Tool to Push the Middle Down
Oregon State University
Computer Graphics
mjb – January 27, 2010
34
35. Use the Move Tool with the Control Key Pressed,
to Copy the Floor of the Pool and Raise it Up
This will become the water surface
Oregon State University
Computer Graphics
mjb – January 27, 2010
Select Window→Materials→Tile to Apply a Surface to Your Pool
If you hold down the Control Key when adding the tile
pattern, it will apply it to all surfaces, not just one. This
saves you a lot of time.
This isn’t right – the top surface of the water is
currently tile instead. We’ll fix this next.
Oregon State University
Computer Graphics
mjb – January 27, 2010
35
36. Select Window→Materials→Water and click on the top surface to
change it to water
Oregon State University
Computer Graphics
mjb – January 27, 2010
Make the Water Surface Translucent
In the Materials→Water dialog box, click on the Edit tab.
Then lower the Opacity until the water surface looks properly translucent.
Oregon State University
Computer Graphics
mjb – January 27, 2010
36
37. Adding Fog
This brings up the Fog dialog box
Click Window→Fog
Click here to turn the fog feature on
This slider adjusts how far in
front of your eye the fog starts.
Items closer to you than this
will not be fogged at all
all.
This slider adjusts how far in
front of your eye the fog
completely hides your scene.
Items farther away than this
will not be visible at all.
Oregon State University
Computer Graphics
mjb – January 27, 2010
Adding Fog
Oregon State University
Computer Graphics
mjb – January 27, 2010
37
38. Adding a Vertical Chimney to a Sloped Roof
1.
Draw a line along the roof using
the pencil tool. SketchUp’s
inference engine will try to force it
to be parallel to an axis. Let it do
that.
2.
Select the line you just drew. Use
the Move/Copy icon with the
Control Key held down to lift it up
in the air (The Control key will
air.
force it to do a Copy.) Wiggle it a
little bit until you get the phrase
“On Blue Axis” to appear. This
indicates that you are lifting it
straight up.
Oregon State University
Computer Graphics
mjb – January 27, 2010
Adding a Vertical Chimney to a Sloped Roof
3.
Draw lines using the pencil tool
from the ends of this new line to
the face of the roof. SketchUp will
tell you when you are there. Be
sure the line is a color (red in this
case) to indicate that you are
parallel to an axis.
4.
Using the pencil tool, connect up
all the points to form edges. You
should have 9 lines in all. (Don’t
forget to look at the back of the
chimney.) SketchUp will turn the
edges into faces as you complete
them. There should be 4 faces in
all.
all
Oregon State University
Computer Graphics
mjb – January 27, 2010
38
39. Adding a Vertical Chimney to a Sloped Roof
5.
Use the Push/Pull tool to lift the
top surface.
6.
Use the Offset tool to make an
inner surface on that top surface.
7.
7
Use the Push/Pull tool to
U th P h/P ll t l t push th t
h that
inner surface down.
Oregon State University
Computer Graphics
mjb – January 27, 2010
Adding a Vertical Chimney to a Sloped Roof
8.
Add whatever Window→Material
decoration you want
9.
Get rid of the excess chimney under
the roof by hiding an end face and
erasing those edges. (See previous
sections.)
10. Unhide the end face when you are
done
Oregon State University
Computer Graphics
mjb – January 27, 2010
39
40. Subtracting one Surface from Another
1. Create two objects
2. Use the Move Tool to overlap them
3. Select both objects
4. Select Edit→Intersect→Intersect
4 S l t Edit I t
t I t
t
with Model
5. Erase the surfaces and lines you don’t
need
Note the difference
in edges
Oregon State University
Computer Graphics
mjb – January 27, 2010
Creating a Flying Animation
To create an animation:
1. Create a view of the scene
2. Select View→Animation→Add Scene
3. Create a different view
4. Select View→Animation→Add Scene
5. . . .
To play the full animation:
1. Select View→Animation→Play
As you add scenes, SketchUp will list
them. You can click on any of them to
get back to that view.
2. Pause or stop the scene with these buttons
Oregon State University
Computer Graphics
mjb – January 27, 2010
40
41. Animation Settings
Set how long each scene transition lasts
How long to wait before starting the animation
Oregon State University
Computer Graphics
mjb – January 27, 2010
Exporting Your Animation
To save an animation to a file:
1. Select File→Export→Animation
2. Save as an AVI file
To play the animation file:
Double-click on your AVI file
To import your animation into PowerPoint:
1. Select Insert→Movies and Sounds→Movie from File
2. Double-click on the image when editing the slide
3. Click on the image in Slide Show mode
Oregon State University
Computer Graphics
mjb – January 27, 2010
41
42. Making SketchUp Work
with Google Earth
Oregon State University
Computer Graphics
mjb – January 27, 2010
What if you want to show your creation . . .
Oregon State University
Computer Graphics
mjb – January 27, 2010
42
43. . . . where it really belongs on the Earth?
The tacky proposed
“Dimple Hill Beacon”
Corvallis, Oregon, USA
Oregon State University
Computer Graphics
mjb – January 27, 2010
Steps
1. Launch Google Earth
2. Navigate to where you want your model to go
Oregon State University
Computer Graphics
mjb – January 27, 2010
43
44. Navigating
Type in a city name or street
address here
Rotate the scene CW and CCW (the right
mouse button also does this, plus zooming)
Pan the scene (the left mouse button also
does this)
Zoom the scene (the mouse scroll wheel
also does this)
Plus, the middle mouse button will rotate
the scene to change from a top-down view
to a 3D view
Oregon State University
Computer Graphics
mjb – January 27, 2010
Flying to “Corvallis, OR” and Getting a 3D View
Oregon State University
Computer Graphics
mjb – January 27, 2010
44
45. Next Step: Navigate to a Top-down View of Where you
want to put Your Structure
Dimple Hill, OR
Oregon State University
Computer Graphics
mjb – January 27, 2010
Over in SketchUp, click on the Get Current View Icon
This brings a grayscale
version of the Google
Earth scene into SketchUp
Oregon State University
Computer Graphics
mjb – January 27, 2010
45
46. SketchUp Menu Icons Related to Google Earth
Get
current
view
Place
model
Get
models
Get current view – copy the Google Earth
scene into SketchUp
Toggle terrain – change the terrain in
SketchUp from flat to 3D and back again
Place model – send your model back to
Google Earth to see how it looks
Toggle
terrain
i
Oregon State University
Computer Graphics
Share
model
d l
Get models – Get 3D models that others
have created
Share models -- Publish the model so that
others who use Google Earth can get them
too (you need a Google account to do this)
mjb – January 27, 2010
Use SketchUp to Draw a New Model, or File→Import an Existing One
Then, use Place model
to ship it back to
Google Earth
Oregon State University
Computer Graphics
mjb – January 27, 2010
46
47. Placing the Model
Oregon State University
Computer Graphics
mjb – January 27, 2010
In Google Earth, select File→Save →Save image to write an image file
of this scene, suitable for displaying on a web page or a poster
Oregon State University
Computer Graphics
mjb – January 27, 2010
47
48. In Google Earth, you can also turn on the 3D Buildings layer to see
what other buildings people have published – this is really fun
Oregon State University
Computer Graphics
mjb – January 27, 2010
If you want to be seriously awed,
Fly To Washington, DC or New York City
and turn the 3D Buildings on
Oregon State University
Computer Graphics
mjb – January 27, 2010
48
49. Marking GIS Areas with
SketchUp and Google Earth
Outlining the meadow
area of Dimple Hill
Oregon State University
Computer Graphics
mjb – January 27, 2010
In Google Earth, Navigate to Where you Want to Be
Dimple Hill, Oregon
Hill
Oregon State University
Computer Graphics
mjb – January 27, 2010
49
50. Fire Up SketchUp, and Import the Google Earth Image
Oregon State University
Computer Graphics
mjb – January 27, 2010
Get a Top-Down View
(You might have to hit Zoom Extents to Center the View)
Oregon State University
Computer Graphics
mjb – January 27, 2010
50
51. Using the Line Tool, Click Multiple Times to Draw a Connected Series
of Lines Around the Dimple Hill Meadow Area
The outline will be a little
hard to see because the
lines are black and the
background is gray. Oh well.
Be sure the last point you
click matches the point you
started with. SketchUp will
help you do this by popping
up the Endpoint inference.
Click there . . .
Oregon State University
Computer Graphics
mjb – January 27, 2010
Use the Line Tool, Click Multiple Times to Draw a Line Around the
Dimple Hill Meadow Area
. . . to form a polygon.
You can tell that a polygon
has been formed because it
will color the inside, like this.
Oregon State University
Computer Graphics
mjb – January 27, 2010
51
52. Use the Push-Pull Tool to Lift the Polygon into 3D
Oregon State University
Computer Graphics
mjb – January 27, 2010
Turn the Google Earth Terrain into 3D, Sweep over the Entire 3D Box with the
Selection Tool, then use the Move Tool to Push the Building Down into the Terrain
You might have to hold the Down
Arrow key to force the
movement to be along the
vertical (blue) axis only.
You also might need to Push-Pull
the top of the box higher.
Oregon State University
Computer Graphics
mjb – January 27, 2010
52
53. Select Window → Material → Colors and Pick a Nice Color for the Box.
Holding down the Control Key, click the Paint Brush on the Box
You hold down the Control Key
when you click the paint bucket
on your box so that it will color
all the faces connected to the
one face that you click.
Otherwise, you will need to click
the paint bucket on each face
individually. Yuch.
Oregon State University
Computer Graphics
mjb – January 27, 2010
While We’re at it, Click on the Edit Tab and Adjust the Opacity of the Colored Box
Oregon State University
Computer Graphics
mjb – January 27, 2010
53
54. If you want to make the Box Look “Softer”(like it is made from Jello),
Right-Click on the Box and Select Soften/Smooth Edges, then Adjust These Two
Controls
Oregon State University
Computer Graphics
mjb – January 27, 2010
Now, Send your Box Back to Google Earth
If Google Earth has changed
your height exaggeration, go to:
Tools → Options
and change the Elevation
Exaggeration back to 1.0
Oregon State University
Computer Graphics
mjb – January 27, 2010
54
55. Good SketchUp Web Links
These Notes
http://cs.oregonstate.edu/~mjb/sketchup
General SketchUp Site
http://sketchup.google.com
Download SketchUp Models
http://sketchup.google.com/3dwarehouse
Tips and Tricks
http://sketchupdate.blogspot.com/search/label/Tips%20and%20Tricks
Step-by-Step SketchUp Examples
http://www.3dvinci.net/teacherguide
SketchUp Blogs
http://sketchupdate.blogspot.com
Oregon State University
Computer Graphics
mjb – January 27, 2010
More Good SketchUp Web Links
Video Tutorials
http://sites.google.com/site/3dbasecamp2008
Developing Plug-ins (Advanced!)
http://groups.google.com/group/SketchUp-Plugins-Dev/web/index.html
http://groups.google.com/group/SketchUp Plugins Dev
http://groups.google.com/group/SketchUp-Plugins-Dev
Oregon State University
Computer Graphics
mjb – January 27, 2010
55
56. Reference Books
Bonnie Roskes, SketchUp 7 Hands On.
Bonnie Roskes, Google SketchUp Cookbook.
Oregon State University
Computer Graphics
mjb – January 27, 2010
Other Examples
Hassan Sinky
OSU s
OSU’s Reser Stadium
Oregon State University
Computer Graphics
mjb – January 27, 2010
56
57. Other Examples – the OSU 3D Campus Map Project
Kris Hemenway
Chris Wasco
Oliver Forral
Kelley Engineering Center
Kearney Hall
Clock
Tower
Weniger Hall
Women’s Center
Milne Hall
Kidder Hall
Oregon State University
Computer Graphics
mjb – January 27, 2010
Oregon State University
Computer Graphics
mjb – January 27, 2010
57