SlideShare uma empresa Scribd logo
1 de 25
Baixar para ler offline
z
Ying Cheung
13019879
Product Design Technology
Product Design Engineering:
“Escape to Freedom” - Bridge
P1
Contents
P2
P3 Introduction
P4 Initial Concept (1/4 scale)
P5 2nd Concept (1/8 scale)
P6 Triangular Profiles Testing
P7 Folding Concept (Primary)
P8 Torsional Impact On Folding Structure
P9 Folding Concept (Secondary)
P10 Design Requirements Of Folding Concept
P11 Stabilising Secondary Fold Mechanism
P12 Fixture To The Balcony
P13 Hinge Dimensions
P14 Hinge Clearance Impact On Overall Deflection
P15 Overall Deflection Caused By Hinges
P16 Angle Of Deflection
P17 Improvement Made After Competition
P18 Change In Material Thickness Impact on
Bridge’s Stiffness
P19 Mass Of Bridge
P20 Centre Of Mass
P21 Factor Of Safety
P22 Deflection
P23 Deploy The Bridge To Escape
P24 Summary
Overall Design
And Feature
Development
Relationship
Between Hinges
And Deflection
Changes Made To
The Bridge After
Submission
Final Design
Details And
Summary
P3
Introduction
To construct a bridge that fits on the balcony and travels forward
6m and then 2m at 90°
 The bridge must not intersect with the No-Go-Zone.
 Made of Aluminium 2024-0
 Under 2.5m when folded
 Allow user of 80kg to walk on
 Deploy under 5 mins
Initial Concept (1/4 scale)
 Failure due to;
 manufacturing error,
 Torsional stress,
 open cross section profile
Improvement can be made;
 Create a closed cross section
profile, to resist torsion and
buckling
 Buckling occur during the testing of the
1/4 scale card model.
P4
Destructive testing of the first card-board bridge (1/4 scale) and
understanding of failure
Side
view
Bottom
view
Cross section profile
Ribs
2nd Concept (1/8 scale)
 Shear failure at the “hook” during
the testing of the 1/8 scale card
model.
 Failure due to;
 Under-Engineering
 Stress concentration
 Corrugation of cardboard
Improvement can be made;
 Create profile with larger
contact surface area to
reduce stress
concentration,
 Increase “h” value to
increase second moment of
area to reduce stress.
The cross section of this design
is triangular to create a closed
profile in order to resist torsion
and buckling
P5
After changing the cross-section profile into a triangle, and
observing failure through destructive testing
Ribs
Previous profile Triangular profile
Triangular Profiles Testing
P6
Using Solidworks simulation to test and identify which profile is
suitable for this torsion scenario.
Cross section
Cross section
Cross section
This configuration has more uniform stress range
(1.16e+1 – 8.72e+2 Mpa).
And lower stress at the intersection between the bridge
and dog-leg
Profile used in the 2nd concept
Folding Concept (Primary)
 However the collapsed bridge is
relatively large and balky.
 Not meeting the maximum size
standard – 2.5m (full scale)
Further development;
 Create internal folding
structure to reduce
overall size. Flat pack
idea.
P7
Concept of primary folding mechanism to allow the bridge
become portable.
Detach the dog-leg off the bridge
Balcony
Top view
Side view
3.3 m
The folding concept is to
“roll” up the parts to reduce
the size
Torsional Impact On
Folding Structure
As the torsional force
applied, the support plates
collide with the section on
it’s left to resist the torsional
motion
The centre point of the torsional motion is
unknown however the plates are added to
location as far away as possible to have
greater mechanical advantage against
torsion
 Torsion will force the folding
parts to shift, this will cause
misalignment and result
large deflection
Support plates are joined to the
section on it’s right
P8
Rotation of parts caused by torsion will affect the performance of
the bridge.
Folding Concept
(Secondary)
Combining both the primary
and secondary folding
mechanisms together to
collapse the bridge down to
smaller size – 1.88m
P9
Introducing secondary folding structure to reduce size of the
folded bridge in order to meet the brief’s requirement – under
2.5m (full scale)
3.3 m 1.88 m
Using 4-bar-linkage to as
secondary to minimise the size
of the bridge to flat-pack
 Previously without the
secondary fold result 3.3m
in folded size and unable to
meet the maximum limit of
2.5m
Design Requirements Of
Folding Concept
Tapered beam able to provide linear axis and flat
surfaces for folding
Ideal beam curve
Walking surface
with constant width
Twisted surface
 It is difficult to manufacture
a twisted piece and to
make it collapsible
 Since the ideal beam curved was replaced the stress
concentration will increase. However this was sacrificed so that
the structure can be folded
P10
Front view
Identifying requirements needed for the secondary fold to be
feasible
 Hinges require a linear pivot axis
Hinge axis
Stabilising Secondary Fold
Mechanism
P11
The Fold mechanism is required to be stabilised or else the structure
will collapse
The 2 possible consequences of not
having a stabiliser for the secondary
folding structure
A B
Providing both tensional and
compressive support to avoid
failure in both figure “A” and
“B”.
Fr = 400N
θ = 46:
(for compression calculation)
Fθ = 576N
θ = 44:
(for tensional calculation)
Fθ = 555N
Fc = Compressive force
9.9N
Fc = Tensional force
9.9N
The forces are relatively small and neglectable however both the
compressive and tensional reinforcements are required to be installed
for reassuring that the structure will not collapse during operation.
Fixture To The Balcony
 As the bridge is fixed
to the balcony, the
edge of the balcony
is likely to shear the
fixture.
To avoid the balcony cutting into and shear the
fixture, a bottle-cap-remover design was used
in order to have control of the location where
the force exert.
With a side effect of this design, it allows
clearance to slot on to the balcony.
P12
Failure of the 2nd concept
Identify failure occur on the fixture to the balcony and identify
features needed to minimise the chance of failure.
< Torsional stress is greater beam stress on the
same profile therefore the fixture will be stronger
if it is converted into a beam.
Hinge Dimensions
Shear surfaces = 5
H1 H2 H3
 The stress shown in the FEA
suggest that the hinges in “H1”
are the most likely to fail due to
low Fos value
P13
Identifying the dimension of the hinges through trial and error due to
complicated scenario – difficulty of applying both shear equation and
torsion equation onto the pin of the hinge
Deformation of the
pin during operation
Diameter (inner)
(mm)
Diameter (outer)
(mm)
Number of shear faces
Max FEA stress
(Mpa)
Fos
H1 50 100 5 37.96 1.9
H2 50 100 5 25.06 2.99
H3 50 100 4 20.47 3.66
Outer diameter
Inner diameter
Diameter of the pin
Although the stress operating of the pins are different, however they
are under the yield stress by at least 1.9 times therefore it is unlikely to
yield.
Hinge Clearance Impact On
Overall Deflection
The clearance between the pin
and the bracket of the hinge is
set to be 0.5 mm
 the clearance of the hinges
will have impact on the
overall deflection
Deformation results caused by
hinges;
 H1 11.1mm
 H2 3.74mm
 H3 2.9mm
 H4 2.48mm
Total 20.22mm
H1 H2 H3
H4
 The closer the hinge to the fixture
the more deflection it will cause due
to the mechanical advantage
P14
Clearance on both
brackets therefore the
result deformation x2
Hinge clearance allow parts to shift, the movement will cause the
bridge to deflect. Referencing to “clearance deformation”
calculation within the process book
Overall Deflection Caused By
Hinges
P15
H1 H2 H3
H4
The pin with in the hinge will deform during operation and allow parts
to shift, the movement will cause the bridge to deflect. Referencing to
“Hinge Stress Analysis” calculation within the process book
 The sum of the
deformation caused
by hinges is
32.24mm
By adding all the values together –
Total estimate value (without clearance) = 12.02mm
H1
H2
H3
H4
The image above shows how the pin of
the hinge is deformed.
The overall deformation values were
extracted from Autodesk Simulation
Mechanical
- Hinges were made without clearance
Referring to “Hinge Clearance Impact On Overall Deflection”
= 20.22mm
3.2 cm is visible deformation however user is still
enabled to walk on the bridge therefore no
actions need to be taken
Angle Of Deflection
P16
Using Solidworks Section Properties to analyse the polar moment of
inertia of the cross-section at every 500mm of the bridge to calculate
the deflection angle
length
(mm)
polar moment of inertia
(J) (m^4)
deflection
(rad)
deflection
(deg)
0 0.000534286 0 0
500 0.000599333 5.80348E-05 0.000364643
1000 0.000669455 0.000103912 0.000652897
1500 0.000744845 0.000140092 0.000880221
2000 0.000825692 0.000168499 0.001058712
2500 0.000912188 0.000190652 0.001197904
3000 0.001004522 0.000207753 0.001305352
3500 0.001102887 0.000220762 0.001387085
4000 0.001207472 0.000230446 0.001447935
4500 0.001318468 0.000237427 0.001491794
5000 0.001436066 0.000242204 0.001521814
5500 0.001560457 0.000245187 0.001540554
6000 0.001691832 0.000246706 0.001550101
Total = 0.014399012
0
0.0002
0.0004
0.0006
0.0008
0.001
0.0012
0.0014
0.0016
0.0018
0 1000 2000 3000 4000 5000 6000 7000
Deflection(deg)
Length from Balcony (mm)
Angle of deflection was
calculated by rearranging the
torsion equation
The graph shows the amount of
deflection caused by each of the
cross sections
0.014° of deflection is very small therefore the user
can walk on the without inconvenient.
Improvement Made After
Competition
P17
As the bridge was loaded with weight, a small displacement was
spotted along the secondary folding structure, the bridge structure
was weaken by the displacement.
The secondary fold mechanism was removed from
the 2 rear parts, this change stabilise the shear
motion to reduce the overall deformation
 When the bridge is loaded, 2 forces exerted by the
wall (blue arrows), that cause a shear motion. Small
changes made near the balcony will have significant
change to the overall performance.
5526N
The force – 5526N was calculated in the
“Free Body Diagram” within the process
book
A thread was used as reinforcement
to reduce the displacement of the
secondary fold mechanism to
reduce the overall deformation of
the bridge
No secondary fold
 2 secondary folding mechanism needed to be kept so
that the bridge don’t exceed the size requirement
when folded
Change In Material Thickness
Impact on Bridge’s Stiffness
P18
Material Thickness
(mm)
End of bridge deformation
(mm)
Stress
(Mpa)
Mpa/deformation
ratio
25 6.109 17.483 2.861843182
3 0.769 3.485 4.531859558
0
0.5
1
1.5
2
2.5
3
3.5
4
4.5
5
0 5 10 15 20 25 30
Mpa/deformation
ratio
Material Thickness (mm)
Changing material thickness to reduce weight of the bridge and
identify the impact on the stiffness on the bridge
Bridge with material
thickness of 25 mm
Weight: 1670kg
Bridge with material
thickness of 3 mm
Weight: 196 kg
The graph shows that by
reducing the material
thickness the stiffness of
the bridge has increase
significantly
The extra 22mm on top of
the 3mm has become a
burden to the bridge
By reducing the material thickness, unnecessary
weight was removed so that the bridge it self has
become lighter and stiffness has increased
Mass Of Bridge
P19
Calculate mass of the bridge made of Aluminium 2024-0
The volume value obtained
from Solidworks Mass
Properties
Volume = 70389712.29 mm^3
0.0703 m^3
Mass = Volume X Density
0.0703 X 2780
195.7kg
 The weight of the
bridge is too much
compare to how
much a single
human can carry
The maximum combined pulling force exert by a
male is approximately 1019N (556+643)
Therefore minimum of 2 people are required to
carry the bridge.
Centre Of Mass
P20
Identifying the centre of mass of the bridge with Solidworks Centre of
Mass feature.
The centre of mass is located near to the balcony
due to larger amount of material used is greater
near the balcony.
Therefore it has greater mechanical advantage
compare to having the centre of mass at the half
way across the bridge
Height from top of the walk way
Distance from front of
the Balcony
(2106mm)
Distance from side of
the bridge
 The centre of gravity is closer to one side of the
bridge, this suggest that a lot of material is used to
construct the dog-leg
Factor Of Safety
P21
height of plank from floor
(mm)
Displacement
(mm)
Load applied
(kg)
110 0 0
87 23 80 (Still)
82 28 80 (Shock load)
Using shock load (user’s footstep) and maximum stress from FEA to
calculate the Factor Of Safety.
Physical demonstration was performed so that
the deformation of the beam can be measure
to calculate force
Load: 80kg
800N
Shock load: 800 X (28/23)
973.9N
Max Stress = 3.485 Mpa
The FEA simulation was set up with 800N
therefore
Stress is proportional to
force therefore when shock
load is applied the stress will
increase by 1.2
Stress = 3.584 X 1.2
4.363 Mpa
Fos = yield stress / operating stress
75 / 4.363
17.2
 The factor of safety shows that the bridge is over engineered by
approximately 17 time. This suggest that the cross section of the
bridge can be reduced to minimise the FOS and weight.
X1.2
Aluminium 2024-0:
Yield stress = 75 Mpa
Deflection
P22
Identify the deflection of the bridge after reducing the material
thickness.
0.769mm of deformation for a single body is very little and
hardly noticeable.
referring to the change in stiffness after change in material
thickness,
Autodesk simulation on
the bridge as one solid
body (except the balcony)
Referring to “Hinge Clearance Impact On Overall Deflection”
= 20.22mm
Is proportional to 1/J
The sum of the deformation is
21.mm
As one increases the other decreases
Referring to the “Factor of safety” the Fos value has increased
by 17.2 therefore the deflection will be reduce by 17.2 times
0.014 x (1/17.2) = 0.000813°
These deflection are hardly noticeable and they do not cause
any obstruction of inconvenient to the user during operation
Deploy The Bridge To Escape
P23
Step by step of deploying the bridge and assembling the dog-leg
onto the end of the bridge
Time required to deploy the cardboard bridge during the competition
was 29s. The estimate time to deploy for full scale bridge to be
approximately 10 time longer – 4mins 50 seconds
4mins 50s is under the brief requirement however it is very close to the
maximum limit of 5 mins.
*unfold secondary mechanism
Summary
P24
• The bridge as a single body is very stiff with estimate
0.77mm of deformation due to the triangular profile.
However the folding mechanisms reduce the stiffness
(increase deformation by estimate 32mm) due to both stress
concentration and clearance on the hinges
- In order to improve the performance of the bridge, keep
the number of hinges and parts to minimal
• A large deformation was detected due to displacement of the
secondary folding mechanism therefore it was removed from
the 2 rear sections of the bridge to reduce deformation – this
change does not exceed the size limit of the folded bridge.
- Changes made to the rear end of the bridge (near the
balcony) will have a greater impact compare to changes
made to the end of the bridge.
• Shock loading force is required to take into account to
calculate maximum load applying onto the bridge.
- Applying realistic interaction between user and the
bridge to capture changes in force, in order to
calculate Factor Of Safety
• The full scale design was designated to have 25mm of material thickness however
the bridge perform much better when the material thickness was changed to 3 mm.
- The material thickness should be considered at early stages so that the factor of
safety can be minimised.
Not interact with the no-go zone ✓
Made of Aluminium 2024-0 ✓
Under 2.25m when folded ✓ 1.88m when folded
Allow user of 80kg to walk on ✓ The bridge can hold up to 17 users of 80kg
Deploy under 5 mins ✓ 29 seconds to deploy the cardboard model
The dog-leg has a triangular
fixture that fit around the end of
the bridge to transfer the
moment when the user is
standing at the end
Reinforcement to support the
secondary folding mechanism
(4-bar-linkage) to avoid it
collapsing during operation
Secondary folding mechanism
(4-bar-linkage) to collapse the
parts to minimal size – flat pack
Bottle-Cap-Opener
alike design used to
convert failure mode
of the fixture from
“shear” to “beam”
Reinforcement to transfer the
torsional motion along the
bridge
P13 –
P15
P12 P17
P18
P9 –
P11

Mais conteúdo relacionado

Mais procurados

Pile cap two pile laod 50 t desigh and drawing
Pile cap  two pile laod 50 t  desigh and drawingPile cap  two pile laod 50 t  desigh and drawing
Pile cap two pile laod 50 t desigh and drawingRAJESH JAIN
 
Memo 55c-tss-41-rekommended-reinforcement-pattern
Memo 55c-tss-41-rekommended-reinforcement-patternMemo 55c-tss-41-rekommended-reinforcement-pattern
Memo 55c-tss-41-rekommended-reinforcement-patternS.s. Lee
 
design of column ad slenderness ratio
design of column ad slenderness ratiodesign of column ad slenderness ratio
design of column ad slenderness ratioRathod Mehul
 
Base plate and anchor design
Base plate and anchor designBase plate and anchor design
Base plate and anchor designBalázs Kisfali
 
base plate in bending and anchor bolts in tension
base plate in bending and anchor bolts in tensionbase plate in bending and anchor bolts in tension
base plate in bending and anchor bolts in tensionabdul latief
 
Design of combined footing ppt
Design of combined footing pptDesign of combined footing ppt
Design of combined footing pptBharti Shinde
 
Lec09 Shear in RC Beams (Reinforced Concrete Design I & Prof. Abdelhamid Charif)
Lec09 Shear in RC Beams (Reinforced Concrete Design I & Prof. Abdelhamid Charif)Lec09 Shear in RC Beams (Reinforced Concrete Design I & Prof. Abdelhamid Charif)
Lec09 Shear in RC Beams (Reinforced Concrete Design I & Prof. Abdelhamid Charif)Hossam Shafiq II
 
Parametric study of flat slab building with and without shear wall to seismic...
Parametric study of flat slab building with and without shear wall to seismic...Parametric study of flat slab building with and without shear wall to seismic...
Parametric study of flat slab building with and without shear wall to seismic...eSAT Journals
 
Continuity in RC beams and frames-AFM (Complete).pdf
Continuity in RC beams and frames-AFM (Complete).pdfContinuity in RC beams and frames-AFM (Complete).pdf
Continuity in RC beams and frames-AFM (Complete).pdfaslhal
 
Lec6-Aircraft structural idealisation 1
Lec6-Aircraft structural idealisation 1Lec6-Aircraft structural idealisation 1
Lec6-Aircraft structural idealisation 1Mahdi Damghani
 
PUNCHING SHEAR RESISTANCE OF FLAT SLABS WITH OPENING
PUNCHING SHEAR RESISTANCE OF FLAT SLABS WITH OPENINGPUNCHING SHEAR RESISTANCE OF FLAT SLABS WITH OPENING
PUNCHING SHEAR RESISTANCE OF FLAT SLABS WITH OPENINGIAEME Publication
 
Design of flat plate slab and its Punching Shear Reinf.
Design of flat plate slab and its Punching Shear Reinf.Design of flat plate slab and its Punching Shear Reinf.
Design of flat plate slab and its Punching Shear Reinf.MD.MAHBUB UL ALAM
 
Isolated footing design
Isolated footing designIsolated footing design
Isolated footing designsrinu_anduri
 

Mais procurados (20)

Project 2b (1) (2)
Project 2b  (1) (2)Project 2b  (1) (2)
Project 2b (1) (2)
 
Pile cap two pile laod 50 t desigh and drawing
Pile cap  two pile laod 50 t  desigh and drawingPile cap  two pile laod 50 t  desigh and drawing
Pile cap two pile laod 50 t desigh and drawing
 
Memo 55c-tss-41-rekommended-reinforcement-pattern
Memo 55c-tss-41-rekommended-reinforcement-patternMemo 55c-tss-41-rekommended-reinforcement-pattern
Memo 55c-tss-41-rekommended-reinforcement-pattern
 
design of column ad slenderness ratio
design of column ad slenderness ratiodesign of column ad slenderness ratio
design of column ad slenderness ratio
 
Column
ColumnColumn
Column
 
Base plate and anchor design
Base plate and anchor designBase plate and anchor design
Base plate and anchor design
 
Column design: as per bs code
Column design: as per bs codeColumn design: as per bs code
Column design: as per bs code
 
Strut and Tie Model for Pile Cap
Strut and Tie Model for Pile CapStrut and Tie Model for Pile Cap
Strut and Tie Model for Pile Cap
 
base plate in bending and anchor bolts in tension
base plate in bending and anchor bolts in tensionbase plate in bending and anchor bolts in tension
base plate in bending and anchor bolts in tension
 
Design of combined footing ppt
Design of combined footing pptDesign of combined footing ppt
Design of combined footing ppt
 
Lec09 Shear in RC Beams (Reinforced Concrete Design I & Prof. Abdelhamid Charif)
Lec09 Shear in RC Beams (Reinforced Concrete Design I & Prof. Abdelhamid Charif)Lec09 Shear in RC Beams (Reinforced Concrete Design I & Prof. Abdelhamid Charif)
Lec09 Shear in RC Beams (Reinforced Concrete Design I & Prof. Abdelhamid Charif)
 
Design of steel structural elements
Design of steel structural elementsDesign of steel structural elements
Design of steel structural elements
 
Parametric study of flat slab building with and without shear wall to seismic...
Parametric study of flat slab building with and without shear wall to seismic...Parametric study of flat slab building with and without shear wall to seismic...
Parametric study of flat slab building with and without shear wall to seismic...
 
Continuity in RC beams and frames-AFM (Complete).pdf
Continuity in RC beams and frames-AFM (Complete).pdfContinuity in RC beams and frames-AFM (Complete).pdf
Continuity in RC beams and frames-AFM (Complete).pdf
 
10 columns
10 columns10 columns
10 columns
 
Lec6-Aircraft structural idealisation 1
Lec6-Aircraft structural idealisation 1Lec6-Aircraft structural idealisation 1
Lec6-Aircraft structural idealisation 1
 
PUNCHING SHEAR RESISTANCE OF FLAT SLABS WITH OPENING
PUNCHING SHEAR RESISTANCE OF FLAT SLABS WITH OPENINGPUNCHING SHEAR RESISTANCE OF FLAT SLABS WITH OPENING
PUNCHING SHEAR RESISTANCE OF FLAT SLABS WITH OPENING
 
Design of flat plate slab and its Punching Shear Reinf.
Design of flat plate slab and its Punching Shear Reinf.Design of flat plate slab and its Punching Shear Reinf.
Design of flat plate slab and its Punching Shear Reinf.
 
Isolated footing design
Isolated footing designIsolated footing design
Isolated footing design
 
Beam design
Beam designBeam design
Beam design
 

Semelhante a Overall Design And Feature Development Of A Folding Escape Bridge

Chapter 6 column
Chapter 6   columnChapter 6   column
Chapter 6 columnSimon Foo
 
continuity of pre-cast concrete girders
 continuity of pre-cast concrete girders continuity of pre-cast concrete girders
continuity of pre-cast concrete girdersKamel Farid
 
MEP 209: Design of Machine elements LEC 11
MEP 209: Design of Machine elements LEC 11MEP 209: Design of Machine elements LEC 11
MEP 209: Design of Machine elements LEC 11Dr Mohamed Elfarran
 
Roof bar design- a case study
Roof bar design- a case studyRoof bar design- a case study
Roof bar design- a case studyTIKESHWAR MAHTO
 
Design and Standardization of Toggle Jack
Design and Standardization of Toggle JackDesign and Standardization of Toggle Jack
Design and Standardization of Toggle JackIJARIIE JOURNAL
 
column and it's types
column and it's  types column and it's  types
column and it's types Asi Mahar
 
Design of Main Girder [Compatibility Mode].pdf
Design of Main Girder [Compatibility Mode].pdfDesign of Main Girder [Compatibility Mode].pdf
Design of Main Girder [Compatibility Mode].pdfmohamed abdo
 
Design of an unprotected flange coupling
Design of an unprotected flange couplingDesign of an unprotected flange coupling
Design of an unprotected flange couplingjsunny155
 
Shaped blade centeress_grinding_v0
Shaped blade centeress_grinding_v0Shaped blade centeress_grinding_v0
Shaped blade centeress_grinding_v0Marco Leonesio
 
IRJET - Experimental Investigation of flexural member of Beam Opening in ...
IRJET -  	  Experimental Investigation of flexural member of Beam Opening in ...IRJET -  	  Experimental Investigation of flexural member of Beam Opening in ...
IRJET - Experimental Investigation of flexural member of Beam Opening in ...IRJET Journal
 
Deflections in PT elements pt structure for all pt slabs in civil industry.pdf
Deflections in PT elements pt structure for all pt slabs in civil industry.pdfDeflections in PT elements pt structure for all pt slabs in civil industry.pdf
Deflections in PT elements pt structure for all pt slabs in civil industry.pdfvijayvijay327286
 
introduction, drawing, calculation for winch design
introduction, drawing, calculation for winch designintroduction, drawing, calculation for winch design
introduction, drawing, calculation for winch designAman Huri
 
Anchored excavations
Anchored excavationsAnchored excavations
Anchored excavationsDeniz Kurt
 
Lec12 Continuous Beams and One Way Slabs(2) Columns (Reinforced Concrete Desi...
Lec12 Continuous Beams and One Way Slabs(2) Columns (Reinforced Concrete Desi...Lec12 Continuous Beams and One Way Slabs(2) Columns (Reinforced Concrete Desi...
Lec12 Continuous Beams and One Way Slabs(2) Columns (Reinforced Concrete Desi...Hossam Shafiq II
 
Reinforced concrete Course assignments, 2019
Reinforced concrete Course assignments, 2019Reinforced concrete Course assignments, 2019
Reinforced concrete Course assignments, 2019JanneHanka
 
Multi-StageSheet Metal Fromed Bolted Fastener Design
Multi-StageSheet Metal Fromed Bolted Fastener DesignMulti-StageSheet Metal Fromed Bolted Fastener Design
Multi-StageSheet Metal Fromed Bolted Fastener DesignMark Brooks
 
FEM_Modeling_Project_Evaluation of a Steel Pulley and Shaft Design
FEM_Modeling_Project_Evaluation of a Steel Pulley and Shaft DesignFEM_Modeling_Project_Evaluation of a Steel Pulley and Shaft Design
FEM_Modeling_Project_Evaluation of a Steel Pulley and Shaft DesignMehmet Bariskan
 

Semelhante a Overall Design And Feature Development Of A Folding Escape Bridge (20)

Chapter 6 column
Chapter 6   columnChapter 6   column
Chapter 6 column
 
Mpe 209 lec 11 springs
Mpe 209 lec 11 springs Mpe 209 lec 11 springs
Mpe 209 lec 11 springs
 
continuity of pre-cast concrete girders
 continuity of pre-cast concrete girders continuity of pre-cast concrete girders
continuity of pre-cast concrete girders
 
MEP 209: Design of Machine elements LEC 11
MEP 209: Design of Machine elements LEC 11MEP 209: Design of Machine elements LEC 11
MEP 209: Design of Machine elements LEC 11
 
Ijariie1189
Ijariie1189Ijariie1189
Ijariie1189
 
Roof bar design- a case study
Roof bar design- a case studyRoof bar design- a case study
Roof bar design- a case study
 
Design and Standardization of Toggle Jack
Design and Standardization of Toggle JackDesign and Standardization of Toggle Jack
Design and Standardization of Toggle Jack
 
column and it's types
column and it's  types column and it's  types
column and it's types
 
Design of Main Girder [Compatibility Mode].pdf
Design of Main Girder [Compatibility Mode].pdfDesign of Main Girder [Compatibility Mode].pdf
Design of Main Girder [Compatibility Mode].pdf
 
Design of an unprotected flange coupling
Design of an unprotected flange couplingDesign of an unprotected flange coupling
Design of an unprotected flange coupling
 
Shaped blade centeress_grinding_v0
Shaped blade centeress_grinding_v0Shaped blade centeress_grinding_v0
Shaped blade centeress_grinding_v0
 
IRJET - Experimental Investigation of flexural member of Beam Opening in ...
IRJET -  	  Experimental Investigation of flexural member of Beam Opening in ...IRJET -  	  Experimental Investigation of flexural member of Beam Opening in ...
IRJET - Experimental Investigation of flexural member of Beam Opening in ...
 
Deflections in PT elements pt structure for all pt slabs in civil industry.pdf
Deflections in PT elements pt structure for all pt slabs in civil industry.pdfDeflections in PT elements pt structure for all pt slabs in civil industry.pdf
Deflections in PT elements pt structure for all pt slabs in civil industry.pdf
 
introduction, drawing, calculation for winch design
introduction, drawing, calculation for winch designintroduction, drawing, calculation for winch design
introduction, drawing, calculation for winch design
 
Short Composite Columns - thesis
Short Composite Columns - thesis Short Composite Columns - thesis
Short Composite Columns - thesis
 
Anchored excavations
Anchored excavationsAnchored excavations
Anchored excavations
 
Lec12 Continuous Beams and One Way Slabs(2) Columns (Reinforced Concrete Desi...
Lec12 Continuous Beams and One Way Slabs(2) Columns (Reinforced Concrete Desi...Lec12 Continuous Beams and One Way Slabs(2) Columns (Reinforced Concrete Desi...
Lec12 Continuous Beams and One Way Slabs(2) Columns (Reinforced Concrete Desi...
 
Reinforced concrete Course assignments, 2019
Reinforced concrete Course assignments, 2019Reinforced concrete Course assignments, 2019
Reinforced concrete Course assignments, 2019
 
Multi-StageSheet Metal Fromed Bolted Fastener Design
Multi-StageSheet Metal Fromed Bolted Fastener DesignMulti-StageSheet Metal Fromed Bolted Fastener Design
Multi-StageSheet Metal Fromed Bolted Fastener Design
 
FEM_Modeling_Project_Evaluation of a Steel Pulley and Shaft Design
FEM_Modeling_Project_Evaluation of a Steel Pulley and Shaft DesignFEM_Modeling_Project_Evaluation of a Steel Pulley and Shaft Design
FEM_Modeling_Project_Evaluation of a Steel Pulley and Shaft Design
 

Mais de Calvin Cheung

Portfolio.2017_Ying Yeung Cheung
Portfolio.2017_Ying Yeung CheungPortfolio.2017_Ying Yeung Cheung
Portfolio.2017_Ying Yeung CheungCalvin Cheung
 
CV.2017_Ying Yeung Cheung
CV.2017_Ying Yeung CheungCV.2017_Ying Yeung Cheung
CV.2017_Ying Yeung CheungCalvin Cheung
 
Ying's Portfolio 2016
Ying's Portfolio 2016Ying's Portfolio 2016
Ying's Portfolio 2016Calvin Cheung
 
Ying Cheung's portfolio
Ying Cheung's portfolioYing Cheung's portfolio
Ying Cheung's portfolioCalvin Cheung
 
Design For Manufacture - Ying Cheung
Design For Manufacture - Ying CheungDesign For Manufacture - Ying Cheung
Design For Manufacture - Ying CheungCalvin Cheung
 

Mais de Calvin Cheung (8)

Portfolio.2017_Ying Yeung Cheung
Portfolio.2017_Ying Yeung CheungPortfolio.2017_Ying Yeung Cheung
Portfolio.2017_Ying Yeung Cheung
 
CV.2017_Ying Yeung Cheung
CV.2017_Ying Yeung CheungCV.2017_Ying Yeung Cheung
CV.2017_Ying Yeung Cheung
 
Ying's CV
Ying's CVYing's CV
Ying's CV
 
Ying's Portfolio 2016
Ying's Portfolio 2016Ying's Portfolio 2016
Ying's Portfolio 2016
 
Ying Cheung's CV
Ying Cheung's CVYing Cheung's CV
Ying Cheung's CV
 
Ying Cheung's portfolio
Ying Cheung's portfolioYing Cheung's portfolio
Ying Cheung's portfolio
 
Design For Manufacture - Ying Cheung
Design For Manufacture - Ying CheungDesign For Manufacture - Ying Cheung
Design For Manufacture - Ying Cheung
 
Plant pot project
Plant pot projectPlant pot project
Plant pot project
 

Overall Design And Feature Development Of A Folding Escape Bridge

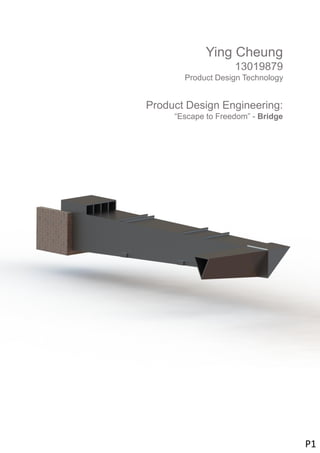
  • 1. z Ying Cheung 13019879 Product Design Technology Product Design Engineering: “Escape to Freedom” - Bridge P1
  • 2. Contents P2 P3 Introduction P4 Initial Concept (1/4 scale) P5 2nd Concept (1/8 scale) P6 Triangular Profiles Testing P7 Folding Concept (Primary) P8 Torsional Impact On Folding Structure P9 Folding Concept (Secondary) P10 Design Requirements Of Folding Concept P11 Stabilising Secondary Fold Mechanism P12 Fixture To The Balcony P13 Hinge Dimensions P14 Hinge Clearance Impact On Overall Deflection P15 Overall Deflection Caused By Hinges P16 Angle Of Deflection P17 Improvement Made After Competition P18 Change In Material Thickness Impact on Bridge’s Stiffness P19 Mass Of Bridge P20 Centre Of Mass P21 Factor Of Safety P22 Deflection P23 Deploy The Bridge To Escape P24 Summary Overall Design And Feature Development Relationship Between Hinges And Deflection Changes Made To The Bridge After Submission Final Design Details And Summary
  • 3. P3 Introduction To construct a bridge that fits on the balcony and travels forward 6m and then 2m at 90°  The bridge must not intersect with the No-Go-Zone.  Made of Aluminium 2024-0  Under 2.5m when folded  Allow user of 80kg to walk on  Deploy under 5 mins
  • 4. Initial Concept (1/4 scale)  Failure due to;  manufacturing error,  Torsional stress,  open cross section profile Improvement can be made;  Create a closed cross section profile, to resist torsion and buckling  Buckling occur during the testing of the 1/4 scale card model. P4 Destructive testing of the first card-board bridge (1/4 scale) and understanding of failure Side view Bottom view Cross section profile Ribs
  • 5. 2nd Concept (1/8 scale)  Shear failure at the “hook” during the testing of the 1/8 scale card model.  Failure due to;  Under-Engineering  Stress concentration  Corrugation of cardboard Improvement can be made;  Create profile with larger contact surface area to reduce stress concentration,  Increase “h” value to increase second moment of area to reduce stress. The cross section of this design is triangular to create a closed profile in order to resist torsion and buckling P5 After changing the cross-section profile into a triangle, and observing failure through destructive testing Ribs Previous profile Triangular profile
  • 6. Triangular Profiles Testing P6 Using Solidworks simulation to test and identify which profile is suitable for this torsion scenario. Cross section Cross section Cross section This configuration has more uniform stress range (1.16e+1 – 8.72e+2 Mpa). And lower stress at the intersection between the bridge and dog-leg Profile used in the 2nd concept
  • 7. Folding Concept (Primary)  However the collapsed bridge is relatively large and balky.  Not meeting the maximum size standard – 2.5m (full scale) Further development;  Create internal folding structure to reduce overall size. Flat pack idea. P7 Concept of primary folding mechanism to allow the bridge become portable. Detach the dog-leg off the bridge Balcony Top view Side view 3.3 m The folding concept is to “roll” up the parts to reduce the size
  • 8. Torsional Impact On Folding Structure As the torsional force applied, the support plates collide with the section on it’s left to resist the torsional motion The centre point of the torsional motion is unknown however the plates are added to location as far away as possible to have greater mechanical advantage against torsion  Torsion will force the folding parts to shift, this will cause misalignment and result large deflection Support plates are joined to the section on it’s right P8 Rotation of parts caused by torsion will affect the performance of the bridge.
  • 9. Folding Concept (Secondary) Combining both the primary and secondary folding mechanisms together to collapse the bridge down to smaller size – 1.88m P9 Introducing secondary folding structure to reduce size of the folded bridge in order to meet the brief’s requirement – under 2.5m (full scale) 3.3 m 1.88 m Using 4-bar-linkage to as secondary to minimise the size of the bridge to flat-pack  Previously without the secondary fold result 3.3m in folded size and unable to meet the maximum limit of 2.5m
  • 10. Design Requirements Of Folding Concept Tapered beam able to provide linear axis and flat surfaces for folding Ideal beam curve Walking surface with constant width Twisted surface  It is difficult to manufacture a twisted piece and to make it collapsible  Since the ideal beam curved was replaced the stress concentration will increase. However this was sacrificed so that the structure can be folded P10 Front view Identifying requirements needed for the secondary fold to be feasible  Hinges require a linear pivot axis Hinge axis
  • 11. Stabilising Secondary Fold Mechanism P11 The Fold mechanism is required to be stabilised or else the structure will collapse The 2 possible consequences of not having a stabiliser for the secondary folding structure A B Providing both tensional and compressive support to avoid failure in both figure “A” and “B”. Fr = 400N θ = 46: (for compression calculation) Fθ = 576N θ = 44: (for tensional calculation) Fθ = 555N Fc = Compressive force 9.9N Fc = Tensional force 9.9N The forces are relatively small and neglectable however both the compressive and tensional reinforcements are required to be installed for reassuring that the structure will not collapse during operation.
  • 12. Fixture To The Balcony  As the bridge is fixed to the balcony, the edge of the balcony is likely to shear the fixture. To avoid the balcony cutting into and shear the fixture, a bottle-cap-remover design was used in order to have control of the location where the force exert. With a side effect of this design, it allows clearance to slot on to the balcony. P12 Failure of the 2nd concept Identify failure occur on the fixture to the balcony and identify features needed to minimise the chance of failure. < Torsional stress is greater beam stress on the same profile therefore the fixture will be stronger if it is converted into a beam.
  • 13. Hinge Dimensions Shear surfaces = 5 H1 H2 H3  The stress shown in the FEA suggest that the hinges in “H1” are the most likely to fail due to low Fos value P13 Identifying the dimension of the hinges through trial and error due to complicated scenario – difficulty of applying both shear equation and torsion equation onto the pin of the hinge Deformation of the pin during operation Diameter (inner) (mm) Diameter (outer) (mm) Number of shear faces Max FEA stress (Mpa) Fos H1 50 100 5 37.96 1.9 H2 50 100 5 25.06 2.99 H3 50 100 4 20.47 3.66 Outer diameter Inner diameter Diameter of the pin Although the stress operating of the pins are different, however they are under the yield stress by at least 1.9 times therefore it is unlikely to yield.
  • 14. Hinge Clearance Impact On Overall Deflection The clearance between the pin and the bracket of the hinge is set to be 0.5 mm  the clearance of the hinges will have impact on the overall deflection Deformation results caused by hinges;  H1 11.1mm  H2 3.74mm  H3 2.9mm  H4 2.48mm Total 20.22mm H1 H2 H3 H4  The closer the hinge to the fixture the more deflection it will cause due to the mechanical advantage P14 Clearance on both brackets therefore the result deformation x2 Hinge clearance allow parts to shift, the movement will cause the bridge to deflect. Referencing to “clearance deformation” calculation within the process book
  • 15. Overall Deflection Caused By Hinges P15 H1 H2 H3 H4 The pin with in the hinge will deform during operation and allow parts to shift, the movement will cause the bridge to deflect. Referencing to “Hinge Stress Analysis” calculation within the process book  The sum of the deformation caused by hinges is 32.24mm By adding all the values together – Total estimate value (without clearance) = 12.02mm H1 H2 H3 H4 The image above shows how the pin of the hinge is deformed. The overall deformation values were extracted from Autodesk Simulation Mechanical - Hinges were made without clearance Referring to “Hinge Clearance Impact On Overall Deflection” = 20.22mm 3.2 cm is visible deformation however user is still enabled to walk on the bridge therefore no actions need to be taken
  • 16. Angle Of Deflection P16 Using Solidworks Section Properties to analyse the polar moment of inertia of the cross-section at every 500mm of the bridge to calculate the deflection angle length (mm) polar moment of inertia (J) (m^4) deflection (rad) deflection (deg) 0 0.000534286 0 0 500 0.000599333 5.80348E-05 0.000364643 1000 0.000669455 0.000103912 0.000652897 1500 0.000744845 0.000140092 0.000880221 2000 0.000825692 0.000168499 0.001058712 2500 0.000912188 0.000190652 0.001197904 3000 0.001004522 0.000207753 0.001305352 3500 0.001102887 0.000220762 0.001387085 4000 0.001207472 0.000230446 0.001447935 4500 0.001318468 0.000237427 0.001491794 5000 0.001436066 0.000242204 0.001521814 5500 0.001560457 0.000245187 0.001540554 6000 0.001691832 0.000246706 0.001550101 Total = 0.014399012 0 0.0002 0.0004 0.0006 0.0008 0.001 0.0012 0.0014 0.0016 0.0018 0 1000 2000 3000 4000 5000 6000 7000 Deflection(deg) Length from Balcony (mm) Angle of deflection was calculated by rearranging the torsion equation The graph shows the amount of deflection caused by each of the cross sections 0.014° of deflection is very small therefore the user can walk on the without inconvenient.
  • 17. Improvement Made After Competition P17 As the bridge was loaded with weight, a small displacement was spotted along the secondary folding structure, the bridge structure was weaken by the displacement. The secondary fold mechanism was removed from the 2 rear parts, this change stabilise the shear motion to reduce the overall deformation  When the bridge is loaded, 2 forces exerted by the wall (blue arrows), that cause a shear motion. Small changes made near the balcony will have significant change to the overall performance. 5526N The force – 5526N was calculated in the “Free Body Diagram” within the process book A thread was used as reinforcement to reduce the displacement of the secondary fold mechanism to reduce the overall deformation of the bridge No secondary fold  2 secondary folding mechanism needed to be kept so that the bridge don’t exceed the size requirement when folded
  • 18. Change In Material Thickness Impact on Bridge’s Stiffness P18 Material Thickness (mm) End of bridge deformation (mm) Stress (Mpa) Mpa/deformation ratio 25 6.109 17.483 2.861843182 3 0.769 3.485 4.531859558 0 0.5 1 1.5 2 2.5 3 3.5 4 4.5 5 0 5 10 15 20 25 30 Mpa/deformation ratio Material Thickness (mm) Changing material thickness to reduce weight of the bridge and identify the impact on the stiffness on the bridge Bridge with material thickness of 25 mm Weight: 1670kg Bridge with material thickness of 3 mm Weight: 196 kg The graph shows that by reducing the material thickness the stiffness of the bridge has increase significantly The extra 22mm on top of the 3mm has become a burden to the bridge By reducing the material thickness, unnecessary weight was removed so that the bridge it self has become lighter and stiffness has increased
  • 19. Mass Of Bridge P19 Calculate mass of the bridge made of Aluminium 2024-0 The volume value obtained from Solidworks Mass Properties Volume = 70389712.29 mm^3 0.0703 m^3 Mass = Volume X Density 0.0703 X 2780 195.7kg  The weight of the bridge is too much compare to how much a single human can carry The maximum combined pulling force exert by a male is approximately 1019N (556+643) Therefore minimum of 2 people are required to carry the bridge.
  • 20. Centre Of Mass P20 Identifying the centre of mass of the bridge with Solidworks Centre of Mass feature. The centre of mass is located near to the balcony due to larger amount of material used is greater near the balcony. Therefore it has greater mechanical advantage compare to having the centre of mass at the half way across the bridge Height from top of the walk way Distance from front of the Balcony (2106mm) Distance from side of the bridge  The centre of gravity is closer to one side of the bridge, this suggest that a lot of material is used to construct the dog-leg
  • 21. Factor Of Safety P21 height of plank from floor (mm) Displacement (mm) Load applied (kg) 110 0 0 87 23 80 (Still) 82 28 80 (Shock load) Using shock load (user’s footstep) and maximum stress from FEA to calculate the Factor Of Safety. Physical demonstration was performed so that the deformation of the beam can be measure to calculate force Load: 80kg 800N Shock load: 800 X (28/23) 973.9N Max Stress = 3.485 Mpa The FEA simulation was set up with 800N therefore Stress is proportional to force therefore when shock load is applied the stress will increase by 1.2 Stress = 3.584 X 1.2 4.363 Mpa Fos = yield stress / operating stress 75 / 4.363 17.2  The factor of safety shows that the bridge is over engineered by approximately 17 time. This suggest that the cross section of the bridge can be reduced to minimise the FOS and weight. X1.2 Aluminium 2024-0: Yield stress = 75 Mpa
  • 22. Deflection P22 Identify the deflection of the bridge after reducing the material thickness. 0.769mm of deformation for a single body is very little and hardly noticeable. referring to the change in stiffness after change in material thickness, Autodesk simulation on the bridge as one solid body (except the balcony) Referring to “Hinge Clearance Impact On Overall Deflection” = 20.22mm Is proportional to 1/J The sum of the deformation is 21.mm As one increases the other decreases Referring to the “Factor of safety” the Fos value has increased by 17.2 therefore the deflection will be reduce by 17.2 times 0.014 x (1/17.2) = 0.000813° These deflection are hardly noticeable and they do not cause any obstruction of inconvenient to the user during operation
  • 23. Deploy The Bridge To Escape P23 Step by step of deploying the bridge and assembling the dog-leg onto the end of the bridge Time required to deploy the cardboard bridge during the competition was 29s. The estimate time to deploy for full scale bridge to be approximately 10 time longer – 4mins 50 seconds 4mins 50s is under the brief requirement however it is very close to the maximum limit of 5 mins. *unfold secondary mechanism *unfold secondary mechanism
  • 24. Summary P24 • The bridge as a single body is very stiff with estimate 0.77mm of deformation due to the triangular profile. However the folding mechanisms reduce the stiffness (increase deformation by estimate 32mm) due to both stress concentration and clearance on the hinges - In order to improve the performance of the bridge, keep the number of hinges and parts to minimal • A large deformation was detected due to displacement of the secondary folding mechanism therefore it was removed from the 2 rear sections of the bridge to reduce deformation – this change does not exceed the size limit of the folded bridge. - Changes made to the rear end of the bridge (near the balcony) will have a greater impact compare to changes made to the end of the bridge. • Shock loading force is required to take into account to calculate maximum load applying onto the bridge. - Applying realistic interaction between user and the bridge to capture changes in force, in order to calculate Factor Of Safety • The full scale design was designated to have 25mm of material thickness however the bridge perform much better when the material thickness was changed to 3 mm. - The material thickness should be considered at early stages so that the factor of safety can be minimised. Not interact with the no-go zone ✓ Made of Aluminium 2024-0 ✓ Under 2.25m when folded ✓ 1.88m when folded Allow user of 80kg to walk on ✓ The bridge can hold up to 17 users of 80kg Deploy under 5 mins ✓ 29 seconds to deploy the cardboard model
  • 25. The dog-leg has a triangular fixture that fit around the end of the bridge to transfer the moment when the user is standing at the end Reinforcement to support the secondary folding mechanism (4-bar-linkage) to avoid it collapsing during operation Secondary folding mechanism (4-bar-linkage) to collapse the parts to minimal size – flat pack Bottle-Cap-Opener alike design used to convert failure mode of the fixture from “shear” to “beam” Reinforcement to transfer the torsional motion along the bridge P13 – P15 P12 P17 P18 P9 – P11