2. Why Use Tables ?
You know how present information in parallel columns by using tabs or using
columns in Word. Word's Tables feature will allow you to format, edit,
delete, and move text without affecting the rest of your document.
Microsoft Word tables can help you arrange your thoughts and data in ways
that make sense to the people you're trying to reach.
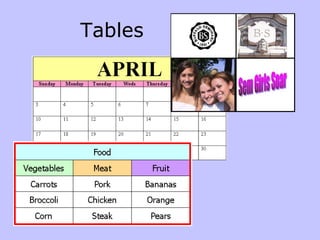
Tables can be a great way to present numbers, but it also does a great job of
presenting text and graphics. Just about anything can be put into the table. It's
all up to you.
In short, a table is a collection of rows and columns that allows you organize
text, graphics and data.
There are several ways to create tables in Word…….
3. 1. Creating Tables by dragging to size
•On the Insert Tab, in the Table Group click on the table command.
•Now, drag the number of columns and rows you want in your table.
Drag your
mouse
diagonally
7 Rows
by 5
columns
4. 2. The Insert Table Dialog Box:
From the menu, Choose Insert Table. The Insert Table dialog box appears.
•Determine the number of columns and rows
you need in your table. You can add more later.
•To create a table as wide as your page, leave
the Fixed Column Width setting on Auto.
•Click OK. A table is inserted into your
document.
5. 3. Creating Tables Using the Draw Tables command:
•Click the Draw Tables button on menu.
The mouse pointer turns into a pencil.
•Drag the pencil to create a rectangle about
the size of the table you want.
•Release the mouse button. The border of the
table appears in your document.
•Use the pencil again to draw in column and
row borders.
•Click the Draw Table button again to
change the pencil back into an I-beam.
6. Anatomy of a Table
A column is a vertical A row is a horizontal A cell is one box
line of boxes line of boxes
7. Enter Text
Click in a cell and start typing.
Moving Around in a Table:
•Use the Tab key or right arrow key to move right.
•Use Shift + Tab or the left arrow key to move left.
•The up and down arrow keys will move the insertion point above or
below its current location.
If you start in the upper left corner, you can use the tab key to move to the
right and then down and across again.
8. Add a Row
To Add Rows at the bottom:
•Move the insertion point to the last cell in the table and press Tab.
To Insert Rows in the Middle of the Table:
•Place the insertion point where you want to add your row.
•Right click and choose INSERT
9. Add a Column
To Insert a Column:
•Position the mouse pointer where you want to column to be located.
•Right click and choose Insert - Insert Columns to the Right or
Insert Columns to the Left.
10. Delete a Row or Column
To Delete Rows or Columns:
•Select the row(s) or column(s) you want to delete.
•Right-click and choose Delete Rows or Columns from the shortcut
menu.
To delete an entire table – select the entire table
Right click choose CUT
11. Change Column Width or Height
After a table is created, you may need to adjust the size of columns and cells.
To Adjust Columns and Cell Width:
•Hover the insertion point over the border between the row and column.
•The insertion point changes to a double-headed arrow.
•Drag the border in either direction.
12. Merge Cells
You can combine two or more cells in your table to create one large
cell. This is useful when you want to display a title in the cell at the
top of your table.
Highlight the adjacent cells that you want to merge.
Right click
select
merge cells
Type your
title into the
merged cell
13. Split Cells
You can split one cell in your table into several smaller cells.
Click the cell you want to split
On the table menu choose split cell
Double click and type the
number of columns and
rows that you want inside
the cell.
Click OK
14. Formatting Text
Whatever you do to format text in a paragraph (make it bold green, for example), you can
do to text in a table cell.
Selecting parts of a table:
A cell: click inside cell.
A row: Move mouse to left of margins, the I beam becomes an arrow. Point to the
row, and click.
Multiple rows: Select the first row, click and drag the number of rows desired.
A column: Move the mouse above the column. It turns into a downward pointing arrow.
Click once.
Multiple columns: Select the first column, click and drag the number of columns
desired.
Entire Table: Click on the handle in the upper left corner
15. Align Text in Cells
You have the option to place text exactly where you want it in a cell.
To select the text you
want to align
differently, drag your
mouse across the cells.
Right click and choose
cell alignment. Click on
the icon that
represents the
alignment you need.
16. Change Text Direction
You can change the direction of text to emphasize text or to
fit long column headings into a narrow column.
To select the text you want to align differently, drag your mouse across the cells
Click the button to change
the direction of the text.
Repeat this step until the
text appears the way you
want.
17. Change or Remove
Table Borders
You can enhance the appearance of your tables by changing the borders. You can
change all of borders, or just specific cells. Changing the border on individual cells can
help to emphasize important information.
Select the cells, rows, columns, or entire table that you wish to change.
To remove borders select the cells with borders and
choose NONE
18. Add Shading to Cells
You can draw attention to an area of your table by adding shading to cells.
Select the cells, rows, columns, or entire table that you wish to change.
19. Table Tools
Here is another set of tools that only appears when you need it.
Word offers many ready-to-use designs that you can apply to your tables.
You can see what the style will look like before you select it.
20. Move a Table
You can move a table from one location to another in your document. You must be in
print layout or web layout view.
Position the mouse over the table you want to
move. A handle appears in the upper left corner
Position the mouse over the handle and your
cursor changes to the same 2 arrow symbol.
table
Drag your table with the handle.
21. Resize a Table
You can change the size of a table to improve the layout of your document.
Position the mouse over the table you want to
resize. A square handle appears in the lower
right corner
Position the mouse over the handle and your table
cursor changes to a two way arrow symbol.
Drag to resize your table with the handle.