

Recomendados
Mais conteúdo relacionado
Semelhante a Est 8 1 st
Semelhante a Est 8 1 st (20)
Mais de Akshay Sharma
Mais de Akshay Sharma (13)
Último
Último (20)
Est 8 1 st
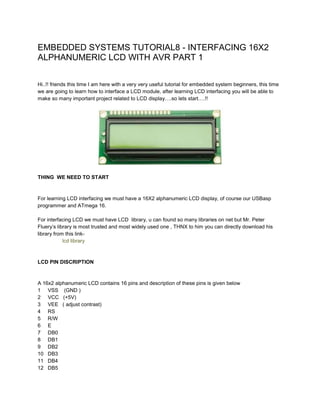
- 1. EMBEDDED SYSTEMS TUTORIAL8 - INTERFACING 16X2 ALPHANUMERIC LCD WITH AVR PART 1 Hi..!! friends this time I am here with a very very useful tutorial for embedded system beginners, this time we are going to learn how to interface a LCD module, after learning LCD interfacing you will be able to make so many important project related to LCD display….so lets start….!! THING WE NEED TO START For learning LCD interfacing we must have a 16X2 alphanumeric LCD display, of course our USBasp programmer and ATmega 16. For interfacing LCD we must have LCD library, u can found so many libraries on net but Mr. Peter Fluery’s library is most trusted and most widely used one , THNX to him you can directly download his library from this linklcd library LCD PIN DISCRIPTION A 16x2 alphanumeric LCD contains 16 pins and description of these pins is given below 1 VSS (GND ) 2 VCC (+5V) 3 VEE ( adjust contrast) 4 RS 5 R/W 6 E 7 DB0 8 DB1 9 DB2 10 DB3 11 DB4 12 DB5
- 2. 13 DB6 14 DB7 15 LED+ (+5V) 16 LED- (GND) In this tutorial we are using our LCD in 4bit mode so we will use DB4-DB7(PIN 11-14 of LCD) as DATA pins. USING LIBRARIES The LCD library which u will download will contain mainly two files lcd.c and lcd.h, by changing the PORT in lcd.h you can change the port of LCD connection, by default it is set to PORTA. You can also change pins of LCD connection from same file for this purpose you have to open lcd.h with notepad , then change PORT/PINS according to your choice and then save it. For adding library support in your program you have to paste lcd.c and lcd.h in the same folder where your .c file of program is contained. And these libraries can be added to the program by including these header file in starting of program#include”lcd.c” #include”lc.h” COMMANDS USED In lcd.h file you can get information about the commands which we have to use in our program , I am discussing some of them here but you can check the library to get knowledge about all the useful command Initializing the LCD To initialize the LCD in program we have to this command is used lcd_init(LCD_DISP_ON); To move cursor at a specific position lcd_gotoxy(x,y); here x and y are the co-ordinates of desired location. To clear the display lcd_clrscr(); To set cursor to home position lcd_home(); To display any text string lcd_puts("desired text string"); in addition to these commands there are many more command but for starting interfacing these commands are sufficient and we will discuss other commands later. SAMPLE CODE
- 3. Here is a simple sample code to start with this time we are going to display a simple text on string on the LCD . #include <stdlib.h> #include <avr/io.h> #include <avr/pgmspace.h> #include<util/delay.h> #include "lcd.h" #include "lcd.c" int main(void) { while(1) { lcd_init(LCD_DISP_ON); lcd_gotoxy(2,0); lcd_puts("TECH_STRONG"); _delay_ms(500); lcd_clrscr(); lcd_gotoxy(1,0); lcd_puts("LCD INTERFACING"); lcd_gotoxy(2,1); lcd_puts("BY ABHILASH"); _delay_ms(500); lcd_clrscr(); } } CIRCUIT DIAGRAM FOR CONNECTIONS So that’s it now just make a simple circuit as shown below. // Initialize LCD // setting cursor to (2,0) // to display text // wait for some time // clear display //setting cursor to (1,0) // to display text //setting cursor to (1,0) // to display text // wait for some time // clear display
- 4. The contrast of LCD can be adjusted by using the variable resistance used here. Now compile the program and burn your MCU with corresponding hex file and our first LCD interfacing project is ready……now you can display any thing on the LCD …..yes I know you are going to display your name first…..:p I hope this article was useful for guys in case of any query, doubt or critical view just leave a comment. In next LCD interfacing tutorial we will discuss about rotating a text , displaying integers and some basic LCD projects……..till then bye….enjoy your LCD……!!