Manual de Recarga HP CP6015 Espanhol.
•
0 gostou•686 visualizações

Manual de Recarga HP CP6015 Espanhol. ValeJET shop www.valejetshop.com.br

Recomendados
Recomendados
Mais conteúdo relacionado
Semelhante a Manual de Recarga HP CP6015 Espanhol.
Semelhante a Manual de Recarga HP CP6015 Espanhol. (20)
Mais de Valejet
Mais de Valejet (20)
Último
Último (11)
Manual de Recarga HP CP6015 Espanhol.
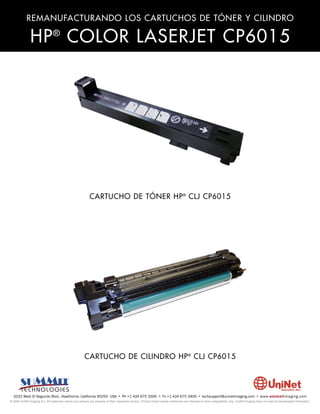
- 1. REMANUFACTURANDO LOS CARTUCHOS DE TÓNER Y CILINDRO HP ® COLOR LASERJET CP6015 CARTUCHO DE TÓNER HP ® CLJ CP6015 CARTUCHO DE CILINDRO HP ® CLJ CP6015 3232 West El Segundo Blvd., Hawthorne, California 90250 USA • Ph +1 424 675 3300 • Fx +1 424 675 3400 • techsupport@uninetimaging.com • www.uninetimaging.com © 2009 UniNet Imaging Inc. All trademark names and artwork are property of their respective owners. Product brand names mentioned are intended to show compatibility only. UniNet Imaging does not warrant downloaded information.
- 2. REMANUFACTURANDO LOS CARTUCHOS DE TÓNER Y CILINDRO HP CLJ CP6015 REMANUFACTURANDO LOS CARTUCHOS DE TÓNER Y CILINDRO HP CLJ CP6015 Por Mike Josiah y el equipo técnico de UniNet Imaging Las impresoras HP CLJ CP6015 fueron introducidas al mercado en mayo del 2009 y están basadas en un mecanismo láser con capacidad de impresión de 40ppm, a 600 DPI. El procesador es de 835MHz, y la memoria es fija a 512Mb. Estas impresoras son muy grandes y muy costosas. Los cartuchos también (grandes y costosos). Estas máquinas tienen unidades de cilindro y tóner separadas. La buena noticia es que la unidad de tóner es muy sencilla de remanufacturar y a su vez es muy rentable. La mala noticia es que la unidad de cilindro es un poco complicada. Las partes tienden a brincar cuando se las desensambla. Nada de que preocuparse, tenemos el orden correcto de las partes y le mostraremos como colocarlas en el orden apropiado. Ambos cartuchos tienen chips que requieren ser reemplazados en cada ciclo. LOS CARTUCHOS DE TÓNER USADOS EN ESTAS MÁQUINAS SON LOS SIGUIENTES: Negro CB380A 16,500 $298.31 lista* Cyan CB381A 21,000 $466.41 lista* Magenta CB383A 21,000 $466.41 lista* Amarillo CB382A 21,000 $466.41 lista* LAS UNIDADES DE CILINDRO UTILIZADAS SON: Negro CB384A 35,000 $172.52 lista* Cyan CB385A 35,000 $485.31 lista* Magenta CB387A 35,000 $485.31 lista* Amarillo CB386A 35,000 $485.31 lista* *los precios de lista mostrados están en Dólares Americanos. LAS IMPRESORAS ACTUALES EN ESTAS SERIES SON: CP6015dn CP6015de CP6015x CP6015xh También existen algunos multifuncionales en esta serie. Usan los mismos cartuchos de tóner a color y las mismas unidades de cilindro. Pero tienen un cartucho de tóner negro diferente, el CB390A. Ya que este cartucho acaba de ser introducido al merca- do, este no esta cubierto aquí. LOS MULTIFUNCIONALES SON: CM6030 MFP CM6030f MFP CM6040f MFP 3232 West El Segundo Blvd., Hawthorne, California 90250 USA • Ph +1 424 675 3300 • Fx +1 424 675 3400 • techsupport@uninetimaging.com • www.uninetimaging.com © 2009 UniNet Imaging Inc. All trademark names and artwork are property of their respective owners. Product brand names mentioned are intended to show compatibility only. UniNet Imaging does not warrant downloaded information.
- 3. REMANUFACTURANDO LOS CARTUCHOS DE TÓNER Y CILINDRO HP CLJ CP6015 REMANUFACTURACIÓN DEL CARTUCHO DE TÓNER Herramientas necesarias 1. Aspiradora aprobada para tóner. 2. Un desarmador común pequeño. 3. Un desarmador con cabeza Phillips. 4. Soldadura de hierro modificada, o taladro con broca de ½” (ver texto y fotografía). 5. Pistola de pegamento caliente o taladro y tornillos auto ajustables (ver texto). Insumos requeridos 1. HP CLP CP6015 tóner 2. Chip de reemplazo para cartucho de tóner 3. Trapos magnéticos para tóner 1. El cartucho de tóner no cuenta con tapón de llenado o una abertura lo suficientemente grande como para limpiar o rellenar por esta. Por lo tanto, se necesita cortar un agujero en el cartucho. Este procedimiento se hace mucho mejor colocando soldadura de hierro y con ayuda de un tornillo en punta y una broca con extremo de plomo de ½” realizará un agujero en la soldadura. También puede taladrar el agujero directamente en el cartucho, pero debe tener mucho cuidado de que no se metan desperdicios o rebabas de plástico adentro del cartucho. La punta no es de un tamaño estándar pero un tornillo #8 puede ser usado. Si el tornillo es muy largo, use una tuerca para mantener el tamaño requerido. 2. El mejor lugar para realizar esto es debajo de la cubierta lateral. Así no hay manera de dañar el sello. Con cuidado quite la etiqueta en la cubierta lateral. 3232 West El Segundo Blvd., Hawthorne, California 90250 USA • Ph +1 424 675 3300 • Fx +1 424 675 3400 • techsupport@uninetimaging.com • www.uninetimaging.com © 2009 UniNet Imaging Inc. All trademark names and artwork are property of their respective owners. Product brand names mentioned are intended to show compatibility only. UniNet Imaging does not warrant downloaded information.
- 4. REMANUFACTURANDO LOS CARTUCHOS DE TÓNER Y CILINDRO HP CLJ CP6015 3. Remueva el tornillo. 4. Deslice la cubierta hacia arriba y afuera del cartucho. 5. Coloque el agujero en la sección superior izquierda como se 6. Limpie todo el tóner de desperdicio, y llene con tóner muestra. dedicado HP CLJ CP6015. 3232 West El Segundo Blvd., Hawthorne, California 90250 USA • Ph +1 424 675 3300 • Fx +1 424 675 3400 • techsupport@uninetimaging.com • www.uninetimaging.com © 2009 UniNet Imaging Inc. All trademark names and artwork are property of their respective owners. Product brand names mentioned are intended to show compatibility only. UniNet Imaging does not warrant downloaded information.
- 5. REMANUFACTURANDO LOS CARTUCHOS DE TÓNER Y CILINDRO HP CLJ CP6015 7. Cubra el agujero con una cinta adhesiva de buena calidad. Revise que no haya escurrimientos. 8. Una vez que tenga un sello disponible, deberá ser instalado removiendo los tres tornillos en la parte superior del ensamble, y un tornillo en la cubierta lateral. 3232 West El Segundo Blvd., Hawthorne, California 90250 USA • Ph +1 424 675 3300 • Fx +1 424 675 3400 • techsupport@uninetimaging.com • www.uninetimaging.com © 2009 UniNet Imaging Inc. All trademark names and artwork are property of their respective owners. Product brand names mentioned are intended to show compatibility only. UniNet Imaging does not warrant downloaded information.
- 6. REMANUFACTURANDO LOS CARTUCHOS DE TÓNER Y CILINDRO HP CLJ CP6015 9. Remueva la cubierta superior y la cubierta lateral. 10. Deslice el plástico derretido, si esta usando tornillos para colocar la cubierta, taladre cuatro agujeros pequeños en las áreas indicadas de la cubierta. El método preferido y más sencillo es usar pegamento caliente para asegurar la cubierta cuando la coloque nuevamente. 3232 West El Segundo Blvd., Hawthorne, California 90250 USA • Ph +1 424 675 3300 • Fx +1 424 675 3400 • techsupport@uninetimaging.com • www.uninetimaging.com © 2009 UniNet Imaging Inc. All trademark names and artwork are property of their respective owners. Product brand names mentioned are intended to show compatibility only. UniNet Imaging does not warrant downloaded information.
- 7. REMANUFACTURANDO LOS CARTUCHOS DE TÓNER Y CILINDRO HP CLJ CP6015 11. Remueva la cubierta del sello presionando con cuidado. 12. Instale el sello nuevo. Envuelva el sobrante en el engranaje superior. 13. Coloque la cubierta del sello de nuevo y con pegamento caliente péguela. Si realizo los 4 agujeros, instale los cuatro tornillos auto ajustables. 3232 West El Segundo Blvd., Hawthorne, California 90250 USA • Ph +1 424 675 3300 • Fx +1 424 675 3400 • techsupport@uninetimaging.com • www.uninetimaging.com © 2009 UniNet Imaging Inc. All trademark names and artwork are property of their respective owners. Product brand names mentioned are intended to show compatibility only. UniNet Imaging does not warrant downloaded information.
- 8. REMANUFACTURANDO LOS CARTUCHOS DE TÓNER Y CILINDRO HP CLJ CP6015 14. Instale la cubierta superior y los cuatro tornillos. 15. Deslice la cubierta lateral de llenado en su lugar. Instale el 16. Reemplace el chip. tornillo y reemplace la etiqueta (como podrá ver la etiqueta se rasga fácilmente). 3232 West El Segundo Blvd., Hawthorne, California 90250 USA • Ph +1 424 675 3300 • Fx +1 424 675 3400 • techsupport@uninetimaging.com • www.uninetimaging.com © 2009 UniNet Imaging Inc. All trademark names and artwork are property of their respective owners. Product brand names mentioned are intended to show compatibility only. UniNet Imaging does not warrant downloaded information.
- 9. REMANUFACTURANDO LOS CARTUCHOS DE TÓNER Y CILINDRO HP CLJ CP6015 REMANUFACTURACIÓN DEL CILINDRO DEL CARTUCHO Herramientas requeridas 1. Aspiradora aprobada para tóner 2. Desarmador común pequeño 3. Desarmador con cabeza Phillips 4. Gancho para resortes 5. Navaja 6. Extractor de pines de 3/32” 7. Extractor de pines de 1/16” 8. Martillo pequeño para tachuelas 9. Pistola de pegamento caliente Insumos requeridos 1. Cilindro HP CLP CP6015 nuevo 2. Cuchilla limpiadora nueva 3. Chip de reemplazo para cilindro de cartucho 4. Cubierta del cilindro 1. Deslice la cubierta del cilindro (si esta instalada). La 5. Trapos magnéticos de tóner cubierta se desliza hacia el lado derecho. 2. En el lado de la etiqueta del cartucho, remueva los tres 3. Corte un agujero de forma rectangular en la etiqueta como tornillos. Tenga en cuenta que el tornillo exterior en el borde es se muestra y presione hacia abajo la lengüeta para liberar la más grande que los otros. cubierta lateral. Tenga cuidado de no perderla. 3232 West El Segundo Blvd., Hawthorne, California 90250 USA • Ph +1 424 675 3300 • Fx +1 424 675 3400 • techsupport@uninetimaging.com • www.uninetimaging.com © 2009 UniNet Imaging Inc. All trademark names and artwork are property of their respective owners. Product brand names mentioned are intended to show compatibility only. UniNet Imaging does not warrant downloaded information.
- 10. REMANUFACTURANDO LOS CARTUCHOS DE TÓNER Y CILINDRO HP CLJ CP6015 4. Remueva los dos pines metálicos sueltos. 5. Remueva el resorte. 6. Levante la unidad del revelador del cartucho. 7. Remueva el tornillo y la cinta/riel de los engranajes. 3232 West El Segundo Blvd., Hawthorne, California 90250 USA • Ph +1 424 675 3300 • Fx +1 424 675 3400 • techsupport@uninetimaging.com • www.uninetimaging.com © 2009 UniNet Imaging Inc. All trademark names and artwork are property of their respective owners. Product brand names mentioned are intended to show compatibility only. UniNet Imaging does not warrant downloaded information.
- 11. REMANUFACTURANDO LOS CARTUCHOS DE TÓNER Y CILINDRO HP CLJ CP6015 8. Remueva la cinta/riel de los engranajes y los dos 9. Deslice el buje del lado de contacto del eje del cilindro. agitadores. Aspire todo el tóner de desperdicio de los agitadores, cavidades y la cinta/riel de los engranajes. 10. Con el extractor pequeño de 3/32”, mueva los pines hasta que estén en un ángulo que la parte inferior este libre, extraiga el pin del eje del cilindro. Asegúrese de golpearlo hasta que salga. Si intenta halar el pin se arruinará y no podrá ser colocado nuevamente en el eje del cilindro. Si no mueve el pin para hacer ángulo este se atorará en la pared del cartucho y será muy difícil de remover. 3232 West El Segundo Blvd., Hawthorne, California 90250 USA • Ph +1 424 675 3300 • Fx +1 424 675 3400 • techsupport@uninetimaging.com • www.uninetimaging.com © 2009 UniNet Imaging Inc. All trademark names and artwork are property of their respective owners. Product brand names mentioned are intended to show compatibility only. UniNet Imaging does not warrant downloaded information.
- 12. REMANUFACTURANDO LOS CARTUCHOS DE TÓNER Y CILINDRO HP CLJ CP6015 11. Remueva los tres tornillos de la cubierta lateral del lado de contacto. 12. Hale el eje del cilindro y la cubierta lateral juntas aproximadamente 2”. Tome nota del lugar donde están colocados los resortes ¡Deben volverse a colocar de esta misma manera cuando reinstale la cubierta lateral! Remueva la cubierta lateral. Tenga cuidado de no perder los dos resortes. 3232 West El Segundo Blvd., Hawthorne, California 90250 USA • Ph +1 424 675 3300 • Fx +1 424 675 3400 • techsupport@uninetimaging.com • www.uninetimaging.com © 2009 UniNet Imaging Inc. All trademark names and artwork are property of their respective owners. Product brand names mentioned are intended to show compatibility only. UniNet Imaging does not warrant downloaded information.
- 13. REMANUFACTURANDO LOS CARTUCHOS DE TÓNER Y CILINDRO HP CLJ CP6015 13. Remueva los dos pines metálicos. 14. Remueva el resto del eje del cilindro o y remueva el cilindro. 15. Rote y deslice la barra metálica hacia fuera del lado que no hace contacto. El engranaje derecho se soltará. 3232 West El Segundo Blvd., Hawthorne, California 90250 USA • Ph +1 424 675 3300 • Fx +1 424 675 3400 • techsupport@uninetimaging.com • www.uninetimaging.com © 2009 UniNet Imaging Inc. All trademark names and artwork are property of their respective owners. Product brand names mentioned are intended to show compatibility only. UniNet Imaging does not warrant downloaded information.
- 14. REMANUFACTURANDO LOS CARTUCHOS DE TÓNER Y CILINDRO HP CLJ CP6015 16. Remueva el ensamble del PCR. La película se saldrá con esta. 17. Con una navaja, deslice el sello a lo largo del borde trasero de la cuchilla limpiadora. 3232 West El Segundo Blvd., Hawthorne, California 90250 USA • Ph +1 424 675 3300 • Fx +1 424 675 3400 • techsupport@uninetimaging.com • www.uninetimaging.com © 2009 UniNet Imaging Inc. All trademark names and artwork are property of their respective owners. Product brand names mentioned are intended to show compatibility only. UniNet Imaging does not warrant downloaded information.
- 15. REMANUFACTURANDO LOS CARTUCHOS DE TÓNER Y CILINDRO HP CLJ CP6015 18. Remueva los dos tornillos en la cuchilla limpiadora. Cuidadosamente levante la cuchilla mientras va cortando el sello al irla removiendo. 19. Limpie el tóner de desperdicio del área de la cuchilla 20. Limpie todo el tóner de desperdicio de la cavidad del limpiadora y de los agitadores. Asegúrese que el sello de felpa agitador trasero. Aspire el eje. No use aire comprimido, o este limpio. dañara los sellos internos. 3232 West El Segundo Blvd., Hawthorne, California 90250 USA • Ph +1 424 675 3300 • Fx +1 424 675 3400 • techsupport@uninetimaging.com • www.uninetimaging.com © 2009 UniNet Imaging Inc. All trademark names and artwork are property of their respective owners. Product brand names mentioned are intended to show compatibility only. UniNet Imaging does not warrant downloaded information.
- 16. REMANUFACTURANDO LOS CARTUCHOS DE TÓNER Y CILINDRO HP CLJ CP6015 21. Instale la cuchilla limpiadora nueva y los dos tornillos. 22. Limpie el PCR e instale el ensamble del PCR. Tenga cuidado de no dañar la película. Reemplace la grasa conductiva en la base negra del PCR. 23. Instale la barra de metal y el engranaje. Tiene que girar la barra para alcanzar los bujes a través del agujero con esa forma. Asegúrese que el último buje este colocado en el cartucho. 3232 West El Segundo Blvd., Hawthorne, California 90250 USA • Ph +1 424 675 3300 • Fx +1 424 675 3400 • techsupport@uninetimaging.com • www.uninetimaging.com © 2009 UniNet Imaging Inc. All trademark names and artwork are property of their respective owners. Product brand names mentioned are intended to show compatibility only. UniNet Imaging does not warrant downloaded information.
- 17. REMANUFACTURANDO LOS CARTUCHOS DE TÓNER Y CILINDRO HP CLJ CP6015 24. Instale el lado grande de la cavidad del cilindro en el lado 25. Saque el pin hacia afuera del eje de engranaje guía del engranaje del cartucho. Deslice el eje del cilindro adentro metálico del cilindro. Remueva el engranaje. por el lado del engranaje. 26. Instale el resorte grande de manera que la base encaje en el poste y la cola encaje en el agujero como se muestra. 3232 West El Segundo Blvd., Hawthorne, California 90250 USA • Ph +1 424 675 3300 • Fx +1 424 675 3400 • techsupport@uninetimaging.com • www.uninetimaging.com © 2009 UniNet Imaging Inc. All trademark names and artwork are property of their respective owners. Product brand names mentioned are intended to show compatibility only. UniNet Imaging does not warrant downloaded information.
- 18. REMANUFACTURANDO LOS CARTUCHOS DE TÓNER Y CILINDRO HP CLJ CP6015 27. Remueva el buje metálico del eje del cilindro y colóquelo en la cubierta lateral detrás del resorte. 28. Comience a instalar la cubierta lateral. Asegúrese que los resortes encajen en la ranura del eje del cilindro. Instale los tres tornillos. 3232 West El Segundo Blvd., Hawthorne, California 90250 USA • Ph +1 424 675 3300 • Fx +1 424 675 3400 • techsupport@uninetimaging.com • www.uninetimaging.com © 2009 UniNet Imaging Inc. All trademark names and artwork are property of their respective owners. Product brand names mentioned are intended to show compatibility only. UniNet Imaging does not warrant downloaded information.
- 19. REMANUFACTURANDO LOS CARTUCHOS DE TÓNER Y CILINDRO HP CLJ CP6015 29. Instale el engranaje guía en el eje del cilindro, e inserte el pin golpeándolo con el martillo pequeño. Asegúrese de que el engranaje este instalado adecuadamente. 30. Alinee el agujero en la cavidad del cilindro con el agujero 31. Presione los pines grandes de metal en el lado del del eje del cilindro e inserte el pin. engranaje. 3232 West El Segundo Blvd., Hawthorne, California 90250 USA • Ph +1 424 675 3300 • Fx +1 424 675 3400 • techsupport@uninetimaging.com • www.uninetimaging.com © 2009 UniNet Imaging Inc. All trademark names and artwork are property of their respective owners. Product brand names mentioned are intended to show compatibility only. UniNet Imaging does not warrant downloaded information.
- 20. REMANUFACTURANDO LOS CARTUCHOS DE TÓNER Y CILINDRO HP CLJ CP6015 32. Instale el buje de metal en el lado opuesto del eje del 33. Instale los dos ejes de metal grandes restantes. cilindro. 34. Instale los dos agitadores en el ensamble de la cinta/guía como se muestra. El extremo angulado del agitador corto cabe en el eje del engranaje y el extremo plano del largo en el otro. Instale el ensamble de la cinta y los agitadores. Gire los engranajes hasta que los agitadores estén asentados en los ejes opuestos. Escuchara que hacen un click cuando estén en su sitio. 3232 West El Segundo Blvd., Hawthorne, California 90250 USA • Ph +1 424 675 3300 • Fx +1 424 675 3400 • techsupport@uninetimaging.com • www.uninetimaging.com © 2009 UniNet Imaging Inc. All trademark names and artwork are property of their respective owners. Product brand names mentioned are intended to show compatibility only. UniNet Imaging does not warrant downloaded information.
- 21. REMANUFACTURANDO LOS CARTUCHOS DE TÓNER Y CILINDRO HP CLJ CP6015 35. Instale el tornillo del ensamble del cinta/guía. 36. Cuando el rodillo revelador este disponible, remueva el tapón de llenado, saque el revelador antiguo, aspire la cámara e instale el rodillo revelador nuevo. En este momento no recomendamos que le haga nada a la cuchilla dosificadora. 37. Instale la unidad del revelador en la unidad del cilindro. Asegúrese de colocar la cola del resorte largo en la lengüeta y después instalar los resortes cortos como se muestra. 3232 West El Segundo Blvd., Hawthorne, California 90250 USA • Ph +1 424 675 3300 • Fx +1 424 675 3400 • techsupport@uninetimaging.com • www.uninetimaging.com © 2009 UniNet Imaging Inc. All trademark names and artwork are property of their respective owners. Product brand names mentioned are intended to show compatibility only. UniNet Imaging does not warrant downloaded information.
- 22. REMANUFACTURANDO LOS CARTUCHOS DE TÓNER Y CILINDRO HP CLJ CP6015 38. En el lado del engranaje instale el pin metálico pequeño en la cubierta lateral. Instale la cubierta lateral mientras mueve la unidad del revelador hacia atrás y hacia delante hasta que los pines metálicos estén insertados en la unidad del revelador. 39. Instale los tres tornillos. Coloque el tornillo grande en el 40. Reemplace el chip cortando el plástico derretido del borde agüero del borde exterior. superior. Deslice el chip y reemplácelo. Asegure el chip de reemplazo con dos gotas pequeñas de pegamento caliente. 3232 West El Segundo Blvd., Hawthorne, California 90250 USA • Ph +1 424 675 3300 • Fx +1 424 675 3400 • techsupport@uninetimaging.com • www.uninetimaging.com © 2009 UniNet Imaging Inc. All trademark names and artwork are property of their respective owners. Product brand names mentioned are intended to show compatibility only. UniNet Imaging does not warrant downloaded information.
- 23. REMANUFACTURANDO LOS CARTUCHOS DE TÓNER Y CILINDRO HP CLJ CP6015 IMPRIMIENDO UNA PAGINA DE PRUEBA Presione MENU y después elija INFORMACION. Hay múltiples páginas que pueden ser impresas: 1. Mapa del Menú 2. Configuración 3. Estado de los insumos 4. Página de consumo 5. Consumo de color 6. Demo 7. Muestras RGB 8. Muestras CMYK 9. Varias fuentes 41. Deslice la cubierta del cilindro en su lugar. También hay páginas de problemas de CALIDAD DE IMPRESIÓN que pueden ser impresas: 1. Presione MENU. 2. Presione la flecha hacia abajo hasta que DIAGNOSTICOS aparezca en la pantalla. 3. Presione el botón de “Chequear.” 4. Presione la flecha hacia abajo hasta que PROBLEMAS DE CALIDAD DE IMPRESIÓN aparezca en la pantalla. 5. Presione el botón “Chequear.” 6. Una serie de página se imprimirá, siga las instrucciones de estas páginas. AJUSTANDO EL COLOR 1. Presione MENU. 2. Seleccione CONFIGURAR EQUIPO. 3. Después selección CALIDAD DE IMPRESIÓN. Entonces podrá cambiar los tonos claros, medios y oscuros para los 4 colores. También hay una opción muy sencilla que es “RESTAURAR VALORES DE COLOR.” CARTA DE DEFECTOS REPETITIVOS Hay una unidad de rodillo revelador de 36mm; el color del defecto determinará la unidad de cilindro dañada. 40 mm PCR en unidad de cilindro OPC. 50 mm Rodillo de transferencia #1 71 mm Rodillo de transferencia #2 82 mm Tensión en la unidad de transferencia 94 mm Cilindro OPC. El color del defecto determinará el cilindro dañado. 144 mm Rodillo de presión en el fusor 148 mm Rodillo de calentamiento en el fusor 3232 West El Segundo Blvd., Hawthorne, California 90250 USA • Ph +1 424 675 3300 • Fx +1 424 675 3400 • techsupport@uninetimaging.com • www.uninetimaging.com © 2009 UniNet Imaging Inc. All trademark names and artwork are property of their respective owners. Product brand names mentioned are intended to show compatibility only. UniNet Imaging does not warrant downloaded information.