

Recomendados
Mais conteúdo relacionado
Mais procurados
Mais procurados (20)
Destaque
Destaque (14)
Semelhante a Triad 2010 excel_chapter_1
Semelhante a Triad 2010 excel_chapter_1 (20)
Mais de Dalia Saeed
Mais de Dalia Saeed (17)
Último
Último (20)
Triad 2010 excel_chapter_1
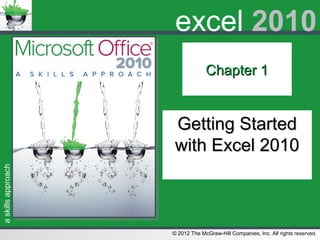
- 1. askillsapproach © 2012 The McGraw-Hill Companies, Inc. All rights reserved. excel 2010 Chapter 1Chapter 1 Getting StartedGetting Started with Excel 2010with Excel 2010
- 2. askillsapproach © 2012 The McGraw-Hill Companies, Inc. All rights reserved. Getting Started with Excel 2010Getting Started with Excel 2010 • Skill 1.1 Introduction to Microsoft Excel 2010 • Skill 1.2 Entering and Editing Text and Numbers in Cells • Skill 1.3 Wrapping Text in Cells • Skill 1.4 Inserting Data Using AutoFill • Skill 1.5 Inserting and Deleting Cells • Skill 1.6 Applying Formatting to Cells • Skill 1.7 Changing Fonts • Skill 1.8 Applying Cell Styles • Skill 1.9 Applying Number Formats • Skill 1.10 Applying Date Formats • Skill 1.11 Entering Simple Formulas • Skill 1.12 Adding Borders • Skill 1.13 Adding Shading • Skill 1.14 Using Format Painter with Excel • Skill 1.15 Using Paste Options • Skill 1.16 Using Find and Replace in Excel • Skill 1.17 Clearing Cell Content • Skill 1.18 Changing the Zoom Level 1-2
- 3. askillsapproach © 2012 The McGraw-Hill Companies, Inc. All rights reserved. Excel Skill 1.1Excel Skill 1.1 Introduction to Microsoft Excel 2010Introduction to Microsoft Excel 2010 • Microsoft Excel 2010 is a spreadsheet program in which you enter, manipulate, calculate, and chart numerical and text data. • An Excel file is referred to as a workbook. • A workbook is a collection of worksheets. • Each worksheet (also called a “sheet”) is made up of rows and columns of data on which you can perform calculations. • It’s these calculations that make Excel such a powerful tool. 1-3
- 4. askillsapproach © 2012 The McGraw-Hill Companies, Inc. All rights reserved. Basic Elements of a Microsoft Excel WorkbookBasic Elements of a Microsoft Excel Workbook • Worksheet —an electronic ledger where you enter data. • Row —a horizontal group of cells. Rows are identified by numbers. • Column —a vertical group of cells. Columns are identified by letters. • Cell —the intersection of a column and a row. • Formula Bar —data entry area. • Name Box — displays the address of the selected cell. • Status Bar —displays information about the selected data. 1-4
- 5. askillsapproach © 2012 The McGraw-Hill Companies, Inc. All rights reserved. Excel Skill 1.2Excel Skill 1.2 Entering and Editing Text and Numbers in CellsEntering and Editing Text and Numbers in Cells • The most basic task in Excel is entering data in your workbook. – Entering numerical data is as easy as typing a number in a cell. Numbers can be displayed as dates, currency values, percentages, and other formats. – Adding text headers to your rows and columns creates the structure for you to enter data into your workbook. • Excel gives you different ways to edit the data in your worksheet. – If you want to change the contents of the entire cell, use Ready mode. – If you want to change only part of the cell data, use Edit mode. – The status bar, located at the lower-left corner of the Excel window, displays which mode you are in—Ready or Edit. 1-5
- 6. askillsapproach © 2012 The McGraw-Hill Companies, Inc. All rights reserved. 1. Click the cell where you want the data to appear. 2. Type the number or text. 3. Press the Enter key or the Tab key to move between cells. • Press Enter to move the cursor down one cell. • Press Tab to move the cursor to the right one cell. If there were any old contents in the cell, the old contents are completely removed and replaced with what you’ve typed. To Enter or Edit Data in a Cell Using the Ready ModeTo Enter or Edit Data in a Cell Using the Ready Mode 1-6
- 7. askillsapproach © 2012 The McGraw-Hill Companies, Inc. All rights reserved. 1. Double-click the cell you want to change. 2. You should now see a blinking cursor in the cell. 3. Move the cursor to the part of the entry you want to change and make your changes. • Use the Backspace key to delete characters to the left of the cursor. • Use the Delete key to delete characters to the right of the cursor. • Click-and-drag your mouse to select a section of text to delete. 1. Press Enter or Tab when you are finished making changes. To Change Data in a Cell Using the Edit ModeTo Change Data in a Cell Using the Edit Mode 1-7
- 8. askillsapproach © 2012 The McGraw-Hill Companies, Inc. All rights reserved. Excel Skill 1.3Excel Skill 1.3 Wrapping Text in CellsWrapping Text in Cells • When you type text in a cell, the text will appear to continue to the right as far as it can until there is another cell that contains data. At that point, the text will appear to be cut off. • If your worksheet includes cells with more text than will comfortably fit in the cell, you should use the wrap text feature. – When wrap text is enabled for a cell, the text in the cell will automatically wrap to multiple lines, just as a paragraph would. – The text wrapping feature only works for cells that contain text. – If a column is too narrow to display its numerical data, Excel will not wrap it. Instead, the cell will show a series of # symbols, indicating that the cell contains numerical data, but the column is too narrow to display it. 1-8
- 9. askillsapproach © 2012 The McGraw-Hill Companies, Inc. All rights reserved. 1. On the Home tab, in the Alignment group, click the Wrap Text button. 2. Notice the button appears selected when text wrapping is active for the cell. 3. To turn off text wrapping in a cell, click the Wrap Text button again to deselect it. To Wrap Text in a CellTo Wrap Text in a Cell 1-9
- 10. askillsapproach © 2012 The McGraw-Hill Companies, Inc. All rights reserved. Excel Skill 1.4Excel Skill 1.4 Inserting Data Using AutoFillInserting Data Using AutoFill • Use the AutoFill feature to fill a group of cells with the same data or to extend a data series. – AutoFill copies the same value or formula to a group of cells at once. – AutoFill is much more efficient than using copy-and-paste over and over. • If you have a group of cells with similar data in a series, AutoFill can extend the series automatically. A data series is any sequence of cells with a recognizable pattern: 1-10
- 11. askillsapproach © 2012 The McGraw-Hill Companies, Inc. All rights reserved. 1. Enter the data you want in the first cell. 2. If you want to fill a series of cells with that same value, skip to step 5. 3. Enter the second value of the series in an adjacent cell. 4. Select the cell(s) to base the series on. (Click the first cell. Then holding S click the last cell you want to select.) 5. Click and drag the Fill Handle in the direction you want to fill the series. 6. Release the mouse button when you have highlighted the last cell you want to fill. To Use theTo Use the Fill HandleFill Handle ToolTool 1-11
- 12. askillsapproach © 2012 The McGraw-Hill Companies, Inc. All rights reserved. Excel Skill 1.5Excel Skill 1.5 Inserting and Deleting CellsInserting and Deleting Cells • When you insert a new cell, you have the option to shift the existing cells to the right or down, allowing you to place the new cell exactly where you want it. • Inserting and deleting cells may have unexpected consequences. – Be careful not to delete cells that are referenced in formulas. Even though a new value may shift into the original cell’s position, the formula will still be looking for the original cell (now deleted), causing an invalid cell reference error. – When you insert a cell, any formulas referencing the cell address will update to reflect the new position of the original cell. Even if the formula uses absolute cell references, it will still update to reflect the updated cell reference 1-12
- 13. askillsapproach © 2012 The McGraw-Hill Companies, Inc. All rights reserved. To insert a cell: 1.On the Home tab, in the Cells group, click the Insert button arrow. 2.Click Insert Cells. . . 3.Click the Shift cells right or Shift cells down radio button. 4.Click OK. To delete a cell: 1.On the Home tab, in the Cells group, click the Delete button arrow. 2.Click Delete Cells. . . 3.Click the Shift cells left or Shift cells up radio button. 4.Click OK. To Insert or Delete a CellTo Insert or Delete a Cell 1-13
- 14. askillsapproach © 2012 The McGraw-Hill Companies, Inc. All rights reserved. Excel Skill 1.6Excel Skill 1.6 Applying Formatting to CellsApplying Formatting to Cells • Well-formatted spreadsheets have consistent formatting. • You can apply common formatting to cells, such as bold, italic, and underline, to emphasize cells in your workbook. 1-14
- 15. askillsapproach © 2012 The McGraw-Hill Companies, Inc. All rights reserved. To apply bold formatting: •On the Home tab, in the Font group, click the Bold button. To apply italic formatting: •On the Home tab, in the Font group, click the Italic button. To apply underline formatting: •On the Home tab, in the Font group, click the Underline button. •You can also click the arrow next to the Underline button to expand the underline options and apply the double-underline style. To Apply Bold, Italic, or Underline FormattingTo Apply Bold, Italic, or Underline Formatting 1-15
- 16. askillsapproach © 2012 The McGraw-Hill Companies, Inc. All rights reserved. 1. Click the dialog box launcher in the Font group. 2. In the Format Cells dialog box box, in addition to bold, italics, and underline, you can apply additional character effects, including strikethrough, superscript, and subscript. 3. Choose the character effects you want. 4. Click OK. To Apply Additional Character EffectsTo Apply Additional Character Effects 1-16
- 17. askillsapproach © 2012 The McGraw-Hill Companies, Inc. All rights reserved. To change the font, 1.On the Home tab, in the Font group, click the arrow next to the Font box to expand the list of available fonts. 2.Select the font you want. To change the font size, 1.On the Home tab, in the Font group, click the arrow next to the Font Size box. 2.Select the size you want. To change the font color, 1.On the Home tab, in the Font group, click the arrow next to the Font Color button to expand the color palette. 2.Select the color you want. Excel Skill 1.7Excel Skill 1.7 Changing FontsChanging Fonts 1-17
- 18. askillsapproach © 2012 The McGraw-Hill Companies, Inc. All rights reserved. The font color palette is divided into three parts: •Top Part - Automatic color choice (black or white, depending on the color of the background). •Middle Part - the colors included in the theme that is applied to the workbook. These colors are designed to work together and complement each other. •Bottom Part - the standard colors (dark red, red, orange, etc.) These colors are always available, no matter what theme is in use. You can pick a custom color by clicking More Colors . . . from the bottom of the font color palette. The Font Color PaletteThe Font Color Palette 1-18
- 19. askillsapproach © 2012 The McGraw-Hill Companies, Inc. All rights reserved. Excel Skill 1.8Excel Skill 1.8 Applying Cell StylesApplying Cell Styles • A style is a combination of effects that can be applied at one time. • Styles can include formatting such as: – Character effects – Background color – Typefaces – Number formatting • Excel 2010 includes an extensive gallery of prebuilt cell styles. 1-19
- 20. askillsapproach © 2012 The McGraw-Hill Companies, Inc. All rights reserved. 1. Select the cell or cells you want to apply the style to. 2. On the Home tab, in the Styles group, click the Cell Styles button. 3. Click the style you want to apply to your cells. To Apply a Cell StyleTo Apply a Cell Style 1-20
- 21. askillsapproach © 2012 The McGraw-Hill Companies, Inc. All rights reserved. 1. On the Home tab, in the Styles group, click the Cell Styles button. 2. Click New Cell Style . . . 3. Type the name of your style in the Style name: box. 4. Click the Format . . . button to open the Format Cells dialog box. 5. In the Format Cells dialog box, set the formatting for your new style, and then click OK. 6. In the Style dialog box, click check boxes for formatting types to include in your style (number format, alignment, etc.). 7. Click OK to save the new cell style. The style will appear in the Cell Styles gallery. To Create Your Own Customer Cell StyleTo Create Your Own Customer Cell Style 1-21
- 22. askillsapproach © 2012 The McGraw-Hill Companies, Inc. All rights reserved. Excel Skill 1.9Excel Skill 1.9 Applying Number FormatsApplying Number Formats • Formatting numbers changes the appearance of the data but doesn’t change the numerical values. • The formatted number is displayed in the cell; the actual value is displayed in the formula bar. • The Number Group – Comma Style button - display value with a thousands separator. – Accounting Number Format button - choose an alternate currency format. – Percent Style button - display the value as a percentage. – Increase Decimal and Decrease Decimal buttons - increase or decrease the number of digits that appear to the right of the decimal point. 1-22
- 23. askillsapproach © 2012 The McGraw-Hill Companies, Inc. All rights reserved. Applying Number FormatsApplying Number Formats 1-23
- 24. askillsapproach © 2012 The McGraw-Hill Companies, Inc. All rights reserved. • In the Number group, click the Number Format arrow above the buttons to display the Number Format menu. • Click the More Number Formats . . . to open the Format Cells dialog box to the Number tab. • Select from even more number formats & customize any format, including: • adding color • specifying the number of decimal places to display • setting whether or not negative numbers should be enclosed in parentheses Common Number FormatsCommon Number Formats 1-24
- 25. askillsapproach © 2012 The McGraw-Hill Companies, Inc. All rights reserved. Excel Skill 1.10Excel Skill 1.10 Applying Date FormatsApplying Date Formats Two number formats available from the Number Format menu: •Short Date —Applies a simple format displaying the one or two-digit number representing the month, followed by the one- or two-digit number representing the day, followed by the four-digit year (9/5/2011). •Long Date —Applies a longer format displaying the day of the week, and then the name of the month, the two-digit date, and the four-digit year (Monday, September 05, 2011). 1-25
- 26. askillsapproach © 2012 The McGraw-Hill Companies, Inc. All rights reserved. 1. Select More Number Formats . . . from the Number Format list. 2. In the Format Cells dialog box, from the Number tab, if necessary, click Date in the Category: list. Excel offers a variety of prebuilt date formats to choose from. 3. Notice that as you click each format in the Type: list, the Sample box shows how the active cell will display with the selected format. 4. Click the date format you would like, and click OK. To Use a Different Date FormatTo Use a Different Date Format 1-26
- 27. askillsapproach © 2012 The McGraw-Hill Companies, Inc. All rights reserved. Excel Skill 1.11Excel Skill 1.11 Entering Simple FormulasEntering Simple Formulas • A formula is an equation used to calculate a value. • A formula can: – Perform a mathematical calculation (e.g., displaying the sum of 35 + 47) – Calculate a value using cell references: • Displaying the sum of the values of cells A3 + B3 or • Calculating the product of the value of cell A3 * 3. • Formulas always begin with an equal sign ( = ). • Formulas may include functions. – Functions are preprogrammed shortcuts for calculating complex equations. – Most functions require you to provide input called arguments. – Arguments are the parts of the formula that the function uses to calculate the value. 1-27
- 28. askillsapproach © 2012 The McGraw-Hill Companies, Inc. All rights reserved. 1. Click the cell in which you want to enter the formula. 2. Type = . 3. Type the formula. 4. To add a cell reference to a formula, you can type the cell address or click the cell. 5. Press Enter. To Enter a FormulaTo Enter a Formula 1-28
- 29. askillsapproach © 2012 The McGraw-Hill Companies, Inc. All rights reserved. Excel Skill 1.12Excel Skill 1.12 Adding BordersAdding Borders • Add borders to your workbook to emphasize a cell or group of cells. • Use borders to make your workbook look more like a desktop publishing form, or to follow accounting conventions such as using a double-underline for cells displaying totals. • The Borders button displays the most recently used border style. 1-29
- 30. askillsapproach © 2012 The McGraw-Hill Companies, Inc. All rights reserved. To add borders: 1.Select the cell(s) you want to add a border to. 2.On the Home tab, in the Font group, click the Borders button arrow and select the border style you want. To remove borders: 1.Select the cell(s) you want to remove the borders from. 2.On the Home tab, in the Font group, click the Borders button arrow and select No Border from the list of border styles. To Add or Remove BordersTo Add or Remove Borders 1-30
- 31. askillsapproach © 2012 The McGraw-Hill Companies, Inc. All rights reserved. Excel Skill 1.13Excel Skill 1.13 Adding ShadingAdding Shading • Another way to emphasize cells in your workbook is to add shading. • Shading is often used to: – Differentiate alternating rows in a large table. – Make the heading row stand out. • If you use a dark color for shading, change the font color to white or another light color. • Avoid overusing shading and using too many colors in your workbook. • Shading should be used for emphasis and to make the workbook easier to read, not just to make the workbook more colorful. 1-31
- 32. askillsapproach © 2012 The McGraw-Hill Companies, Inc. All rights reserved. To add shading: 1.Select the cell(s) you want to add shading to. 2.On the Home tab, in the Font group, click the Fill Color button arrow to display the color palette. 3.Click the color you want. To remove shading: 1.Select the cell(s) you want to remove shading from. 2.On the Home tab, in the Font group, click the Fill Color button arrow to display the color palette. 3.Click No Fill to remove the fill color from the selected cells. To Add Shading to Your WorkbookTo Add Shading to Your Workbook 1-32
- 33. askillsapproach © 2012 The McGraw-Hill Companies, Inc. All rights reserved. Excel Skill 1.14Excel Skill 1.14 Using Format Painter with ExcelUsing Format Painter with Excel • A professional, well-organized workbook uses consistent formatting. • Use the format painter tool to copy formatting from one part of a worksheet to another, rather than trying to recreate the exact combination of font color and size, number formatting, borders, and shading to reuse. 1-33
- 34. askillsapproach © 2012 The McGraw-Hill Companies, Inc. All rights reserved. 1. Select the cell that has the formatting you want to copy. 2. On the Home tab, in the Clipboard group, click the Format Painter button. 3. Click the cell where you want to apply the formatting. • To apply the formatting to a range of cells, 1. Click the first cell in group. 2. Hold down the left mouse button and drag across the cells. 3. Release when you reach the last cell. 4. The formatting is automatically applied to the selected cell(s). To UseTo Use Format PainterFormat Painter 1-34
- 35. askillsapproach © 2012 The McGraw-Hill Companies, Inc. All rights reserved. When pasting data into Excel, •Use the default Paste option to insert the copied data (including formulas and formatting) into the selected cell, or •Select from the paste options to control more precisely what is pasted. Excel Skill 1.15Excel Skill 1.15 Using Paste OptionsUsing Paste Options 1-35
- 36. askillsapproach © 2012 The McGraw-Hill Companies, Inc. All rights reserved. When your source includes formulas, you also have the option to paste the calculated cell values without pasting the underlying formulas. Pasting the Calculated Cell ValuesPasting the Calculated Cell Values 1-36
- 37. askillsapproach © 2012 The McGraw-Hill Companies, Inc. All rights reserved. The final group of paste options provides alternatives to pasting the actual contents of one cell into another. Pasting the Actual Contents of a CellPasting the Actual Contents of a Cell 1-37
- 38. askillsapproach © 2012 The McGraw-Hill Companies, Inc. All rights reserved. 1. On the Home tab, in the Clipboard group, click the bottom part of the Paste button (the Paste button arrow ) to expand the Paste Options menu. 2. Move your mouse over the icon for each paste option to see a preview of how the paste would look, and then click the icon for the paste option you want. To Use theTo Use the PastePaste button on the Ribbonbutton on the Ribbon 1-38
- 39. askillsapproach © 2012 The McGraw-Hill Companies, Inc. All rights reserved. Excel Skill 1.16Excel Skill 1.16 Using Find and Replace in ExcelUsing Find and Replace in Excel • All of the Microsoft Office applications include Find and Replace commands that allow you to search for and replace data in your file. • In Excel, these commands can be used to not only find and replace text, but also numbers in values and formulas in a single worksheet or across an entire workbook. 1-39
- 40. askillsapproach © 2012 The McGraw-Hill Companies, Inc. All rights reserved. 1. On the Home tab, in the Editing group at the far right side of the Ribbon, click the Find & Select button. 2. From the Find & Select menu, click Find . . . 3. The Find and Replace dialog box opens, with the Find tab on top. 4. Type the word, phrase, or number to find in the Find what: box. 5. Click the Find All button. When you click Find All, Excel displays a list detailing every instance of the data— worksheet, cell address, the value of the cell, and the formula (if there is one). To Find the Data You Want to ReplaceTo Find the Data You Want to Replace 1-40
- 41. askillsapproach © 2012 The McGraw-Hill Companies, Inc. All rights reserved. 1. Click the Replace tab. 2. Excel keeps the data you typed in the Find what: box. Now type the replacement text or values in the Replace with: box. 3. Click the Replace button to replace one instance of the data at a time, or click Replace All to replace all instances at once. 4. Excel displays a message telling you how many replacements were made. Click OK to dismiss the message. 5. Click Close to close the Find and Replace dialog box. To Replace the DataTo Replace the Data 1-41
- 42. askillsapproach © 2012 The McGraw-Hill Companies, Inc. All rights reserved. Excel Skill 1.17Excel Skill 1.17 Clearing Cell ContentClearing Cell Content • To remove the contents of a cell without removing the cell from the structure of your workbook, you will need to clear the cell. • In Excel, when you clear a cell, you remove its contents, formats, comments, and hyperlinks, but the blank cell remains in the worksheet. • Clearing a cell does not affect the layout of your worksheet. 1-42
- 43. askillsapproach © 2012 The McGraw-Hill Companies, Inc. All rights reserved. 1. Select the cell you want to clear of formats or contents. 2. On the Home tab, in the Editing group, click the Clear button. 3. Click the command for the type of formatting or contents you want to remove from the cell. To Clear a CellTo Clear a Cell • Clear All —clears all cell contents and formatting & deletes any comments or hyperlinks attached to cell. • Clear Formats —clears only cell formatting & leaves cell contents, comments, and hyperlinks. • Clear Contents —clears only contents (including hyperlinks) & leaves cell formatting and comments. • Clear Comments —deletes any comments attached to cell while leaving cell contents, formatting, and hyperlinks intact. • Clear Hyperlinks —removes hyperlink action from cell without removing content or hyperlink style of formatting. 1-43
- 44. askillsapproach © 2012 The McGraw-Hill Companies, Inc. All rights reserved. Excel Skill 1.18Excel Skill 1.18 Changing the Zoom LevelChanging the Zoom Level • Use the zoom slider in the lower-right corner of the window to zoom in and out of a worksheet, changing the size of text and images on screen. • As you move the slider, the zoom level displays the percentage the worksheet has been zoomed in or zoomed out. • Zooming a worksheet only affects how the worksheet appears on screen. It does not affect how the worksheet will print. 1-44
- 45. askillsapproach © 2012 The McGraw-Hill Companies, Inc. All rights reserved. To zoom in on a worksheet, making the text and graphics appear larger: •Click and drag the zoom slider to the right. •Click the Zoom In button on the slider. To zoom out of a worksheet, making the text and graphics appear smaller: •Click and drag the zoom slider to the left. •Click the Zoom Out button on the slider. To Zoom In or Out on a WorksheetTo Zoom In or Out on a Worksheet 1-45
- 46. askillsapproach © 2012 The McGraw-Hill Companies, Inc. All rights reserved. On the View tab, the Zoom group includes buttons for two of the most common zoom options: •Click the Zoom to Selection button to zoom in as close as possible on the currently selected cell(s). •Click the 100% button to return the worksheet back to 100% of the normal size. The Zoom Group buttonsThe Zoom Group buttons 1-46
- 47. askillsapproach © 2012 The McGraw-Hill Companies, Inc. All rights reserved. Getting Started with Excel 2010 RecapGetting Started with Excel 2010 Recap • Skill 1.1 Introduction to Microsoft Excel 2010 • Skill 1.2 Entering and Editing Text and Numbers in Cells • Skill 1.3 Wrapping Text in Cells • Skill 1.4 Inserting Data Using AutoFill • Skill 1.5 Inserting and Deleting Cells • Skill 1.6 Applying Formatting to Cells • Skill 1.7 Changing Fonts • Skill 1.8 Applying Cell Styles • Skill 1.9 Applying Number Formats • Skill 1.10 Applying Date Formats • Skill 1.11 Entering Simple Formulas • Skill 1.12 Adding Borders • Skill 1.13 Adding Shading • Skill 1.14 Using Format Painter with Excel • Skill 1.15 Using Paste Options • Skill 1.16 Using Find and Replace in Excel • Skill 1.17 Clearing Cell Content • Skill 1.18 Changing the Zoom Level 1-47
Notas do Editor
- Excel Skills Page: EX-2 In this chapter, you will learn the skills to build an Excel 2010 worksheet by entering data, descriptions, and simple computations. Also you will learn how to enhance your worksheet’s appearance with formatting.
- Excel Skill 1.1 Introduction to Microsoft Excel 2010 Page: EX-3 You can use Excel for a wide variety of purposes, from calculating payments for a personal loan, to creating a personal budget, to tracking employee sales and calculating bonuses for your business.
- Excel Skill 1.1 Introduction to Microsoft Excel 2010 Page: EX-3; Figure EX 1.1 Worksheet —an electronic ledger where you enter data. The worksheet appears as a grid where you can enter and then manipulate data using functions, formulas, and formatting. Excel workbooks have three worksheets by default (named Sheet1, Sheet2, and Sheet3). You can rename, add, and delete worksheets as necessary. To navigate to a worksheet, click the appropriate tab at the bottom of the worksheet grid. Row —a horizontal group of cells. Rows are identified by numbers. For example, the third row is labeled with the number 3. To select a row, click the row selector (the box with the row numberat the left side of the worksheet grid). Column —a vertical group of cells. Columns are identified by letters. For example, the fourth column is labeled with the letter D. To select a column, click the column selector (the box with the column letter at the top of the worksheet grid). Cell —the intersection of a column and a row. A cell is identified by its address—its column and row position. For example, the cell at the intersection of column B and row 4 has a cell address of B4. To navigate from cell to cell, use the mouse to click the cell you want to go to. You can also use the arrow keys on the keyboard to navigate around the worksheet. Formula Bar —data entry area directly below the Ribbon and above the worksheet grid. Although you can type any data in the formula bar, the Insert Function button at the left side of the formula bar was designed to make it easier to create complex formulas. Name Box —appears at the left side of the formula bar and displays the address of the selected cell. If a group of cells is selected, the Name Box displays the address of the first cell in the group. You can use the Name Box to navigate to a specific cell in the worksheet by typing the cell address in the Name Box and then pressing Enter . Status Bar —appears at the bottom of the worksheet grid and displays information about the selected data, including the number of cells selected that contain data (count) and the average and sum (total) of the selected values (when appropriate).
- Excel Skill 1.2 Entering and Editing Text and Numbers in Cells Page: EX-4 Later topics discuss number formatting and using functions and formulas to automate numerical calculations. Excel is not just about numbers, though. Without text headers, descriptions, and instructions, your workbook would consist of numbers and formulas without any structure.
- Excel Skill 1.2 Entering and Editing Text and Numbers in Cells Page: EX-4; Figure EX 1.2 tips & tricks - To add a line break within the cell, press Alt while pressing Enter . try this - As you type in a cell, the entry is displayed in the formula bar as well as in the active cell. Clicking the Enter icon next to the formula bar accepts your entry. Clicking the Cancel icon next to the formula bar removes your entry.
- Excel Skill 1.2 Entering and Editing Text and Numbers in Cells Page: EX-4
- Excel Skill 1.3 Wrapping Text in Cells Page: EX-5 You could increase the width of the cell to show all the text, but do you really want the entire column to be that wide?
- Excel Skill 1.3 Wrapping Text in Cells Page: EX-5; Figure EX 1.3 tell me more - You can also turn on the text wrapping feature from the Format Cells dialog box. Open the Format Cells dialog box. Click the Alignment tab if necessary. Click the Wrap Text check box. Click OK.
- Excel Skill 1.4 Inserting Data Using AutoFill Page: EX-6 Excel attempts to detect automatically if the data appear to be a series. Sometimes, however, the series doesn’t fill with the data you expect or want. To change the type of data AutoFill inserts, click the AutoFill Options button and select a different option. From the AutoFill Options button, you can choose to copy the cells or fill the series. You can also choose to copy the cell formatting only or to fill or copy the data series without formatting. tips & tricks - Use AutoFill to enter repetitive data in your worksheet to avoid errors from entering data manually. tell me more - The Fill Handle tool can be used to fill a series of dates by month as well as year. For example, if you start the series with Jan-2011 and Feb-2011, the Fill Handle will fill in the next cells with Mar-2011, Apr-2011, May-2011, etc. When the series reaches Dec-2011, the next cell will be filled in with Jan-2012. If you are filling a series of dates, the AutoFill Options button will give you the options to fill by day, weekday, month, or year.
- Excel Skill 1.4 Inserting Data Using AutoFill Page: EX-6; Figure EX 1.4 The easiest way to use AutoFill is to use the Fill Handle tool to fill data up or down in a column or to the left or right in a row. As you drag the Fill Handle, a tool tip appears displaying the value of the highlighted cell. try this - You can also use the Fill command from the Ribbon. First, select the cells you want to fill. On the Home tab, in the Editing group, click the Fill button and select the type of fill you want: Down, Right, Up, Left, Across Worksheets . . ., Series . . ., or Justify. Pressing Ctrl +D on the keyboard will fill the selected cell(s) with the value from the cell above it. Pressing Ctrl + R on the keyboard will fill the selected cell(s) with the value from the cell to the left of it.
- Excel Skill 1.5 Inserting and Deleting Cells Page: EX-7 You may find you want to add some extra space or more information into the middle of your worksheet. To do this, you must insert a new cell or group of cells.
- Excel Skill 1.5 Inserting and Deleting Cells Page: EX-7; Figure EX 1.5 Of course, you can also delete cells. Deleting cells not only deletes the information and formatting in the cell, but also shifts the layout of the worksheet. Even if you delete an empty cell, you shift all the surrounding cells into new positions. tell me more - Pressing the Delete key on the keyboard will delete the contents of the cell but not the cell itself. try this - Both Insert . . . and Delete . . . commands are available from the right-click menu.
- Excel Skill 1.6 Applying Formatting to Cells Page: EX-8 tell me more - From the Font tab in the Format Cells dialog box, you can apply additional character effects formatting such as strikethrough, superscript, and subscript.
- Excel Skill 1.6 Applying Formatting to Cells Page: EX-8; Figure EX 1.6 When you select a row or column, you can apply formatting to the entire row or column at once. Select the row or column by clicking the row heading or column heading (the number that represents the row or the letter than represents the column). Select the formatting option(s) you want to apply. tips & tricks - Underline styles used in accounting spreadsheets are slightly different from “regular” underline styles. If you need to apply the accounting style of underline or double underline, do not use the Underline button on the Ribbon. Instead, use one of the accounting underline options from the Format Cells dialog box: Open the Format Cells dialog box. Click the arrow to expand the Underline: list and select Single Accounting or Double Accounting. Click OK to apply the formatting. try this - When you right-click a cell, the Bold and Italic buttons are available on the mini toolbar. You can also use the keyboard shortcuts: Bold: CTRL + B Italic: CTRL + I Underline: CTRL + U
- Excel Skill 1.6 Applying Formatting to Cells Page: EX-8
- Excel Skill 1.7 Changing Fonts Page: EX-9; Figure EX 1.7 try this - You can also change the font, font size, or font color by Opening the Format Cells dialog box, clicking the Font tab, making the font selections you want, and then clicking OK. Right-clicking and making the font, font size, and font color selections you want from the Mini toolbar.
- Excel Skill 1.7 Changing Fonts Page: EX-9
- Excel Skill 1.8 Applying Cell Styles Page: EX-10 You can use these styles to help visualize your data by consistently applying them to your worksheet. For example, use the Good and Bad styles to highlight positive and negative data. Use text styles such as Title for the title of your worksheet and Warning Text to highlight crucial information about the data or worksheet. tips & tricks - If you have Live Preview enabled in Excel 2010, you can move your mouse over each style in the Cell Styles gallery to see a preview of how that style would look applied to your worksheet.
- Excel Skill 1.8 Applying Cell Styles Page: EX-10; Figure EX 1.8 You can apply cell styles to an entire column or row at one time by first clicking the row or column selector, and then selecting the style you want from the Cell Styles gallery.
- Excel Skill 1.8 Applying Cell Styles Page: EX-10
- Excel Skill 1.9 Applying Number Formats Page: EX-11 Use the Increase Decimal and Decrease Decimal buttons from the Number group to increase or decrease the number of digits that appear to the right of the decimal point. For example, if a cell contains the number 1.234 and you click the Decrease Decimal button twice, the cell will now display 1.2. The number that displays in the formula bar will still be 1.234 because that is the number stored in the worksheet.
- Excel Skill 1.9 Applying Number Formats Page: EX-11; Figure EX 1.9 When you first type numbers in a worksheet, Excel applies the General number format automatically. The General format right-aligns numbers in the cells but does not maintain a consistent number of decimal places (43.00 will appear as 43, while 42.25 appears as 42.25) and does not display commas (so 1,123,456 appears as 1123456). For consistency, and to make your worksheet easier to read, you should apply the specific number format that is most appropriate for your data. Excel provides several number formats for you to choose from.
- Excel Skill 1.9 Applying Number Formats Page: EX-12 tell me more - On the Home tab, in the Styles group, click the Cell Styles button to expand the Styles gallery. At the bottom of the gallery are five number styles. Applying one of these cell styles is the same as applying a number format. However, be aware that applying the Currency cell style actually applies the Accounting Number Format, not the Currency format. Comma —applies the default Comma Style format with two digits to the right of the decimal. Comma [0] —applies the Comma Style format but with no digits to the right of the decimal. Currency —applies the default Accounting Number Format, with two digits to the right of the decimal. Currency [0] —applies the Accounting Number Format but with no digits to the right of the decimal. Percent —applies the default Percent Style format. try this - When you right-click a cell, these formats are available from the Mini toolbar: Accounting Number Format Percent Style Comma Style To apply the Percent Style, you can also use the keyboard shortcut Ctrl + Shift + 5.
- Excel Skill 1.10 Applying Date Formats Page: EX-13; Figure EX 1.10 When you enter numbers in a date format such as 9/5/2011 or September 5, 2011, Excel detects that you are entering a date and automatically applies one of the date formats. Excel treats dates as a special type of number. There are many types of date formats available, but the underlying number for the date will always be the same. Cells formatted as dates can be used in calculations. To apply one of these formats, from the Home tab, click the Number Format arrow above the buttons in the Number group, and then click the format you want.
- Excel Skill 1.10 Applying Date Formats Pages: EX-13 and EX-14; Figure EX 1.11 tips & tricks - Only dates from January 1, 1900, through December 31, 9999, are stored as numbers. Dates prior to January 1, 1900, are stored as text and cannot be used in calculations. To see the serial number for a date, change the cell format from Date to General or Number . The date will be converted to a “regular” number. For example, December 31, 2009, is the number 40178. tell me more - Every date format can be expressed as a code. The code for the Short Date format is m/d/yyy. The code for the Long Date format is more complicated: [$ −F800]dddd, mmmmdd, yyyy. If Excel does not offer the exact date format you want to use, you can modify the date code using the Custom number option. Select More Number Formats . . . from the Number list. In the Format Cells dialog box, from the Number tab, click Custom in the Category: list. The Custom list includes the code for every number format offered. Click the code for the format closest to the format you want, and then make adjustments to the code in the Type: box. The Sample box shows how the number format will look in your worksheet. Click OK to apply your new custom number format.
- Excel Skill 1.11 Entering Simple Formulas Page: EX-15 Formulas that include functions always begin with an equal sign, followed by the function name, followed by the arguments enclosed in parentheses. If there are multiple arguments, separate them with a comma. = AVERAGE(A2:A16) The formula above uses the AVERAGE function to calculate the average value of cells A2 through A16. When you select a cell that contains a formula, the cell will display the value and the formula bar will display the formula. You can edit the formula in the formula bar, or you can double-click the cell to edit the formula directly in the cell. Notice that when you edit the formula, any referenced cells are highlighted.
- Excel Skill 1.11 Entering Simple Formulas Page: EX-15 and EX-16; Figure EX 1.12 If you are in the middle of typing a formula and you click another cell in the worksheet, Excel knows to add that cell reference to the formula instead of moving to it. tips & tricks - When you enter a formula with more than one mathematical operation, the formula is not necessarily calculated from left to right. Excel calculations follow the mathematical rules called the order of operations (also called precedence ). The rules state that mathematical operations in a formula are calculated in this order: Exponents and roots Multiplication and division Addition and subtraction Adding parentheses around part of a formula will override the order of operations, forcing Excel to perform the calculation within the parentheses first. 4 + 5 * 2 = 40—Excel calculates 5 * 2 first (10) and then adds 4. (4 + 5) * 2 = 18—Excel calculates 4 + 5 first (9), and then multiples by 2. 4 + 5 ˆ 2 = 29—Excel calculates 5 to the 2nd power first (25), and then adds 4. (4 + 5) ˆ 2 = 81—Excel calculates 4 + 5 first (9), and then raises that number to the 2nd power. tell me more - Using functions in formulas is covered in depth in the lesson Using Formulas and Functions. try this - To enter a formula, you can click the Enter button to the left of the formula bar.
- Excel Skill 1.12 Adding Borders Page: EX-17 The Borders button displays the most recently used border style. If you want to reuse this style, you can just click the button. You do not need to reselect the border style from the menu again.
- Excel Skill 1.12 Adding Borders Page: EX-17; Figure EX 1.13 tell me more - For more control over the look of cell borders, select More Borders . . . from the Borders menu to open the Format Cells dialog box. From the Border tab, you can specify the line style and color for the border. You can also see a preview of how the border will look. try this - The Borders button is also available from the Mini toolbar when you right-click a cell.
- Excel Skill 1.13 Adding Shading Page: EX-18
- Excel Skill 1.13 Adding Shading Page: EX-18; Figure EX 1.14 The color palette includes colors from the workbook theme as well as a row of standard colors along the bottom. Notice that as you hold the mouse over each color in the palette, a tool tip appears displaying the color name. tips & tricks - Like the Borders button, the Fill Color button displays the most recently used shading color. If you want to reuse this color, just click the button. You do not need to reselect the color from the Fill Color palette. tell me more - The Fill tab on the Format Cells dialog box offers options for fill effects and pattern styles. try this - The Fill Color button is also available from the Mini toolbar when you right-click a cell.
- Excel Skill 1.14 Using Format Painter with Excel Page: EX-19
- Excel Skill 1.14 Using Format Painter with Excel Page: EX-19; Figure EX 1.15 Notice that your mouse cursor changes to the Format Painter shape. When you reach the last cell in the group, release the mouse button. tell me more - If you want to apply the formatting to different parts of a worksheet or workbook, double-click the Format Painter button when you select it. It will stay on until you click the Format Painter button again or press Esc to deselect it. try this - To activate Format Painter, you can also right-click the cell with formatting you want to copy and click the Format Painter button on the Mini toolbar.
- Excel Skill 1.15 Using Paste Options Page: EX-20; table
- Excel Skill 1.15 Using Paste Options Page: EX-20; table
- Excel Skill 1.15 Using Paste Options Page: EX-20; table
- Excel Skill 1.15 Using Paste Options Page: EX-21; Figure EX 1.16 To use the keyboard shortcut: Press Ctrl + V on the keyboard. The source is pasted using the default Paste option, and the Paste Options button appears. Click the Paste Options button or press the CTRL key to display the Paste Options menu. This is the same menu that is available from the Paste button on the Ribbon, but moving your mouse over the icons does not show a preview of how the paste would look. tips & tricks - A useful paste option is Keep Source Column Widths. Often, when you paste data into a new worksheet, the default column width is too narrow to display the data. Use the Keep Source Column Widths paste option to maintain any column width adjustments you made in the source worksheet. tell me more - If you do not want the Paste Options button to appear every time you paste with the keyboard shortcut, you can turn it off: Click the File tab to open Backstage view. Click Options to open the Excel Options dialog box. Click Advanced. In the Cut, copy, and paste section near the bottom of the window, click the check box in front of Show Paste Options button when content is pasted to remove the check mark. Click OK. try this - You can also access the paste options from the right-click menu. Six of the paste options appear on the right-click menu ( Paste, Values, Formulas, Transpose, Formatting, and Paste Link ). To select an option from the full Paste Options menu, point to Paste Special . . ., and then click the paste option you want.
- Excel Skill 1.16 Using Find and Replace in Excel Page: EX-22
- Excel Skill 1.16 Using Find and Replace in Excel Page: EX-22; Figure EX 1.17 Before using the Replace command, you should use Find to make sure the data you are about to replace arewhat you expect.
- Excel Skill 1.16 Using Find and Replace in Excel Page: EX-23; Figure EX 1.18 Once you have verified the data you want to replace, switch to the Replace tab in the Find and Replace dialog box. tips & tricks - By default, Excel searches for the data both in cell values and within formulas. If you want to limit the search to only cell values, first click the Options >> button in the Find and Replace dialog box to display the find and replace optional settings. Next, expand the Look in: list by clicking the arrow, and select Values. tell me more - Find and Replace allows you to find and replace formatting as well as data. This feature is especially helpful when replacing number formats throughout a workbook. To find and replace formatting: Open the Find and Replace dialog box. If necessary, click the Options >> button to display the find and replace optional settings. Notice that next to the Find what: and Replace with: boxes, the preview box displays “No Format Set.” Click the Format . . . button next to the Find what: box and use the Find Format dialog box to define the formatting you want to find. The preview box now displays the word “Preview” using the formatting you defined. If you included number formatting, “Preview” will appear with an * after it (because the word “Preview” cannot display number formatting). Click the Format . . . button next to the Replace with: box and repeat the same process to define the new format you want to use. Click Replace All. Click OK in the message that appears. Click Close to close the Find and Replace dialog box. try this Use the keyboard shortcut CTRL + F to open the Find and Replace dialog box with the Find tab on top. Use the keyboard shortcut CTRL + H to open the Find and Replace dialog box with the Replace tab on top.
- Excel Skill 1.17 Clearing Cell Content Page: EX-24 tell me more - A hyperlink is text or a graphic that when clicked jumps to another location in your workbook or opens another file or Web page. When a cell contains a hyperlink, the Clear menu option Remove Hyperlinks will appear active. Clicking Remove Hyperlinks deletes the link and the hyperlink formatting from the cell, leaving the cell content. try this - To clear the contents of a cell, you can Right-click the cell and select Clear Contents from the menu. Using the right-click method, there are no options to clear formats or comments. Select the cell and then press the Delete key or the Backspace key to clear the cell contents but not the cell formatting.
- Excel Skill 1.17 Clearing Cell Content Page: EX-24; Figure EX 1.19
- Excel Skill 1.18 Changing the Zoom Level Page: EX-25 If you are working with a large spreadsheet, you may find that you need to see more of the spreadsheet at one time or that you would like a closer look at a cell or group of cells.
- Excel Skill 1.18 Changing the Zoom Level Page: EX-25; Figure EX 1.20
- Excel Skill 1.18 Changing the Zoom Level Page: EX-25; Figure EX 1.21 tips & tricks- When you create a new worksheet or open another worksheet, Excel will retain the zoom setting from the last active worksheet.
- Excel Skills Page: EX-2