SlideShare a Scribd company logo
1 of 18
Serial echo
Click on the terminal. Once the window opens type ‘cad’
This is the bit used for machining the part inside de board. (1/64’’ end mill)
We are making the echo board, so you can download it from http://fab.cba.mit.edu/about/fab/ . The one to choose is ‘hello.echo.44.MTA.cad’ since we are using MTA connectors. Don’t forget that everything must be in the same file! After opening cad, look for the file in ‘input’. Then click on ‘cam’ and in ‘output format’ choose ‘modella’.  Uncomment ‘dpi=500#high resolution for machining’. Adjust the values: tool diameter=0.0156, #contours=-1,  xy and z speed=4 . Click on ‘contour’ to see how it’ll look like, and ‘move’  to adjust the height of the bit. Once it is ready, click on ‘send to machine’.
Now, wait until the 1/64’’ bit finishes its work.
This is the bit used for the contour of the board (1/32’’ end mill)
This time, uncomment ‘cad function = frame’ and ‘z = -.065’. Adjust the values: tool diameter=0.0312, #contours=1,  xy and z speed=0.5. Click on ‘contour’ to see how it’ll look like, and ‘move’  to adjust the height of the bit.  Once it is ready, click on ‘send to machine’.
Now, wait until the 1/32’’ bit finishes its work.
It is ready to be soldered. After getting all the items (components and tools), it is recommended to stick the board on the table to avoid it moves.
I think this part requires patience. You have to be very careful when soldering the parts. Check that the line in the diode and the LED are in the proper direction, and the 4-pin MTA connector too!
To program you have to download ‘hello.echo.44.MTA.asm’. Remember to save everything in the same file!!  Open the terminal and get into the folder where all files are located Once you have the .asm, you have to change it to .hex.  Like below, you would type ‘gavrasm hello.echo.44.MTA.asm’ Then send power to the PCB. In my case , it was ‘python rx.py /dev/ttyS0 9600’ Fro the crystal (resonator) you will have to type this ‘avrdude –p t44 –c bsd –U lfuse:w:0x7E:m Then, send the program typing this ‘avrdude –p t44 –c bsd –U flash:w:hello.echo.44.MTA.hex’
Finally, to see if it really works, you type ‘python term.py /dev/ttyS0 9600’.  You MUST check that the serial cable is  working properly!. Sometimes I thought me PCB wasn’t  working. Then, we realized it was the cable.  So, how does this work?  When you type what is above, another window will open. Press any character form the keypad and the LED will turn on.
This board is the dasa.MTA. This board is used as a voltage limiter. The process to machine this board is completely the same as the others. You can find the file (dasa.MTA.cad) in http://fab.cba.mit.edu/about/fab/ .
External power supply
serial AMP MTA plug <-> DB9F cable (wire side view)
5-pin AMP connector to another 5-pin AMP
5-pin AMP to a DB-9 female
Connection

More Related Content

Similar to Embedded programming

Pspice software+ presentation
Pspice software+ presentationPspice software+ presentation
Pspice software+ presentationRAhul Soni
 
Ch_2_8,9,10.pptx
Ch_2_8,9,10.pptxCh_2_8,9,10.pptx
Ch_2_8,9,10.pptxyosikit826
 
[Apostila] programação arduíno brian w. evans
[Apostila] programação arduíno   brian w. evans[Apostila] programação arduíno   brian w. evans
[Apostila] programação arduíno brian w. evansWeb-Desegner
 
concurrency.cc OSHUG #3
concurrency.cc OSHUG #3concurrency.cc OSHUG #3
concurrency.cc OSHUG #3Omer Kilic
 
Express pcb tutorial
Express pcb tutorialExpress pcb tutorial
Express pcb tutorialawazapki
 
Media Frameworks Versus Swift (Swift by Northwest, October 2017)
Media Frameworks Versus Swift (Swift by Northwest, October 2017)Media Frameworks Versus Swift (Swift by Northwest, October 2017)
Media Frameworks Versus Swift (Swift by Northwest, October 2017)Chris Adamson
 
Input and output basic of c++ programming and escape sequences
Input and output basic of c++ programming and escape sequencesInput and output basic of c++ programming and escape sequences
Input and output basic of c++ programming and escape sequencesssuserf86fba
 
Introduction to l tspice iv
Introduction to l tspice ivIntroduction to l tspice iv
Introduction to l tspice ivHoopeer Hoopeer
 
Introduction to LTspice iv
Introduction to LTspice ivIntroduction to LTspice iv
Introduction to LTspice ivHoopeer Hoopeer
 
Adding System Call to Kernel
Adding System Call to KernelAdding System Call to Kernel
Adding System Call to KernelMuhammad Bilal
 
The can sat_book_2016-2017_versienov2016
The can sat_book_2016-2017_versienov2016The can sat_book_2016-2017_versienov2016
The can sat_book_2016-2017_versienov2016Ana Carneirinho
 
Project_PPT_Presentation.ppt
Project_PPT_Presentation.pptProject_PPT_Presentation.ppt
Project_PPT_Presentation.pptBIPLABNAYAK10
 
lec5 - The processor.pptx
lec5 - The processor.pptxlec5 - The processor.pptx
lec5 - The processor.pptxMahadevaAH
 
Microcontroladores: programación con microcontrolador AVR
Microcontroladores: programación con microcontrolador AVRMicrocontroladores: programación con microcontrolador AVR
Microcontroladores: programación con microcontrolador AVRSANTIAGO PABLO ALBERTO
 

Similar to Embedded programming (20)

Gmid ruida
Gmid ruidaGmid ruida
Gmid ruida
 
Pspice software+ presentation
Pspice software+ presentationPspice software+ presentation
Pspice software+ presentation
 
Ch_2_8,9,10.pptx
Ch_2_8,9,10.pptxCh_2_8,9,10.pptx
Ch_2_8,9,10.pptx
 
[Apostila] programação arduíno brian w. evans
[Apostila] programação arduíno   brian w. evans[Apostila] programação arduíno   brian w. evans
[Apostila] programação arduíno brian w. evans
 
concurrency.cc OSHUG #3
concurrency.cc OSHUG #3concurrency.cc OSHUG #3
concurrency.cc OSHUG #3
 
Express pcb tutorial
Express pcb tutorialExpress pcb tutorial
Express pcb tutorial
 
Media Frameworks Versus Swift (Swift by Northwest, October 2017)
Media Frameworks Versus Swift (Swift by Northwest, October 2017)Media Frameworks Versus Swift (Swift by Northwest, October 2017)
Media Frameworks Versus Swift (Swift by Northwest, October 2017)
 
INET for Starters
INET for StartersINET for Starters
INET for Starters
 
Input and output basic of c++ programming and escape sequences
Input and output basic of c++ programming and escape sequencesInput and output basic of c++ programming and escape sequences
Input and output basic of c++ programming and escape sequences
 
Dtmf robot
Dtmf robotDtmf robot
Dtmf robot
 
Introduction to l tspice iv
Introduction to l tspice ivIntroduction to l tspice iv
Introduction to l tspice iv
 
Introduction to LTspice iv
Introduction to LTspice ivIntroduction to LTspice iv
Introduction to LTspice iv
 
Adding System Call to Kernel
Adding System Call to KernelAdding System Call to Kernel
Adding System Call to Kernel
 
USBASP
USBASPUSBASP
USBASP
 
The can sat_book_2016-2017_versienov2016
The can sat_book_2016-2017_versienov2016The can sat_book_2016-2017_versienov2016
The can sat_book_2016-2017_versienov2016
 
Project_PPT_Presentation.ppt
Project_PPT_Presentation.pptProject_PPT_Presentation.ppt
Project_PPT_Presentation.ppt
 
Start with arduino
Start with arduinoStart with arduino
Start with arduino
 
lec5 - The processor.pptx
lec5 - The processor.pptxlec5 - The processor.pptx
lec5 - The processor.pptx
 
Avr book
Avr bookAvr book
Avr book
 
Microcontroladores: programación con microcontrolador AVR
Microcontroladores: programación con microcontrolador AVRMicrocontroladores: programación con microcontrolador AVR
Microcontroladores: programación con microcontrolador AVR
 

More from Victor Freundt

More from Victor Freundt (12)

Fabricación digital
Fabricación digitalFabricación digital
Fabricación digital
 
laser cutter
laser cutterlaser cutter
laser cutter
 
Nighty Lighty
Nighty LightyNighty Lighty
Nighty Lighty
 
3D Scanning and Printing
3D Scanning and Printing3D Scanning and Printing
3D Scanning and Printing
 
Fabricacion Digital
Fabricacion DigitalFabricacion Digital
Fabricacion Digital
 
Something big: Biggy
Something big: BiggySomething big: Biggy
Something big: Biggy
 
IT the press-fit monster
IT the press-fit monsterIT the press-fit monster
IT the press-fit monster
 
FabLab Kids Barcelona
FabLab Kids BarcelonaFabLab Kids Barcelona
FabLab Kids Barcelona
 
Gossip Goblins 3 D
Gossip Goblins 3 DGossip Goblins 3 D
Gossip Goblins 3 D
 
Gossip Goblins
Gossip GoblinsGossip Goblins
Gossip Goblins
 
Aqua Self
Aqua SelfAqua Self
Aqua Self
 
Máquinas de FabLabBcn
Máquinas de FabLabBcnMáquinas de FabLabBcn
Máquinas de FabLabBcn
 

Embedded programming

  • 2. Click on the terminal. Once the window opens type ‘cad’
  • 3. This is the bit used for machining the part inside de board. (1/64’’ end mill)
  • 4. We are making the echo board, so you can download it from http://fab.cba.mit.edu/about/fab/ . The one to choose is ‘hello.echo.44.MTA.cad’ since we are using MTA connectors. Don’t forget that everything must be in the same file! After opening cad, look for the file in ‘input’. Then click on ‘cam’ and in ‘output format’ choose ‘modella’. Uncomment ‘dpi=500#high resolution for machining’. Adjust the values: tool diameter=0.0156, #contours=-1, xy and z speed=4 . Click on ‘contour’ to see how it’ll look like, and ‘move’ to adjust the height of the bit. Once it is ready, click on ‘send to machine’.
  • 5. Now, wait until the 1/64’’ bit finishes its work.
  • 6. This is the bit used for the contour of the board (1/32’’ end mill)
  • 7. This time, uncomment ‘cad function = frame’ and ‘z = -.065’. Adjust the values: tool diameter=0.0312, #contours=1, xy and z speed=0.5. Click on ‘contour’ to see how it’ll look like, and ‘move’ to adjust the height of the bit. Once it is ready, click on ‘send to machine’.
  • 8. Now, wait until the 1/32’’ bit finishes its work.
  • 9. It is ready to be soldered. After getting all the items (components and tools), it is recommended to stick the board on the table to avoid it moves.
  • 10. I think this part requires patience. You have to be very careful when soldering the parts. Check that the line in the diode and the LED are in the proper direction, and the 4-pin MTA connector too!
  • 11. To program you have to download ‘hello.echo.44.MTA.asm’. Remember to save everything in the same file!! Open the terminal and get into the folder where all files are located Once you have the .asm, you have to change it to .hex. Like below, you would type ‘gavrasm hello.echo.44.MTA.asm’ Then send power to the PCB. In my case , it was ‘python rx.py /dev/ttyS0 9600’ Fro the crystal (resonator) you will have to type this ‘avrdude –p t44 –c bsd –U lfuse:w:0x7E:m Then, send the program typing this ‘avrdude –p t44 –c bsd –U flash:w:hello.echo.44.MTA.hex’
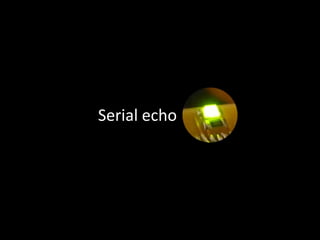
  • 12. Finally, to see if it really works, you type ‘python term.py /dev/ttyS0 9600’. You MUST check that the serial cable is working properly!. Sometimes I thought me PCB wasn’t working. Then, we realized it was the cable. So, how does this work? When you type what is above, another window will open. Press any character form the keypad and the LED will turn on.
  • 13. This board is the dasa.MTA. This board is used as a voltage limiter. The process to machine this board is completely the same as the others. You can find the file (dasa.MTA.cad) in http://fab.cba.mit.edu/about/fab/ .
  • 15. serial AMP MTA plug <-> DB9F cable (wire side view)
  • 16. 5-pin AMP connector to another 5-pin AMP
  • 17. 5-pin AMP to a DB-9 female