SlideShare uma empresa Scribd logo
1 de 32
MODULE 2
SKILLS
Microsoft Windows 8
Navigating around Windows
Managing Files and Folders
Working with Windows Settings,
Accessories, Security, and Help
© Paradigm Publishing, Inc. 1
SKILLS© Paradigm Publishing, Inc. 2
Managing Files and Folders
SKILLS
Managing Files and Folders
© Paradigm Publishing, Inc. 3
 A file is a collection of data that is stored on a
hard drive or other storage medium
 File names have two parts:
– a descriptive name you assign, such as Resume
– a file extension automatically assigned by the
application when you save the file
 Using the context-sensitive ribbons in the File
Explorer window, you can copy, rename,
organize, delete, and search for files
 By default, Windows contains four libraries:
Documents, Music, Pictures, and Videos
SKILLS
Skills You Learn
1. Use File Explorer
2. Copy a folder from the Student Resources disc
3. Create a folder
4. Rename files and folders
5. Compress and extract files
6. Search for files
7. Delete files and folders
8. Use the Recycle Bin
© Paradigm Publishing, Inc. 4
SKILLS
Skill 1 Steps: Use File Explorer
1. Click the File Explorer button on the Taskbar
2. Double-click Pictures in the Libraries section of
the Navigation pane
3. Click Desktop in the Favorites section of the
Navigation pane to display desktop files and
folders
4. Click the Back button to redisplay the Pictures
library
© Paradigm Publishing, Inc. 5
SKILLS
Skill 1 Visual: Use File Explorer
© Paradigm Publishing, Inc. 6
Double-click Pictures in the
Libraries section of the
Navigation pane.
Address bar
Status bar
SKILLS© Paradigm Publishing, Inc. 7
Using the Preview and Details Views
 Open File Explorer, open a folder, and click a file to
select it
 Click Preview pane in the Panes group on the View
tab to see a thumbnail image of the file
– click Preview pane again when you no longer wish to
display the Preview pane
 Click Details pane to see a thumbnail image plus
key properties of the file
 You will find shortcut buttons to these views in the
lower right corner of the File Explorer window:
SKILLS© Paradigm Publishing, Inc. 8
Browsing a Location
 When a File Explorer window opens, the
Address bar displays the current location
 The path to reach the location is shown on the
Address bar as links with arrows between them
– for example: Libraries ► Pictures
 You can jump to a location by clicking its name
in the Address bar
 You can jump to a particular location in the path
by clicking the arrow to the right of a link and
then clicking a location from the displayed menu
SKILLS
Skill 2 Steps: Copy a Folder from
the Student Resources Disc
1. Insert the Student Resources disc into the
CD/DVD drive
2. Insert your USB flash drive into a USB port
3. Press Win + D to open your desktop
4. Click the File Explorer button on the Taskbar
5. Right-click the disk drive in the Navigation pane
and then click Open in new window
6. Click the Module2-Windows folder in the File
List pane
© Paradigm Publishing, Inc. 9
SKILLS
Skill 2 Steps…continued
7. Click the Home tab
8. Click the Copy button in the Clipboard group
9. Close the Guidelines13-StudentResources
window
10. In the File Explorer window that is still open,
click your USB drive (Removable Disk) in
Computer section in the Navigation pane
11. Click the Paste button in the Clipboard group
on the Home tab
© Paradigm Publishing, Inc. 10
SKILLS
Skill 2 Visual: Copy a Folder from
the Student Resources Disc
© Paradigm Publishing, Inc. 11
Click the Paste button
in the Clipboard group
on the Home tab.
SKILLS© Paradigm Publishing, Inc. 12
Copying Folders Another Way
 Open two File Explorer windows and arrange
them so that both are visible on the screen
 You can then drag a folder from one window to
the other
 If you drag the folder to a different disk location,
the folder will be copied
 If the new folder location is on the same disk,
the folder will be moved
SKILLS
Skill 3 Steps: Create a Folder
1. With your USB flash drive inserted and the
desktop displayed, click the File Explorer button
2. Double-click Computer in the Navigation pane
to expand the section and then click the
removable disk drive name in the Navigation
pane
3. Click the New Folder button in the New group
on the Home tab to create a new folder
4. Type Module2-Skill3 and then press Enter
5. Double-click the Module2-Skill3 folder to open it
6. Click the Back button
© Paradigm Publishing, Inc. 13
SKILLS
Skill 3 Visual: Create a Folder
© Paradigm Publishing, Inc. 14
Click the New Folder
button in the New group
on the Home tab.
SKILLS© Paradigm Publishing, Inc. 15
Creating a New Library
 You can create additional libraries from the File
Explorer window by clicking the Home tab
 Click New item in the New group, and then click
Library
 A new library appears with its name open for
editing
 Type a unique name for your library
 You can optimize the library and manage the
type of folders that are included using the
Library Tools Manage ribbon
SKILLS
Skill 4 Steps: Rename Files and Folders
1. With your USB flash drive inserted and the
desktop displayed, click the File Explorer button
2. Double-click Computer in the Navigation pane
expand the section and then click the
removable disk drive name to see the list of
files or folders saved on your USB flash drive
3. Right-click the Module2-Skill3 folder to display
the shortcut menu
4. Click Rename
5. Type Module2-Practice and then press Enter
© Paradigm Publishing, Inc. 16
SKILLS
Skill 4 Visual: Rename Files and Folders
© Paradigm Publishing, Inc. 17
Click Rename at the
shortcut menu.
SKILLS© Paradigm Publishing, Inc. 18
Displaying File Extensions
 If you prefer to have Windows display file
extensions, follow these steps:
1. click the View tab in a File Explorer window
2. click the File name extensions check box in the
Show/Hide ¶ group to insert a check mark
SKILLS© Paradigm Publishing, Inc. 19
Renaming Multiple Files
 To rename a series of files in a File Explorer
window, follow these steps:
1. hold down the Ctrl key and click each file you want
to rename
2. press the F2 key, type the prefix you will use to
rename the files, and then press Enter
 The computer automatically adds the
parenthetical numbers after your prefix to
differentiate the files
SKILLS
Skill 5 Steps: Compress and Extract Files
1. With your USB flash drive inserted and the
desktop displayed, click the File Explorer button
2. Double-click Computer in the Navigation pane to
expand the section and then click the removable
disk drive name
3. Right-click the Module2-Windows folder
4. At the shortcut menu, point to Send to and then
click Compressed (zipped) folder
5. Press Enter to accept the default name
6. Double-click the compressed Module2-Windows
folder
© Paradigm Publishing, Inc. 20
SKILLS
Skill 5 Steps…continued
7. Click the Compressed Folder Tools Extract tab
and then click the Extract All button to open the
Extract Compressed (Zipped) Folders dialog box
8. Click the Browse button
9. In the Select a destination dialog box, browse to
the Module2-CompletedSkills folder and click it
10. Click OK to close the Select a destination dialog
box
11. Click the Extract button in the Extract
Compressed (Zipped) Folders dialog box
© Paradigm Publishing, Inc. 21
SKILLS
Skill 5 Visual: Compress and Extract Files
© Paradigm Publishing, Inc. 22
At the shortcut menu,
point to Send to and
then click Compressed
(zipped) folder.
SKILLS
Skill 6 Steps: Search for Files
1. With your USB flash drive inserted and the
desktop displayed, click the File Explorer button
2. Double-click Computer in the Navigation pane
to expand the section and then click the
removable disk drive name
3. Click in the search box and type Module2
4. Click the Clear button next to the search box
5. In the search box, type *.zip
6. Click the Clear button next to the search box
© Paradigm Publishing, Inc. 23
SKILLS
Skill 6 Visual: Search for Files
© Paradigm Publishing, Inc. 24
Click in the search box
and type Module2.
SKILLS© Paradigm Publishing, Inc. 25
Repeating a Search and Using Search Filters
 When you click in a search box in a File
Explorer window, previous searches are
displayed in a drop-down list
 Click a previous search to repeat it
 The Refine group on the Search Tools Search
tab contains filter categories that you can use to
refine your search
SKILLS
Skill 7 Steps: Delete Files and Folders
1. With your USB flash drive inserted and the
desktop displayed, click the File Explorer button
2. Double-click Computer in the Navigation pane
to expand the section and double-click the
removable disk drive name in the Navigation
pane
3. Right-click the zipped Module2-Windows folder
in the File List pane to display a shortcut menu
4. Click Delete
5. At the warning dialog box, click Yes
© Paradigm Publishing, Inc. 26
SKILLS
Skill 7 Visual: Delete Files and Folders
© Paradigm Publishing, Inc. 27
Click Delete at the
shortcut menu.
SKILLS© Paradigm Publishing, Inc. 28
Deleting Multiple Files
 If you want to delete a series of files listed one
after the other, select the files as follows:
– select adjacent files by clicking the first file and then
holding down the Shift key while clicking the last file
– select nonadjacent files by clicking the first file and
then holding down the Ctrl key while clicking the other
files
 Once you’ve selected the files, click the Delete
button in the Organize group on the Home tab
SKILLS
Skill 8 Steps: Use the Recycle Bin
1. With your USB flash drive inserted and the
desktop displayed, click the File Explorer button
2. Double-click Computer in the Navigation pane
and then click the removable disk drive name
3. Double-click the Module2-Windows folder
4. Size and move the Module2-Windows window
so that you can see the Recycle Bin and part of
the desktop on the left of your computer screen
5. Click M2-C2-S8-RecycleBin and drag the file
onto your desktop
© Paradigm Publishing, Inc. 29
SKILLS
Skill 8 Steps…continued
6. Right-click M2-C2-S8-RecycleBin on the
desktop and then click Delete
7. At the warning dialog box, click Yes
8. Double-click the Recycle Bin icon to open the
Recycle Bin window
9. Click M2-C2-S8-RecycleBin
10. Click the Recycle Bin Tools Manage tab and
then click the Restore the selected items
button in the Restore group
11. Close the Recycle Bin window
© Paradigm Publishing, Inc. 30
SKILLS
Skill 8 Visual: Use the Recycle Bin
© Paradigm Publishing, Inc. 31
At the warning dialog
box, click Yes.
SKILLS© Paradigm Publishing, Inc. 32
Adjusting the Recycle Bin Properties
 The maximum storage size of the Recycle Bin
can be adjusted by following these steps:
1. right-click the Recycle Bin icon
2. click Properties
3. enter a different number in the Maximum size (MB)
box
 You can also turn off the Recycle Bin by
selecting the option Don’t move files to the
Recycle Bin. Remove files immediately when
deleted.

Mais conteúdo relacionado

Mais procurados

Apple file organising
Apple file organisingApple file organising
Apple file organisingJacqui Sharp
 
San disksecureaccess quickstartguide_win
San disksecureaccess quickstartguide_winSan disksecureaccess quickstartguide_win
San disksecureaccess quickstartguide_winmonicagallant2
 
E portfolio guide how to upload and manage files
E portfolio guide  how to upload and manage filesE portfolio guide  how to upload and manage files
E portfolio guide how to upload and manage filesIris Hershenson
 
Windows 8.1 Guide
Windows 8.1 GuideWindows 8.1 Guide
Windows 8.1 GuideCorcelll
 
Windows 7- Introduction and Features
Windows 7- Introduction and FeaturesWindows 7- Introduction and Features
Windows 7- Introduction and FeaturesRajashri Bhairamadgi
 

Mais procurados (8)

Apple file organising
Apple file organisingApple file organising
Apple file organising
 
creating prize
creating prizecreating prize
creating prize
 
San disksecureaccess quickstartguide_win
San disksecureaccess quickstartguide_winSan disksecureaccess quickstartguide_win
San disksecureaccess quickstartguide_win
 
E portfolio guide how to upload and manage files
E portfolio guide  how to upload and manage filesE portfolio guide  how to upload and manage files
E portfolio guide how to upload and manage files
 
Windows 8.1 Guide
Windows 8.1 GuideWindows 8.1 Guide
Windows 8.1 Guide
 
Windows 7- Introduction and Features
Windows 7- Introduction and FeaturesWindows 7- Introduction and Features
Windows 7- Introduction and Features
 
L11 slides
L11 slidesL11 slides
L11 slides
 
Mac User Group Marina Dzougoutov
Mac User Group Marina DzougoutovMac User Group Marina Dzougoutov
Mac User Group Marina Dzougoutov
 

Destaque

Gl13 m2-c1-presentation
Gl13 m2-c1-presentationGl13 m2-c1-presentation
Gl13 m2-c1-presentationTracie King
 
Gl13 m2-c3-presentation
Gl13 m2-c3-presentationGl13 m2-c3-presentation
Gl13 m2-c3-presentationTracie King
 
Windows Phone 8 - 4 Files and Storage
Windows Phone 8 - 4 Files and StorageWindows Phone 8 - 4 Files and Storage
Windows Phone 8 - 4 Files and StorageOliver Scheer
 
Files and Folders in Windows 7
Files and Folders in Windows 7Files and Folders in Windows 7
Files and Folders in Windows 7RIAH ENCARNACION
 
Computer lesson 7 files & folders
Computer lesson 7   files & foldersComputer lesson 7   files & folders
Computer lesson 7 files & foldersallsaintstech
 
File management
File managementFile management
File managementMohd Arif
 
Windows 7 Unit B PPT
Windows 7 Unit B PPTWindows 7 Unit B PPT
Windows 7 Unit B PPTokmomwalking
 
Managing Files
Managing FilesManaging Files
Managing Filesnorzaini
 
File management ppt
File management pptFile management ppt
File management pptmarotti
 
Operating Systems - File Management
Operating Systems -  File ManagementOperating Systems -  File Management
Operating Systems - File ManagementDamian T. Gordon
 

Destaque (14)

Gl13 m2-c1-presentation
Gl13 m2-c1-presentationGl13 m2-c1-presentation
Gl13 m2-c1-presentation
 
Gl13 m2-c3-presentation
Gl13 m2-c3-presentationGl13 m2-c3-presentation
Gl13 m2-c3-presentation
 
Regine Magbanua 3 1
Regine Magbanua 3 1Regine Magbanua 3 1
Regine Magbanua 3 1
 
Windows Phone 8 - 4 Files and Storage
Windows Phone 8 - 4 Files and StorageWindows Phone 8 - 4 Files and Storage
Windows Phone 8 - 4 Files and Storage
 
Files and Folders in Windows 7
Files and Folders in Windows 7Files and Folders in Windows 7
Files and Folders in Windows 7
 
Files and Folders
Files and FoldersFiles and Folders
Files and Folders
 
Computer lesson 7 files & folders
Computer lesson 7   files & foldersComputer lesson 7   files & folders
Computer lesson 7 files & folders
 
File management
File managementFile management
File management
 
File Management
File ManagementFile Management
File Management
 
Windows 7 Unit B PPT
Windows 7 Unit B PPTWindows 7 Unit B PPT
Windows 7 Unit B PPT
 
Managing Files
Managing FilesManaging Files
Managing Files
 
File management
File managementFile management
File management
 
File management ppt
File management pptFile management ppt
File management ppt
 
Operating Systems - File Management
Operating Systems -  File ManagementOperating Systems -  File Management
Operating Systems - File Management
 

Semelhante a Gl13 m2-c2-presentation

Mac OS X Guide.doc
Mac OS X Guide.docMac OS X Guide.doc
Mac OS X Guide.docbutest
 
Understanding and Using Information Technology_Exploring Windows 7_2.pptx
Understanding and Using Information Technology_Exploring Windows 7_2.pptxUnderstanding and Using Information Technology_Exploring Windows 7_2.pptx
Understanding and Using Information Technology_Exploring Windows 7_2.pptxReubenMawukoDordunu
 
training materials.ppt
training materials.ppttraining materials.ppt
training materials.pptWakumaTeshome
 
ITFT - Window explorer
ITFT - Window explorerITFT - Window explorer
ITFT - Window explorerBlossom Sood
 
Deleting Files and Folders - R.D.Sivakumar
Deleting Files and Folders - R.D.SivakumarDeleting Files and Folders - R.D.Sivakumar
Deleting Files and Folders - R.D.SivakumarSivakumar R D .
 
Exploring the MS Windows Environment part 2
Exploring the MS Windows Environment part 2Exploring the MS Windows Environment part 2
Exploring the MS Windows Environment part 2vxiiayah
 
WORKING WITH FILES AND FOLDERS OR DIRECTORIES.pptx
WORKING WITH FILES AND FOLDERS OR DIRECTORIES.pptxWORKING WITH FILES AND FOLDERS OR DIRECTORIES.pptx
WORKING WITH FILES AND FOLDERS OR DIRECTORIES.pptxGessabelMatugas1
 
Lesson 7 using my docs
Lesson 7   using my docsLesson 7   using my docs
Lesson 7 using my docsguevarra_2000
 
Quick Start Guide.pdf
Quick Start Guide.pdfQuick Start Guide.pdf
Quick Start Guide.pdfpa jo
 
Files & folders.38
Files & folders.38Files & folders.38
Files & folders.38myrajendra
 
Week 1 lesson 9 Intro to tech class
Week 1 lesson 9 Intro to tech classWeek 1 lesson 9 Intro to tech class
Week 1 lesson 9 Intro to tech classrdubroy
 
Penge, pølser und Ideen
Penge, pølser und IdeenPenge, pølser und Ideen
Penge, pølser und IdeenTorben Rick
 
Lesson 7 Using My Docs
Lesson 7   Using My DocsLesson 7   Using My Docs
Lesson 7 Using My Docsguevarra_2000
 
Word 2013 Mateo Rueda
Word 2013 Mateo RuedaWord 2013 Mateo Rueda
Word 2013 Mateo RuedaMateoDavid64
 

Semelhante a Gl13 m2-c2-presentation (20)

Mac OS X Guide.doc
Mac OS X Guide.docMac OS X Guide.doc
Mac OS X Guide.doc
 
Unit 2 introduction to windows 7
Unit 2    introduction to windows 7Unit 2    introduction to windows 7
Unit 2 introduction to windows 7
 
Understanding and Using Information Technology_Exploring Windows 7_2.pptx
Understanding and Using Information Technology_Exploring Windows 7_2.pptxUnderstanding and Using Information Technology_Exploring Windows 7_2.pptx
Understanding and Using Information Technology_Exploring Windows 7_2.pptx
 
training materials.ppt
training materials.ppttraining materials.ppt
training materials.ppt
 
ITFT - Window explorer
ITFT - Window explorerITFT - Window explorer
ITFT - Window explorer
 
Deleting Files and Folders - R.D.Sivakumar
Deleting Files and Folders - R.D.SivakumarDeleting Files and Folders - R.D.Sivakumar
Deleting Files and Folders - R.D.Sivakumar
 
Exploring the MS Windows Environment part 2
Exploring the MS Windows Environment part 2Exploring the MS Windows Environment part 2
Exploring the MS Windows Environment part 2
 
WORKING WITH FILES AND FOLDERS OR DIRECTORIES.pptx
WORKING WITH FILES AND FOLDERS OR DIRECTORIES.pptxWORKING WITH FILES AND FOLDERS OR DIRECTORIES.pptx
WORKING WITH FILES AND FOLDERS OR DIRECTORIES.pptx
 
Windows 7: The Basics
Windows 7:  The BasicsWindows 7:  The Basics
Windows 7: The Basics
 
Lesson 7 using my docs
Lesson 7   using my docsLesson 7   using my docs
Lesson 7 using my docs
 
Quick Start Guide.pdf
Quick Start Guide.pdfQuick Start Guide.pdf
Quick Start Guide.pdf
 
Files & folders.38
Files & folders.38Files & folders.38
Files & folders.38
 
Week 1 lesson 9 Intro to tech class
Week 1 lesson 9 Intro to tech classWeek 1 lesson 9 Intro to tech class
Week 1 lesson 9 Intro to tech class
 
citigroup Financial Supplement
citigroup Financial Supplementcitigroup Financial Supplement
citigroup Financial Supplement
 
Penge, pølser und Ideen
Penge, pølser und IdeenPenge, pølser und Ideen
Penge, pølser und Ideen
 
Bruja
BrujaBruja
Bruja
 
Sphinx
SphinxSphinx
Sphinx
 
ff
ffff
ff
 
Lesson 7 Using My Docs
Lesson 7   Using My DocsLesson 7   Using My Docs
Lesson 7 Using My Docs
 
Word 2013 Mateo Rueda
Word 2013 Mateo RuedaWord 2013 Mateo Rueda
Word 2013 Mateo Rueda
 

Mais de Tracie King

The career search project
The career search projectThe career search project
The career search projectTracie King
 
The career search project word
The career search project wordThe career search project word
The career search project wordTracie King
 
Roles and Responsibilities: Developing the Team
Roles and Responsibilities: Developing the TeamRoles and Responsibilities: Developing the Team
Roles and Responsibilities: Developing the TeamTracie King
 
Interface: Creating the connection
Interface: Creating the connectionInterface: Creating the connection
Interface: Creating the connectionTracie King
 
Gameplay: Creating the Experience
Gameplay:  Creating the ExperienceGameplay:  Creating the Experience
Gameplay: Creating the ExperienceTracie King
 
Game Story and Character Development
Game Story and Character DevelopmentGame Story and Character Development
Game Story and Character DevelopmentTracie King
 
Production and Management: Developing the Process
Production and Management: Developing the ProcessProduction and Management: Developing the Process
Production and Management: Developing the ProcessTracie King
 
98 374 Lesson 02-slides
98 374 Lesson 02-slides98 374 Lesson 02-slides
98 374 Lesson 02-slidesTracie King
 
98 374 Lesson 01-slides
98 374 Lesson 01-slides98 374 Lesson 01-slides
98 374 Lesson 01-slidesTracie King
 
98 374 Lesson 06-slides
98 374 Lesson 06-slides98 374 Lesson 06-slides
98 374 Lesson 06-slidesTracie King
 
98 374 Lesson 05-slides
98 374 Lesson 05-slides98 374 Lesson 05-slides
98 374 Lesson 05-slidesTracie King
 
98 374 Lesson 04-slides
98 374 Lesson 04-slides98 374 Lesson 04-slides
98 374 Lesson 04-slidesTracie King
 
98 374 Lesson 03-slides
98 374 Lesson 03-slides98 374 Lesson 03-slides
98 374 Lesson 03-slidesTracie King
 

Mais de Tracie King (20)

The career search project
The career search projectThe career search project
The career search project
 
The career search project word
The career search project wordThe career search project word
The career search project word
 
Roles and Responsibilities: Developing the Team
Roles and Responsibilities: Developing the TeamRoles and Responsibilities: Developing the Team
Roles and Responsibilities: Developing the Team
 
Interface: Creating the connection
Interface: Creating the connectionInterface: Creating the connection
Interface: Creating the connection
 
Gameplay: Creating the Experience
Gameplay:  Creating the ExperienceGameplay:  Creating the Experience
Gameplay: Creating the Experience
 
Game Story and Character Development
Game Story and Character DevelopmentGame Story and Character Development
Game Story and Character Development
 
Production and Management: Developing the Process
Production and Management: Developing the ProcessProduction and Management: Developing the Process
Production and Management: Developing the Process
 
98 374 Lesson 02-slides
98 374 Lesson 02-slides98 374 Lesson 02-slides
98 374 Lesson 02-slides
 
98 374 Lesson 01-slides
98 374 Lesson 01-slides98 374 Lesson 01-slides
98 374 Lesson 01-slides
 
98 374 Lesson 06-slides
98 374 Lesson 06-slides98 374 Lesson 06-slides
98 374 Lesson 06-slides
 
98 374 Lesson 05-slides
98 374 Lesson 05-slides98 374 Lesson 05-slides
98 374 Lesson 05-slides
 
98 374 Lesson 04-slides
98 374 Lesson 04-slides98 374 Lesson 04-slides
98 374 Lesson 04-slides
 
98 374 Lesson 03-slides
98 374 Lesson 03-slides98 374 Lesson 03-slides
98 374 Lesson 03-slides
 
Max2015 ch01
Max2015 ch01Max2015 ch01
Max2015 ch01
 
Max2015 ch03
Max2015 ch03Max2015 ch03
Max2015 ch03
 
Max2015 ch02
Max2015 ch02Max2015 ch02
Max2015 ch02
 
Max2015 ch05
Max2015 ch05Max2015 ch05
Max2015 ch05
 
Max2015 ch04
Max2015 ch04Max2015 ch04
Max2015 ch04
 
Max2015 ch06
Max2015 ch06Max2015 ch06
Max2015 ch06
 
Max2015 ch07
Max2015 ch07Max2015 ch07
Max2015 ch07
 

Último

Using Grammatical Signals Suitable to Patterns of Idea Development
Using Grammatical Signals Suitable to Patterns of Idea DevelopmentUsing Grammatical Signals Suitable to Patterns of Idea Development
Using Grammatical Signals Suitable to Patterns of Idea Developmentchesterberbo7
 
MS4 level being good citizen -imperative- (1) (1).pdf
MS4 level   being good citizen -imperative- (1) (1).pdfMS4 level   being good citizen -imperative- (1) (1).pdf
MS4 level being good citizen -imperative- (1) (1).pdfMr Bounab Samir
 
4.11.24 Poverty and Inequality in America.pptx
4.11.24 Poverty and Inequality in America.pptx4.11.24 Poverty and Inequality in America.pptx
4.11.24 Poverty and Inequality in America.pptxmary850239
 
Active Learning Strategies (in short ALS).pdf
Active Learning Strategies (in short ALS).pdfActive Learning Strategies (in short ALS).pdf
Active Learning Strategies (in short ALS).pdfPatidar M
 
How to Make a Duplicate of Your Odoo 17 Database
How to Make a Duplicate of Your Odoo 17 DatabaseHow to Make a Duplicate of Your Odoo 17 Database
How to Make a Duplicate of Your Odoo 17 DatabaseCeline George
 
CHEST Proprioceptive neuromuscular facilitation.pptx
CHEST Proprioceptive neuromuscular facilitation.pptxCHEST Proprioceptive neuromuscular facilitation.pptx
CHEST Proprioceptive neuromuscular facilitation.pptxAneriPatwari
 
Blowin' in the Wind of Caste_ Bob Dylan's Song as a Catalyst for Social Justi...
Blowin' in the Wind of Caste_ Bob Dylan's Song as a Catalyst for Social Justi...Blowin' in the Wind of Caste_ Bob Dylan's Song as a Catalyst for Social Justi...
Blowin' in the Wind of Caste_ Bob Dylan's Song as a Catalyst for Social Justi...DhatriParmar
 
How to Fix XML SyntaxError in Odoo the 17
How to Fix XML SyntaxError in Odoo the 17How to Fix XML SyntaxError in Odoo the 17
How to Fix XML SyntaxError in Odoo the 17Celine George
 
ICS 2208 Lecture Slide Notes for Topic 6
ICS 2208 Lecture Slide Notes for Topic 6ICS 2208 Lecture Slide Notes for Topic 6
ICS 2208 Lecture Slide Notes for Topic 6Vanessa Camilleri
 
Expanded definition: technical and operational
Expanded definition: technical and operationalExpanded definition: technical and operational
Expanded definition: technical and operationalssuser3e220a
 
Grade 9 Quarter 4 Dll Grade 9 Quarter 4 DLL.pdf
Grade 9 Quarter 4 Dll Grade 9 Quarter 4 DLL.pdfGrade 9 Quarter 4 Dll Grade 9 Quarter 4 DLL.pdf
Grade 9 Quarter 4 Dll Grade 9 Quarter 4 DLL.pdfJemuel Francisco
 
Textual Evidence in Reading and Writing of SHS
Textual Evidence in Reading and Writing of SHSTextual Evidence in Reading and Writing of SHS
Textual Evidence in Reading and Writing of SHSMae Pangan
 
Unraveling Hypertext_ Analyzing Postmodern Elements in Literature.pptx
Unraveling Hypertext_ Analyzing  Postmodern Elements in  Literature.pptxUnraveling Hypertext_ Analyzing  Postmodern Elements in  Literature.pptx
Unraveling Hypertext_ Analyzing Postmodern Elements in Literature.pptxDhatriParmar
 
Q-Factor General Quiz-7th April 2024, Quiz Club NITW
Q-Factor General Quiz-7th April 2024, Quiz Club NITWQ-Factor General Quiz-7th April 2024, Quiz Club NITW
Q-Factor General Quiz-7th April 2024, Quiz Club NITWQuiz Club NITW
 
Concurrency Control in Database Management system
Concurrency Control in Database Management systemConcurrency Control in Database Management system
Concurrency Control in Database Management systemChristalin Nelson
 
4.11.24 Mass Incarceration and the New Jim Crow.pptx
4.11.24 Mass Incarceration and the New Jim Crow.pptx4.11.24 Mass Incarceration and the New Jim Crow.pptx
4.11.24 Mass Incarceration and the New Jim Crow.pptxmary850239
 
ARTERIAL BLOOD GAS ANALYSIS........pptx
ARTERIAL BLOOD  GAS ANALYSIS........pptxARTERIAL BLOOD  GAS ANALYSIS........pptx
ARTERIAL BLOOD GAS ANALYSIS........pptxAneriPatwari
 
Grade Three -ELLNA-REVIEWER-ENGLISH.pptx
Grade Three -ELLNA-REVIEWER-ENGLISH.pptxGrade Three -ELLNA-REVIEWER-ENGLISH.pptx
Grade Three -ELLNA-REVIEWER-ENGLISH.pptxkarenfajardo43
 

Último (20)

Using Grammatical Signals Suitable to Patterns of Idea Development
Using Grammatical Signals Suitable to Patterns of Idea DevelopmentUsing Grammatical Signals Suitable to Patterns of Idea Development
Using Grammatical Signals Suitable to Patterns of Idea Development
 
MS4 level being good citizen -imperative- (1) (1).pdf
MS4 level   being good citizen -imperative- (1) (1).pdfMS4 level   being good citizen -imperative- (1) (1).pdf
MS4 level being good citizen -imperative- (1) (1).pdf
 
4.11.24 Poverty and Inequality in America.pptx
4.11.24 Poverty and Inequality in America.pptx4.11.24 Poverty and Inequality in America.pptx
4.11.24 Poverty and Inequality in America.pptx
 
Active Learning Strategies (in short ALS).pdf
Active Learning Strategies (in short ALS).pdfActive Learning Strategies (in short ALS).pdf
Active Learning Strategies (in short ALS).pdf
 
How to Make a Duplicate of Your Odoo 17 Database
How to Make a Duplicate of Your Odoo 17 DatabaseHow to Make a Duplicate of Your Odoo 17 Database
How to Make a Duplicate of Your Odoo 17 Database
 
CHEST Proprioceptive neuromuscular facilitation.pptx
CHEST Proprioceptive neuromuscular facilitation.pptxCHEST Proprioceptive neuromuscular facilitation.pptx
CHEST Proprioceptive neuromuscular facilitation.pptx
 
Blowin' in the Wind of Caste_ Bob Dylan's Song as a Catalyst for Social Justi...
Blowin' in the Wind of Caste_ Bob Dylan's Song as a Catalyst for Social Justi...Blowin' in the Wind of Caste_ Bob Dylan's Song as a Catalyst for Social Justi...
Blowin' in the Wind of Caste_ Bob Dylan's Song as a Catalyst for Social Justi...
 
How to Fix XML SyntaxError in Odoo the 17
How to Fix XML SyntaxError in Odoo the 17How to Fix XML SyntaxError in Odoo the 17
How to Fix XML SyntaxError in Odoo the 17
 
ICS 2208 Lecture Slide Notes for Topic 6
ICS 2208 Lecture Slide Notes for Topic 6ICS 2208 Lecture Slide Notes for Topic 6
ICS 2208 Lecture Slide Notes for Topic 6
 
Paradigm shift in nursing research by RS MEHTA
Paradigm shift in nursing research by RS MEHTAParadigm shift in nursing research by RS MEHTA
Paradigm shift in nursing research by RS MEHTA
 
Expanded definition: technical and operational
Expanded definition: technical and operationalExpanded definition: technical and operational
Expanded definition: technical and operational
 
Grade 9 Quarter 4 Dll Grade 9 Quarter 4 DLL.pdf
Grade 9 Quarter 4 Dll Grade 9 Quarter 4 DLL.pdfGrade 9 Quarter 4 Dll Grade 9 Quarter 4 DLL.pdf
Grade 9 Quarter 4 Dll Grade 9 Quarter 4 DLL.pdf
 
Textual Evidence in Reading and Writing of SHS
Textual Evidence in Reading and Writing of SHSTextual Evidence in Reading and Writing of SHS
Textual Evidence in Reading and Writing of SHS
 
Unraveling Hypertext_ Analyzing Postmodern Elements in Literature.pptx
Unraveling Hypertext_ Analyzing  Postmodern Elements in  Literature.pptxUnraveling Hypertext_ Analyzing  Postmodern Elements in  Literature.pptx
Unraveling Hypertext_ Analyzing Postmodern Elements in Literature.pptx
 
Q-Factor General Quiz-7th April 2024, Quiz Club NITW
Q-Factor General Quiz-7th April 2024, Quiz Club NITWQ-Factor General Quiz-7th April 2024, Quiz Club NITW
Q-Factor General Quiz-7th April 2024, Quiz Club NITW
 
Concurrency Control in Database Management system
Concurrency Control in Database Management systemConcurrency Control in Database Management system
Concurrency Control in Database Management system
 
4.11.24 Mass Incarceration and the New Jim Crow.pptx
4.11.24 Mass Incarceration and the New Jim Crow.pptx4.11.24 Mass Incarceration and the New Jim Crow.pptx
4.11.24 Mass Incarceration and the New Jim Crow.pptx
 
ARTERIAL BLOOD GAS ANALYSIS........pptx
ARTERIAL BLOOD  GAS ANALYSIS........pptxARTERIAL BLOOD  GAS ANALYSIS........pptx
ARTERIAL BLOOD GAS ANALYSIS........pptx
 
INCLUSIVE EDUCATION PRACTICES FOR TEACHERS AND TRAINERS.pptx
INCLUSIVE EDUCATION PRACTICES FOR TEACHERS AND TRAINERS.pptxINCLUSIVE EDUCATION PRACTICES FOR TEACHERS AND TRAINERS.pptx
INCLUSIVE EDUCATION PRACTICES FOR TEACHERS AND TRAINERS.pptx
 
Grade Three -ELLNA-REVIEWER-ENGLISH.pptx
Grade Three -ELLNA-REVIEWER-ENGLISH.pptxGrade Three -ELLNA-REVIEWER-ENGLISH.pptx
Grade Three -ELLNA-REVIEWER-ENGLISH.pptx
 

Gl13 m2-c2-presentation

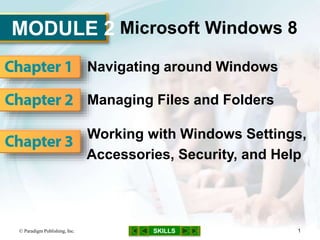
  • 1. MODULE 2 SKILLS Microsoft Windows 8 Navigating around Windows Managing Files and Folders Working with Windows Settings, Accessories, Security, and Help © Paradigm Publishing, Inc. 1
  • 2. SKILLS© Paradigm Publishing, Inc. 2 Managing Files and Folders
  • 3. SKILLS Managing Files and Folders © Paradigm Publishing, Inc. 3  A file is a collection of data that is stored on a hard drive or other storage medium  File names have two parts: – a descriptive name you assign, such as Resume – a file extension automatically assigned by the application when you save the file  Using the context-sensitive ribbons in the File Explorer window, you can copy, rename, organize, delete, and search for files  By default, Windows contains four libraries: Documents, Music, Pictures, and Videos
  • 4. SKILLS Skills You Learn 1. Use File Explorer 2. Copy a folder from the Student Resources disc 3. Create a folder 4. Rename files and folders 5. Compress and extract files 6. Search for files 7. Delete files and folders 8. Use the Recycle Bin © Paradigm Publishing, Inc. 4
  • 5. SKILLS Skill 1 Steps: Use File Explorer 1. Click the File Explorer button on the Taskbar 2. Double-click Pictures in the Libraries section of the Navigation pane 3. Click Desktop in the Favorites section of the Navigation pane to display desktop files and folders 4. Click the Back button to redisplay the Pictures library © Paradigm Publishing, Inc. 5
  • 6. SKILLS Skill 1 Visual: Use File Explorer © Paradigm Publishing, Inc. 6 Double-click Pictures in the Libraries section of the Navigation pane. Address bar Status bar
  • 7. SKILLS© Paradigm Publishing, Inc. 7 Using the Preview and Details Views  Open File Explorer, open a folder, and click a file to select it  Click Preview pane in the Panes group on the View tab to see a thumbnail image of the file – click Preview pane again when you no longer wish to display the Preview pane  Click Details pane to see a thumbnail image plus key properties of the file  You will find shortcut buttons to these views in the lower right corner of the File Explorer window:
  • 8. SKILLS© Paradigm Publishing, Inc. 8 Browsing a Location  When a File Explorer window opens, the Address bar displays the current location  The path to reach the location is shown on the Address bar as links with arrows between them – for example: Libraries ► Pictures  You can jump to a location by clicking its name in the Address bar  You can jump to a particular location in the path by clicking the arrow to the right of a link and then clicking a location from the displayed menu
  • 9. SKILLS Skill 2 Steps: Copy a Folder from the Student Resources Disc 1. Insert the Student Resources disc into the CD/DVD drive 2. Insert your USB flash drive into a USB port 3. Press Win + D to open your desktop 4. Click the File Explorer button on the Taskbar 5. Right-click the disk drive in the Navigation pane and then click Open in new window 6. Click the Module2-Windows folder in the File List pane © Paradigm Publishing, Inc. 9
  • 10. SKILLS Skill 2 Steps…continued 7. Click the Home tab 8. Click the Copy button in the Clipboard group 9. Close the Guidelines13-StudentResources window 10. In the File Explorer window that is still open, click your USB drive (Removable Disk) in Computer section in the Navigation pane 11. Click the Paste button in the Clipboard group on the Home tab © Paradigm Publishing, Inc. 10
  • 11. SKILLS Skill 2 Visual: Copy a Folder from the Student Resources Disc © Paradigm Publishing, Inc. 11 Click the Paste button in the Clipboard group on the Home tab.
  • 12. SKILLS© Paradigm Publishing, Inc. 12 Copying Folders Another Way  Open two File Explorer windows and arrange them so that both are visible on the screen  You can then drag a folder from one window to the other  If you drag the folder to a different disk location, the folder will be copied  If the new folder location is on the same disk, the folder will be moved
  • 13. SKILLS Skill 3 Steps: Create a Folder 1. With your USB flash drive inserted and the desktop displayed, click the File Explorer button 2. Double-click Computer in the Navigation pane to expand the section and then click the removable disk drive name in the Navigation pane 3. Click the New Folder button in the New group on the Home tab to create a new folder 4. Type Module2-Skill3 and then press Enter 5. Double-click the Module2-Skill3 folder to open it 6. Click the Back button © Paradigm Publishing, Inc. 13
  • 14. SKILLS Skill 3 Visual: Create a Folder © Paradigm Publishing, Inc. 14 Click the New Folder button in the New group on the Home tab.
  • 15. SKILLS© Paradigm Publishing, Inc. 15 Creating a New Library  You can create additional libraries from the File Explorer window by clicking the Home tab  Click New item in the New group, and then click Library  A new library appears with its name open for editing  Type a unique name for your library  You can optimize the library and manage the type of folders that are included using the Library Tools Manage ribbon
  • 16. SKILLS Skill 4 Steps: Rename Files and Folders 1. With your USB flash drive inserted and the desktop displayed, click the File Explorer button 2. Double-click Computer in the Navigation pane expand the section and then click the removable disk drive name to see the list of files or folders saved on your USB flash drive 3. Right-click the Module2-Skill3 folder to display the shortcut menu 4. Click Rename 5. Type Module2-Practice and then press Enter © Paradigm Publishing, Inc. 16
  • 17. SKILLS Skill 4 Visual: Rename Files and Folders © Paradigm Publishing, Inc. 17 Click Rename at the shortcut menu.
  • 18. SKILLS© Paradigm Publishing, Inc. 18 Displaying File Extensions  If you prefer to have Windows display file extensions, follow these steps: 1. click the View tab in a File Explorer window 2. click the File name extensions check box in the Show/Hide ¶ group to insert a check mark
  • 19. SKILLS© Paradigm Publishing, Inc. 19 Renaming Multiple Files  To rename a series of files in a File Explorer window, follow these steps: 1. hold down the Ctrl key and click each file you want to rename 2. press the F2 key, type the prefix you will use to rename the files, and then press Enter  The computer automatically adds the parenthetical numbers after your prefix to differentiate the files
  • 20. SKILLS Skill 5 Steps: Compress and Extract Files 1. With your USB flash drive inserted and the desktop displayed, click the File Explorer button 2. Double-click Computer in the Navigation pane to expand the section and then click the removable disk drive name 3. Right-click the Module2-Windows folder 4. At the shortcut menu, point to Send to and then click Compressed (zipped) folder 5. Press Enter to accept the default name 6. Double-click the compressed Module2-Windows folder © Paradigm Publishing, Inc. 20
  • 21. SKILLS Skill 5 Steps…continued 7. Click the Compressed Folder Tools Extract tab and then click the Extract All button to open the Extract Compressed (Zipped) Folders dialog box 8. Click the Browse button 9. In the Select a destination dialog box, browse to the Module2-CompletedSkills folder and click it 10. Click OK to close the Select a destination dialog box 11. Click the Extract button in the Extract Compressed (Zipped) Folders dialog box © Paradigm Publishing, Inc. 21
  • 22. SKILLS Skill 5 Visual: Compress and Extract Files © Paradigm Publishing, Inc. 22 At the shortcut menu, point to Send to and then click Compressed (zipped) folder.
  • 23. SKILLS Skill 6 Steps: Search for Files 1. With your USB flash drive inserted and the desktop displayed, click the File Explorer button 2. Double-click Computer in the Navigation pane to expand the section and then click the removable disk drive name 3. Click in the search box and type Module2 4. Click the Clear button next to the search box 5. In the search box, type *.zip 6. Click the Clear button next to the search box © Paradigm Publishing, Inc. 23
  • 24. SKILLS Skill 6 Visual: Search for Files © Paradigm Publishing, Inc. 24 Click in the search box and type Module2.
  • 25. SKILLS© Paradigm Publishing, Inc. 25 Repeating a Search and Using Search Filters  When you click in a search box in a File Explorer window, previous searches are displayed in a drop-down list  Click a previous search to repeat it  The Refine group on the Search Tools Search tab contains filter categories that you can use to refine your search
  • 26. SKILLS Skill 7 Steps: Delete Files and Folders 1. With your USB flash drive inserted and the desktop displayed, click the File Explorer button 2. Double-click Computer in the Navigation pane to expand the section and double-click the removable disk drive name in the Navigation pane 3. Right-click the zipped Module2-Windows folder in the File List pane to display a shortcut menu 4. Click Delete 5. At the warning dialog box, click Yes © Paradigm Publishing, Inc. 26
  • 27. SKILLS Skill 7 Visual: Delete Files and Folders © Paradigm Publishing, Inc. 27 Click Delete at the shortcut menu.
  • 28. SKILLS© Paradigm Publishing, Inc. 28 Deleting Multiple Files  If you want to delete a series of files listed one after the other, select the files as follows: – select adjacent files by clicking the first file and then holding down the Shift key while clicking the last file – select nonadjacent files by clicking the first file and then holding down the Ctrl key while clicking the other files  Once you’ve selected the files, click the Delete button in the Organize group on the Home tab
  • 29. SKILLS Skill 8 Steps: Use the Recycle Bin 1. With your USB flash drive inserted and the desktop displayed, click the File Explorer button 2. Double-click Computer in the Navigation pane and then click the removable disk drive name 3. Double-click the Module2-Windows folder 4. Size and move the Module2-Windows window so that you can see the Recycle Bin and part of the desktop on the left of your computer screen 5. Click M2-C2-S8-RecycleBin and drag the file onto your desktop © Paradigm Publishing, Inc. 29
  • 30. SKILLS Skill 8 Steps…continued 6. Right-click M2-C2-S8-RecycleBin on the desktop and then click Delete 7. At the warning dialog box, click Yes 8. Double-click the Recycle Bin icon to open the Recycle Bin window 9. Click M2-C2-S8-RecycleBin 10. Click the Recycle Bin Tools Manage tab and then click the Restore the selected items button in the Restore group 11. Close the Recycle Bin window © Paradigm Publishing, Inc. 30
  • 31. SKILLS Skill 8 Visual: Use the Recycle Bin © Paradigm Publishing, Inc. 31 At the warning dialog box, click Yes.
  • 32. SKILLS© Paradigm Publishing, Inc. 32 Adjusting the Recycle Bin Properties  The maximum storage size of the Recycle Bin can be adjusted by following these steps: 1. right-click the Recycle Bin icon 2. click Properties 3. enter a different number in the Maximum size (MB) box  You can also turn off the Recycle Bin by selecting the option Don’t move files to the Recycle Bin. Remove files immediately when deleted.

Notas do Editor

  1. In Module 2, you learn about Microsoft Windows 8. Chapter 1 covers navigating around windows. Chapter 2 deals with managing files and folders. In Chapter 3, you will work with Windows settings, accessories, and the security and help features.
  2. In this chapter, you learn to manage the files and folders on your computer. You start to create a folder structure on your removable USB flash drive that reflects the modules in yourtextbook by copying a folder from the Student Resources disc. As you work through this module and the other modules in the textbook, you will use this folder structure to organize your files.
  3. Everything that a computer does is based on data stored in files. Files can be stored on any storage medium, including a hard drive, a removable USB flash drive, a server, a CD or DVD, and in the cloud. Excel workbook files have an .xlsx extension, PowerPoint presentation files have a .pptx extension, Access database files have an .accdb extension, and Word documents have a .docx extension. An extension indicates the file type and is used by the operating system to recognize which application to use to open the file. Files deleted from the hard drive are sent to the Recycle Bin where they are held for a time, permanently deleted, or restored to their original location on the computer. Files can also be compressed to reduce the file size, making it easier to email the files or transfer them to another computer. Files from various folders can be placed together into a Library, a logical grouping that helps you work with related sets of files.
  4. In this chapter, you will use File Explorer to copy, rename, and delete files and folders. You will learn how to create a folder. You will also learn how to compress, extract, and search for files. Finally, you will learn how to use the Recycle Bin. Navigation Tip: In Slide Show view, click an underlined skill on this slide to navigate directly to the related slide. At any time in Slide Show view, you may navigate to the beginning of this presentation by clicking the left-most button at the bottom center of the slide. To navigate to the previous slide in this presentation, click the second button from the left. Click the SKILLS button to return to this slide. Click the button to the right of the SKILLS button to navigate to the next slide in this presentation, and click the right-most button to navigate to the end of this presentation.
  5. File Explorer is the file management interface in Windows 8. A File Explorer window lets you view the folders and files in a selected storage location, such as your hard drive, DVD drive, server, SkyDrive, or USB flash drive. Features of a File Explorer window include a Navigation pane, an Address bar, a toolbar, a ribbon, a search box, a Details pane, and a Preview pane. Another Way: Type explorer from the Start screen and then click File Explorer in the Apps results list. Libraries are a structure for organizing and managing your files in Windows 8. They are similar to folders, but different in that a library gathers together files that may be stored in several locations on your computer.
  6. Notice in the illustration in this slide that the path in the Address bar changes to show that you are viewing the Pictures library. Notice that the Status bar shows how many items are in the Pictures library and how many locations are included in that library.
  7. Windows 8 allows you to see a preview or details of a folder or file without actually opening it.
  8. Clicking the arrow to the right of Libraries displays a menu that lists all of the available libraries. Click a library in the displayed menu to jump to that location.
  9. Some of the work you do in this course involves opening student data files. These files are organized by module in folders on the Student Resources disc. The first page of each module in this book provides (when necessary) instructions for copying the folder you need from the disc to your storage medium. In this skill, you practice this procedure using a USB flash drive. (Note that the Student Resources disc is a read-only disc. Files can be copied from it, but they cannot be copied to it or removed from it.) If an AutoPlay window displays, click the Close button. If you do not have a CD/DVD drive on your computer, you can download the student data files from www.ParadigmCollege.net/Guidelines13. If an AutoPlay window displays, click the Close button. If you are not using a USB flash drive and are working in a computer lab, ask your instructor where you should save your files. Files can be copied to SkyDrive instead of your USB flash drive. The procedure for using SkyDrive is explained in the Introduction (Your Digital Toolkit), Chapter 2. This window displays all of the storage locations on your computer.
  10. Your computer may display the removable disk storage location with a name such as Removable Disk, USB Disk, or External Disk. Or, if you’ve renamed your disk, it will display that name. The Module2-Windows folder appears as a folder in your USB drive.
  11. The Module2-Windows folder appears as a folder in your USB drive as illustrated in this slide.
  12. Folders can be moved and copied using the drag-and-drop method. This method will either copy or move the folder, depending on the destination location.
  13. Just as you store printed documents that relate to each other in a single manila folder, you can store related computer files in virtual folders. For example, you might want to make a folder called Job Search to store your resume, cover letters, and portfolio documents.
  14. You can create a folder in a File Explorer window as illustrated in this slide. Once you create the folder, you can save or move files to the folder.
  15. By default, Windows has four predefined libraries (Music, Pictures, Documents, and Video). Remember, a library is different from a folder in that it is a place to compile like types of files.
  16. You may need to rename a file or folder after you create it. File and folder names can be up to 255 characters in length and can include spaces. Certain characters, including / : * ? ” < > |, cannot be used in file and folder names. File names have an extension, such as .docx, which the computer program adds automatically when the file is saved. You should not change the file extension when you rename a file because the extension tells the computer which application to use to open the file. If you make a mistake when renaming a file you can click the Undo button on the Quick Access toolbar. If you do not see the Undo button, click the Customize Quick Access Toolbar button arrow and then click Undo to place a check mark beside this option. You can also use the shortcut F2 to rename. Another Way: Click the Rename button in the Organize group to make the folder name available for editing.
  17. When you click Rename, as illustrated in this slide, the folder name becomes available for editing.
  18. In a default File Explorer window, file extensions are not displayed.
  19. If you want to rename a series of files, such as photo files from a digital camera, you can do so quickly if you use a specific prefix to name each of the files. For example, you could use the prefix photo to rename a batch of files photo(1).jpg, photo(2).jpg, photo(3).jpg, photo(4).jpg, and so forth.
  20. If you have large files that you need to email or transfer to another computer, you may want to compress the files. Compressed files take up less storage space and can be transferred to other computers more quickly than uncompressed files. To edit a compressed file, you must first extract the files. Extracting essentially reverses the process, or decompresses the file, once you are ready to use it. The compressed folder appears with a folder icon with a zipper image on it. Be aware that you will probably hear two different terms, compressed and zipped, used to describe such files. If WinZip is installed on the computer, the icon will be the WinZip "folder in vise" icon rather than a folder with a zipper on it. Many compressed files have a .zip extension. Others have an .rar extension or other special extension, depending on the compression application used.
  21. The uncompressed folder opens in a new window.
  22. Folders can also be compressed as illustrated in this slide. Compressing a folder combines all of the files in the folder into a single file that is smaller in size than the total of the individual file sizes.
  23. You can use the search box in a File Explorer window to quickly locate a specific file or folder. When you type a file or folder name in the search box, Windows searches the currently open File Explorer window for a match. If you want to search a different location, use the Navigation pane to change the search location. For example, to search your USB flash drive, click Removable Disk in the Computer section in the Navigation pane and then type the file or folder name in the search box. The * is a wildcard that can be used to specify any combination of characters. In this case, you are searching for all files with a .zip file extension because * tells the computer to retrieve files with any name appearing to the left of the .zip extension. The Search feature finds one zipped file and lists it in the search results.
  24. Search results display in the File List pane, as illustrated in this slide, indicating that there are four occurrences of Module2.
  25. For example, you can click the Date modified button and then click a date or date range to narrow the search for files or folders that were saved on a specific date or within a specific date range.
  26. If you have files that you no longer need on your computer, you should delete them. Regularly deleting such files will help keep your files organized and free up disk space. Another Way: Click the file and then press the Delete key.
  27. You can also delete folders as illustrated in this slide. When you delete a folder, all of the files and folders within that folder are deleted with it. Be sure to look within all subfolders to remind yourself of the complete contents before deleting the outer folder.
  28. Alternatively, once you have selected the files, you can press the Delete key to delete those files.
  29. In Windows 8, when you delete a file from the hard drive, it does not, in fact, get deleted. Instead, it is moved to the Recycle Bin, which is a temporary holding area. The Recycle Bin protects you from accidental loss of files by giving you a chance to change your mind and restore a deleted file. When you are absolutely sure your deleted files are no longer needed, you can empty the Recycle Bin. The Recycle Bin stores deleted files until it runs out of storage space, at which point it will start deleting files, beginning with the files that have been in the bin the longest. When you delete a file or folder that is saved on a removable disk, it is not sent to the Recycle Bin—it is permanently deleted. Dragging a file from a USB flash drive onto the desktop copies the file; the file is not removed from the folder. You may not be permitted to save files to the desktop in a public lab.
  30. The Recycle Bin displays on the desktop by default. If the icon is not on your desktop, right-click the desktop, click Personalize, click Change desktop icons, and then click the Recycle Bin check box to insert a check mark. You may not be able to personalize the desktop in a public lab. Notice that the file is restored to its previous location on your desktop.
  31. If no warning dialog box appears when you click Delete, as illustrated in this slide, double-click the Recycle Bin icon, click the Manage tab, click the Recycle Bin properties button in the Manage group, click Display delete confirmation dialog check box to insert a check mark, and then click OK.
  32. Turning off the Recycle Bin is not recommended.