
Recomendados
Mais conteúdo relacionado
Destaque
Destaque (13)
Semelhante a Anatomy lab6
Semelhante a Anatomy lab6 (20)
Anatomy lab6
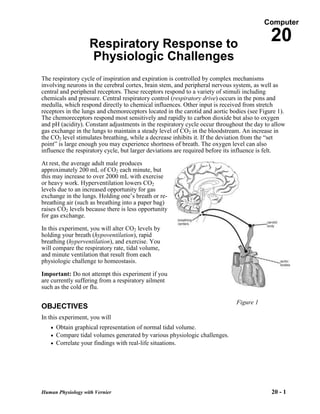
- 1. Computer Respiratory Response to 20 Physiologic Challenges The respiratory cycle of inspiration and expiration is controlled by complex mechanisms involving neurons in the cerebral cortex, brain stem, and peripheral nervous system, as well as central and peripheral receptors. These receptors respond to a variety of stimuli including chemicals and pressure. Central respiratory control (respiratory drive) occurs in the pons and medulla, which respond directly to chemical influences. Other input is received from stretch receptors in the lungs and chemoreceptors located in the carotid and aortic bodies (see Figure 1). The chemoreceptors respond most sensitively and rapidly to carbon dioxide but also to oxygen and pH (acidity). Constant adjustments in the respiratory cycle occur throughout the day to allow gas exchange in the lungs to maintain a steady level of CO2 in the bloodstream. An increase in the CO2 level stimulates breathing, while a decrease inhibits it. If the deviation from the “set point” is large enough you may experience shortness of breath. The oxygen level can also influence the respiratory cycle, but larger deviations are required before its influence is felt. At rest, the average adult male produces approximately 200 mL of CO2 each minute, but this may increase to over 2000 mL with exercise or heavy work. Hyperventilation lowers CO2 levels due to an increased opportunity for gas exchange in the lungs. Holding one’s breath or re- breathing air (such as breathing into a paper bag) raises CO2 levels because there is less opportunity for gas exchange. In this experiment, you will alter CO2 levels by holding your breath (hypoventilation), rapid breathing (hyperventilation), and exercise. You will compare the respiratory rate, tidal volume, and minute ventilation that result from each physiologic challenge to homeostasis. Important: Do not attempt this experiment if you are currently suffering from a respiratory ailment such as the cold or flu. Figure 1 OBJECTIVES In this experiment, you will Obtain graphical representation of normal tidal volume. Compare tidal volumes generated by various physiologic challenges. Correlate your findings with real-life situations. Human Physiology with Vernier 20 - 1
- 2. Respiratory Response to Physiologic Challenges MATERIALS computer disposable mouthpiece Vernier computer interface disposable bacterial filter Logger Pro nose clip Vernier Spirometer PROCEDURE Part I Tidal Volume Response to Breath Holding 1. Connect the Spirometer to the Vernier computer interface. Open the file “20 Respiratory Response” from the Human Physiology with Vernier folder. 2. Attach the larger diameter side of the disposable bacterial filter to the “Inlet” side of the Spirometer head. Attach a disposable Spirometer mouthpiece to the other end of the bacterial filter (Figure 2). Figure 2 3. Hold the Spirometer in one or both hands. Brace your arm(s) against a solid surface, such as a table, and click to zero the sensor. Note: The Spirometer must be held straight up and down (as in Figure 2) during data collection. 4. Collect inhalation and exhalation data. a. Put on the nose clip. b. Click to begin data collection. c. Taking normal breaths, begin data collection with an inhalation and continue to breathe in and out. After 4 cycles of normal inspirations and expirations fill your lungs as deeply as possible (maximum inspiration) and hold your breath for 40 s. d. After 40 s of breath holding, resume normal breathing. Data will be collected for 120 s. 5. Click the Next Page button, , to see the volume data. If the baseline on your volume graph has drifted, use the Baseline Adjustment feature to bring Figure 3 the baseline volumes closer to zero, as in Figure 3. Human Physiology with Vernier 20 - 2
- 3. Respiratory Response to Physiologic Challenges 6. Select a representative peak and valley in the portion of your graph prior to the onset of breath holding. Place the cursor on the peak and click and drag down to the valley that follows it. Enter the y value displayed in the lower left corner of the graph to the nearest 0.1 L as the Before Challenge Tidal Volume in Table 1. 7. Select two adjacent peaks in the portion of your graph prior to the onset of breath holding. Click and drag the cursor from one peak to the next. Use the x value displayed in the lower left corner of the graph to calculate the respiratory rate in breaths/minute. Enter this value to the nearest 0.1 breaths/min as the Before Challenge Respiratory Rate in Table 1. 8. Repeat Steps 6 and 7, selecting regions in the portion of your graph after normal breathing had been resumed (between 60–80 s). Enter the values in the After Challenge section in Table 1. 9. Calculate the Minute Ventilation values for before and after the challenge and enter the results to the nearest 0.1 L in Table 1. (Tidal Volume)(Respiration Rate) = Minute Ventilation Part II Tidal Volume Response to Rapid Breathing 10. Clear the data from Part I by choosing Clear All Data from the Data menu. 11. Hold the Spirometer in one or both hands. Brace your arm(s) against a solid surface, such as a table, and click . Note: The Spirometer must be held straight up and down (see Figure 2) during data collection. 12. Collect inhalation and exhalation data. a. Put on the nose plug. b. Click to begin data collection. c. Taking normal breaths, begin data collection with an inhalation and continue to breathe in and out. After 4 cycles of normal inspirations and expirations, begin breathing deeply and rapidly for 40 s. Note: If you begin to feel faint, slow your breathing rate. d. After 40 s of rapid breathing, resume normal breathing. Data will be collected for 120 s. 13. Click the Next Page button, , to see the volume data. If the baseline on your graph has drifted, use the Baseline Adjustment feature to bring the baseline volumes closer to zero. 14. Select a representative peak and valley in the portion of your graph prior to the onset of rapid breathing. Place the cursor on the peak and click and drag down to the valley that follows it. Enter the y value displayed in the lower left corner of the graph to the nearest 0.1 L as Before Challenge Tidal Volume in Table 1. 15. Select two adjacent peaks in the portion of your graph prior to the onset of rapid breathing. Click and drag the cursor from one peak to the next. Use the x value displayed in the lower left corner of the graph to calculate the respiratory rate in breaths/minute. Enter this value to the nearest 0.1 breaths/min as Before Challenge Respiratory Rate in Table 1. 16. Repeat Steps 14 and 15, selecting regions in the potion of your graph after normal breathing had been resumed (between 60–80 s). Enter the values in the After Challenge section in Table 1. 17. Calculate the Minute Ventilation values for before and after the challenge and enter the results to the nearest 0.1 L in Table 1. Return to Page 1 to prepare for Part III. Human Physiology with Vernier 20 - 3
- 4. Respiratory Response to Physiologic Challenges Part III Tidal Volume Response to Exercise 18. Clear the data from Part II by choosing Clear All Data from the Data menu. 19. Hold the Spirometer in one or both hands and click . Note: The Spirometer must be held straight up and down (see Figure 2) during data collection. 20. Collect inhalation and exhalation data. a. Put on the nose plug. b. Click to begin data collection. c. Taking normal breaths, begin data collection with an inhalation and continue to breathe in and out. After 4 cycles of normal inspirations and expirations begin running in place for 40 s. d. After 40 s of running in place, stand quietly. Continue to breathe into the Spirometer. Data will be collected for 120 s. 21. Click the Next Page button, , to see the volume data. If the baseline on your graph has drifted, use the Baseline Adjustment feature to bring the baseline volumes closer to zero. 22. Select a representative peak and valley in the portion of your graph prior to the onset of exercise. Place the cursor on the peak and click and drag down to the valley that follows it. Enter the y value displayed in the lower left corner of the graph to the nearest 0.1 L as Before Challenge Tidal Volume in Table 2. 23. Select two adjacent peaks in the portion of your graph prior to the onset of exercise. Click and drag the cursor from one peak to the next. Use the x value displayed in the lower left corner of the graph to calculate the respiratory rate in breaths/minute. Enter this value to the nearest 0.1 breaths/min as Initial Respiratory Rate in Table 2. 24. Repeat Steps 22 and 23 two times. The first time, select regions in the potion of your graph during the challenge and the second time select regions after normal breathing had been resumed. Enter the values in the During and After Challenge sections in Table 2. 25. Calculate the Minute Ventilation values for before, during, and after the challenge and enter the results to the nearest 0.1 L in Table 2. DATA Table 1 Holding Breath Rapid Breathing Before Challenge Tidal volume (L) 1.2 L .08 Respiratory rate (breaths/min) 3.9 breaths/min 3.5 Initial minute ventilation (L/min) 4.7 .28 After Challenge Tidal volume (L) .08 L 1.2 Human Physiology with Vernier 20 - 4
- 5. Respiratory Response to Physiologic Challenges Respiratory rate (breaths/min) 3.3 breaths/min 5.5 Minute ventilation (L/min) .26 6.6 Table 2–Exercise Before Challenge Tidal volume (L) .16 Respiratory rate (breaths/min) 4.2 Minute ventilation (L/min) .67 During Challenge Tidal volume (L) 2.5 Respiratory rate (breaths/min) 3.2 Minute ventilation (L/min) 8 After Challenge Tidal volume (L) .82 Respiratory rate (breaths/min) 3.9 Minute ventilation (L/min) 3.2 DATA ANALYSIS 1. Describe the changes in respiratory rates, tidal volumes, and minute ventilations that occurred after each of the following physiologic challenges in terms of CO2 levels and their effect on respiratory drive: (a) breath holding: Tidal volume decreased by 1.12 L. The respiratory rate decreased by .6 breaths/minute and the minute ventilation decreased by 4.44 L/min. (b) rapid breathing: The tidal volume increased by 1.12 L. The respiratory rate increased 2 breaths/minute and the minute ventilation increased by 6.32 L/min. (c) exercise: The tidal volume increased by .66 L. The respiratory rate decreased by .30 breaths/minute and the minute ventilation increased by 2.53 L/min. Human Physiology with Vernier 20 - 5
- 6. Respiratory Response to Physiologic Challenges 2. Which challenge caused the greatest change in respiratory rate (pre-challenge vs. post challenge)? Tidal volume? Minute ventilation? Did respiratory rate or tidal volume change the most relative to its resting value? The greatest change in respiratory rate was during the rapid breathing, the greatest change in tidal volume was during breath holding and rapid breathing. The greatest change in minute ventilation is during the rapid breathing. The respiratory rate changed the most relative to its resting value. 3. How might breathing into a paper bag help someone who is extremely anxious and hyperventilating? When a person is hyperventilating, they are breathing out too much carbon dioxide which upsets the normal body chemistry. Breathing into a bag helps breath back in some of the excessive amounts of carbon dioxide being breathed out. 4. Some patients with severe emphysema have constant high levels of CO2 because of inadequate ventilation. The central nervous system breathing center in these patients becomes insensitive to CO2 and more dependent on the level of O2, which is low. These patients are said to have “oxygen-dependent respiratory drive.” What might happen if you give such a person high levels of supplemental O2? It balances out the need for O2 and CO2 which slowly lets go of the oxygen-dependent respiratory drive. 5. Would breathing pure O2 help the air hunger experienced by athletes who have just completed a race? Why or why not? Yes because taking deep breaths brings air to the brain and the process will be faster because there isn’t as much of a separation needed. Human Physiology with Vernier 20 - 6