

Recomendados
Recomendados
Mais conteúdo relacionado
Mais procurados
Mais procurados (20)
Destaque
Destaque (20)
Mais de Κατερίνα Λάζαρη
Mais de Κατερίνα Λάζαρη (20)
Último
Último (20)
κεφαλαιο 18
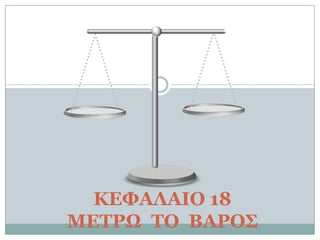
- 1. ΚΔΦΑΛΑΙΟ 18 ΜΔΣΡΩ ΣΟ ΒΑΡΟ
- 2. ΜΟΝΑΓΔ ΜΔΣΡΗΗ ΣΟΤ ΒΑΡΟΤ Η μονάδα μζτρθςθσ του βάρουσ είναι το κιλό. Ονομάηεται επίςθσ και χιλιόγραμμο, επειδι υποδιαιρείται ςε 1.000 γραμμάρια. 1 κιλό (κ.) = 1.000 γραμμάρια 1 γραμμάριο (γρ.) = 1/1.000 του κιλοφ = 0,001 κιλά Πολλαπλάςιο του κιλοφ είναι ο τόνοσ. 1 τόνοσ = 1.000 κιλά
- 3. ΜΔΣΑΣΡΟΠΔ ΜΟΝΑΓΩΝ ΜΔΣΡΗΗ Για να μετατρζψω τα κιλά ςε γραμμάρια, πολλαπλαςιάηω με το 1.000. π.χ. 15 κιλά = 15.000 γραμμάρια (15Χ1.000=15.000) Για να μετατρζψω τα γραμμάρια ςε κιλά, διαιρϊ με το 1.000. π.χ. 18.000 γραμμάρια = 18 κιλά (18.000 : 1.000 = 18) Για να μετατρζψω τουσ τόνουσ ςε κιλά, πολλαπλαςιάηω με το 1.000. π.χ. 3 τόνοι = 3.000 κιλά ( 3 Χ 1.000 = 2.000 ) Για να μετατρζψω τα κιλά ςε τόνουσ, διαιρϊ με το 1.000. 9.000 κιλά = 9 τόνοι (9.000:1.000=9)
- 4. ΠΩ ΥΡΗΙΜΟΠΟΙΟΤΜΔ ΣΙ ΓΙΑΦΟΡΔ ΜΟΝΑΓΔ ΜΔΣΡΗΗ Χρθςιμοποιοφμε τα γραμμάρια για να ηυγίςουμε ελαφριά αντικείμενα. π.χ. Το μολφβι ηυγίηει 10 γραμμάρια. Χρθςιμοποιοφμε τα κιλά για να ηυγίςουμε πιο βαριά αντικείμενα. π.χ. Ο μπαμπάσ ηυγίηει 70 κιλά. Χρθςιμοποιοφμε τουσ τόνουσ για να ηυγίςουμε πολφ βαριά αντικείμενα. π.χ. Το αυτοκίνθτο ηυγίηει 2 τόνουσ.
- 5. ΠΡΑΞΔΙ ΜΔ ΒΑΡΗ Το βάροσ μπορεί να γραφτεί: ςαν ακζραιοσ αρικμόσ π.χ. 3.250 γραμμάρια ςαν δεκαδικόσ αρικμόσ π.χ. 3,250 κιλά ςαν ςυμμιγισ αρικμόσ π.χ. 3 κιλά και 250 γραμμάρια Προςοχι!!! Για να κάνω πράξεισ με αντικείμενα που ζχουν διαφορετικι μονάδα μζτρθςθσ, πρζπει πρϊτα να κάνω τισ απαραίτθτεσ μετατροπζσ, ϊςτε όλα να ζχουν τθν ίδια μονάδα μζτρθςθσ. π.χ. 3 κ. + 250 γρ. = 3.000 γρ. + 250 γρ. = 3.250 γρ. 15 τ. + 1.200 κ. = 15.000 κ. + 1.200 κ. = 16.200 κ.
- 6. ΚΑΘΑΡΟ ΒΑΡΟ – ΜΔΙΚΣΟ ΒΑΡΟ ΑΠΟΒΑΡΟ Κακαρό βάροσ Μεικτό βάροσ Απόβαρο Περιεχόμενο Περιεχόμενο + Συςκευαςία Συςκευαςία
Notas do Editor
- Animated tipping scales(Difficult)To reproduce the shape effects on this slide, do the following:On the Home tab, in theSlides group, click Layout, and then click Blank.On the Home tab, in the Drawing group, click Shapes, and under BasicShapes select Oval (first row, second option from the left). Press and hold SHIFT and on the slide, drag to draw a circle.Select the oval. Under DrawingTools, on the Format tab, in theSize group, do the following:In the ShapeHeight box enter2.16”.In the ShapeWidth box enter2.16”.With the oval still selected, on the Home tab, in the bottom right corner of the Drawing group, click the FormatShape dialog box launcher. In the FormatShape dialog box, click Fill in the left pane, and in the Fill pane, do the following:Select Solidfill.Click the button next to Color, and then under ThemeColors select White, Background 1, Darker 25% (fourth row, first option from the left).Also in the FormatShape dialog box, click LineColor in the left pane, and in the LineColor pane click Noline.Also in the FormatShape dialog box, click 3-DFormat in the left pane, and in the 3-DFormat pane do the following:Under Bevel, in the Top list, under Bevel select Angle (second row, first option from the left).Next to the Top list, in the Width box enter 5.5 pt. and in the Height box enter 9.5 pt. Under Depth, in the Depth box enter 3.5 pt.Also in the FormatShape dialog box, click 3-DRotation in the left pane, and in the 3-DRotation pane, under Rotation do the following:In the X box enter 297.8°. In the Y box enter 298.9°. In the Z box enter 65.2°.Also in the Format Shape dialog box, click Shadow in the left pane, and in the Shadow pane do the following:In the Transparency box enter 60%.In the Size box enter 105%. In the Blur box enter 15 pt. In the Angle box enter 120°. In the Distance box enter 9 pt.Select the circle and position towards the bottom of the slide. On the Home tab, in the Drawing group, click Arrange, and then under PositionObjects, point to Align and select AlignCenter. On the Home tab, in the Drawing group, click Shapes, and under Rectangles select RoundedRectangle (second option from the left). On the slide, drag to draw a rounded rectangle.Drag the yellow adjustment diamond to the right to create a rounded top.Select the rectangle. Under DrawingTools, on the Format tab, in the Size group, in the ShapeHeight box enter 4.2” and in the ShapeWidth box enter 0.18”.On the Home tab, in the Drawing group, click the FormatShape dialog box launcher. In the FormatShape dialog box, in the left pane click Fill tab, and in the Fill pane do the following:Click Solidfill. In the Color list, under ThemeColors select White, Background 1, Darker 15% (third row, first option from the left).Also in the FormatShape dialog box, in the left pane click LineColor, and in the LineColor tab click Noline.Also in the FormatShape dialog box, in the left pane click 3-DFormat, and in the 3-DFormat pane do the following:Under Bevel, in the Top list select Circle. Next to the Top list, in the Width box enter 10 pt. and in the Height box enter 10 pt. Position the bottom of rectangle so that it slightly overlaps the oval.Select the rounded rectangle. On the Home tab, in the Drawing group, click Arrange, and then under PositionObjects, point to Align and select AlignCenter. With the rounded rectangle still selected, on the Home tab, in the Clipboard group, click the arrow to the right of Copy, and then click Duplicate.Select the second rounded rectangle. Under DrawingTools, on the Format tab, in theSize group, do the following:In the ShapeHeight box enter4.35”.In the ShapeWidth box enter0.13”.With the second rounded rectangle still selected, on the Home tab, in the Drawing group, click Arrange, and then under PositionObjects, point to Rotate and select RotateLeft 90°. Position the second (horizontal) round rectangle so that it slightly overlaps the top of the first, vertical round rectangle.Select the second (horizontal) round rectangle. On the Home tab, in the Drawing group, click Arrange, under PositionObjects, point to Align and select AlignCenter. Select the first (vertical) round rectangle. On the Home tab, in the Clipboard group, click the arrow to the right of Copy, and then click Duplicate.Select the third (vertical) rounded rectangle. Under DrawingTools, on the Format tab, in theSize group, do the following:In the ShapeHeight box enter0.32”.In the ShapeWidth box enter0.32”.Position the third, smaller round rectangle at the intersection at the top of the first (vertical) and second (horizontal) round rectangles.Select the third smaller round rectangle. On the Home tab, in the Drawing group, click Arrange, under PositionObjects, point to Align and select AlignCenter. Press and hold SHIFT and select the second (horizontal) and third (smaller) round rectangles. On the Home tab, in the Drawing group, click Arrange, and under GroupObjects select Group.Select the oval. On the Home tab, in the Clipboard group, click the arrow to the right of Copy, and then click Duplicate.Select the second oval. Under DrawingTools, on the Format tab, in theSize group, do the following:In the ShapeHeight box enter1.93”.In the ShapeWidth box enter1.93”.On the Home tab, in the bottom right corner of the Drawing group, click the FormatShape dialog box launcher. On the FormatShape dialog box, click Fill in the left pane, and in the Fill pane do the following:Click Solidfill.Click the button next to Color, and then under ThemeColors select White, Background 1, Darker 15% (third row, first option from the left).Also in the FormatShape dialog box, click Shadow in the left pane, and in the Shadow pane, in the Presets list select NoShadow. Also in the FormatShape dialog box, click 3-DFormat in the left pane, and in the 3-DFormat pane do the following:Under Bevel, in the Top list, under Bevel, select Slope (second row, fourth option from the left).Next to the Top list, in the Width box enter 5.5 pt and in the Height box enter 5 pt. Under Bevel, in the Bottom list, under Bevel, select Angle (second row, the first option from the left). Next to the Bottom list, in the Width box enter 11 pt and in the Height box enter 5 pt.Also in the FormatShape dialog box, click 3-DRotation in the left pane, and in the 3-DRotation pane, under Rotation do the following:In the X box enter 287.8°.In the Y box enter 297.1°.In the Z box enter 74.1°.Position this oval (or dish) on the left side of the slide, approximately 2.5 inches below the horizontal round rectangleOn the Home tab, in the Drawing group, click Shapes, and under Lines select Line (first option from the left). On the slide, drag to draw a line from left edge of the horizontal rectangle and to the bottom left edge of the dish.Select the line. On the Home tab, in bottom right corner of the Drawing group, click the FormatShape dialog box launcher. In the FormatShape dialog box, click LineColor in the left pane, and in the LineColor pane do the following:Click Solidline. Click the button next to Color, and then under ThemeColors select White, Background 1, Darker 25% (fourth row, first option from the left).Also in the FormatShape dialog box, click LineStyle in the left pane, and in the LineStyle pane do the following:In the Width box enter 3.75 pt. In the Dashtype list select Round Dot (second option). In the Captype list select Round. In the Jointype list select Round. Select the line. On the Home tab, in the Clipboard group, click the arrow to the right of Copy, and then click Duplicate.Select the second line. On the Home tab, in the Drawing group, click Arrange, and then under PositionObjects, point to Rotate and select FlipHorizontal. Position duplicate line so the top point is at the same position as the top point on the first line. Position the end point is on the right edge of the dish.On the Home tab, in the Drawing group, click Arrange, and then under OrderObjects select Send to Back. Press and hold CTRL and select both lines and the dish. On the Home tab, in the Drawing group, click Arrange, and under GroupObjects select Group. Select the group of (the two dotted lines and the dish). On the Home tab, in the Clipboard group, click the arrow to the right of Copy, and then click Duplicate. Position the second group on the right side of the slide.Press and hold CTRL and select both left and right groups. On the Home tab, in the Drawing group, click Arrange, and then do the following:Under PositionObjects, point to Align and select AlignSelectedObjects.Under PositionObjects, point to Align and select AlignTop.Under OrderObjects select Send to Back.To reproduce the animation effects on this slide, do the following:Select top horizontal bar group. On the Animations tab, in the Advanced Animation group, click Add Animation, and then under Emphasis click Spin.Also on the Animationtab, in the Animation group, click the Effect Options dialog box launcher. In the Spin dialog box, do the following:On the Effect tab, do the following:In the Amount list, in the Custom box enter 10 and press ENTER.Also in the Amount list, select Clockwise.Clear the Smooth Start box.Clear the Smooth End box.On the Timing tab, do the following:In the Speed list select Fast.In the Start list select WithPrevious.Click OK.Select the left dish group. Also on the Animations tab, in the Advanced Animation group, click AddAnimation, and then click MoreMotionPaths. In the Add Motion Path dialog box, under Lines & Curves, click Up.Also on the Animations tab, in the Animation group, click the Effect Options dialog box launcher. In the Up dialog box, do the following:On the Timing tab, in the Start list, select WithPrevious, and then in the Speed list, select Fast.On the Effect tab, clear the Smooth Start and Smooth End boxes.Click OK.Select the motion path on the slide. Press and hold the SHIFT key and drag the end point (red arrow) down to shorten the motion path (approximately .33” length). (Note: If needed, zoom in to see the objects. On the View tab, in the Zoom group, click Zoom, and in the Zoom dialog box, in the Percent box enter 200%. After editing, on the View tab, in the Zoom group click Fit to Window to return to the slide to its original size.)Select right dish group. Also on the Animations tab, in the Advanced Animation group, click AddAnimation, and then click MoreMotionPaths. In the Add Motion Path dialog box, under Lines & Curves, click Down.Also on the Animations tab, in the Animation group, click the Effect Options dialog box launcher. In the Down dialog box, do the following:On the Timing tab, in the Start list, select WithPrevious, and then in the Speed list, select Fast.On the Effect tab, clear the Smooth Start and Smooth End boxes.Click OK.Select the down motion path on the slide. Press and hold SHIFT and the drag end point (red arrow) upwards to shorten path (approximately .33” length).Select the top horizontal bar group. On the Animations tab, in the Advanced Animation group, click Add Animation, and then under Emphasis click Spin.Also on the Animationtab, in the Animation group, click the Effect Options dialog box launcher. In the Spin dialog box, do the following:On the Effect tab, do the following:In the Amount list, in the Custom box enter 20 and press ENTER.Also in the Amount list, select Counterclockwise.Clear the Smooth Start box.Clear the Smooth End box.On the Timing tab, do the following:In the Speed list select Fast.In the Start list select WithPrevious.Click OK.Select the left dish group. Also on the Animations tab, in the Advanced Animation group, click AddAnimation, and then click MoreMotionPaths. In the Add Motion Path dialog box, under Lines & Curves, click Down.Also on the Animations tab, in the Animation group, click the Effect Options dialog box launcher. In the Down dialog box, do the following:On the Timing tab, in the Start list, select WithPrevious, and then in the Speed list, select Fast.On the Effect tab, clear the Smooth Start and Smooth End boxes.Click OK.Select the down motion path on the slide. Press and hold SHIFT and the drag end point (red arrow) upwards to shorten path (approximately .66” length).Select the Down motion path for the right dish on the slide. Press and hold SHIFT and drag the start point (green arrow) to meet end point (red arrow) from the first Up motion path.Select the right dish group. Also on the Animations tab, in the Advanced Animation group, click AddAnimation, and then click MoreMotionPaths. In the Add Motion Path dialog box, under Lines & Curves, click Up.Also on the Animations tab, in the Animation group, click the Effect Options dialog box launcher. In the Up dialog box, do the following:On the Timing tab, in the Start list, select WithPrevious, and then in the Speed list, select Fast.On the Effect tab, clear the Smooth Start and Smooth End boxes.Click OK.Select the motion path on the slide. Press and hold the SHIFT key and drag the end point (red arrow) down to shorten the motion path (approximately .66” length). Select the Up motion path for the right dish on the slide. Press and hold SHIFT and drag the start point (green arrow) to meet end point (red arrow) from the first Down motion path.To reproduce the background effects on this slide, do the following:Right-click the slide background area, and then click Format Background. In the Format Background dialog box, click Fill in the left pane, select Gradient fill in the right pane, and then do the following:In the Type list, select Linear.In the Direction list, click Linear Down (first row, second option from the left).Under Gradient stops, click Add gradient stops or Remove gradient stops until two stops appear in the slider.Also under Gradient stops, customize the gradient stops as follows:Select the first stop in the slider, and then do the following:In the Position box, enter 65%.Click the button next to Color, and then click underThemeColors select White, Background 1 (first row, the first option from the left).Select second stop in the slider, and then do the following: In the Position box, enter 96%.Click the button next to Color, and then click underThemeColors select Black, Text 1, Lighter 50%(second row, the second option from the left).