SlideShare uma empresa Scribd logo
1 de 12
Baixar para ler offline
Tutorial: The Basics
Image Capture + Editing + Video Capture
Table of Contents


Chapter 1 “Capture scrolling web pages”…………………………………….................…….3


Chapter II “Capture scrolling web pages.”…………………………………......….......……...6


Chapter III “Creating “screen cam” videos”………………………...........................……….9
2       Chapter I: Capturing/Editing Images


                                     Chapter I
                                         Capturing/Editing Images


You can use Snagit to capture images like snapping a photo on you computer screen.
Thereby, you can show what you have been working on or what you were doing on
your computer. After capturing the image, your image is shown to you on a editing
screen where you can do, among other things, resize and/or crop your image.

Let’s begin with Capturing an image!
                                  Image capturing

In this lesson you will open open Myspace.
com in a browser, go to your Myspace
homepage, then capture an image of your
homepage, then resize and crop it. The
finish product should look like Figure 1

Let’s begin:
1.     First make sure you have an account with
       Myspace.com. If you don’t, create one.
2.     Open Myspace in Firefox.

     If your having problems with starting an account
                                                                     Figure 1
     and navigating through Myspace, refer to the
     help link in the upper-right corner of Myspace’s
                                            startpage.

3.       Go to your Myspace homepage.
4.       Open Snagit by clicking on the
         Snagit icon on your desktop. This
         bring up Snagit’s main screen.
5.       Press the big red button at the lower
         corner of the screen. Refer to Figure 2

This causes the Snagit’s main page to
disappear and the previous window view
to display. You should see the target screen
and your curser should become a cross.
                                                                    Figure 2
Chapter I: Capturing/Editing Images   3


     Make sure the target screen is the next window
     opened behind Snagit. If the correct screen is
     not there after you have pressed the red button,
     press the escape button, maximize the target
     screen you wish to capture, return to Snagit,
                                  then repeat step 2

6.         Let’s capture and image.
        a.      Place your curser beneath the
                body of your target on either side
                (If you want to capture the whole
                screen, then place the curser on
                either corners of the screen.)
        b.      Hold down the right mouse button.
        c.      Move the curser diagonally up
                towards the opposing corner                             Figure 3
        d.      A box will open around your
                target. Refer to Figure 3
        e.      Let go of the right mouse button when
                you’ve selected the desire area.
        f.      A new Snagit screen will replace your
                target screen.Your capture should
                be within it. Refer back to Figure 1
        g.      This is Snagit’s image editor
        h.      Congratulations! You captured
                your first image with Snagit

     If you didn’t capture your target as you would
     desire, close image editor screen. This will bring
     you back to the Snagit’s main page. Repeat
                                  steps one and two.

Now that we have an image, lets play around!

Cropping and Resizing Images
in Snagit Image Editor
                                                                        Figure 4
1.       Let us start by Cropping an image:
        a.    Place your curser on one the
              image’s handles. Refer to Figure 4
        b.    Hold down the left mouse button
        c.    Grab one of these handles by placing
4       Chapter I: Capturing/Editing Images


               your curser over it until the curser
               turns into a two sided arrow.
        d.     Drag the handle inward to
               eleminate unwanted areas.
        e.     Press Alt-z if you don’t like your
               cropping to start over.

     Note: All areas cropped are gone and simply
     by dragging back from the direction you went
                         will not restore the image.

2.       Congratulations! You just
         cropped your first image!
3.       Let’s resize your image:                                       Figure 5

On the Snagit Image editor screen, you
will see a captured image on the editing
canvas. To the right of it will be a bar listing
a series of commands. They will be broken
up into four categories. Refer to Figure 5

        a.     Select the first choice under the
               category “Size” titled “Resize
               Image.” Refer to Figure 6
        b.     This will bring up new options
               that will allow you to change the
               size of your captured image.
        c.     By press up and down on the
               buttons adjacent to either the Width
                                                                         Firgure 6
               or Height boxes, you increase of
               decrease the size of your image.
        d.     Congratulations! You can now
               resize your captured image!


                             The real benefit of the Snagit Image Capturing
                             Function is the ability to edit an image after
                             aquiring it. This allows you to tailor what you
                             grab instantly. Later on when the image needs
                             further work, you may return to this editor
                             (or use another image editor if you choose) to
                             editted the image again.
Chapter I: Capturing/Editing Images   5


     That concludes this section. Now,
      go get some coffee and come
      back and play around with the
        new skills you’ve acquired!

Here’s some exercises to help you
develop what you’ve learned:

1.     Capture an image on your
       desktop and crop it so that
       only the image is left.
2.     Capture a photo on a webpage,
       crop it so only the image remains,
       then shrink it to the size of an icon
3.     Capture one quarter of a
       webpage and enlarge it so as to
       appear that that section of the
       screen has been magnified

Remember:
9   If you make a mistake you can
    always use “ctrl z” and “ctrl y”
    to siphon between all the steps
    you’ve done in your work
9   If this doesn’t help, close the
    program and start over.
9   If all else fails, email us:
    helpdesk@writeon.com
6     Chapter II: Capture scrolling web pages


                                Chapter                          II
                                      Capture scrolling web pages.


You can use Snagit to capture a scrolling web page. With a few steps
a complete page can be captured from top to bottom.

Let’s capture a Scrolling Webpage!
                    Scrolling page capturing

In this tutorial you will be scroll-capturing
your Myspace homepage, then using the
cropping and resizing tools you learned
in the previous tutorial. You will resize
the image so it fits on one screen.
The finish product should look like Figure 1
  Since we have covered cropping and resizing
  in the previous chapter, it will not be covered
  here. If your still unsure about the latter topics,
                            do the first chapter over.
                                                                     Figure 1
Let’s begin:
1.     Open target screen.
2.     Open Snagit.
3.     Select Scrolling window (web page) from
       the choices available to you. See Figure 2
4.     Press the big red button at the
       lower corner of the screen.

This causes the Snagit main page to
disappear and the previous window view
to display. You should see the target screen
and your curser should become a cross.

  Make sure the target screen is the next window
  openned behind Snagit. If the correct screen
  is not ready after you have pressed the red
  button, press the escape button then maximize
  the target screen you wish to capture, return to
                                                                      Figure 2
                        Snagit, then repeat step 2
Chapter II: Capture scrolling web pages   7


5.      Your now ready to capture an
        image from the target window.
       a.   Place your curser in the main frame (a
            red, blinking outline will appear Refer
            to Figure 3) surrounding the webpage
       b.   Press the right mouse button.

A countdown will be displayed on your scrollbar
and the webpage will begin to scroll down.
This signifies that the page is being captured.
You will be brought to the Snagit image editor
screen when the webpage is captured.

       c.      Use the cropping and resizing skills you
               learned in the previous chapter to
               get your image to the end product
       d.      Press “Save as” and save your file
       e.      Congratulations! You captured your
                                                                          Figure 3
               first scrolling webpage with Snagit

     Remember that Snagit in this mode can focus
     on the webpage frame or one of the frames in
     the webpage. If you don’t get the whole image
     the first time you try, start over and make sure
                   the whole webpage is outlined red.


                        The benefit of using Snagit Web Capture Function
                        is you are able to get the whole page cought. A
                        webpages typical height (due to a webpages scrolling
                        capability) can be extremely long. Window’s screen
                        caputure function is only able to capture what is
                        currently being viewed. The Snagit Web Capture
                        Fucntion will actually scroll down and aquire the
                        whole page instead of just what is currently being
                        viewed!
8   Chapter II: Capture scrolling web pages


                                That concludes this tutorial. Now,
                                 go get some coffee and come
                                 back and play around with the
                                   new skills you’ve acquired!

                           Here’s some exercise to help you
                           develop what you’ve learned:

                           1.     Open your Myspace page and
                                  capture it. Crop it so that only the
                                  My Bulletin Space frame is left.
                           2.     Open an old word document, if you
                                  have one, capture it. Now, you have
                                  you word document in one single
                                  image. Shrink it so it fits on one page
                           3.     Open craigslist.org and open
                                  a link to “apartments for rent,”
                                  capture it, and see how long the
                                  image is. Resize it so it fits on the
                                  screen. How small is the print?

                           Remember:
                           9      If you make a mistake you can
                                  always use “ctrl z” and “ctrl y”
                                  to coffin between all the sets
                                  you’ve done in your work
                           9      If this doesn’t help, close the
                                  program and start over
                           9      If all else fails, email us:
                                  helpdesk@writeon.com
Chapter III: Creating screen cam” videos   9


                           Chapter III
                               Creating “screen cam” videos

You can use Snagit to create on-screen videos that record your actions on
the computer screen. Once you’ve finished recording, you can save the
videos as mpegs and other video formats, which can be viewed on Media
Player, Quicktime, Realplayer, or any media player you perfer.

Let’s record an on-screen video!
             On-screen video recording

In this chapter you will be making a short
video using the Snagit On-screen Video
Capture Function. Your end product
will be a video that will show you:
      a.    Opening Internet explorer
      b.    Navigating to Yahoo
      c.    Clicking on the weather icon
      d.    Entering “San Francisco” in
            the box asking which city
            to check for weather
      e.    Select “San Francisco, CA” in
            the follow-up dialog box
      f.    Viewing the current weather                            Figure 1
      g.    Closing Internet explorer
      h.    Ending the video.

Let’s begin:
1.     Open Snagit by clicking on the
       Snagit icon on your desktop. This
       bring up Snagit’s main screen.

     Make sure no other program is open but
                                     Snagit.

2.      Press the “record screen
        video” icon. See Figure 1

This causes the Snagit main page to disappear
and the previous window viewed to be
display. You should see the target screen
and your curser should become a cross.

3.      You’re now ready to record a video of                       Figure 2
        what you’re doing on your computer.
       a.   Press the big, red button at
10    Chapter III: Creating“screen cam” videos


            the lower right hand corner
            of the Snagit main menu
     b.     Place your curser at the
            bottom of your screen .
     c.     Hold down the right mouse button.
     d.     Move the curse diagonally up
            towards the opposing corner
     e.     A box will open around
            you’re the whole screen
     f.     Let go of the right mouse button.
     g.     A dialog box should appear. Press
            the start button on the dialog
            box to begin. See Figure 2
     h.     Open Internet explore                    Figure 3
     i.     Type www.yahoo.com
     j.     Click on the weather icon on
            the upper left-hand of the
            webpage. See Figure 3
     k.     This opens up Yahoo’s weather page
     l.     Enter “San Francisco” in the
            dialog box that says “Enter city
            or zip code.” See Figure 4
     m.     You will be asked after entering
            in the San Francisco by Yahoo
            which “San Francisco” do you
            want. Select “San Francisco CA”
     n.     You should now see the San
            Francisco Bayarea Weather
            Screen. See Figure 5
     o.     When you finished, double click the
                                                     Figure 4
            recorder icon in your system tray.
     p.     This will bring back up the
            dialog box. Press the stop
            button to stop recording.
4.      Now that you’ve record your video, you
        must save your work. As soon as you stop
        recording, the video editor screen pops up
     a.     Press save icon to save the recording
     b.     Congratulations! You just recorded
            and saved your first on screen video.


                                                       Fgiure 5
Chapter III: Creating screen cam” videos   11


    That concludes this tutorial. Now,
     go get some coffee and come
     back and play around with the
       new skills you’ve acquired!

Here’s some exercise to help you
develop what you’ve learned:
1.    Open you favorite email program and
      record yourself composing an email
2.    Open your favorite word processer
      and record yourself writing a
      document. (Or revising one)
3.    Open Windows solitaire game
      and record yourself playing

Remember:
9   If you make a mistake you can always
    use “ctrl z” and “ctrl y” to coffin between
    all the sets you’ve done in your work
9   If this doesn’t help, close the
    program and start over
9   If all else fails, email us:
    helpdesk@writeon.com

Mais conteúdo relacionado

Destaque

Single-Sourcing with RoboHelp 9: Presentation by WritePoint
Single-Sourcing with RoboHelp 9: Presentation by WritePointSingle-Sourcing with RoboHelp 9: Presentation by WritePoint
Single-Sourcing with RoboHelp 9: Presentation by WritePointPaula Stern
 
An Overview of RoboHelp 7
An Overview of RoboHelp 7An Overview of RoboHelp 7
An Overview of RoboHelp 7Scott Abel
 
Cool Tools for Technical Writers
Cool Tools for Technical WritersCool Tools for Technical Writers
Cool Tools for Technical WritersJeff Haas
 
Using DITA without becoming a Geek
Using DITA without becoming a GeekUsing DITA without becoming a Geek
Using DITA without becoming a GeekJang F.M. Graat
 
The DITA Learning and Training Specialization
The DITA Learning and Training SpecializationThe DITA Learning and Training Specialization
The DITA Learning and Training SpecializationIXIASOFT
 
API Technical Writing
API Technical WritingAPI Technical Writing
API Technical WritingSarah Maddox
 

Destaque (8)

RoboHelp 2002 - overview
RoboHelp 2002 - overviewRoboHelp 2002 - overview
RoboHelp 2002 - overview
 
Single-Sourcing with RoboHelp 9: Presentation by WritePoint
Single-Sourcing with RoboHelp 9: Presentation by WritePointSingle-Sourcing with RoboHelp 9: Presentation by WritePoint
Single-Sourcing with RoboHelp 9: Presentation by WritePoint
 
An Overview of RoboHelp 7
An Overview of RoboHelp 7An Overview of RoboHelp 7
An Overview of RoboHelp 7
 
Cool Tools for Technical Writers
Cool Tools for Technical WritersCool Tools for Technical Writers
Cool Tools for Technical Writers
 
Using DITA without becoming a Geek
Using DITA without becoming a GeekUsing DITA without becoming a Geek
Using DITA without becoming a Geek
 
The DITA Learning and Training Specialization
The DITA Learning and Training SpecializationThe DITA Learning and Training Specialization
The DITA Learning and Training Specialization
 
DITA Quick Start
DITA Quick StartDITA Quick Start
DITA Quick Start
 
API Technical Writing
API Technical WritingAPI Technical Writing
API Technical Writing
 

Semelhante a Tutorial: Capture + Edit Images + Videos

Introduction to portraiture
Introduction to portraitureIntroduction to portraiture
Introduction to portraitureMissBrazeau
 
Photoshop tutorial - Getting Started and Magic Wand
Photoshop tutorial - Getting Started and Magic WandPhotoshop tutorial - Getting Started and Magic Wand
Photoshop tutorial - Getting Started and Magic WandJenna9
 
Media arts 2013
Media arts 2013Media arts 2013
Media arts 2013grassyblog
 
ETECH_WEEK7-Image-Manipulation-Techniques-1.pdf
ETECH_WEEK7-Image-Manipulation-Techniques-1.pdfETECH_WEEK7-Image-Manipulation-Techniques-1.pdf
ETECH_WEEK7-Image-Manipulation-Techniques-1.pdfbongsantiago96
 
Photo Story Manual
Photo Story ManualPhoto Story Manual
Photo Story ManualElsa Castro
 
217 quick guide to photoshop cs6
217 quick guide to photoshop cs6217 quick guide to photoshop cs6
217 quick guide to photoshop cs6Rodel Morales
 
Digital Drawing Assignment Directions & Tutorial
Digital Drawing Assignment Directions & TutorialDigital Drawing Assignment Directions & Tutorial
Digital Drawing Assignment Directions & TutorialMrsM2014
 
Photo combination how to
Photo combination how toPhoto combination how to
Photo combination how toaztechtchr
 
Paths, Masks And Blend Modes
Paths, Masks And Blend ModesPaths, Masks And Blend Modes
Paths, Masks And Blend ModesShan
 
Cropping and resizing the graphics
Cropping and resizing the graphicsCropping and resizing the graphics
Cropping and resizing the graphicsAnn Alcid
 

Semelhante a Tutorial: Capture + Edit Images + Videos (20)

Photoshop basics
Photoshop basicsPhotoshop basics
Photoshop basics
 
waagen-ecard
waagen-ecardwaagen-ecard
waagen-ecard
 
waagen-ecard
waagen-ecardwaagen-ecard
waagen-ecard
 
Introduction to portraiture
Introduction to portraitureIntroduction to portraiture
Introduction to portraiture
 
Photoshop tutorial - Getting Started and Magic Wand
Photoshop tutorial - Getting Started and Magic WandPhotoshop tutorial - Getting Started and Magic Wand
Photoshop tutorial - Getting Started and Magic Wand
 
L14 engh
L14 enghL14 engh
L14 engh
 
PDT Engineering: ProE Tip #018
PDT Engineering: ProE Tip #018PDT Engineering: ProE Tip #018
PDT Engineering: ProE Tip #018
 
Media arts 2013
Media arts 2013Media arts 2013
Media arts 2013
 
ETECH_WEEK7-Image-Manipulation-Techniques-1.pdf
ETECH_WEEK7-Image-Manipulation-Techniques-1.pdfETECH_WEEK7-Image-Manipulation-Techniques-1.pdf
ETECH_WEEK7-Image-Manipulation-Techniques-1.pdf
 
Spine Simplified
Spine SimplifiedSpine Simplified
Spine Simplified
 
Photo Story Manual
Photo Story ManualPhoto Story Manual
Photo Story Manual
 
Powerpoint class 4
Powerpoint class 4Powerpoint class 4
Powerpoint class 4
 
SnagIt Job Aid
SnagIt Job AidSnagIt Job Aid
SnagIt Job Aid
 
Entry 6
Entry 6Entry 6
Entry 6
 
217 quick guide to photoshop cs6
217 quick guide to photoshop cs6217 quick guide to photoshop cs6
217 quick guide to photoshop cs6
 
Digital Drawing Assignment Directions & Tutorial
Digital Drawing Assignment Directions & TutorialDigital Drawing Assignment Directions & Tutorial
Digital Drawing Assignment Directions & Tutorial
 
Photo combination how to
Photo combination how toPhoto combination how to
Photo combination how to
 
Paths, Masks And Blend Modes
Paths, Masks And Blend ModesPaths, Masks And Blend Modes
Paths, Masks And Blend Modes
 
Tutoriais SolidWorls
Tutoriais SolidWorlsTutoriais SolidWorls
Tutoriais SolidWorls
 
Cropping and resizing the graphics
Cropping and resizing the graphicsCropping and resizing the graphics
Cropping and resizing the graphics
 

Tutorial: Capture + Edit Images + Videos

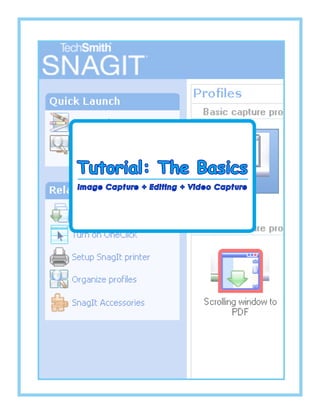
  • 1. Tutorial: The Basics Image Capture + Editing + Video Capture
  • 2. Table of Contents Chapter 1 “Capture scrolling web pages”…………………………………….................…….3 Chapter II “Capture scrolling web pages.”…………………………………......….......……...6 Chapter III “Creating “screen cam” videos”………………………...........................……….9
  • 3. 2 Chapter I: Capturing/Editing Images Chapter I Capturing/Editing Images You can use Snagit to capture images like snapping a photo on you computer screen. Thereby, you can show what you have been working on or what you were doing on your computer. After capturing the image, your image is shown to you on a editing screen where you can do, among other things, resize and/or crop your image. Let’s begin with Capturing an image! Image capturing In this lesson you will open open Myspace. com in a browser, go to your Myspace homepage, then capture an image of your homepage, then resize and crop it. The finish product should look like Figure 1 Let’s begin: 1. First make sure you have an account with Myspace.com. If you don’t, create one. 2. Open Myspace in Firefox. If your having problems with starting an account Figure 1 and navigating through Myspace, refer to the help link in the upper-right corner of Myspace’s startpage. 3. Go to your Myspace homepage. 4. Open Snagit by clicking on the Snagit icon on your desktop. This bring up Snagit’s main screen. 5. Press the big red button at the lower corner of the screen. Refer to Figure 2 This causes the Snagit’s main page to disappear and the previous window view to display. You should see the target screen and your curser should become a cross. Figure 2
  • 4. Chapter I: Capturing/Editing Images 3 Make sure the target screen is the next window opened behind Snagit. If the correct screen is not there after you have pressed the red button, press the escape button, maximize the target screen you wish to capture, return to Snagit, then repeat step 2 6. Let’s capture and image. a. Place your curser beneath the body of your target on either side (If you want to capture the whole screen, then place the curser on either corners of the screen.) b. Hold down the right mouse button. c. Move the curser diagonally up towards the opposing corner Figure 3 d. A box will open around your target. Refer to Figure 3 e. Let go of the right mouse button when you’ve selected the desire area. f. A new Snagit screen will replace your target screen.Your capture should be within it. Refer back to Figure 1 g. This is Snagit’s image editor h. Congratulations! You captured your first image with Snagit If you didn’t capture your target as you would desire, close image editor screen. This will bring you back to the Snagit’s main page. Repeat steps one and two. Now that we have an image, lets play around! Cropping and Resizing Images in Snagit Image Editor Figure 4 1. Let us start by Cropping an image: a. Place your curser on one the image’s handles. Refer to Figure 4 b. Hold down the left mouse button c. Grab one of these handles by placing
  • 5. 4 Chapter I: Capturing/Editing Images your curser over it until the curser turns into a two sided arrow. d. Drag the handle inward to eleminate unwanted areas. e. Press Alt-z if you don’t like your cropping to start over. Note: All areas cropped are gone and simply by dragging back from the direction you went will not restore the image. 2. Congratulations! You just cropped your first image! 3. Let’s resize your image: Figure 5 On the Snagit Image editor screen, you will see a captured image on the editing canvas. To the right of it will be a bar listing a series of commands. They will be broken up into four categories. Refer to Figure 5 a. Select the first choice under the category “Size” titled “Resize Image.” Refer to Figure 6 b. This will bring up new options that will allow you to change the size of your captured image. c. By press up and down on the buttons adjacent to either the Width Firgure 6 or Height boxes, you increase of decrease the size of your image. d. Congratulations! You can now resize your captured image! The real benefit of the Snagit Image Capturing Function is the ability to edit an image after aquiring it. This allows you to tailor what you grab instantly. Later on when the image needs further work, you may return to this editor (or use another image editor if you choose) to editted the image again.
  • 6. Chapter I: Capturing/Editing Images 5 That concludes this section. Now, go get some coffee and come back and play around with the new skills you’ve acquired! Here’s some exercises to help you develop what you’ve learned: 1. Capture an image on your desktop and crop it so that only the image is left. 2. Capture a photo on a webpage, crop it so only the image remains, then shrink it to the size of an icon 3. Capture one quarter of a webpage and enlarge it so as to appear that that section of the screen has been magnified Remember: 9 If you make a mistake you can always use “ctrl z” and “ctrl y” to siphon between all the steps you’ve done in your work 9 If this doesn’t help, close the program and start over. 9 If all else fails, email us: helpdesk@writeon.com
  • 7. 6 Chapter II: Capture scrolling web pages Chapter II Capture scrolling web pages. You can use Snagit to capture a scrolling web page. With a few steps a complete page can be captured from top to bottom. Let’s capture a Scrolling Webpage! Scrolling page capturing In this tutorial you will be scroll-capturing your Myspace homepage, then using the cropping and resizing tools you learned in the previous tutorial. You will resize the image so it fits on one screen. The finish product should look like Figure 1 Since we have covered cropping and resizing in the previous chapter, it will not be covered here. If your still unsure about the latter topics, do the first chapter over. Figure 1 Let’s begin: 1. Open target screen. 2. Open Snagit. 3. Select Scrolling window (web page) from the choices available to you. See Figure 2 4. Press the big red button at the lower corner of the screen. This causes the Snagit main page to disappear and the previous window view to display. You should see the target screen and your curser should become a cross. Make sure the target screen is the next window openned behind Snagit. If the correct screen is not ready after you have pressed the red button, press the escape button then maximize the target screen you wish to capture, return to Figure 2 Snagit, then repeat step 2
  • 8. Chapter II: Capture scrolling web pages 7 5. Your now ready to capture an image from the target window. a. Place your curser in the main frame (a red, blinking outline will appear Refer to Figure 3) surrounding the webpage b. Press the right mouse button. A countdown will be displayed on your scrollbar and the webpage will begin to scroll down. This signifies that the page is being captured. You will be brought to the Snagit image editor screen when the webpage is captured. c. Use the cropping and resizing skills you learned in the previous chapter to get your image to the end product d. Press “Save as” and save your file e. Congratulations! You captured your Figure 3 first scrolling webpage with Snagit Remember that Snagit in this mode can focus on the webpage frame or one of the frames in the webpage. If you don’t get the whole image the first time you try, start over and make sure the whole webpage is outlined red. The benefit of using Snagit Web Capture Function is you are able to get the whole page cought. A webpages typical height (due to a webpages scrolling capability) can be extremely long. Window’s screen caputure function is only able to capture what is currently being viewed. The Snagit Web Capture Fucntion will actually scroll down and aquire the whole page instead of just what is currently being viewed!
  • 9. 8 Chapter II: Capture scrolling web pages That concludes this tutorial. Now, go get some coffee and come back and play around with the new skills you’ve acquired! Here’s some exercise to help you develop what you’ve learned: 1. Open your Myspace page and capture it. Crop it so that only the My Bulletin Space frame is left. 2. Open an old word document, if you have one, capture it. Now, you have you word document in one single image. Shrink it so it fits on one page 3. Open craigslist.org and open a link to “apartments for rent,” capture it, and see how long the image is. Resize it so it fits on the screen. How small is the print? Remember: 9 If you make a mistake you can always use “ctrl z” and “ctrl y” to coffin between all the sets you’ve done in your work 9 If this doesn’t help, close the program and start over 9 If all else fails, email us: helpdesk@writeon.com
  • 10. Chapter III: Creating screen cam” videos 9 Chapter III Creating “screen cam” videos You can use Snagit to create on-screen videos that record your actions on the computer screen. Once you’ve finished recording, you can save the videos as mpegs and other video formats, which can be viewed on Media Player, Quicktime, Realplayer, or any media player you perfer. Let’s record an on-screen video! On-screen video recording In this chapter you will be making a short video using the Snagit On-screen Video Capture Function. Your end product will be a video that will show you: a. Opening Internet explorer b. Navigating to Yahoo c. Clicking on the weather icon d. Entering “San Francisco” in the box asking which city to check for weather e. Select “San Francisco, CA” in the follow-up dialog box f. Viewing the current weather Figure 1 g. Closing Internet explorer h. Ending the video. Let’s begin: 1. Open Snagit by clicking on the Snagit icon on your desktop. This bring up Snagit’s main screen. Make sure no other program is open but Snagit. 2. Press the “record screen video” icon. See Figure 1 This causes the Snagit main page to disappear and the previous window viewed to be display. You should see the target screen and your curser should become a cross. 3. You’re now ready to record a video of Figure 2 what you’re doing on your computer. a. Press the big, red button at
  • 11. 10 Chapter III: Creating“screen cam” videos the lower right hand corner of the Snagit main menu b. Place your curser at the bottom of your screen . c. Hold down the right mouse button. d. Move the curse diagonally up towards the opposing corner e. A box will open around you’re the whole screen f. Let go of the right mouse button. g. A dialog box should appear. Press the start button on the dialog box to begin. See Figure 2 h. Open Internet explore Figure 3 i. Type www.yahoo.com j. Click on the weather icon on the upper left-hand of the webpage. See Figure 3 k. This opens up Yahoo’s weather page l. Enter “San Francisco” in the dialog box that says “Enter city or zip code.” See Figure 4 m. You will be asked after entering in the San Francisco by Yahoo which “San Francisco” do you want. Select “San Francisco CA” n. You should now see the San Francisco Bayarea Weather Screen. See Figure 5 o. When you finished, double click the Figure 4 recorder icon in your system tray. p. This will bring back up the dialog box. Press the stop button to stop recording. 4. Now that you’ve record your video, you must save your work. As soon as you stop recording, the video editor screen pops up a. Press save icon to save the recording b. Congratulations! You just recorded and saved your first on screen video. Fgiure 5
  • 12. Chapter III: Creating screen cam” videos 11 That concludes this tutorial. Now, go get some coffee and come back and play around with the new skills you’ve acquired! Here’s some exercise to help you develop what you’ve learned: 1. Open you favorite email program and record yourself composing an email 2. Open your favorite word processer and record yourself writing a document. (Or revising one) 3. Open Windows solitaire game and record yourself playing Remember: 9 If you make a mistake you can always use “ctrl z” and “ctrl y” to coffin between all the sets you’ve done in your work 9 If this doesn’t help, close the program and start over 9 If all else fails, email us: helpdesk@writeon.com