THE PERFECT GUIDE TO HELP YOU MASTER YOUR NIKON D-SLR
•
4 likes•3,523 views

THE PERFECT GUIDE TO HELP YOU MASTER YOUR NIKON D-SLR

Recommended
More Related Content
What's hot
What's hot (20)
Similar to THE PERFECT GUIDE TO HELP YOU MASTER YOUR NIKON D-SLR
Similar to THE PERFECT GUIDE TO HELP YOU MASTER YOUR NIKON D-SLR (20)
Recently uploaded
Recently uploaded (20)
THE PERFECT GUIDE TO HELP YOU MASTER YOUR NIKON D-SLR
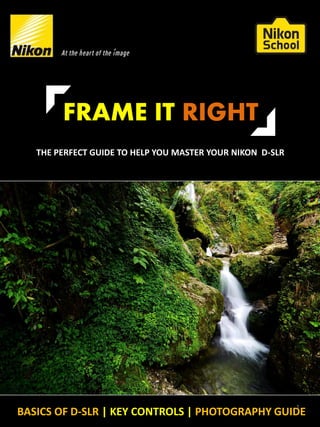
- 1. BASICS OF D-SLR | KEY CONTROLS | PHOTOGRAPHY GUIDE THE PERFECT GUIDE TO HELP YOU MASTER YOUR NIKON D-SLR FRAME IT RIGHT 1
- 2. OVERVIEW Introduction Camera Concept D-SLR Design D-SLR Mechanism Understanding Exposure Aperture, Shutter speed and ISO Understanding White Balance Creative use of Exposure controls RAW Format Lenses & their utility Focus Photography Guide 2
- 3. • What is Photography? INTRODUCTION Photography is a process of creating an image on any photo sensitive material with the help of natural or artificial light. Document memories Fine-art Professional 3
- 4. Sharp Properly exposed Achieved by focusing Lens Achieved by setting Aperture, Shutter speed & ISO CAMERA CONCEPT 1. Image/ object should be sharp : 2. Image/ object should be properly exposed : Perfectly focused and Exposed Image 4
- 5. D-SLR DESIGN The Digital Single Lens Reflex ( D-SLR ) camera comprises of a body and a Lens. The Lens contains the aperture which controls the light going inside the camera, then the light is reflected upwards through a mirror and falls on the viewfinder which allows us to frame the image. When the shutter button is pressed fully the mirror goes up to lock the viewfinder thus allowing light directly to fall on the sensor where the image is recorded. NIKKOR Lens Aperture Mechanical shutter Pentaprism / Pentamirror LCD monitor Viewfinder Quick-return mirror Digital sensor 5
- 6. D-SLR Mechanism 1. Camera at normal position 2. In this position you can see through the viewfinder & Frame6
- 7. D-SLR Mechanism 3. Shutter is released , viewfinder is blocked & Light falls on sensor 4. Image is captured and the camera is again in position to capture7
- 8. EXPOSURE ISO SHUTTER SPEED F-number Exposure is the amount of light collected by the sensor in your camera during a single picture. If the shot is exposed too long the photograph will be Overexposed/Washed out. If the shot is exposed too short the photograph will appear underexposed/Dark. Proper Exposure can be achieved by properly adjusting the Shutter speed, Aperture and ISO together. 8
- 9. APERTURE Aperture? Controls amount of light falling on the digital sensor. Values (f-number) f/1.4, f/2, f/2.8, f/4, f/5.6, f/8, f/11, f/16, f/22, f/32 Effect Controls depth in the image. Counter effect Higher f number increases depth (amount of scene in focus) & smaller f results in shallow depth. Use Landscapes, portraits with blur background etc. f/1.4 f/5.6 f/16 Effect of different Aperture settings on the image 9
- 10. APERTURE • The Aperture can be controlled by holding down the Exposure Compensation ( +/- ) button placed under the shutter button and rotating the command dial. Aperture f/2.8 Aperture f/22 10
- 11. SHUTTERSPEED Shutter Speed? Measure of how long the camera’s shutter is open for. Values (sec) 30, 20,……… 4, 2, 1, 1/2, 1/4, 1/8, 1/16, 1/32, 1/64, 1/125, 1/250 ………. 1/4000 Effect Faster shutter speed freezes the action. Counter effect Slower the shutter speed motion blur becomes more apparent. Use Faster shutter speed to freeze action & slower for motion effect. 1 sec 1/30 sec 1/200 sec 1/800 sec 11
- 12. SHUTTER SPEED – 1/125 SEC SHUTTER SPEED – 1/15 SEC SHUTTERSPEED • The Shutter speed can be controlled rotating the command dial located at the back of the camera towards the left or right. 12
- 13. ISO ISO? Measure of the camera’s ability to capture light. Values 100, 200, 400, 800, 1600, 3200 Effect Higher sensitivity makes sensor more sensitive to light, can take photos in darker conditions without the need of flash or tripod. Counter effect Increasing ISO comes at a cost, it also increases digital noise in the photos. Use Low light conditions, Dawn, Dusk, Night landscape etc. Dark Scenes No Flash Low ISO sensitivity, slow shutter speed. High ISO sensitivity, fast shutter speed. With flash on High ISO sensitivity with flash off 13
- 14. ISO 100 HIGHER ISO RESULTS IN GREATER NOISE IN THE PICTURE ISO ISO 6400ISO 1600 The ISO can be controlled through dedicated buttons on the camera or from the MENU>SHOOTING MENU> ISO SENSITIVITY SETTINGS. Using higher ISO may lead to noise which will bring down the overall quality of the image, hence using a lower ISO is advisable. 14
- 15. WHITE BALANCE White balance Application situation Auto Use for normal conditions. Incandescent Use under incandescent lighting. Fluorescent Use under white fluorescent lighting. Direct sunlight Use with subjects lit by direct sunlight. Flash Use with the built-in Speedlight and Nikon external Speedlight's. Cloudy Use under daylight under overcast skies. Shade Use in daylight, in clear weather, when subjects are in shade. White balance is used to adjust colors to match the color of the light source so that white objects appear white. 15
- 16. WHITE BALANCE Direct sunlight Cloudy Fluorescent ShadeIncandescent Auto The White Balance can be controlled through dedicated buttons on the camera or from the MENU>SHOOTING MENU> WHITE BALANCE. 16
- 17. EXPOSURE CONTROL Mode P (Programmed Auto) The camera automatically adjusts aperture and shutter speed for optimal exposure, but the photographer can choose from different combinations of aperture and shutter speed that will produce the same exposure. This is known as flexible program. Mode S (Shutter-Priority Auto) The photographer chooses the shutter speed and the camera automatically adjusts aperture for optimal exposure. Mode A (Aperture-Priority Auto) The photographer chooses the aperture and the camera automatically adjusts shutter speed for optimal exposure. Mode M (Manual) The photographer chooses both aperture and shutter speed. Choosing the wrong combination could, however, result in photographs that are too bright (overexposed) or too dark (underexposed). 17
- 18. EXPOSURE METER The Exposure meter is an instrument inside your camera that tells you if the amount of light reaching the sensor will be enough or too much to properly expose your image. The light meter takes into account your Shutter Speed, ISO setting and Aperture settings. The Meter is available in Manual Mode. -………………………..0…………………………+ UNDEREXPOSED OVEREXPOSED PERFECT 18
- 19. RAW is uncompressed, unprocessed image It is the best output from the camera RAW files can be converted again and again without loss of data RAW format can be used for specific images which are very important for future storage RAW Image Processed JPEG Image RAW FORMAT 19
- 20. IN CAMERA RAW PROCESSING ADVANTAGES OF RAW IMAGES : • Image can be edited again and again without data loss. • Wrong/Incorrect White Balance can be changed after taking the image. • Wrong/Incorrect Exposure can be corrected after taking the image. • Set Picture Control can be altered including Sharpness /Contrast/Saturation can be altered. The NEF ( RAW ) Processing option can be found under the RETOUCH MENU or directly accessed by Pressing the OK Button over the playback image. Opening/Editing RAW files on the computer requires VIEW NX 2 software to be installed.
- 21. Lens Categories Wide angle Normal Telephoto Below 50mm 50mm Above 100mm LENS CATEGORIES Lenses are mainly categories into three parts, first being the normal lens which is equivalent to our normal vision , anything lesser than that is an wide angle lens and anything above 100mm is called as Telephoto lens. Apart from these there are special purpose lenses like Fisheye, Macro & Perspective Control. 21
- 22. WIDEANGLE NORMAL TELEPHOTO LENS ADVANTAGES 1. These lenses help you capture a vast scene or area in one image. 2. Wide Angle lenses can easily keep a higher Depth of field allowing more subjects to be in focus. 1. Helps Capture Distant Objects clearly 2. Easy to keep shallow depth of field as high focal length will easily help blur the background. 1. Supports Aperture opening like f/1.8 or f/1.4 which will help blur the background easily. 2. These lenses are also more sharper than basic zoom lenses. 22
- 23. Focus Manual Focus Autofocus FOCUS Due to the optical properties of photographic lenses, only objects within a limited range of distances from the camera will be reproduced clearly. The process of adjusting this range is known as changing the camera's focus. The two main ways of adjusting focus is : Manual Focus means manually rotating the focusing ring to achieve desired focus. In Auto focus mode the camera will automatically detect focus on the desired subject. The A/M Button on the Lens and camera body helps you switch between these mode. 23
- 24. Achieving Proper Auto Focus 1. 2. 3. 24
- 25. Portraits Night portrait Landscapes Night landscape Flowing water Freezing action Wildlife & Pets Photography Guide 25
- 26. Which Mode P or A are the best modes What settings f/4 or f/5.6 What lens settings Higher end of the zoom ( e.g. 55mm if you are using 18 -55, or 105mm if you are using 18 – 105mm) Tripod required Yes, if light is low, and camera selects shutter speed slower than 1/60 s Best lens 50 mm f/1.8 , 50 mm f/1.4 , 85 mm f/1.8 Tips for great portraits : • Keep background as far away from your subject as possible. • Your background colour and shade should be as different as possible from your subject’s hair and clothing colour. Shooting Portraits 26
- 27. Which Mode P or S are the best modes What settings f/4 or f/5.6 , or widest aperture available Slow shutter speeds 1/30, 1/15 or slower may be required, Slow sync flash mode if flash is also used What lens settings Higher end of the zoom ( e.g. 55mm if you are using 18 -55, or 105mm if you are using 18 – 105mm) Tripod required Yes , if not available us e a stable surface Best lens 50 mm f/1.8 , 50 mm f/1.4 , 85mm f/1.8 Tips for great night portraits : • Keep background as far away from your subject as possible. • Asking the subject to pose and stay still will ensure image is not blurred due to slow shutter speed Shooting Night Portraits 27
- 28. Which Mode ? P or A are the best modes What settings ? f/11 or f/16 What lens settings ? Wider end of the zoom ( e.g. 18mm if you are using 18 -55, or 18 – 105mm) OR as per your composition Tripod required ? Yes, if light is low, and camera selects shutter speed slower than 1/60 s Best lens ? 10-24mm , 20 mm , 18-300 mm Tips for great landscapes : Try to include foreground elements to guide the eyes through the frame Under-expose your shots by 1 – 2 stops to get darker skies and correct textures Shooting Landscapes 28
- 29. Tips for great night landscapes : • You may have to focus manually. Adjust focus while looking at a tree or a building in the landscape. Adjust till you get a sharp silhouette of this feature Which Mode ? P or A are the best modes What settings ? f/8 or f/11 What lens settings ? Wider end of the zoom ( e.g. 18mm if you are using 18 -55, or 18 – 105mm) OR as per your composition Tripod required ? Absolutely Best lenses ? 28mm f/1.8, 10-24mm, 24mm f/1.4 Shooting Night Landscapes 29
- 30. Which Mode ? S or M What settings ? 250, 500, 1000 What lens settings ? Depends on composition and framing Recommended lens ? Lens with wide aperture like f/2.8 or wider ISO To support fast shutter speeds, higher ISOs like 800 or 1600 may be required. Tips for great action shots : • Use continuous servo focus AF-C and continuous shooting mode • set a manual pre-focus at the spot where you expect the action to occur Freezing Actions 30
- 31. Which Mode ? S or M What settings ? 1” (to show flow) and faster to show drops What lens settings ? Depends on composition and framing Tripod required ? Absolutely Tips for great waterfall shots : • Try to include the surrounding foliage to compliment the beauty of the waterfall • A slightly low angle will make the shot look dramatic Shooting Flowing Water 31
- 32. Which Mode ? P or S What settings ? 125 or faster , for posing pets use wide aperture like f/4 or f/2.8 What lens settings ? Preferably 200mm or higher Metering ? Matrix or center weighted Tips for great wildlife shots : • Try to camp or wait instead of looking for animals. Let them come to you • Doing some research on the wildlife of the region is very helpful Shooting Wildlife & Pets 32
- 33. Visit us at : www.Nikonschool.in 33