1. ADD A RADIATOR
Basic plumbing skills are needed to cut and join pipes. You
also need to know about your heating system and how to
drain it down
Check for pipes and electric cables before drilling. Always
make certain you have identified the pipe properly before
cutting it. Know where to turn off the gas, water and
electricity before you start work. If you use plastic pipes or
fittings to join metal pipes, make sure you link the metal
with an earth wire.
Add a radiator to your central-heating system to provide
extra heat.
A radiator can be teed into any part of the central-heating
flow-and-return pipes, but it is important that adding a
radiator doesn't rob existing radiators of their share of the
boiler output. Once you have established where to join the
new pipes to the circuit, you can set about hanging the
radiator on the wall. The best direction to work in is from the
radiator to the heating circuit. Only when you reach the
existing pipework do you need to drain down and cut the
pipes.
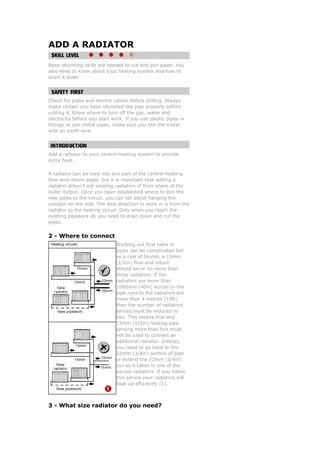
2 - Where to connect
Working out flow rates in
pipes can be complicated but
as a rule of thumb, a 15mm
(1/2in) flow and return
should serve no more than
three radiators. If the
radiators are more than
1000mm (40in) across or the
pipe runs to the radiators are
more than 4 metres (13ft)
then the number of radiators
served must be reduced to
two. This means that any
15mm (1/2in) heating pipe
serving more than this must
not be used to connect an
additional radiator. Instead,
you need to go back to the
22mm (3/4in) section of pipe
or extend the 22mm (3/4in)
run so it takes in one of the
excess radiators. If you follow
this advice your radiators will
heat up efficiently (1).
3 - What size radiator do you need?
2. Radiator outputs are given in British Thermal Units and
Kilowatts. Select a radiator to suit the heat you require. A
4m x 3m (13ft x 10ft) living room with two outside
uninsulated cavity walls needs around 3kw to give 21oC
when it is minus 1oC outside. The bedroom above it needs
just 2.2kw because it doesn't need to be as hot and there is
some gain from the heated room below. It is customary to
add 10% to the figures above for exposed sites or very cold
weather. If you select a radiator with a larger output, it can
be controlled with a thermostatic radiator valve.
A very rough rule of thumb is: the volume of the room in
cubic feet multiplied by 5 = temperature requirement in
BTUs.
4 - Positioning a radiator
Radiators work best in the coldest part of the room. Ideally
this will be on an outside wall, usually under a window
where the cold air drops to the floor. If you have long
curtains or don't want to put a radiator beneath a window, it
is perfectly acceptable to place one where it will suit your
furnishing arrangements. Modern convector radiators with
fins at the back will still work well in any position. If you
haven't got enough room for the right-sized radiator, choose
two smaller ones and spread the heat more evenly.
5 - Fitting the valves
Fit the valves before you hang the radiator so you can see
where the pipes will come up through the floor. If the valve
is directly above a floor joist you might be able to move the
position of the radiator slightly to one side in order to miss
the joist. If you can't do this you will have to bend the pipe.
Remove the protective plugs from the radiator. Wrap at least
five turns of PTFE tape around the threaded tails of the
valves and screw them into the radiator. Some valves
require a large allen key to screw them in, others have flat
sections for a spanner. Screw the valve tails tightly into the
radiator.
Make sure the PTFE tape
stays on the thread rather
than just running along it as
you tighten. If it does run,
undo the valve and roughen
the thread slightly with a
hacksaw blade then re-tape
the thread more tightly (2).
When the tails are tight
attach the valve bodies. One
valve will have a lockshield
head and the other will have
a knob for turning the valve
on and off.
3. 6 - Hanging a radiator
The radiator is supplied with
brackets, but you must
choose the right plugs and
screws to suit your walls.
50mm No12 wood screws
with ordinary wall-plugs will
be fine for brick or block
walls. For plasterboard-
covered timber-stud walls,
you need to select special
heavy-duty plasterboard
fixings and limit the size of
the radiator so it doesn't
exceed the permitted weight
for the fixings. If possible screw into timber supports (3).
Place the radiator on the floor in the position you want to
hang it. Check the top is level and if necessary pack up one
side to level it. Draw a pencil line on the wall along the top
of the radiator. Look at the back of the radiator and draw
two vertical marks directly above the centre line of the
bracket straps. You now have two crosses on the wall to
position the tops of the wall brackets.
Take care when lifting large radiators. You will need help to
lift them onto the brackets. Wear strong shoes to protect
your toes and, better still, keep your feet clear when lifting
heavy objects.
Place the radiator to one side and line up the brackets with
the marks, so you can drill a hole through the slot of each
bracket. Screw the brackets on the wall and hang the
radiator. Check it is level. If it is, you can remove the
radiator and drill through the round holes in the brackets to
keep them in position. If the radiator wasn't quite level, tap
one of the brackets to compensate.
There is no need to tilt the radiator towards the air release
point. The air can always be removed from a level radiator
7 - Marking holes for drilling
4. There are two ways to run
pipes - from beneath the floor
or along the surface of a wall.
If the pipes are coming from
beneath a wooden floor, you
need to mark and drill holes
(4). The best way to do this
is with a right angle of some
kind. Hold a try square in line
with the centre of the valve in
two positions and mark the
points on the floor. Where the
lines cross on the floor
indicates the centre line of the valve. Remove the radiator
from the wall brackets so you can drill the floor. Use an
18mm wood bit (or larger) to allow clearance around the
pipe. If the hole is too small the pipes will creak.
Check that there aren't any pipes or cables where you want
to drill. Once the holes are drilled, you can insert two
lengths of copper pipe to protrude beneath the floor.
8 - Connecting pipework
There are several ways to join pipes. Where access is
restricted it is often easier to use push-fit joints (5). These
are reliable, provided the pipe ends have been cut evenly so
they can't damage the rubber seals when the pipes are
pushed in. Use a pipe cutter rather than a hacksaw to make
sure you get a clean smooth cut. Avoid getting dirt on the
pipe ends and in the fittings.
9 - Soldering
If you prefer to use solder joints, make sure you have a heat
resistant mat to protect the surrounding area from the
flame. If possible make up two lengths of pipe with elbows
and solder them outside. You should then be able to push
them though the holes and into the radiator.
Where it is impossible to pre-fabricate pipe runs with joints,
you can solder the joints in situ using fittings with integral
solder.
5. Smear a small amount of self-cleaning flux to the pipe ends
and push them into the fittings. Apply gentle heat until you
see a ring of solder appear around each mouth of the joint.
If the solder forms all the way round the joint is sound.
Don't disturb the joint until it cools.
Use a small plant spray to damp down any wood before
soldering and again afterwards.
Run the pipes back from the radiator to the main flow-and-
return arteries, finishing them ready to tee in.
Drain the system and, when you are sure all the water has
gone, cut the pipes with cutters or a junior hacksaw. Be
ready to catch a small amount of residual water from the
pipes.
You need to cut out a section of pipe just large enough to fit
a tee in. If there is enough movement in the pipe you might
not need to make two cuts in each pipe - just slide it along.
Because solder won't run properly if there is even the
slightest trace of water in the joints, it is often easier to use
compression fittings. If the pipes are old imperial 3/4in
(20mm) pipes, buy some substitute rings for the 22mm
rings fitted in the compression fittings.
10 - Bending pipes
Pipes can be bent by
inserting a bending spring of
the correct size and gently
bending the pipe over a
rounded object. Slightly over-
bend past the angle and then
bend back to release the
spring (6).
If you want to make the job a lot easier, use plastic heating
pipe which can be threaded under floorboards.
11 - Draining down the system
Turn off the water supply to the feed and expansion tank
which is the smaller of the two cold tanks in the loft. If there
isn't a valve to turn it off, tie up the float valve arm to stop
the tank refilling as you drain it.
6. Turn off the heating system at the mains electricity supply.
It is not enough to turn off the programmer because many
systems have an override function. Attach a hose pipe to a
drain point lower than the point you want to tee into, and
run it out to a drain - the lower the better.
If you can't find a drain-off point, you can drain through a
radiator by turning off the valves and removing a radiator. If
all else fails, buy a self-tapping washing-machine valve and
screw it into a heating pipe at the lowest point on the
system. You can then attach a hose pipe to the valve.
Open the drain cock and let the water out. It will speed
things up if you can open some of the venting points on the
radiators, but remember to shut them again afterwards so
you don't have lots of open points when you come to refill
the system.
Fill the system with cold water and check for leaks before
turning on the boiler. You can run the heating with the boiler
turned off. This will allow you to remove air from radiators
without the risk of being scalded.
12 - Refilling
Let water back into the feed and expansion tank and the
system will fill. You will need to bleed all the radiators.
If you have a sealed system or combination boiler, turn on
the filling loop and let water into the system until the
pressure gauge reads 2 bar, then go round and bleed the
radiators. You will have to top up as you go by opening the
filling valve , but eventually you need a cold pressure of
around 1 bar which will rise slightly when the system heats
up.