SlideShare a Scribd company logo
1 of 10
How to create a bootable VMware ESXi 3.5 & 4.0 (vSphere) USB pen drive.


There are a couple of methods to create a VMWareESXi 3.5 or v 4.0 (vSphere) bootable USB key. Firstly though I should point out
that at this stage you can only buy/create ESXi and not ESX (ie: the Service Console version) on a memory pen drive or card.

A Choice of Methods

UPDATE: VMware have now provided a much simpler method of installing ESXi onto a USB pen drive as outlined in method 3
below. For step-by-step instructions on how to do this check out my new post here.

As with most things in the world of computers there are multiple ways of doing the same thing and creating a bootable ESXi 3.5
or 4.0 USB pen drive is no exception. The most popular approach to creating a bootable ESXi USB pen drive is to use WinImage
so in this article I will be covering this method along with using an alternative Windows Command Line based method (DD for
Windows). However with the introduction of VMware ESXi 4.0 there is an option to select USB pen drive as a target during the
installation process – this being the easiest method of all.

I have used both methods successfully but others have reported some problems when using ‘DD for Windows’ under x64 Vista.

The reason for showing the ‘DD for Windows’ method is that most postings you’ll come across only show examples of using
WinImage to extract the relevant files from the ESXi ISO and to save the resultant
image onto the USB key.

I thought it good to show an alternative as I have experienced issues when using
WinImage under Windows 7 beta (7000) & RC (7100) x64 – though others report
that it has run ok for them.

                     I found that WinImage installed just fine under Windows 7 though when I went to write an image to a USB
                     key I was presented with a RED X with no description or hint as to what the
                     problem may be. Also the capacity of my USB key went from 2GB to 4MB
                     something a normal reformat could not fix ! To get your USB key back to its
                     original capacity download the HP USB Disk Storage Format Tool from here
                     and run it against your USB key.

                    I tried running WinImage as an administrator and also tried running it with an
XP and Vista shim under Window 7’s compatibility mode – still with no luck. Doh!So you may want
to consider running WinImage under Windows XP or Vista.

Why create a bootable VMware ESXi USB pen drive?

I really like the idea of having a bootable ESXi USB key around as it is useful for quickly spinning up
an ESXi install on one of my lab machines. For this project (and also because I didn’t have any spare
USB keys or sufficient capacity lying around) I went out yesterday and bought 2 x 2GB USB keys
(for £9.99).

In this article I will provide steps for both ESXi pen drive creation methods so you can take your pick.

Two easy methods:

    1.   DD for Windows (Command Line)
    2.   WinImage (GUI)
    3.   ESXi Install CD (ESXi 4.0 Only)

What you’ll need for today’s project is:

1 x USB key (>1GB in capacity). I’m using a 2GB Dane-Elec USB key – never heard of them to be honest but 2 for £9.99 I couldn’t
pass up that deal. I have heard from some that not all USB keys work though that said I have never come across one so far that
hasn’t. Maybe we could start a list of known USB keys (ie: Manufacturer/Model) that work/don’t work at the bottom of this
article in the Comments section.

1 x Copy of the ‘dd’ for Windows utility which can be downloaded from here. At the time of writing this article the latest version
is 0.5. After downloading install/extract it onto your PC and take note of the location.

or

1 x Copy of WinImage, downloaded from here.

1 x VMware ESX(i) ISO image either on CD or in file format. Just a reminder that you can download VMware ESXifor free from
here.

1 x Copy and install WinRar (Shareware). If you haven’t already got this
installed then you should as it’s very useful. It can be downloaded from here.

1 x Roll of Cello tape

1 x Pair of Scissors

1 x Clothes Peg

1 x Squeegee Bottle

Ok – so ignore the last 4 items

Location, Location, Location:

There aren’t really any differences between creating a ESXi 3.5 or 4.0 bootable USB pen drive apart from the obvious difference
between the actual image file names.

Both of the ‘dd’ image files that you need are located in the INSTALL.TGZ file when this file is abstracted you will find the
required ‘dd’ image file in the directories outline below:

VMware ESXi 3.5 (U4)


VMware ESXi 4.0
Now onto the first method…

Method #1 – ‘DD for Windows’:

Firstly we want to extract the relevant ‘dd’ file from the VMware ESXi ISO image so that we can then apply it to the USB key.

For the purposes of this exercise I am going to build a bootable ESXi USB key based on VMware ESXi U3 (it was a little while ago
when I first wrote this article though the same still applies to ESXi 3.5 U4 and ESXi 4.0). The file name for this is: ‘VMware-
VMvisor-InstallerCD-3.5.0_Update_3-123629.i386’.

Using WinRar open your VMware ESXi ISO using WinRar.


Now whilst still in WinRar open (by double clicking) the ‘INSTALL.TGZ’ file.


From here drill down the directories until you reach the ‘usrlibvmwareinstaller’ sub-directory.
Now double click on the ‘bz2’ file to extract it (in this instance called ‘VMware-VMvisor-big-3.5.0_Update_3-123629.i386.dd.bz2’.


You are now left with a single file with a ‘dd’ extension. This is the file that we are after. Extract this file to the same directory as
where the ‘dd’ for Windows utility resides. (Note: The other option would be to add this directory to the ‘Path’ environment
variable within your Windows OS so that the ‘dd’ for Windows util can be access via command line from any directory).

We are now at the stage where we’ll use the ‘dd for Windows’ utility to apply the image you just extracted to a USB pen drive. If
you have any WinRAR windows left open you can now close them as we will only be dealing with the file with the ‘dd’ extension
you just extracted.

Insert your USB key that you wish to have ESXi installed onto into your PC.

With your USB key inserted into your PC open up ‘My Computer’ within the OS and take note of the drive mapping letter that
your USB key has been assigned.

In my case it is the F (Removable Drive) drive.


Open up a Command Prompt and navigate to the directory where the ‘dd’ for Windows utility and VMware ESXi image file is
located.
Run the command: ‘dd – -list’ (Note: there are two dashes before the list command)

If you are trying to run this from a Windows 7 Beta installation, as I am, you will notice that there is no entry for the USB pen
drive (F:) under the ‘NT Block Device Objects’ section (see image below) – this is where we’d usually expect to see an entry for
the pen drive and the other attached hard disks. I’m guessing this is down to some incompatibility between ‘dd’ for Windows
and Windows 7 Beta.

So this part of the process will need to be performed either using Windows XP or Vista.


I don’t have a Vista machine built up at the moment though so I will perform the remaining steps from within Windows XP
where we run the same command (ie: ‘dd – -list’) we get the following output. I have run this process multiple times from a Vista
based PC in the past and can confirm it works the same as it does from an XP machine.

After running the ‘dd – -list’ from the XP machine notice how you can now see the hard disks and the USB drive (e:) appear in the
‘NT Block Device Objects’
We are now ready to apply the ESXi image onto the USB drive. To do this use the following command (for more details on the
commands click here):

ddbs=1M if=VMware-VMvisor-big-3.5.0_Update_3-123629.i386.dd of=?DeviceHarddisk1Partition1 –progress


The portion of the command that starts with ‘?’ specifies the location of your USB pen drive – just to clarify this information you
get from running the ‘dd –list’ (see above). This will most likely vary between machines depending on how may hard disks and
other USB drives it has attached.

With the ddprocess running you will see a number that increments like that seen below. The process with generally run for a few
minutes whilst the image is applied to the USB key.


Once the process has completed you are then a proud owner of a bootable VMware ESXi USB pen drive!
Insert it into a compatible server/PC and boot to test that it works.

Method #2 – ‘WinImage’:

First begin with starting WinImage (assuming you’ve already installed it).


From the ‘Disk’ drop-down menu select ‘Restore Virtual Hard Disk image on physical drive…” as you want to restore the VMware
ESXi image into your USB pen drive.
The next screen (below) should show you a list of all your attached removable drives. If you have multiple removable drives
attached then take care to select the correct USB pen drive – don’t want any accidents happening to we?

Select you USB pen drive to write the ESXi image to and click ‘Ok’


See image below – to select your VMware ESXi ‘dd’ image file.


Once you have selected ‘All files (*.*) ‘ and can now see you ESXi ‘dd’ image file select ‘Open’
Select ‘Yes’ at the ‘Warning’ screen..


The VMware ESXi image at this stage is now written to your select USB pen drive.


Once the ESXi image has been written when you open your USB pen drive within Windows Explorer, containing the ESXi image,
you should see the following few files. You don’t have to perform this step – only if you want to check to see if the image was
written successfully.
Method #3 – ‘ESXi Install CD’ (ESXi 4.0 Only):

This third option is the easiest and most hassle free of all. From ESXi 4.0 you get the ability to install a USB pen drive into a USB
port of your server and then boot from the ESxi 4.0 installation CD. When you get to to stage in the installation process to select
the destination for the ESXi install you should see your USB pen drive as a destination along with your server’s internal hard disk.

Just select your USB pen drive as the target for the ESXi 4.0 install and follow the rest of the installation process through –
everything going to plan you should see it install onto your USB pen drive.

Finished! Now go and put the cello tape, scissors and clothes peg back into the drawer..

Have fun..

More Related Content

Recently uploaded

A Domino Admins Adventures (Engage 2024)
A Domino Admins Adventures (Engage 2024)A Domino Admins Adventures (Engage 2024)
A Domino Admins Adventures (Engage 2024)Gabriella Davis
 
Handwritten Text Recognition for manuscripts and early printed texts
Handwritten Text Recognition for manuscripts and early printed textsHandwritten Text Recognition for manuscripts and early printed texts
Handwritten Text Recognition for manuscripts and early printed textsMaria Levchenko
 
Understanding the Laravel MVC Architecture
Understanding the Laravel MVC ArchitectureUnderstanding the Laravel MVC Architecture
Understanding the Laravel MVC ArchitecturePixlogix Infotech
 
Boost PC performance: How more available memory can improve productivity
Boost PC performance: How more available memory can improve productivityBoost PC performance: How more available memory can improve productivity
Boost PC performance: How more available memory can improve productivityPrincipled Technologies
 
CNv6 Instructor Chapter 6 Quality of Service
CNv6 Instructor Chapter 6 Quality of ServiceCNv6 Instructor Chapter 6 Quality of Service
CNv6 Instructor Chapter 6 Quality of Servicegiselly40
 
Data Cloud, More than a CDP by Matt Robison
Data Cloud, More than a CDP by Matt RobisonData Cloud, More than a CDP by Matt Robison
Data Cloud, More than a CDP by Matt RobisonAnna Loughnan Colquhoun
 
GenCyber Cyber Security Day Presentation
GenCyber Cyber Security Day PresentationGenCyber Cyber Security Day Presentation
GenCyber Cyber Security Day PresentationMichael W. Hawkins
 
04-2024-HHUG-Sales-and-Marketing-Alignment.pptx
04-2024-HHUG-Sales-and-Marketing-Alignment.pptx04-2024-HHUG-Sales-and-Marketing-Alignment.pptx
04-2024-HHUG-Sales-and-Marketing-Alignment.pptxHampshireHUG
 
Google AI Hackathon: LLM based Evaluator for RAG
Google AI Hackathon: LLM based Evaluator for RAGGoogle AI Hackathon: LLM based Evaluator for RAG
Google AI Hackathon: LLM based Evaluator for RAGSujit Pal
 
Finology Group – Insurtech Innovation Award 2024
Finology Group – Insurtech Innovation Award 2024Finology Group – Insurtech Innovation Award 2024
Finology Group – Insurtech Innovation Award 2024The Digital Insurer
 
Slack Application Development 101 Slides
Slack Application Development 101 SlidesSlack Application Development 101 Slides
Slack Application Development 101 Slidespraypatel2
 
Neo4j - How KGs are shaping the future of Generative AI at AWS Summit London ...
Neo4j - How KGs are shaping the future of Generative AI at AWS Summit London ...Neo4j - How KGs are shaping the future of Generative AI at AWS Summit London ...
Neo4j - How KGs are shaping the future of Generative AI at AWS Summit London ...Neo4j
 
08448380779 Call Girls In Civil Lines Women Seeking Men
08448380779 Call Girls In Civil Lines Women Seeking Men08448380779 Call Girls In Civil Lines Women Seeking Men
08448380779 Call Girls In Civil Lines Women Seeking MenDelhi Call girls
 
Breaking the Kubernetes Kill Chain: Host Path Mount
Breaking the Kubernetes Kill Chain: Host Path MountBreaking the Kubernetes Kill Chain: Host Path Mount
Breaking the Kubernetes Kill Chain: Host Path MountPuma Security, LLC
 
A Call to Action for Generative AI in 2024
A Call to Action for Generative AI in 2024A Call to Action for Generative AI in 2024
A Call to Action for Generative AI in 2024Results
 
08448380779 Call Girls In Greater Kailash - I Women Seeking Men
08448380779 Call Girls In Greater Kailash - I Women Seeking Men08448380779 Call Girls In Greater Kailash - I Women Seeking Men
08448380779 Call Girls In Greater Kailash - I Women Seeking MenDelhi Call girls
 
My Hashitalk Indonesia April 2024 Presentation
My Hashitalk Indonesia April 2024 PresentationMy Hashitalk Indonesia April 2024 Presentation
My Hashitalk Indonesia April 2024 PresentationRidwan Fadjar
 
The 7 Things I Know About Cyber Security After 25 Years | April 2024
The 7 Things I Know About Cyber Security After 25 Years | April 2024The 7 Things I Know About Cyber Security After 25 Years | April 2024
The 7 Things I Know About Cyber Security After 25 Years | April 2024Rafal Los
 
🐬 The future of MySQL is Postgres 🐘
🐬  The future of MySQL is Postgres   🐘🐬  The future of MySQL is Postgres   🐘
🐬 The future of MySQL is Postgres 🐘RTylerCroy
 
Presentation on how to chat with PDF using ChatGPT code interpreter
Presentation on how to chat with PDF using ChatGPT code interpreterPresentation on how to chat with PDF using ChatGPT code interpreter
Presentation on how to chat with PDF using ChatGPT code interpreternaman860154
 

Recently uploaded (20)

A Domino Admins Adventures (Engage 2024)
A Domino Admins Adventures (Engage 2024)A Domino Admins Adventures (Engage 2024)
A Domino Admins Adventures (Engage 2024)
 
Handwritten Text Recognition for manuscripts and early printed texts
Handwritten Text Recognition for manuscripts and early printed textsHandwritten Text Recognition for manuscripts and early printed texts
Handwritten Text Recognition for manuscripts and early printed texts
 
Understanding the Laravel MVC Architecture
Understanding the Laravel MVC ArchitectureUnderstanding the Laravel MVC Architecture
Understanding the Laravel MVC Architecture
 
Boost PC performance: How more available memory can improve productivity
Boost PC performance: How more available memory can improve productivityBoost PC performance: How more available memory can improve productivity
Boost PC performance: How more available memory can improve productivity
 
CNv6 Instructor Chapter 6 Quality of Service
CNv6 Instructor Chapter 6 Quality of ServiceCNv6 Instructor Chapter 6 Quality of Service
CNv6 Instructor Chapter 6 Quality of Service
 
Data Cloud, More than a CDP by Matt Robison
Data Cloud, More than a CDP by Matt RobisonData Cloud, More than a CDP by Matt Robison
Data Cloud, More than a CDP by Matt Robison
 
GenCyber Cyber Security Day Presentation
GenCyber Cyber Security Day PresentationGenCyber Cyber Security Day Presentation
GenCyber Cyber Security Day Presentation
 
04-2024-HHUG-Sales-and-Marketing-Alignment.pptx
04-2024-HHUG-Sales-and-Marketing-Alignment.pptx04-2024-HHUG-Sales-and-Marketing-Alignment.pptx
04-2024-HHUG-Sales-and-Marketing-Alignment.pptx
 
Google AI Hackathon: LLM based Evaluator for RAG
Google AI Hackathon: LLM based Evaluator for RAGGoogle AI Hackathon: LLM based Evaluator for RAG
Google AI Hackathon: LLM based Evaluator for RAG
 
Finology Group – Insurtech Innovation Award 2024
Finology Group – Insurtech Innovation Award 2024Finology Group – Insurtech Innovation Award 2024
Finology Group – Insurtech Innovation Award 2024
 
Slack Application Development 101 Slides
Slack Application Development 101 SlidesSlack Application Development 101 Slides
Slack Application Development 101 Slides
 
Neo4j - How KGs are shaping the future of Generative AI at AWS Summit London ...
Neo4j - How KGs are shaping the future of Generative AI at AWS Summit London ...Neo4j - How KGs are shaping the future of Generative AI at AWS Summit London ...
Neo4j - How KGs are shaping the future of Generative AI at AWS Summit London ...
 
08448380779 Call Girls In Civil Lines Women Seeking Men
08448380779 Call Girls In Civil Lines Women Seeking Men08448380779 Call Girls In Civil Lines Women Seeking Men
08448380779 Call Girls In Civil Lines Women Seeking Men
 
Breaking the Kubernetes Kill Chain: Host Path Mount
Breaking the Kubernetes Kill Chain: Host Path MountBreaking the Kubernetes Kill Chain: Host Path Mount
Breaking the Kubernetes Kill Chain: Host Path Mount
 
A Call to Action for Generative AI in 2024
A Call to Action for Generative AI in 2024A Call to Action for Generative AI in 2024
A Call to Action for Generative AI in 2024
 
08448380779 Call Girls In Greater Kailash - I Women Seeking Men
08448380779 Call Girls In Greater Kailash - I Women Seeking Men08448380779 Call Girls In Greater Kailash - I Women Seeking Men
08448380779 Call Girls In Greater Kailash - I Women Seeking Men
 
My Hashitalk Indonesia April 2024 Presentation
My Hashitalk Indonesia April 2024 PresentationMy Hashitalk Indonesia April 2024 Presentation
My Hashitalk Indonesia April 2024 Presentation
 
The 7 Things I Know About Cyber Security After 25 Years | April 2024
The 7 Things I Know About Cyber Security After 25 Years | April 2024The 7 Things I Know About Cyber Security After 25 Years | April 2024
The 7 Things I Know About Cyber Security After 25 Years | April 2024
 
🐬 The future of MySQL is Postgres 🐘
🐬  The future of MySQL is Postgres   🐘🐬  The future of MySQL is Postgres   🐘
🐬 The future of MySQL is Postgres 🐘
 
Presentation on how to chat with PDF using ChatGPT code interpreter
Presentation on how to chat with PDF using ChatGPT code interpreterPresentation on how to chat with PDF using ChatGPT code interpreter
Presentation on how to chat with PDF using ChatGPT code interpreter
 

Featured

Product Design Trends in 2024 | Teenage Engineerings
Product Design Trends in 2024 | Teenage EngineeringsProduct Design Trends in 2024 | Teenage Engineerings
Product Design Trends in 2024 | Teenage EngineeringsPixeldarts
 
How Race, Age and Gender Shape Attitudes Towards Mental Health
How Race, Age and Gender Shape Attitudes Towards Mental HealthHow Race, Age and Gender Shape Attitudes Towards Mental Health
How Race, Age and Gender Shape Attitudes Towards Mental HealthThinkNow
 
AI Trends in Creative Operations 2024 by Artwork Flow.pdf
AI Trends in Creative Operations 2024 by Artwork Flow.pdfAI Trends in Creative Operations 2024 by Artwork Flow.pdf
AI Trends in Creative Operations 2024 by Artwork Flow.pdfmarketingartwork
 
PEPSICO Presentation to CAGNY Conference Feb 2024
PEPSICO Presentation to CAGNY Conference Feb 2024PEPSICO Presentation to CAGNY Conference Feb 2024
PEPSICO Presentation to CAGNY Conference Feb 2024Neil Kimberley
 
Content Methodology: A Best Practices Report (Webinar)
Content Methodology: A Best Practices Report (Webinar)Content Methodology: A Best Practices Report (Webinar)
Content Methodology: A Best Practices Report (Webinar)contently
 
How to Prepare For a Successful Job Search for 2024
How to Prepare For a Successful Job Search for 2024How to Prepare For a Successful Job Search for 2024
How to Prepare For a Successful Job Search for 2024Albert Qian
 
Social Media Marketing Trends 2024 // The Global Indie Insights
Social Media Marketing Trends 2024 // The Global Indie InsightsSocial Media Marketing Trends 2024 // The Global Indie Insights
Social Media Marketing Trends 2024 // The Global Indie InsightsKurio // The Social Media Age(ncy)
 
Trends In Paid Search: Navigating The Digital Landscape In 2024
Trends In Paid Search: Navigating The Digital Landscape In 2024Trends In Paid Search: Navigating The Digital Landscape In 2024
Trends In Paid Search: Navigating The Digital Landscape In 2024Search Engine Journal
 
5 Public speaking tips from TED - Visualized summary
5 Public speaking tips from TED - Visualized summary5 Public speaking tips from TED - Visualized summary
5 Public speaking tips from TED - Visualized summarySpeakerHub
 
ChatGPT and the Future of Work - Clark Boyd
ChatGPT and the Future of Work - Clark Boyd ChatGPT and the Future of Work - Clark Boyd
ChatGPT and the Future of Work - Clark Boyd Clark Boyd
 
Getting into the tech field. what next
Getting into the tech field. what next Getting into the tech field. what next
Getting into the tech field. what next Tessa Mero
 
Google's Just Not That Into You: Understanding Core Updates & Search Intent
Google's Just Not That Into You: Understanding Core Updates & Search IntentGoogle's Just Not That Into You: Understanding Core Updates & Search Intent
Google's Just Not That Into You: Understanding Core Updates & Search IntentLily Ray
 
Time Management & Productivity - Best Practices
Time Management & Productivity -  Best PracticesTime Management & Productivity -  Best Practices
Time Management & Productivity - Best PracticesVit Horky
 
The six step guide to practical project management
The six step guide to practical project managementThe six step guide to practical project management
The six step guide to practical project managementMindGenius
 
Beginners Guide to TikTok for Search - Rachel Pearson - We are Tilt __ Bright...
Beginners Guide to TikTok for Search - Rachel Pearson - We are Tilt __ Bright...Beginners Guide to TikTok for Search - Rachel Pearson - We are Tilt __ Bright...
Beginners Guide to TikTok for Search - Rachel Pearson - We are Tilt __ Bright...RachelPearson36
 
Unlocking the Power of ChatGPT and AI in Testing - A Real-World Look, present...
Unlocking the Power of ChatGPT and AI in Testing - A Real-World Look, present...Unlocking the Power of ChatGPT and AI in Testing - A Real-World Look, present...
Unlocking the Power of ChatGPT and AI in Testing - A Real-World Look, present...Applitools
 
12 Ways to Increase Your Influence at Work
12 Ways to Increase Your Influence at Work12 Ways to Increase Your Influence at Work
12 Ways to Increase Your Influence at WorkGetSmarter
 

Featured (20)

Product Design Trends in 2024 | Teenage Engineerings
Product Design Trends in 2024 | Teenage EngineeringsProduct Design Trends in 2024 | Teenage Engineerings
Product Design Trends in 2024 | Teenage Engineerings
 
How Race, Age and Gender Shape Attitudes Towards Mental Health
How Race, Age and Gender Shape Attitudes Towards Mental HealthHow Race, Age and Gender Shape Attitudes Towards Mental Health
How Race, Age and Gender Shape Attitudes Towards Mental Health
 
AI Trends in Creative Operations 2024 by Artwork Flow.pdf
AI Trends in Creative Operations 2024 by Artwork Flow.pdfAI Trends in Creative Operations 2024 by Artwork Flow.pdf
AI Trends in Creative Operations 2024 by Artwork Flow.pdf
 
Skeleton Culture Code
Skeleton Culture CodeSkeleton Culture Code
Skeleton Culture Code
 
PEPSICO Presentation to CAGNY Conference Feb 2024
PEPSICO Presentation to CAGNY Conference Feb 2024PEPSICO Presentation to CAGNY Conference Feb 2024
PEPSICO Presentation to CAGNY Conference Feb 2024
 
Content Methodology: A Best Practices Report (Webinar)
Content Methodology: A Best Practices Report (Webinar)Content Methodology: A Best Practices Report (Webinar)
Content Methodology: A Best Practices Report (Webinar)
 
How to Prepare For a Successful Job Search for 2024
How to Prepare For a Successful Job Search for 2024How to Prepare For a Successful Job Search for 2024
How to Prepare For a Successful Job Search for 2024
 
Social Media Marketing Trends 2024 // The Global Indie Insights
Social Media Marketing Trends 2024 // The Global Indie InsightsSocial Media Marketing Trends 2024 // The Global Indie Insights
Social Media Marketing Trends 2024 // The Global Indie Insights
 
Trends In Paid Search: Navigating The Digital Landscape In 2024
Trends In Paid Search: Navigating The Digital Landscape In 2024Trends In Paid Search: Navigating The Digital Landscape In 2024
Trends In Paid Search: Navigating The Digital Landscape In 2024
 
5 Public speaking tips from TED - Visualized summary
5 Public speaking tips from TED - Visualized summary5 Public speaking tips from TED - Visualized summary
5 Public speaking tips from TED - Visualized summary
 
ChatGPT and the Future of Work - Clark Boyd
ChatGPT and the Future of Work - Clark Boyd ChatGPT and the Future of Work - Clark Boyd
ChatGPT and the Future of Work - Clark Boyd
 
Getting into the tech field. what next
Getting into the tech field. what next Getting into the tech field. what next
Getting into the tech field. what next
 
Google's Just Not That Into You: Understanding Core Updates & Search Intent
Google's Just Not That Into You: Understanding Core Updates & Search IntentGoogle's Just Not That Into You: Understanding Core Updates & Search Intent
Google's Just Not That Into You: Understanding Core Updates & Search Intent
 
How to have difficult conversations
How to have difficult conversations How to have difficult conversations
How to have difficult conversations
 
Introduction to Data Science
Introduction to Data ScienceIntroduction to Data Science
Introduction to Data Science
 
Time Management & Productivity - Best Practices
Time Management & Productivity -  Best PracticesTime Management & Productivity -  Best Practices
Time Management & Productivity - Best Practices
 
The six step guide to practical project management
The six step guide to practical project managementThe six step guide to practical project management
The six step guide to practical project management
 
Beginners Guide to TikTok for Search - Rachel Pearson - We are Tilt __ Bright...
Beginners Guide to TikTok for Search - Rachel Pearson - We are Tilt __ Bright...Beginners Guide to TikTok for Search - Rachel Pearson - We are Tilt __ Bright...
Beginners Guide to TikTok for Search - Rachel Pearson - We are Tilt __ Bright...
 
Unlocking the Power of ChatGPT and AI in Testing - A Real-World Look, present...
Unlocking the Power of ChatGPT and AI in Testing - A Real-World Look, present...Unlocking the Power of ChatGPT and AI in Testing - A Real-World Look, present...
Unlocking the Power of ChatGPT and AI in Testing - A Real-World Look, present...
 
12 Ways to Increase Your Influence at Work
12 Ways to Increase Your Influence at Work12 Ways to Increase Your Influence at Work
12 Ways to Increase Your Influence at Work
 

How to create a bootable v mware esxi 3

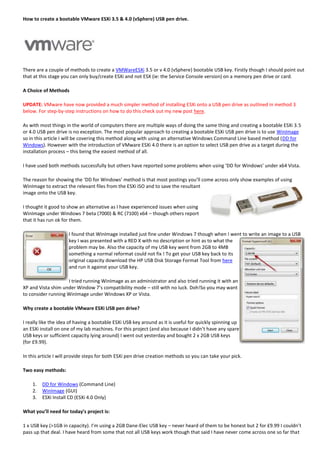
  • 1. How to create a bootable VMware ESXi 3.5 & 4.0 (vSphere) USB pen drive. There are a couple of methods to create a VMWareESXi 3.5 or v 4.0 (vSphere) bootable USB key. Firstly though I should point out that at this stage you can only buy/create ESXi and not ESX (ie: the Service Console version) on a memory pen drive or card. A Choice of Methods UPDATE: VMware have now provided a much simpler method of installing ESXi onto a USB pen drive as outlined in method 3 below. For step-by-step instructions on how to do this check out my new post here. As with most things in the world of computers there are multiple ways of doing the same thing and creating a bootable ESXi 3.5 or 4.0 USB pen drive is no exception. The most popular approach to creating a bootable ESXi USB pen drive is to use WinImage so in this article I will be covering this method along with using an alternative Windows Command Line based method (DD for Windows). However with the introduction of VMware ESXi 4.0 there is an option to select USB pen drive as a target during the installation process – this being the easiest method of all. I have used both methods successfully but others have reported some problems when using ‘DD for Windows’ under x64 Vista. The reason for showing the ‘DD for Windows’ method is that most postings you’ll come across only show examples of using WinImage to extract the relevant files from the ESXi ISO and to save the resultant image onto the USB key. I thought it good to show an alternative as I have experienced issues when using WinImage under Windows 7 beta (7000) & RC (7100) x64 – though others report that it has run ok for them. I found that WinImage installed just fine under Windows 7 though when I went to write an image to a USB key I was presented with a RED X with no description or hint as to what the problem may be. Also the capacity of my USB key went from 2GB to 4MB something a normal reformat could not fix ! To get your USB key back to its original capacity download the HP USB Disk Storage Format Tool from here and run it against your USB key. I tried running WinImage as an administrator and also tried running it with an XP and Vista shim under Window 7’s compatibility mode – still with no luck. Doh!So you may want to consider running WinImage under Windows XP or Vista. Why create a bootable VMware ESXi USB pen drive? I really like the idea of having a bootable ESXi USB key around as it is useful for quickly spinning up an ESXi install on one of my lab machines. For this project (and also because I didn’t have any spare USB keys or sufficient capacity lying around) I went out yesterday and bought 2 x 2GB USB keys (for £9.99). In this article I will provide steps for both ESXi pen drive creation methods so you can take your pick. Two easy methods: 1. DD for Windows (Command Line) 2. WinImage (GUI) 3. ESXi Install CD (ESXi 4.0 Only) What you’ll need for today’s project is: 1 x USB key (>1GB in capacity). I’m using a 2GB Dane-Elec USB key – never heard of them to be honest but 2 for £9.99 I couldn’t pass up that deal. I have heard from some that not all USB keys work though that said I have never come across one so far that
  • 2. hasn’t. Maybe we could start a list of known USB keys (ie: Manufacturer/Model) that work/don’t work at the bottom of this article in the Comments section. 1 x Copy of the ‘dd’ for Windows utility which can be downloaded from here. At the time of writing this article the latest version is 0.5. After downloading install/extract it onto your PC and take note of the location. or 1 x Copy of WinImage, downloaded from here. 1 x VMware ESX(i) ISO image either on CD or in file format. Just a reminder that you can download VMware ESXifor free from here. 1 x Copy and install WinRar (Shareware). If you haven’t already got this installed then you should as it’s very useful. It can be downloaded from here. 1 x Roll of Cello tape 1 x Pair of Scissors 1 x Clothes Peg 1 x Squeegee Bottle Ok – so ignore the last 4 items Location, Location, Location: There aren’t really any differences between creating a ESXi 3.5 or 4.0 bootable USB pen drive apart from the obvious difference between the actual image file names. Both of the ‘dd’ image files that you need are located in the INSTALL.TGZ file when this file is abstracted you will find the required ‘dd’ image file in the directories outline below: VMware ESXi 3.5 (U4) VMware ESXi 4.0
  • 3. Now onto the first method… Method #1 – ‘DD for Windows’: Firstly we want to extract the relevant ‘dd’ file from the VMware ESXi ISO image so that we can then apply it to the USB key. For the purposes of this exercise I am going to build a bootable ESXi USB key based on VMware ESXi U3 (it was a little while ago when I first wrote this article though the same still applies to ESXi 3.5 U4 and ESXi 4.0). The file name for this is: ‘VMware- VMvisor-InstallerCD-3.5.0_Update_3-123629.i386’. Using WinRar open your VMware ESXi ISO using WinRar. Now whilst still in WinRar open (by double clicking) the ‘INSTALL.TGZ’ file. From here drill down the directories until you reach the ‘usrlibvmwareinstaller’ sub-directory.
  • 4. Now double click on the ‘bz2’ file to extract it (in this instance called ‘VMware-VMvisor-big-3.5.0_Update_3-123629.i386.dd.bz2’. You are now left with a single file with a ‘dd’ extension. This is the file that we are after. Extract this file to the same directory as where the ‘dd’ for Windows utility resides. (Note: The other option would be to add this directory to the ‘Path’ environment variable within your Windows OS so that the ‘dd’ for Windows util can be access via command line from any directory). We are now at the stage where we’ll use the ‘dd for Windows’ utility to apply the image you just extracted to a USB pen drive. If you have any WinRAR windows left open you can now close them as we will only be dealing with the file with the ‘dd’ extension you just extracted. Insert your USB key that you wish to have ESXi installed onto into your PC. With your USB key inserted into your PC open up ‘My Computer’ within the OS and take note of the drive mapping letter that your USB key has been assigned. In my case it is the F (Removable Drive) drive. Open up a Command Prompt and navigate to the directory where the ‘dd’ for Windows utility and VMware ESXi image file is located.
  • 5. Run the command: ‘dd – -list’ (Note: there are two dashes before the list command) If you are trying to run this from a Windows 7 Beta installation, as I am, you will notice that there is no entry for the USB pen drive (F:) under the ‘NT Block Device Objects’ section (see image below) – this is where we’d usually expect to see an entry for the pen drive and the other attached hard disks. I’m guessing this is down to some incompatibility between ‘dd’ for Windows and Windows 7 Beta. So this part of the process will need to be performed either using Windows XP or Vista. I don’t have a Vista machine built up at the moment though so I will perform the remaining steps from within Windows XP where we run the same command (ie: ‘dd – -list’) we get the following output. I have run this process multiple times from a Vista based PC in the past and can confirm it works the same as it does from an XP machine. After running the ‘dd – -list’ from the XP machine notice how you can now see the hard disks and the USB drive (e:) appear in the ‘NT Block Device Objects’
  • 6. We are now ready to apply the ESXi image onto the USB drive. To do this use the following command (for more details on the commands click here): ddbs=1M if=VMware-VMvisor-big-3.5.0_Update_3-123629.i386.dd of=?DeviceHarddisk1Partition1 –progress The portion of the command that starts with ‘?’ specifies the location of your USB pen drive – just to clarify this information you get from running the ‘dd –list’ (see above). This will most likely vary between machines depending on how may hard disks and other USB drives it has attached. With the ddprocess running you will see a number that increments like that seen below. The process with generally run for a few minutes whilst the image is applied to the USB key. Once the process has completed you are then a proud owner of a bootable VMware ESXi USB pen drive!
  • 7. Insert it into a compatible server/PC and boot to test that it works. Method #2 – ‘WinImage’: First begin with starting WinImage (assuming you’ve already installed it). From the ‘Disk’ drop-down menu select ‘Restore Virtual Hard Disk image on physical drive…” as you want to restore the VMware ESXi image into your USB pen drive.
  • 8. The next screen (below) should show you a list of all your attached removable drives. If you have multiple removable drives attached then take care to select the correct USB pen drive – don’t want any accidents happening to we? Select you USB pen drive to write the ESXi image to and click ‘Ok’ See image below – to select your VMware ESXi ‘dd’ image file. Once you have selected ‘All files (*.*) ‘ and can now see you ESXi ‘dd’ image file select ‘Open’
  • 9. Select ‘Yes’ at the ‘Warning’ screen.. The VMware ESXi image at this stage is now written to your select USB pen drive. Once the ESXi image has been written when you open your USB pen drive within Windows Explorer, containing the ESXi image, you should see the following few files. You don’t have to perform this step – only if you want to check to see if the image was written successfully.
  • 10. Method #3 – ‘ESXi Install CD’ (ESXi 4.0 Only): This third option is the easiest and most hassle free of all. From ESXi 4.0 you get the ability to install a USB pen drive into a USB port of your server and then boot from the ESxi 4.0 installation CD. When you get to to stage in the installation process to select the destination for the ESXi install you should see your USB pen drive as a destination along with your server’s internal hard disk. Just select your USB pen drive as the target for the ESXi 4.0 install and follow the rest of the installation process through – everything going to plan you should see it install onto your USB pen drive. Finished! Now go and put the cello tape, scissors and clothes peg back into the drawer.. Have fun..