Preventing Moisture Damage and Termite Infestation
•
1 gostou•3,386 visualizações

With reference to a construction site visited recently, describe in details key features that can be observed on site as follows Foundations backfilling, hardcore, soil treatment, DPM and BRC works prior to pouring oversite concrete CONSTRUCTION [soil treatment, foundation backfill, Damp Proof Membrane[DPM] and BRC for engineers (civil)

Recomendados
Mais conteúdo relacionado
Mais procurados
Mais procurados (20)
Semelhante a Preventing Moisture Damage and Termite Infestation
Semelhante a Preventing Moisture Damage and Termite Infestation (20)
Mais de musadoto
Mais de musadoto (20)
Último
Último (20)
Preventing Moisture Damage and Termite Infestation
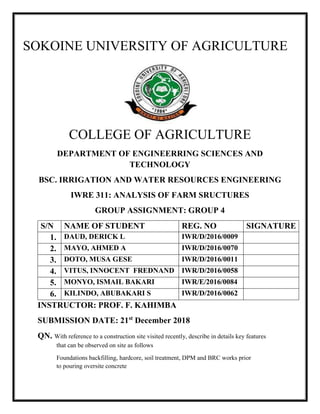
- 1. - 0 - SOKOINE UNIVERSITY OF AGRICULTURE COLLEGE OF AGRICULTURE DEPARTMENT OF ENGINEERRING SCIENCES AND TECHNOLOGY BSC. IRRIGATION AND WATER RESOURCES ENGINEERING IWRE 311: ANALYSIS OF FARM SRUCTURES GROUP ASSIGNMENT: GROUP 4 S/N NAME OF STUDENT REG. NO SIGNATURE 1. DAUD, DERICK L IWR/D/2016/0009 2. MAYO, AHMED A IWR/D/2016/0070 3. DOTO, MUSA GESE IWR/D/2016/0011 4. VITUS, INNOCENT FREDNAND IWR/D/2016/0058 5. MONYO, ISMAIL BAKARI IWR/E/2016/0084 6. KILINDO, ABUBAKARI S IWR/D/2016/0062 INSTRUCTOR: PROF. F. KAHIMBA SUBMISSION DATE: 21st December 2018 QN. With reference to a construction site visited recently, describe in details key features that can be observed on site as follows Foundations backfilling, hardcore, soil treatment, DPM and BRC works prior to pouring oversite concrete
- 2. - 1 - Foundations backfilling Is the process of putting soil back into a trench or foundation once excavation and related work has been completed. The back fill process requires skills and heavy equipments as well as knowledge of specifications, contract requirements and soil conditions. Every area soil has unique characteristics, requiring different construction techniques to ensure optimum performance Types of backfilling in foundation based upon the type of material use, they can be divided into 1. Course Grained Soil 2. Fine-Graded Soils of Low to Medium Plasticity 3. Commercial By-Products 4. CLSM (Controlled low strength material) Steps involved in backfilling in foundation 1. Before you begin the backfill process, you have to be sure that the foundation cures for at least five to seven days. There are even instances when cracks may occur when you backfill too soon. 2. The ground over which the filling has to be done should be cleaned off all grass, loose stones, rubbish of all kinds etc. If there is water in the area, it should be pumped or bailed out. 3. Determine the types of material you will use for foundation backfill. A mixture of various materials such as rocks, soil and stone are commonly used. Some soil can retain too much moisture that is not good for your foundation. 4. Try to use the refilling material from the excavated earth 5. The approved excavated material, which has been stocked, shall be cleaned of all rubbish, large size stone, vegetation etc. 6. Begin backfilling at the corners and be sure that the distribution of the soil is even so as to provide ample lateral support for the walls of your home. 7. Use an excavator to fill in twelve inches of mixed materials on the sides of the area. After which, compress the soil and stone using the rolling compactor. You must repeat the same backfill procedure until the entire area is completely filled. 8. Filling should be done in layers, each layer being of 15cm to 20cm. 9. Each layer is watered and compacted with heavy rammers of wooden logs or steel. 10. Under no circumstances black cotton soil shall be used for filling in plinth and footing pits Factors affecting foundation backfilling 1. Choosing the right backfill materials 2. Compacting the backfill 3. Period of backfill
- 3. 2 Hardcore The term 'hardcore' refers to the mass of solid materials used as a makeup, formation material to raise levels, fill irregularities in excavations and create a firm and level working base onto which heavy load-bearing surfaces such as stone or concrete can be laid. The hardcore then helps evenly spread imposed loads. Hardcore may be used in the formation of roads, paving, driveways, foundations, ground floor slabs, and so on. It may also be used on its own to form a temporary road surface on construction sites. A variety of graded materials can be used to make up a hardcore layer: 1. Construction waste such as brick and broken tiles. 2. Gravel. 3. Quarry waste. 4. Crushed rock. 5. Clean, graded concrete rubble. 6. Blast furnace slag. 7. Colliery spoil. 8. Oil shale residue. 9. Pulverized-fuel ash. Materials need to be sufficiently hard as well as being capable of being compressed (rammed to form a compact base) before the upper layer is added. This removes gaps or voids which could otherwise threaten the supportive properties of the hardcore layer. They should also be resistant to deterioration, chemically inert, should not be absorbent and should not be affected by the presence of water (for example, colliery shale expands when moist). The type of construction, expected load and probable stresses will determine the appropriate thickness of the hardcore layer that must be used. Typically, it is laid in well-compacted layers of 100-150 mm.
- 4. 3 Soil treatment in construction Treating termites before construction starts can help you defend against possible claims in the future as they frequently dwell where there is a high concentration of moisture and dampness. In old houses, these are frequent problems because they tend to live in obstructed or blocked water supply and sewerage pipes. Several projects' construction specification require protection for termites in their finishing, and several others request a termite free environment. Pre-Construction Termite treatment in pre-construction stages includes several procedures that must be done to ensure an area of termite-free construction. Treating the soil before any slab placement with insecticides is the most common method of termite treatment. It will form a chemical barrier between the ground slab and masonry that will prevent the insects from approaching the building. The chemical treatment can be done as follows: 1. Treat the bottom and sides of an excavation with chemical products prior to the onset of foundation work. 2. Make holes in the earth and fill them with chemical products where slabs on grade will be built. 3. Use chemicals where walls and floors intersect. 4. Treat the perimeter of the construction by making holes filled with chemicals surrounding structure. 5. Fill an area with chemical products in pipe beddings to secure the future of the piping 6. Use specific anti-termite chemicals to treat the portion of the buildings were wooden products such as cabinets, doors, and others will be placed. Post-Construction We cannot always take measures during pre-construction, but there will be means to react and catch up with a different approach. Start with an assessment of the entire area. Determine the extent of the damage (if any), location of the termites, access points to the structure, and their spread in the area. The following tips should be kept in mind: 1. As in the pre-construction process, make holes and filled them with chemicals, to create a barrier around the house. 2. Treat the floors and walls by drilling holes and filling them with chemicals. All walls or the vast majority should be treated to ensure that no more spreading will continue. 3. Apply chemicals on all points of contacts of wood with the ground or with any part of the building. 4. Also, treat any voids in masonry with anti-termite treatment. 5. Change and replace wood products or furniture that have high impact and presence of termites, beyond any limit of reparation. Safety Measures When all measurements have been taken, perform these simple steps to ensure that your area keeps free of termites.
- 5. 4 Keep drains and gutters clean to avoid leakage. Make sure that there are no blocked lines, no filtration nor broken pipes with excess moisture around them. Eliminate all sources of moisture. Do not leave unattended areas where there is a high concentration of humidity. Clean those areas periodically. Apply chemicals as soon as you detect areas where termites are congregating. Remove wood products that have had the presence of moisture or have been in contact with water for a prolonged time. Eliminate wood contact with the ground Do not bury direct pieces of wood in the ground for any use. Fill junctions or voids. DPM (DAMP PROOF MEMBRANE) Is a membrane material applied to prevent moisture transmission. It can be placed above or below the concrete. Typically, a DPM polyethylene sheet laid under a concrete slab prevents the concrete from gaining moisture through capillary action. A membrane laid above the concrete may be either polyethylene sheet as described above (but without the bedding material) or three coats of cold applied bitumen solution or similar moisture and water vapour resisting material. Damp-proof membranes come in different forms. 1. (polyethylene) foils are most widely used 2. aluminium or aluminated paper are also often used for insulation materials - examples that come to mind include flensing decks and laminated insulation panels. 3. another solution is a bituminous course
- 6. 5 Damp in buildings can cause a number of serious problems, such as: (source: Design building wiki) 1) Damp patches. 2) Mould growth, which is a cause of respiratory allergies. 3) Mildew, salts, staining and ‘tide marks’. 4) Damage to surface finishes. 5) Corrosion and decay of the building fabric. 6) Slip hazards. 7) Frost damage. 8) Poor performance of insulation. 9) Damage to equipment, or electrical failure. BRC Wires Mesh Is a steel reinforcement material in concrete. Reinforcing Wire Mesh consisting of a series of high- strength wires welded together by special electrical resistance welding process to form a square or rectangular grids fabric. The preferred fabrics are categorized as follows: Type A Square fabric 200 mm x 200mm spacing Type B Rectangular fabric 100mm main wire spacing 200mm cross wire spacing Type C Rectangular fabric 100mm main wire spacing 400mm cross wire spacing Type D Square fabric 100mm x 100mm spacing. Conclusion In structures construction, soil treatment, foundation backfilling, the use of damp proof membrane and British reinforcement company (BRC) wire meshes are important basic components for establishing a structure, therefore the principles should be done based on the design of the respective structure so as to avoid side effects of poorly established structure.
- 7. 6 REFERENCES Anti-termite (Termite control) Pre-construction Treatment for a Building Project – Image ID: EXXKDX https://www.alamy.com/stock-photo-anti-termite-termite-control-pre-construction-treatment- for-a-building-85408566.html Construction and Civil engineering magazine. BRC- materials Design building wiki. Soil treatment article. Last edited 03 May 2018, accessed from https://www.designingbuildings.co.uk/wiki/Soil_treatment Design building wiki. Dampness problems. Last edited 12 June 2018, accessed from https://www.designingbuildings.co.uk/wiki/Damp_proof_membrane_DPM Grace Construction, Inc. Foundation backfilled with sand text. Accessed on 20/12/2018 from: http://www.graceconstructnc.com/foundation-backfilled-with-sand-text/ Labs, K., Carmody, J., Sterling, R., Shen, L., Huang, Y.J., Parker, D. 1988. Building Foundation Design Handbook, ORNL/Sub/ 86-72143/1, May, 1988. Michael. J. T. (June 1980). Foundation Design and Construction. Pitman Pub Ltd (June 1 1980). National Association of Home Builders (NAHB) 2006: Termite Protection for Exterior Insulated Foundation Systems Accessed on 5/11/2012 from: http://www.toolbase.org/ToolbaseResources/level3.aspx?BucketID=4&CategoryID=5