Creating animated GIFs
•
0 gostou•313 visualizações

There are millions of animated Gifs on the Internet. These are spread across dozens of open repositories. Even with this selection portraying the concepts or actions that your lesson demand is difficult to find. A solution to this is to generate your own animated Gif.

Recomendados
Mais conteúdo relacionado
Semelhante a Creating animated GIFs
Semelhante a Creating animated GIFs (20)
Mais de John Allan
Mais de John Allan (20)
Último
Último (20)
Creating animated GIFs
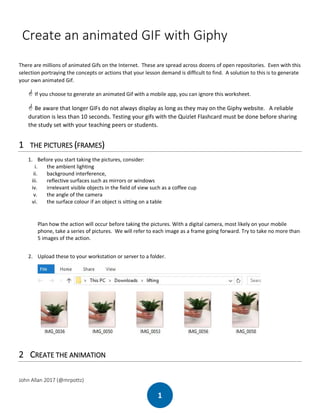
- 1. John Allan 2017 (@mrpottz) 1 Create an animated GIF with Giphy There are millions of animated Gifs on the Internet. These are spread across dozens of open repositories. Even with this selection portraying the concepts or actions that your lesson demand is difficult to find. A solution to this is to generate your own animated Gif. If you choose to generate an animated Gif with a mobile app, you can ignore this worksheet. Be aware that longer GIFs do not always display as long as they may on the Giphy website. A reliable duration is less than 10 seconds. Testing your gifs with the Quizlet Flashcard must be done before sharing the study set with your teaching peers or students. 1 THE PICTURES (FRAMES) 1. Before you start taking the pictures, consider: i. the ambient lighting ii. background interference, iii. reflective surfaces such as mirrors or windows iv. irrelevant visible objects in the field of view such as a coffee cup v. the angle of the camera vi. the surface colour if an object is sitting on a table Plan how the action will occur before taking the pictures. With a digital camera, most likely on your mobile phone, take a series of pictures. We will refer to each image as a frame going forward. Try to take no more than 5 images of the action. 2. Upload these to your workstation or server to a folder. 2 CREATE THE ANIMATION
- 2. John Allan 2017 (@mrpottz) 2 1. In a browser, open the site https://giphy.com 2. Click on the Create button 3. The GIF Maker screen appears. 4. In the folder, select the image files. 5. Drag these images onto the Choose photo or GIF area of the GIF Maker. 6. A message may appear noting that the animation is too long. 7. If so, drag the Slideshow Duration slider to reduce the length of the animation. 8. View the animation preview, if it is to your satisfaction, click on the Continue to Decorate button. 9. On the right there are several style options. Use these as you feel they improve your animation. 10. Adding a caption might be helpful for students.
- 3. John Allan 2017 (@mrpottz) 3 11. To add a caption, type the text in the Enter your caption textbox. (eg: lifting) 12. Drag the text on the Gif preview to position it. 13. Select colour combinations that make the text contrast with the background. 14. Once you have a suitable Gif, click on the Continue to Upload button. 15. The Add Info screen appears. 16. Type information into the text fields. 17. Click on the Upload to Giphy button. 18. Giphy renders the GIF. (a green line appears across the screen)
- 4. John Allan 2017 (@mrpottz) 4 19. To the right of the GIF, click on the link Download. 20. Choose the option Small 21. Save this file to your computer. (record the file’s location) 3 INSERTING AN ANIMATED GIF INTO QUIZLET 1. Open your Quizlet Study set as an instructor 2. Click on the Import button 3. Choose the Edit icon near the top of the screen. 4. The Study set editing screen appears 5. At the bottom, click on the link + Add Card 6. In the Term field, type a word 7. In the Definition field, type a definition
- 5. John Allan 2017 (@mrpottz) 5 8. In the Definition field, choose the image icon 9. Images appear below the term, choose Or upload your own image 10. Locate the downloaded file, click on it. 11. Click on the Open button 12. After you have added your new terms, click on the Done button 13. Scroll down the screen to check the new entries for spelling. 14. The Study Set has been updated