Six Myths about Ontologies: The Basics of Formal Ontology
Website annotations
1. Lydia Platts Task 6
Website annotations
1. Logo
I made my logo by both Microsoft Word and Fireworks, using Microsoft I
found the image of headphones. I then copied and pasted this image into
Fireworks; once I had the image into Fireworks I enlarged the image and
began to add text. I wanted the text on the logo to stand out from the rest
of the website so instead of having it century
gothic, which will be the general text font, I chose
white, size 66, freestyle text font. My reason for
choosing white as the text colour was so the text
stands out from the background colours, with the
logo being seen it means that people will be able
to recognise it when they next see it. The logo will be placed in the top left
hand corner of every page on the website.
2. Navigation Bar
The navigation bar was made using Fireworks. To create the bar I
used the rounded rectangle shape tool and made four identical
shapes and placed them next to each other. I then filled the
shapes in black, once I had done this I added text. Using the text
tool I added text onto every shape with the appropriate page
name, the text was white, size 70 and Freestyle text font. My reason for choosing black and white
for the colour scheme was because I wanted the navigation to be made clear to the viewer against
the background. The navigation bar will be positioned at the top of every page on the website.
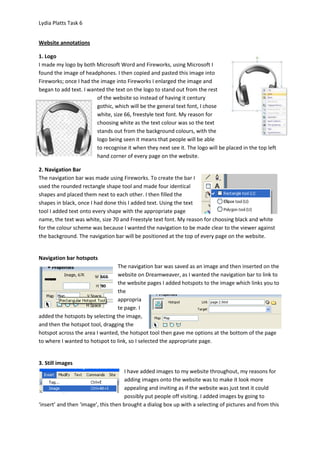
Navigation bar hotspots
The navigation bar was saved as an image and then inserted on the
website on Dreamweaver, as I wanted the navigation bar to link to
the website pages I added hotspots to the image which links you to
the
appropria
te page. I
added the hotspots by selecting the image,
and then the hotspot tool, dragging the
hotspot across the area I wanted, the hotspot tool then gave me options at the bottom of the page
to where I wanted to hotspot to link, so I selected the appropriate page.
3. Still images
I have added images to my website throughout, my reasons for
adding images onto the website was to make it look more
appealing and inviting as if the website was just text it could
possibly put people off visiting. I added images by going to
‘insert’ and then ‘image’, this then brought a dialog box up with a selecting of pictures and from this
2. Lydia Platts Task 6
selection I chose the appropriate picture and positioned it where I wanted it on the website.
4. Background
To add a background to my website I
right clicked the mouse, when I did
this a list of options came down, one
being ‘page properties’. When I
selected this, a dialog box appeared
with options for the page, it gave me
the option to have one consistent
colour for a back ground, or an image.
I decided in the planning that I wanted
my back ground to be an image, so I
browsed my pictures to find the one
that was appropriate. Once I found
the image I wanted I selected it and pressed ‘apply’ I then repeated this for every page on the
website so it has consistency.
5. Slide show
To create a slide show for
my website I went to
insert, media and then
image viewer. Once I did
this is brought up a blank
flash box on my website, I
selected the box and on the right hand side of Dreamweaver a menu
appeared, this menu gave me a number of options including which images I
wanted to include on the slideshow, slide show timing and if I wanted it on a
loop. I then set the option to what I thought was appropriate and suitable for
its purpose and then my slide show was ready for my website. The options I
chose were on a loop, no controls, a slide delay of 4, auto play and 3 images.
6. Roll over images
To make my roll over images I went to Insert, Image
objects and the Rollover Image, when I selected this, a
dialog box came up giving me the option to browse for the
two images I wanted to use for my rollover image. I
browsed through my pictures and found the ones I wanted
to use. I then pressed OK and the image was on my webpage, I then positioned it where I wanted
and my rollover image was complete and
working.
3. Lydia Platts Task 6
7. Videos
Before I could add
the videos onto my
webpage’s I had to
find the appropriate
videos on YouTube. I successfully found videos that related to the subject matter so once I found
them I began to add them to my webpage. To do this I copied the ‘embed’ code from YouTube, I
then went on the Dreamweaver, added layers and positioned them where I wanted my videos. After
I had my layers where I wanted I selected the ‘code’ option on Dreamweaver and pasted the code
from YouTube, this then added the video to my website. I repeated this process again for my next
video.
8. Webpage footer
To make webpage footer I added a layer and added images and
text. To add a layer I went to Insert, Layer Objects and the Layer, I
then placed the layer where I wanted the footer to go. Once I had
the layer where I wanted I went
to Insert and then Image, I
selected the images I wanted
and the inserted onto the layer, I
resized the images and then began to add text. The text I added was size ??? and font style ???.
9. Hyperlinks
I wanted to add
both internal and
external hyperlinks
to my website, to do this I wrote a word, phrase or sentence that would be appropriate and suitable
to add a hyperlink to. Once I had the text I wanted I began to add the hyperlinks, to add the
hyperlink I selected the whole phrase, word or sentence and went to the tool bar at the bottom of
Dreamweaver. Along the tool bar was the option ‘link’ and to add an internal link I pressed the folder
icon near the ‘link’ option, this brought up a dialog box which let me browse and chose a certain file
in my documents I wanted to link the text to. I selected the file I wanted and pressed okay, this then
added a link to the text. To add an external link I selected the text I wanted to link and then went to
the ‘Link’ option and typed the web address into the text field, I then pressed enter and the link was
added.
10. General Text
The font theme throughout the website,
apart from the logo and navigation bar, is
century gothic. Throughout the website
depending where the text is or what it is
saying the size and colour may be different,
for example on page two there is some red
text which is larger than the rest. The reason being for this text being red and large is that it is stating
something important. Therefore depending on what is being stated and where the text is the size
4. Lydia Platts Task 6
and colour may change. To edit the text size and font I highlighted the text and at the bottom of the
screen options were displayed.
11. Table
To insert a table I went to
‘Insert’ and then ‘Table’ this
brought up a dialog box which
had the options of how many
rows and columns I wanted,
when I changed the options to the appropriate numbers I
then selected ‘Ok’ and the table was on my website. Once
it was on my website I resized the table and edited it .
12. HTML button
13. Text box image
The text box image I made was an image with text on top of the image, to add the image I wanted to
add text onto I went to ‘Insert’ then ‘Image’ once I did that a dialog box appeared giving me the
option to browse my documents and find the image I wanted to use. I found the image and then
inserted it onto my website, I positioned it where I wanted and began to add text. To add the text
onto the image I went to ‘Insert’ ‘Layer Objects’ and then ‘Layer’, I placed the layer on top of the
image and began to add text, the text was size ??? and font style ???
14. Buttons
5. Lydia Platts Task 6
15. Drop down menu
To make the drop down options I went to ‘insert’ ‘form’ then
‘menu/list’. Once I had done this I had a blank list, to add the
answers I needed to add the answers so I went to ‘list values’ on
the bottom properties bar and a dialog box came up which gave
me the options to add answers that were appropriate to the
question once I added the selection of answers I selected ‘Ok’ and
then the drop down menu was complete.
16. Radio groups
As I wanted to include more than one set of radio buttons I had to
insert radio groups so that the buttons would work, otherwise
even though the buttons would be in different cells they would
still be seen as one group and only option as an answer would be
possible. To
make the
radio groups
so it was
possible for
multiple
questions
and
answers, I went to ‘Insert’ ‘Form’ and then
‘Radio groups’, this then brought up a dialog giving me the options of what text I wanted after each
button. The text after the button is size 14, white and Century Gothic and was appropriate to the
question.
17. Check boxes
To add a check box I went to ‘insert’ ‘form’ then ‘checkbox’. When
I did this a dialog box came up with the options of where I wanted
the text that went along with the answer to go, when I selected
one and pressed ok I then edited the text so that it was white, size
14 and century gothic.
18. Text area
To add a text area I went to ‘insert’ ‘form’ then ‘text area’ when I
6. Lydia Platts Task 6
did this is brought the text area up on my webpage for the user to give feedback.