SlideShare uma empresa Scribd logo
1 de 31
Baixar para ler offline
A Collection of
Bread Recipes
Favorite Chocolate Recipes
Includes a “Guide to Using Chocolate”
The Prepared Pantry
3847 East 38 North
Rigby, ID 83442
208-745-7892
www.preparedpantry.com
Chocolate
Favorite Chocolate Recipes
Includes a “Guide to Using Chocolate”
Table of Contents
How to Make Easy Sourdough Bread...................................................................3
How to Bake a Crusty Hearth Bread.....................................................................6
How to Bake Easy Focaccia ................................................................................7
How to Bake: Easy Challah (Braided Bread) ........................................................8
Making Great Hamburger (or Sandwich) Buns ...................................................10
Stuffed Bread: Homemade Hot Pockets .............................................................11
Stuffed Bread #2 Italian Filled Bread (with recipes) ............................................12
Stuffed Bread #3 Mushroom Cheddar Oat Bread (with recipes).........................14
Check out this Onion Cheese Bread...................................................................16
Southern Cornbread (Yeast)...............................................................................17
The Versatile Santa Fe Sopaipillas.....................................................................18
American Rye Bread Recipe...............................................................................19
Summer Zucchini and Carrot Bread....................................................................21
Pepper Cheddar Bread.......................................................................................22
European Soft Peasant Bread ............................................................................24
100% Whole Wheat Bread..................................................................................26
Dilly Cheese Bread .............................................................................................27
Golden California Raisin Bread...........................................................................29
October Pumpkin Bread Recipe .........................................................................30
The Prepared Pantry
3847 East 38 North
Rigby, ID 83442
208-745-7892
www.preparedpantry.com
Copyright 2005-2007, The Prepared Pantry. All rights reserved. The material herein is published by The Prepared Pantry
for the private use of individuals and may not be used for commercial purposes without the express consent of the
publisher. The information contained herein is believed accurate but the publisher makes no warranties, express or
implied, and the recipient is using this information at his or her own risk.
How to Make Easy Sourdough Bread
Sourdough simply uses wild yeast in
place of commercial yeast to leaven
the bread. It relies on the wild yeasts
that are in the air all around us and
cultures those yeasts in a warm, wet
environment created with water, flour,
and sometimes other components.
When creating a sourdough starter,
we always felt like we were on an
expedition trying to trap invisible
yeastie beasties with our flour and
water concoctions. Because we
couldn't see the beasties, we were never sure what we had captured. While
usually successful, we never felt like we were in control. Maybe that is the way
sourdough bread should feel, a symbiosis with nature.
But there is an easier way: use commercial yeast in the starter. I know, that's
heresy to the sourdough bread zealot but we only care about the bread. Using
commercial yeast is easier, it's the alcohol from the long cool fermentation that
creates the sourdough-like flavor, and the wild yeasts will eventually take over
the starter anyway. Because it's easy, it's no big deal if you abandon your
starter after a few weeks; you can readily start another when you're back in the
mood or have the time.
Using this recipe for sourdough bread, a small amount of yeast is used in the
starter. As the starter is used and refreshed with new feedings of flour and
water, wild yeasts are introduced and cultivated.
Here is the recipe:
For the starter:
1 cup warm water (about 110 degrees)
1/4 teaspoon yeast
1 cup high gluten unbleached flour.
Mix the starter in a glass or steel bowl, cover with plastic wrap, and set it aside at
room temperature until it is doubled and bubbly, maybe 4 to 6 hours.
For the sponge:
A sponge is a pre-ferment, a wet mixture of flour and yeast that acts as an
incubation chamber to grow yeast at the desired rate. It is added to the dough.
1 cup of the starter
3/4 cup warm water
2 cups flour
Mix the one cup starter with the flour and water, cover, and set aside to ferment
until it has tripled in volume. At room temperature, it will take four to eight hours.
You can put it in a cool place--about fifty degrees--and let it perk all night. (In the
winter, your garage may be just right.) You can also put it in the refrigerator
overnight. At temperatures of forty degrees, the yeast will be inactive but the
friendly bacteria will still be working and enhance the sour flavor of the bread. If
you retard the growth with lower temperatures (“retard” is the correct term for
slowing the growth of the yeast), simply bring the sponge to room temperature
and let it expand to three times its original volume before proceeding.
For the dough:
All of the sponge
11/2 cups flour (more or less)
2 teaspoons salt
Mix the salt with the flour. Knead the combination into the sponge by hand until
you have a smooth, elastic, slightly sticky dough, adding more flour as needed.
Put the dough in an oiled bowl and let it rise again until doubled, about an hour.
Bakers note: Notice that the salt is not added until the last stage. Salt in the
sponge would inhibit yeast growth.
Form the loaves:
Though you can make this bread in
pans, it works best as a large
freestanding round or oval loaf or two
smaller loaves. Place a clean cotton
cloth in a bowl or basket in which to
hold the loaf. Lightly dust the interior
of the bowl with flour. Place each
formed loaf upside down in a bowl on
top of the dusted flour. Cover the
loaves with plastic and let them rise
again until doubled. This rising will
probably take less than an hour.
Bakers note: You want a light dusting of flour on the cloth to be transferred to the
bread, not a heavy caking. Softly sifting flour from a strainer is the easiest way to
achieve an even coating. You can find a small strainer in our kitchen tool
section.
If you choose to bake the bread in pans, omit this step. Instead, let the dough
rise in a greased bowl covered with plastic until doubled. Form the loaves for
pans, place the loaves in greased pans, and let rise until well-expanded and
puffy. Bake at 350 degrees until done, about 30 minutes.
To bake crusty bread:
To form the thick, chewy crust that is typical of artisan breads, follow these
instructions: Place a large, shallow, metal pan in the oven on the lowest shelf.
You will pour hot water in this pan to create steam in the oven. (High heat is
hard on pans so don't use one of your better pans and don't use a glass or
ceramic pan which might shatter.) An old sheet pan is ideal. Fill a spray bottle
with water. You will use this to spray water into the oven to create even more
steam.
Preheat the oven to 425 degrees. When the oven is hot and the bread is fully
risen and is soft and puffy--being very careful not to burn yourself with the rising
steam and with a mitted hand—turn your head away and pour two or three cups
of very hot water in the pan in the oven. Quickly close the oven door to capture
the steam. With spray bottle in hand, open the door and quickly spray the oven
walls to create more steam and close the door. The oven is now ready for the
loaves.
Work quickly to get the bread in the oven before the steam subsides. Gently
invert the loaf or loaves onto a slightly greased non-insulated baking sheet on
which a little cornmeal has been dusted. With your sharpest knife, quickly make
two or three slashes 1/4-inch deep across the top of each loaf. This will vent the
steam in the bread and allow the bread to expand properly. Immediately, put the
bread in the steamy oven. After a few moments, open the door and spray the
walls again to recharge the steam. Do this twice more during the first fifteen
minutes of baking. This steamy environment will create the chewy crust prized in
artisan breads.
Let the bread bake at 425 degrees for fifteen minutes in the hot steamy oven
then reduce the temperature to 375 degrees and bake for a total of 35 to 40
minutes. Check on the bread ten minutes before the baking should be
complete. If the top is browning too quickly, tent the loaf with aluminum foil for
the remainder of the baking to keep it from burning. The bread is done when the
crust turns a dark golden brown and the internal temperature reaches 210
degrees. It is important that the bread is well-baked to drive moisture from the
loaf. If the bread is under baked, the excess moisture will migrate to the crust
and you will no longer have the dry chewy crust of a great artisan loaf.
This sourdough bread is to die for. The prolonged rising gives the yeast plenty of
time to convert the starch to sugars and the friendly bacteria a chance to impart
their nut-like flavors.
Storing your crusty bread:
Unused crusty bread should be stored in a paper bag at room temperature. If the
bread is stored in a plastic bag, the crust will become soft.
How to Bake a Crusty Hearth Bread
To elements create that thick crust
that we love on great European hearth
breads: Steam and a high
temperature. The steam creates a
thicker crust and the high temperature
drives the moisture from the loaf.
Place a large, shallow, metal pan in
the oven on the lowest shelf. You will
pour hot water in this pan to create
steam in the oven. High heat is hard
on pans so don't use one of your
better pans. An old sheet pan is
ideal. Fill a spray bottle with water. You will use this to spray water into the oven
to create more steam.
Preheat the oven to 450 degrees. When the oven is hot and the bread is fully
risen and is soft and puffy--being very careful not to burn yourself with the rising
steam and with a mitted hand--pour two cups of very hot water in the pan in the
oven. Quickly close the oven door to capture the steam. With spray bottle in
hand, open the door and quickly spray the oven walls and close the door.
Gently invert the loaf or loaves onto a slightly greased non-insulated baking
sheet on which a little cornmeal has been dusted. With your sharpest knife,
quickly make two or three slashes 1/4-inch deep across the top of each loaf.
This will vent the steam in the bread and allow the bread to expand properly.
Immediately put the bread in the steamy oven. After a few moments, open the
door and spray the walls again to recharge the steam. Do this twice more during
the first fifteen minutes of baking. This steamy environment will create the chewy
crust prized in artisan breads.
After the bread is in the oven, turn the temperature down to 400 degrees and set
the timer for about forty minutes. Check on the bread ten minutes before the
baking should be complete. If the top is browning too quickly, tent the loaf with
aluminum foil for the last while to keep it from burning. The bread is done when
the crust turns a dark golden brown and the internal temperature reaches 210
degrees. It is important that the bread is well-baked to drive moisture from the
loaf. If the bread is under baked, the excess moisture will migrate to the crust
and you will no longer have the dry chewy crust of a great artisan loaf.
How to Bake Easy Focaccia
This is just about as easy as it gets for
some really good homemade
focaccia. It doesn't take a lot of time
and it's a great project to tackle with
the kids.
Here's how:
We used our Buttermilk White Bread
Mix for bread machines but you can
use your favorite one-loaf mix or a
recipe. (If you are using a two-loaf
mix or recipe, make two breads--
maybe one a focaccia and the other a standard loaf.) You will also need two to
four tablespoons of olive oil, depending on your taste.
Mix the bread dough according to package directions or according to the recipe.
We used our bread machine for convenience but we could have made the dough
by hand or with our stand-type mixer. (If you use your bread machine, be sure to
set the machine to the “dough” setting.) Let the dough rise until doubled--for
most recipes, 45 to 60 minutes. If you use your bread machine on the dough
setting, it will rise in the machine.
Punch down the dough, shape it into a ball, and then cover it with plastic wrap.
Let it stand for 15 minutes. In the meantime, mix together the following
ingredients for a topping:
Ingredients
2-3 tablespoons parmesan cheese
1 tablespoon basil
1/2 teaspoon oregano flakes
1/8 teaspoon garlic powder
1/8 teaspoon salt
Set a rack in the middle of the oven and
preheat the oven to 375 degrees F.
Gently place the round dough on a
large greased baking sheet and press it
into an oval 9x15-inches. Make 1/2-
inch deep indentations in the dough
with your fingers one to two inches
apart.
Pour two to four tablespoons of olive oil
over the dough, letting it run down into
the indentations. Spoon the topping
mixture evenly over the dough. (Your prepared dough should look something
like the picture.)
Bake the bread for 20 to 25 minutes or until the top turns golden brown. Remove
the bread to a wire rack to cool for ten minutes before serving warm. Makes ten
to twelve servings.
Notes:
You can use this as a pizza crust or vary the toppings or spices to taste. Try
onions, mushrooms, or spinach. If you don't have olive oil, you can use melted
butter or a good quality vegetable oil.
Check out our other focaccia choices--Onion and Herb Focaccia for a very quick
focaccia, (you only let it rise once) or Rosemary Focaccia for a classic focaccia
with the traditional open crumb.
How to Bake: Easy Challah (Braided Bread)
While challah is a traditional bread
baked for the Jewish Sabbath, it has
become popular with everyone,
everywhere. It's attractive and has a
firm, egg-rich texture that works for
dinner, sandwiches, or French toast.
It is typically braided with three, four,
or six strands of dough. (The braided
strands are symbolic of love.)
Challah is really very easy to make,
especially from a mix. There is a
sense of satisfaction in working the
dough by hand and crafting such an attractive bread and it certainly will impress
guests.
For this bread, we used one of our traditional bread mixes though you can braid
nearly any bread—including your favorite recipe. The package directions called
for two cups of water. To make the dough egg-rich, we cracked two large eggs
into a measuring cup and added warm water--enough to total two cups. Whisk
the water and eggs together with a fork then heat it in the microwave until warm
(110 degrees).
Mix the bread according to package instructions using the egg and water
mixture. Place the bread dough in a greased bowl, cover, and let rise until
doubled—about 1 1/2 hours.
Prepare a large baking sheet by greasing and sprinkling with cornmeal. Use a
lighter colored sheet to help keep the bottom from burning.
Once raised, use a knife to divide the
dough into three equal pieces (or four
if you choose to make a four-braid
bread). Roll the pieces under the
palms of your hands into three long
ropes as shown. You may need to let
each rest for five to ten minutes to
allow the dough to relax to get the
proper shape. Using this mix, you
should have three ropes nearly 24-
inches long. If you want the loaf to be
larger in the center and less
rectangular shaped, make the ropes
thicker in the middle and tapered toward the ends.
Braid the three ropes as shown in a
common three strand braid just as if
you were braiding pigtails. (Some
people find it easier to create a
symmetrical shape if they start
braiding from the center.) When you
get to the ends, wet them, pinch them
together, and tuck them under. You
should have a neat, symmetrical loaf
when you are through. You can
shape the loaf somewhat with your
hands. If you don't like how the loaf
looks, simply pull the braids apart and
start again.
Place the finished loaf on the prepared sheet. (The formed loaf will be about 12-
inches long but after rising and baking, you will have a finished loaf of about 24-
inches so be sure to allow room on your sheet for expansion.) Cover the loaf
and let rise until doubled, about one hour.
Preheat the oven to 350 degrees.
Prepare a glaze by whisking one egg with one-half tablespoon of water. Just
before baking and when the loaf has fully doubled, remove the plastic wrap and
gently brush glaze over the entire surface of the loaf. Sprinkle the top with poppy
seeds or sesame seeds as desired. (Tip the loaf so that you can sprinkle seeds
on the sides as well.)
Bake the bread for 20 minutes then cover the bread with a large sheet of
aluminum foil to protect the top. Continue baking for another 20 to 30 minutes or
until the bread crust is a deep golden brown. The interior of the loaf should
register 190 degrees with an insta-read thermometer.
Use an egg turner to loosen the bread from the pan and transfer the loaf to a wire
rack to cool.
Note: If you choose to bake two loaves, reduce the baking time by five to ten
minutes.
Making Great Hamburger (or Sandwich) Buns
We've said it before, “Buns make the
burger” and nothing makes a better
burger than homemade buns. In fact,
once you've had a burger on a fresh
homemade bun, burgers will never be
the same.
You can use your favorite bread mix
(or bread recipe) to make some terrific
hamburger or sandwich buns. A two-
loaf mix will make about eighteen
large hamburger buns and a single-
loaf mix or bread machine mix will
make eight or ten.
Mix the dough according to the package or recipe directions and then remove the
dough to a greased bowl and cover it with plastic. Let it rise until it is doubled and
very puffy--an hour or more.
Grease two large baking sheets (for a two loaf mix) or cover them with
parchment paper. Once the dough has risen, deflate it and divide the dough into
eighteen equal pieces with a sharp knife (or scale the pieces at 3 ounces each
on your kitchen scales). Form smooth round balls by pulling the dough around
the center and pinching the seams together on the bottom of the roll. Place them
on the greased sheet allowing room for them to expand. (You can place a dozen
of them on a 12-inch by 18-inch baking sheet---three rows of four buns each.)
On the baking sheet, gently press the balls into flat discs with your hand. The
dough will tend to spring back. Allow the dough to relax a few minutes and then
press again. You may need to repeat the process again until you have discs that
are 3 1/2 to 4 inches in diameter and 1/2 to 3/4-inches thick.
Lightly dust the tops with flour (we use a screen or strainer to distribute the flour).
Cover the rolls lightly with plastic and allow them to rise again until doubled and
puffy--about an hour. Let them rise completely for soft, light buns.
Preheat the oven to 375 degrees. Bake the rolls for 15 minutes or until the tops
are a rich golden brown. If you are baking both sheets at once, switch the top
sheet with the bottom sheet half way through the baking so that the buns will
bake evenly. Immediately remove the rolls to a wire rack to cool.
Stuffed Bread: Homemade Hot Pockets
Years ago, we discovered that
stuffed bread was a real treat. At
first, we stuffed them with meat and
cheese concoctions but later, we
tried everything from chocolate chips
(chocolate chips, sour cream, and
sugar) to sun-dried tomatoes (sun-
dried tomatoes, olives or onions, and
basil). Today, we'll show how to stuff
that bread, to make hot pockets.
Homemade Hot Pockets are simple
to make and simple in concept. You
put the sandwich fixings into the bun before you bake it. On the left, is a bun with
a brat, cheddar cheese, and mustard. On the right, is a ham and cheese pocket.
Here's how to make them.
Directions
1. Mix the bread according to package instructions. We used an Idaho
Potato White Mix for bread machines but any mix or recipe will do. If you
are using your bread machine, set the machine for “dough” so that it will
rise but not bake.
2. After the dough has risen, divide it into bun-sized pieces—eight pieces for
a bread machine mix or sixteen for a double loaf mix is about right.
3. Roll each piece flat with a rolling pin. Place the meat, cheese, and
condiments in the center of the bread pieces. Pull the dough around the
filling, pinching the seams closed. The dough will tend to pull apart on the
seams as it rises again so pinch the seams tightly together making sure
that they are bound and sealed well. Place the buns seam side down on a
greased baking sheet. Let the dough rise until puffy and doubled. It will
take longer to rise than dough alone because of the cool filling in the
dough.
4. Bake for eighteen minutes or until the bread is done. Serve hot.
Refrigerate leftovers.
These are great for picnics and box lunches. Because they have fillings that may
spoil, protect them as you would any other meat or cheese sandwich.
These are also great to bake on the grill. To see how, click here.
Stuffed Bread #2 Italian Filled Bread (with recipes)
Think pizza in a loaf. You can stuff
this attractive braided bread with
almost anything that you would put
on a pizza. We'll show you how to
make one of our favorites but make
whatever suits your fancy.
Stuffed Tuscany Tomato Basil
Bread (for two loaves)
The convenient way to make this
bread is with our Tuscany Tomato
Basil Bread Mix, but you can use
your favorite plain white bread recipe. If you are making this bread from a recipe,
use a two loaf recipe and mix according to directions. Add two tablespoon dried
crushed basil during the mixing. (If you are making this from our mix, follow the
directions but set the dried tomatoes aside and use slightly less than the two
cups of water called for. The dried tomatoes soak up some water so using less
than the directions call for is appropriate.) Place the bread dough in an oiled
bowl, turn once, and cover to let rise until doubled.
Use the following recipe for the filling. Stuffed bread recipes lend themselves to
customization so add or substitute ingredients according to your taste.
Ingredients
1 cup sliced sun dried tomatoes (one
packet if you are using our mix)
1 six ounce can of pitted black olives,
drained and chopped or 1/2 pound
Italian sausage, sautéed
1/2 medium sized onion, diced or 1/2
red or green bell pepper, diced
1/2 tablespoon crushed oregano,
Italian seasonings, or other
seasonings of choice
1/4 teaspoon pepper
2 cups grated mozzarella cheese
2 tablespoons grated cheese for topping
Directions
Grease a baking sheet and sprinkle it with cornmeal or semolina flour.
1. Place the dried tomatoes in a
bowl with barely enough water
to cover. Cover with plastic
and microwave for one minute
on high heat. Let the tomatoes
steep in the hot water for
several minutes. Drain the
tomatoes and pat dry with a
paper towel.
2. Mix all the filling ingredients
together in a large bowl.
3. Once the dough has risen,
divide it into two equal parts for two loaves. Roll one part into a rectangle
about 12 inches by 15 inches. Slice the dough into one inch wide fringed
ribbons as shown in the picture leaving the center one-third unsliced.
Make sure there is an equal number of slices on each side. Place half the
filling on the dough center. Fold up the bottom edge one inch and then
beginning folding the ribbons over the filling, lapping them alternately as
shown. When you near the top, fold the top one inch down along with two
of the ribbon pieces. Finish folding over the ribbon pieces. Cup the ends
of the loaf in your palms and compress the loaf into an oblong, well-
shaped loaf. Put the loaf on the prepared pan, and cover with plastic
wrap. Repeat with the other loaf. Let the loaves rise until doubled, about
an hour in a warm kitchen.
4. Preheat the oven to 350
degrees.
5. Whisk one egg with one
tablespoon water. Just before
baking, brush the top of the
loaves with the egg wash.
6. Bake for thirty minutes or until
done. As soon as you remove
the bread from the oven, sprinkle
the tops with the remaining
grated cheese so that it will
partially melt on the loaves. If
need be, return the loaves to the oven for a minute. Cool the bread on
wire racks.
Serve hot. Refrigerate any leftovers. This bread can also be frozen.
Stuffed Bread #3 Mushroom Cheddar Oat Bread
(with recipes)
The third way to make stuffed bread
is jelly-roll fashion. We are most
familiar with this as cinnamon raisin
bread but you can use any filling—
sweet or savory—that pleases you.
We'll show you how by making
Mushroom Cheddar Oat Bread.
For this bread, we used our Old-
Fashioned Oat Bread Mix which
makes two loaves. If you prefer to
use your bread machine or only
make one loaf, try Country Farm Oat
Bread. Of course, you can always
retrieve your favorite bread recipe from the cookbook. We like the chewy
goodness of oats with this combination.
Mix the bread according to directions. Let it rise, covered, in a bowl. Roll the
dough, one loaf at a time, on clean counter until the dough is 1/4-inch thick and in
the shape of a rough rectangle. Spread melted butter, mayonnaise, or mustard
on the dough, cover with filling, and
roll into a tight cylinder. (See below
for the recipe for this filling.) Pinch the
seams together. Place the dough in a
greased loaf pan with the seam down.
There's a trick to making these breads
turn out right. The heavier the fillings,
the more likely it is that the layers will
pull apart as they rise leaving a void
between the layers caused by
trapped gases from the yeast. We
reduce those voids by creating vents
for the gas to escape. It won't eliminate them but it helps.
Once the loaf is in the pan, before the bread begins its second rising, take a
sharp knife and slice the tops lengthwise, one slice at ten o'clock and another at
two o'clock. The cuts should pierce
the first layer of dough so that gas
trapped between these layers can
escape. (See the picture.) Cover the
loaves and let them rise until
doubled.
Bake at 350 degrees for 25 minutes or
until done.
Mushroom Cheddar Filling
Prepared mustard to spread on the
dough according to taste
2 cups grated cheddar cheese
8 ounces mushroom pieces, coarsely chopped
1/4 teaspoon pepper
After the bread is rolled into a 1/4-inch thick rectangle, spread the mustard on the
surface of the dough. Mix the remaining ingredients and spread them on the
dough.
Check out this Onion Cheese Bread
Onions and cheese make a wonderful
combination—but in a bread?
Absolutely.
If you put the cheese in the dough, it’s
tough to get enough cheese for a
sharp flavor without overloading the
dough. If you make a rolled loaf, like a
cinnamon raisin loaf, you can use as
much cheese as you like.
It is not difficult to make. If you would
like to make it even easier, make it
with a mix.
This is great bread. You can use a mix as we have or your favorite recipe. Use
either a two-loaf recipe or one of our traditional bread mixes. Old Fashioned
Honey Wheat, White, or Oat works well. For the batch in this picture, we used
Old-Fashioned Honey Wheat.
You can also use your bread machine to make this bread. Mix the bread
according to directions but on the dough-only setting. Remove the dough, follow
directions for the cheese and onion bread, and bake in the oven. Since the recipe
below is for two loaves, reduce the ingredients by one half when making one loaf.
Ingredients
A two-loaf recipe for bread or a two-loaf mix.
2 medium onions, diced
1 clove garlic, minced
1 teaspoon dried basil
1/2 teaspoon crushed oregano
1/2 teaspoon thyme
1/4 teaspoon paprika
fresh ground pepper
2 cups grated cheddar or mozzarella cheese
1/2 cup grated cheddar cheese (for the top)
Directions
Prepare two bread pans, 8 1/2 x 4 1/2 inches, by greasing well.
1. Mix the bread according to the package instructions. Remove the dough to
an oiled bowl, cover, and let rise until doubled—an hour or more.
2. While the dough is rising, sauté the onions and garlic until the onions are
translucent and tender. Remove the onions to a bowl and add the
seasonings. Add the two cups cheese.
3. Divide the dough in two. Roll out each piece to a rectangle ten inches by
fifteen inches. Spread the filling over the dough. Roll the dough tightly in
the long direction jelly-roll fashion to form loaves. Place the loaves in the
prepared bread pans. Slash the tops with a sharp knife lengthwise to a
depth of 1/4 inch at the ten o’clock position and the two o’clock position.
Sprinkle the tops with flour, cover, and set aside to rise until doubled— an
hour or more. Let it rise completely before baking. The dough should
extend well above the pans and be soft and puffy to the touch.
4. Preheat the oven to 375 degrees. Bake for 40 to 45 minutes or until
golden brown. The interior of the loaf should be 195 to 200 degrees. Place
the pans on a cookie sheet, sprinkle the remaining 1/2 cup grated cheese
across the tops of the loaves, and return them to the oven for another
three minutes. Remove the bread when the cheese is thoroughly melted
but before it burns.
Baker’s note: Bread rolled in jelly-roll fashion tends to separate and leave a void
between the layers. It’s still great bread with filling caked in the voids. The slices
down the tops of the loaves reduce the voids somewhat.
Because this bread is filled with moist onions it will not last long without
refrigeration. Eat it shortly after baking and refrigerate any remainders.
Southern Cornbread (Yeast)
A yeasted cornbread is different—
almost like anadama bread. Because
the kneading develops the gluten, it is
more bread-like and less crumbly than
traditional cornbread. Oh, and this
bread would make great Thanksgiving
dressing.
Ingredients
1 (7 gram) package active dry yeast
1 cups warm water (100 to 110
degrees)
4 1/3 cups all-purpose or bread flour (more or less)
1 teaspoon salt
1 2/3 cup cornmeal
4 tablespoons melted butter
1/4 cup honey
2 large eggs
1 can whole kernel corn, drained
2 tablespoons cornmeal
1 egg for egg wash (optional)
Directions
1. In the bowl of a stand-type mixer, dissolve the yeast in the warm water.
2. Add half of the flour and mix with a dough hook. Add the salt, cornmeal,
butter, honey, two eggs, and drained corn and continue mixing.
3. While continuing to mix, add the flour needed to bring the dough to a
bread-dough type consistency. The amount of flour needed will vary
largely on how well drained the corn was.
4. Knead as you would for other yeast breads and then remove the dough to
a greased bowl. Turn once to oil both sides. Cover with plastic wrap and
let rise until doubled.
5. Once doubled, divide the dough into two equal parts for two loaves. Form
the loaves. If you are going to make free standing artisan loaves, grease
a baking sheet and sprinkle the sheet with part of the remaining
cornmeal. Place the loaves on the sheet. If you are making sandwich
loaves, grease the baking pans well—the bread tends to stick to the pans-
-and sprinkle cornmeal in the pans. Let the bread rise until doubled again.
6. Preheat the oven to 375 degrees. If you choose, just before baking, whisk
the remaining egg with one tablespoon water and brush the egg wash on
the loaf. Sprinkle the loaf with cornmeal. Bake the bread for about 30
minutes or until the bread is golden brown and tests done. Remove the
bread from the pans and cool on racks. Freeze any extra bread or save
the bread for croutons.
The Versatile Santa Fe Sopaipillas
We like the versatility of sopaipillas. They are great at home as an
accompaniment for meals, a vehicle for our favorite Mexican foods, or dipped in
cinnamon and sugar and served as a snack for the kids. But they also work as
camping food. They can be made ahead of time as a mix and they work as
great, fresh bread on a backpacking trip. And keep them in mind for emergency
bread—they can be cooked over any heat when the power goes out. Best of all,
they are quick and easy.
(We're always interested in bread that can be cooked in the event of emergency.
See an earlier article titled, "Emergency Bread".)
Ingredients
2 1/4 cups all purpose flour
1 teaspoon baking powder
1/2 teaspoon salt
1/4 teaspoon cream of tartar
1 tablespoon sugar
1/3 cup dry milk
3 tablespoons shortening
3/4 cup cool water
Optional cinnamon-sugar coating:
1/3 cup sugar
1 tablespoon cinnamon
Directions
1. Mix together the dry ingredients. Cut in the shortening. At this point, you
have a mix. Store the mix for no longer than thirty days in the pantry, six
months in the refrigerator, or two years in the freezer.
2. To make the mix, place the ingredients in a medium bowl. Form a
depression in the middle and pour in the water.
3. Cut the water into the mix. The dough will be crumbly and dry. Remove
to a clean surface and knead for two minutes. You will have a stiff dough.
4. Form the dough into balls the size of golf balls. Smash the balls flat with
the heel of your hand until they are no more than 1/4-inch thick.
5. Heat cooking oil in a heavy fry pan or Dutch oven. The oil should be 3/8-
inch deep and hot enough that there is a slight sizzle when the dough is
placed in the oil.
6. Fry each side until brown. Dip in cinnamon and sugar if desired.
This recipe will make about a dozen three-inch sopaipillas.
American Rye Bread Recipe
This rye bread recipe uses white rye
flour for a light bread that is great with
meals or sandwiches. For a more
traditional rye bread, add caraway
seeds and substitute dark rye flour for
the white rye. But we think you’ll fall in
love with the great light taste of white
rye.
Ingredients
2 tablespoons butter, melted
2 cups white rye flour
3 cups high protein bread flour
2 tablespoons wheat gluten
1 seven gram packet instant yeast
2 cups water at 105 degrees
1 1/2 teaspoons salt
1/2 tablespoon caraway seeds (optional)
1 tablespoon molasses or molasses crystals
2 tablespoons melted butter
Note: In place of the flours and gluten, you can substitute our Hi-Country Rye
Flour Blend. If you use this flour blend, your dough will include a dough
conditioner that will strengthen the gluten structure and enhance yeast growth.
Directions
1. Melt the butter in the microwave and set it aside to cool. With shortening
or butter, grease a large bowl for the dough and 2 large loaf pans (8½ x
4½). If you are going to make hearth loaves, grease a baking sheet and
sprinkle it with cornmeal.
2. Measure the flours into a large bowl by whisking the flour so that it not
packed and then spooning it into the measure followed by leveling the top
with a straightedge. Add the gluten and stir to combine.
3. Put about 1/3 of the flour in the bowl of your stand type mixer equipped
with a dough hook. Add the yeast. Add the water at the indicated
temperature. With the dough hook, run the machine for thirty seconds to
mix the water with the flour to create a slurry. Add the rest of the flour. Add
the salt, the optional caraway seeds, the molasses, and the melted butter.
Mix at medium speed for about three minutes or until the gluten has
formed and the dough is elastic. The dough should be soft but not too
sticky. To reach the right consistency, you may need to dribble a little
extra water (maybe one tablespoon) or flour as the dough is kneading.
Place the dough in the prepared bowl and cover it to keep the dough from
drying while it rises. Let it rise until it doubles.
4. Gently deflate the dough and form two loaves either as free-standing
loaves on a baking sheet or sandwich loaves for your bread pans. Cover
the loaves and let them rise again until the dough is soft and puffy, about
doubled in size.
5. If you are going to make hearth bread with its, chewy, crisp crust, see the
direction for baking listed for “EZ Sourdough Bread.” If not, preheat the
oven to 350 degrees. Bake the bread for about 35 minutes. The time will
vary depending on your loaves, the pans, and your oven. The bread
should make a hollow sound when thumped on the bottom. The internal
temperature of the loaves should be 190 degrees.
6. Remove the loaves form the pans and let them cool on a wire rack. Cool
completely, or nearly so, before slicing.
For helpful suggestions for making your bread turn out perfect, see
“Troubleshooting Notes on Making Breads,” especially the notes for rye breads.
Summer Zucchini and Carrot Bread
In some parts of the country, the
first fresh vegetables of the
summer are on. You’ll find that you
can use many of the vegetables
from the garden in your baking—
adding color, flavor, and nutrition to
your baking.
Here is a wonderful bread recipe
for all that zucchini squash that
seems to overwhelm us each
summer. Some fresh carrots are
added for color and nutrition.
Unlike the quick bread recipes for
zucchini squash, this is a yeasted recipe.
This is not a sweet bread recipe and so it makes wonderful sandwiches and
toast. We like it with peach and apricot jam.
Summer Zucchini and Carrot Bread Recipe
Any time that you add vegetables to your bread, be prepared to adjust the
amount of flour that you use. Vegetables will add moisture to your bread and how
they are grated or pureed along with the type of vegetables, will determine the
moisture added. But it’s easy to add a little more flour; a little more difficult to
dribble in a bit of water. Because it is easier to add flour than water, start your
dough a bit on the wet side and add flour as needed.
Because zucchini has such a high moisture content, salt is used to draw some of
the moisture from the squash.
Ingredients
3 cups coarsely grated zucchini squash
1 tablespoon salt
2 cups coarsely grated carrots
3 1/2 cups white bread flour
3 tablespoons granulated sugar
1 seven-gram packet of instant yeast
1 1/4 cup warm water, 110 degrees
2 cups fine ground whole wheat flour
1/2 tablespoon salt
2 tablespoons melted butter
1 teaspoon cinnamon
Directions
1. Grate the zucchini. Place the zucchini in colander over the sink and stir in the
salt. The salt will draw water from the zucchini. Grate the carrots and set them
aside.
2. Place the white bread flour, sugar, and yeast in the bowl of your stand-type
mixer. Add the warm water and beat with a dough hook until it is partially mixes.
The purpose of this mix is to hydrate the yeast.
3. Squeeze the water from the zucchini. Add the vegetables to the mixer bowl
along with the whole wheat flour, the rest of the salt, the butter, and the
cinnamon. Knead with the dough hook at medium speed for four minutes. You
will likely need to adjust the moisture level either by adding flour or water. Start
out a little on the dry side as the kneading tends to wring water from the zucchini.
Set the dough in a greased bowl, turn once, and cover. Set the bowl in a warm
place and allow it to double in size.
4. Grease two large loaf pans. Form two loaves, cover them, and let them rise
until doubled and puffy.
5. Bake at 375 degrees for 25 minutes or until done. The internal temperature
should be at 190 to 200 degrees. If this bread is under baked, with all the
vegetables, it will tend to be soggy. Remove and let the bread cool on a wire
rack.
Pepper Cheddar Bread
We know of three ways to add fresh
veggies to bread: stuff the bread hot-
pocket fashion, add bits of chopped
veggies to the dough, or puree the
vegetables and add the puree to the
dough. In this recipe, bits of green or
red peppers are laced through a
cheddar bread. It makes for an
attractive, unusual bread.
Consider this a type of bread. We’ve
made this bread with bacon bits
instead of green peppers. We’ve also used sautéed onions instead of peppers.
Don’t hesitate to experiment.
This is a great cheddar bread. The addition of bell peppers is an extra. There is
just so much cheese that you can add to a bread before it is weighed down and
the rise becomes very slow. Get the most pronounced flavor from your cheese by
using a sharp cheddar. A slow rise will only enhance flavors, so be patient.
You may need to adjust the moisture used in this bread. It’s easy to add a little
more flour; a little more difficult to dribble in a bit of water. Because it is easier to
add flour than water, start your dough a bit on the wet side and add flour as
needed.
Ingredients
1 bell pepper, either red or green
5-6 cups white bread flour
3 tablespoons granulated sugar
1 seven-gram packet of instant yeast
1 3/4 cups warm water, 110 degrees
2 1/2 cups grated sharp cheddar cheese
2 tablespoons melted butter
1/4 teaspoon white pepper
1/2 tablespoon salt
Directions
1. Dice the bell peppers. Spread the pepper pieces on a paper towel on a
plate and cook them in the microwave until tender. Set them aside to cool.
2. Place about two cups of the bread flour, sugar, and yeast in the bowl of
your stand-type mixer. Add the warm water and beat with a dough hook
until it is partially mixed. The purpose of this mixing is to hydrate the yeast.
3. Add most of the remaining flour to the bowl. Add the cheese, melted
butter, white pepper, and salt. Knead with the dough hook at medium
speed for four minutes. Add the vegetables and knead them in. Since the
vegetables are moist, you will likely need to add flour to reach the right
consistency. Set the dough in a greased bowl, turn once, and cover. Set
the bowl in a warm place and allow it to double in size.
4. Grease two large loaf pans. Form two loaves, cover them, and let them
rise until doubled and puffy.
5. Bake at 375 degrees for 25 minutes or until done. The internal
temperature should be 190 to 200 degrees. Remove the bread from the
pans and let the bread cool on a wire rack.
Baker’s Note: A soft dough rises more quickly than does a firm dough. Since
this recipe calls for so much cheese, make the dough a little softer than normal
with just a bit more water.
European Soft Peasant Bread
Peasant bread is a wonderful lean
bread from Europe made with a
combination of whole grain flours.
This variation gives you a chance to
explore whole wheat flour, graham
flour, and dark rye flour. In
combination, they make a great
hearty bread.
This recipe calls for baking the bread
in nine-inch pie pans. The pans help
hold the loaves in shape resulting in
taller loaves than if baked on flat
sheets. This is a whole grain recipe but by soaking some of the flour overnight,
the bran is softened and absorbs moisture resulting in a softer bread than many
peasant breads. The recipe makes two large loaves.
Baker’s notes: This recipe calls for a soft crust. This bread can properly be
made as an artisan bread with a hard, chewy crust. To do so, follow the baking
directions for Easy Sourdough Bread.
This bread can also be made in loaf pans for sandwich breads. Form the loaves
and bake the bread at 350 degrees for about 25 minutes or until done.
If you would like to make similar loaves from a mix, you can do so with our Irish
Potato Wheat Bread mixes. The Irish Potato Wheat Bread has some white bread
flour to temper the whole wheat and give it more structure and is a richer bread
with an ample addition of buttermilk.
Ingredients
1 cup whole wheat flour
1 1/2 cup dark rye flour
2 1/3 cups water at room temperature
1 seven gram packet of instant yeast (or two teaspoons)
2 cups graham flour
1/2 tablespoon salt
1/4 cup brown sugar
4 tablespoons melted and slightly cooled butter
2 cups more or less whole wheat flour
extra graham flour for dusting
Directions
1. The night before, mix the one cup of whole wheat flour, the rye flour, and
the water together until combined. Cover and let sit at room temperature
until the next day.
2. The next day, move the flour and water mixture to the bowl of your stand-
type mixer. Add the yeast and combine using the dough hook. Add the
graham flour, salt, and sugar. Add the butter on top of the dry ingredients
and then begin mixing with your dough hook attachment. Add portions of
the two cups whole wheat flour until the dough forms a ball. Continue
kneading with the machine, adding more flour as needed to get the right
consistency. The dough should be soft when you poke it with your finger.
The dough ball should knead for about five minutes at medium speed or
until the wheat gluten is well-developed. Remove the dough to a greased
bowl, turn once, and cover with plastic wrap. Let rise until doubled.
3. Grease two nine-inch pie pans with shortening and sprinkle them with
cornmeal, graham flour, or semolina flour. Set aside. After the dough has
risen, divide it in two with a knife. Form a ball by pulling the dough around
the center and tucking the seams together on the bottom thus gently
stretching the surface of the dough. Pinch the seams together to keep
them from opening as the loaf expands. Place the seam side down on the
prepared pie pan and repeat with the second loaf. Cover lightly with
greased plastic wrap and set aside to rise until doubled. Because these
are whole grain loaves with rye flour, it may take longer for them to rise,
maybe two hours. Let them rise until they are soft and puffy. While the
bread is still rising, preheat the oven to 350 degrees.
4. When the bread has risen, lightly dust the tops of the loaves with graham
flour. When the bread has risen and just before placing the loaves in the
oven, take a very sharp knife or razor and score the tops by making
several quick slashes at a 45 degree angle and not more than 1/4-inch
deep. The slashes can be made in a cross or square pattern as shown.
(Slashes allow steam to escape without splitting the loaves.) Immediately
place the loaves on the center rack of the oven leaving as much room for
the air to circulate around the loaves as possible. Bake for 40 minutes or
until the bread is done and well browned. If you are using an insta-read
thermometer, the bread should register 195 to 200 degrees when done.
Remove the loaves from the pans to cool on wire racks. Let the bread cool
before slicing.
100% Whole Wheat Bread
The key to really great 100% whole
wheat bread is to extract the best
flavors from the whole wheat and
temper the harsh tones that
sometimes accompany whole wheat
flour. Good whole wheat bread has an
almost nutty taste without a bitter
aftertaste. A long fermentation gives
the yeast a chance to produce its own
flavors and convert the starch to
sugar. By refrigerating the dough
overnight, you can make excellent
100% whole wheat bread.
This is one of our favorite bread recipes. Yeasts perform differently at low
temperatures. In this recipe, the dough is mixed the day before and refrigerated.
The acids and enzymes produced by the yeast at lower temperatures temper the
harshness of the whole wheat and develop wonderfully complex bread flavors.
It’s no more work than other recipes; you just mix the dough the day before.
Bakers note: This bread should be very light and fluffy, not dense. The secret of
making it so is to make sure that the dough rises fully both in the first rise and in
the pans. The dough will fill two 5 x 9-inch loaf pans and should be very soft and
puffy before baking. If you let it over-rise, you may see a blister or two in the
dough. Poke the blisters with the point of a knife and hurry the bread into the hot
oven.
Ingredients
5 to 6 cups fine-ground whole wheat flour
2 tablespoons wheat gluten (optional)
1 teaspoon dough conditioner
1 seven gram packet of instant yeast (or two teaspoons)
2 cups plus 2 tablespoons water
1/2 tablespoon salt
1/3 cup brown sugar
4 tablespoons melted and slightly cooled butter
Directions
1. Place about three cups of the flour in the bowl of your stand-type mixer.
Add the yeast. Carefully measure 2 cups room temperature (80 degrees)
water. The water should feel cool to the touch. Mix the water with the flour
with a dough hook for 30 seconds or until the yeast is dissolved and the
ingredients begin to combine.
2. Add the salt, sugar, and butter and continue mixing. Add most of the
remaining flour, the wheat gluten, and dough conditioner and continue
mixing at a medium speed for at least four minutes adding more flour as
needed to reach a soft dough consistency. (It is important that the dough
be mixed for at least four minutes to develop the gluten.) The dough
should clear the sides of the bowl but will be soft, not firm, to the touch.
3. Once the dough is mixed, place it in a large greased bowl, turning once to
coat both sides, and cover with plastic wrap. Refrigerate overnight or for
up to three days.
4. On the day that you would like to bake your bread, remove the dough from
the refrigerator and let it warm to room temperature--about three hours.
The dough should rise to nearly double in size.
5. Once the dough has risen, form the loaves. Coat your hands with flour and
gently form a loaf by pulling the dough around itself to create a slightly
stretched skin. You may need to coat your hands several times if the
dough is sticky. If necessary, pinch the seams together on the bottom of
the loaf. Lay the loaf gently in a well-greased loaf pan and cover with
plastic wrap. Repeat with the second loaf. Let double again in size, about
11/2 hours.
6. Preheat the oven to 350 degrees. Once the dough has doubled (the loaf
should be very puffy), place the two loaves on a shelf in the top half of the
oven, well-spaced so that air can circulate between the loaves. Bake for
thirty minutes or until done. The interior of the loaves should register at
least 185 degrees when an insta-read thermometer is inserted through the
bottom crust. Remove the bread from the pans and cool on wire racks. Let
it cool completely before cutting.
Dilly Cheese Bread
This is a great cheddar bread. This recipe
includes sharp cheddar and parmesan.
There is a limit to how much cheese you
can add to bread dough before you weigh it
down. When there is too much cheese, it
takes much longer to rise. It can still make
a fine bread but it takes patience. (There is
a point where the cheese will just
overcome the ability of the yeast.) This
bread will still rise quickly.
The recipe calls for dill weed. Feel free to
substitute basil or the herb of your choice.
The two tablespoons dill weed in this recipe results in a mildly dilly bread. If you
want more dill flavor, try three or even four tablespoons of dill.
The white pepper adds just a little bite that accents the cheese. Freshly ground
black pepper also works. Dry mustard or paprika is sometimes added for the
same purpose.
You may need to adjust the moisture used in this bread. It’s easy to add a little
more flour; a little more difficult to dribble in a bit of water. Because it is easier to
add flour than water, start your dough a bit on the wet side and add flour as
needed.
Ingredients
2 cups fine ground whole wheat flour
2 tablespoons granulated sugar
1 seven-gram packet of instant yeast
2 cups warm whole milk, 110 degrees (see note)
3 to 3 1/2 cups white bread flour
2 tablespoons dill weed
1 1/2 cups grated sharp cheddar cheese
1 cup grated parmesan cheese
1 tablespoons melted butter
1/4 teaspoon white pepper
1/2 tablespoon salt
Baker's Notes: This is best made with high-heat dry milk. (The high heat dry
milk will produce a dough with a better gluten structure.) Use 1 3/4 cup plus 2
tablespoons warm water along with 1/3 cup dry milk. Increase the melted butter
to two tablespoons.
This can also be made with skim milk. If using skim milk, increase the butter to
two tablespoons. If using low fat milk, increase the butter to 1 1/2 tablespoons.
Directions
1. Place the whole wheat bread flour, sugar, and yeast in the bowl of your
stand-type mixer. Add the warm milk and beat with a dough hook until it is
partially mixed. The purpose of this mixing is to hydrate the yeast.
2. Add most of the bread flour to the bowl. Add the dill, the cheese, melted
butter, white pepper, and salt. Knead with the dough hook at medium
speed for four minutes, adding flour to reach the right consistency. A
softer dough rises more quickly than does a firm dough so do not add too
much flour.
3. Set the dough in a greased bowl, turn once, and cover. Set the bowl in a
warm place and allow it to double in size.
4. Grease two large loaf pans. Form two loaves, cover them, and let them
rise until doubled and puffy.
5. Bake at 375 degrees for 25 minutes or until done. The internal
temperature should be 190 to 200 degrees. The lactose in the cheese will
caramelize and make a very bronze crust, a darker crust than most
breads. 6. Remove the bread from the pans and let the bread cool on a
wire rack.
Golden California Raisin Bread
This recipe has so many things to
love. We love the taste of raisins and
orange together. And we’re
particularly partial of golden raisins.
We also love white rye flour. It’s mild
and has an almost sourdough-like
taste. All in all, we’re pretty proud of
this bread.
You can buy, plump, giant golden
raisins at The Prepared Pantry.
If you are having trouble finding white
rye flour, medium rye will work. Better yet, try our white rye flour blend and use
that in place of both the rye and bread flours. If you use our blend, it will have the
right ratio of rye and bread flours along with extra gluten and dough conditioners
to make a great bread.
Ingredients
zest from one orange
about 3/4 cup freshly squeezed orange juice
1 cup whole milk or one cup reduced fat milk and one tablespoon butter
about 1/4 cup warm water
1/2 cup honey
1 seven gram package instant yeast
2 cups white rye flour
about 4 cups high protein bread flour
1 tablespoon salt
1 tablespoon cinnamon
2 1/2 cups golden raisins
Directions
1. Grate the zest from one orange being careful not to get the bitter, white
pithy layer. Set the zest aside.
2. Squeeze the orange juice from one or two oranges until you have about
3/4 cup. Mix the orange juice with the milk and water. You should have 2
1/4 cups of liquid mixture. Add the honey. Heat the liquid mixture in the
microwave until it reaches 105 degrees.
3. Place the rye flour and yeast in the bowl of your stand-type mixer. Add the
warm liquid mixture and beat with a dough hook until it is partially mixed—
about 30 seconds. The purpose of this mixing is to hydrate the yeast.
4. Add most of the bread flour to the bowl. Add the salt, cinnamon, and
orange zest. Knead with the dough hook at medium speed for four
minutes adding more flour to reach a soft but not sticky dough. Add the
raisins and knead them in. (You may need to knead the raisins in by
hand.) Set the dough in a greased bowl, turn once, and cover. Set the
bowl in a warm place and allow it to double in size.
5. Grease two 8 1/2" x 4 1/2" loaf pans. Form two loaves, cover them, and let
them rise until doubled and puffy.
Bakers Note: This bread is very good. The key is to let it rise enough. The yeast
has to lift a lot of raisins and the bread has a high rye content and it just takes a
while. Be patient. If there is a second key, it’s to use quality golden raisins. They
should be soft and plump.
6. Bake at 350 degrees for 25 minutes or until done. The internal
temperature should be 190 to 200 degrees. Remove the bread from the
pans and let the bread cool on a wire rack.
Bakers Note: Whole milk has an enzyme which retards the growth of yeast. We
recommend that you use Bakers Dry Milk, high heat treated dry milk, for this
recipe, though liquid milk will still make an excellent bread.
October Pumpkin Bread Recipe
Pumpkin makes a wonderful addition
to bread, adding color, nutrition, and
flavor. There are two ways to add
pumpkin: grated or pureed. If you add
grated pumpkin, you will have flecks
of deep orange color and the bits of
pumpkin tend to give the bread a
chewier texture. The other way is to
add pumpkin purée. The following
recipe uses pumpkin purée.
This is wonderful bread. Be prepared to adjust the amount of flour that you use to
accommodate different moisture contents of the pumpkin purée. If you like, you
can substitute up to three cups of whole wheat flour for the white bread flour.
(The picture is of bread with whole wheat flour.) We like golden raisins in this
bread but suit your own taste.
This bread is not sweet like a dessert bread. You can add more sugar if you like.
You can also add one cup of chopped walnuts. And if your kids don’t like raisins
(like ours), you can leave them out.
Ingredients
5 1/2 to 6 1/2 cups white bread flour (you can substitute up to 3 cups whole
wheat flour)
1/4 cup brown sugar
1 seven-gram packet of instant yeast
1 1/3 cup warm water, 110 degrees
1/2 tablespoon cinnamon
1/4 teaspoon ground cloves
1/2 teaspoon ground ginger
1 cup puréed pumpkin or canned pumpkin
1/2 tablespoon salt
6 tablespoons melted butter
1 1/2 cups raisins, golden raisins, or currents
Directions
1. Place half the bread flour, sugar, and yeast in the bowl of your stand-type
mixer. Add the warm water and beat with a dough hook until it is partially
mixes. (The purpose of this mix is to hydrate the yeast.)
2. Add the rest of the flour, the spices, the pumpkin, the salt, and the butter.
Knead with the dough hook at medium speed for four minutes. When the
dough comes together, add the raisins and continue beating for the
remainder of the four minutes or until the gluten is developed. You will
likely need to adjust the moisture level either by adding flour or water.
Place the dough in a greased bowl, turn once, and cover. Set the bowl in a
warm place and allow it to double in size.
3. Grease two 9 x 5-inch loaf pans. Form two loaves, cover them, and let
them rise until doubled and puffy.
4. Bake at 350 degrees for 25 minutes or until done. The internal
temperature should be at 190 to 200 degrees. Remove the loaves from
the pans and let the bread cool on a wire rack.

Mais conteúdo relacionado

Mais procurados

Betty crocker cooking basics recipes
Betty crocker cooking basics recipesBetty crocker cooking basics recipes
Betty crocker cooking basics recipesFree lancer
 
Adlandpro blackberry-jam-recipes
Adlandpro blackberry-jam-recipesAdlandpro blackberry-jam-recipes
Adlandpro blackberry-jam-recipesDiane Bjorling
 
Vi peer cookbook
Vi peer cookbookVi peer cookbook
Vi peer cookbookMaria Weir
 
PC Ceramic Egg Cooker E-cookbook courtesy of Mindy's Menu PC
PC Ceramic Egg Cooker E-cookbook courtesy of Mindy's Menu PCPC Ceramic Egg Cooker E-cookbook courtesy of Mindy's Menu PC
PC Ceramic Egg Cooker E-cookbook courtesy of Mindy's Menu PCMindy Phillips
 
Cooking With Medical Cannabis - Holiday Recipes
Cooking With Medical Cannabis - Holiday RecipesCooking With Medical Cannabis - Holiday Recipes
Cooking With Medical Cannabis - Holiday RecipesBenjamin Gelassen, MBA
 
Bread Making and its Ingredients,Kinds of Conventional Method and as a Potent...
Bread Making and its Ingredients,Kinds of Conventional Method and as a Potent...Bread Making and its Ingredients,Kinds of Conventional Method and as a Potent...
Bread Making and its Ingredients,Kinds of Conventional Method and as a Potent...Mae-mae Valdez
 
Lesson1:Introduction of baking 1920
Lesson1:Introduction of baking 1920Lesson1:Introduction of baking 1920
Lesson1:Introduction of baking 1920Nym Unknw
 
Bakery products
Bakery productsBakery products
Bakery productsLykaJane2
 
Grandma's Bread Bowl article and recipe
Grandma's Bread Bowl article and recipeGrandma's Bread Bowl article and recipe
Grandma's Bread Bowl article and recipeCarol Butler
 
10 steps to bread production
10 steps to bread production10 steps to bread production
10 steps to bread productiondan widmann
 
Festive Cook Book
Festive Cook BookFestive Cook Book
Festive Cook BookGrazyna
 
Yeast breads ppt
Yeast breads pptYeast breads ppt
Yeast breads pptjeanne56
 
Diagnose & Respond to bread faults
Diagnose & Respond to bread faultsDiagnose & Respond to bread faults
Diagnose & Respond to bread faultsKylie101
 

Mais procurados (19)

Betty crocker cooking basics recipes
Betty crocker cooking basics recipesBetty crocker cooking basics recipes
Betty crocker cooking basics recipes
 
Epic latkes 2013
Epic latkes 2013Epic latkes 2013
Epic latkes 2013
 
Adlandpro blackberry-jam-recipes
Adlandpro blackberry-jam-recipesAdlandpro blackberry-jam-recipes
Adlandpro blackberry-jam-recipes
 
Vi peer cookbook
Vi peer cookbookVi peer cookbook
Vi peer cookbook
 
PC Ceramic Egg Cooker E-cookbook courtesy of Mindy's Menu PC
PC Ceramic Egg Cooker E-cookbook courtesy of Mindy's Menu PCPC Ceramic Egg Cooker E-cookbook courtesy of Mindy's Menu PC
PC Ceramic Egg Cooker E-cookbook courtesy of Mindy's Menu PC
 
Cooking With Medical Cannabis - Holiday Recipes
Cooking With Medical Cannabis - Holiday RecipesCooking With Medical Cannabis - Holiday Recipes
Cooking With Medical Cannabis - Holiday Recipes
 
Bread faults
Bread faultsBread faults
Bread faults
 
Bread Making and its Ingredients,Kinds of Conventional Method and as a Potent...
Bread Making and its Ingredients,Kinds of Conventional Method and as a Potent...Bread Making and its Ingredients,Kinds of Conventional Method and as a Potent...
Bread Making and its Ingredients,Kinds of Conventional Method and as a Potent...
 
Bread faults
Bread faultsBread faults
Bread faults
 
Lesson1:Introduction of baking 1920
Lesson1:Introduction of baking 1920Lesson1:Introduction of baking 1920
Lesson1:Introduction of baking 1920
 
Bakery products
Bakery productsBakery products
Bakery products
 
Grandma's Bread Bowl article and recipe
Grandma's Bread Bowl article and recipeGrandma's Bread Bowl article and recipe
Grandma's Bread Bowl article and recipe
 
10 steps to bread production
10 steps to bread production10 steps to bread production
10 steps to bread production
 
Bread and common problem
Bread and common problemBread and common problem
Bread and common problem
 
Festive Cook Book
Festive Cook BookFestive Cook Book
Festive Cook Book
 
Bachour chocolate ebook
Bachour chocolate ebookBachour chocolate ebook
Bachour chocolate ebook
 
Our cook book
Our cook bookOur cook book
Our cook book
 
Yeast breads ppt
Yeast breads pptYeast breads ppt
Yeast breads ppt
 
Diagnose & Respond to bread faults
Diagnose & Respond to bread faultsDiagnose & Respond to bread faults
Diagnose & Respond to bread faults
 

Destaque

Recipe collection 27
Recipe collection 27Recipe collection 27
Recipe collection 27Sal Lie
 
Recipe collection 25
Recipe collection 25Recipe collection 25
Recipe collection 25Sal Lie
 
Recipe collection 63
Recipe collection 63Recipe collection 63
Recipe collection 63Sal Lie
 
Recipe collection 26
Recipe collection 26Recipe collection 26
Recipe collection 26Sal Lie
 
Recipe collection 2
Recipe collection 2Recipe collection 2
Recipe collection 2Sal Lie
 
Recipe collection 52
Recipe collection 52Recipe collection 52
Recipe collection 52Sal Lie
 
Recipe collection 49
Recipe collection 49Recipe collection 49
Recipe collection 49Sal Lie
 
Recipe collection 8
Recipe collection 8Recipe collection 8
Recipe collection 8Sal Lie
 
Recipe collection 35
Recipe collection 35Recipe collection 35
Recipe collection 35Sal Lie
 
Recipe collection 34
Recipe collection 34Recipe collection 34
Recipe collection 34Sal Lie
 
Recipe collection 22
Recipe collection 22Recipe collection 22
Recipe collection 22Sal Lie
 
Recipe collection 15
Recipe collection 15Recipe collection 15
Recipe collection 15Sal Lie
 
Recipe collection 24
Recipe collection 24Recipe collection 24
Recipe collection 24Sal Lie
 
Recipe collection 21
Recipe collection 21Recipe collection 21
Recipe collection 21Sal Lie
 
Recipe collection 55
Recipe collection 55Recipe collection 55
Recipe collection 55Sal Lie
 
Recipe collection 69
Recipe collection 69Recipe collection 69
Recipe collection 69Sal Lie
 
Recipe collection 5
Recipe collection 5Recipe collection 5
Recipe collection 5Sal Lie
 
Recipe collection 12
Recipe collection 12Recipe collection 12
Recipe collection 12Sal Lie
 
Recipe collection 11
Recipe collection 11Recipe collection 11
Recipe collection 11Sal Lie
 

Destaque (20)

Recipe collection 27
Recipe collection 27Recipe collection 27
Recipe collection 27
 
Recipe collection 25
Recipe collection 25Recipe collection 25
Recipe collection 25
 
Recipe collection 63
Recipe collection 63Recipe collection 63
Recipe collection 63
 
Recipe collection 26
Recipe collection 26Recipe collection 26
Recipe collection 26
 
Recipe collection 2
Recipe collection 2Recipe collection 2
Recipe collection 2
 
Recipe collection 52
Recipe collection 52Recipe collection 52
Recipe collection 52
 
Recipe collection 49
Recipe collection 49Recipe collection 49
Recipe collection 49
 
Recipe collection 8
Recipe collection 8Recipe collection 8
Recipe collection 8
 
Recipe collection 35
Recipe collection 35Recipe collection 35
Recipe collection 35
 
Recipe collection 34
Recipe collection 34Recipe collection 34
Recipe collection 34
 
What is Tiki?
What is Tiki?What is Tiki?
What is Tiki?
 
Recipe collection 22
Recipe collection 22Recipe collection 22
Recipe collection 22
 
Recipe collection 15
Recipe collection 15Recipe collection 15
Recipe collection 15
 
Recipe collection 24
Recipe collection 24Recipe collection 24
Recipe collection 24
 
Recipe collection 21
Recipe collection 21Recipe collection 21
Recipe collection 21
 
Recipe collection 55
Recipe collection 55Recipe collection 55
Recipe collection 55
 
Recipe collection 69
Recipe collection 69Recipe collection 69
Recipe collection 69
 
Recipe collection 5
Recipe collection 5Recipe collection 5
Recipe collection 5
 
Recipe collection 12
Recipe collection 12Recipe collection 12
Recipe collection 12
 
Recipe collection 11
Recipe collection 11Recipe collection 11
Recipe collection 11
 

Semelhante a Recipe collection 62

4-H Baking Bun Fun
4-H Baking Bun Fun4-H Baking Bun Fun
4-H Baking Bun FunAmy Peterson
 
How to make kugelhopf breakfast rolls
How to make kugelhopf breakfast rollsHow to make kugelhopf breakfast rolls
How to make kugelhopf breakfast rollsGajanan Shirke
 
Bread: The value of time
Bread: The value of timeBread: The value of time
Bread: The value of timemoniquewalsh
 
Hrd647 final project powerpoint learning objective
Hrd647 final project powerpoint learning objectiveHrd647 final project powerpoint learning objective
Hrd647 final project powerpoint learning objectiveChristina Rolle
 
Carls sourdough bread
Carls sourdough breadCarls sourdough bread
Carls sourdough breadChef Central
 
How to bake the best yeast breads
How to bake the best yeast breadsHow to bake the best yeast breads
How to bake the best yeast breadsDenver Begino
 
Sour dough instructions
Sour dough instructionsSour dough instructions
Sour dough instructionsMichael Scott
 
Bakers Apprentice Month #4
Bakers Apprentice Month #4Bakers Apprentice Month #4
Bakers Apprentice Month #4Sid Khullar
 
Perfect Pie Bake 101- Achatz Handmade Pie Company
Perfect Pie Bake 101- Achatz Handmade Pie Company Perfect Pie Bake 101- Achatz Handmade Pie Company
Perfect Pie Bake 101- Achatz Handmade Pie Company Jill Christoff
 
Baking Bread
Baking BreadBaking Bread
Baking Breadschriltz
 
rum cake
rum cakerum cake
rum cakejjkaz
 
Cream Puff - Dela Cruz, A., Mancera, X.
Cream Puff - Dela Cruz, A., Mancera, X.Cream Puff - Dela Cruz, A., Mancera, X.
Cream Puff - Dela Cruz, A., Mancera, X.AngelicaDelaCruz59
 
Recipe collection 61
Recipe collection 61Recipe collection 61
Recipe collection 61Sal Lie
 

Semelhante a Recipe collection 62 (20)

4-H Baking Bun Fun
4-H Baking Bun Fun4-H Baking Bun Fun
4-H Baking Bun Fun
 
How to make kugelhopf breakfast rolls
How to make kugelhopf breakfast rollsHow to make kugelhopf breakfast rolls
How to make kugelhopf breakfast rolls
 
Bread: The value of time
Bread: The value of timeBread: The value of time
Bread: The value of time
 
Grill Baked Zucchini Bread Cake: With a Pinch of Lime & Coconut
Grill Baked Zucchini Bread Cake: With a Pinch of Lime & Coconut  Grill Baked Zucchini Bread Cake: With a Pinch of Lime & Coconut
Grill Baked Zucchini Bread Cake: With a Pinch of Lime & Coconut
 
Bread making tips
Bread making tipsBread making tips
Bread making tips
 
Hrd647 final project powerpoint learning objective
Hrd647 final project powerpoint learning objectiveHrd647 final project powerpoint learning objective
Hrd647 final project powerpoint learning objective
 
Biscuits
BiscuitsBiscuits
Biscuits
 
Squashes
SquashesSquashes
Squashes
 
Carls sourdough bread
Carls sourdough breadCarls sourdough bread
Carls sourdough bread
 
How to bake the best yeast breads
How to bake the best yeast breadsHow to bake the best yeast breads
How to bake the best yeast breads
 
Sour dough instructions
Sour dough instructionsSour dough instructions
Sour dough instructions
 
Bakers Apprentice Month #4
Bakers Apprentice Month #4Bakers Apprentice Month #4
Bakers Apprentice Month #4
 
Perfect Pie Bake 101- Achatz Handmade Pie Company
Perfect Pie Bake 101- Achatz Handmade Pie Company Perfect Pie Bake 101- Achatz Handmade Pie Company
Perfect Pie Bake 101- Achatz Handmade Pie Company
 
Peshwari naan recipe
Peshwari naan recipePeshwari naan recipe
Peshwari naan recipe
 
Baking Bread
Baking BreadBaking Bread
Baking Bread
 
rum cake
rum cakerum cake
rum cake
 
Cream Puff - Dela Cruz, A., Mancera, X.
Cream Puff - Dela Cruz, A., Mancera, X.Cream Puff - Dela Cruz, A., Mancera, X.
Cream Puff - Dela Cruz, A., Mancera, X.
 
Recipe collection 61
Recipe collection 61Recipe collection 61
Recipe collection 61
 
Grill Baked Hot Cross Buns
Grill Baked Hot Cross Buns  Grill Baked Hot Cross Buns
Grill Baked Hot Cross Buns
 
Blueberry pie
Blueberry pieBlueberry pie
Blueberry pie
 

Mais de Sal Lie

Recipe collection 93
Recipe collection 93Recipe collection 93
Recipe collection 93Sal Lie
 
Recipe collection 57
Recipe collection 57Recipe collection 57
Recipe collection 57Sal Lie
 
Recipe collection 56
Recipe collection 56Recipe collection 56
Recipe collection 56Sal Lie
 
Recipe collection 55
Recipe collection 55Recipe collection 55
Recipe collection 55Sal Lie
 
Recipe collection 54
Recipe collection 54Recipe collection 54
Recipe collection 54Sal Lie
 
Recipe collection 52
Recipe collection 52Recipe collection 52
Recipe collection 52Sal Lie
 
Recipe collection 50
Recipe collection 50Recipe collection 50
Recipe collection 50Sal Lie
 
Recipe collection 49
Recipe collection 49Recipe collection 49
Recipe collection 49Sal Lie
 
Recipe collection 47
Recipe collection 47Recipe collection 47
Recipe collection 47Sal Lie
 
Recipe collection 43
Recipe collection 43Recipe collection 43
Recipe collection 43Sal Lie
 
Recipe collection 40
Recipe collection 40Recipe collection 40
Recipe collection 40Sal Lie
 
Recipe collection 39
Recipe collection 39Recipe collection 39
Recipe collection 39Sal Lie
 
Recipe collection 38
Recipe collection 38Recipe collection 38
Recipe collection 38Sal Lie
 
Recipe collection 37
Recipe collection 37Recipe collection 37
Recipe collection 37Sal Lie
 
Recipe collection 36
Recipe collection 36Recipe collection 36
Recipe collection 36Sal Lie
 
Recipe collection 33
Recipe collection 33Recipe collection 33
Recipe collection 33Sal Lie
 
Recipe collection 32
Recipe collection 32Recipe collection 32
Recipe collection 32Sal Lie
 
Recipe collection 31
Recipe collection 31Recipe collection 31
Recipe collection 31Sal Lie
 
Recipe collection 30
Recipe collection 30Recipe collection 30
Recipe collection 30Sal Lie
 
Recipe collection 29
Recipe collection 29Recipe collection 29
Recipe collection 29Sal Lie
 

Mais de Sal Lie (20)

Recipe collection 93
Recipe collection 93Recipe collection 93
Recipe collection 93
 
Recipe collection 57
Recipe collection 57Recipe collection 57
Recipe collection 57
 
Recipe collection 56
Recipe collection 56Recipe collection 56
Recipe collection 56
 
Recipe collection 55
Recipe collection 55Recipe collection 55
Recipe collection 55
 
Recipe collection 54
Recipe collection 54Recipe collection 54
Recipe collection 54
 
Recipe collection 52
Recipe collection 52Recipe collection 52
Recipe collection 52
 
Recipe collection 50
Recipe collection 50Recipe collection 50
Recipe collection 50
 
Recipe collection 49
Recipe collection 49Recipe collection 49
Recipe collection 49
 
Recipe collection 47
Recipe collection 47Recipe collection 47
Recipe collection 47
 
Recipe collection 43
Recipe collection 43Recipe collection 43
Recipe collection 43
 
Recipe collection 40
Recipe collection 40Recipe collection 40
Recipe collection 40
 
Recipe collection 39
Recipe collection 39Recipe collection 39
Recipe collection 39
 
Recipe collection 38
Recipe collection 38Recipe collection 38
Recipe collection 38
 
Recipe collection 37
Recipe collection 37Recipe collection 37
Recipe collection 37
 
Recipe collection 36
Recipe collection 36Recipe collection 36
Recipe collection 36
 
Recipe collection 33
Recipe collection 33Recipe collection 33
Recipe collection 33
 
Recipe collection 32
Recipe collection 32Recipe collection 32
Recipe collection 32
 
Recipe collection 31
Recipe collection 31Recipe collection 31
Recipe collection 31
 
Recipe collection 30
Recipe collection 30Recipe collection 30
Recipe collection 30
 
Recipe collection 29
Recipe collection 29Recipe collection 29
Recipe collection 29
 

Último

Irradiation preservation of food advancements
Irradiation preservation of food advancementsIrradiation preservation of food advancements
Irradiation preservation of food advancementsDeepika Sugumar
 
pitch presentation B2.pptx Sunderland Culture
pitch presentation B2.pptx Sunderland Culturepitch presentation B2.pptx Sunderland Culture
pitch presentation B2.pptx Sunderland CultureChloeMeadows1
 
Custom Wine Cellars by Green Refrigeration LLC.pdf
Custom Wine Cellars by Green Refrigeration LLC.pdfCustom Wine Cellars by Green Refrigeration LLC.pdf
Custom Wine Cellars by Green Refrigeration LLC.pdfGreen Refrigeration LLC
 
Russian Escorts DELHI - Russian Call Girls in Delhi Greater Kailash TELL-NO. ...
Russian Escorts DELHI - Russian Call Girls in Delhi Greater Kailash TELL-NO. ...Russian Escorts DELHI - Russian Call Girls in Delhi Greater Kailash TELL-NO. ...
Russian Escorts DELHI - Russian Call Girls in Delhi Greater Kailash TELL-NO. ...dollysharma2066
 
Gwal Pahari Call Girls 9873940964 Book Hot And Sexy Girls
Gwal Pahari Call Girls 9873940964 Book Hot And Sexy GirlsGwal Pahari Call Girls 9873940964 Book Hot And Sexy Girls
Gwal Pahari Call Girls 9873940964 Book Hot And Sexy Girlshram8477
 
How Ang Chong Yi Singapore is serving up sustainable future-ready foods?
How Ang Chong Yi Singapore is serving up sustainable future-ready foods?How Ang Chong Yi Singapore is serving up sustainable future-ready foods?
How Ang Chong Yi Singapore is serving up sustainable future-ready foods?Ang Chong Yi Singapore
 
Food-Allergy-PowerPoint-Presentation-2.ppt
Food-Allergy-PowerPoint-Presentation-2.pptFood-Allergy-PowerPoint-Presentation-2.ppt
Food-Allergy-PowerPoint-Presentation-2.pptIsaacMensah62
 
Abu Dhabi Housewife Call Girls +971509530047 Abu Dhabi Call Girls
Abu Dhabi Housewife Call Girls +971509530047 Abu Dhabi Call GirlsAbu Dhabi Housewife Call Girls +971509530047 Abu Dhabi Call Girls
Abu Dhabi Housewife Call Girls +971509530047 Abu Dhabi Call Girlstiril72860
 
Prediksi Angka BBFS 10 Digit Betting 10 Perak Magnumtogel
Prediksi Angka BBFS 10 Digit Betting  10 Perak MagnumtogelPrediksi Angka BBFS 10 Digit Betting  10 Perak Magnumtogel
Prediksi Angka BBFS 10 Digit Betting 10 Perak Magnumtogeltok dalang
 
(办理学位证)加州大学圣塔芭芭拉分校毕业证成绩单原版一比一
(办理学位证)加州大学圣塔芭芭拉分校毕业证成绩单原版一比一(办理学位证)加州大学圣塔芭芭拉分校毕业证成绩单原版一比一
(办理学位证)加州大学圣塔芭芭拉分校毕业证成绩单原版一比一Fi sss
 
Future Ready Agriculture- 01-10-2023.pdf
Future Ready Agriculture- 01-10-2023.pdfFuture Ready Agriculture- 01-10-2023.pdf
Future Ready Agriculture- 01-10-2023.pdfSKUASTKashmir
 
日本学位记,筑波大学毕业证书1:1制作
日本学位记,筑波大学毕业证书1:1制作日本学位记,筑波大学毕业证书1:1制作
日本学位记,筑波大学毕业证书1:1制作aecnsnzk
 
如何办韩国SKKU文凭,成均馆大学毕业证学位证怎么辨别?
如何办韩国SKKU文凭,成均馆大学毕业证学位证怎么辨别?如何办韩国SKKU文凭,成均馆大学毕业证学位证怎么辨别?
如何办韩国SKKU文凭,成均馆大学毕业证学位证怎么辨别?t6tjlrih
 
FUTURISTIC FOOD PRODUCTS OFTEN INVOLVE INNOVATIONS THAT
FUTURISTIC FOOD PRODUCTS OFTEN INVOLVE INNOVATIONS THATFUTURISTIC FOOD PRODUCTS OFTEN INVOLVE INNOVATIONS THAT
FUTURISTIC FOOD PRODUCTS OFTEN INVOLVE INNOVATIONS THATBHIKHUKUMAR KUNWARADIYA
 
what is the importance of work immersion
what is the importance of work immersionwhat is the importance of work immersion
what is the importance of work immersionIssaMuana
 
韩国学位证,全北大学毕业证书1:1制作
韩国学位证,全北大学毕业证书1:1制作韩国学位证,全北大学毕业证书1:1制作
韩国学位证,全北大学毕业证书1:1制作7tz4rjpd
 
Prepare And Cook Meat.pptx Quarter II Module
Prepare And Cook Meat.pptx Quarter II ModulePrepare And Cook Meat.pptx Quarter II Module
Prepare And Cook Meat.pptx Quarter II Modulemaricel769799
 
nutrient-management-of-corn.pptxSfklavFV
nutrient-management-of-corn.pptxSfklavFVnutrient-management-of-corn.pptxSfklavFV
nutrient-management-of-corn.pptxSfklavFVFarhanaNoor12
 
Insect Meal as an Alternative Protein Source for poultry
Insect Meal as an Alternative Protein Source for poultryInsect Meal as an Alternative Protein Source for poultry
Insect Meal as an Alternative Protein Source for poultryHarshRahan
 

Último (20)

Irradiation preservation of food advancements
Irradiation preservation of food advancementsIrradiation preservation of food advancements
Irradiation preservation of food advancements
 
pitch presentation B2.pptx Sunderland Culture
pitch presentation B2.pptx Sunderland Culturepitch presentation B2.pptx Sunderland Culture
pitch presentation B2.pptx Sunderland Culture
 
Custom Wine Cellars by Green Refrigeration LLC.pdf
Custom Wine Cellars by Green Refrigeration LLC.pdfCustom Wine Cellars by Green Refrigeration LLC.pdf
Custom Wine Cellars by Green Refrigeration LLC.pdf
 
Russian Escorts DELHI - Russian Call Girls in Delhi Greater Kailash TELL-NO. ...
Russian Escorts DELHI - Russian Call Girls in Delhi Greater Kailash TELL-NO. ...Russian Escorts DELHI - Russian Call Girls in Delhi Greater Kailash TELL-NO. ...
Russian Escorts DELHI - Russian Call Girls in Delhi Greater Kailash TELL-NO. ...
 
Gwal Pahari Call Girls 9873940964 Book Hot And Sexy Girls
Gwal Pahari Call Girls 9873940964 Book Hot And Sexy GirlsGwal Pahari Call Girls 9873940964 Book Hot And Sexy Girls
Gwal Pahari Call Girls 9873940964 Book Hot And Sexy Girls
 
How Ang Chong Yi Singapore is serving up sustainable future-ready foods?
How Ang Chong Yi Singapore is serving up sustainable future-ready foods?How Ang Chong Yi Singapore is serving up sustainable future-ready foods?
How Ang Chong Yi Singapore is serving up sustainable future-ready foods?
 
Food-Allergy-PowerPoint-Presentation-2.ppt
Food-Allergy-PowerPoint-Presentation-2.pptFood-Allergy-PowerPoint-Presentation-2.ppt
Food-Allergy-PowerPoint-Presentation-2.ppt
 
Abu Dhabi Housewife Call Girls +971509530047 Abu Dhabi Call Girls
Abu Dhabi Housewife Call Girls +971509530047 Abu Dhabi Call GirlsAbu Dhabi Housewife Call Girls +971509530047 Abu Dhabi Call Girls
Abu Dhabi Housewife Call Girls +971509530047 Abu Dhabi Call Girls
 
Call Girls in Hauz Khas⎝⎝9953056974⎝⎝ Delhi NCR
Call Girls in Hauz Khas⎝⎝9953056974⎝⎝ Delhi NCRCall Girls in Hauz Khas⎝⎝9953056974⎝⎝ Delhi NCR
Call Girls in Hauz Khas⎝⎝9953056974⎝⎝ Delhi NCR
 
Prediksi Angka BBFS 10 Digit Betting 10 Perak Magnumtogel
Prediksi Angka BBFS 10 Digit Betting  10 Perak MagnumtogelPrediksi Angka BBFS 10 Digit Betting  10 Perak Magnumtogel
Prediksi Angka BBFS 10 Digit Betting 10 Perak Magnumtogel
 
(办理学位证)加州大学圣塔芭芭拉分校毕业证成绩单原版一比一
(办理学位证)加州大学圣塔芭芭拉分校毕业证成绩单原版一比一(办理学位证)加州大学圣塔芭芭拉分校毕业证成绩单原版一比一
(办理学位证)加州大学圣塔芭芭拉分校毕业证成绩单原版一比一
 
Future Ready Agriculture- 01-10-2023.pdf
Future Ready Agriculture- 01-10-2023.pdfFuture Ready Agriculture- 01-10-2023.pdf
Future Ready Agriculture- 01-10-2023.pdf
 
日本学位记,筑波大学毕业证书1:1制作
日本学位记,筑波大学毕业证书1:1制作日本学位记,筑波大学毕业证书1:1制作
日本学位记,筑波大学毕业证书1:1制作
 
如何办韩国SKKU文凭,成均馆大学毕业证学位证怎么辨别?
如何办韩国SKKU文凭,成均馆大学毕业证学位证怎么辨别?如何办韩国SKKU文凭,成均馆大学毕业证学位证怎么辨别?
如何办韩国SKKU文凭,成均馆大学毕业证学位证怎么辨别?
 
FUTURISTIC FOOD PRODUCTS OFTEN INVOLVE INNOVATIONS THAT
FUTURISTIC FOOD PRODUCTS OFTEN INVOLVE INNOVATIONS THATFUTURISTIC FOOD PRODUCTS OFTEN INVOLVE INNOVATIONS THAT
FUTURISTIC FOOD PRODUCTS OFTEN INVOLVE INNOVATIONS THAT
 
what is the importance of work immersion
what is the importance of work immersionwhat is the importance of work immersion
what is the importance of work immersion
 
韩国学位证,全北大学毕业证书1:1制作
韩国学位证,全北大学毕业证书1:1制作韩国学位证,全北大学毕业证书1:1制作
韩国学位证,全北大学毕业证书1:1制作
 
Prepare And Cook Meat.pptx Quarter II Module
Prepare And Cook Meat.pptx Quarter II ModulePrepare And Cook Meat.pptx Quarter II Module
Prepare And Cook Meat.pptx Quarter II Module
 
nutrient-management-of-corn.pptxSfklavFV
nutrient-management-of-corn.pptxSfklavFVnutrient-management-of-corn.pptxSfklavFV
nutrient-management-of-corn.pptxSfklavFV
 
Insect Meal as an Alternative Protein Source for poultry
Insect Meal as an Alternative Protein Source for poultryInsect Meal as an Alternative Protein Source for poultry
Insect Meal as an Alternative Protein Source for poultry
 

Recipe collection 62

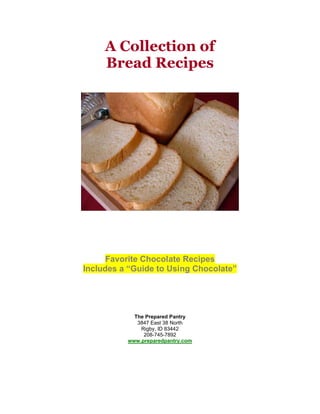
  • 1. A Collection of Bread Recipes Favorite Chocolate Recipes Includes a “Guide to Using Chocolate” The Prepared Pantry 3847 East 38 North Rigby, ID 83442 208-745-7892 www.preparedpantry.com
  • 2. Chocolate Favorite Chocolate Recipes Includes a “Guide to Using Chocolate” Table of Contents How to Make Easy Sourdough Bread...................................................................3 How to Bake a Crusty Hearth Bread.....................................................................6 How to Bake Easy Focaccia ................................................................................7 How to Bake: Easy Challah (Braided Bread) ........................................................8 Making Great Hamburger (or Sandwich) Buns ...................................................10 Stuffed Bread: Homemade Hot Pockets .............................................................11 Stuffed Bread #2 Italian Filled Bread (with recipes) ............................................12 Stuffed Bread #3 Mushroom Cheddar Oat Bread (with recipes).........................14 Check out this Onion Cheese Bread...................................................................16 Southern Cornbread (Yeast)...............................................................................17 The Versatile Santa Fe Sopaipillas.....................................................................18 American Rye Bread Recipe...............................................................................19 Summer Zucchini and Carrot Bread....................................................................21 Pepper Cheddar Bread.......................................................................................22 European Soft Peasant Bread ............................................................................24 100% Whole Wheat Bread..................................................................................26 Dilly Cheese Bread .............................................................................................27 Golden California Raisin Bread...........................................................................29 October Pumpkin Bread Recipe .........................................................................30 The Prepared Pantry 3847 East 38 North Rigby, ID 83442 208-745-7892 www.preparedpantry.com Copyright 2005-2007, The Prepared Pantry. All rights reserved. The material herein is published by The Prepared Pantry for the private use of individuals and may not be used for commercial purposes without the express consent of the publisher. The information contained herein is believed accurate but the publisher makes no warranties, express or implied, and the recipient is using this information at his or her own risk.
  • 3. How to Make Easy Sourdough Bread Sourdough simply uses wild yeast in place of commercial yeast to leaven the bread. It relies on the wild yeasts that are in the air all around us and cultures those yeasts in a warm, wet environment created with water, flour, and sometimes other components. When creating a sourdough starter, we always felt like we were on an expedition trying to trap invisible yeastie beasties with our flour and water concoctions. Because we couldn't see the beasties, we were never sure what we had captured. While usually successful, we never felt like we were in control. Maybe that is the way sourdough bread should feel, a symbiosis with nature. But there is an easier way: use commercial yeast in the starter. I know, that's heresy to the sourdough bread zealot but we only care about the bread. Using commercial yeast is easier, it's the alcohol from the long cool fermentation that creates the sourdough-like flavor, and the wild yeasts will eventually take over the starter anyway. Because it's easy, it's no big deal if you abandon your starter after a few weeks; you can readily start another when you're back in the mood or have the time. Using this recipe for sourdough bread, a small amount of yeast is used in the starter. As the starter is used and refreshed with new feedings of flour and water, wild yeasts are introduced and cultivated. Here is the recipe: For the starter: 1 cup warm water (about 110 degrees) 1/4 teaspoon yeast 1 cup high gluten unbleached flour. Mix the starter in a glass or steel bowl, cover with plastic wrap, and set it aside at room temperature until it is doubled and bubbly, maybe 4 to 6 hours.
  • 4. For the sponge: A sponge is a pre-ferment, a wet mixture of flour and yeast that acts as an incubation chamber to grow yeast at the desired rate. It is added to the dough. 1 cup of the starter 3/4 cup warm water 2 cups flour Mix the one cup starter with the flour and water, cover, and set aside to ferment until it has tripled in volume. At room temperature, it will take four to eight hours. You can put it in a cool place--about fifty degrees--and let it perk all night. (In the winter, your garage may be just right.) You can also put it in the refrigerator overnight. At temperatures of forty degrees, the yeast will be inactive but the friendly bacteria will still be working and enhance the sour flavor of the bread. If you retard the growth with lower temperatures (“retard” is the correct term for slowing the growth of the yeast), simply bring the sponge to room temperature and let it expand to three times its original volume before proceeding. For the dough: All of the sponge 11/2 cups flour (more or less) 2 teaspoons salt Mix the salt with the flour. Knead the combination into the sponge by hand until you have a smooth, elastic, slightly sticky dough, adding more flour as needed. Put the dough in an oiled bowl and let it rise again until doubled, about an hour. Bakers note: Notice that the salt is not added until the last stage. Salt in the sponge would inhibit yeast growth. Form the loaves: Though you can make this bread in pans, it works best as a large freestanding round or oval loaf or two smaller loaves. Place a clean cotton cloth in a bowl or basket in which to hold the loaf. Lightly dust the interior of the bowl with flour. Place each formed loaf upside down in a bowl on top of the dusted flour. Cover the loaves with plastic and let them rise again until doubled. This rising will
  • 5. probably take less than an hour. Bakers note: You want a light dusting of flour on the cloth to be transferred to the bread, not a heavy caking. Softly sifting flour from a strainer is the easiest way to achieve an even coating. You can find a small strainer in our kitchen tool section. If you choose to bake the bread in pans, omit this step. Instead, let the dough rise in a greased bowl covered with plastic until doubled. Form the loaves for pans, place the loaves in greased pans, and let rise until well-expanded and puffy. Bake at 350 degrees until done, about 30 minutes. To bake crusty bread: To form the thick, chewy crust that is typical of artisan breads, follow these instructions: Place a large, shallow, metal pan in the oven on the lowest shelf. You will pour hot water in this pan to create steam in the oven. (High heat is hard on pans so don't use one of your better pans and don't use a glass or ceramic pan which might shatter.) An old sheet pan is ideal. Fill a spray bottle with water. You will use this to spray water into the oven to create even more steam. Preheat the oven to 425 degrees. When the oven is hot and the bread is fully risen and is soft and puffy--being very careful not to burn yourself with the rising steam and with a mitted hand—turn your head away and pour two or three cups of very hot water in the pan in the oven. Quickly close the oven door to capture the steam. With spray bottle in hand, open the door and quickly spray the oven walls to create more steam and close the door. The oven is now ready for the loaves. Work quickly to get the bread in the oven before the steam subsides. Gently invert the loaf or loaves onto a slightly greased non-insulated baking sheet on which a little cornmeal has been dusted. With your sharpest knife, quickly make two or three slashes 1/4-inch deep across the top of each loaf. This will vent the steam in the bread and allow the bread to expand properly. Immediately, put the bread in the steamy oven. After a few moments, open the door and spray the walls again to recharge the steam. Do this twice more during the first fifteen minutes of baking. This steamy environment will create the chewy crust prized in artisan breads. Let the bread bake at 425 degrees for fifteen minutes in the hot steamy oven then reduce the temperature to 375 degrees and bake for a total of 35 to 40 minutes. Check on the bread ten minutes before the baking should be complete. If the top is browning too quickly, tent the loaf with aluminum foil for the remainder of the baking to keep it from burning. The bread is done when the crust turns a dark golden brown and the internal temperature reaches 210
  • 6. degrees. It is important that the bread is well-baked to drive moisture from the loaf. If the bread is under baked, the excess moisture will migrate to the crust and you will no longer have the dry chewy crust of a great artisan loaf. This sourdough bread is to die for. The prolonged rising gives the yeast plenty of time to convert the starch to sugars and the friendly bacteria a chance to impart their nut-like flavors. Storing your crusty bread: Unused crusty bread should be stored in a paper bag at room temperature. If the bread is stored in a plastic bag, the crust will become soft. How to Bake a Crusty Hearth Bread To elements create that thick crust that we love on great European hearth breads: Steam and a high temperature. The steam creates a thicker crust and the high temperature drives the moisture from the loaf. Place a large, shallow, metal pan in the oven on the lowest shelf. You will pour hot water in this pan to create steam in the oven. High heat is hard on pans so don't use one of your better pans. An old sheet pan is ideal. Fill a spray bottle with water. You will use this to spray water into the oven to create more steam. Preheat the oven to 450 degrees. When the oven is hot and the bread is fully risen and is soft and puffy--being very careful not to burn yourself with the rising steam and with a mitted hand--pour two cups of very hot water in the pan in the oven. Quickly close the oven door to capture the steam. With spray bottle in hand, open the door and quickly spray the oven walls and close the door. Gently invert the loaf or loaves onto a slightly greased non-insulated baking sheet on which a little cornmeal has been dusted. With your sharpest knife, quickly make two or three slashes 1/4-inch deep across the top of each loaf. This will vent the steam in the bread and allow the bread to expand properly. Immediately put the bread in the steamy oven. After a few moments, open the door and spray the walls again to recharge the steam. Do this twice more during the first fifteen minutes of baking. This steamy environment will create the chewy crust prized in artisan breads.
  • 7. After the bread is in the oven, turn the temperature down to 400 degrees and set the timer for about forty minutes. Check on the bread ten minutes before the baking should be complete. If the top is browning too quickly, tent the loaf with aluminum foil for the last while to keep it from burning. The bread is done when the crust turns a dark golden brown and the internal temperature reaches 210 degrees. It is important that the bread is well-baked to drive moisture from the loaf. If the bread is under baked, the excess moisture will migrate to the crust and you will no longer have the dry chewy crust of a great artisan loaf. How to Bake Easy Focaccia This is just about as easy as it gets for some really good homemade focaccia. It doesn't take a lot of time and it's a great project to tackle with the kids. Here's how: We used our Buttermilk White Bread Mix for bread machines but you can use your favorite one-loaf mix or a recipe. (If you are using a two-loaf mix or recipe, make two breads-- maybe one a focaccia and the other a standard loaf.) You will also need two to four tablespoons of olive oil, depending on your taste. Mix the bread dough according to package directions or according to the recipe. We used our bread machine for convenience but we could have made the dough by hand or with our stand-type mixer. (If you use your bread machine, be sure to set the machine to the “dough” setting.) Let the dough rise until doubled--for most recipes, 45 to 60 minutes. If you use your bread machine on the dough setting, it will rise in the machine. Punch down the dough, shape it into a ball, and then cover it with plastic wrap. Let it stand for 15 minutes. In the meantime, mix together the following ingredients for a topping: Ingredients 2-3 tablespoons parmesan cheese 1 tablespoon basil 1/2 teaspoon oregano flakes 1/8 teaspoon garlic powder 1/8 teaspoon salt
  • 8. Set a rack in the middle of the oven and preheat the oven to 375 degrees F. Gently place the round dough on a large greased baking sheet and press it into an oval 9x15-inches. Make 1/2- inch deep indentations in the dough with your fingers one to two inches apart. Pour two to four tablespoons of olive oil over the dough, letting it run down into the indentations. Spoon the topping mixture evenly over the dough. (Your prepared dough should look something like the picture.) Bake the bread for 20 to 25 minutes or until the top turns golden brown. Remove the bread to a wire rack to cool for ten minutes before serving warm. Makes ten to twelve servings. Notes: You can use this as a pizza crust or vary the toppings or spices to taste. Try onions, mushrooms, or spinach. If you don't have olive oil, you can use melted butter or a good quality vegetable oil. Check out our other focaccia choices--Onion and Herb Focaccia for a very quick focaccia, (you only let it rise once) or Rosemary Focaccia for a classic focaccia with the traditional open crumb. How to Bake: Easy Challah (Braided Bread) While challah is a traditional bread baked for the Jewish Sabbath, it has become popular with everyone, everywhere. It's attractive and has a firm, egg-rich texture that works for dinner, sandwiches, or French toast. It is typically braided with three, four, or six strands of dough. (The braided strands are symbolic of love.) Challah is really very easy to make, especially from a mix. There is a sense of satisfaction in working the
  • 9. dough by hand and crafting such an attractive bread and it certainly will impress guests. For this bread, we used one of our traditional bread mixes though you can braid nearly any bread—including your favorite recipe. The package directions called for two cups of water. To make the dough egg-rich, we cracked two large eggs into a measuring cup and added warm water--enough to total two cups. Whisk the water and eggs together with a fork then heat it in the microwave until warm (110 degrees). Mix the bread according to package instructions using the egg and water mixture. Place the bread dough in a greased bowl, cover, and let rise until doubled—about 1 1/2 hours. Prepare a large baking sheet by greasing and sprinkling with cornmeal. Use a lighter colored sheet to help keep the bottom from burning. Once raised, use a knife to divide the dough into three equal pieces (or four if you choose to make a four-braid bread). Roll the pieces under the palms of your hands into three long ropes as shown. You may need to let each rest for five to ten minutes to allow the dough to relax to get the proper shape. Using this mix, you should have three ropes nearly 24- inches long. If you want the loaf to be larger in the center and less rectangular shaped, make the ropes thicker in the middle and tapered toward the ends. Braid the three ropes as shown in a common three strand braid just as if you were braiding pigtails. (Some people find it easier to create a symmetrical shape if they start braiding from the center.) When you get to the ends, wet them, pinch them together, and tuck them under. You should have a neat, symmetrical loaf when you are through. You can shape the loaf somewhat with your hands. If you don't like how the loaf looks, simply pull the braids apart and start again.
  • 10. Place the finished loaf on the prepared sheet. (The formed loaf will be about 12- inches long but after rising and baking, you will have a finished loaf of about 24- inches so be sure to allow room on your sheet for expansion.) Cover the loaf and let rise until doubled, about one hour. Preheat the oven to 350 degrees. Prepare a glaze by whisking one egg with one-half tablespoon of water. Just before baking and when the loaf has fully doubled, remove the plastic wrap and gently brush glaze over the entire surface of the loaf. Sprinkle the top with poppy seeds or sesame seeds as desired. (Tip the loaf so that you can sprinkle seeds on the sides as well.) Bake the bread for 20 minutes then cover the bread with a large sheet of aluminum foil to protect the top. Continue baking for another 20 to 30 minutes or until the bread crust is a deep golden brown. The interior of the loaf should register 190 degrees with an insta-read thermometer. Use an egg turner to loosen the bread from the pan and transfer the loaf to a wire rack to cool. Note: If you choose to bake two loaves, reduce the baking time by five to ten minutes. Making Great Hamburger (or Sandwich) Buns We've said it before, “Buns make the burger” and nothing makes a better burger than homemade buns. In fact, once you've had a burger on a fresh homemade bun, burgers will never be the same. You can use your favorite bread mix (or bread recipe) to make some terrific hamburger or sandwich buns. A two- loaf mix will make about eighteen large hamburger buns and a single- loaf mix or bread machine mix will make eight or ten. Mix the dough according to the package or recipe directions and then remove the dough to a greased bowl and cover it with plastic. Let it rise until it is doubled and very puffy--an hour or more.
  • 11. Grease two large baking sheets (for a two loaf mix) or cover them with parchment paper. Once the dough has risen, deflate it and divide the dough into eighteen equal pieces with a sharp knife (or scale the pieces at 3 ounces each on your kitchen scales). Form smooth round balls by pulling the dough around the center and pinching the seams together on the bottom of the roll. Place them on the greased sheet allowing room for them to expand. (You can place a dozen of them on a 12-inch by 18-inch baking sheet---three rows of four buns each.) On the baking sheet, gently press the balls into flat discs with your hand. The dough will tend to spring back. Allow the dough to relax a few minutes and then press again. You may need to repeat the process again until you have discs that are 3 1/2 to 4 inches in diameter and 1/2 to 3/4-inches thick. Lightly dust the tops with flour (we use a screen or strainer to distribute the flour). Cover the rolls lightly with plastic and allow them to rise again until doubled and puffy--about an hour. Let them rise completely for soft, light buns. Preheat the oven to 375 degrees. Bake the rolls for 15 minutes or until the tops are a rich golden brown. If you are baking both sheets at once, switch the top sheet with the bottom sheet half way through the baking so that the buns will bake evenly. Immediately remove the rolls to a wire rack to cool. Stuffed Bread: Homemade Hot Pockets Years ago, we discovered that stuffed bread was a real treat. At first, we stuffed them with meat and cheese concoctions but later, we tried everything from chocolate chips (chocolate chips, sour cream, and sugar) to sun-dried tomatoes (sun- dried tomatoes, olives or onions, and basil). Today, we'll show how to stuff that bread, to make hot pockets. Homemade Hot Pockets are simple to make and simple in concept. You put the sandwich fixings into the bun before you bake it. On the left, is a bun with a brat, cheddar cheese, and mustard. On the right, is a ham and cheese pocket. Here's how to make them. Directions 1. Mix the bread according to package instructions. We used an Idaho Potato White Mix for bread machines but any mix or recipe will do. If you
  • 12. are using your bread machine, set the machine for “dough” so that it will rise but not bake. 2. After the dough has risen, divide it into bun-sized pieces—eight pieces for a bread machine mix or sixteen for a double loaf mix is about right. 3. Roll each piece flat with a rolling pin. Place the meat, cheese, and condiments in the center of the bread pieces. Pull the dough around the filling, pinching the seams closed. The dough will tend to pull apart on the seams as it rises again so pinch the seams tightly together making sure that they are bound and sealed well. Place the buns seam side down on a greased baking sheet. Let the dough rise until puffy and doubled. It will take longer to rise than dough alone because of the cool filling in the dough. 4. Bake for eighteen minutes or until the bread is done. Serve hot. Refrigerate leftovers. These are great for picnics and box lunches. Because they have fillings that may spoil, protect them as you would any other meat or cheese sandwich. These are also great to bake on the grill. To see how, click here. Stuffed Bread #2 Italian Filled Bread (with recipes) Think pizza in a loaf. You can stuff this attractive braided bread with almost anything that you would put on a pizza. We'll show you how to make one of our favorites but make whatever suits your fancy. Stuffed Tuscany Tomato Basil Bread (for two loaves) The convenient way to make this bread is with our Tuscany Tomato Basil Bread Mix, but you can use your favorite plain white bread recipe. If you are making this bread from a recipe, use a two loaf recipe and mix according to directions. Add two tablespoon dried crushed basil during the mixing. (If you are making this from our mix, follow the directions but set the dried tomatoes aside and use slightly less than the two cups of water called for. The dried tomatoes soak up some water so using less than the directions call for is appropriate.) Place the bread dough in an oiled bowl, turn once, and cover to let rise until doubled.
  • 13. Use the following recipe for the filling. Stuffed bread recipes lend themselves to customization so add or substitute ingredients according to your taste. Ingredients 1 cup sliced sun dried tomatoes (one packet if you are using our mix) 1 six ounce can of pitted black olives, drained and chopped or 1/2 pound Italian sausage, sautéed 1/2 medium sized onion, diced or 1/2 red or green bell pepper, diced 1/2 tablespoon crushed oregano, Italian seasonings, or other seasonings of choice 1/4 teaspoon pepper 2 cups grated mozzarella cheese 2 tablespoons grated cheese for topping Directions Grease a baking sheet and sprinkle it with cornmeal or semolina flour. 1. Place the dried tomatoes in a bowl with barely enough water to cover. Cover with plastic and microwave for one minute on high heat. Let the tomatoes steep in the hot water for several minutes. Drain the tomatoes and pat dry with a paper towel. 2. Mix all the filling ingredients together in a large bowl. 3. Once the dough has risen, divide it into two equal parts for two loaves. Roll one part into a rectangle about 12 inches by 15 inches. Slice the dough into one inch wide fringed ribbons as shown in the picture leaving the center one-third unsliced. Make sure there is an equal number of slices on each side. Place half the filling on the dough center. Fold up the bottom edge one inch and then beginning folding the ribbons over the filling, lapping them alternately as shown. When you near the top, fold the top one inch down along with two of the ribbon pieces. Finish folding over the ribbon pieces. Cup the ends of the loaf in your palms and compress the loaf into an oblong, well- shaped loaf. Put the loaf on the prepared pan, and cover with plastic
  • 14. wrap. Repeat with the other loaf. Let the loaves rise until doubled, about an hour in a warm kitchen. 4. Preheat the oven to 350 degrees. 5. Whisk one egg with one tablespoon water. Just before baking, brush the top of the loaves with the egg wash. 6. Bake for thirty minutes or until done. As soon as you remove the bread from the oven, sprinkle the tops with the remaining grated cheese so that it will partially melt on the loaves. If need be, return the loaves to the oven for a minute. Cool the bread on wire racks. Serve hot. Refrigerate any leftovers. This bread can also be frozen. Stuffed Bread #3 Mushroom Cheddar Oat Bread (with recipes) The third way to make stuffed bread is jelly-roll fashion. We are most familiar with this as cinnamon raisin bread but you can use any filling— sweet or savory—that pleases you. We'll show you how by making Mushroom Cheddar Oat Bread. For this bread, we used our Old- Fashioned Oat Bread Mix which makes two loaves. If you prefer to use your bread machine or only make one loaf, try Country Farm Oat Bread. Of course, you can always retrieve your favorite bread recipe from the cookbook. We like the chewy goodness of oats with this combination.
  • 15. Mix the bread according to directions. Let it rise, covered, in a bowl. Roll the dough, one loaf at a time, on clean counter until the dough is 1/4-inch thick and in the shape of a rough rectangle. Spread melted butter, mayonnaise, or mustard on the dough, cover with filling, and roll into a tight cylinder. (See below for the recipe for this filling.) Pinch the seams together. Place the dough in a greased loaf pan with the seam down. There's a trick to making these breads turn out right. The heavier the fillings, the more likely it is that the layers will pull apart as they rise leaving a void between the layers caused by trapped gases from the yeast. We reduce those voids by creating vents for the gas to escape. It won't eliminate them but it helps. Once the loaf is in the pan, before the bread begins its second rising, take a sharp knife and slice the tops lengthwise, one slice at ten o'clock and another at two o'clock. The cuts should pierce the first layer of dough so that gas trapped between these layers can escape. (See the picture.) Cover the loaves and let them rise until doubled. Bake at 350 degrees for 25 minutes or until done. Mushroom Cheddar Filling Prepared mustard to spread on the dough according to taste 2 cups grated cheddar cheese 8 ounces mushroom pieces, coarsely chopped 1/4 teaspoon pepper After the bread is rolled into a 1/4-inch thick rectangle, spread the mustard on the surface of the dough. Mix the remaining ingredients and spread them on the dough.
  • 16. Check out this Onion Cheese Bread Onions and cheese make a wonderful combination—but in a bread? Absolutely. If you put the cheese in the dough, it’s tough to get enough cheese for a sharp flavor without overloading the dough. If you make a rolled loaf, like a cinnamon raisin loaf, you can use as much cheese as you like. It is not difficult to make. If you would like to make it even easier, make it with a mix. This is great bread. You can use a mix as we have or your favorite recipe. Use either a two-loaf recipe or one of our traditional bread mixes. Old Fashioned Honey Wheat, White, or Oat works well. For the batch in this picture, we used Old-Fashioned Honey Wheat. You can also use your bread machine to make this bread. Mix the bread according to directions but on the dough-only setting. Remove the dough, follow directions for the cheese and onion bread, and bake in the oven. Since the recipe below is for two loaves, reduce the ingredients by one half when making one loaf. Ingredients A two-loaf recipe for bread or a two-loaf mix. 2 medium onions, diced 1 clove garlic, minced 1 teaspoon dried basil 1/2 teaspoon crushed oregano 1/2 teaspoon thyme 1/4 teaspoon paprika fresh ground pepper 2 cups grated cheddar or mozzarella cheese 1/2 cup grated cheddar cheese (for the top) Directions Prepare two bread pans, 8 1/2 x 4 1/2 inches, by greasing well.
  • 17. 1. Mix the bread according to the package instructions. Remove the dough to an oiled bowl, cover, and let rise until doubled—an hour or more. 2. While the dough is rising, sauté the onions and garlic until the onions are translucent and tender. Remove the onions to a bowl and add the seasonings. Add the two cups cheese. 3. Divide the dough in two. Roll out each piece to a rectangle ten inches by fifteen inches. Spread the filling over the dough. Roll the dough tightly in the long direction jelly-roll fashion to form loaves. Place the loaves in the prepared bread pans. Slash the tops with a sharp knife lengthwise to a depth of 1/4 inch at the ten o’clock position and the two o’clock position. Sprinkle the tops with flour, cover, and set aside to rise until doubled— an hour or more. Let it rise completely before baking. The dough should extend well above the pans and be soft and puffy to the touch. 4. Preheat the oven to 375 degrees. Bake for 40 to 45 minutes or until golden brown. The interior of the loaf should be 195 to 200 degrees. Place the pans on a cookie sheet, sprinkle the remaining 1/2 cup grated cheese across the tops of the loaves, and return them to the oven for another three minutes. Remove the bread when the cheese is thoroughly melted but before it burns. Baker’s note: Bread rolled in jelly-roll fashion tends to separate and leave a void between the layers. It’s still great bread with filling caked in the voids. The slices down the tops of the loaves reduce the voids somewhat. Because this bread is filled with moist onions it will not last long without refrigeration. Eat it shortly after baking and refrigerate any remainders. Southern Cornbread (Yeast) A yeasted cornbread is different— almost like anadama bread. Because the kneading develops the gluten, it is more bread-like and less crumbly than traditional cornbread. Oh, and this bread would make great Thanksgiving dressing. Ingredients 1 (7 gram) package active dry yeast 1 cups warm water (100 to 110 degrees) 4 1/3 cups all-purpose or bread flour (more or less) 1 teaspoon salt 1 2/3 cup cornmeal
  • 18. 4 tablespoons melted butter 1/4 cup honey 2 large eggs 1 can whole kernel corn, drained 2 tablespoons cornmeal 1 egg for egg wash (optional) Directions 1. In the bowl of a stand-type mixer, dissolve the yeast in the warm water. 2. Add half of the flour and mix with a dough hook. Add the salt, cornmeal, butter, honey, two eggs, and drained corn and continue mixing. 3. While continuing to mix, add the flour needed to bring the dough to a bread-dough type consistency. The amount of flour needed will vary largely on how well drained the corn was. 4. Knead as you would for other yeast breads and then remove the dough to a greased bowl. Turn once to oil both sides. Cover with plastic wrap and let rise until doubled. 5. Once doubled, divide the dough into two equal parts for two loaves. Form the loaves. If you are going to make free standing artisan loaves, grease a baking sheet and sprinkle the sheet with part of the remaining cornmeal. Place the loaves on the sheet. If you are making sandwich loaves, grease the baking pans well—the bread tends to stick to the pans- -and sprinkle cornmeal in the pans. Let the bread rise until doubled again. 6. Preheat the oven to 375 degrees. If you choose, just before baking, whisk the remaining egg with one tablespoon water and brush the egg wash on the loaf. Sprinkle the loaf with cornmeal. Bake the bread for about 30 minutes or until the bread is golden brown and tests done. Remove the bread from the pans and cool on racks. Freeze any extra bread or save the bread for croutons. The Versatile Santa Fe Sopaipillas We like the versatility of sopaipillas. They are great at home as an accompaniment for meals, a vehicle for our favorite Mexican foods, or dipped in cinnamon and sugar and served as a snack for the kids. But they also work as camping food. They can be made ahead of time as a mix and they work as great, fresh bread on a backpacking trip. And keep them in mind for emergency bread—they can be cooked over any heat when the power goes out. Best of all, they are quick and easy. (We're always interested in bread that can be cooked in the event of emergency. See an earlier article titled, "Emergency Bread".) Ingredients
  • 19. 2 1/4 cups all purpose flour 1 teaspoon baking powder 1/2 teaspoon salt 1/4 teaspoon cream of tartar 1 tablespoon sugar 1/3 cup dry milk 3 tablespoons shortening 3/4 cup cool water Optional cinnamon-sugar coating: 1/3 cup sugar 1 tablespoon cinnamon Directions 1. Mix together the dry ingredients. Cut in the shortening. At this point, you have a mix. Store the mix for no longer than thirty days in the pantry, six months in the refrigerator, or two years in the freezer. 2. To make the mix, place the ingredients in a medium bowl. Form a depression in the middle and pour in the water. 3. Cut the water into the mix. The dough will be crumbly and dry. Remove to a clean surface and knead for two minutes. You will have a stiff dough. 4. Form the dough into balls the size of golf balls. Smash the balls flat with the heel of your hand until they are no more than 1/4-inch thick. 5. Heat cooking oil in a heavy fry pan or Dutch oven. The oil should be 3/8- inch deep and hot enough that there is a slight sizzle when the dough is placed in the oil. 6. Fry each side until brown. Dip in cinnamon and sugar if desired. This recipe will make about a dozen three-inch sopaipillas. American Rye Bread Recipe This rye bread recipe uses white rye flour for a light bread that is great with meals or sandwiches. For a more traditional rye bread, add caraway seeds and substitute dark rye flour for the white rye. But we think you’ll fall in love with the great light taste of white rye.
  • 20. Ingredients 2 tablespoons butter, melted 2 cups white rye flour 3 cups high protein bread flour 2 tablespoons wheat gluten 1 seven gram packet instant yeast 2 cups water at 105 degrees 1 1/2 teaspoons salt 1/2 tablespoon caraway seeds (optional) 1 tablespoon molasses or molasses crystals 2 tablespoons melted butter Note: In place of the flours and gluten, you can substitute our Hi-Country Rye Flour Blend. If you use this flour blend, your dough will include a dough conditioner that will strengthen the gluten structure and enhance yeast growth. Directions 1. Melt the butter in the microwave and set it aside to cool. With shortening or butter, grease a large bowl for the dough and 2 large loaf pans (8½ x 4½). If you are going to make hearth loaves, grease a baking sheet and sprinkle it with cornmeal. 2. Measure the flours into a large bowl by whisking the flour so that it not packed and then spooning it into the measure followed by leveling the top with a straightedge. Add the gluten and stir to combine. 3. Put about 1/3 of the flour in the bowl of your stand type mixer equipped with a dough hook. Add the yeast. Add the water at the indicated temperature. With the dough hook, run the machine for thirty seconds to mix the water with the flour to create a slurry. Add the rest of the flour. Add the salt, the optional caraway seeds, the molasses, and the melted butter. Mix at medium speed for about three minutes or until the gluten has formed and the dough is elastic. The dough should be soft but not too sticky. To reach the right consistency, you may need to dribble a little extra water (maybe one tablespoon) or flour as the dough is kneading. Place the dough in the prepared bowl and cover it to keep the dough from drying while it rises. Let it rise until it doubles. 4. Gently deflate the dough and form two loaves either as free-standing loaves on a baking sheet or sandwich loaves for your bread pans. Cover the loaves and let them rise again until the dough is soft and puffy, about doubled in size. 5. If you are going to make hearth bread with its, chewy, crisp crust, see the direction for baking listed for “EZ Sourdough Bread.” If not, preheat the oven to 350 degrees. Bake the bread for about 35 minutes. The time will vary depending on your loaves, the pans, and your oven. The bread
  • 21. should make a hollow sound when thumped on the bottom. The internal temperature of the loaves should be 190 degrees. 6. Remove the loaves form the pans and let them cool on a wire rack. Cool completely, or nearly so, before slicing. For helpful suggestions for making your bread turn out perfect, see “Troubleshooting Notes on Making Breads,” especially the notes for rye breads. Summer Zucchini and Carrot Bread In some parts of the country, the first fresh vegetables of the summer are on. You’ll find that you can use many of the vegetables from the garden in your baking— adding color, flavor, and nutrition to your baking. Here is a wonderful bread recipe for all that zucchini squash that seems to overwhelm us each summer. Some fresh carrots are added for color and nutrition. Unlike the quick bread recipes for zucchini squash, this is a yeasted recipe. This is not a sweet bread recipe and so it makes wonderful sandwiches and toast. We like it with peach and apricot jam. Summer Zucchini and Carrot Bread Recipe Any time that you add vegetables to your bread, be prepared to adjust the amount of flour that you use. Vegetables will add moisture to your bread and how they are grated or pureed along with the type of vegetables, will determine the moisture added. But it’s easy to add a little more flour; a little more difficult to dribble in a bit of water. Because it is easier to add flour than water, start your dough a bit on the wet side and add flour as needed. Because zucchini has such a high moisture content, salt is used to draw some of the moisture from the squash. Ingredients 3 cups coarsely grated zucchini squash 1 tablespoon salt
  • 22. 2 cups coarsely grated carrots 3 1/2 cups white bread flour 3 tablespoons granulated sugar 1 seven-gram packet of instant yeast 1 1/4 cup warm water, 110 degrees 2 cups fine ground whole wheat flour 1/2 tablespoon salt 2 tablespoons melted butter 1 teaspoon cinnamon Directions 1. Grate the zucchini. Place the zucchini in colander over the sink and stir in the salt. The salt will draw water from the zucchini. Grate the carrots and set them aside. 2. Place the white bread flour, sugar, and yeast in the bowl of your stand-type mixer. Add the warm water and beat with a dough hook until it is partially mixes. The purpose of this mix is to hydrate the yeast. 3. Squeeze the water from the zucchini. Add the vegetables to the mixer bowl along with the whole wheat flour, the rest of the salt, the butter, and the cinnamon. Knead with the dough hook at medium speed for four minutes. You will likely need to adjust the moisture level either by adding flour or water. Start out a little on the dry side as the kneading tends to wring water from the zucchini. Set the dough in a greased bowl, turn once, and cover. Set the bowl in a warm place and allow it to double in size. 4. Grease two large loaf pans. Form two loaves, cover them, and let them rise until doubled and puffy. 5. Bake at 375 degrees for 25 minutes or until done. The internal temperature should be at 190 to 200 degrees. If this bread is under baked, with all the vegetables, it will tend to be soggy. Remove and let the bread cool on a wire rack. Pepper Cheddar Bread We know of three ways to add fresh veggies to bread: stuff the bread hot- pocket fashion, add bits of chopped veggies to the dough, or puree the vegetables and add the puree to the dough. In this recipe, bits of green or red peppers are laced through a cheddar bread. It makes for an attractive, unusual bread. Consider this a type of bread. We’ve made this bread with bacon bits
  • 23. instead of green peppers. We’ve also used sautéed onions instead of peppers. Don’t hesitate to experiment. This is a great cheddar bread. The addition of bell peppers is an extra. There is just so much cheese that you can add to a bread before it is weighed down and the rise becomes very slow. Get the most pronounced flavor from your cheese by using a sharp cheddar. A slow rise will only enhance flavors, so be patient. You may need to adjust the moisture used in this bread. It’s easy to add a little more flour; a little more difficult to dribble in a bit of water. Because it is easier to add flour than water, start your dough a bit on the wet side and add flour as needed. Ingredients 1 bell pepper, either red or green 5-6 cups white bread flour 3 tablespoons granulated sugar 1 seven-gram packet of instant yeast 1 3/4 cups warm water, 110 degrees 2 1/2 cups grated sharp cheddar cheese 2 tablespoons melted butter 1/4 teaspoon white pepper 1/2 tablespoon salt Directions 1. Dice the bell peppers. Spread the pepper pieces on a paper towel on a plate and cook them in the microwave until tender. Set them aside to cool. 2. Place about two cups of the bread flour, sugar, and yeast in the bowl of your stand-type mixer. Add the warm water and beat with a dough hook until it is partially mixed. The purpose of this mixing is to hydrate the yeast. 3. Add most of the remaining flour to the bowl. Add the cheese, melted butter, white pepper, and salt. Knead with the dough hook at medium speed for four minutes. Add the vegetables and knead them in. Since the vegetables are moist, you will likely need to add flour to reach the right consistency. Set the dough in a greased bowl, turn once, and cover. Set the bowl in a warm place and allow it to double in size. 4. Grease two large loaf pans. Form two loaves, cover them, and let them rise until doubled and puffy. 5. Bake at 375 degrees for 25 minutes or until done. The internal temperature should be 190 to 200 degrees. Remove the bread from the pans and let the bread cool on a wire rack.
  • 24. Baker’s Note: A soft dough rises more quickly than does a firm dough. Since this recipe calls for so much cheese, make the dough a little softer than normal with just a bit more water. European Soft Peasant Bread Peasant bread is a wonderful lean bread from Europe made with a combination of whole grain flours. This variation gives you a chance to explore whole wheat flour, graham flour, and dark rye flour. In combination, they make a great hearty bread. This recipe calls for baking the bread in nine-inch pie pans. The pans help hold the loaves in shape resulting in taller loaves than if baked on flat sheets. This is a whole grain recipe but by soaking some of the flour overnight, the bran is softened and absorbs moisture resulting in a softer bread than many peasant breads. The recipe makes two large loaves. Baker’s notes: This recipe calls for a soft crust. This bread can properly be made as an artisan bread with a hard, chewy crust. To do so, follow the baking directions for Easy Sourdough Bread. This bread can also be made in loaf pans for sandwich breads. Form the loaves and bake the bread at 350 degrees for about 25 minutes or until done. If you would like to make similar loaves from a mix, you can do so with our Irish Potato Wheat Bread mixes. The Irish Potato Wheat Bread has some white bread flour to temper the whole wheat and give it more structure and is a richer bread with an ample addition of buttermilk. Ingredients 1 cup whole wheat flour 1 1/2 cup dark rye flour 2 1/3 cups water at room temperature 1 seven gram packet of instant yeast (or two teaspoons) 2 cups graham flour 1/2 tablespoon salt 1/4 cup brown sugar 4 tablespoons melted and slightly cooled butter 2 cups more or less whole wheat flour
  • 25. extra graham flour for dusting Directions 1. The night before, mix the one cup of whole wheat flour, the rye flour, and the water together until combined. Cover and let sit at room temperature until the next day. 2. The next day, move the flour and water mixture to the bowl of your stand- type mixer. Add the yeast and combine using the dough hook. Add the graham flour, salt, and sugar. Add the butter on top of the dry ingredients and then begin mixing with your dough hook attachment. Add portions of the two cups whole wheat flour until the dough forms a ball. Continue kneading with the machine, adding more flour as needed to get the right consistency. The dough should be soft when you poke it with your finger. The dough ball should knead for about five minutes at medium speed or until the wheat gluten is well-developed. Remove the dough to a greased bowl, turn once, and cover with plastic wrap. Let rise until doubled. 3. Grease two nine-inch pie pans with shortening and sprinkle them with cornmeal, graham flour, or semolina flour. Set aside. After the dough has risen, divide it in two with a knife. Form a ball by pulling the dough around the center and tucking the seams together on the bottom thus gently stretching the surface of the dough. Pinch the seams together to keep them from opening as the loaf expands. Place the seam side down on the prepared pie pan and repeat with the second loaf. Cover lightly with greased plastic wrap and set aside to rise until doubled. Because these are whole grain loaves with rye flour, it may take longer for them to rise, maybe two hours. Let them rise until they are soft and puffy. While the bread is still rising, preheat the oven to 350 degrees. 4. When the bread has risen, lightly dust the tops of the loaves with graham flour. When the bread has risen and just before placing the loaves in the oven, take a very sharp knife or razor and score the tops by making several quick slashes at a 45 degree angle and not more than 1/4-inch deep. The slashes can be made in a cross or square pattern as shown. (Slashes allow steam to escape without splitting the loaves.) Immediately place the loaves on the center rack of the oven leaving as much room for the air to circulate around the loaves as possible. Bake for 40 minutes or until the bread is done and well browned. If you are using an insta-read thermometer, the bread should register 195 to 200 degrees when done. Remove the loaves from the pans to cool on wire racks. Let the bread cool before slicing.
  • 26. 100% Whole Wheat Bread The key to really great 100% whole wheat bread is to extract the best flavors from the whole wheat and temper the harsh tones that sometimes accompany whole wheat flour. Good whole wheat bread has an almost nutty taste without a bitter aftertaste. A long fermentation gives the yeast a chance to produce its own flavors and convert the starch to sugar. By refrigerating the dough overnight, you can make excellent 100% whole wheat bread. This is one of our favorite bread recipes. Yeasts perform differently at low temperatures. In this recipe, the dough is mixed the day before and refrigerated. The acids and enzymes produced by the yeast at lower temperatures temper the harshness of the whole wheat and develop wonderfully complex bread flavors. It’s no more work than other recipes; you just mix the dough the day before. Bakers note: This bread should be very light and fluffy, not dense. The secret of making it so is to make sure that the dough rises fully both in the first rise and in the pans. The dough will fill two 5 x 9-inch loaf pans and should be very soft and puffy before baking. If you let it over-rise, you may see a blister or two in the dough. Poke the blisters with the point of a knife and hurry the bread into the hot oven. Ingredients 5 to 6 cups fine-ground whole wheat flour 2 tablespoons wheat gluten (optional) 1 teaspoon dough conditioner 1 seven gram packet of instant yeast (or two teaspoons) 2 cups plus 2 tablespoons water 1/2 tablespoon salt 1/3 cup brown sugar 4 tablespoons melted and slightly cooled butter Directions 1. Place about three cups of the flour in the bowl of your stand-type mixer. Add the yeast. Carefully measure 2 cups room temperature (80 degrees) water. The water should feel cool to the touch. Mix the water with the flour
  • 27. with a dough hook for 30 seconds or until the yeast is dissolved and the ingredients begin to combine. 2. Add the salt, sugar, and butter and continue mixing. Add most of the remaining flour, the wheat gluten, and dough conditioner and continue mixing at a medium speed for at least four minutes adding more flour as needed to reach a soft dough consistency. (It is important that the dough be mixed for at least four minutes to develop the gluten.) The dough should clear the sides of the bowl but will be soft, not firm, to the touch. 3. Once the dough is mixed, place it in a large greased bowl, turning once to coat both sides, and cover with plastic wrap. Refrigerate overnight or for up to three days. 4. On the day that you would like to bake your bread, remove the dough from the refrigerator and let it warm to room temperature--about three hours. The dough should rise to nearly double in size. 5. Once the dough has risen, form the loaves. Coat your hands with flour and gently form a loaf by pulling the dough around itself to create a slightly stretched skin. You may need to coat your hands several times if the dough is sticky. If necessary, pinch the seams together on the bottom of the loaf. Lay the loaf gently in a well-greased loaf pan and cover with plastic wrap. Repeat with the second loaf. Let double again in size, about 11/2 hours. 6. Preheat the oven to 350 degrees. Once the dough has doubled (the loaf should be very puffy), place the two loaves on a shelf in the top half of the oven, well-spaced so that air can circulate between the loaves. Bake for thirty minutes or until done. The interior of the loaves should register at least 185 degrees when an insta-read thermometer is inserted through the bottom crust. Remove the bread from the pans and cool on wire racks. Let it cool completely before cutting. Dilly Cheese Bread This is a great cheddar bread. This recipe includes sharp cheddar and parmesan. There is a limit to how much cheese you can add to bread dough before you weigh it down. When there is too much cheese, it takes much longer to rise. It can still make a fine bread but it takes patience. (There is a point where the cheese will just overcome the ability of the yeast.) This bread will still rise quickly. The recipe calls for dill weed. Feel free to substitute basil or the herb of your choice.
  • 28. The two tablespoons dill weed in this recipe results in a mildly dilly bread. If you want more dill flavor, try three or even four tablespoons of dill. The white pepper adds just a little bite that accents the cheese. Freshly ground black pepper also works. Dry mustard or paprika is sometimes added for the same purpose. You may need to adjust the moisture used in this bread. It’s easy to add a little more flour; a little more difficult to dribble in a bit of water. Because it is easier to add flour than water, start your dough a bit on the wet side and add flour as needed. Ingredients 2 cups fine ground whole wheat flour 2 tablespoons granulated sugar 1 seven-gram packet of instant yeast 2 cups warm whole milk, 110 degrees (see note) 3 to 3 1/2 cups white bread flour 2 tablespoons dill weed 1 1/2 cups grated sharp cheddar cheese 1 cup grated parmesan cheese 1 tablespoons melted butter 1/4 teaspoon white pepper 1/2 tablespoon salt Baker's Notes: This is best made with high-heat dry milk. (The high heat dry milk will produce a dough with a better gluten structure.) Use 1 3/4 cup plus 2 tablespoons warm water along with 1/3 cup dry milk. Increase the melted butter to two tablespoons. This can also be made with skim milk. If using skim milk, increase the butter to two tablespoons. If using low fat milk, increase the butter to 1 1/2 tablespoons. Directions 1. Place the whole wheat bread flour, sugar, and yeast in the bowl of your stand-type mixer. Add the warm milk and beat with a dough hook until it is partially mixed. The purpose of this mixing is to hydrate the yeast. 2. Add most of the bread flour to the bowl. Add the dill, the cheese, melted butter, white pepper, and salt. Knead with the dough hook at medium speed for four minutes, adding flour to reach the right consistency. A softer dough rises more quickly than does a firm dough so do not add too much flour.
  • 29. 3. Set the dough in a greased bowl, turn once, and cover. Set the bowl in a warm place and allow it to double in size. 4. Grease two large loaf pans. Form two loaves, cover them, and let them rise until doubled and puffy. 5. Bake at 375 degrees for 25 minutes or until done. The internal temperature should be 190 to 200 degrees. The lactose in the cheese will caramelize and make a very bronze crust, a darker crust than most breads. 6. Remove the bread from the pans and let the bread cool on a wire rack. Golden California Raisin Bread This recipe has so many things to love. We love the taste of raisins and orange together. And we’re particularly partial of golden raisins. We also love white rye flour. It’s mild and has an almost sourdough-like taste. All in all, we’re pretty proud of this bread. You can buy, plump, giant golden raisins at The Prepared Pantry. If you are having trouble finding white rye flour, medium rye will work. Better yet, try our white rye flour blend and use that in place of both the rye and bread flours. If you use our blend, it will have the right ratio of rye and bread flours along with extra gluten and dough conditioners to make a great bread. Ingredients zest from one orange about 3/4 cup freshly squeezed orange juice 1 cup whole milk or one cup reduced fat milk and one tablespoon butter about 1/4 cup warm water 1/2 cup honey 1 seven gram package instant yeast 2 cups white rye flour about 4 cups high protein bread flour 1 tablespoon salt 1 tablespoon cinnamon 2 1/2 cups golden raisins Directions
  • 30. 1. Grate the zest from one orange being careful not to get the bitter, white pithy layer. Set the zest aside. 2. Squeeze the orange juice from one or two oranges until you have about 3/4 cup. Mix the orange juice with the milk and water. You should have 2 1/4 cups of liquid mixture. Add the honey. Heat the liquid mixture in the microwave until it reaches 105 degrees. 3. Place the rye flour and yeast in the bowl of your stand-type mixer. Add the warm liquid mixture and beat with a dough hook until it is partially mixed— about 30 seconds. The purpose of this mixing is to hydrate the yeast. 4. Add most of the bread flour to the bowl. Add the salt, cinnamon, and orange zest. Knead with the dough hook at medium speed for four minutes adding more flour to reach a soft but not sticky dough. Add the raisins and knead them in. (You may need to knead the raisins in by hand.) Set the dough in a greased bowl, turn once, and cover. Set the bowl in a warm place and allow it to double in size. 5. Grease two 8 1/2" x 4 1/2" loaf pans. Form two loaves, cover them, and let them rise until doubled and puffy. Bakers Note: This bread is very good. The key is to let it rise enough. The yeast has to lift a lot of raisins and the bread has a high rye content and it just takes a while. Be patient. If there is a second key, it’s to use quality golden raisins. They should be soft and plump. 6. Bake at 350 degrees for 25 minutes or until done. The internal temperature should be 190 to 200 degrees. Remove the bread from the pans and let the bread cool on a wire rack. Bakers Note: Whole milk has an enzyme which retards the growth of yeast. We recommend that you use Bakers Dry Milk, high heat treated dry milk, for this recipe, though liquid milk will still make an excellent bread. October Pumpkin Bread Recipe Pumpkin makes a wonderful addition to bread, adding color, nutrition, and flavor. There are two ways to add pumpkin: grated or pureed. If you add grated pumpkin, you will have flecks of deep orange color and the bits of pumpkin tend to give the bread a chewier texture. The other way is to add pumpkin purée. The following recipe uses pumpkin purée.
  • 31. This is wonderful bread. Be prepared to adjust the amount of flour that you use to accommodate different moisture contents of the pumpkin purée. If you like, you can substitute up to three cups of whole wheat flour for the white bread flour. (The picture is of bread with whole wheat flour.) We like golden raisins in this bread but suit your own taste. This bread is not sweet like a dessert bread. You can add more sugar if you like. You can also add one cup of chopped walnuts. And if your kids don’t like raisins (like ours), you can leave them out. Ingredients 5 1/2 to 6 1/2 cups white bread flour (you can substitute up to 3 cups whole wheat flour) 1/4 cup brown sugar 1 seven-gram packet of instant yeast 1 1/3 cup warm water, 110 degrees 1/2 tablespoon cinnamon 1/4 teaspoon ground cloves 1/2 teaspoon ground ginger 1 cup puréed pumpkin or canned pumpkin 1/2 tablespoon salt 6 tablespoons melted butter 1 1/2 cups raisins, golden raisins, or currents Directions 1. Place half the bread flour, sugar, and yeast in the bowl of your stand-type mixer. Add the warm water and beat with a dough hook until it is partially mixes. (The purpose of this mix is to hydrate the yeast.) 2. Add the rest of the flour, the spices, the pumpkin, the salt, and the butter. Knead with the dough hook at medium speed for four minutes. When the dough comes together, add the raisins and continue beating for the remainder of the four minutes or until the gluten is developed. You will likely need to adjust the moisture level either by adding flour or water. Place the dough in a greased bowl, turn once, and cover. Set the bowl in a warm place and allow it to double in size. 3. Grease two 9 x 5-inch loaf pans. Form two loaves, cover them, and let them rise until doubled and puffy. 4. Bake at 350 degrees for 25 minutes or until done. The internal temperature should be at 190 to 200 degrees. Remove the loaves from the pans and let the bread cool on a wire rack.