Oppenheimer Film Discussion for Philosophy and Film
Curs eng
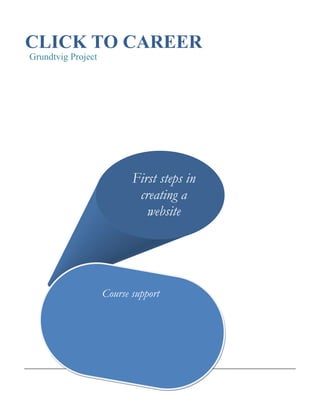
1. First steps in
creating a
website
CLICK TO CAREER
Grundtvig Project aquote from the document or the summary of an interesting point. You can position the text box anywhere in the
document. Use the Drawing Tools tab to change the formatting of the pull quote
Course support
2. WHAT IS A WEBSITE AND HOW TO CREATE ONE?
Every day, there are huge opportunities via the Internet in the tumultuous world of
business. Sitting in front of the computer, besides your usual activities, you can launch a
successful online business by yourself, without investment or effort, in a somewhat short time.
The first step in starting a business on the net would be to create your website.
A website is a virtual space where you can post ideas, photos, videos, and can communicate
with other people. It is a mean of promoting and developing your business.
There are your thoughts to the entire world and the entire world can become a spectator.
The site can be anything you want it to be. There are sites of various kinds, and what makes
them so exciting is just full liberty without rules.
In few words, the site offers the opportunity to achieve information transfer through
successive posting. Visitors can leave links or you can submit their comments. You decide
whether or not to provide a right of reply.
Enables users to interact because the attributes of a site can be summarized in one word:
communication.
Whatever you have to say, the site is the ideal tool.
You can understand more quickly how a site is working simply by tying to create one.
What will happen next? Up to you. It depends on you, on your imagination, on how much
interested you are and know you disclose in order to start what could end up as a thrilling
adventure.
Mixxt platform is the best option. It's free, easy to set up and easy to manage.
But let's start and see how to create a website step by step with this platform
Step 1. CREATING A GMAIL ACCOUNT
First, in order to create a site, we need a prior e-mail account on Gmail platform. You
will use this account as own email address as well as to have access to the internal details of your
site.
Also in this account you will receive notification of comments from site visitors.
Moreover, gmail account creation will give you access to all the tools Google (Youtube, Docs,
Calendar), not just the e-mail and website!
A Gmail account can be created at https://accounts.google.com by pressing Create an
Account. After creating access button, you will be asked a series of information.
3. In the example above, one creates teamprojectbjaiv@gmail.com account, but you will
enter your data instead of the image. Steps to take are:
Begin by entering your name and surname;
Select the desired name for the account (which will appear in your address before
de@gmail.com). Check availability button you can find out whether your chosen name was
already taken by someone else (it is not allowed for two Gmail addresses to have the same
name);
Password desired must be typed twice for verification. On the right side you have an
indication whether you choose a strong password or weak (easily broken);
Box Enable web history can be checked if you want to register your business on the
Internet as long as you are connected to your Google account. This option brings a number of
benefits for easier finding previously visited pages or various recommendations;
For the cases when you forget your password, and you are required for another older
email address where it will be sent useful information for account recovery when you don't
manage to connect to it;
You are asked for location and birth date;
Also you need to recognize a word with distorted letters so Google can realize if you are a
human user or a program able to automatically enter data.
4. Finally, press the button to accept the takeover of data by Google, which will take you to
a confirmation page, if no errors occurred. Otherwise, the error is signaled (eg.,
Incorrectly typing the word deformed, or the old email address, password repetition).
With their account you can go to the platform mixxt, where you use your Gmail address
and password that you have chosen (recall, a Gmail account gives you access to the same
password for all online services offered by Google).
To create the site you must go through a few steps, think at the images below:
Step 2. CREATING A WEBSITE ON PLATFORM MIXXT
First you need to go to the home page www.mixxt.com →
http://smallcommunities.mixxt.com/
Type the word mixxt in the search field of Google.
You click on the first option from the list.
This will open the following page :
5. At the top of the page, you can access information about the social platform mixxt about
modules and features, by clicking on the arrows located on the sides.
Below, you have the option Create Your Own Free Social Network that allows you to
create your own network, accessing the Start now button.
This will open a window that contains a form with several fields that must be completed as
shown below.
Under each field there is transparent information that will guide you step by step to
creating your site.
In building the site, following the model below, the fields will be adjusted after the need, the
profile, the imagination and creativity of each.
6. Here you set your site title and address. The location is particularly important, as you will
communicate this to all who want to visit your site. In addition, the address has the same role as
name of a product or a company: it must represent you, to ensure that you will not be confused.
You have to remember, however, that address would end mandatory with the extension
mixxt (fields 1 and 2 of the form above).
Field 7 contains a list of features from which you can select those that you need in the
composition of the menu. There is no need to select them all from the beginning, they can add or
delete the process.
7. In field 8 you can choose your desired template that can be modified for coloring and layout
according to your preference. If you have some knowledge of creating Web pages, you can
change any element of the template, but for most users this is not necessary, templates provided
are sufficiently diversified.
Selecting a suitable design for the site is very important because if the design does not impress,
the user will leave the site quickly. Design is the first impression that lasts less than a second, if
it is positive the user will remain on the site and if it is negative, regardless of the offer and the
products we offer, he will soon leave the site.
Once you have completed the process of creating the site (filling in), you'll be able to access
the site using your email account and password created using Google (gmail).
In order to do this, enter the platform mixxt. The top right is a button to login Login.
8. Clicking this button will open a window - door you need to enter new website created.
In this regard, a window will open divided into two parts. We will complete the left side of the
window Sign in as:
We will introduce in the email and password fields, the gmail address and password
previously created after that we will access the Sign in button.
In the right side of Sign In button, we have the option Remember me. When you check
this option after you have entered the username and password, your account will remain logged
9. in all the time. It is best to disable this option, especially if you use a computer with other
persons.
By clicking the Sign in button, this opens the antechamber of the site, which in the right, displays
the name of the newly created site - Click to Career.
We access the created site name by a click that will lead us to the dashboard from which we
access all the options for the construction of the site.
Construction / assembly of site
By accessing the option Edit your network, get to the administration page of the
website.
The administration panel consists of four windows: Network, Members Panel, Extract and Edit
network.
We all go through the four windows above, explaining the procedure of operation and use of the
characteristics in building the site.
10. First window: Network comprises the following options: Details, Features, mixxt
Apps, Main page, Menu builder, Privacy, Profiles, Style, Pokomatic, News Feed and
Statistics.
First option Details gives details about the website set: title, subtitle, language and a brief
description. You can make changes to those fields.
11. Choose a language field provides us with a list of several options for selecting the
language we want to edit the site. By accessing the right button of English it will open a list
from which you select the desired language.
12. In the field Tags (keywords) you will type a word or short phrase that labels information on
website content or page, facilitating its retrieval by using the tool. You can add more tabs
(words) separated by commas. Words contain letters, numbers, spaces, and they written as a rule
in lowercase.
In these fields you can make changes anytime you want and will be saved by clicking the Save
button. To return to the previous window you have to access the back button located at the top
left or bottom of the window About your network.
Features - Enable appropriate features to your site: Blogs, Videos, Forums, Images,
Groups, Wiki, Events, Files, Content Management, News.
There is no need to add them all at the beginning. It is sufficient to select those which best define
the profile of the site, for then, to add new ones.
Each feature is accompanied by appropriate explanations. Selecting an option is done through
Activate button with two choices: Yes or No. You will check by clicking one of these variants.
After the options activation, these are saved by clicking the Save button and return to the
previous page clicking back.
13. Mixxt Apps - enables network expansion with various applications, and personalization.
The page contains the following applications: Chat, Articles, Testimonials, Footprints,
Jobs, Artists with appropriate explanations of each.
Select the applications that you need for your site by checking the small square located to
the right of each application.
These applications are limited by the chosen package. Free version is available for any
two options.
After selection, save and return to the previous page activating buttons Save and Back.
Main Page - outlines the main page of the site, page presentation of what you are, is your
business card.
This feature allows you to build and change the page layout presentation based on desire,
need and your imagination.
14. By clicking on the Main page, a construction page will open where you can arrange and
rearrange, move and delete features, thus personalizing the main page of the site as needed, by
your creativity and imagination.
At this stage the site is pretty poor as options, but can be added the so-called gadgets, a
very diverse range of components that displays useful information such as links to blogs / partner
websites, images, videos, forums, chat, membership, traffic, etc.
The enrichment page of the site can be accessed with the option Main page available in
Admin panel window (Edit your network - Main page). It looks like the picture below and
represents the blog area divided into several compartments containing a number of predefined
components.
15. The left side are the active components, which multiply by clicking the green crosshairs.
They can move anywhere, any place, any suitable position of the other three columns: left, center
and right by drag and drop, i.e. by fixing the cursor on one of its features and dragging to the
desired location.
This maneuver can be done at any time by adding or deleting components.
Holding the mouse pointer on each part to the right will display information about it.
16. Deleting a component is done simple as well, setting the mouse cursor on the
corresponding rectangle on the right side of its features one can observe a smaller rectangle
formed by points. The mouse cursor will turn arrow-cross. In this moment we draw the rectangle
(the feature that is intended to be removed) to the bin located at the bottom.
17. Depending on how these components are located and arranged so will show the main
page of the website - presentation page (Home).
Menu builder - building site menu and customize it as you wish.
The menu of a site is a sequence of buttons arranged either horizontally or vertically, by
accessing them you link to different pages of the site. The menu is one of the most important part
of a website or blog, it offers the visitor a much easier access to site content.
18. Click Menu builder feature and you get to build the menu page.
On the left is a column of tabs which file selection menu helps you configure your site.
In addition to the tabs displayed on the left, you can add new ones by accessing the option
Add new tab.
19. Rename tabs as you like by way of a click on the right (the dotted rectangle) of the tab. This will
open a window with two fields: the first field will be the key that you want to name that tab ex.
About Project.
In the second field you will configure the newly created tab. Click on the right side of the
field set new tab which opens a list from which you select the appropriate tab set.
The box is a window that contains two fields: URL and Visibility.
The URL field is completed if you have selected the appropriate option Link from the list
corresponding to the field Configure your new tab.
The field Visibility opens a list with more options: Anybody (visible to all), Members
Only (visible for members), Moderators and Administrators (visible to moderators and
administrators) and Only administrators (visible to administrators), in which you select the
desired option.
20. Creating a Sub-Tab
You access the Add New tab located at the top left of the page Menu builder. There will be
two mini windows whose fields will complement the model described above Tab name ex.
Partners and Configure your new tab that opens a list from which you select the options Link
or Blank. For the field Visibility the desired option will be selected from the list (eg Anybody)
after that the settings will saved by clicking the Save button located at the top of the page.
You access again the option Add new tab.
Under Configure your new tab field there is the Sub-tab option. It will be checked the small
square in front of the option. Fill in the name of sub-tag (eg Romania), and the other fields
Configure your new tab and Visibility - save.
21.
22. Tabs and sub-tabs can be moved and rearrange as you wish by drag-and-drop.
Drag-and-drop (drag and release - drag and drop editing) is a function that allows editing of
moving or copying of blocks of data, showing the block on which it operates and then using the
mouse to drag the block to the new location (by holding down the left button of the mouse).
When you release the mouse button, the block outlined above appears on new location.
Privacy - This option provides us with two options: General Settings and Features -
settings of the site. So you can restrict how much you want access of members and non members
to view certain pages of the site to load right pictures or video, file sharing or modification.
For site security, it is recommended that the right to change, delete and manage the
information, files, images, videos, reviews, forums, groups, features, etc. to be granted only to
the administrator.
So, check the options you want for your site safety as shown below and save.
23. Profiles - this option allows you to select questions to members who register on the site.
As you can see, there are some predefined questions.
These can be edited, deleted, or you can add new ones.
24. The options Add a question at the top and Add a question at the bottom allow us, by clicking
on them to add questions to the top or bottom of the page.
Windows multiply if you click on the + sign in the right side of the window that contains the
question for members.
Deleting questions is made by clicking on the x that is in the top right of the window
for building the question.
The field Question title (question type) provides a list from which to select the
appropriate fields in response to questions (eg online, longer text) or options that you want
information about members (website address, email address, etc.. ).
Next to this field, you must tick one of the two options: Mandatory (Required) and
Private answer.
25.
26. So when a user wants to become a member on your site, logs through a user account and
then completes his profile using the questions you chose through the option Profiles.
Blocks containing questions for members in order to complete their profiles can be
arranged and rearranged by setting the mouse cursor to the left of the block containing the
question for members and pulling it to the desired position.
Thus will show a member's profile!
Style - This option enables you to choose a template for your site.
You're on the page where you choose a template for your site. Check one of the templates
under Choose a theme and click on Save. You can change your template anytime, but it is
preferable to establish from the outset by your site profile.
Predefined template can be modified as you wish.
Changing template
Windows Header & Navigation open up a range of options by which you can change the
template.
27. You can make changes regarding: the color of the title and subtitle site, you can insert a
logo; you can change the background color, background image, the color of the menu tabs.
After any changes (save)
Changing the color is done by clicking the color palette located to the right side of each
field
You can make changes related to text: change the font, the text color, the links color.
28. The same applies to the other options: Page, Form elements, Custom CSS.
Custom CSS option is recommended for those who are experts in CSS (CSS stands for
Cascading Style Sheets. CSS is a language (language style) defining "layout" for HTML
documents. CSS covers colors, fonts, margins (borders), lines, height, width, background
images, advanced positions and many other options.) If you are a beginner, you should not
enable this option.
Pokomatic - with this option you can do settings for the profile page of the members.
For members profile page, you will fill the fields contained by Pokomatic window: Profile
Pages, View, subject Notification, Notification text containing information on their
29. completion.
You will fill these fields as you wish, as in ex. below and save.
News Feed. Here you can manage what information you want to display.
By enabling this option, you can determine the type and amount of information to be
displayed in the News Feed, you can check the active characteristics and standard information,
you can choose the maximum number of entries, number of days, or you can delete entries.
By Shoutbox option, you can directly post important announcements or other
information in News Feed.
30. Statistics - with this option you can visualize a clear statistical of new members enrolled
in the last 7 and 30 days.
Further statistical viewable of site characteristics (Forums, Videos, Images, Groups, Events,
Files, etc.)
31. Follows a statistic from the disk free space (as percent of disk space occupied by certain
characteristics: members, images, files, CSS images) but also the current monthly traffic and
traffic history for the past three months.
32. Members Panel - is the second block containing several features that facilitate the
settings related to the network members.
Members - with this option you can view information about members, moderators or
administrators of the network.
At the top there is a field that enables us to search them (Search). From Show all list, we select
the appropriate search category: Show all, Moderators and administrators and only
administrators.
Under this field is displayed information on date registering as a member, moderator and
administrator of the network and the last login date.
The same applies with the choice of Name ascending list.
By selecting the option Show profile questions, it will be opened a list containing
questions regarding the profile of the members and the answers to these questions (if they were
completed by members) will be shown below for each one.
33. Next to each member displayed on the right side, there are three options
that allow us to accomplish several tasks: to edit profile members (in member
profile page you can select to send a message to reset the picture and password, to change their
status in: Member, Moderator, administration or to delete), to email or to delete a member.
These operations are done by clicking on each of the three options and save changes.
Newsletters - allows us to send a message to members, moderators and / or network
administrator.
ccccc
By clicking the Newsletters option a window will opened where you can send a message
either to members, moderators or administrators of the network. This is done by selecting from
the list of Target group field, the desired category.
In the Subject field you will write one or more words that reflect the content of the message.
Below there is a window where you can edit the message. It can be send as whole or only the
first 80 letters by selecting one of the two options in the field Text length under the editing
window.
After editing the message press the Send button and then Back to go to the previous page.
34. mm
M
Member requests - this option displays users who want to become members of the
network and the possibility of their management.
Invitations – creates the opportunity to invite new members to join your network.
35. Page Invite new members will open where you can send invitations to new members to your
network.
This window contains several fields and options.
Fill in the Subject and Message fields. Devise a message attractive for sending invitation to new
members that you can save it as a template by checking the box corresponding Save this
message as a template.
For the invitation to get also to friends of the members, check the box When They join the
network, automatically, add invited members to my friends.
Below there is Invitations box, where you send invitations to people to become members of the
network.
This is done as follows: enter the email address of a person or the mixxt ID (if the person is
registered as a member on another network mixxt and if you know his/hers ID) in the Enter
email or mixxt-ID fields.
After entering the email address or ID you will press the Add button. You will see a field
where you will type the name of the person (recipient) and push the button Invite.
Invitations can be sent also to persons in other networks mixxt.
emSe
36. To the right of the box Invitations, we access the option Open Address Book. Here we
have a search field where we will search the key name, and push the Search button.
Following the search, it will be shown the persons that wear the specific name or surname
but also the name of the network where they are acting as members.
Select (click on name) the person you wish to send the invitation. Name (mixxt ID) will be
displayed in the box Invitations and you will access the Invite button.
If more people will be selected, they will be displayed as a list (List of recipients).
37. Under the Search field is displayed a list (Networks) with other mixxt networks.
In our example appear networks Books Like Acting, Career and Click to Career.
Clicking on one of these networks, it will open a list of its members. From this list select the
people you want and send them invitations to become members of our network (the same
procedure as described above).
Accepting the invitation
Persons who were sent invitations to become members of the network will receive an email that
contains a link that will be accessed.
38. By clicking this link show a window will appear (Join Network) whose fields must be
completed by the member.
You will check the two options at the bottom, and then you press the button Sing up.
A new window will be opened in which the member is informed that he was invited to join the
network and must check the boxes of the two options: blog and I have read and accepted the
Terms Network, and then click Join Network button.
At this point, the person who received and accepted the invitation joins the network and can log
in with the email address and password on the homepage.
uăW
We
39. A Welcome mail – welcomes the new members with a message
Activate by clicking Welcome mail and in the window that appears, complete fields
Subject, Message, and check the box Activate - save.
Ex
Extras is the block that contains the following features: Premium Features, Your own
domains, Network Founders, Google Analytics.
40. Premium Features - enables you to select multiple features to develop your site.
Your own domains - it is the option through which you can add more fields to this network.
41. For this procedure another package will be purchased.
Network Founders - gives you the opportunity to exchange experiences, tips and tricks for
developing your network.
Edit network includes: Delete network, On / Off switch, transfer host.
Delete network - enable this option if you want to delete the site.
On / Off switch - allows you to activate or deactivate site
42. Transfer Host - choose another member to become a network host. It must be given as
the network administrator. He will receive a confirmation email after which he will
automatically become the new administrator of the network.
Step 3. BUILDING PAGES AND ADDING CONTENT
Posting an article is no more complicated than writing an email.
In our example, we describe how to load the appropriate information for site menu.
We take each tab and explain its construction and how to load content (text, images,
video etc.) on site pages.
Home is the main page of the site. It should be as attractive and well determined.
43. Home page construction and arrangement was made with Menu builder options and Main
page.
Menu builder, with this option we created the site menu (see description for Menu builder).
You access Edit new your network and new Menu builder.
44. Main page - with this option you can accomplish designer page. Access Edit new network and
Main page (see description of Main page).
Access Edit to your network and Main page.
About Project - this tab you create by clicking Edit new network - Menu builder. You click
on the About project tab. In the field Configure your new tab, select Content Management
option from the list and save.
You set the tab About project and is ready to receive information.
Posting a text on this page is as follows:
Click on the tab Home - About Project. This will open the Create a new content page.
45. You will give a page title in the Title field, and then you will access the button Create content
page.
Editing window will open.
It is important to add a title of the article (above) and write your message in the main box.
Above the main box you can see a bar of buttons that allow you to change fonts, colors, insert
images, links, tables, etc.. Once the article is full you have below the main box buttons to save it.
It is recommended to use also the box Tags (Labels) to give a short description in the form of
keywords separated by commas (examples: Click to Career, Project etc.). With these tags you
can create a small table of contents, a division of articles into categories according to their topic.
The contents will be useful to visitors after accumulating a large number of messages.
We note that the title of the page will appear on the right, in the Navigation window where it can
be accessed.
If in the future you want to return to the page of the item to change, you have the option
Edit Page which displays the existing articles and allows you to recover them.
46. New page - offers the possibility to add a new page with information (the procedure is the
same as described above).
Meetings and Activites - is the tab that allows us to post information about specific events and
activities.
Click on Edit your network on dashboard from the main page, click on Menu builder and
click on the tab Meetings and Activites. From the list Configure your new tab, select Events
and save (Save).
Go to the main page and from the menu you access Meetings and Activites tab. Overview
window will open that will allow us to add a new event. In this respect, you fill Add new event.
47. This will open the Add New Event in which you complete the fields with the appropriate
information as in eg. below and save.
Documents tab has been created as follows: Edit your network - Menu Builder - Documents.
From the appropriate list of field Configure new tab, select Files and save.
48. Go to main page and access the Documents tab in the menu. Overview window will
open that has a search field for files, Search. In the upper left side are positioned three options:
New File, New Folder, My files that enable you to upload a file (New file), create a folder to
upload files, both you and the members and the friends of the network (New folder) or you can
view the uploaded files (My files).
To upload a new file you access the Add a new file now option. This will open the Add
file window where you fill the file name that will be loaded by accessing the option Choose file.
We notice the display of file Project presentation.pdf that we uploaded. Below at the
Visibility field, we select from the list the desired option for file visibility. In the Description
box we can write a short description on the file contents, add one or more keywords in the Tags
field and Save Settings
49. Dissemination (dissemination of information) - Edit your network - Menu builder -
Dissemination tab. From the list Configure your new tab select the option mixxtApp:
Articles and save.
Access Dissemination tab from the menu of the first page. Articles window will open that
displays a search field for articles Search Articles
To add an item, access the Add button at the top left of the window. Fields of the window
Articles will be filled as shown below.
50. After filling Publish button will be accessed on the right bottom of the page.
Newsletter - access Edit your network - Menu builder - Newsletter tab. From the list
Configure your new tab select the option News and save.
Access the Newsletter tab in the menu on the first page. It will open the window News that
contains two fields account: Search for and Sort by (sort by date).
51. To add a new article you access the top left option, Create news article. Edit news will open
the required fields will be filled as in e.g. below:
52. Forums - access Edit your network - Menu Builder - Forums tab. From the list
Configure your new tab select the option Forums and save.
Access the Forums tab from the menu of first page. It will open the window Forums that
contains a searching field Search: option Settings and Edit forums and categories
Settings option allows us to make some settings for the forum: display 2 or 3 columns,
determining the number of subjects per category and number of posts on the subject-save.
Edit forums and categories - allows us to build and post a new forum. After accessing
this option a window will open Edit forums and categories where you will click on the Add
forum.
53. In the opened window you will fill the title of the forum that you create in the field
Forum title.
After establishing title you will access the Add category. In the window that opens, you
fill in the forum category title in Category Title field. Select the desired visibility of the forum -
Visibility then complete the other fields: Topic sorting, Sorting of posts, Description - Save.
So we created a new forum.
54. Edit forum. To complete contents of the forum you will go on main page (Home) and
click on the tab Forums. In the window Forums is displayed title of the created forum and its
subcategory. In eg. below, the title is Kick-off meeting and subcategory Impressions.
Click on this category (Impressions) to open the Impressions window. Here you will
access the option New topic.
In the New topic window fill the Title field (may contain a greeting or a question). In the
appropriate box of the field Post write the contents of the forum. Follows the Tag field
corresponding to keywords and then Publish.
55. To view the forum created go to Home page and access Forums tab.
Chat - Edit your network – Menu builder – Chat. From the list Configure your new
tab select the option Chat and save
56. To access the chat, go to Home page and access the Chat tab.
Chat window opens. To open a list of discussions with network members you will access option
Join chat from the window Chatters in the top right.
57. In the new window we have on the bottom left. The possibility to select people you want to
converse. Immediately to the right there is a box where you type messages to friends. To send
the message, access Say it!
Images - Edit your network – Menu builder – tab Images. From Configure your new
tab you select the option Images and save.
58. Uploading images. Go in Home page, access Images tab. In the window New images
uploaded yet access the option Upload imagesso you can upload images.
In the window Add images access the button Multi images.
59. In the window Album: New album access the button Choose images.
Open window will allow you to select images stored on your computer. To upload access
the button open.
Upload images and Continue.
60. Window Album will open: New Album where appears the uploaded image. Here we
have editing options for the new created album. You will fill the available fields: Name, Date,
Location, Description. At the Visibility field you will select from the list, the desired option for
images visibility. The field Add images offers you the possibility to choose the option for the
person who will have access to upload the images. After album editing you will acess the button
save
Videos – Edit your network – Menu builder – tab Videos. From the list Configure
your new tab select option Videos and save
Uploading video files. You can upload the movies from your personal computer or the
ones already available on the internet (eg. Youtube or Picasa).
Go on main page (Home), click on tab Videos. In the window Overview we have three
options: My videos which plays the uploaded videos, New playlist and New video.
61. New playlist – opens the window Create new playlist .
In this window create a new list by completing the Title with a name for your list of
plays. Define who can view and add videos to complement the other two fields:Who may see
this playlist and watch the videos and Who may add videos to this playlist – save.
Uploading a video from Youtube. You access New video option which opens window
Add new video. From the appropriate list of the field Video service, select You Tube (url &
embed). Below is the Link or embed code field, paste the link corresponding to the video from
You Tube (copy-paste).
62. Search on the internet the YouTube application through a searching engine (Google), select the
video and copy the link of the appropriate video in the Link or embed code field in the window
Service and link - Continue.
The next step consists in filling the fields of the window Video details then save (save).
63. Groups - Edit your network – Menu builder – tab Groups. From the Configure your new
tab list select the option Groups and save.
The group contains a selection of members who share the same interest. To form a group, go to
the main page Home and access Groups tab. Groups window opens where you select the
Create new group option.
Create New Group window will appear where you complete the appropriate fields:
group name, logo, description, keywords, settings for group members (Member settings) and
save.
64. So we created the group C2C which has three options: Main page, Members, Admin panel.
65. Admin panel includes a number of features (options) similar to those of the site. Access each
option and operate the appropriate settings.
Group members can upload and share images between them and can communicate with other
members of the forum to access the network.
Sending invitation to group members
Access the option Invitation in the window Members (Admin panel).
The window Invite new group members will open. Fill the fields: Subject, Message.
66. In the Invitations box you have two options to invite the members: either you type
the mixxt ID-ul of the member in the field Enter mixxt ID, or you select it from the addresses
list Open Address book.
We note that the member selected from the open address book is loaded on the invitation
that will be sent through command Invite.
67. Sending invitation is confirmed by displaying a message.
Members - Groups - Edit your network – Menu builder – tab Members. From the
list Configure your new tab select Members option and save.
68. Accessing Members tab of the Home page displays the list of all network members.
On the left there is a search box (Search) for members. From this list you can access
member profiles. Click on one of the members of this list. It will open a window displaying his
profile (information about him) and a few options that facilitate communication: Actions - Add
as friend and Send message
69. Partners - Groups - Edit your network – Menu builder – tab Partners. Here you
build the subtabs corresponding to partners.
It is necessary to create separate pages for each partner.
Creating a page
About Project tab will be accessed in the Home page. In the upper right, click on the option
New Page.
70. Create a new content page will open where you fill the field Page Title with the title of
the page, then you access the button Create content page.
In the new window, you can add text that will clothe the page created and keywords
(optional). After completing these tasks, click the Save button
71. We note that the newly created page is displayed on the right, in the Navigation box.
72. Click the Edit navigation. Editing window opens in which you complete the Title field
and from the corresponding list of field Assign to content page, select the tab or page you want
to link the newly created page (in our eg., we linked the newly created page (Romania ) to the
Romania tab - save.
We note the display of the newly created page title which can be modified or deleted
through the two options in the top right.
We return to the Home page and access the About Project tab. We note on the right side
of the box Navigation the title of the created page Romania which we access. The content of
the created page will be displayed.
73. Copy the link displayed on the top of the page, go through the path Edit your network –
Menu builder – subtab Romania – and paste to field URL – save.
To check, go back in the the Home page and access the Partners tab - Romania subtab.
Contact - is the page that contains contact information.
Edit your network – Menu builder – Contact. From the list corresponding to the field
Configure your new tab, select Link. Building the page and its linkage to the tab Contact will
be made as in the example described above (Romania).
74. To see the final form of the site, as will be seen by your friends, use the address you have
chosen to create it. In the example shown is about clicktocareer.mixxt.eu