
Recommended
Recommended
More Related Content
Viewers also liked
Recently uploaded
Recently uploaded (20)
How to Install Hyperion Planning - Part 3 Install Essbase
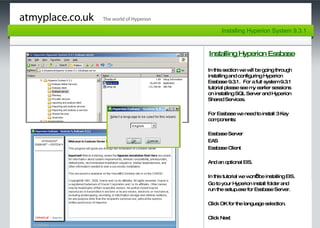
- 1. Page 4 Installing Hyperion Essbase In this section we will be going through installing and configuring Hyperion Essbase 9.3.1. For a full system 9.3.1 tutorial please see my earlier sessions on installing SQL Server and Hyperion Shared Services. For Essbase we need to install 3 Key components: Essbase Server EAS Essbase Client And an optional EIS. In this tutorial we won’t be installing EIS. Go to your Hyperion install folder and run the setup.exe for Essbase Server. Click OK for the language selection. Click Next Installing Hyperion System 9.3.1
- 2. Page 4 Installing Hyperion Essbase In the licence agreement screen select I AGREE and Click Next. On the Home directory screen Click Next Installing Hyperion System 9.3.1
- 3. Page 4 Installing Hyperion Essbase Select your directory or leave as default and click Next Unless you wish to remove the sample applications leave the install type as Typical and click Next Installing Hyperion System 9.3.1
- 4. Page 4 Installing Hyperion Essbase Click Next Leave the ESSLAN as English Latin1 and Click Next Installing Hyperion System 9.3.1
- 5. Page 4 Installing Hyperion Essbase Review the summary page and you guessed it… Click Next Installing Hyperion System 9.3.1
- 6. Page 4 Installing Hyperion Essbase Click Next Do not launch the configuration utility just yet. Installing Hyperion System 9.3.1
- 7. Page 4 Installing Hyperion Essbase At this stage you can validate the Essbase server easily by going to: Start > All Programs > Hyperion > Essbase > Essbase This will launch the command windows for Essbase. Installing Hyperion System 9.3.1
- 8. Page 4 Installing Hyperion Essbase Here you you’ll be asked for the company name, the Essbase username and the password which you set yourself. Take a note of these settings as you will need them later when you login to EAS. Type Exit to close the screen. Installing Hyperion System 9.3.1
- 9. Page 4 Installing Hyperion Essbase Go to your Hyperion install folder and run the setup.exe for Essbase Admin Services. Click OK for the language selection. Click Next Installing Hyperion System 9.3.1
- 10. Page 4 Installing Hyperion System 9.3.1 Installing Hyperion Essbase In the licence agreement screen select I AGREE and Click Next. On the Home directory screen Click Next
- 11. Page 4 Installing Hyperion System 9.3.1 Installing Hyperion Essbase Select your directory or leave as default and click Next Leave the install type as Typical and click Next
- 12. Page 4 Installing Hyperion Essbase Click Next with English Latin 1 selected. Review the summary and Click Next. Installing Hyperion System 9.3.1
- 13. Page 4 Installing Hyperion Essbase This time we want to launch the configuration tool. It’s worth mentioning at this point that, you could if you wanted to, install the Essbase client before configuring the Essbase server and EAS. I however like to configure these first and ensure everything is working correctly before installing the client right at the end. Select your language as English and click OK. Click Next. Installing Hyperion System 9.3.1
- 14. Page 4 Installing Hyperion Essbase Select the Essbase Server and click Next Installing Hyperion System 9.3.1
- 15. Page 4 Installing Hyperion Essbase Uncheck the SAP option unless you plan to use it. Click Next Installing Hyperion System 9.3.1
- 16. Page 4 Installing Hyperion Essbase Enter your SQL server database username and password. Enter your company name. Leave the Service Name identifier as hypservice. Click Next Installing Hyperion System 9.3.1
- 17. Page 4 Installing Hyperion Essbase Click Next Installing Hyperion System 9.3.1
- 18. Page 4 Installing Hyperion Essbase Enter your Shared Services details: Server: Hyperion User: admin Password: password Click Next Installing Hyperion System 9.3.1
- 19. Page 4 Installing Hyperion Essbase Click Next Installing Hyperion System 9.3.1
- 20. Page 4 Installing Hyperion Essbase Select Yes to go back to the Selection Panel. Click Next Installing Hyperion System 9.3.1
- 21. Page 4 Installing Hyperion Essbase Select Essbase Administration Services.; Click Next Installing Hyperion System 9.3.1
- 22. Page 4 Installing Hyperion Essbase Enter your Shared Services details: Server: hyperion User: admin Password: password Click Next Installing Hyperion System 9.3.1
- 23. Page 4 Installing Hyperion Essbase Select SQL Server and click Next. Installing Hyperion System 9.3.1
- 24. Page 4 Installing Hyperion Essbase Enter the SQL Server details and click Next. Installing Hyperion System 9.3.1
- 25. Page 4 Installing Hyperion Essbase Click Next Installing Hyperion System 9.3.1
- 26. Page 4 Installing Hyperion Essbase Click Next Installing Hyperion System 9.3.1
- 27. Page 4 Installing Hyperion Essbase Click Next Installing Hyperion System 9.3.1
- 28. Page 4 Installing Hyperion Essbase Click Next Installing Hyperion System 9.3.1
- 29. Page 4 Installing Hyperion Essbase Select No and Click Next. Installing Hyperion System 9.3.1
- 30. Page 4 Installing Hyperion Essbase You should now have 4 Hyperion Services available to run. Start the Services and launch the Essbase Administration Console. Log into the Essbase Administration Console: Server: hyperion Username: admin Password: password Installing Hyperion System 9.3.1
- 31. Page 4 Installing Hyperion Essbase Under Enterprise View, right click on Essbase Server and select ‘Add Essbase Server’. Log in with the same details as before. Installing Hyperion System 9.3.1
- 32. Page 4 Installing Hyperion Essbase This now gives you access to the ‘hyperion’ Server. Drill on the Server to ensure you have access to the applications and Sample Basic outline. For the complete Hyperion System installation please visit: http:// www.atmyplace.co.uk Installing Hyperion System 9.3.1