SlideShare uma empresa Scribd logo
1 de 35
Baixar para ler offline
Contents                    I


Table of Contents
     Part I Document Overview                                                                                                                                           3

    Part II Document Details                                                                                                                                            4

   Part III General                                                                                                                                                     5
             1 Goals                  ................................................................................................................................... 5
             2 Overview               ................................................................................................................................... 5
             3 Redhat Installation
                             ................................................................................................................................... 6
             4 The vi editor ................................................................................................................................... 8

   Part IV Verifying Network Settings                                                                                                                                 10
             1 Verify the hostname
                            ................................................................................................................................... 10
             2 Verify your ip address
                            ................................................................................................................................... 10

    Part V Configuring DNS                                                                                                                                            11
             1 Verifying that DNS is installed
                            ................................................................................................................................... 11
             2 Configuring ................................................................................................................................... 12
                           DNS / BIND
             3 Verifying DNS configuration
                           ................................................................................................................................... 17
             4 Configuring ................................................................................................................................... 18
                           named to start automatically after every reboot

   Part VI Sendmail                                                                                                                                                   20
             1 Configuring ................................................................................................................................... 20
                           sendmail
             2 Testing the sendmail configuration
                            ................................................................................................................................... 21

  Part VII POP3 and IMAP                                                                                                                                              22
             1 Installing the Washington IMAP and POP3 services
                             ................................................................................................................................... 22
             2 Configuring ................................................................................................................................... 23
                           IMAP and POP3
             3 Testing the POP3 and IMAP configuration
                           ................................................................................................................................... 24
             4 Enabling quotas to limit the mailbox size
                          ................................................................................................................................... 25

 Part VIII LDAP from OpenLDAP                                                                                                                                         28
             1 Installing LDAP
                            ................................................................................................................................... 28
             2 Configuring ................................................................................................................................... 29
                           LDAP
             3 Testing the LDAP configuration
                           ................................................................................................................................... 32

   Part IX Administration with Perl                                                                                                                                   34
             1 Installing the necessary Modules
                             ................................................................................................................................... 34
             2 Installing the perl script
                             ................................................................................................................................... 34


© <2003> ... NETIKUS.NET ltd


                                                                                                                                                                              I
II     Setting up an Email Server with RedHat Linux


Part X Setting up a simple webpage                                                                                                                  35
     1 Creating a group
                   ................................................................................................................................... 35
     2 Modifying file permissions
                    ................................................................................................................................... 35
     3 Creating a symbolic link
                   ................................................................................................................................... 35

        Index                                                                                                                                          0


                                                                                                                     © <2003> ... NETIKUS.NET ltd
Document Overview          3


1          Document Overview

                                                                                          Author:     NETIKU
                                                                                          Date:       S.NET
                                                                                          Revision:   ltd
                                                                                                      14th of
                                                                                                      Novemb
                                                                                                      er 2000
                                                                                                      1.1


                               Setting up an Email Server with RedHat Linux


            Title                   Setting up an Email Server with RedHat Linux
            Summary                 Step-By-Step instructions on how to install an email server (including DNS,
                                    LDAP, POP) using RedHat Linux 7. There should not be many differences
                                    to RedHat 8 or RedHat 9.
            Software                RedHat 7
                                    Washington IMAP
                                    OpenLDAP
                                    Perl Modules: Term::ReadKey, Passwd::Linux, Convert::ASN1, Net::LDAP
            Hardware                Not Applicable
            Skill Level             Beginner
            Skills Required         - Basic understanding of Networking (TCP/IP)
                                    - Basic understanding of Linux
            Download                http://www.netikus.net/ (guides section)


© <2003> ... NETIKUS.NET ltd
4     Setting up an Email Server with RedHat Linux


2       Document Details

        Overview                    This document describes in great detail how to install an email
                                    server using RedHat Linux 7. We will explain how the VI text editor
                                    and works and then setup DNS, Sendmail, POP3, IMAP and LDAP.

                                    Even though this document is already a couple of years old most
                                    parts should apply to RedHat 8 and RedHat 9.
        Additional Notes            The DNS service will be install so that email clients can resolve DNS
                                    domains through this server.

                                    The applications used here (sendmail, Washington IMAP) might not
                                    be the most suitable for every environment but are generally a good
                                    start.
        Why?                        Because everybody needs an email server.


                                                                                 © <2003> ... NETIKUS.NET ltd
General        5


3          General
3.1        Goals
           The goal is to set up a Linux server supporting the following internet services:

           FTP                 only needed to transfer software updates            optional
           TELNET              only needed for administrative access               optional
           SMTP                needed for sending emails                           mandatory
           DNS                 needed for SMTP name resolution                     mandatory
           HTTP                only needed for documentation                       optional
           POP3                needed for picking up email (either pop3 or imap)   mandatory
           IMAP4               needed for picking up email (either imap or pop3)   mandatory
           LDAP                needed for email resolution                         optional

           Clients will be able to send and receive emails with this server. With ldap names can be automatically
           resolved to email addresses, if the email client supports this feature. Imap enabled clients can use all
           the functionality that imap supports, such as leaving their mails on the server and having multiple
           folders.


3.2        Overview
           We will create an imaginary company with the name OrganicBrownSugar that has a class C network
           with the IP address 192.10.1.0.

           Please note that this sample configuration is suitable only for a network not connected to the
           internet. If you want to connect this server to the internet additional steps have to be taken that are
           not covered in this document. This procedure however is a good basis for any further steps you
           might want to take later.

           The base for this Linux Server will be RedHat 7.0, the current version of the Redhat Distribution as of
           this writing. I choose Redhat for several reasons:

                    1.   Probably the most popular Linux distribution
                    2.   a lot of literature is available for Redhat
                    3.   an website with extensive resources is available at www.redhat.com
                    4.   commercial support is available from Redhat
                    5.   one of the most used distributions focused on server installations
                    6.   The Redhat Package Manager for easy installations

           Redhat 7 comes with 2 CDs, both of which are needed for the installation. This document does not
           cover details about Linux or the installation process itself, it just guides you through the installation,
           setup and configuration process of the various components. If you are new to Linux we recommend
           reading a quick introduction at http://www.netikus.net/documents/winnt-to-linux.pdf. If you are
           experiencing problems during installation and configuration of your Linux system, please refer to one
           of the resources available at one of the following websites:

           http://www.redhat.com/
           http://www.linuxdoc.org/
           http://www.expertse-xchange.com/

© <2003> ... NETIKUS.NET ltd
6      Setting up an Email Server with RedHat Linux


          http://www.netikus.net/

          I tried to make this guide as "safe" as possible. About 95% of the commands that have to be typed are
          listed in an extra line. However, sometimes – especially towards the end –explanations are given to
          perform a specific standard task.

          This document is accompanied by the zipfile Linux-Mailserver-Installation.zip that is available in
          the downloads section of www.netikus.net. It includes the tar.gz files and some configuration files
          as well. You might want to check the distributors homepages for the most current version of their
          applications. The included versions, however, where tested and used while writing this document.


3.3       Redhat Installation
          After starting the installation, please choose the following installation options:

          Language:                       English

          Keyboard:                       your choice

          Mouse configuration:            your choice

          Install type:                   Server System

          Partition type:                 Automatically or manually partition with Disk Druid

                                          / (2Gb)
                                          /boot (50Mb)
                                          /home (Rest)

          Network Configuration:          IP Address: 192.10.1.10
                                          Netmask: 255.255.255.0
                                          Network: 192.10.1.0
                                          Broadcast: 192.10.1.1.255
                                          Hostname: email.organicbrownsugar.com
                                          Gateway: your choice
                                          Primary DNS: 192.10.1.10

          Time Zone Selection:            your choice

          Account Configuration:          Root Password: your choice
                                          Account Name: testuser
                                          Password: usertest
                                          Full Name: Temporary test user

          Package Group Selection:      Web Server
                                        DNS Name Server
                                        Select individual packages
          Individual Package Selection: (INCLUDE THE PACKAGES LISTED IF THEY ARE NOT SELECTED):


                                                                                               © <2003> ... NETIKUS.NET ltd
General   7


           Applications
                                Archiving
                                               zip
           Development
                                Languages
                                               cpp* (all those which start with cpp)
                                               gcc* (all those which start with gcc)
                                               kgcc
                                               libgcj-devel
                                               tk
                                System
                                               kernel-headers
                                               rpmdb-redhat
                                Tools
                                               autoconf
                                               automake
                                               libtool
                                               make
                                               pmake
                                               rpm-build
           Documentation
                                man-pages
           System Environment
                                Daemons
                                               apache
                                               bind
                                               sendmail-cf
                                               wu-ftpd
                                               xinetd
                                               telnet-server
                                Kernel
                                               kernel-boot
                                Libraries
                                               libgcj
                                Shells
                                               mc
           Individual Package Selection REMOVE (THOSE PACKAGES DON'T HURT, BUT ARE NOT NEEDED
           HERE)


© <2003> ... NETIKUS.NET ltd
8        Setting up an Email Server with RedHat Linux


          Applications
                                 Internet
                                                       Elm
                                                       Mutt
                                                       Ncftp
                                                       Talk
                                                       Tin
                                                       Trn
                                 System
                                                       isdn4k-utils
                                                       ucd-snmp-utils
          System Environment
                                 Daeomons
                                                       finger-server
                                                       imap
                                                       inews
                                                       rp-pppoe
                                                       rsh-server
                                                       rusers
                                                       rusers-server
                                                       talk-server
                                                       tftp-server
                                                       ucd-snmp

          Hit next

          Checking Dependencies:            Install packages to satisfy dependencies
                                            (Do this as often as necessary)

          About to install:                 HIT NEXT

          Bootdisk Creation:                this is up to you, recommended though


3.4       The vi editor
          Throughout this course we will use the text-based VI editor to manipulate our configuration files. If you
          are not familiar with this editor, I will give you brief introduction so you will be able to use it without
          getting a heart attack.

          VI has to major modes: COMMAND MODE and INSERT MODE. Since VI doesn't have a menu and
          fancy things like that, you can either type and modify text (INSERT MODE) or send commands such
          as SAVE, QUIT … (COMMAND MODE). As soon as you start VI, you are in COMMAND MODE. To
          change into INSERT MODE simply press I and you will see – INSERT – at the bottom. You can now
          type your text, change text, use the PgUp and PgDown keys and so on. Once you are done editing,
          you want to save your text file and quit again. To this, you first have to go back into COMMAND
          MODE hitting the

          ESC

          key. You are now in COMMAND MODE. Now type

          ZZ

          To save the document and go back into the command line. This is all you will need to now about VI for
          this guide. However, I included to most used commands to make editing a little more fun for you. But


                                                                                           © <2003> ... NETIKUS.NET ltd
General        9


           always remember, don't forget which mode you are in – you will not be able to edit text while in
           COMMAND MODE! Press i for INSERT MODE and ESC for COMMAND MODE.

           Important commands:
           ZZ<enter>          Save and Quit
           :w<enter>             Save only
           :qi<enter>            Quit without saving (hooo)


           dd                    Delete current line
           yy                    Copy the current line into the default buffer
           xyy                   Copy x lines into the default buffer
           P                     Insert the content of the default buffer
           u                     undo last command
           :set number display line numbers on the left
           :set nonumber don't display line numbers on the left

           /pattern              Search for pattern


           Some of you might still remember, or use, the norton commander. Redhat 7 includes a nifty tool
           called Midnight Commander which can be launched by typing mc wherever you are. It looks
           almost 100% like the good old DOS Norton Commander – but works on Linux as well! I found it to
           work quite reliable and I personally like the editor a lot.


© <2003> ... NETIKUS.NET ltd
10      Setting up an Email Server with RedHat Linux


4        Verifying Network Settings
         After rebooting, log in as root and the password you assigned during the installation


4.1      Verify the hostname
         more /etc/sysconfig/network

         If the hostname does not like the one we want, go into vi and edit the file with

         vi /etc/sysconfig/network

         and change the hostname. If you don't know how vi works you didn't read the **short** introduction
         above! Go right back and read it (again).


4.2      Verify your ip address
         more /etc/sysconfig/network-scripts/ifcfg-eth0


                                                                                            © <2003> ... NETIKUS.NET ltd
Configuring DNS   11


5          Configuring DNS
5.1        Verifying that DNS is installed
           If DNS was installed successfully, the following startup script should exist

           more /etc/rc.d/init.d/named


© <2003> ... NETIKUS.NET ltd
12      Setting up an Email Server with RedHat Linux


5.2    Configuring DNS / BIND
       The main configuration file of DNS is /etc/named.conf and should look, by default, something like
       this:

       // generated by named-bootconf.pl

       options {
              directory "/var/named";
              /*
               * If there is a firewall between you and nameservers you want
               * to talk to, you might need to uncomment the query-source
               * directive below. Previous versions of BIND always asked
               * questions using port 53, but BIND 8.1 uses an unprivileged
               * port by default.
               */
              // query-source address * port 53;
       };

       //
       // a caching only nameserver config
       //
       zone "." IN {
              type hint;
              file "named.ca";
       };

       zone "0.0.127.in-addr.arpa" IN {
              type master;
              file "named.local";
              allow-update { none; };
       };

       We will now change it to support our domain organicbrownsugar.com which is NOT connected to
       the internet by typing:

       vi /etc/named.conf

       And the file should look like this when we are done:

       // generated by named-bootconf.pl

       options {
              directory "/var/named";
              /*
               * If there is a firewall between you and nameservers you want
               * to talk to, you might need to uncomment the query-source
               * directive below. Previous versions of BIND always asked
               * questions using port 53, but BIND 8.1 uses an unprivileged
               * port by default.
               */
              // query-source address * port 53;
       };

       zone "." IN {
              type master;
              file "db.root";
       };

       zone "localhost" IN {
              type master;
              file "localhost.zone";
              allow-update { none; };
       };


                                                                                    © <2003> ... NETIKUS.NET ltd
Configuring DNS         13


           zone "0.0.127.in-addr.arpa" IN {
                  type master;
                  file "named.local";
                  allow-update { none; };
           };

           zone "organicbrownsugar.com" IN {
                  type master;
                  file "organicbrownsugar.com.zone";
                  allow-update { none; };
           };

           zone "1.10.192.in-addr.arpa" IN {
                  type master;
                  file "organicbrownsugar.com.zone.rev";
                  allow-update { none; };
           };

           zone "us.organicbrownsugar.com" IN {
                  type master;
                  file "us.organicbrownsugar.com.zone";
                  allow-update { none; };
           };

           This tells the DNS service which domains we are hosting here. The first paragraph adds our domain
           while not allowing remote servers to send our server updates of any kind. The second paragraph
           creates a so called Reverse Lookup Zone to later map IP addresses to hostnames.

           After creating the config file, we now have to set up the two zone files we are pointing to. For this we
           type

           vi /var/named/organicbrownsugar.zone

           and add the following lines (remember, you can save some typing by downloading this from
           www.netikus.net):

           $TTL     86400
           @           IN         SOA       organicbrownsugar.com. hostmaster.organicbrownsugar.com.
                                            2000103001             (
                                                                   ;serial number
                                                                   ;increase this number whenever
                                                                   you make
                                                                   ;changes to this file. It's
                                                                   necessary for
                                                                   ;secondary servers to know if
                                                                   they have to update
                                                                   ;their zone data
                                            10800                  ;refresh every 10800 seconds
                                                                   ;tells a secondary server how
                                                                   often to
                                                                   ;contact a (the) master server
                                            1800                   ;retry every 30 minutes
                                                                   ;if a connect fails to a primary
                                                                   name server,
                                                                   connect again in 1800 seconds
                                            1209600                ;expire records received from
                                                                   master server if I
                                                                   ;was not able to contact him for
                                                                   1209600 seconds
                                            604800 )               ;TTL tells other servers (cache)
                                                                   to keep the
                                                                   ;records of this zone (file) for
                                                                   604800 seconds,
                                                                   ;then "refresh"


© <2003> ... NETIKUS.NET ltd
14        Setting up an Email Server with RedHat Linux


     ;we need at least one of those entries to make this file valid
     IN       NS       email.organicbrownsugar.com.

     ;where to find the email server for our domain
     IN       MX       10     email.organicbrownsugar.com
                       .

     ;the records
     email    IN             A        192.10.1.10

     ;aliases for the email server
     ftp       IN      CNAME email;
     telnet      IN          CNAME email;
     smtp        IN          CNAME email;
     mail        IN          CNAME email;
     mailhost IN             CNAME email;
     ns          IN          CNAME email;
     ns1         IN          CNAME email;
     http        IN          CNAME email;
     pop         IN          CNAME email;
     pop3        IN          CNAME email;
     mailbox     IN          CNAME email;
     imap        IN          CNAME email;
     ldap        IN          CNAME email;
     www         IN          CNAME email;

     ;our other computer where we are testing
     netikus   IN       A     192.10.1.244


     Now copy this file (organicbrownsugar.com.zone) to us.organicbrownsugar.com.zone with

     cd /var/named
     cp organicbrownsugar.com.zone us.organicbrownsugar.com.zone

     and change the first line so it looks like this:
     @            IN         SOA         us.organicbrownsugar.com. hostmaster.us.organicbrownsuga
                                                                   r.com. (

     What is this good for? Now we prepared ourselves if we want multiple mailservers someday. Now we
     set up the reverse lookup file by typing

     vi /var/named/organicbrownsugar.com.zone.rev

     Add the following lines again:

     $TTL     86400


                                                                               © <2003> ... NETIKUS.NET ltd
Configuring DNS        15


           @            IN       SOA        1.10.192.in-addr.arpa. hostmaster.organicbrownsugar.com
                                                                   . (
                                            2000103001             ;serial number
                                                                   ;increase this number whenever
                                                                   you make
                                                                   ;changes to this file
                                            10800                  ;refresh every 3 hours
                                                                   ;tells a secondary server how
                                                                   often to
                                                                   ;contact this server
                                            1800                   ;retry every 30 minutes
                                                                   ;if a connect fails to another
                                                                   name ;server,
                                                                   connect again in 30 minutes
                                            1209600                ;secondary name server discard
                                                                   ;cached records if you have not
                                                                   been able ;to
                                                                   contact your primary within this
                                                                   time
                                            604800 )               caching server discard records
                                                                   if you ;did not
                                                                   reach your primary

           ;we need at least one of those entries to make this file valid
                     IN       NS      email.organicbrownsugar.com.

           ;here we list the ip addresses in use
           10        IN       PTR     email.organicbrownsugar.com.

           ;our client computer
           244       IN       PTR           netikus.organicbrownsugar.com
                                            .

           Now comes the tricky part. We have to set up a root file because we are not connected to the internet.
           It's not important for functianlity but makes the setup complete and avoids error messages in the
           named logs. In named.conf we pointed to a file called db.root which we will create now with

           vi /var/named/db.root

           and this file should look this when we are done:

           $TTL     86400
           .           IN         SOA       email.organicbrownsugar.com.         root.email.organicbrownsu
                                                                                 gar.com. (
                                            2000110801                           ; Serial
                                            28800                                ; Refresh
                                            14400                                ; Retry
                                            3600000                              ; Expire
                                            86400 )                              ; Minimum

                                            IN         NS        email.organicbrownsugar.com.
           email.organicbrownsugar.com                 IN        A       192.10.1.10
           .

           organicbrownsugar.com.           IN          NS       email.organicbrownsugar.com.

           us.organicbrownsugar.com.        IN          NS       email.organicbrownsugar.com.


© <2003> ... NETIKUS.NET ltd
16      Setting up an Email Server with RedHat Linux


     Watch out for the "." In the second line. The other files have a @ here, but since this is the root file
     (and obviously different) there has to be . .

     Please note a couple of things when typing the values above:

         ·   I used <TAB> to separate values in lines
         ·   Whenever you specify a FQDN, make sure that it ends with a . <DOT>, otherwise you make
             yourself trouble

     After entering all the information correctly, we start the DNS daemon and verify the configuration


                                                                                       © <2003> ... NETIKUS.NET ltd
Configuring DNS      17


5.3        Verifying DNS configuration
           First we start the DNS daemon by typing

           /etc/rc.d/init.d/named start

           Then we type

           nslookup

           and we should see something like this

           Default Server: email.organicbrownsugar.com
           Address: 0.0.0.0

           >

           Now we see if our machine's hostname can be resolved to an ip address by typing

           email.organicbrownsugar.com

           … and we should get an output looking something like this

           Server: email.organicbrownsugar.com
           Address: 0.0.0.0

           Name: email.organicbrownsugar.com
           Address: 192.10.1.10

           If this is what you see we can be almost sure our DNS server is working well. Now test some of the
           other names we created before such as

           imap.organicbrownsugar.com

           and we see

           Server: email.organicbrownsugar.com
           Address: 0.0.0.0

           Name: email.organicbrownsugar.com
           Address: 192.10.1.10
           Aliases: imap.organicbrownsugar.com

           Great! You can now call yourself a BASIC-DNS-LINUX-INSTALLER. But now let's see if our reverse
           lookup zones work as well by typing:

           192.10.1.244

           Now if you're your really lucky and didn't make any typo's you should most likely see
           Server: email.organicbrownsugar.com
           Address: 0.0.0.0

           Name: netikus.organicbrownsugar.com
           Address: 192.10.1.244

           Before we make an end to our endless DNS verifications, we make sure that email servers will have
           use of our DNS server by finding a mail exchanger (MX) for our domain @organicbrownsugar.com
           by typing:

           set query=mx

© <2003> ... NETIKUS.NET ltd
18      Setting up an Email Server with RedHat Linux


       organicbrownsugar.com

       This should yield

       Server: email.organicbrownsugar.com
       Address: 0.0.0.0

       organicbrownsugar.com preference = 10, mail exchanger = email.organicbrownsugar.com
       organicbrownsugar.com nameserver = email.organicbrownsugar.com
       email. organicbrownsugar.com    internet address = 192.10.1.10

       Okay now, if all this worked our DNS server is configured correctly for stand alone operation and we
       can type exit to leave nslookup. Please note that we do not have a secondary server at this time
       which inevitably results in absolutely now redundancy. But since we only have one server for all our
       services anyways it doesn't really matter for our scenario. You can say a little prayer to the hardware
       god before you go to bed tonight.

       Now the only thing that's missing to make our name resolution life wonderful is to make our DNS
       daemon start automatically after every boot.


5.4    Configuring named to start automatically after every reboot
       The following might look a little complicated, read it twice if you feel that you don't understand what's
       going on here. Services are started by startup-scripts in the directory /etc/rc.d/init.d/. This is how we
       started named just a few minutes ago (depends how fast you are typing and reading …). Now we
       have to tell linux to start named automatically. You can use tools from x-windows, but since I like Linux
       because I don't need a graphic interface, we will do it by hand, without any special tool. If we run ls
       /etc/rc.d, we will see the following directories (among others): rc0.d, rc1.d, rc2.d, rc3.d,
       rc4.d, rc5.d, rc6.d

       Each of those directories refers to a runlevel, for example rc3.d refers to runlevel three. Runlevels
       could be described as a state of the system. Look at the following table:

               0        Halt the system
               1        Enter single-user mode (no networking is enabled)
               2        Multiuser mode, but without NFS
               3        Full multiuser mode (normal operation)
               4        Unused
               5        Same as runlevel 3, except using an X Windows login rather than a text-based login
               6        Reboot the system

       To tell our linux system when to start which service, we would have to place a startup script in the
       corresponding directory. However, to make things not more complicated than they already are we will
       use symbolic links rather than a separate script file everytime. But just adding named to the rc3.d
       directory (standard runlevel our server should be in most of the time) is not enough. We have to tell
       linux in which order to start or stop the services.

       Let's take a look at result of ls /etc/rc.d/rc3.d/:


                                                                                       © <2003> ... NETIKUS.NET ltd
Configuring DNS          19


           K20nfs              K20rwalld             K20rwhod             K34yppasswdd
           K45arpwatch         K45named              K84ypserv            S05kudzu
           S08ipchains         S10network            S12syslog            S13portmap
           S14nfslock          S16apmd               S20random            S25netfs
           S35identd           S40atd                S45pcmcia            S50xinetd
           S55sshd             S56rawdevices         S60lpd               S75keytable
           S80sendmail         S85gpm                S85httpd             S90crond
           S90xfs              S95anacron            S97rhnsd             S99linuxconf
           S99local


           The first letter, S, indicates that the script should be started. The 2nd and 3rd number tell the order
           where 01 would be the first service to start. The rest is the name of the script in the ../init.d/ directory. If
           we would configure a service to stop (such as in runlevels 0 and 6) we would use a K instead of a S at
           the beginning.

           In our case I would tell named to start before xinetd, using the number 47. I will have named start in
           runlevels 3 and 5. So we type

           ln –s /etc/rc.d/init.d/named /etc/rc.d/rc3.d/S53named
           ln –s /etc/rc.d/init.d/named /etc/rc.d/rc5.d/S53named

           To start named in runlevel 3 and 5 automatically. To stop named everytime we make a reboot or halt
           or system, we add the following if it doesn't already exist (please check)

           ln –s /etc/rc.d/init.d/named /etc/rc.d/rc0.d/K45named
           ln –s /etc/rc.d/init.d/named /etc/rc.d/rc6.d/K45named

           Now reboot by typing

           shutdown –r now

           If we find named started automatically after the login, we are already 25% on our way. You can see if
           the process is active by typing ps –A | grep named

           If we were going from San Diego to Miami, we would probably be somwhere in New Mexico.


© <2003> ... NETIKUS.NET ltd
20      Setting up an Email Server with RedHat Linux


6        Sendmail
6.1      Configuring sendmail
         On our Redhat installation we will find sendmail's configuration file as /etc/sendmail.cf. If you
         download and compile sendmail you would find it in /etc/mail/sendmail.cf. However, we stay with the
         former. Redhat 7 comes with sendmail version 8.11.0-8.

         To configure sendmail you have basically 2 options. Either you edit the sendmail.cf file directly or
         you create the sendmail.cf from a m4 file such as sendmail.mc. Sendmail uses the macro language
         m4 to create the configuration file from an easier to read .mc file. I highly recommend using the latter
         approach in order to keep administration of this configuration overseeable. Our version of sendmail is
         already configured well so we don't have to change anything.


         However, to explain the process I will list the steps to procuce a custom sendmail.cf file. Don't do this
         right now please, just save it for later reference! Redhat comes with a working configuration from the
         file redhat.mc. We will use this file as our template and modify it to our needs. This file should reside
         in /usr/lib/sendmail-cf/cf/. If you can't find it there you can search for it by typing

         cd /
         find –name *.cf

         Now let's copy the template to a new file sendmail-config.mc by typing

         cp /usr/lib/sendmail-cf/cf/redhat.mc /usr/lib/sendmail-cf/cf/sendmail-conf.mc

         Now we edit the file by typing

         vi /usr/lib/sendmail-cf/cf/sendmail-conf.mc

         Now we add the following lines to our configuration file. Please note that some of these settings might
         not be suitable for your configuration or use:
         MASQUERADE_AS(organicbrownsuger.com)dnl                # mails always appear to come from
                                                                # this domain
         Define('confMAX_MESSAGE_SIZE','3145728')dnl # maximum message size of ~3Mb


         Now we create the a file readable by sendmail with

         cd /usr/lib/sendmail-cf/cf
         sh Build sendmail-conf.cf

         Isn't it easy? Now we create a backup copy of our current sendmail.cf file (just in case we messed
         up) and copy our new file over the old one.
         cp /etc/sendmail.cf /etc/sendmail.cf.original
         cp /usr/lib/sendmail-cf/cf/sendmail-conf.cf /etc/sendmail.cf


         Now we're almost there. For sendmail to know what the local email domain is, we have to configure
         the file /etc/mail/local-host-names by typing

         vi /etc/mail/local-host-names


                                                                                         © <2003> ... NETIKUS.NET ltd
Sendmail       21


           and appending the lines

           organicbrownsugar.com
           us.organicbrownsugar.com

           to it. Now we're done. To activate the changes we restart sendmail. We will use the init script, just like
           explained when configuring DNS for automatic startup in 3.4.

           /etc/rc.d/init.d/sendmail restart

           If we didn't get an error message here it at least means that our configuration file is ok. Now let's see if
           we can actually use sendmail as we would like to.


6.2        Testing the sendmail configuration
           We telnet to port 25 (SMTP) of our machine and try to send our test user testuser (created during
           installation) an email. Let's type

           telnet localhost 25

           and we should see something like

           220 email.organicbrownsugar.com ESTMP Sendmail 8.11.0/8.11.0; Mon, 30 Oct 2000
           16:56:36 –0500

           Type in the following lines:

           mail from: root@organicbrownsugar.com
           rcpt to: testuser@organicbrownsugar.com
           data
           subject: I love the world and the world loves me!
           Cool, I just installed and configured sendmail. Wow!!
           .

           and you should now see something like

           250 2.0.0 e9UmxRw01218 Message accepted for delivery

           Now enter

           quit

           Now log in as testuser on a different console (by pressing ALT+F2 for example) and type

           mail

           At the command prompt. You should see something like
           Mail version 8.1 6/6/92. Type ? for help.
           "/var/spool/mail/testuser": 1 message 1 new
           >N 1 root@organicbrownsugar.com Mon Oct 30 16:59                 13/571       "Hello from telnet"
           & _

           Now simply type 1 and enter to read the message. q exits from the mail application. Voila! We're half
           way and almost out of Texas.

           Now compared to almost 5 pages DNS configuration this was pretty straightforward. Time to install
           POP3 and IMAP! Don't forget to logout again as the testuser and switch to your root console,
           otherwise our imap experience is not going to last very long …

© <2003> ... NETIKUS.NET ltd
22        Setting up an Email Server with RedHat Linux


7        POP3 and IMAP
7.1      Installing the Washington IMAP and POP3 services
         We download the latest version of the Washington IMAP from
         ftp://ftp.cac.washington.edu/imap/imap-2000.tar.Z

         to one of our computers that is connected to the internet. Then we create a directory on our linux box
         with

         mkdir /usr/software

         and copy the file imap-2000.tar.Z into this directory. You can do this with ftp, floppies and so on. You
         don't have to create the directory in the /usr folder – but I will reference to this folder in this chapter.
         Now "cd" into this directory and decompress the archive by typing

         cd /usr/software
         tar –xvzf imap-2000.tar.Z

         The source should now have been extracted properly and we are ready to install. The decompression
         created a directory imap-2000 which we will use to install. Let's do that! Imap's root folder is the user's
         home folder by default. Some people like that, I however prefer the imap root to be in a subfolder of
         the home directory, imap in our scenario. We achive this by editing the file Makefile

         vi /usr/software/imap-2000/Makefile

         And changing the following line from

         EXTRACFLAGS=

         to

         EXTRACFLAGS=-DMAILSUBDIR="imap"

         You can quickly find the line in the file by typing

         /EXTRACFLAGS=

         while in command mode of vi.

         If you edit the file Makefile and modify the root directory of imap, you have to make sure that the
         subdirectory actually exists in every users homedirectory. Forgetting this will yield to unpredictable
         results according to the documentation.

         To automate the procedure of creating an imap directory everytime we can create a user, we will
         modify the template directory /etc/skel/ by creating a directory there with:

         mkdir /etc/skel/imap

         Now, everytime you create a user make sure you will use the –m option with the useradd program.
         However, for the user we created during installation the above procedure will not work so we create it
         manually one time with

         mkdir /home/testuser/imap

         So to finally start the installation we type


                                                                                            © <2003> ... NETIKUS.NET ltd
POP3 and IMAP          23


           cd imap-2000
           make slx

           This means that we are installing on an up to date Linux box. This should go well without problems
           and will create the executables that we need (yes, there is nothing more to do except the make
           command):

           ls /usr/software/imap-2000/imapd/imapd
           ls /usr/software/imap-2000/ipopd/ipop3d

           Those files of course would be better located in a directory that is designed for little daemons, so we
           copy them to the /etc/sbin directory with

           cp /usr/software/imap-2000/imapd/imapd /usr/sbin
           cp /usr/software/imap-2000/ipopd/ipop3d /usr/sbin


7.2        Configuring IMAP and POP3
           What now? Are we done? Are we finally getting near Florida? Almost. Those two daemons will be
           invoked by the service xinetd so we have to tell xinetd where to find them and how to start them. But
           first we make sure the both services are registered in the /etc/services file by typing

           cat /etc/services | grep pop3
           cat /etc/services | grep imap

           this should result in lines like this ones (unimportant ones omitted)
           pop3           110/tcp         pop-3         # POP version 3
           imap2          143/tcp         imap          # Interim Mail Access Proto
                                                        v2

           If you don't see those lines, please add them with vi /etc/services. Xinetd loads all daemons which
           are properly configured in the directory /etc/xinetd.d/. Since neither pop3 nor imap are configured
           there, we will have to create 2 files. Lets create ourselves a template by copying the configuration of
           telnet and editing it

           cp /etc/xinetd.d/telnet /etc/xinetd.d/pop3
           vi /etc/xinetd.d/pop3

           Then edit the file /etc/xinetd.d/pop3 so it will look like this:

           # default: on
           # description: The pop3 server serves pop3 connections; it uses
           # unencrypted username/password pairs for authentication
           #
           service pop3
           {


© <2003> ... NETIKUS.NET ltd
24       Setting up an Email Server with RedHat Linux


                socket_type          = stream
                wait                 = no
                user                 = root
                server               = /usr/sbin/ipop3d
                log_on_failure       += USERID
       }
       Then we do the same for imap

       cp /etc/xinetd.d/pop3 /etc/xinetd.d/imap
       vi /etc/xinetd.d/imap

       And the file should look like this

       # default: on
       # description: The pop3 server serves pop3 connections; it uses
       # unencrypted username/password pairs for authentication
       #
       service imap2
       {
              socket_type      = stream
                wait                  = no
                user                  = root
                server                = /usr/sbin/imapd
                log_on_failure        += USERID
       }

       You should be careful and make sure that the name that's listed next to service is the one you found /
       entered in the file /etc/services. Once the configuration files exist we can restart xinetd and see if we
       can use those services. We simply type

       /etc/rc.d/init.d/xinetd restart

       and see what happens.


7.3    Testing the POP3 and IMAP configuration
       To start testing pop3, we simply type

       telnet localhost 110

       and should see an output similar to this:

       +OK POP3 email.organicbrownsugar.com v2000.69 server ready

       and type

       quit

       to exit again. To see if we actually can read email with our pop3 connection, we will send another
       email via SMTP. Please repeat the steps listed at 3.2 where we telnetted to port 25 and sent an email
       to testuser@organicbrownsugar.com. After we did that, we connect again with with telnet localhost
       110 and issue the following commands
       user testuser
       pass usertest
       list

                                                                                       © <2003> ... NETIKUS.NET ltd
POP3 and IMAP         25


           we should then see something like

           +OK Mailbox scan listing follows
           1 708
           .

           Now we can retrieve the mail by typing

           retr 1

           Which should display the message in it's raw format. You will probably appreciate an email client here
           that does not use HTML… Ok, pop3 hopefully works and we quickly see if imap works as well. If you
           cannot establish a connection to port 110 for some mean reason, make sure your entries in the xinetd
           configuration file match the proper service name in the /etc/services file and that the executables
           actually point to existing files! Now lets logout with quit and quickly type

           telnet localhost 143

           and we should see an output similar to this:

           OK [CAPABILITY IMAP4 IMAP4REV1 LOGIN-REFERRALS AUTH=LOGIN]
           email.organicbrownsugar.com IMAP4rev1 2000.293 at Mon, 30 Oct 2000 18:47:11 –0500
           (CST)

           and type

           . logout

           to leave imap at it's peace. To really test imap you will have to launch your imap cabable email client
           and connect to the server, at this point I am not listing all the imap commands here which are more
           complex than the ones used in pop3.

           Good! DNS is working, we can send mail via sendmail / smtp and we can read our emails happily
           with either pop3 or imap4. Wonderful. We're through Lousiana and will now enter Florida. 75%. But
           wait!


7.4        Enabling quotas to limit the mailbox size
           Our linux distribution comes with quota support, so we might want to enable it. If you trust your users
           and/or have unlimited disk space, you can simply skip this step. Knowing how to turn on quotas won't
           hurt I would say anyways. First we have to activate the quotas in 3 steps. First we enable quota on our
           machine during the boot-up, then we enable a volume / mount point for quotas and finally we add the
           quota database files. So we add the following lines to the end of the file /etc/rc.d/rc.local just before
           the last fi command

           vi /etc/rc.d/rc.local
           # Check quota and then turn it on
                  if [ -x /sbin/quotacheck ]
                         then
                               echo "Checking quotas …"
                               /sbin/quotacheck –avug
                               echo "Done"
                         fi
                  if [ -x /sbin/quotaon ]
                         then
                               echo "Turning quota on …"
                               /sbin/quotaon –avug
                         fi


© <2003> ... NETIKUS.NET ltd
26      Setting up an Email Server with RedHat Linux


     Now we will enable the /home mountpoint for quotas. This is done by adding some stuff to the
     /etc/fstab file:

     vi /etc/fstab

     Now look for the line that starts with "LABEL=/home" and change the word defaults to
     defaults,usrquota,grpquota so that it looks like this:

     LABEL=/home              /home             ext2             defaults,usrquota,grpquota 1 2

     Now we have to create the quota database files in the root of the directory with

     cd /home
     touch quota.user
     touch quota.group
     chmod 600 quota.*

     That's all. We make a reboot and our system is at least ready to accept our quota commands! So let's
     add those commands for our testuser by typing:

     edquota –u testuser

     And we will see something like this (hda5 will most likely be different for you):

     Quotas for user testuser:
     /dev/hda5: blocks in user: 28, limits (soft = 0, hard = 0)
            inodes in use: 7, limits (soft = 0, hard = 0)

     As you see the edquota command has launched the vi editor for you automatically. Whenever you're
     done with the changes just save them as you would usually with ZZ. But what changes ? First the
     explanation of a hard and soft limit. A soft limit let's a user exceed this limit for a limited amount of
     time, called the grace period. You can notifiy the user that this is happening. The hard limit is a limit
     that can not be exceeded at any costs – unless it is changed. If the user exceeds it, he can not write to
     the directory anymore – unless he cleans up or the administrator changes the hard limit.

     But what are blocks and i-nodes? 1 block in linux is 1kb. So if you want to limit the quota to 1 Mb you
     will just use 1024 blocks. I-nodes are control structures that point to other i-nodes or to the file itself.
     So one file has one or more I-nodes assigned to it. I prefer to change only the block use.
     So to limit the testuser's mailbox size (and everything else as well) to a soft limit (warning) of
     reasonable 10Mb, and an ultimate hard limit of 15Mb, we change the above output in vi to:

     Quotas for user testuser:
     /dev/hda5: blocks in user: 28, limits (soft = 10240, hard = 15360)
            inodes in use: 7, limits (soft = 0, hard = 0)

     Pretty neat, hmm? Never mind the filename vi displays while you edit, edquota manages all this for
     you. So how do you know what user used to be a mailman in his previous life? The program
     quotacheck lets you check the quota dat abase, and the program repquota shows you some current
     statistics. Just type

     edquota –a

     And you see the current status for everybody. With perl you can run a daily job that sends emails to
     users or to you. The grace period is set to 7 days, by the way. If you want to change it for all users,
     type

     edquota –g –t

     To change it for all users, type

                                                                                         © <2003> ... NETIKUS.NET ltd
POP3 and IMAP       27


           edquota –u –t

           For users to view their quota information, they can use the program
           quota

           With the switch –g the user can view statistics. The –q switch prints a message to the user if
           he is over quota.


© <2003> ... NETIKUS.NET ltd
28      Setting up an Email Server with RedHat Linux


8        LDAP from OpenLDAP
8.1      Installing LDAP
         We download the latest version of OpenLDAP from

         ftp://ftp.openldap.org/pub/OpenLDAP/openldap-stable/openldap-stable-20000704.tgz

         and copy it just like before to our favorite software directory, /usr/software. Then we uncompress it by
         typing
         cd /usr/software
         tar –xvzf openldap-stable-20000704.tgz

         Please note that the file mentioned above was the most stable version available as of 30th October
         2000. You might want to check for a newer version at http://www.openldap.org/. Now that we have
         unpacked it we are ready to configure, so lets type

         cd openldap-1.2.11
         ./configure
         make depend
         make

         Now we will test our installation with
         cd tests
         make

         which hopefully turns out well. To finish the installation we do
         cd ..
         make install

         and LDAP should now be installed properly and we can start configuring it. Not exactly the easiest and
         most obvious thing to do, but I'll guide you through everything.


                                                                                        © <2003> ... NETIKUS.NET ltd
LDAP from OpenLDAP            29


8.2        Configuring LDAP
           LDAP comes with a couple of configuration files, which are

           /etc/openldap/ldap.conf
           /usr/local/etc/openldap/slapd.conf
           /usr/local/etc/openldap/slapd.at.conf
           /usr/local/etc/openldap/slapd.oc.conf

           ldap.conf does not have to be changed for our installation, so we continue with slapd.conf. We edit the
           file with vi by typing

           vi /usr/local/etc/openldap/slapd.conf

           and should have a slapd.conf file that will look like this

           #
           # See slapd.conf(5) for details on configuration options.
           # This file should NOT be world readable.
           #
           include             /usr/local/etc/openldap/slapd.at.conf
           include             /usr/local/etc/openldap/slapd.oc.conf
           schemacheck off
           #referral    ldap://root.openldap.org/

           pidfile                   /usr/local/var/slapd.pid
           argsfile                  /usr/local/var/slapd.args

           #######################################################################
           # ldbm database definitions
           #######################################################################


           database     ldbm
           suffix       ""
           suffix       "dc=organicbrownsugar, dc=com"
           suffix       "o=Organic Brown Sugar, c=US"
           #rootdn      "cn=Manager, dc=organicbrownsugar, dc=com "
           rootdn       "cn=Manager, o=Organic Brown Sugar, c=US"
           # cleartext passwords, especially for the rootdn, should
           # be avoid. See slapd.conf(5) for details.
           rootpw       secret
           # database directory
           # this directory MUST exist prior to running slapd AND
           # should only be accessable by the slapd/tools Mode 700 recommended.
           directory    /usr/local/var/openldap-ldbm
           index        cn,sn,mail pres,eq,app

           The first change we applied concerns the suffix value. The suffix determines to which kind of queries
           our ldap server will response. In order to use automatic name resolution from various email clients,
           we need to add the line
           suffix              ""

           Since the email client does not include a search base (like o=Organic Brown Suger,c=US) we have to
           add this line. Otherwise our queries will always be unsuccessful. The next two line include two other
           search bases that might be used. The line rootdn specifies the LDAP administrator – the user who
           has the right to update and change the database. Please note the following password that goes with
           the username. At the end of the document we have a few indexes for searches.

           Now we'll take a look at the next document with


© <2003> ... NETIKUS.NET ltd
30        Setting up an Email Server with RedHat Linux


     vi /usr/local/etc/openldap/slapd.at.conf

     where we will add an attribute for email addresses. We append the line

     attribute        mail                                       dn
     attribute        ou                                         dn

     to the file. Now ldap knows about the mail attribute, but we have to tell ldap that we want to use it
     with the person objectclass. What is an objectclass? It's a collection of attributes, an objectclass
     person e.g. would need a lastname, firstname, email and so on. An organization objectclass would
     probably need attributes like street, telephone number, state and so on. Whenever we add an object
     to the ldap database, it has to be in an object class. Let's open the file slapd.oc.conf with

     vi /usr/local/etc/openldap/slapd.oc.conf

     and look for the line objectclass person which should look like this after our modifications:

     objectclass person
            requires
                   objectClass,
                   sn,
                   cn
            allows
                   description,
                   seeAlso,
                   telephoneNumber,
                   userPassword,
                   mail,
                   ou

     We now edited most of our configuration files and are now ready to move on and create our first
     entries. For this reason we will create a ldif file that contains the records in readable format. Let's type
     vi /tmp/root.ldif and create the following file:

     dn: o=Organic Brown Sugar, c=US
     objectclass: organization
     o: Organic Brown Sugar

     I choose to use an LDAP hirachy that is based on organzation and country rather than email domains.
     If I would want to add both, I could create a file that looks like this:

     dn: o=Organic Brown Sugar, c=US
     objectclass: organization
     o: Organic Brown Sugar

     dn: dc=organicbrownsugar,dc=com
     objectclass: dcObject
     dc: organicbrownsugar

     Now we are almost in LDAP land. We will now configure ldap to automatically everytime we boot. For
     this reason we will create a file ldap in the directory /etc/rc.d/init.d/ by typing

     cd    /etc/rc.d/init.d/

     And creating the /etc/rc.d/init.d/ldap file:

     #!/bin/sh
     #
     # ldap This shell script takes care of starting and stopping
     #      ldap servers (slapd and slurpd).
     #


                                                                                       © <2003> ... NETIKUS.NET ltd
LDAP from OpenLDAP      31


           #   chkconfig: - 39 61
           #   description: LDAP stands for Lightweight Directory Access Protocol, used 
           #                for implementing the industry standard directory services.
           #   processname: slapd
           #   config: /usr/local/libexec/slapd.conf
           #   pidfile: /usr/local/var/slapd.pid

           # Source function library.
           . /etc/init.d/functions

           # Source networking configuration and check that networking is up.
           if [ -r /etc/sysconfig/network ] ; then
                  . /etc/sysconfig/network
                  [ ${NETWORKING} = "no" ] && exit 0
           fi


           slapd=/usr/local/libexec/slapd
           slurpd=/usr/local/libexec/slurpd
           [ -x ${slapd} ] || exit 0
           [ -x ${slurpd} ] || exit 0

           RETVAL=0

           function start() {
                   # Start daemons.
                   echo -n "Starting slapd:"
                  daemon ${slapd}
                  RETVAL=$?
                  echo
                  if [ $RETVAL -eq 0 ]; then
                       if grep -q "^replogfile" /usr/local/etc/openldap/slapd.conf; then
                         echo -n "Starting slurpd:"
                            daemon ${slurpd}
                         RETVAL=$?
                         echo
                       fi
                  fi
                  [ $RETVAL -eq 0 ] && touch /var/lock/subsys/ldap
                  return $RETVAL
           }

           function stop() {
                   # Stop daemons.
                  echo -n "Shutting down ldap: "
                  killproc ${slapd}
                  RETVAL=$?
                  if [ $RETVAL -eq 0 ]; then
                      if grep -q "^replogfile" /usr/local/etc/openldap/slapd.conf; then
                          killproc ${slurpd}
                          RETVAL=$?
                       fi
                  fi
                  echo
                   [ $RETVAL -eq 0 ] && rm -f /var/lock/subsys/ldap /var/run/slapd.args
                  return $RETVAL
           }

           # See how we were called.
           case "$1" in
               start)
                   start
                   ;;
               stop)
                   stop
                   ;;
               status)

© <2003> ... NETIKUS.NET ltd
32      Setting up an Email Server with RedHat Linux


       status ${slapd}
               if grep -q "^replogfile" /usr/local/etc/openldap/slapd.conf ; then
                    status ${slurpd}
              fi
              ;;
           restart)
              stop
              start
              ;;
           reload)
              killall -HUP ${slapd}
              RETVAL=$?
              if [ $RETVAL -eq 0 ]; then
                  if grep -q "^replogfile" /usr/local/etc/openldap/slapd.conf; then
                      killall -HUP ${slurpd}
                      RETVAL=$?
                   fi
              fi
              ;;
           condrestart)
               if [ -f /var/lock/subsys/ldap ] ; then
                    stop
                    start
               fi
              ;;
           *)
              echo "Usage: $0 start|stop|restart|status|condrestart}"
              RETVAL=1
       esac

       exit $RETVAL

       Of course you can download this file from http://www.netikus.net/. Make sure this file has the same
       permissions assigned to it as all the other startup files in this directory. If it does not, enter

       chmod 755 /etc/rc.d/init.d/ldap

       However, this file does not start our ldap server by itself, we have to invoke it just like we did with our
       DNS service. So we create the necessary symbolic links with

       ln –s /etc/rc.d/init.d/ldap /etc/rc.d/rc3.d/S54ldap
       ln –s /etc/rc.d/init.d/ldap /etc/rc.d/rc5.d/S54ldap

       for starting the service and with

       ln –s /etc/rc.d/init.d/ldap /etc/rc.d/rc0.d/K41ldap
       ln –s /etc/rc.d/init.d/ldap /etc/rc.d/rc6.d/K41ldap

       we stop the services when our machine shuts down or reboots.
       You should now reboot your system – I experienced some problems without doing a reboot. So type
       shutdown –r now

       and wait until our system is back up. Now login again as root.


8.3    Testing the LDAP configuration
       To finally add the entry to the ldap database, we will use a programm called ldapadd by typing

       ldapadd –D "cn=Manager,o=Organic Brown Suger,c=US" –W –f /tmp/root.ldif


                                                                                         © <2003> ... NETIKUS.NET ltd
LDAP from OpenLDAP             33


           When asked for a password, please enter secret. This should produce an output similar to:
           adding new entry o=Organic Brown Sugar, c=US

           If your output matches and you didn't get any error messages, verify it with the ldapsearch
           commando like this:

           ldapsearch –u –b '' –s sub '(objectclass=*)'

           This should display the one or two entries you created for the root of the hirarchy. To make things a
           little more fun we will add another entry that has a telephonenumber and an email address. Create a
           file /tmp/entry1.ldif and enter the following data:

           dn: cn=Buffalo Bill,o=Organic Brown Sugar,c=US
           objectclass: person
           cn: Buffalo Bill
           cn: Bill Buffalo
           sn: Buffalo
           mail: buffalo.bill@organicbrownsugar.com
           mail: buffalo.bill@animalhunting.com
           telephonenumber: +001 (987) 654-3210

           Note here that you can have multiple attributes defined, cn and mail show up twice here. Make sure
           you separate multiple entries with a blank line. dn stands for distinguished name and should be
           unique for every entry. I could have also used dn: cn=Buffalo Bill,
           dc=organicbrownsugar,dc=com instead in the first line, or a combination. Now type

           ldapadd –D "cn=Manager,o=Organic Brown Suger,c=US" –W –f /tmp/entry1.ldif

           and if you don't see any errors, type immediately: ldapsearch –u –b '' –s sub
           '(objectclass=*)'
           Do you see Buffalo Bill? If yes, we both have succeeded. Now delete the entry by typing:

           ldapdelete –D "cn=Manager,o=Organic Brown Suger,c=US" "cn=Buffalo Bill,o=Organic
           Brown Sugar, c=US" –W

           One last word on ldap. Befory you start adding entries to an organizational unit, make sure you
           create the organizational unit itself first with the objectclass=organizationalUnit objectclass.

           Congratulations! Stand up, have your favorite drink and call your computer friends to tell them that you
           escaped the
           magic powers of Bill Gates and is supporters J


© <2003> ... NETIKUS.NET ltd
34      Setting up an Email Server with RedHat Linux


9        Administration with Perl
9.1      Installing the necessary Modules
         To ease administration I wrote a perl script that let's you create and modify users with a perl script. To
         make the user interface a little bit more appealable, you will need to install several modules for PERL.
         Simply go to http://www.cpan.org and search for all the modules listed below, download them, and
         copy them to the /usr/software directory. Those modules are needed (and included in the netikus
         package):

         1. Term::ReadKey                           TermReadKey-2.14.tar.gz
         2. Passwd::Linux                           Passwd-Linux-0.70.tar.gz
         3. Convert::ASN1                           Convert-ASN1-0.07.tar.gz
         4. Net::LDAP                               perl-ldap-0.22.tar.gz


         The installation procedure is the same for all of those modules (and for most other ones). Please note
         that you will have to substitute the correct file- and directory names to make it work. Also make sure
         you install the modules in the order showed above. I showed one example with real filenames on the
         right side with the Term::ReadKey Module:

         tar –xvzf filename.tar.gz                  tar –xvzf TermReadKey-2.14.tar.gz
         cd directory                               cd TermReadKey-2.14
         perl Makefile.PL                           perl Makefile.PL
         make                                       make
         make test                                  make test
         make install                               make install


         Do this for every modele and the modules should now all be installed correctly!


9.2      Installing the perl script
         Now copy the file useradministration.pl and usermanager.sh from the downloaded package to the
         (recommended) the /root directory.

         You can launch the usermanager anytime by typing

         /root/usermanager.sh

         To change default values (like the password for the ldap server) edit lines 33 to 37 of the file
         useradministration.pl.

         To make sure that only our holy root user has access to this valuable file(s), we type the following:

         cd /root
         chmod 700 useradministration.pl
         chmod 700 usermanager.sh

         which will only give the root user read, write and execute access.


                                                                                          © <2003> ... NETIKUS.NET ltd
Setting up a simple webpage          35


10         Setting up a simple webpage
           Since our webserver should already be up and running, we will use some standard unix commands to
           make administration bearable. We will

           - Create a group for content administrators and adding a user
           - Modify the file permissions
           - Create a symbolic link in a users homedirectory that points to the content


10.1       Creating a group
           That's as easy as it can be. All we do is type

           groupadd htmladmins

           and we have group for all of those html administrators (to see all groups look into /etc/group). Of
           course we have to add user to this group, so we edit the /etc/group file, look for the line with our new
           group and simply append testuser to it. The line should then look something like this:

           htmladmins:x:501:testuser

           The only thing that might look different on your installation might be the running number 501. If you
           don't specify a GID, this number is always increased by one.


10.2       Modifying file permissions
           Now we have to tell our directory that we have group we want to assign to it (and it's subdirectories).
           By default the group root is assigned to that directory, but we don't want that. The html files for our
           apache server are in the /var/www/html directory, so we have to go /var/www and change the group:

           cd /var/www
           chgrp –R htmladmins html

           And that's it! So now every file and directory below (or above, depends on how you see it) has
           htmladmins as it's group. Now we change the file permissions and give full rights to our new group.
           We type

           chmod –R 775 html

           And off we go, it's done. If you wonder what the –R switch means … it stands for Recursive and
           applies to all subdirectories as well. Bueno.


10.3       Creating a symbolic link
           This will be short. Simply go into our testuser directory and we type

           cd /home/testuser
           ln –s /var/www/html html

           This creates a symbolic with the name html (you can call it whatever you want) that redirects us to the
           root directory of our webserver.


© <2003> ... NETIKUS.NET ltd

Mais conteúdo relacionado

Mais procurados

Winserver 2012 R2 and Winserver 2012.Technet
Winserver 2012 R2 and Winserver 2012.TechnetWinserver 2012 R2 and Winserver 2012.Technet
Winserver 2012 R2 and Winserver 2012.TechnetEmilio
 
Tivoli data warehouse version 1.3 planning and implementation sg246343
Tivoli data warehouse version 1.3 planning and implementation sg246343Tivoli data warehouse version 1.3 planning and implementation sg246343
Tivoli data warehouse version 1.3 planning and implementation sg246343Banking at Ho Chi Minh city
 
WebHost Manager Online Help 1.0
WebHost Manager Online Help 1.0WebHost Manager Online Help 1.0
WebHost Manager Online Help 1.0webhostingguy
 
Parallels Plesk Panel 9 Reseller's Guide
Parallels Plesk Panel 9 Reseller's GuideParallels Plesk Panel 9 Reseller's Guide
Parallels Plesk Panel 9 Reseller's Guidewebhostingguy
 
B4X Custom Views v1.9
B4X Custom Views v1.9B4X Custom Views v1.9
B4X Custom Views v1.9B4X
 
Ad Ch.1 8 (1)
Ad Ch.1 8 (1)Ad Ch.1 8 (1)
Ad Ch.1 8 (1)gopi1985
 
Introduction to system_administration
Introduction to system_administrationIntroduction to system_administration
Introduction to system_administrationmeoconhs2612
 
B4X SQLite Databases v1.9
B4X SQLite Databases v1.9B4X SQLite Databases v1.9
B4X SQLite Databases v1.9B4X
 
Plesk 8.0 for Linux/UNIX
Plesk 8.0 for Linux/UNIXPlesk 8.0 for Linux/UNIX
Plesk 8.0 for Linux/UNIXwebhostingguy
 
Deployment guide series ibm tivoli usage and accounting manager v7.1 sg247569
Deployment guide series ibm tivoli usage and accounting manager v7.1 sg247569Deployment guide series ibm tivoli usage and accounting manager v7.1 sg247569
Deployment guide series ibm tivoli usage and accounting manager v7.1 sg247569Banking at Ho Chi Minh city
 
Metatron Technology Consulting 's MySQL to PostgreSQL ...
Metatron Technology Consulting 's MySQL to PostgreSQL ...Metatron Technology Consulting 's MySQL to PostgreSQL ...
Metatron Technology Consulting 's MySQL to PostgreSQL ...webhostingguy
 
B4X SQLite databases
B4X SQLite databasesB4X SQLite databases
B4X SQLite databasesB4X
 
Backing up db2 using ibm tivoli storage management sg246247
Backing up db2 using ibm tivoli storage management sg246247Backing up db2 using ibm tivoli storage management sg246247
Backing up db2 using ibm tivoli storage management sg246247Banking at Ho Chi Minh city
 

Mais procurados (19)

Winserver 2012 R2 and Winserver 2012.Technet
Winserver 2012 R2 and Winserver 2012.TechnetWinserver 2012 R2 and Winserver 2012.Technet
Winserver 2012 R2 and Winserver 2012.Technet
 
Tivoli data warehouse version 1.3 planning and implementation sg246343
Tivoli data warehouse version 1.3 planning and implementation sg246343Tivoli data warehouse version 1.3 planning and implementation sg246343
Tivoli data warehouse version 1.3 planning and implementation sg246343
 
WebHost Manager Online Help 1.0
WebHost Manager Online Help 1.0WebHost Manager Online Help 1.0
WebHost Manager Online Help 1.0
 
Parallels Plesk Panel 9 Reseller's Guide
Parallels Plesk Panel 9 Reseller's GuideParallels Plesk Panel 9 Reseller's Guide
Parallels Plesk Panel 9 Reseller's Guide
 
Assembly
AssemblyAssembly
Assembly
 
B4X Custom Views v1.9
B4X Custom Views v1.9B4X Custom Views v1.9
B4X Custom Views v1.9
 
Ad Ch.1 8 (1)
Ad Ch.1 8 (1)Ad Ch.1 8 (1)
Ad Ch.1 8 (1)
 
Netfinity tape solutions sg245218
Netfinity tape solutions sg245218Netfinity tape solutions sg245218
Netfinity tape solutions sg245218
 
Introduction to system_administration
Introduction to system_administrationIntroduction to system_administration
Introduction to system_administration
 
A practical guide to tivoli sa nergy sg246146
A practical guide to tivoli sa nergy sg246146A practical guide to tivoli sa nergy sg246146
A practical guide to tivoli sa nergy sg246146
 
B4X SQLite Databases v1.9
B4X SQLite Databases v1.9B4X SQLite Databases v1.9
B4X SQLite Databases v1.9
 
Plesk 8.0 for Linux/UNIX
Plesk 8.0 for Linux/UNIXPlesk 8.0 for Linux/UNIX
Plesk 8.0 for Linux/UNIX
 
Deployment guide series ibm tivoli usage and accounting manager v7.1 sg247569
Deployment guide series ibm tivoli usage and accounting manager v7.1 sg247569Deployment guide series ibm tivoli usage and accounting manager v7.1 sg247569
Deployment guide series ibm tivoli usage and accounting manager v7.1 sg247569
 
R Admin
R AdminR Admin
R Admin
 
Metatron Technology Consulting 's MySQL to PostgreSQL ...
Metatron Technology Consulting 's MySQL to PostgreSQL ...Metatron Technology Consulting 's MySQL to PostgreSQL ...
Metatron Technology Consulting 's MySQL to PostgreSQL ...
 
Ibm total storage san file system sg247057
Ibm total storage san file system sg247057Ibm total storage san file system sg247057
Ibm total storage san file system sg247057
 
B4X SQLite databases
B4X SQLite databasesB4X SQLite databases
B4X SQLite databases
 
Citrix admin
Citrix adminCitrix admin
Citrix admin
 
Backing up db2 using ibm tivoli storage management sg246247
Backing up db2 using ibm tivoli storage management sg246247Backing up db2 using ibm tivoli storage management sg246247
Backing up db2 using ibm tivoli storage management sg246247
 

Semelhante a Linux mailserver-installation

Ibm tivoli web access for information management sg246823
Ibm tivoli web access for information management sg246823Ibm tivoli web access for information management sg246823
Ibm tivoli web access for information management sg246823Banking at Ho Chi Minh city
 
Ngen mvpn with pim implementation guide 8010027-002-en
Ngen mvpn with pim implementation guide   8010027-002-enNgen mvpn with pim implementation guide   8010027-002-en
Ngen mvpn with pim implementation guide 8010027-002-enNgoc Nguyen Dang
 
WebHost Manager 7 User Guide
WebHost Manager 7 User GuideWebHost Manager 7 User Guide
WebHost Manager 7 User Guidewebhostingguy
 
WebHost Manager 7 User Guide
WebHost Manager 7 User GuideWebHost Manager 7 User Guide
WebHost Manager 7 User Guidewebhostingguy
 
Da package usersguide
Da package usersguideDa package usersguide
Da package usersguideVishwa Mohan
 
Newfies-Dialer : Autodialer software - Documentation version 1.1.0
Newfies-Dialer : Autodialer software - Documentation version 1.1.0Newfies-Dialer : Autodialer software - Documentation version 1.1.0
Newfies-Dialer : Autodialer software - Documentation version 1.1.0Areski Belaid
 
Ibm tivoli intelligent think dynamic orchestrator pre proof of-concept cookbo...
Ibm tivoli intelligent think dynamic orchestrator pre proof of-concept cookbo...Ibm tivoli intelligent think dynamic orchestrator pre proof of-concept cookbo...
Ibm tivoli intelligent think dynamic orchestrator pre proof of-concept cookbo...Banking at Ho Chi Minh city
 
Certification guide series ibm tivoli provisioning manager express for softwa...
Certification guide series ibm tivoli provisioning manager express for softwa...Certification guide series ibm tivoli provisioning manager express for softwa...
Certification guide series ibm tivoli provisioning manager express for softwa...Banking at Ho Chi Minh city
 
Zenoss administration
Zenoss administrationZenoss administration
Zenoss administrationlibros007
 
Certification guide series ibm tivoli usage and accounting manager v7.1 imple...
Certification guide series ibm tivoli usage and accounting manager v7.1 imple...Certification guide series ibm tivoli usage and accounting manager v7.1 imple...
Certification guide series ibm tivoli usage and accounting manager v7.1 imple...Banking at Ho Chi Minh city
 
Integration guide for ibm tivoli netcool omn ibus, ibm tivoli network manager...
Integration guide for ibm tivoli netcool omn ibus, ibm tivoli network manager...Integration guide for ibm tivoli netcool omn ibus, ibm tivoli network manager...
Integration guide for ibm tivoli netcool omn ibus, ibm tivoli network manager...Banking at Ho Chi Minh city
 

Semelhante a Linux mailserver-installation (20)

Tortoise svn 1.7-en
Tortoise svn 1.7-enTortoise svn 1.7-en
Tortoise svn 1.7-en
 
Knowledge base
Knowledge baseKnowledge base
Knowledge base
 
LSI_SAS2008_Manual_v100.pdf
LSI_SAS2008_Manual_v100.pdfLSI_SAS2008_Manual_v100.pdf
LSI_SAS2008_Manual_v100.pdf
 
Ibm tivoli web access for information management sg246823
Ibm tivoli web access for information management sg246823Ibm tivoli web access for information management sg246823
Ibm tivoli web access for information management sg246823
 
UsersGuide
UsersGuideUsersGuide
UsersGuide
 
UsersGuide
UsersGuideUsersGuide
UsersGuide
 
Dpdmf en
Dpdmf enDpdmf en
Dpdmf en
 
Ngen mvpn with pim implementation guide 8010027-002-en
Ngen mvpn with pim implementation guide   8010027-002-enNgen mvpn with pim implementation guide   8010027-002-en
Ngen mvpn with pim implementation guide 8010027-002-en
 
WebHost Manager 7 User Guide
WebHost Manager 7 User GuideWebHost Manager 7 User Guide
WebHost Manager 7 User Guide
 
WebHost Manager 7 User Guide
WebHost Manager 7 User GuideWebHost Manager 7 User Guide
WebHost Manager 7 User Guide
 
Da package usersguide
Da package usersguideDa package usersguide
Da package usersguide
 
Newfies-Dialer : Autodialer software - Documentation version 1.1.0
Newfies-Dialer : Autodialer software - Documentation version 1.1.0Newfies-Dialer : Autodialer software - Documentation version 1.1.0
Newfies-Dialer : Autodialer software - Documentation version 1.1.0
 
Begining j2 me
Begining j2 meBegining j2 me
Begining j2 me
 
Ibm tivoli intelligent think dynamic orchestrator pre proof of-concept cookbo...
Ibm tivoli intelligent think dynamic orchestrator pre proof of-concept cookbo...Ibm tivoli intelligent think dynamic orchestrator pre proof of-concept cookbo...
Ibm tivoli intelligent think dynamic orchestrator pre proof of-concept cookbo...
 
Certification guide series ibm tivoli provisioning manager express for softwa...
Certification guide series ibm tivoli provisioning manager express for softwa...Certification guide series ibm tivoli provisioning manager express for softwa...
Certification guide series ibm tivoli provisioning manager express for softwa...
 
Zenoss administration
Zenoss administrationZenoss administration
Zenoss administration
 
Certification guide series ibm tivoli usage and accounting manager v7.1 imple...
Certification guide series ibm tivoli usage and accounting manager v7.1 imple...Certification guide series ibm tivoli usage and accounting manager v7.1 imple...
Certification guide series ibm tivoli usage and accounting manager v7.1 imple...
 
SEAMLESS MPLS
SEAMLESS MPLSSEAMLESS MPLS
SEAMLESS MPLS
 
Integration guide for ibm tivoli netcool omn ibus, ibm tivoli network manager...
Integration guide for ibm tivoli netcool omn ibus, ibm tivoli network manager...Integration guide for ibm tivoli netcool omn ibus, ibm tivoli network manager...
Integration guide for ibm tivoli netcool omn ibus, ibm tivoli network manager...
 
Integration guide for ibm tivoli netcool omn ibus, ibm tivoli network manager...
Integration guide for ibm tivoli netcool omn ibus, ibm tivoli network manager...Integration guide for ibm tivoli netcool omn ibus, ibm tivoli network manager...
Integration guide for ibm tivoli netcool omn ibus, ibm tivoli network manager...
 

Último

"Subclassing and Composition – A Pythonic Tour of Trade-Offs", Hynek Schlawack
"Subclassing and Composition – A Pythonic Tour of Trade-Offs", Hynek Schlawack"Subclassing and Composition – A Pythonic Tour of Trade-Offs", Hynek Schlawack
"Subclassing and Composition – A Pythonic Tour of Trade-Offs", Hynek SchlawackFwdays
 
TeamStation AI System Report LATAM IT Salaries 2024
TeamStation AI System Report LATAM IT Salaries 2024TeamStation AI System Report LATAM IT Salaries 2024
TeamStation AI System Report LATAM IT Salaries 2024Lonnie McRorey
 
Unleash Your Potential - Namagunga Girls Coding Club
Unleash Your Potential - Namagunga Girls Coding ClubUnleash Your Potential - Namagunga Girls Coding Club
Unleash Your Potential - Namagunga Girls Coding ClubKalema Edgar
 
Developer Data Modeling Mistakes: From Postgres to NoSQL
Developer Data Modeling Mistakes: From Postgres to NoSQLDeveloper Data Modeling Mistakes: From Postgres to NoSQL
Developer Data Modeling Mistakes: From Postgres to NoSQLScyllaDB
 
Advanced Computer Architecture – An Introduction
Advanced Computer Architecture – An IntroductionAdvanced Computer Architecture – An Introduction
Advanced Computer Architecture – An IntroductionDilum Bandara
 
Nell’iperspazio con Rocket: il Framework Web di Rust!
Nell’iperspazio con Rocket: il Framework Web di Rust!Nell’iperspazio con Rocket: il Framework Web di Rust!
Nell’iperspazio con Rocket: il Framework Web di Rust!Commit University
 
Streamlining Python Development: A Guide to a Modern Project Setup
Streamlining Python Development: A Guide to a Modern Project SetupStreamlining Python Development: A Guide to a Modern Project Setup
Streamlining Python Development: A Guide to a Modern Project SetupFlorian Wilhelm
 
Unraveling Multimodality with Large Language Models.pdf
Unraveling Multimodality with Large Language Models.pdfUnraveling Multimodality with Large Language Models.pdf
Unraveling Multimodality with Large Language Models.pdfAlex Barbosa Coqueiro
 
Human Factors of XR: Using Human Factors to Design XR Systems
Human Factors of XR: Using Human Factors to Design XR SystemsHuman Factors of XR: Using Human Factors to Design XR Systems
Human Factors of XR: Using Human Factors to Design XR SystemsMark Billinghurst
 
SIP trunking in Janus @ Kamailio World 2024
SIP trunking in Janus @ Kamailio World 2024SIP trunking in Janus @ Kamailio World 2024
SIP trunking in Janus @ Kamailio World 2024Lorenzo Miniero
 
Tampa BSides - Chef's Tour of Microsoft Security Adoption Framework (SAF)
Tampa BSides - Chef's Tour of Microsoft Security Adoption Framework (SAF)Tampa BSides - Chef's Tour of Microsoft Security Adoption Framework (SAF)
Tampa BSides - Chef's Tour of Microsoft Security Adoption Framework (SAF)Mark Simos
 
Are Multi-Cloud and Serverless Good or Bad?
Are Multi-Cloud and Serverless Good or Bad?Are Multi-Cloud and Serverless Good or Bad?
Are Multi-Cloud and Serverless Good or Bad?Mattias Andersson
 
SAP Build Work Zone - Overview L2-L3.pptx
SAP Build Work Zone - Overview L2-L3.pptxSAP Build Work Zone - Overview L2-L3.pptx
SAP Build Work Zone - Overview L2-L3.pptxNavinnSomaal
 
CloudStudio User manual (basic edition):
CloudStudio User manual (basic edition):CloudStudio User manual (basic edition):
CloudStudio User manual (basic edition):comworks
 
Powerpoint exploring the locations used in television show Time Clash
Powerpoint exploring the locations used in television show Time ClashPowerpoint exploring the locations used in television show Time Clash
Powerpoint exploring the locations used in television show Time Clashcharlottematthew16
 
Commit 2024 - Secret Management made easy
Commit 2024 - Secret Management made easyCommit 2024 - Secret Management made easy
Commit 2024 - Secret Management made easyAlfredo García Lavilla
 
Dev Dives: Streamline document processing with UiPath Studio Web
Dev Dives: Streamline document processing with UiPath Studio WebDev Dives: Streamline document processing with UiPath Studio Web
Dev Dives: Streamline document processing with UiPath Studio WebUiPathCommunity
 
Designing IA for AI - Information Architecture Conference 2024
Designing IA for AI - Information Architecture Conference 2024Designing IA for AI - Information Architecture Conference 2024
Designing IA for AI - Information Architecture Conference 2024Enterprise Knowledge
 
How to write a Business Continuity Plan
How to write a Business Continuity PlanHow to write a Business Continuity Plan
How to write a Business Continuity PlanDatabarracks
 

Último (20)

"Subclassing and Composition – A Pythonic Tour of Trade-Offs", Hynek Schlawack
"Subclassing and Composition – A Pythonic Tour of Trade-Offs", Hynek Schlawack"Subclassing and Composition – A Pythonic Tour of Trade-Offs", Hynek Schlawack
"Subclassing and Composition – A Pythonic Tour of Trade-Offs", Hynek Schlawack
 
TeamStation AI System Report LATAM IT Salaries 2024
TeamStation AI System Report LATAM IT Salaries 2024TeamStation AI System Report LATAM IT Salaries 2024
TeamStation AI System Report LATAM IT Salaries 2024
 
Unleash Your Potential - Namagunga Girls Coding Club
Unleash Your Potential - Namagunga Girls Coding ClubUnleash Your Potential - Namagunga Girls Coding Club
Unleash Your Potential - Namagunga Girls Coding Club
 
Developer Data Modeling Mistakes: From Postgres to NoSQL
Developer Data Modeling Mistakes: From Postgres to NoSQLDeveloper Data Modeling Mistakes: From Postgres to NoSQL
Developer Data Modeling Mistakes: From Postgres to NoSQL
 
Advanced Computer Architecture – An Introduction
Advanced Computer Architecture – An IntroductionAdvanced Computer Architecture – An Introduction
Advanced Computer Architecture – An Introduction
 
Nell’iperspazio con Rocket: il Framework Web di Rust!
Nell’iperspazio con Rocket: il Framework Web di Rust!Nell’iperspazio con Rocket: il Framework Web di Rust!
Nell’iperspazio con Rocket: il Framework Web di Rust!
 
Streamlining Python Development: A Guide to a Modern Project Setup
Streamlining Python Development: A Guide to a Modern Project SetupStreamlining Python Development: A Guide to a Modern Project Setup
Streamlining Python Development: A Guide to a Modern Project Setup
 
Unraveling Multimodality with Large Language Models.pdf
Unraveling Multimodality with Large Language Models.pdfUnraveling Multimodality with Large Language Models.pdf
Unraveling Multimodality with Large Language Models.pdf
 
Human Factors of XR: Using Human Factors to Design XR Systems
Human Factors of XR: Using Human Factors to Design XR SystemsHuman Factors of XR: Using Human Factors to Design XR Systems
Human Factors of XR: Using Human Factors to Design XR Systems
 
SIP trunking in Janus @ Kamailio World 2024
SIP trunking in Janus @ Kamailio World 2024SIP trunking in Janus @ Kamailio World 2024
SIP trunking in Janus @ Kamailio World 2024
 
Tampa BSides - Chef's Tour of Microsoft Security Adoption Framework (SAF)
Tampa BSides - Chef's Tour of Microsoft Security Adoption Framework (SAF)Tampa BSides - Chef's Tour of Microsoft Security Adoption Framework (SAF)
Tampa BSides - Chef's Tour of Microsoft Security Adoption Framework (SAF)
 
Are Multi-Cloud and Serverless Good or Bad?
Are Multi-Cloud and Serverless Good or Bad?Are Multi-Cloud and Serverless Good or Bad?
Are Multi-Cloud and Serverless Good or Bad?
 
SAP Build Work Zone - Overview L2-L3.pptx
SAP Build Work Zone - Overview L2-L3.pptxSAP Build Work Zone - Overview L2-L3.pptx
SAP Build Work Zone - Overview L2-L3.pptx
 
CloudStudio User manual (basic edition):
CloudStudio User manual (basic edition):CloudStudio User manual (basic edition):
CloudStudio User manual (basic edition):
 
Powerpoint exploring the locations used in television show Time Clash
Powerpoint exploring the locations used in television show Time ClashPowerpoint exploring the locations used in television show Time Clash
Powerpoint exploring the locations used in television show Time Clash
 
Commit 2024 - Secret Management made easy
Commit 2024 - Secret Management made easyCommit 2024 - Secret Management made easy
Commit 2024 - Secret Management made easy
 
E-Vehicle_Hacking_by_Parul Sharma_null_owasp.pptx
E-Vehicle_Hacking_by_Parul Sharma_null_owasp.pptxE-Vehicle_Hacking_by_Parul Sharma_null_owasp.pptx
E-Vehicle_Hacking_by_Parul Sharma_null_owasp.pptx
 
Dev Dives: Streamline document processing with UiPath Studio Web
Dev Dives: Streamline document processing with UiPath Studio WebDev Dives: Streamline document processing with UiPath Studio Web
Dev Dives: Streamline document processing with UiPath Studio Web
 
Designing IA for AI - Information Architecture Conference 2024
Designing IA for AI - Information Architecture Conference 2024Designing IA for AI - Information Architecture Conference 2024
Designing IA for AI - Information Architecture Conference 2024
 
How to write a Business Continuity Plan
How to write a Business Continuity PlanHow to write a Business Continuity Plan
How to write a Business Continuity Plan
 

Linux mailserver-installation

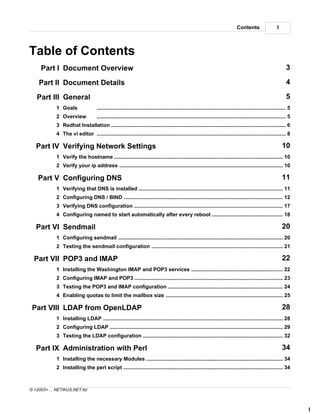
  • 1. Contents I Table of Contents Part I Document Overview 3 Part II Document Details 4 Part III General 5 1 Goals ................................................................................................................................... 5 2 Overview ................................................................................................................................... 5 3 Redhat Installation ................................................................................................................................... 6 4 The vi editor ................................................................................................................................... 8 Part IV Verifying Network Settings 10 1 Verify the hostname ................................................................................................................................... 10 2 Verify your ip address ................................................................................................................................... 10 Part V Configuring DNS 11 1 Verifying that DNS is installed ................................................................................................................................... 11 2 Configuring ................................................................................................................................... 12 DNS / BIND 3 Verifying DNS configuration ................................................................................................................................... 17 4 Configuring ................................................................................................................................... 18 named to start automatically after every reboot Part VI Sendmail 20 1 Configuring ................................................................................................................................... 20 sendmail 2 Testing the sendmail configuration ................................................................................................................................... 21 Part VII POP3 and IMAP 22 1 Installing the Washington IMAP and POP3 services ................................................................................................................................... 22 2 Configuring ................................................................................................................................... 23 IMAP and POP3 3 Testing the POP3 and IMAP configuration ................................................................................................................................... 24 4 Enabling quotas to limit the mailbox size ................................................................................................................................... 25 Part VIII LDAP from OpenLDAP 28 1 Installing LDAP ................................................................................................................................... 28 2 Configuring ................................................................................................................................... 29 LDAP 3 Testing the LDAP configuration ................................................................................................................................... 32 Part IX Administration with Perl 34 1 Installing the necessary Modules ................................................................................................................................... 34 2 Installing the perl script ................................................................................................................................... 34 © <2003> ... NETIKUS.NET ltd I
  • 2. II Setting up an Email Server with RedHat Linux Part X Setting up a simple webpage 35 1 Creating a group ................................................................................................................................... 35 2 Modifying file permissions ................................................................................................................................... 35 3 Creating a symbolic link ................................................................................................................................... 35 Index 0 © <2003> ... NETIKUS.NET ltd
  • 3. Document Overview 3 1 Document Overview Author: NETIKU Date: S.NET Revision: ltd 14th of Novemb er 2000 1.1 Setting up an Email Server with RedHat Linux Title Setting up an Email Server with RedHat Linux Summary Step-By-Step instructions on how to install an email server (including DNS, LDAP, POP) using RedHat Linux 7. There should not be many differences to RedHat 8 or RedHat 9. Software RedHat 7 Washington IMAP OpenLDAP Perl Modules: Term::ReadKey, Passwd::Linux, Convert::ASN1, Net::LDAP Hardware Not Applicable Skill Level Beginner Skills Required - Basic understanding of Networking (TCP/IP) - Basic understanding of Linux Download http://www.netikus.net/ (guides section) © <2003> ... NETIKUS.NET ltd
  • 4. 4 Setting up an Email Server with RedHat Linux 2 Document Details Overview This document describes in great detail how to install an email server using RedHat Linux 7. We will explain how the VI text editor and works and then setup DNS, Sendmail, POP3, IMAP and LDAP. Even though this document is already a couple of years old most parts should apply to RedHat 8 and RedHat 9. Additional Notes The DNS service will be install so that email clients can resolve DNS domains through this server. The applications used here (sendmail, Washington IMAP) might not be the most suitable for every environment but are generally a good start. Why? Because everybody needs an email server. © <2003> ... NETIKUS.NET ltd
  • 5. General 5 3 General 3.1 Goals The goal is to set up a Linux server supporting the following internet services: FTP only needed to transfer software updates optional TELNET only needed for administrative access optional SMTP needed for sending emails mandatory DNS needed for SMTP name resolution mandatory HTTP only needed for documentation optional POP3 needed for picking up email (either pop3 or imap) mandatory IMAP4 needed for picking up email (either imap or pop3) mandatory LDAP needed for email resolution optional Clients will be able to send and receive emails with this server. With ldap names can be automatically resolved to email addresses, if the email client supports this feature. Imap enabled clients can use all the functionality that imap supports, such as leaving their mails on the server and having multiple folders. 3.2 Overview We will create an imaginary company with the name OrganicBrownSugar that has a class C network with the IP address 192.10.1.0. Please note that this sample configuration is suitable only for a network not connected to the internet. If you want to connect this server to the internet additional steps have to be taken that are not covered in this document. This procedure however is a good basis for any further steps you might want to take later. The base for this Linux Server will be RedHat 7.0, the current version of the Redhat Distribution as of this writing. I choose Redhat for several reasons: 1. Probably the most popular Linux distribution 2. a lot of literature is available for Redhat 3. an website with extensive resources is available at www.redhat.com 4. commercial support is available from Redhat 5. one of the most used distributions focused on server installations 6. The Redhat Package Manager for easy installations Redhat 7 comes with 2 CDs, both of which are needed for the installation. This document does not cover details about Linux or the installation process itself, it just guides you through the installation, setup and configuration process of the various components. If you are new to Linux we recommend reading a quick introduction at http://www.netikus.net/documents/winnt-to-linux.pdf. If you are experiencing problems during installation and configuration of your Linux system, please refer to one of the resources available at one of the following websites: http://www.redhat.com/ http://www.linuxdoc.org/ http://www.expertse-xchange.com/ © <2003> ... NETIKUS.NET ltd
  • 6. 6 Setting up an Email Server with RedHat Linux http://www.netikus.net/ I tried to make this guide as "safe" as possible. About 95% of the commands that have to be typed are listed in an extra line. However, sometimes – especially towards the end –explanations are given to perform a specific standard task. This document is accompanied by the zipfile Linux-Mailserver-Installation.zip that is available in the downloads section of www.netikus.net. It includes the tar.gz files and some configuration files as well. You might want to check the distributors homepages for the most current version of their applications. The included versions, however, where tested and used while writing this document. 3.3 Redhat Installation After starting the installation, please choose the following installation options: Language: English Keyboard: your choice Mouse configuration: your choice Install type: Server System Partition type: Automatically or manually partition with Disk Druid / (2Gb) /boot (50Mb) /home (Rest) Network Configuration: IP Address: 192.10.1.10 Netmask: 255.255.255.0 Network: 192.10.1.0 Broadcast: 192.10.1.1.255 Hostname: email.organicbrownsugar.com Gateway: your choice Primary DNS: 192.10.1.10 Time Zone Selection: your choice Account Configuration: Root Password: your choice Account Name: testuser Password: usertest Full Name: Temporary test user Package Group Selection: Web Server DNS Name Server Select individual packages Individual Package Selection: (INCLUDE THE PACKAGES LISTED IF THEY ARE NOT SELECTED): © <2003> ... NETIKUS.NET ltd
  • 7. General 7 Applications Archiving zip Development Languages cpp* (all those which start with cpp) gcc* (all those which start with gcc) kgcc libgcj-devel tk System kernel-headers rpmdb-redhat Tools autoconf automake libtool make pmake rpm-build Documentation man-pages System Environment Daemons apache bind sendmail-cf wu-ftpd xinetd telnet-server Kernel kernel-boot Libraries libgcj Shells mc Individual Package Selection REMOVE (THOSE PACKAGES DON'T HURT, BUT ARE NOT NEEDED HERE) © <2003> ... NETIKUS.NET ltd
  • 8. 8 Setting up an Email Server with RedHat Linux Applications Internet Elm Mutt Ncftp Talk Tin Trn System isdn4k-utils ucd-snmp-utils System Environment Daeomons finger-server imap inews rp-pppoe rsh-server rusers rusers-server talk-server tftp-server ucd-snmp Hit next Checking Dependencies: Install packages to satisfy dependencies (Do this as often as necessary) About to install: HIT NEXT Bootdisk Creation: this is up to you, recommended though 3.4 The vi editor Throughout this course we will use the text-based VI editor to manipulate our configuration files. If you are not familiar with this editor, I will give you brief introduction so you will be able to use it without getting a heart attack. VI has to major modes: COMMAND MODE and INSERT MODE. Since VI doesn't have a menu and fancy things like that, you can either type and modify text (INSERT MODE) or send commands such as SAVE, QUIT … (COMMAND MODE). As soon as you start VI, you are in COMMAND MODE. To change into INSERT MODE simply press I and you will see – INSERT – at the bottom. You can now type your text, change text, use the PgUp and PgDown keys and so on. Once you are done editing, you want to save your text file and quit again. To this, you first have to go back into COMMAND MODE hitting the ESC key. You are now in COMMAND MODE. Now type ZZ To save the document and go back into the command line. This is all you will need to now about VI for this guide. However, I included to most used commands to make editing a little more fun for you. But © <2003> ... NETIKUS.NET ltd
  • 9. General 9 always remember, don't forget which mode you are in – you will not be able to edit text while in COMMAND MODE! Press i for INSERT MODE and ESC for COMMAND MODE. Important commands: ZZ<enter> Save and Quit :w<enter> Save only :qi<enter> Quit without saving (hooo) dd Delete current line yy Copy the current line into the default buffer xyy Copy x lines into the default buffer P Insert the content of the default buffer u undo last command :set number display line numbers on the left :set nonumber don't display line numbers on the left /pattern Search for pattern Some of you might still remember, or use, the norton commander. Redhat 7 includes a nifty tool called Midnight Commander which can be launched by typing mc wherever you are. It looks almost 100% like the good old DOS Norton Commander – but works on Linux as well! I found it to work quite reliable and I personally like the editor a lot. © <2003> ... NETIKUS.NET ltd
  • 10. 10 Setting up an Email Server with RedHat Linux 4 Verifying Network Settings After rebooting, log in as root and the password you assigned during the installation 4.1 Verify the hostname more /etc/sysconfig/network If the hostname does not like the one we want, go into vi and edit the file with vi /etc/sysconfig/network and change the hostname. If you don't know how vi works you didn't read the **short** introduction above! Go right back and read it (again). 4.2 Verify your ip address more /etc/sysconfig/network-scripts/ifcfg-eth0 © <2003> ... NETIKUS.NET ltd
  • 11. Configuring DNS 11 5 Configuring DNS 5.1 Verifying that DNS is installed If DNS was installed successfully, the following startup script should exist more /etc/rc.d/init.d/named © <2003> ... NETIKUS.NET ltd
  • 12. 12 Setting up an Email Server with RedHat Linux 5.2 Configuring DNS / BIND The main configuration file of DNS is /etc/named.conf and should look, by default, something like this: // generated by named-bootconf.pl options { directory "/var/named"; /* * If there is a firewall between you and nameservers you want * to talk to, you might need to uncomment the query-source * directive below. Previous versions of BIND always asked * questions using port 53, but BIND 8.1 uses an unprivileged * port by default. */ // query-source address * port 53; }; // // a caching only nameserver config // zone "." IN { type hint; file "named.ca"; }; zone "0.0.127.in-addr.arpa" IN { type master; file "named.local"; allow-update { none; }; }; We will now change it to support our domain organicbrownsugar.com which is NOT connected to the internet by typing: vi /etc/named.conf And the file should look like this when we are done: // generated by named-bootconf.pl options { directory "/var/named"; /* * If there is a firewall between you and nameservers you want * to talk to, you might need to uncomment the query-source * directive below. Previous versions of BIND always asked * questions using port 53, but BIND 8.1 uses an unprivileged * port by default. */ // query-source address * port 53; }; zone "." IN { type master; file "db.root"; }; zone "localhost" IN { type master; file "localhost.zone"; allow-update { none; }; }; © <2003> ... NETIKUS.NET ltd
  • 13. Configuring DNS 13 zone "0.0.127.in-addr.arpa" IN { type master; file "named.local"; allow-update { none; }; }; zone "organicbrownsugar.com" IN { type master; file "organicbrownsugar.com.zone"; allow-update { none; }; }; zone "1.10.192.in-addr.arpa" IN { type master; file "organicbrownsugar.com.zone.rev"; allow-update { none; }; }; zone "us.organicbrownsugar.com" IN { type master; file "us.organicbrownsugar.com.zone"; allow-update { none; }; }; This tells the DNS service which domains we are hosting here. The first paragraph adds our domain while not allowing remote servers to send our server updates of any kind. The second paragraph creates a so called Reverse Lookup Zone to later map IP addresses to hostnames. After creating the config file, we now have to set up the two zone files we are pointing to. For this we type vi /var/named/organicbrownsugar.zone and add the following lines (remember, you can save some typing by downloading this from www.netikus.net): $TTL 86400 @ IN SOA organicbrownsugar.com. hostmaster.organicbrownsugar.com. 2000103001 ( ;serial number ;increase this number whenever you make ;changes to this file. It's necessary for ;secondary servers to know if they have to update ;their zone data 10800 ;refresh every 10800 seconds ;tells a secondary server how often to ;contact a (the) master server 1800 ;retry every 30 minutes ;if a connect fails to a primary name server, connect again in 1800 seconds 1209600 ;expire records received from master server if I ;was not able to contact him for 1209600 seconds 604800 ) ;TTL tells other servers (cache) to keep the ;records of this zone (file) for 604800 seconds, ;then "refresh" © <2003> ... NETIKUS.NET ltd
  • 14. 14 Setting up an Email Server with RedHat Linux ;we need at least one of those entries to make this file valid IN NS email.organicbrownsugar.com. ;where to find the email server for our domain IN MX 10 email.organicbrownsugar.com . ;the records email IN A 192.10.1.10 ;aliases for the email server ftp IN CNAME email; telnet IN CNAME email; smtp IN CNAME email; mail IN CNAME email; mailhost IN CNAME email; ns IN CNAME email; ns1 IN CNAME email; http IN CNAME email; pop IN CNAME email; pop3 IN CNAME email; mailbox IN CNAME email; imap IN CNAME email; ldap IN CNAME email; www IN CNAME email; ;our other computer where we are testing netikus IN A 192.10.1.244 Now copy this file (organicbrownsugar.com.zone) to us.organicbrownsugar.com.zone with cd /var/named cp organicbrownsugar.com.zone us.organicbrownsugar.com.zone and change the first line so it looks like this: @ IN SOA us.organicbrownsugar.com. hostmaster.us.organicbrownsuga r.com. ( What is this good for? Now we prepared ourselves if we want multiple mailservers someday. Now we set up the reverse lookup file by typing vi /var/named/organicbrownsugar.com.zone.rev Add the following lines again: $TTL 86400 © <2003> ... NETIKUS.NET ltd
  • 15. Configuring DNS 15 @ IN SOA 1.10.192.in-addr.arpa. hostmaster.organicbrownsugar.com . ( 2000103001 ;serial number ;increase this number whenever you make ;changes to this file 10800 ;refresh every 3 hours ;tells a secondary server how often to ;contact this server 1800 ;retry every 30 minutes ;if a connect fails to another name ;server, connect again in 30 minutes 1209600 ;secondary name server discard ;cached records if you have not been able ;to contact your primary within this time 604800 ) caching server discard records if you ;did not reach your primary ;we need at least one of those entries to make this file valid IN NS email.organicbrownsugar.com. ;here we list the ip addresses in use 10 IN PTR email.organicbrownsugar.com. ;our client computer 244 IN PTR netikus.organicbrownsugar.com . Now comes the tricky part. We have to set up a root file because we are not connected to the internet. It's not important for functianlity but makes the setup complete and avoids error messages in the named logs. In named.conf we pointed to a file called db.root which we will create now with vi /var/named/db.root and this file should look this when we are done: $TTL 86400 . IN SOA email.organicbrownsugar.com. root.email.organicbrownsu gar.com. ( 2000110801 ; Serial 28800 ; Refresh 14400 ; Retry 3600000 ; Expire 86400 ) ; Minimum IN NS email.organicbrownsugar.com. email.organicbrownsugar.com IN A 192.10.1.10 . organicbrownsugar.com. IN NS email.organicbrownsugar.com. us.organicbrownsugar.com. IN NS email.organicbrownsugar.com. © <2003> ... NETIKUS.NET ltd
  • 16. 16 Setting up an Email Server with RedHat Linux Watch out for the "." In the second line. The other files have a @ here, but since this is the root file (and obviously different) there has to be . . Please note a couple of things when typing the values above: · I used <TAB> to separate values in lines · Whenever you specify a FQDN, make sure that it ends with a . <DOT>, otherwise you make yourself trouble After entering all the information correctly, we start the DNS daemon and verify the configuration © <2003> ... NETIKUS.NET ltd
  • 17. Configuring DNS 17 5.3 Verifying DNS configuration First we start the DNS daemon by typing /etc/rc.d/init.d/named start Then we type nslookup and we should see something like this Default Server: email.organicbrownsugar.com Address: 0.0.0.0 > Now we see if our machine's hostname can be resolved to an ip address by typing email.organicbrownsugar.com … and we should get an output looking something like this Server: email.organicbrownsugar.com Address: 0.0.0.0 Name: email.organicbrownsugar.com Address: 192.10.1.10 If this is what you see we can be almost sure our DNS server is working well. Now test some of the other names we created before such as imap.organicbrownsugar.com and we see Server: email.organicbrownsugar.com Address: 0.0.0.0 Name: email.organicbrownsugar.com Address: 192.10.1.10 Aliases: imap.organicbrownsugar.com Great! You can now call yourself a BASIC-DNS-LINUX-INSTALLER. But now let's see if our reverse lookup zones work as well by typing: 192.10.1.244 Now if you're your really lucky and didn't make any typo's you should most likely see Server: email.organicbrownsugar.com Address: 0.0.0.0 Name: netikus.organicbrownsugar.com Address: 192.10.1.244 Before we make an end to our endless DNS verifications, we make sure that email servers will have use of our DNS server by finding a mail exchanger (MX) for our domain @organicbrownsugar.com by typing: set query=mx © <2003> ... NETIKUS.NET ltd
  • 18. 18 Setting up an Email Server with RedHat Linux organicbrownsugar.com This should yield Server: email.organicbrownsugar.com Address: 0.0.0.0 organicbrownsugar.com preference = 10, mail exchanger = email.organicbrownsugar.com organicbrownsugar.com nameserver = email.organicbrownsugar.com email. organicbrownsugar.com internet address = 192.10.1.10 Okay now, if all this worked our DNS server is configured correctly for stand alone operation and we can type exit to leave nslookup. Please note that we do not have a secondary server at this time which inevitably results in absolutely now redundancy. But since we only have one server for all our services anyways it doesn't really matter for our scenario. You can say a little prayer to the hardware god before you go to bed tonight. Now the only thing that's missing to make our name resolution life wonderful is to make our DNS daemon start automatically after every boot. 5.4 Configuring named to start automatically after every reboot The following might look a little complicated, read it twice if you feel that you don't understand what's going on here. Services are started by startup-scripts in the directory /etc/rc.d/init.d/. This is how we started named just a few minutes ago (depends how fast you are typing and reading …). Now we have to tell linux to start named automatically. You can use tools from x-windows, but since I like Linux because I don't need a graphic interface, we will do it by hand, without any special tool. If we run ls /etc/rc.d, we will see the following directories (among others): rc0.d, rc1.d, rc2.d, rc3.d, rc4.d, rc5.d, rc6.d Each of those directories refers to a runlevel, for example rc3.d refers to runlevel three. Runlevels could be described as a state of the system. Look at the following table: 0 Halt the system 1 Enter single-user mode (no networking is enabled) 2 Multiuser mode, but without NFS 3 Full multiuser mode (normal operation) 4 Unused 5 Same as runlevel 3, except using an X Windows login rather than a text-based login 6 Reboot the system To tell our linux system when to start which service, we would have to place a startup script in the corresponding directory. However, to make things not more complicated than they already are we will use symbolic links rather than a separate script file everytime. But just adding named to the rc3.d directory (standard runlevel our server should be in most of the time) is not enough. We have to tell linux in which order to start or stop the services. Let's take a look at result of ls /etc/rc.d/rc3.d/: © <2003> ... NETIKUS.NET ltd
  • 19. Configuring DNS 19 K20nfs K20rwalld K20rwhod K34yppasswdd K45arpwatch K45named K84ypserv S05kudzu S08ipchains S10network S12syslog S13portmap S14nfslock S16apmd S20random S25netfs S35identd S40atd S45pcmcia S50xinetd S55sshd S56rawdevices S60lpd S75keytable S80sendmail S85gpm S85httpd S90crond S90xfs S95anacron S97rhnsd S99linuxconf S99local The first letter, S, indicates that the script should be started. The 2nd and 3rd number tell the order where 01 would be the first service to start. The rest is the name of the script in the ../init.d/ directory. If we would configure a service to stop (such as in runlevels 0 and 6) we would use a K instead of a S at the beginning. In our case I would tell named to start before xinetd, using the number 47. I will have named start in runlevels 3 and 5. So we type ln –s /etc/rc.d/init.d/named /etc/rc.d/rc3.d/S53named ln –s /etc/rc.d/init.d/named /etc/rc.d/rc5.d/S53named To start named in runlevel 3 and 5 automatically. To stop named everytime we make a reboot or halt or system, we add the following if it doesn't already exist (please check) ln –s /etc/rc.d/init.d/named /etc/rc.d/rc0.d/K45named ln –s /etc/rc.d/init.d/named /etc/rc.d/rc6.d/K45named Now reboot by typing shutdown –r now If we find named started automatically after the login, we are already 25% on our way. You can see if the process is active by typing ps –A | grep named If we were going from San Diego to Miami, we would probably be somwhere in New Mexico. © <2003> ... NETIKUS.NET ltd
  • 20. 20 Setting up an Email Server with RedHat Linux 6 Sendmail 6.1 Configuring sendmail On our Redhat installation we will find sendmail's configuration file as /etc/sendmail.cf. If you download and compile sendmail you would find it in /etc/mail/sendmail.cf. However, we stay with the former. Redhat 7 comes with sendmail version 8.11.0-8. To configure sendmail you have basically 2 options. Either you edit the sendmail.cf file directly or you create the sendmail.cf from a m4 file such as sendmail.mc. Sendmail uses the macro language m4 to create the configuration file from an easier to read .mc file. I highly recommend using the latter approach in order to keep administration of this configuration overseeable. Our version of sendmail is already configured well so we don't have to change anything. However, to explain the process I will list the steps to procuce a custom sendmail.cf file. Don't do this right now please, just save it for later reference! Redhat comes with a working configuration from the file redhat.mc. We will use this file as our template and modify it to our needs. This file should reside in /usr/lib/sendmail-cf/cf/. If you can't find it there you can search for it by typing cd / find –name *.cf Now let's copy the template to a new file sendmail-config.mc by typing cp /usr/lib/sendmail-cf/cf/redhat.mc /usr/lib/sendmail-cf/cf/sendmail-conf.mc Now we edit the file by typing vi /usr/lib/sendmail-cf/cf/sendmail-conf.mc Now we add the following lines to our configuration file. Please note that some of these settings might not be suitable for your configuration or use: MASQUERADE_AS(organicbrownsuger.com)dnl # mails always appear to come from # this domain Define('confMAX_MESSAGE_SIZE','3145728')dnl # maximum message size of ~3Mb Now we create the a file readable by sendmail with cd /usr/lib/sendmail-cf/cf sh Build sendmail-conf.cf Isn't it easy? Now we create a backup copy of our current sendmail.cf file (just in case we messed up) and copy our new file over the old one. cp /etc/sendmail.cf /etc/sendmail.cf.original cp /usr/lib/sendmail-cf/cf/sendmail-conf.cf /etc/sendmail.cf Now we're almost there. For sendmail to know what the local email domain is, we have to configure the file /etc/mail/local-host-names by typing vi /etc/mail/local-host-names © <2003> ... NETIKUS.NET ltd
  • 21. Sendmail 21 and appending the lines organicbrownsugar.com us.organicbrownsugar.com to it. Now we're done. To activate the changes we restart sendmail. We will use the init script, just like explained when configuring DNS for automatic startup in 3.4. /etc/rc.d/init.d/sendmail restart If we didn't get an error message here it at least means that our configuration file is ok. Now let's see if we can actually use sendmail as we would like to. 6.2 Testing the sendmail configuration We telnet to port 25 (SMTP) of our machine and try to send our test user testuser (created during installation) an email. Let's type telnet localhost 25 and we should see something like 220 email.organicbrownsugar.com ESTMP Sendmail 8.11.0/8.11.0; Mon, 30 Oct 2000 16:56:36 –0500 Type in the following lines: mail from: root@organicbrownsugar.com rcpt to: testuser@organicbrownsugar.com data subject: I love the world and the world loves me! Cool, I just installed and configured sendmail. Wow!! . and you should now see something like 250 2.0.0 e9UmxRw01218 Message accepted for delivery Now enter quit Now log in as testuser on a different console (by pressing ALT+F2 for example) and type mail At the command prompt. You should see something like Mail version 8.1 6/6/92. Type ? for help. "/var/spool/mail/testuser": 1 message 1 new >N 1 root@organicbrownsugar.com Mon Oct 30 16:59 13/571 "Hello from telnet" & _ Now simply type 1 and enter to read the message. q exits from the mail application. Voila! We're half way and almost out of Texas. Now compared to almost 5 pages DNS configuration this was pretty straightforward. Time to install POP3 and IMAP! Don't forget to logout again as the testuser and switch to your root console, otherwise our imap experience is not going to last very long … © <2003> ... NETIKUS.NET ltd
  • 22. 22 Setting up an Email Server with RedHat Linux 7 POP3 and IMAP 7.1 Installing the Washington IMAP and POP3 services We download the latest version of the Washington IMAP from ftp://ftp.cac.washington.edu/imap/imap-2000.tar.Z to one of our computers that is connected to the internet. Then we create a directory on our linux box with mkdir /usr/software and copy the file imap-2000.tar.Z into this directory. You can do this with ftp, floppies and so on. You don't have to create the directory in the /usr folder – but I will reference to this folder in this chapter. Now "cd" into this directory and decompress the archive by typing cd /usr/software tar –xvzf imap-2000.tar.Z The source should now have been extracted properly and we are ready to install. The decompression created a directory imap-2000 which we will use to install. Let's do that! Imap's root folder is the user's home folder by default. Some people like that, I however prefer the imap root to be in a subfolder of the home directory, imap in our scenario. We achive this by editing the file Makefile vi /usr/software/imap-2000/Makefile And changing the following line from EXTRACFLAGS= to EXTRACFLAGS=-DMAILSUBDIR="imap" You can quickly find the line in the file by typing /EXTRACFLAGS= while in command mode of vi. If you edit the file Makefile and modify the root directory of imap, you have to make sure that the subdirectory actually exists in every users homedirectory. Forgetting this will yield to unpredictable results according to the documentation. To automate the procedure of creating an imap directory everytime we can create a user, we will modify the template directory /etc/skel/ by creating a directory there with: mkdir /etc/skel/imap Now, everytime you create a user make sure you will use the –m option with the useradd program. However, for the user we created during installation the above procedure will not work so we create it manually one time with mkdir /home/testuser/imap So to finally start the installation we type © <2003> ... NETIKUS.NET ltd
  • 23. POP3 and IMAP 23 cd imap-2000 make slx This means that we are installing on an up to date Linux box. This should go well without problems and will create the executables that we need (yes, there is nothing more to do except the make command): ls /usr/software/imap-2000/imapd/imapd ls /usr/software/imap-2000/ipopd/ipop3d Those files of course would be better located in a directory that is designed for little daemons, so we copy them to the /etc/sbin directory with cp /usr/software/imap-2000/imapd/imapd /usr/sbin cp /usr/software/imap-2000/ipopd/ipop3d /usr/sbin 7.2 Configuring IMAP and POP3 What now? Are we done? Are we finally getting near Florida? Almost. Those two daemons will be invoked by the service xinetd so we have to tell xinetd where to find them and how to start them. But first we make sure the both services are registered in the /etc/services file by typing cat /etc/services | grep pop3 cat /etc/services | grep imap this should result in lines like this ones (unimportant ones omitted) pop3 110/tcp pop-3 # POP version 3 imap2 143/tcp imap # Interim Mail Access Proto v2 If you don't see those lines, please add them with vi /etc/services. Xinetd loads all daemons which are properly configured in the directory /etc/xinetd.d/. Since neither pop3 nor imap are configured there, we will have to create 2 files. Lets create ourselves a template by copying the configuration of telnet and editing it cp /etc/xinetd.d/telnet /etc/xinetd.d/pop3 vi /etc/xinetd.d/pop3 Then edit the file /etc/xinetd.d/pop3 so it will look like this: # default: on # description: The pop3 server serves pop3 connections; it uses # unencrypted username/password pairs for authentication # service pop3 { © <2003> ... NETIKUS.NET ltd
  • 24. 24 Setting up an Email Server with RedHat Linux socket_type = stream wait = no user = root server = /usr/sbin/ipop3d log_on_failure += USERID } Then we do the same for imap cp /etc/xinetd.d/pop3 /etc/xinetd.d/imap vi /etc/xinetd.d/imap And the file should look like this # default: on # description: The pop3 server serves pop3 connections; it uses # unencrypted username/password pairs for authentication # service imap2 { socket_type = stream wait = no user = root server = /usr/sbin/imapd log_on_failure += USERID } You should be careful and make sure that the name that's listed next to service is the one you found / entered in the file /etc/services. Once the configuration files exist we can restart xinetd and see if we can use those services. We simply type /etc/rc.d/init.d/xinetd restart and see what happens. 7.3 Testing the POP3 and IMAP configuration To start testing pop3, we simply type telnet localhost 110 and should see an output similar to this: +OK POP3 email.organicbrownsugar.com v2000.69 server ready and type quit to exit again. To see if we actually can read email with our pop3 connection, we will send another email via SMTP. Please repeat the steps listed at 3.2 where we telnetted to port 25 and sent an email to testuser@organicbrownsugar.com. After we did that, we connect again with with telnet localhost 110 and issue the following commands user testuser pass usertest list © <2003> ... NETIKUS.NET ltd
  • 25. POP3 and IMAP 25 we should then see something like +OK Mailbox scan listing follows 1 708 . Now we can retrieve the mail by typing retr 1 Which should display the message in it's raw format. You will probably appreciate an email client here that does not use HTML… Ok, pop3 hopefully works and we quickly see if imap works as well. If you cannot establish a connection to port 110 for some mean reason, make sure your entries in the xinetd configuration file match the proper service name in the /etc/services file and that the executables actually point to existing files! Now lets logout with quit and quickly type telnet localhost 143 and we should see an output similar to this: OK [CAPABILITY IMAP4 IMAP4REV1 LOGIN-REFERRALS AUTH=LOGIN] email.organicbrownsugar.com IMAP4rev1 2000.293 at Mon, 30 Oct 2000 18:47:11 –0500 (CST) and type . logout to leave imap at it's peace. To really test imap you will have to launch your imap cabable email client and connect to the server, at this point I am not listing all the imap commands here which are more complex than the ones used in pop3. Good! DNS is working, we can send mail via sendmail / smtp and we can read our emails happily with either pop3 or imap4. Wonderful. We're through Lousiana and will now enter Florida. 75%. But wait! 7.4 Enabling quotas to limit the mailbox size Our linux distribution comes with quota support, so we might want to enable it. If you trust your users and/or have unlimited disk space, you can simply skip this step. Knowing how to turn on quotas won't hurt I would say anyways. First we have to activate the quotas in 3 steps. First we enable quota on our machine during the boot-up, then we enable a volume / mount point for quotas and finally we add the quota database files. So we add the following lines to the end of the file /etc/rc.d/rc.local just before the last fi command vi /etc/rc.d/rc.local # Check quota and then turn it on if [ -x /sbin/quotacheck ] then echo "Checking quotas …" /sbin/quotacheck –avug echo "Done" fi if [ -x /sbin/quotaon ] then echo "Turning quota on …" /sbin/quotaon –avug fi © <2003> ... NETIKUS.NET ltd
  • 26. 26 Setting up an Email Server with RedHat Linux Now we will enable the /home mountpoint for quotas. This is done by adding some stuff to the /etc/fstab file: vi /etc/fstab Now look for the line that starts with "LABEL=/home" and change the word defaults to defaults,usrquota,grpquota so that it looks like this: LABEL=/home /home ext2 defaults,usrquota,grpquota 1 2 Now we have to create the quota database files in the root of the directory with cd /home touch quota.user touch quota.group chmod 600 quota.* That's all. We make a reboot and our system is at least ready to accept our quota commands! So let's add those commands for our testuser by typing: edquota –u testuser And we will see something like this (hda5 will most likely be different for you): Quotas for user testuser: /dev/hda5: blocks in user: 28, limits (soft = 0, hard = 0) inodes in use: 7, limits (soft = 0, hard = 0) As you see the edquota command has launched the vi editor for you automatically. Whenever you're done with the changes just save them as you would usually with ZZ. But what changes ? First the explanation of a hard and soft limit. A soft limit let's a user exceed this limit for a limited amount of time, called the grace period. You can notifiy the user that this is happening. The hard limit is a limit that can not be exceeded at any costs – unless it is changed. If the user exceeds it, he can not write to the directory anymore – unless he cleans up or the administrator changes the hard limit. But what are blocks and i-nodes? 1 block in linux is 1kb. So if you want to limit the quota to 1 Mb you will just use 1024 blocks. I-nodes are control structures that point to other i-nodes or to the file itself. So one file has one or more I-nodes assigned to it. I prefer to change only the block use. So to limit the testuser's mailbox size (and everything else as well) to a soft limit (warning) of reasonable 10Mb, and an ultimate hard limit of 15Mb, we change the above output in vi to: Quotas for user testuser: /dev/hda5: blocks in user: 28, limits (soft = 10240, hard = 15360) inodes in use: 7, limits (soft = 0, hard = 0) Pretty neat, hmm? Never mind the filename vi displays while you edit, edquota manages all this for you. So how do you know what user used to be a mailman in his previous life? The program quotacheck lets you check the quota dat abase, and the program repquota shows you some current statistics. Just type edquota –a And you see the current status for everybody. With perl you can run a daily job that sends emails to users or to you. The grace period is set to 7 days, by the way. If you want to change it for all users, type edquota –g –t To change it for all users, type © <2003> ... NETIKUS.NET ltd
  • 27. POP3 and IMAP 27 edquota –u –t For users to view their quota information, they can use the program quota With the switch –g the user can view statistics. The –q switch prints a message to the user if he is over quota. © <2003> ... NETIKUS.NET ltd
  • 28. 28 Setting up an Email Server with RedHat Linux 8 LDAP from OpenLDAP 8.1 Installing LDAP We download the latest version of OpenLDAP from ftp://ftp.openldap.org/pub/OpenLDAP/openldap-stable/openldap-stable-20000704.tgz and copy it just like before to our favorite software directory, /usr/software. Then we uncompress it by typing cd /usr/software tar –xvzf openldap-stable-20000704.tgz Please note that the file mentioned above was the most stable version available as of 30th October 2000. You might want to check for a newer version at http://www.openldap.org/. Now that we have unpacked it we are ready to configure, so lets type cd openldap-1.2.11 ./configure make depend make Now we will test our installation with cd tests make which hopefully turns out well. To finish the installation we do cd .. make install and LDAP should now be installed properly and we can start configuring it. Not exactly the easiest and most obvious thing to do, but I'll guide you through everything. © <2003> ... NETIKUS.NET ltd
  • 29. LDAP from OpenLDAP 29 8.2 Configuring LDAP LDAP comes with a couple of configuration files, which are /etc/openldap/ldap.conf /usr/local/etc/openldap/slapd.conf /usr/local/etc/openldap/slapd.at.conf /usr/local/etc/openldap/slapd.oc.conf ldap.conf does not have to be changed for our installation, so we continue with slapd.conf. We edit the file with vi by typing vi /usr/local/etc/openldap/slapd.conf and should have a slapd.conf file that will look like this # # See slapd.conf(5) for details on configuration options. # This file should NOT be world readable. # include /usr/local/etc/openldap/slapd.at.conf include /usr/local/etc/openldap/slapd.oc.conf schemacheck off #referral ldap://root.openldap.org/ pidfile /usr/local/var/slapd.pid argsfile /usr/local/var/slapd.args ####################################################################### # ldbm database definitions ####################################################################### database ldbm suffix "" suffix "dc=organicbrownsugar, dc=com" suffix "o=Organic Brown Sugar, c=US" #rootdn "cn=Manager, dc=organicbrownsugar, dc=com " rootdn "cn=Manager, o=Organic Brown Sugar, c=US" # cleartext passwords, especially for the rootdn, should # be avoid. See slapd.conf(5) for details. rootpw secret # database directory # this directory MUST exist prior to running slapd AND # should only be accessable by the slapd/tools Mode 700 recommended. directory /usr/local/var/openldap-ldbm index cn,sn,mail pres,eq,app The first change we applied concerns the suffix value. The suffix determines to which kind of queries our ldap server will response. In order to use automatic name resolution from various email clients, we need to add the line suffix "" Since the email client does not include a search base (like o=Organic Brown Suger,c=US) we have to add this line. Otherwise our queries will always be unsuccessful. The next two line include two other search bases that might be used. The line rootdn specifies the LDAP administrator – the user who has the right to update and change the database. Please note the following password that goes with the username. At the end of the document we have a few indexes for searches. Now we'll take a look at the next document with © <2003> ... NETIKUS.NET ltd
  • 30. 30 Setting up an Email Server with RedHat Linux vi /usr/local/etc/openldap/slapd.at.conf where we will add an attribute for email addresses. We append the line attribute mail dn attribute ou dn to the file. Now ldap knows about the mail attribute, but we have to tell ldap that we want to use it with the person objectclass. What is an objectclass? It's a collection of attributes, an objectclass person e.g. would need a lastname, firstname, email and so on. An organization objectclass would probably need attributes like street, telephone number, state and so on. Whenever we add an object to the ldap database, it has to be in an object class. Let's open the file slapd.oc.conf with vi /usr/local/etc/openldap/slapd.oc.conf and look for the line objectclass person which should look like this after our modifications: objectclass person requires objectClass, sn, cn allows description, seeAlso, telephoneNumber, userPassword, mail, ou We now edited most of our configuration files and are now ready to move on and create our first entries. For this reason we will create a ldif file that contains the records in readable format. Let's type vi /tmp/root.ldif and create the following file: dn: o=Organic Brown Sugar, c=US objectclass: organization o: Organic Brown Sugar I choose to use an LDAP hirachy that is based on organzation and country rather than email domains. If I would want to add both, I could create a file that looks like this: dn: o=Organic Brown Sugar, c=US objectclass: organization o: Organic Brown Sugar dn: dc=organicbrownsugar,dc=com objectclass: dcObject dc: organicbrownsugar Now we are almost in LDAP land. We will now configure ldap to automatically everytime we boot. For this reason we will create a file ldap in the directory /etc/rc.d/init.d/ by typing cd /etc/rc.d/init.d/ And creating the /etc/rc.d/init.d/ldap file: #!/bin/sh # # ldap This shell script takes care of starting and stopping # ldap servers (slapd and slurpd). # © <2003> ... NETIKUS.NET ltd
  • 31. LDAP from OpenLDAP 31 # chkconfig: - 39 61 # description: LDAP stands for Lightweight Directory Access Protocol, used # for implementing the industry standard directory services. # processname: slapd # config: /usr/local/libexec/slapd.conf # pidfile: /usr/local/var/slapd.pid # Source function library. . /etc/init.d/functions # Source networking configuration and check that networking is up. if [ -r /etc/sysconfig/network ] ; then . /etc/sysconfig/network [ ${NETWORKING} = "no" ] && exit 0 fi slapd=/usr/local/libexec/slapd slurpd=/usr/local/libexec/slurpd [ -x ${slapd} ] || exit 0 [ -x ${slurpd} ] || exit 0 RETVAL=0 function start() { # Start daemons. echo -n "Starting slapd:" daemon ${slapd} RETVAL=$? echo if [ $RETVAL -eq 0 ]; then if grep -q "^replogfile" /usr/local/etc/openldap/slapd.conf; then echo -n "Starting slurpd:" daemon ${slurpd} RETVAL=$? echo fi fi [ $RETVAL -eq 0 ] && touch /var/lock/subsys/ldap return $RETVAL } function stop() { # Stop daemons. echo -n "Shutting down ldap: " killproc ${slapd} RETVAL=$? if [ $RETVAL -eq 0 ]; then if grep -q "^replogfile" /usr/local/etc/openldap/slapd.conf; then killproc ${slurpd} RETVAL=$? fi fi echo [ $RETVAL -eq 0 ] && rm -f /var/lock/subsys/ldap /var/run/slapd.args return $RETVAL } # See how we were called. case "$1" in start) start ;; stop) stop ;; status) © <2003> ... NETIKUS.NET ltd
  • 32. 32 Setting up an Email Server with RedHat Linux status ${slapd} if grep -q "^replogfile" /usr/local/etc/openldap/slapd.conf ; then status ${slurpd} fi ;; restart) stop start ;; reload) killall -HUP ${slapd} RETVAL=$? if [ $RETVAL -eq 0 ]; then if grep -q "^replogfile" /usr/local/etc/openldap/slapd.conf; then killall -HUP ${slurpd} RETVAL=$? fi fi ;; condrestart) if [ -f /var/lock/subsys/ldap ] ; then stop start fi ;; *) echo "Usage: $0 start|stop|restart|status|condrestart}" RETVAL=1 esac exit $RETVAL Of course you can download this file from http://www.netikus.net/. Make sure this file has the same permissions assigned to it as all the other startup files in this directory. If it does not, enter chmod 755 /etc/rc.d/init.d/ldap However, this file does not start our ldap server by itself, we have to invoke it just like we did with our DNS service. So we create the necessary symbolic links with ln –s /etc/rc.d/init.d/ldap /etc/rc.d/rc3.d/S54ldap ln –s /etc/rc.d/init.d/ldap /etc/rc.d/rc5.d/S54ldap for starting the service and with ln –s /etc/rc.d/init.d/ldap /etc/rc.d/rc0.d/K41ldap ln –s /etc/rc.d/init.d/ldap /etc/rc.d/rc6.d/K41ldap we stop the services when our machine shuts down or reboots. You should now reboot your system – I experienced some problems without doing a reboot. So type shutdown –r now and wait until our system is back up. Now login again as root. 8.3 Testing the LDAP configuration To finally add the entry to the ldap database, we will use a programm called ldapadd by typing ldapadd –D "cn=Manager,o=Organic Brown Suger,c=US" –W –f /tmp/root.ldif © <2003> ... NETIKUS.NET ltd
  • 33. LDAP from OpenLDAP 33 When asked for a password, please enter secret. This should produce an output similar to: adding new entry o=Organic Brown Sugar, c=US If your output matches and you didn't get any error messages, verify it with the ldapsearch commando like this: ldapsearch –u –b '' –s sub '(objectclass=*)' This should display the one or two entries you created for the root of the hirarchy. To make things a little more fun we will add another entry that has a telephonenumber and an email address. Create a file /tmp/entry1.ldif and enter the following data: dn: cn=Buffalo Bill,o=Organic Brown Sugar,c=US objectclass: person cn: Buffalo Bill cn: Bill Buffalo sn: Buffalo mail: buffalo.bill@organicbrownsugar.com mail: buffalo.bill@animalhunting.com telephonenumber: +001 (987) 654-3210 Note here that you can have multiple attributes defined, cn and mail show up twice here. Make sure you separate multiple entries with a blank line. dn stands for distinguished name and should be unique for every entry. I could have also used dn: cn=Buffalo Bill, dc=organicbrownsugar,dc=com instead in the first line, or a combination. Now type ldapadd –D "cn=Manager,o=Organic Brown Suger,c=US" –W –f /tmp/entry1.ldif and if you don't see any errors, type immediately: ldapsearch –u –b '' –s sub '(objectclass=*)' Do you see Buffalo Bill? If yes, we both have succeeded. Now delete the entry by typing: ldapdelete –D "cn=Manager,o=Organic Brown Suger,c=US" "cn=Buffalo Bill,o=Organic Brown Sugar, c=US" –W One last word on ldap. Befory you start adding entries to an organizational unit, make sure you create the organizational unit itself first with the objectclass=organizationalUnit objectclass. Congratulations! Stand up, have your favorite drink and call your computer friends to tell them that you escaped the magic powers of Bill Gates and is supporters J © <2003> ... NETIKUS.NET ltd
  • 34. 34 Setting up an Email Server with RedHat Linux 9 Administration with Perl 9.1 Installing the necessary Modules To ease administration I wrote a perl script that let's you create and modify users with a perl script. To make the user interface a little bit more appealable, you will need to install several modules for PERL. Simply go to http://www.cpan.org and search for all the modules listed below, download them, and copy them to the /usr/software directory. Those modules are needed (and included in the netikus package): 1. Term::ReadKey TermReadKey-2.14.tar.gz 2. Passwd::Linux Passwd-Linux-0.70.tar.gz 3. Convert::ASN1 Convert-ASN1-0.07.tar.gz 4. Net::LDAP perl-ldap-0.22.tar.gz The installation procedure is the same for all of those modules (and for most other ones). Please note that you will have to substitute the correct file- and directory names to make it work. Also make sure you install the modules in the order showed above. I showed one example with real filenames on the right side with the Term::ReadKey Module: tar –xvzf filename.tar.gz tar –xvzf TermReadKey-2.14.tar.gz cd directory cd TermReadKey-2.14 perl Makefile.PL perl Makefile.PL make make make test make test make install make install Do this for every modele and the modules should now all be installed correctly! 9.2 Installing the perl script Now copy the file useradministration.pl and usermanager.sh from the downloaded package to the (recommended) the /root directory. You can launch the usermanager anytime by typing /root/usermanager.sh To change default values (like the password for the ldap server) edit lines 33 to 37 of the file useradministration.pl. To make sure that only our holy root user has access to this valuable file(s), we type the following: cd /root chmod 700 useradministration.pl chmod 700 usermanager.sh which will only give the root user read, write and execute access. © <2003> ... NETIKUS.NET ltd
  • 35. Setting up a simple webpage 35 10 Setting up a simple webpage Since our webserver should already be up and running, we will use some standard unix commands to make administration bearable. We will - Create a group for content administrators and adding a user - Modify the file permissions - Create a symbolic link in a users homedirectory that points to the content 10.1 Creating a group That's as easy as it can be. All we do is type groupadd htmladmins and we have group for all of those html administrators (to see all groups look into /etc/group). Of course we have to add user to this group, so we edit the /etc/group file, look for the line with our new group and simply append testuser to it. The line should then look something like this: htmladmins:x:501:testuser The only thing that might look different on your installation might be the running number 501. If you don't specify a GID, this number is always increased by one. 10.2 Modifying file permissions Now we have to tell our directory that we have group we want to assign to it (and it's subdirectories). By default the group root is assigned to that directory, but we don't want that. The html files for our apache server are in the /var/www/html directory, so we have to go /var/www and change the group: cd /var/www chgrp –R htmladmins html And that's it! So now every file and directory below (or above, depends on how you see it) has htmladmins as it's group. Now we change the file permissions and give full rights to our new group. We type chmod –R 775 html And off we go, it's done. If you wonder what the –R switch means … it stands for Recursive and applies to all subdirectories as well. Bueno. 10.3 Creating a symbolic link This will be short. Simply go into our testuser directory and we type cd /home/testuser ln –s /var/www/html html This creates a symbolic with the name html (you can call it whatever you want) that redirects us to the root directory of our webserver. © <2003> ... NETIKUS.NET ltd