
Recomendados
Mais conteúdo relacionado
Semelhante a How to take great underwater photographs with a basic digital camera
Semelhante a How to take great underwater photographs with a basic digital camera (20)
Último
Último (6)
How to take great underwater photographs with a basic digital camera
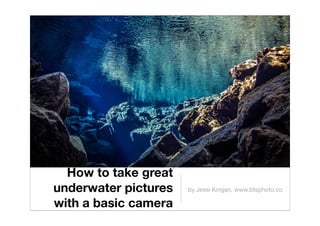
- 1. How to take great underwater pictures with a basic camera by Jessi Kingan, www.btsphoto.co
- 3. • It’s not the camera • It’s different from shooting on land • Water absorbs light and color • There’s no such thing as “motionless” • You have three dimensions to worry about: in front of you, your angle on the subject, and your position relative to the subject (above or below) Some simple truths about underwater photography
- 4. $3,000 $300
- 5. Why spend all that money? • Of course, the $3000 camera setup can do things the other can’t: • Dedicated macro lenses allow the photographer to get closer • Ultra-wide-angle lenses allow over-under shots • Better low-light performance • Off-camera flash results in less back-scatter & more flattering lighting • However, the basic setup also has a few advantages: • Ability to switch on the fly between macro and normal mode • Fits in your pocket! • Easier to learn to use effectively
- 6. See if you can spot the difference between what the $300 camera can do* and the $3000 Canon 500D *The original presentation featured images from the now-discontinued Olympus 1030SW—much better cameras are now available in this price range today. The excellent Canon S100 with housing is about $400 new and allows RAW shooting and some manual control. Used Canon G11/G12 cameras can be found for the same price. Some examples from Canon G12 are included here.
- 7. Shot with Olympus 1030SW
- 8. Banded Coral Shrimp, somewhere in the Caribbean Shot with Olympus 1030SW
- 9. Shot with Canon 500D + Ikelite DS161strobe
- 10. Spotted Moray & Friends Shot with Olympus 1030SW
- 11. Shot with Canon 500D + Ikelite DS161strobe
- 12. Spotted Eagle Ray, Creole Rock, St. Martin Shot with Olympus 1030SW
- 13. Shot with Canon G12
- 14. Underwater Sculpture Garden, Grenada Shot with Olympus 1030SW
- 15. Cup Coral “Blossoms”, Saba, Caribbean Shot with Olympus 1030SW
- 16. Vanishing Star and Jewel Crab on Coral, somewhere in the Caribbean Shot with Olympus 1030SW
- 17. Bubbles in blue water Shot with Olympus 1030SW
- 18. Bubbles under ice Shot with Canon 500D
- 19. Shot with Canon G12
- 20. Shot with Canon 500D + Ikelite DS161strobe
- 21. Silfra, Iceland Shot with Canon G12
- 22. Shot with Canon 500D + Ikelite DS161strobe
- 23. In short: The camera you have is better than the one you don’t If you want to take the best pictures possible and money is no object, then buy the best equipment possible. However, as we have seen, you do NOT need very expensive equipment to get beautiful, colorful underwater pictures.
- 24. Tip #1: Get close. Get closer. When shooting with natural light, the more water between you and your subject, the bluer your picture will be. When shooting with a flash, the more water between you and your subject, the more particulate matter that can get lit up—backscatter.
- 25. Problem: Back scatter Solution: Save the on-camera flash for macro photography, or use an external strobe
- 26. Tip #2: Learn to white balance when shooting with natural light. If your camera has a manual white balance setting, learn how to use it, and white balance frequently, every time you change depth. If your camera doesn’t, but it has one or more underwater modes, learn about them.
- 27. Problem: Green or blue cast due to improper white balancing Solution: Use manual white balance, red filter, or camera’s underwater mode
- 28. Problem: Improper white balance for light source (white light added) Solution: If you switch from shooting without a strobe to shooting with, make sure to change the white balance settings!
- 29. Tip #3: Shoot where the light is. In shallow, clear water, when the sun is highest. This enables you to shoot without flash and get clear pictures.
- 30. Green Turtle, Caye Caulker, Belize Shot with Canon 500D without strobe
- 31. Tip #4: Go for the stuff that doesn’t move so much. Make it easy on yourself.
- 32. Crab, Koh Krok, Thailand Shot with Olympus 1030SW
- 33. “Ghost Rider”, Creepy Statue, Halliburton, Utila, Honduras Shot with Canon 500D without strobe
- 34. Tip #5: Keep shooting! Use your LCD to review. Face it: fish butts aren’t as interesting as their faces. One drawback to point & shoot cameras is that there tends to be a bit of shutter lag, the delay between when you press the shutter button and when the picture is actually taken. This may mean that the picture you frame is not the picture you end up with. Keep trying!
- 35. Filefish, HTMS Suddhathip, Thailand Shot with Olympus 1030SW
- 36. Shark & Ray Alley, Ambergris Caye, Belize Shot with Canon 500D without strobe
- 37. Tip #6: Think composition. Foreground, background, separation, rule of thirds
- 38. Striped Goatfish, Koh Rongnong, Thailand Shot with Olympus 1030SW
- 39. Tip #7: Photoshop is your friend. Making good photos great, and bad photos acceptable.
- 40. Photoshop can make a good photo better, and might make a bad photo acceptable, but it will rarely, if ever, make a bad photo good.
- 41. This improperly white-balanced image was edited in Photoshop. The resulting image, at left, is still monochrome, but an improvement. Compare the colors to the one shot with flash, below.
- 42. To some extent, it’s possible to improve an underexposed image. However, you inevitably lose some detail. Shooting with the correct settings will give you much better results.
- 43. Tip #8: Know your camera before you get in the water.
- 44. Jessi Kingan, www.btsphoto.coHappy shooting!