
Recommended
Recommended
More Related Content
What's hot
What's hot (20)
Similar to Growing sweet potatoes from start to finish 2020 Pam Dawling
Similar to Growing sweet potatoes from start to finish 2020 Pam Dawling (20)
More from Pam Dawling
More from Pam Dawling (16)
Recently uploaded
Recently uploaded (20)
Growing sweet potatoes from start to finish 2020 Pam Dawling
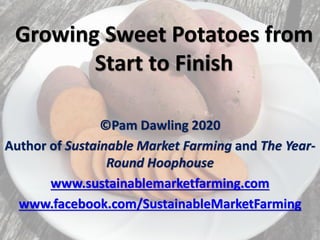
- 1. Growing Sweet Potatoes from Start to Finish ©Pam Dawling 2020 Author of Sustainable Market Farming and The Year- Round Hoophouse www.sustainablemarketfarming.com www.facebook.com/SustainableMarketFarming
- 2. I live and farm at Twin Oaks Community, in central Virginia. We are located on Monacan land. We’re in zone 7, with an average last frost April 30 and average f first frost October 14. Our goal is to feed our intentional community of 100 people with a wide variety of organic produce year round. www.twinoaks.org
- 3. What’s in this presentation • Intro and encouragement • Grow your own sweet potato slips – Twin Oaks method – Slips-in-flats – The Boutard single node method – Traditional bedding technique (Sand Hill) • Crop requirements • Planting out • Sweet potato development • Pest mammals • Afflictions and diseases • Harvest • Selecting stock for next year’s slips • Curing • Storing • Resources
- 4. What are sweet potatoes? • Sweet potatoes are tuberous roots (Ipomoea batatas), related to morning glory, in the genus Ipomoea. • This genus also includes several garden flowers and weeds. • Some varieties of sweet potatoes are grown as ornamental plants under the name tuberous morning glory. • Of the more than 1,000 species of morning glories, sweet potatoes are the only food crop of major importance. • Some others are used locally (eg "kangkong"), but many are poisonous.
- 5. More about sweet potatoes • The large, starchy, sweet-tasting, tuberous roots are used as a vegetable. • The young leaves and shoots are sometimes eaten as greens. Hot weather greens are hard to find! • The root is long and tapered, with a smooth skin, and color ranging from orange, yellow, beige, white, red, pink, violet and purple. • Sweet potato varieties with white or pale yellow flesh are less sweet and moist than those with orange, pink or red flesh. Photo Small Farm Central
- 6. Sweet potatoes are not yams! • Sweet potatoes or sweetpotatoes are native to the tropical regions in central and south America. • They are not yams, even though they’re often called yams! • True yams are a tropical species of tuber (genus Dioscorea). They come from Africa and the Caribbean. Some are huge! They have rough and scaly skin. The flavor is starchy, and usually not very sweet (more like regular potatoes). • Sweet potatoes will not even cross with yams. African yam
- 7. Sweet potatoes are not “Irish” potatoes • Sweet potatoes are sometimes thought to be a type of potato (Solanum tuberosum) but they do not belong to the nightshade family, Solanaceae. • Sweet potatoes are only distant cousins of the nightshade “Irish” (more accurately Peruvian) potatoes. • Unlike Peruvian potatoes, which have the annual sequence of vegetative growth, flowering and dying back, sweet potato plants continue growing as long as the weather is warm enough. They are frost-tender herbaceous perennials. Sweetpotatoflower. PhotoWikimedia Commons Potatoflower
- 8. Sweet potatoes are not only for the South • Modern varieties grow to a good size in as little as 90 days, so they are not just for the South! The further north you are, the longer the daylight at midsummer and the more photosynthesizing the plants can do. • Fitting sweet potatoes into a rotation is easy because it is unlikely that you are growing anything else in that family.Sweet potato harvest Photo Nina Gentle
- 9. Well grown and cured, sweet potatoes store well and are a good market or CSA crop for late fall, winter, or the early spring “Hungry Gap”. They reach their peak in flavor during January and February. One baked sweet potato of 114gm (4 oz) has 185% the RDA of vitamin A, 28% the RDA of Vitamin C, 100% of vitamin E, lots of anti-oxidants, and 160 calories, none from fat. Photo Pam Dawling
- 10. George Washington Carver, advocate for sweet potato growing
- 12. Encouragement You can provide a long-keeping crop of delicious roots for filling those CSA bags at the end of the year, or for sale in late fall and winter. At Twin Oaks we aim to grow enough to supply us from Nov to May. Planting out comes later than most spring crops. It’s late enough for a mature cover crop mix including legumes to grow to the flowering stage, providing all the nitrogen needed. They do not need lots of organic matter, or high fertility levels. Sweet potatoes fit easily into the crop schedule. Slips are started after the first flush of seed-starting, and grow with little attention. They thrive in hot weather and are fairly drought-tolerant . After vining they need little care during the summer (apart from irrigation) until harvest. Photo Nina Gentle
- 13. Understanding sweet potato growth • Don’t plant your sweet potatoes until it is good and warm! It can only stunt their growth, never speed it up! Hoophouses can help provide warmer conditions in cooler climates. • Both flower and tuber initiation are triggered by day length. Each variety has its own internal clock. • Regardless of how early in the season you plant them out, they will not make flowers earlier, or start making tubers sooner. • I usually reckon on the first month after planting being focused on root growth, the next month on vines and the rest on roots.Sweet potato at the vining stage. Photo Nina Gentle
- 14. Heat is important Photo Bridget Aleshire Forget about climate zones – those are about winter-hardiness of perennials. Sweet potato growing is all about warmth and light. • Growing Degree Days (heat units) determine success, not the number of days from planting. Early varieties take 1200 GDDs to grow a good crop. • To calculate GDDs, take the day's high temperature (max) and the day's low temperature (min) and add them together. Divide by 2 and subtract 55. • For a max of 90F, min of 70F, you get 25 GDDs - just about perfect. 90+70=160. 160/2=80. 80-55=25. At 25 GDDs a day, you theoretically only need about 48 days to get a crop. There are some other limits to daily plant growth – the likely minimum for a decent crop is about 76 days.
- 15. The mystique of sweet potato slips Photo Pam Dawling • Sweet potatoes are not grown from seed or from replanted roots, but from “slips,” which are pieces of stem with a few leaves, grown from a mother root. • We used to buy bare-root sweet potato slips for transplanting, believing growing our own would be very tricky. Our desire to have organic plants, plus a need to reduce our expenses one year, pushed us into growing our own. • We had some problems initially, so I can warn you about how not to do it. Now we have a system we really like, and we’ve found several advantages of home-grown slips over purchased ones. • I will describe 3 methods of growing slips.
- 16. Disadvantages of buying slips 1. You need to specify a shipping date months ahead, then hope the weather sprites are kind. 2. Jump-to when the plants arrive, and get them all in the ground pronto, and keep them alive as best you can. 3. A certain amount of drooping (transplant shock) is normal. 4. You might have late frosts, spring droughts, or El Nino wet springs, and climate change is only adding to the uncertainty.
- 17. Advantages of growing your own slips Delay planting if that seems wise; Plant them in stages rather than all on one day. The transplants don’t wilt. Grow them big and plant them with 3-5 nodes underground, giving more chance of survival in heat or frost. Keep some spares on hand to replace casualties. The sturdy plants get off to a strong start – this could be an even bigger advantage further north where the season of warm-enough weather is on the short side for a 90-120 day plant. Self-reliance. Sweet potatoes sprouting slips. Photo Kathryn Simmons
- 18. Three methods of slip production 1. Twin Oaks slips in flats method 2. Boutard single node cutting method 3. Traditional outdoor bedding method (Sand Hill)
- 19. Planning ahead – how many to plant Photo Kathryn Simmons • Decide how much space you want to plant, or how many pounds (tons?) you want to grow. • One slip will produce a cluster of 4–10 roots, each weighing 3–17 oz (80–500 g). • Yield range is 2.5–6.8 lbs (1-3kg) per plant, 276–805 lbs/1,000 ft² (14–40 kg/10 m²), or 6– 17.5 tons/ac (13.5–39 t/ha). • Climate, spacing, growing season affect yield. • Planting space is 6–18” in the row (wide spacing gives more jumbo roots). • We do 15" (38 cm) as we like to get some jumbos. If unsure, try 12” (30 cm). • Space between rows could be 32–48” (0.8- 1.2m). The vines become rampant. • Calculate how many slips you’ll need and add 5–10%. For an acre you’ll need 15,000.
- 20. Selecting mother roots • If you didn’t save your own seed roots from high-yielding plants at harvest, go to your stored crop and choose small to medium-sized roots of typical appearance (no rat-tails!). • Each root will produce 10-30 slips, depending how much time you allow, but regardless of size - no advantage in selecting jumbos. • If have no stored sweet potatoes, buy some. Choose a variety with a short number of days to maturity if you are in the north. Best is to buy from a local grower. • Failing that, buy slips this year, and save your own roots for the next year’s slips. • We save 200 roots for 600 plants. Seed stock saved at harvest time. Photo Nina Gentle
- 21. How not to sprout sweet potatoes ‼ My first big mistake – following directions written for much further south, I tried to start growing slips in mid-January in central Virginia. Dismal fight against nature! ‼ Another path not to take: the first time I tried this, I was puzzled by talk of using cold frames. Ours were freezing cold at that time of year. Indoor spaces are much warmer than outdoors! ‼ Next, I set up a soil warming cable in a cinder-block-enclosed bed on the concrete floor of our greenhouse. This is how I discovered most soil warming cables have thermostats set to switch off the heat at 70F. I just couldn’t get the soil warm enough. ‼ No need to repeat these mistakes ‼ For small quantities of slips, it is possible to sprout the potatoes half-submerged in water, either in trays of water, or suspending a sweet potato impaled on toothpicks s, resting on on top of a glass of water. For larger quantities I recommend our method, which I describe next.
- 22. Timing • Figure out your ideal planting date and work back to find your starting date. • Plants set out too early will struggle with skin fungi, and give uneven yields. • Planting is usually done about 2 weeks after the last frost. You need settled warm weather. The soil temperature should reach at least 65F at 4” deep on 4 consecutive days. • We plant May 10, between pepper and okra & watermelon transplanting. • It takes 7-8 weeks to grow the slips using our method, and the roots produce more slips if conditioned for 2 weeks (or even 4), before you start to grow slips. So start 10-12 weeks before your planting date. We start 3/4.
- 23. Testing 1. Test the roots in a bucket of water – the ones that float are said to yield more and produce better flavored roots. 2. Test for viral streaking, (color breaks or chimeras) where paler spots or radial streaks appear in the flesh. Discard roots with pale spots or streaks wider than a pencil lead. 3. Cut a thin slice from the distal end of each root – that’s the stringy root end, opposite the end that was attached to the plant stem. All the sprouts will grow from the stem end, so don’t cut there! Photo Southern Exposure Seed Exchange If you can’t tell the difference between the ends, ignore this step. Plan to propagate your own slips for just 2 or 3 years (to keep the virus load low). If you grow a small crop, you could keep the slips from each root separate. Before planting, cut up the mother roots, discard slips from streaked roots. An option for commercial growers is to check some, which become your seed stock, and are planted in a different plot from the untested market stock.
- 24. Conditioning • Put the chosen roots in flats, boxes or trays, without soil, in a warm, moist, light place for 2—4 weeks. • Ideal conditions are 75—85°F (24°C— 29°C), 95% humidity. • This can double or triple the number of sprouts the root will produce in a timely manner. • We use our germinating chamber, which is an old glass door refrigerator heated by an incandescent light bulb. • Conditioning after testing allows the cut surfaces to heal before they are covered by compost. • The environment for sprouting the roots is similar, so you can probably use the same location. Photo Pam Dawling
- 25. Sweet Potato Plan 2016 Here’s the first part of our slip-growing worksheet
- 26. Sprouting Our germination chamber. Photo Kathryn Simmons • • Set up a place with light, humidity and ventilation at 75°F–85°F (24°C—29°C) and 12" (30 cm) of headroom. • Plant the selected roots flat, almost touching, in free-draining potting compost in boxes or crates. The tubers do not need to be fully covered with soil. Water the boxes and put them to sprout. • We use our ex-fridge germinator. Using boxes is much more manageable than having the roots loose in a big cold frame. Insulated boxes could set on a bench at a decent working height, with lights or heat lamps over them. • Keep the compost damp. If your planting medium is without nutrients, feed occasionally with some kind of liquid feed.
- 27. Cutting slips Cut slips Photo Kathryn Simmons • After 5-7 days, the roots begin to produce slips. • When the slips are 6-12” tall with 4-6 leaves, cut daily from the roots. • I bundle in rubber bands and set them in water. • Some people twist the slips from the roots, but this can transfer diseases by including a piece of the root • The slips grow more roots while they are in water for several days, which seems to be an advantage. • Once a week I spot (plant) the oldest, most vigorous slips (with good roots) into 4" (10 cm) deep wood flats filled with compost. • The spotted flats need good light in a frost-free greenhouse and sufficient water. • If you are 2 weeks shy of your planting date and short of slips, you can take cuttings from the first flats of slips. • The slips planted in flats become very sturdy, • This system allows for flexibility about planting dates, and a longer slip-cutting season. • 10 days before planting, start to harden off the flats. I learned the slips-in-flats method from Hiu Newcomb of Potomac Vegetable Farms, in the Experienced Organic Farmers’ Network run by SSAWG some years back.
- 28. Here’s the second part
- 29. Newly spotted out slips Photo Kathryn Simmons • K
- 30. Sweet potato slips ready to plant out Photo Kathryn Simmons Many growers have success with slips with few or no roots, but we like a good root system. More important than root size is keeping newly transplanted slips well watered.
- 31. Second method of slip production Both methods start at the same time, planting roots in damp compost in a warm greenhouse Advantages of the Boutard single node cutting method, learned from John Hart of Cornell • Fewer “mother roots” are needed. 10-20% compared to my method. • Smaller plants save on greenhouse space • Only 18 days between cutting nodes and planting in the field. • Smaller plants as plugs experience less transplanting shock. • Root production is concentrated – from a single node rather than several. Drawbacks with my version of the traditional method • The number of slips from one tuber may be limited • Some varieties are meager in providing slips • A lot of warm space is needed to grow the slips, at a time when warm space is at a premium. • The process takes from early March to mid-May
- 32. The Boutard single node cutting method • Anthony Boutard and Caroline Boutard Hunt wrote an article about single node sweet potato propagation in Growing for Market in March 2015. They farm in Oregon and New York respectively. Single node cutting growing roots at 3 days. Photo Anthony Boutard
- 33. To prepare single node cuttings 1. Take a shoot from the mother tuber and cut off about ¼”(6mm) above a leaf node (swollen point where the leaf emerges). 2. In the leaf axil is a bud which will grow a shoot. 3. Just below the bud is a ring of cells that can grow roots. 4. Trim back the leaf stem, or leave the leaf on – your choice. 5. Make the second, lower, cut just above the next node down. Make several cuttings from one slip. 6. If the cutting is too tall to fit your cell plugs, cut more off the lower end. 7. Push the lower end of the shoot cutting at an angle into the soil, creating an even V with the leaf stem. The new shoot will then grow upwards easily. 8. Keep the trays warm and moist 50-cell plug flats work well. 3 day old single node cuttings Photo Anthony Boutard
- 34. Some benefits of single node cuttings This method can also be used to get more plants from purchased cut slips. Plant the purchased slips in the greenhouse and grow them on until you can make cuttings. Very helpful if you are growing a rare heirloom with limited propagation material available. This method buys time if the weather turns bad and you need to back pedal on your planting out date. Just 16 days after striking the cuttings, the plants in this photo have made impressive root growth. Photo Anthony Boutard
- 35. Plant out after 18 days • These plants, 18 days after starting the cuttings, are ready to plant in the field. Photo Anthony Boutard • Delaying planting for 10 days or so should not be a problem. • Plant out into well- prepared damp soil, with drip tape in place. • Plugs are very quick and easy to plant.
- 36. Third method of slip production Sand Hill Preservation Center field bedding method • They start field beds in late April or early May, their usual last frost date. • The soil is still cold, but they prepare beds by digging a wide trench several inches deep. • They set the mother roots in it, cover with peat moss and wet it down. • They cover the beds with clear plastic and wait several weeks. • If they have warm weather the roots start sending up slips in about 20 days. • Cool, cloudy weather means added time, fewer slips - parent roots can rot. • Glenn says: “Slips set out when the weather is very warm will outgrow and out-produce ones set out even as much as a month earlier. A slip set out in cold soil will many times become stunted and not produce as large a yield. I typically do not get my slips planted until June 20 to June 25.” • The sweet potatoes are almost all ready to harvest by mid- to late September. Glenn and Linda Drowns are genetic preservationists in Iowa. They sell small quantities of 225 varieties of sweet potatoes, and have developed a version of field bedding of slips that works well for them.
- 37. Crop requirements • Heat is vital. • Sweet potatoes prefer loose, well-drained soil with pH of 5.8-6.2. They will tolerate pH from 4.5-7.5. • Enough potassium (K) is important for drought-resistance, but too much K makes them taste bitter. • Sweet potatoes do not benefit from high nitrogen (N). They can get plenty from high-biomass cover crops, organic mulch, and soil life. • As with other crops, a 3 or more year rotation helps control disease. • Once they are established, sweet potatoes are fairly drought- tolerant. • Critical times to maintain sufficient moisture are after transplanting and for at least the first 20-40 days while roots are developing. Photo Nina Gentle
- 38. Tips to increase yields Photo Bridget Aleshire • Compacted, heavy, lumpy soils can result in misshapen, undersized tubers. • If you have clay soil or drainage problems, work in lots of compost and make raised beds or ridges 8 to 12 inches high. Ridges help heat up the soil and reduce flood damage • Black plastic warms the soil and increases growth. Plastic set out 3 weeks before planting warms the soil considerably. • You can gain GDDs (heat units) in a cold climate, by planting inside a hoophouse or low tunnel covered in clear plastic. Ventilate in hot weather. Get 20 GDDs a day, not 5.
- 39. Planting out • We like to do 2 plantings a week apart, using the older slips first, and then make a 3rd visit after another week to fill any gaps. • It’s better to wait for the slips to grow 4 leaves or more before planting, rather than rush them outside. • For big potatoes, plant the slip vertically. For average size roots but larger crops, plant horizontally 2-3” deep. • Have 3-5 leaf nodes underground and only the tips above the ground – this gives the plants a 2nd chance if frost strikes. • If you are planting in hot dry weather, water the soil first, and keep the roots enclosed in damp or wet compost as you plant. Photo Bridget Aleshire
- 40. Development • The first month or so after transplanting is the root development stage. Roots can go 8’ deep in 40 days. Don’t be alarmed at the lack of above-ground action. Give 1” water/week, and cultivate to remove weeds. • The second month or so is the vine growth stage. The roots begin to store starch and sugar close to the stem base. Cultivate until vines cover the ground, after which very little weeding will be needed. • During the last month of growth for that variety (3rd or 4th month), the potatoes develop. • Make sure you dig them up before the soil temperature gets down to 55F –the week of the average first fall frost is about right. • Most varieties take 90–110 days from planting out to reach a good size, provided the weather is warm enough. Photo by Bridget Aleshire
- 41. Pest mammals • Deer eat the plants at all stages, including digging out the roots in the fall. Dogs, fences and guns are the 3 most effective methods of deer control. The plants can be covered with row cover or plastic net for the growing season. Motion- sensor sprayers work well if maintained. • Rabbits eat the foliage. Plant the slips on black plastic to hold back weeds, then put wire hoops over the rows and cover with row cover for 3-4 weeks while the plants are young. Even after the plants are large rabbits can cause substantial losses. • Groundhogs dig and eat the roots. They can be trapped with baits of fruit. Sweet potatoes grazed by deer. Photo Nina Gentle
- 42. Solar powered deer fence
- 43. Scarecrow Motion Sensor Sprinkler Animal Deterrent • These can work to keep deer away during the frost-free period. • Works well in low crops like sweet potatoes. • Water must be kept connected and turned on. • Battery needs to be replaced from time to time.
- 44. More pest mammals • Pocket Gophers search out sweet potatoes to eat. Their mounds may be hidden under the foliage and the plants may survive as they only eat the larger roots, leaving no crop. • Voles move in from grassy areas to live under the mulch and feed as fast as the roots form. They eat the roots from the top down leaving the outer shell in the soil where they have feasted. Cats are the best control. • Rats love the roots. Cats or dogs are the best method to remove them from the area. • Field Mice build nests under black plastic and eat the roots emerging from the ground.
- 45. Afflictions Sweet potatoes are often relatively problem-free, but here are a few afflictions, and the reasons they happen, so you know what to do differently next year: • Round chunky roots, low yield, purple color: Planted too early, too cold. • Low yield: Flooded or crusted soil 6-7 weeks after planting? Planted too early? • Rough irregular shaped roots: Heavy clay soils or OM above 2%. • Rattails: thin, tough, tubers caused by hot dry weather, insufficient water. • Souring: tissue breakdown caused by poor soil aeration; for instance, flooding. • Water blisters: Small whitish bumps around the lenticels/breathing holes - wet soil. • Cracking: Uneven water supply or too much late-season water. • Blister: small raised bumps appearing several months into storage – boron deficiency. • Fine hairline cracks: also boron deficiency. • Long, slender malformed roots, reduced yield: Potassium deficiency. North Carolina Sweet Potato Commission commercial growing page Souring Photo NC Sweet Potato Comm.
- 46. Diseases • Brownish skin patches, worse in wet years. Stored roots shrivel. Scurf fungus, Monilochaetes infuscans, more likely if too much compost was used. • Metallic black surface lesions, maybe covering most of the root: black rot fungus, Certocystis fimbriata. Internal decay is not deep, but the fungus may impart a bitter flavor; • Sunken brown lesions that may encircle the root: ring rot, Pythium fungus; • Sunken lesions that dry and may fall out: Circular Spot, Sclerotium rolfsii. The underlying tissue may taste bitter; Ring Rot. Photo North Carolina Sweet Potato Commission
- 47. More diseases • Hard, dry, black, sunken spots developing in harvest wounds: Fusarium. Spots may become larger than 2” (5 cm) diameter, but damage is not deep. • Pitting: Soil rot or soil pox fungus in the presence of water stress. Roots will be small and malformed. • Streptomyces root rot bacterium causes a similar rot; • Fine or coarse irregular cracks, browning of the surface; dry, corky, dark-colored clumps of tissue scattered throughout the flesh, becoming worse if roots are stored warmer than 60°F (16°C): russet- crack/internal cork, feathery mottle virus (yellow feathery patterns of leaves). Do not use as seed stock. Feathery Mottle/internal cork. Photo North Carolina Sweet Potato Commission
- 48. When to harvest • Usually sweet potatoes are harvested in the week that the first frost typically occurs in your region. • Aim to harvest on a mild day, above 50°F (10°C), to avoid chilling injury • Don’t wait till soil temperatures get below 55°F. • If frost strikes, waste no time – get them harvested within a few days. • If the days are warm, a couple of light frosts will not harm your crop. Despite myths, there is no toxin in frozen leaves going down into the roots. • Cold wet soil can quickly rot sweet potatoes. Cold injury can ruin the crop - roots without leaf cover are exposed to cold air temperatures, and have lost their method of pulling water up out of the soil. • In drought, irrigate the field before harvest, to avoid scratching the skin with chunks of dry soil. Photo Kathryn Simmons
- 49. How to harvest Photo Kathryn Simmons • Remove the vines from the plants to be harvested that day. If there is more than one day’s digging, leave intact vines to protect the rest of the crop. Clip the vines, leaving stumps to show where to dig. • Roll the vines into the gaps between the rows –if you have close rows you may need to roll the vines further away. Digging forks can be useful tools for this job. • Mowing isn’t recommended, as the roots sometimes stick up out of the ground. • Mechanical harvesting is done with a modified disk or moldboard plow with a spiral attachment. Potato diggers usually do too much damage on sweet potatoes. • We dig ours by hand
- 50. Dig the potatoes • Using digging forks, carefully dig up the roots, which grow in the ground in a bunch-of-bananas shape. Begin digging 12-18” from the center of the plant to avoid damaging them. Go straight down about 6”, then angle toward the center and gently lift the potatoes out of the ground. • It’s important not to drop, throw or in any other way bruise the roots. • Avoid any abrasion of the skin, which is very fragile at this stage. This is the reason for the recommendation to irrigate before harvest if the soil is very dry. • Set the potatoes out beside the spot they’ve grown, one clump per plant, so it’s easy to identify the most productive plants, for seed stock. Photo Nina Gentle
- 51. Let damp tubers dry Let the tubers dry in the sun for up to an hour, unless the weather is unsuitable. Don’t leave roots exposed to temperatures higher than 90°F for more than ½ hour, or they get sun-scald. And below 55°F, they’ll get chilling injury. Photo Nina Gentle Max 90F Min 55F
- 52. Sorting and crating Photo Nina Gentle 1. If you want to grow your own slips next year, first select seed potatoes. We grow several different kinds, and make sure not to mix roots from different rows. See next slide. 2. Sort storable from damaged roots. Large open broken surfaces will cure and can be stored, but any roots with soft wet damaged areas or deep holes (whether from bugs or fork tines) will not store and should be graded out, for composting or immediate use at home. We sort into wood flats or plastic crates for curing and buckets for the “Use First” or cull category.
- 53. Selecting seed potatoes Photo Nina Gentle • Select the best: choose plants with a high yield and no string (rat-tail) roots. • From these plants, choose medium sized (1½” diameter) potatoes with good shape and color. • Don’t save jumbo potatoes for seed, they’re harder to deal with, and will not produce more or better crops. Each potato produces about the same number of slips (shoots) regardless of size. • Do not save for seed any roots with disease symptoms. Damage due to poor growing conditions can look like a disease, but as it isn’t, it will not carry over to the next crop. • Save about one tuber per 6-10 slips wanted.
- 54. Plant a cover crop • After harvest is complete, we disk the area and sow winter wheat as a cover crop around Oct 25. • It’s usually too late in the year to sow most leguminous cover crops, or for oats. • Here in zone 7, with an average first frost date of October 14, we could sow wheat, winter rye and Austrian winter peas up till Nov 7; crimson clover or hairy vetch till Oct 14. • Because sweet potatoes inhibit the formation of nitrogen nodules, following with a legume may not be very successful. • We choose winter wheat after the sweet potatoes, because in our rotation, we will use that area the next year for spring white potatoes in mid-March, and there is no time in spring for legumes to grow to flowering or produce much nitrogen. • Rye takes too long to break down early in the spring.
- 55. To wash or not to wash? • We do not wash our potatoes. I expect the need depends on soil type. We find most of the soil drops off during curing and storage. • Anthony Boutard says: “we always wash the roots well before curing. I hate handling and washing dirty roots in the winter. I have never had significant shrinkage. Even broken roots skin up nicely during the curing process. . . . So much easier to wash them on a sunny September day . . . Washing is such an easy step when they are freshly dug.” • He adds “Appearance is not my prime concern. . . Listeria is a soil borne bacterium. With the recent outbreaks I am making sure staff and I are careful when handling food and soil together. ” Washed white sweet potatoes. Photo Anthony Boutard
- 56. Cure immediately • Immediately after harvest, field drying, sorting and crating, take the boxes of sweet potatoes into a warm, damp basement or other indoor space to cure. Photo Nina Gentle
- 57. Curing Boxes of sweet potatoes curing with battens between the layers of boxes. Photo Nina Gentle • Curing allows the skin to thicken, cuts to heal, and some of the starches to convert to sugars. Uncured “green” sweet potatoes are not very sweet, and are best used in dishes with other foods. • Ideal conditions are 85-90°F, and 80-95% humidity for 4-7 days. There also needs to be some air flow and ventilation. • Curing takes longer if conditions are less than perfect. The length of the curing period also varies with the dryness of the soil just prior to harvest. We reckon on 10-14 days. • To test if curing is complete, rub two sweet potatoes together. If the skins scratch, they need to cure longer.
- 58. Tips for good curing Temperature In the past we used our greenhouse to cure sweet potatoes, but it really is too hot and sunny, and dry. Nowadays we use a basement with the door to the adjoining furnace room open. We stack our 4” deep flats of roots on pallets, with wood spacer bars between boxes in each stack, to ensure air flow. We use box fans to improve the airflow, and the basement already has some natural ventilation. Humidity We get quite good temperatures, but keeping humidity up is difficult for us. We cover the flats with newspaper to hold in some moisture. Some people use perforated plastic. Perhaps white rowcover would work? We have also used domestic humidifiers and we’ve tried hanging strips of wet cloth from the ceiling. The best result seems to come from splashing water on the concrete floor several times each day.
- 59. Storage • Ideal storage conditions for sweet potatoes are 55-60°F, 85-90% humidity. • Above 60°F, shrinking and sprouting may occur, • Below 55°F, a permanent chilling injury (Hard Core) can happen. The potatoes remain hard no matter how long you cook them, and are useless. Do not ever let the temperature drop below 50°F. • Do not store in airtight containers, sweet potatoes need one complete air change per day. • We use a rodent-proof “cage” in our basement. We stack the boxes directly on top of each other and this seems to keep enough moisture in. This way, assuming we had a good enough harvest, we can still have sweet potatoes into May and early June. Photo Nina Gentle
- 60. What causes sprouting • Sweet potatoes do not need to be in the dark. Light does not break dormancy, generally moisture and warmth do that. Check storage conditions. • Temperatures above 70°F (21°C) allow rapid growth. Don’t leave sweet potatoes curing for longer than needed. Below about 60°F (16°C), sweet potatoes won’t grow. Avoid low temperatures followed by higher ones. • If the heat circulation during storage is uneven, hot spots can develop in front of the heaters and cause sprouting. Never let hot air blow directly on the sweet potatoes.
- 61. The effects of ethylene • Ethylene is an odorless, colorless gas produced by many fruits and vegetables, eg apples, melons, bananas, tomatoes. • Associated with ripening, sprouting, rotting. • Also with chilling, wounding and pathogen attack. • Sweet potatoes are sensitive to ethylene and should not be stored with any thing that produces ethylene. • Propane heaters produce ethylene. Do not use any unvented hydrocarbon fuel heaters nearby. • Also produced by combustion engines. • Ethylene can cause internal darkening and pithy areas, as well as sprouting.
- 62. Resources – revised 1/19/20 ATTRA Sweet Potato: Organic production www.attra.ncat.org/attra-pub/summaries/summary.php?pub=32 North Carolina Sweet Potato Commission, www.ncsweetpotatoes.com/ Their information- packed commercial growing page, including photos of problems has sadly disappeared. Instead, see https://ncsweetpotatoes.com/sweet-potatoes-101/ North Carolina State University, Pests of Sweetpotato https://content.ces.ncsu.edu/insect- and-related-pests-of-vegetables/pests-of-sweetpotato. Mississippi State University Commercial Sweet Potato Production in Mississippi http://ageconsearch.umn.edu/bitstream/15785/1/rr99-005.pdf Clemson University Sweet Potatoes for fresh Market – Irrigated: Estimated Costs and Returns for Sweet Potatoes https://www.clemson.edu/extension/agribusiness/files/enterprise- budgets/sweetpotatoes-irr.pdf Islam, A. F. M. Saiful, C. Kubota, M. Takagaki, and T. Kozai. 2002. Sweetpotato growth and yield from plug transplants of different volumes, planted intact or without roots. Crop Sci. 42:822-826. https://dl.sciencesocieties.org/publications/cs/abstracts/42/3/822?access=0&view=pdf Somasundarum, K. and V. S. Santhosh Mithra. 2008. Madhuram: A simulation model for sweet potato growth. World Jour. Agr. Sci. 4: 241-254. for more understanding of sweet potato growth. http://citeseerx.ist.psu.edu/viewdoc/download?doi=10.1.1.415.4824&rep=rep1&type=pdf Sustainable Practices for Vegetable Production in the South, Dr Mary Peet: https://www.amazon.com/Sustainable-Practices-Vegetable-Production-South/dp/0941051552
- 63. Resources – revised 1/19/20 LSU Ag Center Sweet Potato IPM (not organic, but includes good info on insect pests) https://www.lsuagcenter.com/topics/crops/sweet_potatoes/insects/sweet-potato- insect-pest-management Alabama Co-operative Extension Guide to Commercial Sweetpotato Production in Alabama farmanswers.org/Library/Record/guide_to_commercial_sweetpotato_production_in Alabama Co-operative Extension Harvesting and Curing Sweetpotatoes https://www.aces.edu/wp-content/uploads/2019/03/ANR-1111-Harvesting-Curing- Sweet-Potatos_061319La.pdf University of Georgia Extension Sweet Potato Production and Pest Management in Georgia http://extension.uga.edu Sweetpotato production in California http://anrcatalog.ucanr.edu/pdf/7237.pdf Anthony Boutard and Caroline Boutard Hunt wrote about single node sweet potato propagation in Growing for Market in March 2015. Suppliers of slips Sand Hill Preservation Center, Iowa. Heirlooms, 225 Varieties. Some limits on how many you can buy. https://www.sandhillpreservation.com/sweet-potato Steele Plant Co, Slips in small and large quantities, good prices, great service. 10 varieties https://www.sweetpotatoplant.com/ Southern Exposure Seed Exchange 11 varieties, all organic. https://www.southernexposure.com/categories/sweet-potatoes/
- 64. Resources – lost North Carolina Sweet Potato Commission. The commercial growing page has lots of information, including photos of problems: www.ncsweetpotatoes.com/sweet-potato- industry/growing-sweet-potatoes-in-north-carolina/ North Carolina State University, content.ces.ncsu.edu/guidelines-for-sweetpotato-seed-stock- and-transplant-production Guidelines for Sweetpotato Seed Stock and Transplant Production. No longer available, contact jonr@ncsu.edu
- 65. Growing Sweet Potatoes from Start to Finish ©Pam Dawling 2020 Author of Sustainable Market Farming and The Year- Round Hoophouse www.sustainablemarketfarming.com www.facebook.com/SustainableMarketFarming