
Recomendados
Mais conteúdo relacionado
Mais procurados
Mais procurados (20)
Destaque
Destaque (16)
Semelhante a Poster printscreen colour a2
Semelhante a Poster printscreen colour a2 (20)
Último
Último (20)
Poster printscreen colour a2
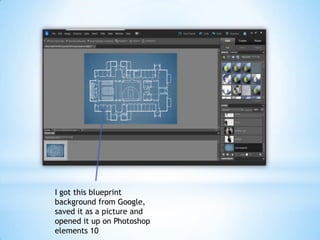
- 1. I got this blueprint background from Google, saved it as a picture and opened it up on Photoshop elements 10
- 2. This was my original end poster product, however I felt that the two left actors were too dark to see their faces clearly unlike the two actors on the right.
- 3. …So I decided that the best thing to do would be to adjust the lighting of my images, however I had to delete the two images because they could not be edited on further, without being simplified first, so It wouldn’t have allowed me to remove the dark lighting in the first place.
- 4. Firstly I went back to one of my original shots in my photo gallery and opened the photo on Photoshop
- 5. Next I used the quick selection tool to remove the background and the rest of the models that were in the original image, most importantly to refine the edges of my main image.
- 6. Then I duplicated this image and placed it onto my film poster file
- 7. The proceeding steps was a repetition of the previous process with my second image/model.
- 8. Next I adjusted the brightness and contrast of both the actors at equal settings, so that the matched the brightness of the actors on the opposite side. Finally I decided to replicate this action onto my main actress in the middle, as I noticed that through editing the brightness of the rest of the cast, she looked dull and dim in comparison to the rest of the images on my poster.