CERAMIC LAMINATE VENEERS.pptx
•Download as PPTX, PDF•
2 likes•666 views

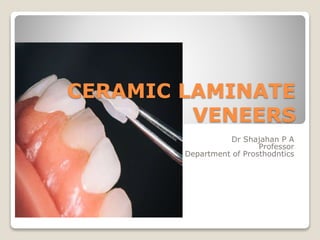
CERAMIC LAMINATE VENEERS- Dr.Shajahan P A

Recommended
More Related Content
What's hot
What's hot (20)
Similar to CERAMIC LAMINATE VENEERS.pptx
Similar to CERAMIC LAMINATE VENEERS.pptx (20)
More from Royal Dental College Library
More from Royal Dental College Library (20)
Recently uploaded
Recently uploaded (20)
CERAMIC LAMINATE VENEERS.pptx
- 1. CERAMIC LAMINATE VENEERS Dr Shajahan P A Professor Department of Prosthodntics
- 2. INTRODUCTION Laminate veneers have evolved over the last several decades to become one of aesthetic dentistry most popular restorations . The laminate veneer is a conservative alteration to full coverage for improving the appearance of an anterior tooth .
- 3. DEFINITIONS PORCELAIN LAMINATE VENEER A thin bonded ceramic restoration that restore the facial surface and part of the proximal surface of the teeth requiring aesthetic restoration. VENEER A thin sheet of material usually used as a finish LAMINATING Constructing a veneer and bonding it to etched tooth structure it is the prosthetic treatment that consists of replacing the visible portion of the dental enamel with a ceramic substitute ,intimately bonded to the tooth surface ,yielding optical ,mechanical and biological properties closely resembling those of the natural enamel.
- 4. HISTORY In 1930’s Dr Charles Pinus first used thin resin facings and then air fired porcelain facings to create the Hollywood Mile for American actors .He used denture adhesive to sold the veneer in place . In the 1970’s performed plastic laminate were bonded to the teeth using composite resin , but bonding to the plastic was poor along with colour instability . The evolution of the modern ceramic laminate was assisted by the following discoveries: Etching of enamel by Buonocore(1955) Bowens BIS-GMA resin (1960) Ceramic etching and bonding by Rochette(1973)
- 5. INDICATIONS Extreme discolorations Enamel defects Diastema Attrition and root exposure Malpositioned teeth and abnormalities of shape Repair of functionally-sound metal ceramic or all ceramic restoration with unsatisfactory colour Tooth fracture Restoring anterior guidance in worn mandibular incisors
- 6. CONTRAINDICATION Insufficient coronal tooth structure :Fractured teeth with more than 1/3 loss of tooth structure ,grossly carious or extensively restored tooth .Full coverage restorations are preferred . Actively erupting teeth Parafunctional habits like bruxism severe periodontal involvement and crowding Endodontically treated teeth :Present a poorly receptive surface for bonding and full coverage restorations are indicated.
- 7. ADVANTAGES minimally invasive conservative Excellent colour and light Transmission-good aesthetic High colour stability Good tissue response Excellent durability –good strength,wear resistance and no fluid absorption . Speed and simplicity
- 8. Disadvantages Tooth preparation ,however minimal is required Cemention is time consuming and technique sensitive Fragile –may fracture if improperly handled during try in or cementation Proper selection of underlying cement is critical for success Difficult to repair Cost`
- 9. SHADE SELECTION This should be done at the beginning ,during the consultation or treatment appoinment . It has to be done when the teeth have not been dried out for any period of time . It is done under a colour corrected light and outside in daylight . The conventional shade guide such as vita porcelain shade guide ,are not ideal for veneers because their porcelain thickness is high . It is best for ceramist to make an individualized shade guide .
- 10. TOOTH PREPARATION PRINCIPLES OF TOOTH PREPARATION Conservation of tooth structure :The preparation should be conservative which is the main principle governing the fabrication of the ceramic laminate . Retention is solely by adhesion :adhesive luting or bonding using resin cements is the main contributors to retention rather than tooth preparation .
- 11. RATIONALE To provide adequate space for porcelain opaquing and composite resin luting materials. To removes convexities in the surface and provide a definite path for insertion. To assist veneer seating during placement and bonding To provide a receptive enamel surface for etching and bonding the laminate To facilitate margin placement To provide adequate contour and colour without over contouring .
- 12. TYPE OF PREPARATION Classified as : TYPE 1 :Contact lens type : Does not cover the incisal edges Type 2 :Classic or conventional type :most commonly used .covers the incisal edges and terminates lingually ..
- 13. thickness to tooth ,need for increasing tooth length and occlusion determine whether type 1 OR 2 is used . TYPE 3 : Wrap around or ¾ type :almost similar to full coverage preparation .Indicated for extensive changes and colour and contour
- 14. ARMAMENTARIUM A diamond depth cutter with three 2mm diameter wheels mounted on a 1.0mm diameter non cutting shaft .The radius of wheels from the non cutting shaft is .5mm .Procedure a depth cut of .5mm A diamond depth cutter with a wheel diameter of 1.6mm ,produce a depth cut of .3mm Round bur Round end tapering diamond Finishing diamond and burs Airotor handpiece .
- 15. PROCEDURE The Preparation for the conventional type is described .it involves the following step Labial reduction Proximal reduction Sulcular reduction Incisal reduction Lingual reduction
- 16. LABIAL REDUCTION The thickness of the ceramic laminate should be .5mm .To achieve this ,the labial preparation should achieve a uniform reduction of .3-.5mm ,less gingivally and more incisally .this involves . 1. Depth cuts 2. Reducing remaining enamel
- 17. DEPTH CUT These can be prepared using round bur only or a combination of round bur and depth cutter DEPTH CUTS USING ONLY ROUND BUR Depth cuts are placed on the labial surface with no.1 round bur along the gingival margins ,and extended proximally and incisally
- 19. The .8mm diameter will produce a .4mm depth of preparation The labial surface is then divided into a mesial and distal half by placing a depth cut cervicoincisally in the centre of labial surface with the round bur
- 20. The labial surface is then divided into cervical ,middle and incisal third by placing two depth cuts mesiodistally with the round burs .
- 21. DEPTH CUTS DIAMOND DEPTH CUTTER After the first depth cut around the gingival margin with a round bur ,depth cuts are placed on the entire labial surface by running the diamond depth cutter mesiodistally. The depth of preparation dictates the choice of depth cutter .
- 22. The cuts are placed in two planes in two planes following the contour of the labial surface Also the wider depth cutter can be used on the incisal part and the other on the gingival part if the amount of preparation on the gingival half is to be lesser .
- 23. REDUCING REMAINING ENAMEL Whichever method is used to produce the depth cut ,the remaining enamel on the labial surface is reduced using a round end tapering diamond ,which will produce a chamfer finish line. Only the direction of reduction varies depending on direction of the cut .
- 24. PROXIMAL REDUCTION Depth can often be as great as .8-1mm ,since the enamel layer is thick towards proximal surface . It is ensured that the diamond is parallel with the long axis of the tooth .
- 25. The facial reduction using the round end tapered diamond is just continued in to the proximal area The proximal reduction should stop just short of breaking the contact
- 26. Reason to preserve contact area It is a anatomical features that is extremely difficult to reproduce . It prevents displacement of the tooth between the preparation and placement appointment if no provisional restoration are planned . Postinsertion oral care is easier Simplifies try in no need to adjust the contact Simplifies bonding and finishing .
- 27. SULCUS EXTENSION Routinely the margin are placed supragingivally . When discoloration is excessive ,the margin are extened subgingivally . A round .3 mm chamfer serves as a ideal margin for ceramic laminate veneer ADVANTAGES Increased areas of enamel in the preparation . Simplified moisture control Visual confirmation of marginal fit Margins are accessible for finishing and polishing Access to margin for routine maintenance and dental hygeine procedure .
- 28. ADVANTAGES OF CHAMFER FINISH LINE Conservative ,distinct Provide increased bulk of porcelain giving adequate strength ,avoid over contouring Good marginal seal Accuracy of fit –veneer is easily inserted at try in and final placement .
- 29. INCISAL REDUCTION As porcelain is stronger in compression than in tension ,wrapping the porcelain over the incisal edge and terminating it on the lingual surface places the veneer in compression during function .
- 30. It also provide a vertical stop that aids in proper seating of the veneer and improves translucency . Incisal reduction should provide a ceramic layer of at least 1mm in thickness .5mm depth orientation grooves are placed in the incisal edges using a depth cutter or round end tapering diamond . A round end tapered diamond is used to remove the tooth structure in between the grooves.
- 31. INDICATION FOR INCISAL COVERAGE The incisal thickness is too thin to support the veneer . A lengthening of the incisal edge 1.0-2 mm is desired Facioincisal margin is visible and unaesthetic Incisal enamel is structurally compromised The incisal edge is subject to functional stress.
- 32. LINGUAL REDUCTION The round end tapered diamond is held parallel to the lingual surface with its end forming a slight chamfer .5mm deep
- 33. Beside placing the porcelain under compression lingual extension will also enhance the retention and increase the surface areas for bonding
- 34. SOFT TISSUE MANAGEMENT Gingival retraction can be done just prior to tooth preparation when the finish line is placed .5 mm subgingivally . It can also be done prior to impression making During cementation ,placement of retraction cord prevents the contamination of the cervical margins with sulcular fluid and facilitates the finishing of the cervical margin.
- 36. IMPRESSION PROCEDURE A single impression technique ,double mix ,using a combination of putty and light body is recommended for laminates .
- 37. A double impression technique using a spacer is not recommended due to the reduced thickness of a laminate compared to a crown , which leads to greater shrinkage of light body .
- 38. The impression is normally made with a standard fixed prosthodontic impression material such as addition silicones as they have excellent accuracy ,remarkable mechanical properties and good dimensional stability
- 39. The light body is syringed on the prepared teeth and gently spread so that the entire preparation is covered and no air bubbles exist . A simultaneously mixed putty material is loaded on a stock tray and inserted over the light body material . Tray is filled with putty and is kept in place.
- 40. PROVISIONAL RESTORATION Provisional restoration for laminate may not be essential as there is no exposure of dentine and the proximal contacts are maintained But most often it may be necessary for a patient to maintain their social engagement and if proximal contact is broken . Two methods are 1. Direct method 2. Indirect method
- 42. DIRECT METHOD The provisional restoration is fabricated intraorally .It can be done using . Composite resin A few spots on the prepared tooth or a central spot is etched with phosphoric acid and bonded . Restorative composite is built up on prepared tooth and light cured . This acts as a provisional restoration as it can be easily removed prior to try in ,as entire surface was not etched .
- 45. Autopolymerising acrylic resin Tooth colour acrylic can also be used similar to routine fixed prosthodontic A putty index of the tooth made prior to tooth preparation ,is filled with resin following the preparation and inserted in the mouth . It is removed following initial set ,allowed to polymerize, trimmed and can be luted using provisional cements or spot etched and boned with resin cements
- 50. INDIRECT METHOD A model fabricated following tooth preparation will allow the acrylic provisional to be made indirectly on a cast .
- 51. LABORATORY PROCEDURE Leucite and lithium disilicate reinforced ceramics are preferred due to their excellent translucency and aesthetics. CEMENTATION Following the Fabrication of the laminate in the laboratory ,the same is cemented .this involves the following steps , 1. Initial veneer inspection 2. Preparation of site 3. Try in 4. Bonding 5. Finishing
- 52. Initial veneer inspection The veneer is placed on the cast and assessed for the following Imperfections Individual fit Collective fit Veneer colour
- 54. Preparation of site The prepared teeth are isolated, provisional removal and cleaned with pumice . Try in The veneers are then tried in the patients mouth .they checked for Individual fit Collective fit Colour Water soluble glycerine ,transparent silicones and colour keyed try in pastes can be used to attach the laminate to the tooth during try in .
- 55. Factors influencing colour Since most often laminates are indicated to correct discolouration ,it is important to understand the factors influencing the same . Original tooth colour Porcelain shade and opacifier Luting resin colour and opacity Tooth not requiring major colour changes is influenced by the factors as follows : 80% ceramic 10% cement 10% tooth
- 56. Bonding Bonding involves the following procedure Preparation of veneer Preparation of tooth Luting
- 58. Preparation of veneer Following cleaning of the veneer with a solvent such as acetone ,it is etched with 10%-15% hydrofluoric acid for 30 seconds to 1 minute according to the manufacturer instruction and the ceramic used . Some clinician tend to get the veneer etched by the laboratory ,this is not recommended as the etched surface may get contaminated during handling and try in procedure . A silane coupling agent is now applied to the fitting surface of the veneer and is allowed to remain for one minute . It is then air dried .
- 59. The silane creates a chemical bond between composite cement and ceramic . A normal composite bonding agent is finally applied to the fitting surface at the same time when the tooth surface is also bonded . It is not light cured .
- 60. Preparation of tooth The prepared teeth are pumiced again to remove any try in paste or cement . They are isolated using soft metal bands or mylar strips . The tooth is etched with 35% phosphoric acid for 15 sec . It is thoroughly rinsed and gently air dried .surface should appear typically frostly following the etching procedure. Composite bonding agent is applied on the tooth surface and is not light cured now .
- 63. Luting The cement of choice for luting ceramic laminate veneers is resin cement . The resin is adhesively cemented or bonded to the tooth and the laminate . Though the resin cement are available as chemical ,light and dual cured varieties ,the light cured cement is preferred as it gives adequate working time and open margins allow good light polymerization .
- 64. Ideal requirement of the luting cements: 1. Thin film thickness ,10-20microns 2. High compressive and tensile strength 3. Ability to tint ,opaque and characterize 4. Low viscosity 5. Low polymerization shrinkage 6. Good colour stability .
- 65. Several manufacturers produce resin cements in variable shades with flowable viscosity and with opaquers . The cement is mixed and applied on the fitting surface of veneer and spread uniformly Veneer is then placed on the prepared tooth giving finger pressure labially . When position is verified to be correct ,veneer is initially light cured for 5sec . The excess material is removed with a probe and then the light curing is continued for 45-60 sec .
- 67. FINISHING Fine grit diamond are used to remove any excess cement from margins .Final finishing is accomplished with disc and diamond polishing paste . Occlusion is checked only after veneer is bonded to tooth Proximal areas are finished with finishing strips
- 72. MAINTENANCE For 72-96 hours following insertion ,patient should avoid highly coloured foods ,tea or coffee ,hard food and extreme temperature . Routine scaling should be done at least every 4 months ,ultrasonic scalers may be avoided . Abrasive and highly fluoridated tooth paste should be avoided. Excessive biting forces and nail biting and pencil chewing habits should be avoided . Soft acrylic mouth guard can be used during contact sports .
- 73. FAILURE OF LAMINATE VENEERS MECHANICAL : Fracture –poor positioning of incisal margins ,less incisal thickness ,margin too subgingival Debonding –use of expired cement ,faulty veneer /tooth preparation during luting . BIOLOGICAL : Postoperative sensitivity-improper curing of cement ,poor marginal adaptation Marginal microleakage –poor fit and extension
- 74. AESTHETIC : Improper shade selection Visible margins in case of discoloured teeth Gingival recession –over contour and improper sub gingival placement
- 75. Thank you