SlideShare a Scribd company logo
1 of 22
Download to read offline
AUGUST 2014 (Revised)
A PRINCIPLED TECHNOLOGIES TEST REPORT
(Second of a three-part series)
Commissioned by Veritas Corp.
VERITAS NETBACKUP BENCHMARK COMPARISON: DATA PROTECTION IN A
LARGE-SCALE VIRTUAL ENVIRONMENT (PART 2)
In1
our hands-on testing at Principled Technologies, we wanted to see how
leading enterprise backup and recovery solutions handled large-scale VM deployments
based on vSphere. We tested a solution using industry-leading Veritas NetBackup
software and the Veritas NetBackup Integrated Appliance, with NetApp FAS3200-series
arrays to host the virtual machines (VMs), and a solution from a leading competitor
(Competitor “E”). We tested a scenario that utilized SAN storage for hosting VMs. In our
scenario, we tested with increasing populations of VMs—as low as 100 and as high as
1,000–to see how each solution scaled as the environment grew.
We found that NetBackup 7.6 with the NetBackup Integrated Appliance,
featuring capabilities such as Accelerator, Replication Director, and Instant Recovery—
all for VMware vSphere—provided a more scalable solution than the Competitor “E”
platform. With 1,000 VMs, the NetBackup solution provided 66.8 percent faster backup
1
In August 2014, Symantec commissioned Principled Technologies to perform this study. In January 2015, Symantec selected Veritas
Technologies Corporation as the name for its independent information management company and changed the name of the product
from Symantec NetBackup to Veritas NetBackup. In July 2015, PT updated this report to reflect the new name. The original version
of this report is available at www.principledtechnologies.com/Symantec/NBU_benchmark_comparison_(part_2)_1214.pdf.
A Principled Technologies test report 2Veritas NetBackup benchmark comparison: Data protection in a
large-scale virtual environment (Part 2)
times using SAN Transport in a Fibre Channel SAN environment than the Competitor “E”
solution.
In our tests, Veritas NetBackup with the NetBackup Integrated Appliance
provided superior scalability needed to protect the largest virtual server deployments,
when compared to the Competitor “E” solution.
PROTECTING DATA IN A VIRTUAL ENVIRONMENT
The inclusion of virtualization into data centers introduces new perspectives on
methods of operation. Technologies such as VMware® vSphere® shrink the physical
footprint of computing hardware by increasing the number of virtual servers.
Enterprises commonly deploy VMs by the thousands and protecting all of their data is a
critical challenge, whether done by hardware snapshots, hypervisor-level backup
(vStorage APIs for Data Protection (VADP) in the case of VMware technology), or
traditional agent-in-guest methods. Using both block Storage Area Network (SAN)
systems and file-based Network-Attached Storage (NAS) can allow for effective scaling,
but backup and recovery systems must fully leverage the strengths of the platforms to
offer reliable performance with minimal impact to the production environment.
WHAT WE COMPARED
Backups via Storage Snapshot Integration
Veritas NetBackup offers hardware snapshot integration with NetApp storage
arrays via Replication Director. Replication Director allows Veritas NetBackup to offload
the snapshot process of a backup to the NetApp array, creating recovery points almost
instantly without consuming server and storage resources. The recovery points can then
be archived to disk, tape, or any other supported media as necessary.
We were unable to compare the Veritas NetBackup Replication Director feature
with Competitor “E” because, as of the commissioning of our tests, Competitor “E” did
not support a competing technology that can utilize NetApp hardware snapshots. As a
result, our testing focused on vStorage APIs for Data Protection (VADP) backups for
comparison.
Backup via VMware vStorage APIs for Data Protection
Using the NetBackup Integrated Appliance as both media server and backup
storage, we tested how long it took to execute backup with virtual application
protection. Using the breakdown illustrated in Figure 4, we performed full backups with
application protection on groups of VMs from 100 to 1,000, measuring the backup time
elapsed.
A Principled Technologies test report 3Veritas NetBackup benchmark comparison: Data protection in a
large-scale virtual environment (Part 2)
OUR ENVIRONMENT
We set up the test environment using 20 Dell™ PowerEdge™ M420 server
blades running VMware vSphere ESXi 5.5. Figure 1 shows our storage network for VADP-
based backup testing.
Figure 1: Detailed storage network: VADP-based backups.
We created a test environment of 1,000 Microsoft® Windows Server®-based
VMs in several different configurations, depending on the test. We used Windows
Server 2012 for application VMs, and Windows Server 2008 R2 Core installation for the
standalone Web and idle file server VMs.
To balance the load across the ESXi hosts and storage, we created a matrix to
ensure that equal load was distributed across all four NetApp filers (four volumes for the
NAS testing, 40 LUNs/datastores for SAN testing) and the 20 ESXi hosts. This prevented
overutilization of individual system components while others were idle, optimizing the
performance of the multi-threaded backup procedures. For VADP backup testing, we
used Veritas NetBackup’s resources limits capability to eliminate the possibility of
resource contention.
When we completed our NetBackup testing, we removed the NetBackup
appliance, added Competitor “E” hardware, and retested on exactly the same test bed.
Competitor “E” does not support SAN Transport for VADP backups. SAN transport allows
A Principled Technologies test report 4Veritas NetBackup benchmark comparison: Data protection in a
large-scale virtual environment (Part 2)
the backup solution to leverage the FC storage network for moving backup data, which
reduces the impact on your production network.
Instead, Competitor “E” leverages virtual machines that act as data movers to
move data across a data network. As shown in Figure 2, the data mover VMs utilize the
“hot-add” method for VADP backups. The hot-add method provides virtual machines
access to the same LUNs their virtualization host can access. This in turn enables the
data mover virtual machines to read the snapshot files housed on the virtual machine
datastores, and then transmit the data to the Competitor “E” backup appliance via the
data network.
Figure 2: The “hot add” method provides a data mover VM access to the same datastores as its host.
To utilize this method, the data movers must reside on virtualization hosts in
your environment. In order to make our comparisons as “apples-to-apples” as possible,
we added additional hardware similar to the Veritas NetBackup Integrated Appliance so
that the overall solution is functionally similar in terms of Fiber Channel connectivity.
We utilized this hardware as a dedicated ESXi host to act as the SAN connection point
for the virtual data movers, rather than distribute the Competitor “E” data movers
among the active test hosts.
A Principled Technologies test report 5Veritas NetBackup benchmark comparison: Data protection in a
large-scale virtual environment (Part 2)
Our host was able to house three virtual data movers without any resource
contention, each with eight available instances for a total of 24 potential streams. We
did this to maximize the 24 processor threads available on the dual socket Intel Xeon E5-
2620 processor-based server. To reduce the chance of over-utilizing any datastore, we
assigned our target datastores to each of the data mover instances in round-robin
fashion, allowing each datastore to be accessed by no more than two instances
simultaneously. This allowed us to manage potential resource contention.
For this first scenario, on SAN transport, we created 200 Windows Server 2012
application VMs running Microsoft SQL Server®, Microsoft Exchange, or Microsoft
SharePoint® (10 tiles of 20 VMs each), and up to 800 idle Windows Server 2012 VMs.
Figure 3 represents the grouping of VMs included in each backup job.
Figure 3: Backup via VADP-based transport VM grouping.
Figure 4 provides the details for the sub-categories of VMs we used in this phase
of testing.
Server VM type Disk size (in GB)
VM count
100 200 400 1,000
Active Directory® server 55 5 10 10 10
Exchange Server 50 25 50 50 50
SharePoint Web server 55 15 30 30 30
SharePoint SQL server 160 5 10 10 10
Web application SQL server 50 50 100 100 100
Idle Web server 22 200 800
Figure 4: Production VMs on SAN storage. Color-coding corresponds with Figure 3.
A Principled Technologies test report 6Veritas NetBackup benchmark comparison: Data protection in a
large-scale virtual environment (Part 2)
WHAT WE FOUND
SAN testing vs. Competitor “E”
Backup with virtual application protection via VADP
We used the Competitor “E” appliance as the backup target and the Competitor
“E” enterprise backup software and consulted published documentation to perform
various backups.2
As we did so, we timed how long it took to complete an application-
consistent backup of a group of VMs using SAN transport.
For this scenario, we created policies or groups containing the client VMs we
wished to target, and from the GUI, instructed the orchestration server of each product
to perform backups of the entire group. The NetBackup solution backed up 1,000 VMs
in 66.8 percent less time than the Competitor “E” solution. In other words, the
NetBackup solution completed the backup of 1,000 VMs three times faster than
Competitor “E” did. Figure 5 shows the total time to complete the SAN backup for both
solutions at every level of VM count we tested.
The Competitor “E” solution has the capability for hot-add transport, which is
not ideal for true off-host backups, and is limited to eight streams per data mover. To
create an equitable comparison, we had to give ESXi resources to work around these
architectural limitations. The goal in doing so was to assist the Competitor “E” solution
by creating a workaround that could extract more hardware resources from the physical
host.
Figure 5: The total time
each system took to
complete VADP-based SAN
backup in
hours:minutes:seconds.
Lower numbers are better.
2
This configuration fell within the recommendations of Competitor “E.”
0:25:40
0:43:23
1:11:04
2:51:33
2:18:32
3:58:23
5:22:43
8:36:50
0:00:00
3:00:00
6:00:00
9:00:00
100 200 400 1,000
Total time to complete backup
NetBackup solution
Competitor “Eˮ solution
A Principled Technologies test report 7Veritas NetBackup benchmark comparison: Data protection in a
large-scale virtual environment (Part 2)
Analysis of the data captured during backup runs suggested the maximum CPU
utilization on the host dedicated to the virtual data movers was in excess of 85 percent
(see Figure 16 in Appendix C). While there were additional CPU resources left available
on the data mover host, the addition of another virtual data mover would have
overtaxed the CPUs, creating resource contention.
The average CPU utilization on the Competitor “E” virtual data mover host
remained relatively high throughout the entire backup job – approximately 75 percent.
Without available dedicated hardware to host virtual data movers, the ESXI hosts
running your production environment would be directly impacted by the load, which
means reduced hosting capacity on any host running a virtual data mover. See Appendix
C for more details on virtual data mover server CPU utilization.
Additionally, as shown in Figures 6 and 7 below, the % disk utilization – the
percentage of time the disks are in use – for the filers was relatively low for both
solutions, which indicates the filers had additional resources available. The figures also
highlight the differences in the length of the backup jobs for each solution.
The NetBackup solution was able to perform backups well within an allotted 8-
hour backup window, while Competitor “E” exceeded the window. In a production
environment, this can mean backups occur during normal business hours, which can
affect user experience.
Figure 6: Average disk activity across the four NetApp filers, as reported by sysstat, for Veritas NetBackup.
A Principled Technologies test report 8Veritas NetBackup benchmark comparison: Data protection in a
large-scale virtual environment (Part 2)
Figure 7: Average disk activity across the four NetApp filers, as reported by sysstat, for Competitor “E.”
The value of granular recovery and the required protection window to ensure it
In the case of file corruption or VM deletion, a system administrator can run a
recovery job to recreate a VM from a previously captured backup image stored on the
media server or media server equivalent. There are times, however, that recovering an
entire VM is very inefficient—for example, when all that really needs recovery is an
individual application file or database object. In the case of a SQL database application,
an administrator may only need to recover an individual database.
In addition to the backup job used to protect a virtual machine, Competitor “E”
requires an in-guest agent to stream data for enabling granular recovery of application
data. VM protection for Competitor “E” requires use of VADP hot-add-based image level
backups while NetBackup provides granular recovery-enabled, application-consistent,
single-pass backups for applications using any supported VADP transport.
During the virtual machine backup job, the NetBackup client installed on the
application VM captures the application metadata in a manner that allows recovery of
either an entire VM or only application-specific data, so no additional backup jobs are
necessary. As Figure 8 shows, in our testing the Veritas NetBackup solution needed just
4 minutes and 46 seconds to create a backup image that supports granular restore.
Competitor “E” required 8 minutes and 30 seconds and required three additional steps
A Principled Technologies test report 9Veritas NetBackup benchmark comparison: Data protection in a
large-scale virtual environment (Part 2)
to protect the same data. Veritas NetBackup’s strategy results in a 43.9 percent
reduction in time required for complete protection of a single application VM.
Figure 8: The additional time and steps needed to create the backup necessary to enable granular recovery.
Recovery at scale
When multiple servers need recovering at the same time, in the case of an off-
site disaster recovery operation for example, the ability to recover servers quickly
means a faster return to service and potentially a smaller impact on your bottom line. In
our labs at Principled Technologies, we compared the time it took to recover a single
application VM, and concurrently, 8-, 16-, and 24-application VMs with Veritas
NetBackup 7.6 and the Competitor “E” solution.
As seen in Figure 9 below, Veritas NetBackup 7.6 offered better performance at
every concurrent recovery level with performance improving at scale, completing 24
application VMs about a half hour faster than Competitor “E”. That’s over 37 percent
faster recovery time at each of the scale levels.
A Principled Technologies test report 10Veritas NetBackup benchmark comparison: Data protection in a
large-scale virtual environment (Part 2)
Figure 9: The total time
each system took to
complete concurrent
restores in
hours:minutes:seconds.
Lower numbers are better.
CONCLUSION
The footprint of a VM can grow quickly in an enterprise environment and large-
scale VM deployments in the thousands are common. As this number of deployed
systems grows, so does the risk of failure. Critical failures can become unavoidable and
offering data protection from a backup solution promotes business continuity.
Elongated protection windows requiring multiple jobs of different types can create
resource contention with production environments and may require valuable IT admin
time, so a finite window for system backups can have plenty of importance.
In our hands-on SAN backup testing, the Veritas NetBackup Integrated
Appliance running NetBackup 7.6 offered application protection to 1,000 VMs in 66.8
percent less time than Competitor “E” did. In addition, the Veritas NetBackup Integrated
Appliance with NetBackup 7.6 created backup images that offered granular recovery
without additional steps. These time and effort savings can scale as your VM footprint
grows, allowing you to execute both system protection and user-friendly, simplified
recovery.
0:08:10
0:19:36
0:36:56
0:56:50
0:06:06
0:31:09
1:00:44
1:31:20
0:00:00
0:30:00
1:00:00
1:30:00
2:00:00
1 VM 8 VMs 16 VMs 24 VMs
Total time to complete concurrent restore
NetBackup Competitor “E”
A Principled Technologies test report 11Veritas NetBackup benchmark comparison: Data protection in a
large-scale virtual environment (Part 2)
APPENDIX A – SYSTEM CONFIGURATION INFORMATION
Figure 10 lists the information for the server from the NetBackup solution.
System Dell PowerEdge M420 blade server (vSphere host)
Power supplies (in the Dell PowerEdge M1000e
Blade Enclosure)
Total number 6
Vendor and model number Dell A236P-00
Wattage of each (W) 2,360
Cooling fans (in the Dell PowerEdge M1000e Blade
Enclosure)
Total number 9
Vendor and model number Dell YK776 Rev. X50
Dimensions (h x w) of each 3.1” x 3.5”
Volts 12
Amps 7
General
Number of processor packages 2
Number of cores per processor 8
Number of hardware threads per core 2
System power management policy Performance
CPU
Vendor Intel
Name Xeon
Model number E5-2420
Stepping 2S
Socket type FCLGA1356
Core frequency (GHz) 1.9
Bus frequency 7.2
L1 cache 32 KB + 32 KB (per core)
L2 cache 256 KB (per core)
L3 cache 15 MB
Platform
Vendor and model number Dell PowerEdge M420
Motherboard model number 0MN3VC
BIOS name and version 1.2.4
BIOS settings Default, Performance profile
Memory module(s)
Total RAM in system (GB) 96
Vendor and model number Samsung® M393B2G70BH0-YH9
Type PC3L-10600R
Speed (MHz) 1,333
Speed running in the system (MHz) 1,333
Timing/Latency (tCL-tRCD-tRP-tRASmin) 9-9-9-36
Size (GB) 16
A Principled Technologies test report 12Veritas NetBackup benchmark comparison: Data protection in a
large-scale virtual environment (Part 2)
System Dell PowerEdge M420 blade server (vSphere host)
Number of RAM module(s) 6
Chip organization Double-sided
Rank Dual
Operating system
Name VMware vSphere 5.5.0
Build number 1209974
File system VMFS
Kernel VMkernel 5.5.0
Language English
Graphics
Vendor and model number Matrox® G200eR
Graphics memory (MB) 16
RAID controller
Vendor and model number Dell PERC H310 Embedded
Firmware version 20.10.1-0084
Driver version 5.1.112.64 (6/12/2011)
Cache size (MB) 0 MB
Hard drive
Vendor and model number Dell SG9XCS1
Number of disks in system 2
Size (GB) 50
Buffer size (MB) N/A
RPM N/A
Type SSD
Ethernet adapters
Vendor and model number 2 x Broadcom® BCM57810 NetXtreme® II 10 GigE
Type LOM
USB ports
Number 2 External
Type 2.0
Figure 10: Detailed information for the server we tested from the NetBackup solution.
Figure 11 lists the information for the NetApp storage from the NetBackup solution.
System NetApp FAS3240
Platform
Vendor and model number 4 x NetApp FAS3240
OS name and version NetApp Release 8.1.3 (7-Mode)
Hard drives
Number of drives 24
Size (GB) 560
RPM 15K
Type SAS
A Principled Technologies test report 13Veritas NetBackup benchmark comparison: Data protection in a
large-scale virtual environment (Part 2)
System NetApp FAS3240
Network adapters
Vendor and model number 2 x 10Gbps
Type Integrated
Fiber adapters
Vendor and model number 2 x 8Gbps
Type PCI-E
Figure 11: System configuration information for the NetApp storage array.
Figure 12 details the configuration of the NetBackup integrated appliance and the Competitor “E” media server.
System
NetBackup 5230
integrated appliance
Competitor “E” appliance
Virtual Data Movers
Host (Competitor “E”)
General
Number of processor
packages
2 1 2
Number of cores per
processor
6 4 6
Number of hardware
threads per core
2 1 2
System power
management policy
Default Default Default
CPU
Vendor Intel Intel Intel
Name Xeon E5-2620 Xeon E5-2603 Xeon E5-2620
Model number E5-2620 E5-2603 E5-2620
Socket type FCLGA2011 FCLGA2011 FCLGA2011
Core frequency (GHz) 2 GHz 1.8 GHz 2 GHz
Bus frequency 7.2 GT/s 6.4 GT/s 7.2 GT/s
L1 cache 32 KB + 32 KB per core 32 KB + 32 KB per core 32 KB + 32 KB per core
L2 cache 1.5 MB (256 KB per core) 1 MB (256 KB per core) 1.5 MB (256 KB per core)
L3 cache 15 MB 10 MB 15 MB
Platform
Vendor and model
number
Veritas NetBackup 5230
Integrated Appliance
N/A N/A
Memory module(s)
Total RAM in system
(GB)
64 32 64
Vendor and model
number
Ventura Tech® D3-
60MM104SV-999
Micron MT36JSF1G72PZ-
1G6K1HF
Ventura Tech D3-
60MM104SV-999
Type PC3-10600 PC3-12800R PC3-10600
Speed (MHz) 1,333 1600 1,333
Timing/Latency (tCL-
tRCD-tRP-tRASmin)
9-9-9-27 11-11-11-34 9-9-9-27
Size (GB) 8 8 8
A Principled Technologies test report 14Veritas NetBackup benchmark comparison: Data protection in a
large-scale virtual environment (Part 2)
System
NetBackup 5230
integrated appliance
Competitor “E” appliance
Virtual Data Movers
Host (Competitor “E”)
Number of RAM
module(s)
8 4 8
Chip organization Double-sided Double-sided Double-sided
Rank Dual rank Dual rank Dual rank
Operating system
Name
NetBackup Appliance
2.6.0.2
Suse Linux 11 VMware vSphere 5.5.0
Build number 2.6.32.59-0.7-default-fsl 2.6.32.59-0.71.5736.1.PTF 1209974
RAID controller
Vendor and model
number
Intel RMS25CB080 Intel RMS25CB080 Intel RMS25CB080
Firmware version 23.9.0-0025 23.12.0-0013 23.9.0-0025
Cache size (MB) 1024 1024 1024
Hard drives
Vendor and model
number
Seagate® Constellation®
ES ST1000NM0001
HGST E182115
Seagate Constellation ES
ST1000NM0001
Number of drives 10 12 10
Size (GB) 1,000 2,000 1,000
RPM 7.2K 7.2k 7.2K
Type SAS SATA SAS
Ethernet adapters
Vendor and model
number
Intel X520 10Gbps dual-
port Ethernet adapter
Intel I350 Quad-Port Gigabit
Controller
Intel X520 10Gbps dual-
port Ethernet adapter
Type PCI-E Integrated PCI-E
Figure 12: Detailed information on the media server from each solution.
A Principled Technologies test report 15Veritas NetBackup benchmark comparison: Data protection in a
large-scale virtual environment (Part 2)
Figure 13 shows how we configured our data network. We used this configuration universally on SAN testing.
Figure 13: Detailed test bed layout: data network.
A Principled Technologies test report 16Veritas NetBackup benchmark comparison: Data protection in a
large-scale virtual environment (Part 2)
APPENDIX B – HOW WE TESTED
We set up hardware and software for Competitor “E” according to administrative best practices.
Creating a storage lifecycle policy with NetBackup 7.6
1. Open a connection to the NetBackup machine.
2. If the Veritas NetBackup Activity Monitor is not open, open it.
3. Log into nbu-master-a with administration credentials.
4. Go to StorageStorage Lifecycle Policies.
5. Right-click in the right pane, and select New Storage Lifecycle Policy.
6. Enter a name for your SLP.
7. Click Add.
8. In the New Operation window, change the operation to Snapshot, and select primary-snap as your destination
storage.
9. Click OK.
Creating a policy with NetBackup 7.6
1. Open a connection to the NetBackup machine.
2. If the Veritas NetBackup Activity Monitor is not open, open it.
3. Log into nbu-master-a with administration credentials.
4. Go to Policies.
5. Right-click the All Policies area, and select New Policy.
6. Under Add a New Policy, enter your policy name, and click OK.
7. Change Policy type to VMware.
8. Click the Policy storage drop-down menu, and select the policy you created earlier.
9. Check Use Replication Director, and click Options.
10. In the Replication Director options, change Maximum Snapshots to 1,000, and make sure that Application
Consistent Snapshot is Enabled.
11. Click the Schedules tab.
12. In the Schedules tab, select New.
13. In the Attributes window, enter a name for your scheduled backup, click Calendar, and click the Calendar Schedule
tab.
14. In the Calendar Schedule tab, select a date as far away as you deem reasonable, and click OK.
15. Click the Clients tab.
16. Click Select automatically through query. If a warning window appears, click Yes.
17. Choose the VMs you wish to backup through queries (for example, if you want to back up all VMs on a drive,
choose Datastore in the Field category, and enter the drive you want to pull all VMs from in quotes in the Values
field.
Running a test with NetBackup 7.6
1. Open a connection to the NetBackup machine.
2. If the Veritas NetBackup Activity Monitor is not open, open it.
3. Log into nbu-master-a with administration credentials.
4. Go to Policies.
5. Right-click the policy you wish to run, and select Manual Backup.
6. Click OK.
Note: In the case of the NAS backups, we had two separate policies as each one targets the opposite VMs. Make
sure to run the even and odd backup.
A Principled Technologies test report 17Veritas NetBackup benchmark comparison: Data protection in a
large-scale virtual environment (Part 2)
Backing up VM hosts in NetBackup 7.6
1. Select Policies.
2. Under All Policies, right-click and select New Policy.
3. Provide a policy name and click OK.
4. On the Attributes tab, use the pull-down menu for Policy type and select VMware.
5. For Destination, use the pull-down menu and select your target storage. We selected media-msdp.
6. Check the box for Disable client-side deduplication.
7. Check the box for Use Accelerator.
8. On the Schedules tab, create a backup schedule based on the desired parameters.
9. On the Clients tab, choose Select automatically through query.
10. Select the master server as the NetBackup host to perform automatic virtual machine selection.
11. Build a query to select the correct VMs required for the backup job.
12. Click Test Query to ensure the correct VMs are properly selected.
13. Start the backup.
NetBackup 7.6 Exchange Instant Recovery
1. Start LoadGen test load.
2. Force-power-down all VMs once 50 LoadGen operations complete.
3. Initiate the Exchange infrastructure restore job/start timer.
a. Establish a connection to the master server via SSH.
b. Log in with administrator credentials.
c. Type support and press Enter.
d. Type maintenance and press Enter.
e. Enter the administrator credentials.
f. Type elevate and press Enter.
g. Type the following:
nbrestorevm -vmw -ir_activate -C client_DNS_name -temp_location temporary_restore_LUN -vmproxy
restore_host_FQDN –vmpo
This will restore, activate, and power-on the VM.
h. Repeat Step g for each of the four VMs to restore.
i. Stop the LoadGen test run.
4. When restores complete, restart the LoadGen test.
5. Once 100 LoadGen operations complete successfully, stop the timer.
NetBackup 7.6 Exchange restore via command line
Initiate Exchange infrastructure restore job
1. Establish a connection to the master server via SSH.
2. Log in with administrator credentials.
3. Type support and press Enter
4. Type maintenance and press Enter.
5. Enter the administrator credentials
6. Type elevate and press Enter.
7. Type the following:
nbrestorevm -vmw -ir_activate -C client_DNS_name -temp_location temporary_restore_LUN -vmproxy
restore_host_FQDN –vmpo
A Principled Technologies test report 18Veritas NetBackup benchmark comparison: Data protection in a
large-scale virtual environment (Part 2)
This will restore, activate, and power-on the VM.
8. Repeat step 7 for each of the four VMs to restore.
NetBackup 7.6 Exchange Instant Recovery
1. Start the LoadGen test load.
2. Force-power-down all VMs once 50 LoadGen operations complete.
3. Initiate the Exchange infrastructure restore job/start timer.
a. Establish a connection to the master server via SSH.
b. Log in with administrator credentials.
c. Type support and press Enter.
d. Type maintenance and press Enter.
e. Enter the administrator credentials.
f. Type elevate and press Enter.
g. Type the following:
nbrestorevm -vmw -ir_activate -C client_DNS_name -temp_location temporary_restore_LUN -vmproxy
restore_host_FQDN –vmpo
This will restore, activate, and power-on the VM.
h. Repeat step g for each of the four VMs to restore.
i. Stop the LoadGen test run.
4. When restores complete, restart the LoadGen test.
5. Once 100 LoadGen operations complete successfully, stop the timer.
Launching collectors and compiling data for NetBackup 7.6
The following two tasks (Launch the collectors & Compile the data) should be executed from the
domainadministrator login on INFRA-SQL.
Launching the collectors
Note: If this is a first run collection, skip to step 2.
1. Double-click the collector job (located in C:Scripts) associated with the number of VMs you want to collect.
2. In the PuTTY session launched for the media server collection, enter the following sequence:
Support
Maintenance
(P@ssw0rd)
iostat –d 30
3. RDP into the Backup-Test server.
4. On the NetBackup Console, expand nbu-master-aNetBackup ManagementPolicies.
1. Right click the Policy you want to start, and select Manual Backup.
5. To start the job, click OK.
6. Open the Activity Monitor on the NetBackup Administration Console.
7. The Backup job will execute and spawn four different kinds of jobs for each target VM:
a. Application State Check
b. VM Snapshot
c. Backup
d. Image Cleanup
Compile the data
In the following steps, ### represents the number of VMs you’re testing, and # represents the test number.
1. At job completion, double-click the StopCollection.bat file (located in C:Scripts).
A Principled Technologies test report 19Veritas NetBackup benchmark comparison: Data protection in a
large-scale virtual environment (Part 2)
2. Capture screenshots of the Main Backup Job (both Tabs) and sub jobs for a SQL server, an Exchange Server, and
a SharePoint server.
a. Save each screenshot in:
E:Veritas Test Results01 Backup Test### VM Results RepositoryTest #
b. If this is a first run, return to step 1 above.
3. On the menu at the top of the NetBackup Console, select FileExport.
4. Select All Rows, and export to <Test#.xls>. Click Save.
5. Manually select all the rows in the activity monitor and delete them.
6. Open WinSCP.
7. Select My Workspace on the left panel and click Login. This will open a connection and automatically log into
each of the ESXI servers undergoing data collection.
a. In the left panel, browse for the correct job folder:
### VM Results RepositoryTest #esxtop
b. In the right panel, select the esxout file (which may be of considerable size) and drag it into the esxtop
directory.
c. Once the file transfer is complete, delete the esxtop from the server (right panel).
d. Repeat steps a-c for each of the esx servers.
8. Close WinSCP.
9. On the INFRA-SQL server, open E:Putty Output.
10. In a separate window, open:
E:Veritas Test Results01 Backup Test### VM Results RepositoryTest #sysstats.
11. Move all the files from E:Putty Output to the Test folder you selected in the previous step.
12. Close all Explorer windows.
13. Return to step 1 above.
General concurrent restore procedure
1. Delete restore target VM(s) from disk in vCenter.
2. Launch the data collector script.
3. Execute a restore job using one of the following methods:
a. For NetBackup:
i. Open a PuTTY session to the NBU master server (172.16.100.100).
1. Log in as admin/P@ssw0rd
2. Type support and press Enter.
3. Type maintenance and press Enter.
4. Enter the maintenance password P@ssw0rd
5. Type elevate and press Enter.
ii. Copy the commands to be executed from a text file and paste them into the command line
interface on the NetBackup master server.
4. Determine the time by determining the difference between the time the first job begins and the end-time of the
last job to complete.
5. Export the NBU job log to disk and copy it to the results folder.
6. Stop the collection script.
7. Transfer the relevant data collector output into the test folder.
A Principled Technologies test report 20Veritas NetBackup benchmark comparison: Data protection in a
large-scale virtual environment (Part 2)
APPENDIX C – CPU UTILIZATION
Figure 14 shows the CPU utilization for the NetBackup solution.
Figure 14: CPU utilization for the NetBackup solution using the NetApp media server.
Figure 15 shows the CPU utilization for the Competitor “E” solution.
Figure 15: CPU utilization for the Competitor “E” media appliance solution.
A Principled Technologies test report 21Veritas NetBackup benchmark comparison: Data protection in a
large-scale virtual environment (Part 2)
Figure 16 shows the CPU utilization for the Competitor “E” virtual data movers host.
Figure 16: CPU utilization for the virtual data movers host used with the Competitor “E” solution.
A Principled Technologies test report 22Veritas NetBackup benchmark comparison: Data protection in a
large-scale virtual environment (Part 2)
ABOUT PRINCIPLED TECHNOLOGIES
Principled Technologies, Inc.
1007 Slater Road, Suite 300
Durham, NC, 27703
www.principledtechnologies.com
We provide industry-leading technology assessment and fact-based
marketing services. We bring to every assignment extensive experience
with and expertise in all aspects of technology testing and analysis, from
researching new technologies, to developing new methodologies, to
testing with existing and new tools.
When the assessment is complete, we know how to present the results to
a broad range of target audiences. We provide our clients with the
materials they need, from market-focused data to use in their own
collateral to custom sales aids, such as test reports, performance
assessments, and white papers. Every document reflects the results of
our trusted independent analysis.
We provide customized services that focus on our clients’ individual
requirements. Whether the technology involves hardware, software, Web
sites, or services, we offer the experience, expertise, and tools to help our
clients assess how it will fare against its competition, its performance, its
market readiness, and its quality and reliability.
Our founders, Mark L. Van Name and Bill Catchings, have worked
together in technology assessment for over 20 years. As journalists, they
published over a thousand articles on a wide array of technology subjects.
They created and led the Ziff-Davis Benchmark Operation, which
developed such industry-standard benchmarks as Ziff Davis Media’s
Winstone and WebBench. They founded and led eTesting Labs, and after
the acquisition of that company by Lionbridge Technologies were the
head and CTO of VeriTest.
Principled Technologies is a registered trademark of Principled Technologies, Inc.
All other product names are the trademarks of their respective owners.
Disclaimer of Warranties; Limitation of Liability:
PRINCIPLED TECHNOLOGIES, INC. HAS MADE REASONABLE EFFORTS TO ENSURE THE ACCURACY AND VALIDITY OF ITS TESTING, HOWEVER,
PRINCIPLED TECHNOLOGIES, INC. SPECIFICALLY DISCLAIMS ANY WARRANTY, EXPRESSED OR IMPLIED, RELATING TO THE TEST RESULTS AND
ANALYSIS, THEIR ACCURACY, COMPLETENESS OR QUALITY, INCLUDING ANY IMPLIED WARRANTY OF FITNESS FOR ANY PARTICULAR PURPOSE.
ALL PERSONS OR ENTITIES RELYING ON THE RESULTS OF ANY TESTING DO SO AT THEIR OWN RISK, AND AGREE THAT PRINCIPLED
TECHNOLOGIES, INC., ITS EMPLOYEES AND ITS SUBCONTRACTORS SHALL HAVE NO LIABILITY WHATSOEVER FROM ANY CLAIM OF LOSS OR
DAMAGE ON ACCOUNT OF ANY ALLEGED ERROR OR DEFECT IN ANY TESTING PROCEDURE OR RESULT.
IN NO EVENT SHALL PRINCIPLED TECHNOLOGIES, INC. BE LIABLE FOR INDIRECT, SPECIAL, INCIDENTAL, OR CONSEQUENTIAL DAMAGES IN
CONNECTION WITH ITS TESTING, EVEN IF ADVISED OF THE POSSIBILITY OF SUCH DAMAGES. IN NO EVENT SHALL PRINCIPLED TECHNOLOGIES,
INC.’S LIABILITY, INCLUDING FOR DIRECT DAMAGES, EXCEED THE AMOUNTS PAID IN CONNECTION WITH PRINCIPLED TECHNOLOGIES, INC.’S
TESTING. CUSTOMER’S SOLE AND EXCLUSIVE REMEDIES ARE AS SET FORTH HEREIN.

More Related Content

What's hot

Net app virtualization preso
Net app virtualization presoNet app virtualization preso
Net app virtualization preso
Accenture
 

What's hot (20)

Veeam - Fast Secure Cloud base Disaster Recovery with Veeam Cloud Connect
Veeam - Fast Secure Cloud base Disaster Recovery with Veeam Cloud ConnectVeeam - Fast Secure Cloud base Disaster Recovery with Veeam Cloud Connect
Veeam - Fast Secure Cloud base Disaster Recovery with Veeam Cloud Connect
 
Veeam Availability Suite version 10
Veeam Availability Suite version 10Veeam Availability Suite version 10
Veeam Availability Suite version 10
 
Veeam Using cloud connect in 3 unexpected, awesome ways
Veeam Using cloud connect in 3 unexpected, awesome waysVeeam Using cloud connect in 3 unexpected, awesome ways
Veeam Using cloud connect in 3 unexpected, awesome ways
 
DRaaS on Microsoft Azure with Veeam Software
DRaaS on Microsoft Azure with Veeam SoftwareDRaaS on Microsoft Azure with Veeam Software
DRaaS on Microsoft Azure with Veeam Software
 
Veeam Agent for Linux - Webinar 20171130
Veeam Agent for Linux - Webinar 20171130Veeam Agent for Linux - Webinar 20171130
Veeam Agent for Linux - Webinar 20171130
 
3 key wins: Dell EMC PowerEdge MX with OpenManage Enterprise over Cisco UCS a...
3 key wins: Dell EMC PowerEdge MX with OpenManage Enterprise over Cisco UCS a...3 key wins: Dell EMC PowerEdge MX with OpenManage Enterprise over Cisco UCS a...
3 key wins: Dell EMC PowerEdge MX with OpenManage Enterprise over Cisco UCS a...
 
Preserve user response time while ensuring data availability
Preserve user response time while ensuring data availabilityPreserve user response time while ensuring data availability
Preserve user response time while ensuring data availability
 
Keep data available without affecting user response time
Keep data available without affecting user response timeKeep data available without affecting user response time
Keep data available without affecting user response time
 
Reap better SQL Server OLTP performance with next-generation Dell EMC PowerEd...
Reap better SQL Server OLTP performance with next-generation Dell EMC PowerEd...Reap better SQL Server OLTP performance with next-generation Dell EMC PowerEd...
Reap better SQL Server OLTP performance with next-generation Dell EMC PowerEd...
 
Citrix XenApp hosted shared desktop performance on Cisco UCS: Cisco VM-FEX vs...
Citrix XenApp hosted shared desktop performance on Cisco UCS: Cisco VM-FEX vs...Citrix XenApp hosted shared desktop performance on Cisco UCS: Cisco VM-FEX vs...
Citrix XenApp hosted shared desktop performance on Cisco UCS: Cisco VM-FEX vs...
 
Migrate VMs faster with a new Dell EMC PowerEdge MX solution
Migrate VMs faster with a new Dell EMC PowerEdge MX solutionMigrate VMs faster with a new Dell EMC PowerEdge MX solution
Migrate VMs faster with a new Dell EMC PowerEdge MX solution
 
Net app virtualization preso
Net app virtualization presoNet app virtualization preso
Net app virtualization preso
 
Implementing a Disaster Recovery Solution using VMware Site Recovery Manager ...
Implementing a Disaster Recovery Solution using VMware Site Recovery Manager ...Implementing a Disaster Recovery Solution using VMware Site Recovery Manager ...
Implementing a Disaster Recovery Solution using VMware Site Recovery Manager ...
 
Business-critical applications on VMware vSphere 6, VMware Virtual SAN, and V...
Business-critical applications on VMware vSphere 6, VMware Virtual SAN, and V...Business-critical applications on VMware vSphere 6, VMware Virtual SAN, and V...
Business-critical applications on VMware vSphere 6, VMware Virtual SAN, and V...
 
Automate high-touch server lifecycle management tasks
Automate high-touch server lifecycle management tasksAutomate high-touch server lifecycle management tasks
Automate high-touch server lifecycle management tasks
 
Hyper-Converged Infrastructure Vx Rail
Hyper-Converged Infrastructure Vx Rail Hyper-Converged Infrastructure Vx Rail
Hyper-Converged Infrastructure Vx Rail
 
Emc vspex customer_presentation_private_cloud_v_mware_smb_2.0
Emc vspex customer_presentation_private_cloud_v_mware_smb_2.0Emc vspex customer_presentation_private_cloud_v_mware_smb_2.0
Emc vspex customer_presentation_private_cloud_v_mware_smb_2.0
 
Power edge mx7000_sds_performance_1018
Power edge mx7000_sds_performance_1018Power edge mx7000_sds_performance_1018
Power edge mx7000_sds_performance_1018
 
Reach new heights with Nutanix
Reach new heights with NutanixReach new heights with Nutanix
Reach new heights with Nutanix
 
VMworld Europe 2014: Virtualizing Databases Doing IT Right – The Sequel
VMworld Europe 2014: Virtualizing Databases Doing IT Right – The SequelVMworld Europe 2014: Virtualizing Databases Doing IT Right – The Sequel
VMworld Europe 2014: Virtualizing Databases Doing IT Right – The Sequel
 

Similar to Veritas NetBackup benchmark comparison: Data protection in a large-scale virtual environment (Part 2)

Veritas NetBackup 7.6 benchmark comparison: Data protection in a large-scale ...
Veritas NetBackup 7.6 benchmark comparison: Data protection in a large-scale ...Veritas NetBackup 7.6 benchmark comparison: Data protection in a large-scale ...
Veritas NetBackup 7.6 benchmark comparison: Data protection in a large-scale ...
Principled Technologies
 
NBU_benchmark_comparison_(part_1)_0914_v3
NBU_benchmark_comparison_(part_1)_0914_v3NBU_benchmark_comparison_(part_1)_0914_v3
NBU_benchmark_comparison_(part_1)_0914_v3
Abdul Rasheed
 
EMC - 10martie2011
EMC - 10martie2011EMC - 10martie2011
EMC - 10martie2011
Agora Group
 

Similar to Veritas NetBackup benchmark comparison: Data protection in a large-scale virtual environment (Part 2) (20)

Veritas NetBackup 7.6 benchmark comparison: Data protection in a large-scale ...
Veritas NetBackup 7.6 benchmark comparison: Data protection in a large-scale ...Veritas NetBackup 7.6 benchmark comparison: Data protection in a large-scale ...
Veritas NetBackup 7.6 benchmark comparison: Data protection in a large-scale ...
 
Veritas NetBackup benchmark comparison: Data protection in a large-scale virt...
Veritas NetBackup benchmark comparison: Data protection in a large-scale virt...Veritas NetBackup benchmark comparison: Data protection in a large-scale virt...
Veritas NetBackup benchmark comparison: Data protection in a large-scale virt...
 
NBU_benchmark_comparison_(part_1)_0914_v3
NBU_benchmark_comparison_(part_1)_0914_v3NBU_benchmark_comparison_(part_1)_0914_v3
NBU_benchmark_comparison_(part_1)_0914_v3
 
Efficient Data Protection – Backup in VMware environments
Efficient Data Protection – Backup in VMware environmentsEfficient Data Protection – Backup in VMware environments
Efficient Data Protection – Backup in VMware environments
 
Dynamic Data Centers - Taking it to the next level
Dynamic Data Centers - Taking it to the next levelDynamic Data Centers - Taking it to the next level
Dynamic Data Centers - Taking it to the next level
 
VMware Recovery: 77x Faster! NEW ESG Lab Review, with Veeam Backup & Replication
VMware Recovery: 77x Faster! NEW ESG Lab Review, with Veeam Backup & ReplicationVMware Recovery: 77x Faster! NEW ESG Lab Review, with Veeam Backup & Replication
VMware Recovery: 77x Faster! NEW ESG Lab Review, with Veeam Backup & Replication
 
Enable greater data reduction, storage performance, and manageability with De...
Enable greater data reduction, storage performance, and manageability with De...Enable greater data reduction, storage performance, and manageability with De...
Enable greater data reduction, storage performance, and manageability with De...
 
VMware vSphere vMotion: 5.4 times faster than Hyper-V Live Migration
VMware vSphere vMotion: 5.4 times faster than Hyper-V Live MigrationVMware vSphere vMotion: 5.4 times faster than Hyper-V Live Migration
VMware vSphere vMotion: 5.4 times faster than Hyper-V Live Migration
 
Netbackup advantages features and benefits Netbackup classes may help hands o...
Netbackup advantages features and benefits Netbackup classes may help hands o...Netbackup advantages features and benefits Netbackup classes may help hands o...
Netbackup advantages features and benefits Netbackup classes may help hands o...
 
CPU performance comparison of two cloud solutions: VMware vCloud Hybrid Servi...
CPU performance comparison of two cloud solutions: VMware vCloud Hybrid Servi...CPU performance comparison of two cloud solutions: VMware vCloud Hybrid Servi...
CPU performance comparison of two cloud solutions: VMware vCloud Hybrid Servi...
 
DATASHEET▶ Enterprise Cloud Backup & Recovery with Symantec NetBackup
DATASHEET▶ Enterprise Cloud Backup & Recovery with Symantec NetBackupDATASHEET▶ Enterprise Cloud Backup & Recovery with Symantec NetBackup
DATASHEET▶ Enterprise Cloud Backup & Recovery with Symantec NetBackup
 
Reducing Operating Expense with EMC ViPR Controller and ViPR SRM
Reducing Operating Expense with EMC ViPR Controller and ViPR SRMReducing Operating Expense with EMC ViPR Controller and ViPR SRM
Reducing Operating Expense with EMC ViPR Controller and ViPR SRM
 
IBM XIV Gen3 Storage System
IBM XIV Gen3 Storage SystemIBM XIV Gen3 Storage System
IBM XIV Gen3 Storage System
 
Datacenter migration using vmware
Datacenter migration using vmwareDatacenter migration using vmware
Datacenter migration using vmware
 
VMware 2009
VMware 2009VMware 2009
VMware 2009
 
Virtualization meisen 042811
Virtualization meisen 042811Virtualization meisen 042811
Virtualization meisen 042811
 
Spirent HyperScale Test Solution
Spirent HyperScale Test SolutionSpirent HyperScale Test Solution
Spirent HyperScale Test Solution
 
Eco4Cloud - Company Presentation
Eco4Cloud - Company PresentationEco4Cloud - Company Presentation
Eco4Cloud - Company Presentation
 
What's New with vSphere 4
What's New with vSphere 4What's New with vSphere 4
What's New with vSphere 4
 
EMC - 10martie2011
EMC - 10martie2011EMC - 10martie2011
EMC - 10martie2011
 

More from Principled Technologies

Improve performance and gain room to grow by easily migrating to a modern Ope...
Improve performance and gain room to grow by easily migrating to a modern Ope...Improve performance and gain room to grow by easily migrating to a modern Ope...
Improve performance and gain room to grow by easily migrating to a modern Ope...
Principled Technologies
 
Increase security, sustainability, and efficiency with robust Dell server man...
Increase security, sustainability, and efficiency with robust Dell server man...Increase security, sustainability, and efficiency with robust Dell server man...
Increase security, sustainability, and efficiency with robust Dell server man...
Principled Technologies
 

More from Principled Technologies (20)

Dell APEX Cloud Platform for Red Hat OpenShift: An easily deployable and powe...
Dell APEX Cloud Platform for Red Hat OpenShift: An easily deployable and powe...Dell APEX Cloud Platform for Red Hat OpenShift: An easily deployable and powe...
Dell APEX Cloud Platform for Red Hat OpenShift: An easily deployable and powe...
 
Upgrade your cloud infrastructure with Dell PowerEdge R760 servers and VMware...
Upgrade your cloud infrastructure with Dell PowerEdge R760 servers and VMware...Upgrade your cloud infrastructure with Dell PowerEdge R760 servers and VMware...
Upgrade your cloud infrastructure with Dell PowerEdge R760 servers and VMware...
 
Upgrade your cloud infrastructure with Dell PowerEdge R760 servers and VMware...
Upgrade your cloud infrastructure with Dell PowerEdge R760 servers and VMware...Upgrade your cloud infrastructure with Dell PowerEdge R760 servers and VMware...
Upgrade your cloud infrastructure with Dell PowerEdge R760 servers and VMware...
 
Realize 2.1X the performance with 20% less power with AMD EPYC processor-back...
Realize 2.1X the performance with 20% less power with AMD EPYC processor-back...Realize 2.1X the performance with 20% less power with AMD EPYC processor-back...
Realize 2.1X the performance with 20% less power with AMD EPYC processor-back...
 
Improve performance and gain room to grow by easily migrating to a modern Ope...
Improve performance and gain room to grow by easily migrating to a modern Ope...Improve performance and gain room to grow by easily migrating to a modern Ope...
Improve performance and gain room to grow by easily migrating to a modern Ope...
 
Boost PC performance: How more available memory can improve productivity
Boost PC performance: How more available memory can improve productivityBoost PC performance: How more available memory can improve productivity
Boost PC performance: How more available memory can improve productivity
 
Deploy with confidence: VMware Cloud Foundation 5.1 on next gen Dell PowerEdg...
Deploy with confidence: VMware Cloud Foundation 5.1 on next gen Dell PowerEdg...Deploy with confidence: VMware Cloud Foundation 5.1 on next gen Dell PowerEdg...
Deploy with confidence: VMware Cloud Foundation 5.1 on next gen Dell PowerEdg...
 
Upgrade your cloud infrastructure with Dell PowerEdge R760 servers and VMware...
Upgrade your cloud infrastructure with Dell PowerEdge R760 servers and VMware...Upgrade your cloud infrastructure with Dell PowerEdge R760 servers and VMware...
Upgrade your cloud infrastructure with Dell PowerEdge R760 servers and VMware...
 
A comparison of security features in Dell, HP, and Lenovo PC systems
A comparison of security features in Dell, HP, and Lenovo PC systemsA comparison of security features in Dell, HP, and Lenovo PC systems
A comparison of security features in Dell, HP, and Lenovo PC systems
 
Increase security, sustainability, and efficiency with robust Dell server man...
Increase security, sustainability, and efficiency with robust Dell server man...Increase security, sustainability, and efficiency with robust Dell server man...
Increase security, sustainability, and efficiency with robust Dell server man...
 
Increase security, sustainability, and efficiency with robust Dell server man...
Increase security, sustainability, and efficiency with robust Dell server man...Increase security, sustainability, and efficiency with robust Dell server man...
Increase security, sustainability, and efficiency with robust Dell server man...
 
Scale up your storage with higher-performing Dell APEX Block Storage for AWS ...
Scale up your storage with higher-performing Dell APEX Block Storage for AWS ...Scale up your storage with higher-performing Dell APEX Block Storage for AWS ...
Scale up your storage with higher-performing Dell APEX Block Storage for AWS ...
 
Scale up your storage with higher-performing Dell APEX Block Storage for AWS
Scale up your storage with higher-performing Dell APEX Block Storage for AWSScale up your storage with higher-performing Dell APEX Block Storage for AWS
Scale up your storage with higher-performing Dell APEX Block Storage for AWS
 
Get in and stay in the productivity zone with the HP Z2 G9 Tower Workstation
Get in and stay in the productivity zone with the HP Z2 G9 Tower WorkstationGet in and stay in the productivity zone with the HP Z2 G9 Tower Workstation
Get in and stay in the productivity zone with the HP Z2 G9 Tower Workstation
 
Open up new possibilities with higher transactional database performance from...
Open up new possibilities with higher transactional database performance from...Open up new possibilities with higher transactional database performance from...
Open up new possibilities with higher transactional database performance from...
 
Improving database performance and value with an easy migration to Azure Data...
Improving database performance and value with an easy migration to Azure Data...Improving database performance and value with an easy migration to Azure Data...
Improving database performance and value with an easy migration to Azure Data...
 
Realize better value and performance migrating from Azure Database for Postgr...
Realize better value and performance migrating from Azure Database for Postgr...Realize better value and performance migrating from Azure Database for Postgr...
Realize better value and performance migrating from Azure Database for Postgr...
 
Realize better value and performance migrating from Azure Database for Postgr...
Realize better value and performance migrating from Azure Database for Postgr...Realize better value and performance migrating from Azure Database for Postgr...
Realize better value and performance migrating from Azure Database for Postgr...
 
Set up students and teachers to excel now and in the future with Intel proces...
Set up students and teachers to excel now and in the future with Intel proces...Set up students and teachers to excel now and in the future with Intel proces...
Set up students and teachers to excel now and in the future with Intel proces...
 
Finding the path to AI success with the Dell AI portfolio - Summary
Finding the path to AI success with the Dell AI portfolio - SummaryFinding the path to AI success with the Dell AI portfolio - Summary
Finding the path to AI success with the Dell AI portfolio - Summary
 

Recently uploaded

EIS-Webinar-Prompt-Knowledge-Eng-2024-04-08.pptx
EIS-Webinar-Prompt-Knowledge-Eng-2024-04-08.pptxEIS-Webinar-Prompt-Knowledge-Eng-2024-04-08.pptx
EIS-Webinar-Prompt-Knowledge-Eng-2024-04-08.pptx
Earley Information Science
 
CNv6 Instructor Chapter 6 Quality of Service
CNv6 Instructor Chapter 6 Quality of ServiceCNv6 Instructor Chapter 6 Quality of Service
CNv6 Instructor Chapter 6 Quality of Service
giselly40
 
Artificial Intelligence: Facts and Myths
Artificial Intelligence: Facts and MythsArtificial Intelligence: Facts and Myths
Artificial Intelligence: Facts and Myths
Joaquim Jorge
 

Recently uploaded (20)

Exploring the Future Potential of AI-Enabled Smartphone Processors
Exploring the Future Potential of AI-Enabled Smartphone ProcessorsExploring the Future Potential of AI-Enabled Smartphone Processors
Exploring the Future Potential of AI-Enabled Smartphone Processors
 
A Domino Admins Adventures (Engage 2024)
A Domino Admins Adventures (Engage 2024)A Domino Admins Adventures (Engage 2024)
A Domino Admins Adventures (Engage 2024)
 
Boost Fertility New Invention Ups Success Rates.pdf
Boost Fertility New Invention Ups Success Rates.pdfBoost Fertility New Invention Ups Success Rates.pdf
Boost Fertility New Invention Ups Success Rates.pdf
 
Evaluating the top large language models.pdf
Evaluating the top large language models.pdfEvaluating the top large language models.pdf
Evaluating the top large language models.pdf
 
EIS-Webinar-Prompt-Knowledge-Eng-2024-04-08.pptx
EIS-Webinar-Prompt-Knowledge-Eng-2024-04-08.pptxEIS-Webinar-Prompt-Knowledge-Eng-2024-04-08.pptx
EIS-Webinar-Prompt-Knowledge-Eng-2024-04-08.pptx
 
Strategies for Unlocking Knowledge Management in Microsoft 365 in the Copilot...
Strategies for Unlocking Knowledge Management in Microsoft 365 in the Copilot...Strategies for Unlocking Knowledge Management in Microsoft 365 in the Copilot...
Strategies for Unlocking Knowledge Management in Microsoft 365 in the Copilot...
 
Axa Assurance Maroc - Insurer Innovation Award 2024
Axa Assurance Maroc - Insurer Innovation Award 2024Axa Assurance Maroc - Insurer Innovation Award 2024
Axa Assurance Maroc - Insurer Innovation Award 2024
 
08448380779 Call Girls In Greater Kailash - I Women Seeking Men
08448380779 Call Girls In Greater Kailash - I Women Seeking Men08448380779 Call Girls In Greater Kailash - I Women Seeking Men
08448380779 Call Girls In Greater Kailash - I Women Seeking Men
 
The 7 Things I Know About Cyber Security After 25 Years | April 2024
The 7 Things I Know About Cyber Security After 25 Years | April 2024The 7 Things I Know About Cyber Security After 25 Years | April 2024
The 7 Things I Know About Cyber Security After 25 Years | April 2024
 
The Role of Taxonomy and Ontology in Semantic Layers - Heather Hedden.pdf
The Role of Taxonomy and Ontology in Semantic Layers - Heather Hedden.pdfThe Role of Taxonomy and Ontology in Semantic Layers - Heather Hedden.pdf
The Role of Taxonomy and Ontology in Semantic Layers - Heather Hedden.pdf
 
Strategies for Landing an Oracle DBA Job as a Fresher
Strategies for Landing an Oracle DBA Job as a FresherStrategies for Landing an Oracle DBA Job as a Fresher
Strategies for Landing an Oracle DBA Job as a Fresher
 
08448380779 Call Girls In Civil Lines Women Seeking Men
08448380779 Call Girls In Civil Lines Women Seeking Men08448380779 Call Girls In Civil Lines Women Seeking Men
08448380779 Call Girls In Civil Lines Women Seeking Men
 
Workshop - Best of Both Worlds_ Combine KG and Vector search for enhanced R...
Workshop - Best of Both Worlds_ Combine  KG and Vector search for  enhanced R...Workshop - Best of Both Worlds_ Combine  KG and Vector search for  enhanced R...
Workshop - Best of Both Worlds_ Combine KG and Vector search for enhanced R...
 
From Event to Action: Accelerate Your Decision Making with Real-Time Automation
From Event to Action: Accelerate Your Decision Making with Real-Time AutomationFrom Event to Action: Accelerate Your Decision Making with Real-Time Automation
From Event to Action: Accelerate Your Decision Making with Real-Time Automation
 
Mastering MySQL Database Architecture: Deep Dive into MySQL Shell and MySQL R...
Mastering MySQL Database Architecture: Deep Dive into MySQL Shell and MySQL R...Mastering MySQL Database Architecture: Deep Dive into MySQL Shell and MySQL R...
Mastering MySQL Database Architecture: Deep Dive into MySQL Shell and MySQL R...
 
CNv6 Instructor Chapter 6 Quality of Service
CNv6 Instructor Chapter 6 Quality of ServiceCNv6 Instructor Chapter 6 Quality of Service
CNv6 Instructor Chapter 6 Quality of Service
 
Artificial Intelligence: Facts and Myths
Artificial Intelligence: Facts and MythsArtificial Intelligence: Facts and Myths
Artificial Intelligence: Facts and Myths
 
04-2024-HHUG-Sales-and-Marketing-Alignment.pptx
04-2024-HHUG-Sales-and-Marketing-Alignment.pptx04-2024-HHUG-Sales-and-Marketing-Alignment.pptx
04-2024-HHUG-Sales-and-Marketing-Alignment.pptx
 
08448380779 Call Girls In Friends Colony Women Seeking Men
08448380779 Call Girls In Friends Colony Women Seeking Men08448380779 Call Girls In Friends Colony Women Seeking Men
08448380779 Call Girls In Friends Colony Women Seeking Men
 
Scaling API-first – The story of a global engineering organization
Scaling API-first – The story of a global engineering organizationScaling API-first – The story of a global engineering organization
Scaling API-first – The story of a global engineering organization
 

Veritas NetBackup benchmark comparison: Data protection in a large-scale virtual environment (Part 2)

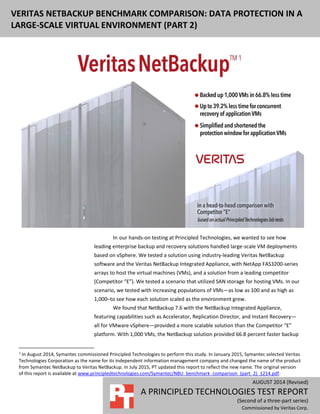
  • 1. AUGUST 2014 (Revised) A PRINCIPLED TECHNOLOGIES TEST REPORT (Second of a three-part series) Commissioned by Veritas Corp. VERITAS NETBACKUP BENCHMARK COMPARISON: DATA PROTECTION IN A LARGE-SCALE VIRTUAL ENVIRONMENT (PART 2) In1 our hands-on testing at Principled Technologies, we wanted to see how leading enterprise backup and recovery solutions handled large-scale VM deployments based on vSphere. We tested a solution using industry-leading Veritas NetBackup software and the Veritas NetBackup Integrated Appliance, with NetApp FAS3200-series arrays to host the virtual machines (VMs), and a solution from a leading competitor (Competitor “E”). We tested a scenario that utilized SAN storage for hosting VMs. In our scenario, we tested with increasing populations of VMs—as low as 100 and as high as 1,000–to see how each solution scaled as the environment grew. We found that NetBackup 7.6 with the NetBackup Integrated Appliance, featuring capabilities such as Accelerator, Replication Director, and Instant Recovery— all for VMware vSphere—provided a more scalable solution than the Competitor “E” platform. With 1,000 VMs, the NetBackup solution provided 66.8 percent faster backup 1 In August 2014, Symantec commissioned Principled Technologies to perform this study. In January 2015, Symantec selected Veritas Technologies Corporation as the name for its independent information management company and changed the name of the product from Symantec NetBackup to Veritas NetBackup. In July 2015, PT updated this report to reflect the new name. The original version of this report is available at www.principledtechnologies.com/Symantec/NBU_benchmark_comparison_(part_2)_1214.pdf.
  • 2. A Principled Technologies test report 2Veritas NetBackup benchmark comparison: Data protection in a large-scale virtual environment (Part 2) times using SAN Transport in a Fibre Channel SAN environment than the Competitor “E” solution. In our tests, Veritas NetBackup with the NetBackup Integrated Appliance provided superior scalability needed to protect the largest virtual server deployments, when compared to the Competitor “E” solution. PROTECTING DATA IN A VIRTUAL ENVIRONMENT The inclusion of virtualization into data centers introduces new perspectives on methods of operation. Technologies such as VMware® vSphere® shrink the physical footprint of computing hardware by increasing the number of virtual servers. Enterprises commonly deploy VMs by the thousands and protecting all of their data is a critical challenge, whether done by hardware snapshots, hypervisor-level backup (vStorage APIs for Data Protection (VADP) in the case of VMware technology), or traditional agent-in-guest methods. Using both block Storage Area Network (SAN) systems and file-based Network-Attached Storage (NAS) can allow for effective scaling, but backup and recovery systems must fully leverage the strengths of the platforms to offer reliable performance with minimal impact to the production environment. WHAT WE COMPARED Backups via Storage Snapshot Integration Veritas NetBackup offers hardware snapshot integration with NetApp storage arrays via Replication Director. Replication Director allows Veritas NetBackup to offload the snapshot process of a backup to the NetApp array, creating recovery points almost instantly without consuming server and storage resources. The recovery points can then be archived to disk, tape, or any other supported media as necessary. We were unable to compare the Veritas NetBackup Replication Director feature with Competitor “E” because, as of the commissioning of our tests, Competitor “E” did not support a competing technology that can utilize NetApp hardware snapshots. As a result, our testing focused on vStorage APIs for Data Protection (VADP) backups for comparison. Backup via VMware vStorage APIs for Data Protection Using the NetBackup Integrated Appliance as both media server and backup storage, we tested how long it took to execute backup with virtual application protection. Using the breakdown illustrated in Figure 4, we performed full backups with application protection on groups of VMs from 100 to 1,000, measuring the backup time elapsed.
  • 3. A Principled Technologies test report 3Veritas NetBackup benchmark comparison: Data protection in a large-scale virtual environment (Part 2) OUR ENVIRONMENT We set up the test environment using 20 Dell™ PowerEdge™ M420 server blades running VMware vSphere ESXi 5.5. Figure 1 shows our storage network for VADP- based backup testing. Figure 1: Detailed storage network: VADP-based backups. We created a test environment of 1,000 Microsoft® Windows Server®-based VMs in several different configurations, depending on the test. We used Windows Server 2012 for application VMs, and Windows Server 2008 R2 Core installation for the standalone Web and idle file server VMs. To balance the load across the ESXi hosts and storage, we created a matrix to ensure that equal load was distributed across all four NetApp filers (four volumes for the NAS testing, 40 LUNs/datastores for SAN testing) and the 20 ESXi hosts. This prevented overutilization of individual system components while others were idle, optimizing the performance of the multi-threaded backup procedures. For VADP backup testing, we used Veritas NetBackup’s resources limits capability to eliminate the possibility of resource contention. When we completed our NetBackup testing, we removed the NetBackup appliance, added Competitor “E” hardware, and retested on exactly the same test bed. Competitor “E” does not support SAN Transport for VADP backups. SAN transport allows
  • 4. A Principled Technologies test report 4Veritas NetBackup benchmark comparison: Data protection in a large-scale virtual environment (Part 2) the backup solution to leverage the FC storage network for moving backup data, which reduces the impact on your production network. Instead, Competitor “E” leverages virtual machines that act as data movers to move data across a data network. As shown in Figure 2, the data mover VMs utilize the “hot-add” method for VADP backups. The hot-add method provides virtual machines access to the same LUNs their virtualization host can access. This in turn enables the data mover virtual machines to read the snapshot files housed on the virtual machine datastores, and then transmit the data to the Competitor “E” backup appliance via the data network. Figure 2: The “hot add” method provides a data mover VM access to the same datastores as its host. To utilize this method, the data movers must reside on virtualization hosts in your environment. In order to make our comparisons as “apples-to-apples” as possible, we added additional hardware similar to the Veritas NetBackup Integrated Appliance so that the overall solution is functionally similar in terms of Fiber Channel connectivity. We utilized this hardware as a dedicated ESXi host to act as the SAN connection point for the virtual data movers, rather than distribute the Competitor “E” data movers among the active test hosts.
  • 5. A Principled Technologies test report 5Veritas NetBackup benchmark comparison: Data protection in a large-scale virtual environment (Part 2) Our host was able to house three virtual data movers without any resource contention, each with eight available instances for a total of 24 potential streams. We did this to maximize the 24 processor threads available on the dual socket Intel Xeon E5- 2620 processor-based server. To reduce the chance of over-utilizing any datastore, we assigned our target datastores to each of the data mover instances in round-robin fashion, allowing each datastore to be accessed by no more than two instances simultaneously. This allowed us to manage potential resource contention. For this first scenario, on SAN transport, we created 200 Windows Server 2012 application VMs running Microsoft SQL Server®, Microsoft Exchange, or Microsoft SharePoint® (10 tiles of 20 VMs each), and up to 800 idle Windows Server 2012 VMs. Figure 3 represents the grouping of VMs included in each backup job. Figure 3: Backup via VADP-based transport VM grouping. Figure 4 provides the details for the sub-categories of VMs we used in this phase of testing. Server VM type Disk size (in GB) VM count 100 200 400 1,000 Active Directory® server 55 5 10 10 10 Exchange Server 50 25 50 50 50 SharePoint Web server 55 15 30 30 30 SharePoint SQL server 160 5 10 10 10 Web application SQL server 50 50 100 100 100 Idle Web server 22 200 800 Figure 4: Production VMs on SAN storage. Color-coding corresponds with Figure 3.
  • 6. A Principled Technologies test report 6Veritas NetBackup benchmark comparison: Data protection in a large-scale virtual environment (Part 2) WHAT WE FOUND SAN testing vs. Competitor “E” Backup with virtual application protection via VADP We used the Competitor “E” appliance as the backup target and the Competitor “E” enterprise backup software and consulted published documentation to perform various backups.2 As we did so, we timed how long it took to complete an application- consistent backup of a group of VMs using SAN transport. For this scenario, we created policies or groups containing the client VMs we wished to target, and from the GUI, instructed the orchestration server of each product to perform backups of the entire group. The NetBackup solution backed up 1,000 VMs in 66.8 percent less time than the Competitor “E” solution. In other words, the NetBackup solution completed the backup of 1,000 VMs three times faster than Competitor “E” did. Figure 5 shows the total time to complete the SAN backup for both solutions at every level of VM count we tested. The Competitor “E” solution has the capability for hot-add transport, which is not ideal for true off-host backups, and is limited to eight streams per data mover. To create an equitable comparison, we had to give ESXi resources to work around these architectural limitations. The goal in doing so was to assist the Competitor “E” solution by creating a workaround that could extract more hardware resources from the physical host. Figure 5: The total time each system took to complete VADP-based SAN backup in hours:minutes:seconds. Lower numbers are better. 2 This configuration fell within the recommendations of Competitor “E.” 0:25:40 0:43:23 1:11:04 2:51:33 2:18:32 3:58:23 5:22:43 8:36:50 0:00:00 3:00:00 6:00:00 9:00:00 100 200 400 1,000 Total time to complete backup NetBackup solution Competitor “Eˮ solution
  • 7. A Principled Technologies test report 7Veritas NetBackup benchmark comparison: Data protection in a large-scale virtual environment (Part 2) Analysis of the data captured during backup runs suggested the maximum CPU utilization on the host dedicated to the virtual data movers was in excess of 85 percent (see Figure 16 in Appendix C). While there were additional CPU resources left available on the data mover host, the addition of another virtual data mover would have overtaxed the CPUs, creating resource contention. The average CPU utilization on the Competitor “E” virtual data mover host remained relatively high throughout the entire backup job – approximately 75 percent. Without available dedicated hardware to host virtual data movers, the ESXI hosts running your production environment would be directly impacted by the load, which means reduced hosting capacity on any host running a virtual data mover. See Appendix C for more details on virtual data mover server CPU utilization. Additionally, as shown in Figures 6 and 7 below, the % disk utilization – the percentage of time the disks are in use – for the filers was relatively low for both solutions, which indicates the filers had additional resources available. The figures also highlight the differences in the length of the backup jobs for each solution. The NetBackup solution was able to perform backups well within an allotted 8- hour backup window, while Competitor “E” exceeded the window. In a production environment, this can mean backups occur during normal business hours, which can affect user experience. Figure 6: Average disk activity across the four NetApp filers, as reported by sysstat, for Veritas NetBackup.
  • 8. A Principled Technologies test report 8Veritas NetBackup benchmark comparison: Data protection in a large-scale virtual environment (Part 2) Figure 7: Average disk activity across the four NetApp filers, as reported by sysstat, for Competitor “E.” The value of granular recovery and the required protection window to ensure it In the case of file corruption or VM deletion, a system administrator can run a recovery job to recreate a VM from a previously captured backup image stored on the media server or media server equivalent. There are times, however, that recovering an entire VM is very inefficient—for example, when all that really needs recovery is an individual application file or database object. In the case of a SQL database application, an administrator may only need to recover an individual database. In addition to the backup job used to protect a virtual machine, Competitor “E” requires an in-guest agent to stream data for enabling granular recovery of application data. VM protection for Competitor “E” requires use of VADP hot-add-based image level backups while NetBackup provides granular recovery-enabled, application-consistent, single-pass backups for applications using any supported VADP transport. During the virtual machine backup job, the NetBackup client installed on the application VM captures the application metadata in a manner that allows recovery of either an entire VM or only application-specific data, so no additional backup jobs are necessary. As Figure 8 shows, in our testing the Veritas NetBackup solution needed just 4 minutes and 46 seconds to create a backup image that supports granular restore. Competitor “E” required 8 minutes and 30 seconds and required three additional steps
  • 9. A Principled Technologies test report 9Veritas NetBackup benchmark comparison: Data protection in a large-scale virtual environment (Part 2) to protect the same data. Veritas NetBackup’s strategy results in a 43.9 percent reduction in time required for complete protection of a single application VM. Figure 8: The additional time and steps needed to create the backup necessary to enable granular recovery. Recovery at scale When multiple servers need recovering at the same time, in the case of an off- site disaster recovery operation for example, the ability to recover servers quickly means a faster return to service and potentially a smaller impact on your bottom line. In our labs at Principled Technologies, we compared the time it took to recover a single application VM, and concurrently, 8-, 16-, and 24-application VMs with Veritas NetBackup 7.6 and the Competitor “E” solution. As seen in Figure 9 below, Veritas NetBackup 7.6 offered better performance at every concurrent recovery level with performance improving at scale, completing 24 application VMs about a half hour faster than Competitor “E”. That’s over 37 percent faster recovery time at each of the scale levels.
  • 10. A Principled Technologies test report 10Veritas NetBackup benchmark comparison: Data protection in a large-scale virtual environment (Part 2) Figure 9: The total time each system took to complete concurrent restores in hours:minutes:seconds. Lower numbers are better. CONCLUSION The footprint of a VM can grow quickly in an enterprise environment and large- scale VM deployments in the thousands are common. As this number of deployed systems grows, so does the risk of failure. Critical failures can become unavoidable and offering data protection from a backup solution promotes business continuity. Elongated protection windows requiring multiple jobs of different types can create resource contention with production environments and may require valuable IT admin time, so a finite window for system backups can have plenty of importance. In our hands-on SAN backup testing, the Veritas NetBackup Integrated Appliance running NetBackup 7.6 offered application protection to 1,000 VMs in 66.8 percent less time than Competitor “E” did. In addition, the Veritas NetBackup Integrated Appliance with NetBackup 7.6 created backup images that offered granular recovery without additional steps. These time and effort savings can scale as your VM footprint grows, allowing you to execute both system protection and user-friendly, simplified recovery. 0:08:10 0:19:36 0:36:56 0:56:50 0:06:06 0:31:09 1:00:44 1:31:20 0:00:00 0:30:00 1:00:00 1:30:00 2:00:00 1 VM 8 VMs 16 VMs 24 VMs Total time to complete concurrent restore NetBackup Competitor “E”
  • 11. A Principled Technologies test report 11Veritas NetBackup benchmark comparison: Data protection in a large-scale virtual environment (Part 2) APPENDIX A – SYSTEM CONFIGURATION INFORMATION Figure 10 lists the information for the server from the NetBackup solution. System Dell PowerEdge M420 blade server (vSphere host) Power supplies (in the Dell PowerEdge M1000e Blade Enclosure) Total number 6 Vendor and model number Dell A236P-00 Wattage of each (W) 2,360 Cooling fans (in the Dell PowerEdge M1000e Blade Enclosure) Total number 9 Vendor and model number Dell YK776 Rev. X50 Dimensions (h x w) of each 3.1” x 3.5” Volts 12 Amps 7 General Number of processor packages 2 Number of cores per processor 8 Number of hardware threads per core 2 System power management policy Performance CPU Vendor Intel Name Xeon Model number E5-2420 Stepping 2S Socket type FCLGA1356 Core frequency (GHz) 1.9 Bus frequency 7.2 L1 cache 32 KB + 32 KB (per core) L2 cache 256 KB (per core) L3 cache 15 MB Platform Vendor and model number Dell PowerEdge M420 Motherboard model number 0MN3VC BIOS name and version 1.2.4 BIOS settings Default, Performance profile Memory module(s) Total RAM in system (GB) 96 Vendor and model number Samsung® M393B2G70BH0-YH9 Type PC3L-10600R Speed (MHz) 1,333 Speed running in the system (MHz) 1,333 Timing/Latency (tCL-tRCD-tRP-tRASmin) 9-9-9-36 Size (GB) 16
  • 12. A Principled Technologies test report 12Veritas NetBackup benchmark comparison: Data protection in a large-scale virtual environment (Part 2) System Dell PowerEdge M420 blade server (vSphere host) Number of RAM module(s) 6 Chip organization Double-sided Rank Dual Operating system Name VMware vSphere 5.5.0 Build number 1209974 File system VMFS Kernel VMkernel 5.5.0 Language English Graphics Vendor and model number Matrox® G200eR Graphics memory (MB) 16 RAID controller Vendor and model number Dell PERC H310 Embedded Firmware version 20.10.1-0084 Driver version 5.1.112.64 (6/12/2011) Cache size (MB) 0 MB Hard drive Vendor and model number Dell SG9XCS1 Number of disks in system 2 Size (GB) 50 Buffer size (MB) N/A RPM N/A Type SSD Ethernet adapters Vendor and model number 2 x Broadcom® BCM57810 NetXtreme® II 10 GigE Type LOM USB ports Number 2 External Type 2.0 Figure 10: Detailed information for the server we tested from the NetBackup solution. Figure 11 lists the information for the NetApp storage from the NetBackup solution. System NetApp FAS3240 Platform Vendor and model number 4 x NetApp FAS3240 OS name and version NetApp Release 8.1.3 (7-Mode) Hard drives Number of drives 24 Size (GB) 560 RPM 15K Type SAS
  • 13. A Principled Technologies test report 13Veritas NetBackup benchmark comparison: Data protection in a large-scale virtual environment (Part 2) System NetApp FAS3240 Network adapters Vendor and model number 2 x 10Gbps Type Integrated Fiber adapters Vendor and model number 2 x 8Gbps Type PCI-E Figure 11: System configuration information for the NetApp storage array. Figure 12 details the configuration of the NetBackup integrated appliance and the Competitor “E” media server. System NetBackup 5230 integrated appliance Competitor “E” appliance Virtual Data Movers Host (Competitor “E”) General Number of processor packages 2 1 2 Number of cores per processor 6 4 6 Number of hardware threads per core 2 1 2 System power management policy Default Default Default CPU Vendor Intel Intel Intel Name Xeon E5-2620 Xeon E5-2603 Xeon E5-2620 Model number E5-2620 E5-2603 E5-2620 Socket type FCLGA2011 FCLGA2011 FCLGA2011 Core frequency (GHz) 2 GHz 1.8 GHz 2 GHz Bus frequency 7.2 GT/s 6.4 GT/s 7.2 GT/s L1 cache 32 KB + 32 KB per core 32 KB + 32 KB per core 32 KB + 32 KB per core L2 cache 1.5 MB (256 KB per core) 1 MB (256 KB per core) 1.5 MB (256 KB per core) L3 cache 15 MB 10 MB 15 MB Platform Vendor and model number Veritas NetBackup 5230 Integrated Appliance N/A N/A Memory module(s) Total RAM in system (GB) 64 32 64 Vendor and model number Ventura Tech® D3- 60MM104SV-999 Micron MT36JSF1G72PZ- 1G6K1HF Ventura Tech D3- 60MM104SV-999 Type PC3-10600 PC3-12800R PC3-10600 Speed (MHz) 1,333 1600 1,333 Timing/Latency (tCL- tRCD-tRP-tRASmin) 9-9-9-27 11-11-11-34 9-9-9-27 Size (GB) 8 8 8
  • 14. A Principled Technologies test report 14Veritas NetBackup benchmark comparison: Data protection in a large-scale virtual environment (Part 2) System NetBackup 5230 integrated appliance Competitor “E” appliance Virtual Data Movers Host (Competitor “E”) Number of RAM module(s) 8 4 8 Chip organization Double-sided Double-sided Double-sided Rank Dual rank Dual rank Dual rank Operating system Name NetBackup Appliance 2.6.0.2 Suse Linux 11 VMware vSphere 5.5.0 Build number 2.6.32.59-0.7-default-fsl 2.6.32.59-0.71.5736.1.PTF 1209974 RAID controller Vendor and model number Intel RMS25CB080 Intel RMS25CB080 Intel RMS25CB080 Firmware version 23.9.0-0025 23.12.0-0013 23.9.0-0025 Cache size (MB) 1024 1024 1024 Hard drives Vendor and model number Seagate® Constellation® ES ST1000NM0001 HGST E182115 Seagate Constellation ES ST1000NM0001 Number of drives 10 12 10 Size (GB) 1,000 2,000 1,000 RPM 7.2K 7.2k 7.2K Type SAS SATA SAS Ethernet adapters Vendor and model number Intel X520 10Gbps dual- port Ethernet adapter Intel I350 Quad-Port Gigabit Controller Intel X520 10Gbps dual- port Ethernet adapter Type PCI-E Integrated PCI-E Figure 12: Detailed information on the media server from each solution.
  • 15. A Principled Technologies test report 15Veritas NetBackup benchmark comparison: Data protection in a large-scale virtual environment (Part 2) Figure 13 shows how we configured our data network. We used this configuration universally on SAN testing. Figure 13: Detailed test bed layout: data network.
  • 16. A Principled Technologies test report 16Veritas NetBackup benchmark comparison: Data protection in a large-scale virtual environment (Part 2) APPENDIX B – HOW WE TESTED We set up hardware and software for Competitor “E” according to administrative best practices. Creating a storage lifecycle policy with NetBackup 7.6 1. Open a connection to the NetBackup machine. 2. If the Veritas NetBackup Activity Monitor is not open, open it. 3. Log into nbu-master-a with administration credentials. 4. Go to StorageStorage Lifecycle Policies. 5. Right-click in the right pane, and select New Storage Lifecycle Policy. 6. Enter a name for your SLP. 7. Click Add. 8. In the New Operation window, change the operation to Snapshot, and select primary-snap as your destination storage. 9. Click OK. Creating a policy with NetBackup 7.6 1. Open a connection to the NetBackup machine. 2. If the Veritas NetBackup Activity Monitor is not open, open it. 3. Log into nbu-master-a with administration credentials. 4. Go to Policies. 5. Right-click the All Policies area, and select New Policy. 6. Under Add a New Policy, enter your policy name, and click OK. 7. Change Policy type to VMware. 8. Click the Policy storage drop-down menu, and select the policy you created earlier. 9. Check Use Replication Director, and click Options. 10. In the Replication Director options, change Maximum Snapshots to 1,000, and make sure that Application Consistent Snapshot is Enabled. 11. Click the Schedules tab. 12. In the Schedules tab, select New. 13. In the Attributes window, enter a name for your scheduled backup, click Calendar, and click the Calendar Schedule tab. 14. In the Calendar Schedule tab, select a date as far away as you deem reasonable, and click OK. 15. Click the Clients tab. 16. Click Select automatically through query. If a warning window appears, click Yes. 17. Choose the VMs you wish to backup through queries (for example, if you want to back up all VMs on a drive, choose Datastore in the Field category, and enter the drive you want to pull all VMs from in quotes in the Values field. Running a test with NetBackup 7.6 1. Open a connection to the NetBackup machine. 2. If the Veritas NetBackup Activity Monitor is not open, open it. 3. Log into nbu-master-a with administration credentials. 4. Go to Policies. 5. Right-click the policy you wish to run, and select Manual Backup. 6. Click OK. Note: In the case of the NAS backups, we had two separate policies as each one targets the opposite VMs. Make sure to run the even and odd backup.
  • 17. A Principled Technologies test report 17Veritas NetBackup benchmark comparison: Data protection in a large-scale virtual environment (Part 2) Backing up VM hosts in NetBackup 7.6 1. Select Policies. 2. Under All Policies, right-click and select New Policy. 3. Provide a policy name and click OK. 4. On the Attributes tab, use the pull-down menu for Policy type and select VMware. 5. For Destination, use the pull-down menu and select your target storage. We selected media-msdp. 6. Check the box for Disable client-side deduplication. 7. Check the box for Use Accelerator. 8. On the Schedules tab, create a backup schedule based on the desired parameters. 9. On the Clients tab, choose Select automatically through query. 10. Select the master server as the NetBackup host to perform automatic virtual machine selection. 11. Build a query to select the correct VMs required for the backup job. 12. Click Test Query to ensure the correct VMs are properly selected. 13. Start the backup. NetBackup 7.6 Exchange Instant Recovery 1. Start LoadGen test load. 2. Force-power-down all VMs once 50 LoadGen operations complete. 3. Initiate the Exchange infrastructure restore job/start timer. a. Establish a connection to the master server via SSH. b. Log in with administrator credentials. c. Type support and press Enter. d. Type maintenance and press Enter. e. Enter the administrator credentials. f. Type elevate and press Enter. g. Type the following: nbrestorevm -vmw -ir_activate -C client_DNS_name -temp_location temporary_restore_LUN -vmproxy restore_host_FQDN –vmpo This will restore, activate, and power-on the VM. h. Repeat Step g for each of the four VMs to restore. i. Stop the LoadGen test run. 4. When restores complete, restart the LoadGen test. 5. Once 100 LoadGen operations complete successfully, stop the timer. NetBackup 7.6 Exchange restore via command line Initiate Exchange infrastructure restore job 1. Establish a connection to the master server via SSH. 2. Log in with administrator credentials. 3. Type support and press Enter 4. Type maintenance and press Enter. 5. Enter the administrator credentials 6. Type elevate and press Enter. 7. Type the following: nbrestorevm -vmw -ir_activate -C client_DNS_name -temp_location temporary_restore_LUN -vmproxy restore_host_FQDN –vmpo
  • 18. A Principled Technologies test report 18Veritas NetBackup benchmark comparison: Data protection in a large-scale virtual environment (Part 2) This will restore, activate, and power-on the VM. 8. Repeat step 7 for each of the four VMs to restore. NetBackup 7.6 Exchange Instant Recovery 1. Start the LoadGen test load. 2. Force-power-down all VMs once 50 LoadGen operations complete. 3. Initiate the Exchange infrastructure restore job/start timer. a. Establish a connection to the master server via SSH. b. Log in with administrator credentials. c. Type support and press Enter. d. Type maintenance and press Enter. e. Enter the administrator credentials. f. Type elevate and press Enter. g. Type the following: nbrestorevm -vmw -ir_activate -C client_DNS_name -temp_location temporary_restore_LUN -vmproxy restore_host_FQDN –vmpo This will restore, activate, and power-on the VM. h. Repeat step g for each of the four VMs to restore. i. Stop the LoadGen test run. 4. When restores complete, restart the LoadGen test. 5. Once 100 LoadGen operations complete successfully, stop the timer. Launching collectors and compiling data for NetBackup 7.6 The following two tasks (Launch the collectors & Compile the data) should be executed from the domainadministrator login on INFRA-SQL. Launching the collectors Note: If this is a first run collection, skip to step 2. 1. Double-click the collector job (located in C:Scripts) associated with the number of VMs you want to collect. 2. In the PuTTY session launched for the media server collection, enter the following sequence: Support Maintenance (P@ssw0rd) iostat –d 30 3. RDP into the Backup-Test server. 4. On the NetBackup Console, expand nbu-master-aNetBackup ManagementPolicies. 1. Right click the Policy you want to start, and select Manual Backup. 5. To start the job, click OK. 6. Open the Activity Monitor on the NetBackup Administration Console. 7. The Backup job will execute and spawn four different kinds of jobs for each target VM: a. Application State Check b. VM Snapshot c. Backup d. Image Cleanup Compile the data In the following steps, ### represents the number of VMs you’re testing, and # represents the test number. 1. At job completion, double-click the StopCollection.bat file (located in C:Scripts).
  • 19. A Principled Technologies test report 19Veritas NetBackup benchmark comparison: Data protection in a large-scale virtual environment (Part 2) 2. Capture screenshots of the Main Backup Job (both Tabs) and sub jobs for a SQL server, an Exchange Server, and a SharePoint server. a. Save each screenshot in: E:Veritas Test Results01 Backup Test### VM Results RepositoryTest # b. If this is a first run, return to step 1 above. 3. On the menu at the top of the NetBackup Console, select FileExport. 4. Select All Rows, and export to <Test#.xls>. Click Save. 5. Manually select all the rows in the activity monitor and delete them. 6. Open WinSCP. 7. Select My Workspace on the left panel and click Login. This will open a connection and automatically log into each of the ESXI servers undergoing data collection. a. In the left panel, browse for the correct job folder: ### VM Results RepositoryTest #esxtop b. In the right panel, select the esxout file (which may be of considerable size) and drag it into the esxtop directory. c. Once the file transfer is complete, delete the esxtop from the server (right panel). d. Repeat steps a-c for each of the esx servers. 8. Close WinSCP. 9. On the INFRA-SQL server, open E:Putty Output. 10. In a separate window, open: E:Veritas Test Results01 Backup Test### VM Results RepositoryTest #sysstats. 11. Move all the files from E:Putty Output to the Test folder you selected in the previous step. 12. Close all Explorer windows. 13. Return to step 1 above. General concurrent restore procedure 1. Delete restore target VM(s) from disk in vCenter. 2. Launch the data collector script. 3. Execute a restore job using one of the following methods: a. For NetBackup: i. Open a PuTTY session to the NBU master server (172.16.100.100). 1. Log in as admin/P@ssw0rd 2. Type support and press Enter. 3. Type maintenance and press Enter. 4. Enter the maintenance password P@ssw0rd 5. Type elevate and press Enter. ii. Copy the commands to be executed from a text file and paste them into the command line interface on the NetBackup master server. 4. Determine the time by determining the difference between the time the first job begins and the end-time of the last job to complete. 5. Export the NBU job log to disk and copy it to the results folder. 6. Stop the collection script. 7. Transfer the relevant data collector output into the test folder.
  • 20. A Principled Technologies test report 20Veritas NetBackup benchmark comparison: Data protection in a large-scale virtual environment (Part 2) APPENDIX C – CPU UTILIZATION Figure 14 shows the CPU utilization for the NetBackup solution. Figure 14: CPU utilization for the NetBackup solution using the NetApp media server. Figure 15 shows the CPU utilization for the Competitor “E” solution. Figure 15: CPU utilization for the Competitor “E” media appliance solution.
  • 21. A Principled Technologies test report 21Veritas NetBackup benchmark comparison: Data protection in a large-scale virtual environment (Part 2) Figure 16 shows the CPU utilization for the Competitor “E” virtual data movers host. Figure 16: CPU utilization for the virtual data movers host used with the Competitor “E” solution.
  • 22. A Principled Technologies test report 22Veritas NetBackup benchmark comparison: Data protection in a large-scale virtual environment (Part 2) ABOUT PRINCIPLED TECHNOLOGIES Principled Technologies, Inc. 1007 Slater Road, Suite 300 Durham, NC, 27703 www.principledtechnologies.com We provide industry-leading technology assessment and fact-based marketing services. We bring to every assignment extensive experience with and expertise in all aspects of technology testing and analysis, from researching new technologies, to developing new methodologies, to testing with existing and new tools. When the assessment is complete, we know how to present the results to a broad range of target audiences. We provide our clients with the materials they need, from market-focused data to use in their own collateral to custom sales aids, such as test reports, performance assessments, and white papers. Every document reflects the results of our trusted independent analysis. We provide customized services that focus on our clients’ individual requirements. Whether the technology involves hardware, software, Web sites, or services, we offer the experience, expertise, and tools to help our clients assess how it will fare against its competition, its performance, its market readiness, and its quality and reliability. Our founders, Mark L. Van Name and Bill Catchings, have worked together in technology assessment for over 20 years. As journalists, they published over a thousand articles on a wide array of technology subjects. They created and led the Ziff-Davis Benchmark Operation, which developed such industry-standard benchmarks as Ziff Davis Media’s Winstone and WebBench. They founded and led eTesting Labs, and after the acquisition of that company by Lionbridge Technologies were the head and CTO of VeriTest. Principled Technologies is a registered trademark of Principled Technologies, Inc. All other product names are the trademarks of their respective owners. Disclaimer of Warranties; Limitation of Liability: PRINCIPLED TECHNOLOGIES, INC. HAS MADE REASONABLE EFFORTS TO ENSURE THE ACCURACY AND VALIDITY OF ITS TESTING, HOWEVER, PRINCIPLED TECHNOLOGIES, INC. SPECIFICALLY DISCLAIMS ANY WARRANTY, EXPRESSED OR IMPLIED, RELATING TO THE TEST RESULTS AND ANALYSIS, THEIR ACCURACY, COMPLETENESS OR QUALITY, INCLUDING ANY IMPLIED WARRANTY OF FITNESS FOR ANY PARTICULAR PURPOSE. ALL PERSONS OR ENTITIES RELYING ON THE RESULTS OF ANY TESTING DO SO AT THEIR OWN RISK, AND AGREE THAT PRINCIPLED TECHNOLOGIES, INC., ITS EMPLOYEES AND ITS SUBCONTRACTORS SHALL HAVE NO LIABILITY WHATSOEVER FROM ANY CLAIM OF LOSS OR DAMAGE ON ACCOUNT OF ANY ALLEGED ERROR OR DEFECT IN ANY TESTING PROCEDURE OR RESULT. IN NO EVENT SHALL PRINCIPLED TECHNOLOGIES, INC. BE LIABLE FOR INDIRECT, SPECIAL, INCIDENTAL, OR CONSEQUENTIAL DAMAGES IN CONNECTION WITH ITS TESTING, EVEN IF ADVISED OF THE POSSIBILITY OF SUCH DAMAGES. IN NO EVENT SHALL PRINCIPLED TECHNOLOGIES, INC.’S LIABILITY, INCLUDING FOR DIRECT DAMAGES, EXCEED THE AMOUNTS PAID IN CONNECTION WITH PRINCIPLED TECHNOLOGIES, INC.’S TESTING. CUSTOMER’S SOLE AND EXCLUSIVE REMEDIES ARE AS SET FORTH HEREIN.