
Recomendados
Mais conteúdo relacionado
Destaque
Destaque (15)
Semelhante a Web Ex Tips N\' Tricks Email Series 2009
Semelhante a Web Ex Tips N\' Tricks Email Series 2009 (20)
Mais de Pambie
Mais de Pambie (20)
Web Ex Tips N\' Tricks Email Series 2009
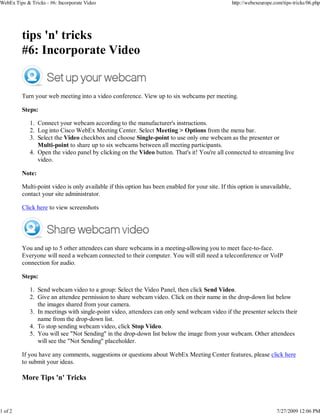
- 1. WebEx Tips & Tricks - #6: Incorporate Video http://webexeurope.com/tips-tricks/06.php Turn your web meeting into a video conference. View up to six webcams per meeting. Steps: 1. Connect your webcam according to the manufacturer's instructions. 2. Log into Cisco WebEx Meeting Center. Select Meeting > Options from the menu bar. 3. Select the Video checkbox and choose Single-point to use only one webcam as the presenter or Multi-point to share up to six webcams between all meeting participants. 4. Open the video panel by clicking on the Video button. That's it! You're all connected to streaming live video. Note: Multi-point video is only available if this option has been enabled for your site. If this option is unavailable, contact your site administrator. Click here to view screenshots You and up to 5 other attendees can share webcams in a meeting-allowing you to meet face-to-face. Everyone will need a webcam connected to their computer. You will still need a teleconference or VoIP connection for audio. Steps: 1. Send webcam video to a group: Select the Video Panel, then click Send Video. 2. Give an attendee permission to share webcam video. Click on their name in the drop-down list below the images shared from your camera. 3. In meetings with single-point video, attendees can only send webcam video if the presenter selects their name from the drop-down list. 4. To stop sending webcam video, click Stop Video. 5. You will see "Not Sending" in the drop-down list below the image from your webcam. Other attendees will see the "Not Sending" placeholder. If you have any comments, suggestions or questions about WebEx Meeting Center features, please click here to submit your ideas. More Tips 'n' Tricks 1 of 2 7/27/2009 12:06 PM
- 2. WebEx Tips & Tricks - #6: Incorporate Video http://webexeurope.com/tips-tricks/06.php #1: Sharing Content #2: Collaborate on a document #3: Record a meeting #4: Transfer files #5: Use the whiteboard #6: Using video Watch our "How do I...?" 3-minute video tutorials Visit our support site or Contact a Customer Support specialist: 1-866-863-3903 Sign up for an online class at the WebEx University ©1992-2009 WebEx Communications, Inc. All rights reserved. 2 of 2 7/27/2009 12:06 PM
- 3. http://webexeurope.com/447/edm/edm-02.htm Dear (First Name), Your Cisco WebEx site is ready! Log in now. Site URL: http://abcd.webex.com User name: name@webex.com Password: Use the password you specified when you placed your order. (Forgot your password? Retrieve it here.) Dive right in. Start using WebEx to meet online with colleagues right away! It’s easy. Simply click the links below to learn the basics and start hosting online meetings. Take the virtual tour How do I...? Quick Start Guide Join Samantha on a 5-minute Learn to use a single feature in Schedule and run meetings in tour. She’ll introduce you to each three-minute video tutorial. three quick steps using this WebEx Meeting Center and Quick Start Guide. show you how it works. Schedule a Meeting Share My Desktop Use Teleconferencing Use Internet Phone (VoIP) To view these videos, make sure pop-ups display in your View Guide browser. Take Tour Manage your account Visit MyResources 24 hours after receiving this email to access your account information and invoices. Log in using your site URL, user name, and password. Questions? Contact: Service questions 1-866-863-3908 Technical questions http://support.webex.com © 2009. WebEx Communications, Inc. All rights reserved. Cisco, WebEx, and Cisco WebEx are registered trademarks or trademarks of Cisco Systems, Inc. and/or its affiliates in the United States and certain other countries. All other trademarks are the property of their respective 1 of 2 7/27/2009 11:56 AM
- 4. http://webexeurope.com/447/edm/edm-02.htm owners. WebEx respects your privacy. http://www.webex.com/webex_privacy.html This email may be an advertisement or solicitation. If you do not wish to receive marketing messages from WebEx, please select this link for removal. View WebEx Terms and Conditions. 2 of 2 7/27/2009 11:56 AM
- 5. http://webexeurope.com/447/edm/edm-01.htm Your WebEx site Site URL: Dear (First Name), http://testing123.webex.com Thank you for choosing Cisco WebEx Meeting Center. User name: john.smith@webex.com Your WebEx site will be active soon. Look for a Welcome email within 30 minutes. This email contains login information and Password: instructions for using the site. Start, schedule, and manage your you specified this when you meetings from your WebEx site. placed your order. (If you have forgotten it, you can retrieve it Be sure to add onlineorders@webex.com to your address book below.) now to help ensure you continue getting important email from WebEx. Retrieve password Order details Your confirmation number: S8555421 Meeting Center, Meetings Plus Package Package includes: Unlimited online meetings Integrated toll teleconferencing PC and Mac compatibility 25-person capacity meetings Free VoIP (internet) conferencing 9 Host(s) @$59/mo/host, prepaid annual plan $6372/year Toll-Free audio for US/Canada Actual usage will be billed to your credit card monthly at $0.15/user/minute Offer details Total charge for the first billing cycle $6372 Your account will renew automatically on a yearly basis with the same terms. Billing Information Contact Information John Smith John Smith Company Name Company Name Address 1 Address 1 Address 2 Address 2 City City ZIP code ZIP code Country Country Telephone number Telephone number Email address Thank you for choosing WebEx Meeting Center from Cisco. Watch your inbox. Your login information will 1 of 2 7/27/2009 11:55 AM
- 6. http://webexeurope.com/447/edm/edm-01.htm arrive shortly! Questions? Contact: Service questions 1-866-863-3908 Technical questions http://support.webex.com © 2009. WebEx Communications, Inc. All rights reserved. Cisco, WebEx, and Cisco WebEx are registered trademarks or trademarks of Cisco Systems, Inc. and/or its affiliates in the United States and certain other countries. All other trademarks are the property of their respective owners. WebEx respects your privacy. http://www.webex.com/webex_privacy.html This email may be an advertisement or solicitation. If you do not wish to receive marketing messages from WebEx, please select this link for removal. View WebEx Terms and Conditions. 2 of 2 7/27/2009 11:55 AM
- 7. WebEx http://webexeurope.com/tips-tricks/edm/edm-01.htm If this message is not displaying properly, click here to launch your browser. Dear {{User}} Make your Cisco WebEx online meetings more productive with this series of useful tips. Practice these quick lessons and you’ll be using WebEx Meeting Center like a pro in no time. Look for a new tip each month to help you make the most of WebEx Meeting Center. Get started right away with this first one about how to share content. Share content. Share documents, applications, and even your entire desktop. Collaborate on presentations, documents, and spreadsheets Share the full functionality of your software with others. Pass control to other attendees so they can work on your application—even if they don’t have it installed. Share your desktop and anything on it during a meeting. Why share content? Get everyone on the same page. Work on documents and applications in real time with other participants, and get more done during your meeting. Next Month: Look for Collaborate on a document in the second of our Tips ‘n’ Tricks series. From, Your WebEx Team © 2009 WebEx Communications, Inc. All rights reserved. WebEx and MediaTone are registered trademarks or trademarks of Cisco Systems, Inc. and/or its affiliates in the U.S. and certain other countries. Other brands and products are trademarks or registered trademarks of their respective holders. WebEx respects your privacy. Privacy policy: http://www.webex.com/webex_privacy.html 1 of 1 7/27/2009 11:57 AM
- 8. WebEx http://webexeurope.com/tips-tricks/edm/edm-02.htm If this message is not displaying properly, click here to launch your browser. Dear {{User}} In Cisco WebEx Tips n’ Tricks #1, you learned how to share your desktop. Now, discover how to work together on a document with other participants. Share and edit a document from any application on your system. Allow other meeting participants to draw, highlight, or add text using annotation tools. Pass control to other meeting participants. Why collaborate on documents? Work together in real time with other attendees to make online meetings more productive. Capture everyone’s feedback instantly, and save time by consolidating ideas and getting consensus from the group all at once, then make agreed-upon changes. Next Month: Look for Record a meeting, the third instalment of Cisco WebEx Tips n’ Tricks. From, Your WebEx Team © 2009 WebEx Communications, Inc. All rights reserved. WebEx and MediaTone are registered trademarks or trademarks of Cisco Systems, Inc. and/or its affiliates in the U.S. and certain other countries. Other brands and products are trademarks or registered trademarks of their respective holders. WebEx respects your privacy. Privacy policy: http://www.webex.com/webex_privacy.html 1 of 1 7/27/2009 11:59 AM
- 9. WebEx http://webexeurope.com/tips-tricks/edm/edm-03.htm If this message is not displaying properly, click here to launch your browser. Dear {{User}} Record a meeting with Cisco WebEx Network Based Recording and save it for later. Whether you keep a record of a meeting for archival purposes or for later on-demand playback, this is a handy feature. Click the button below to learn how to: Record a meeting - complete with audio--to share with people who didn’t attend. Email your recording to people who didn’t attend your online meeting. Why record a meeting? Keep documentation of your meeting for archival purposes, or have a copy available for participants who were unable to attend. Make sure everyone is on the same page and is aware of what took place at the meeting. Look for Cisco WebEx Tips n’ Tricks #4 next month: Transfer files. From, Your WebEx Team © 2009 WebEx Communications, Inc. All rights reserved. WebEx and MediaTone are registered trademarks or trademarks of Cisco Systems, Inc. and/or its affiliates in the U.S. and certain other countries. Other brands and products are trademarks or registered trademarks of their respective holders. WebEx respects your privacy. Privacy policy: http://www.webex.com/webex_privacy.html 1 of 1 7/27/2009 12:00 PM
- 10. WebEx http://webexeurope.com/tips-tricks/edm/edm-04.htm If this message is not displaying properly, click here to launch your browser. Dear {{User}} Did you know that you can send files for attendees to download during your meeting? Do it in a matter of seconds – file size is no problem. Share content easily and immediately with everyone in your meeting. Send documents, photos, even video—in a secure environment. Why transfer files? Avoid the hassle and security risks of emailing large files. Take advantage of the security built into Cisco WebEx Meeting Center. Send it in real time and be sure that everyone gets your file. Look for Cisco Tips ‘n Tricks #5 next month: Use the whiteboard. From, Your WebEx Team © 2009 WebEx Communications, Inc. All rights reserved. WebEx and MediaTone are registered trademarks or trademarks of Cisco Systems, Inc. and/or its affiliates in the U.S. and certain other countries. Other brands and products are trademarks or registered trademarks of their respective holders. WebEx respects your privacy. Privacy policy: http://www.webex.com/webex_privacy.html 1 of 1 7/27/2009 12:02 PM
- 11. WebEx http://webexeurope.com/tips-tricks/edm/edm-05.htm If this message is not displaying properly, click here to launch your browser. Dear {{User}} Consolidate your ideas quickly and efficiently. Use the whiteboard feature included with Cisco WebEx Meeting Center. Whiteboard ideas and notes during a WebEx meeting session. Allow other participants to collaborate on the whiteboard. Why use the whiteboard? Collaborate informally. Brainstorm or take notes. The whiteboard acts just like a conventional whiteboard or flip pad. Give everyone in your meeting the chance to write on the board and collaborate in real time, then save it for future reference. Look for Cisco WebEx Tips n’ Tricks #6 next month: Incorporate video. From, Your WebEx Team © 2009 WebEx Communications, Inc. All rights reserved. WebEx and MediaTone are registered trademarks or trademarks of Cisco Systems, Inc. and/or its affiliates in the U.S. and certain other countries. Other brands and products are trademarks or registered trademarks of their respective holders. WebEx respects your privacy. Privacy policy: http://www.webex.com/webex_privacy.html 1 of 1 7/27/2009 12:04 PM
- 12. WebEx http://webexeurope.com/tips-tricks/edm/edm-06.htm If this message is not displaying properly, click here to launch your browser. Dear {{User}} In the last of the Tips n Tricks series, you will see how to set up your webcams and meet face to face-in real time-across the hall or across continents. Turn your online meeting into a video conference. Did you know Cisco WebEx Meeting Center supports up to six webcams per meeting? Why use video? Boost the interactivity of your WebEx meetings with video. All you need is a webcam to add a face-to-face dimension to your online meeting. Connect more meaningfully with other attendees, and add the personal touch by allowing your audience to see you. Continue learning. Keep exploring WebEx Meeting Center to boost productivity and get creative. Let WebEx Meeting Center enrich your online collaboration experience. Remember to check out the 3-minute "How Do I...?" video tutorials to quickly master an individual feature. Want more in-depth training? Enroll in free online classes at WebEx University. If you have any comments, suggestions or questions about WebEx Meeting Center features, please click here to submit your ideas. From, Your WebEx Team © 2009 WebEx Communications, Inc. All rights reserved. WebEx and MediaTone are registered trademarks or trademarks of Cisco Systems, Inc. and/or its affiliates in the U.S. and certain other countries. Other brands and products are trademarks or registered trademarks of their respective holders. WebEx respects your privacy. Privacy policy: http://www.webex.com/webex_privacy.html 1 of 1 7/27/2009 12:05 PM
- 13. WebEx Tips & Tricks - #6: Incorporate Video http://webexeurope.com/tips-tricks/06.php Turn your web meeting into a video conference. View up to six webcams per meeting. Steps: 1. Connect your webcam according to the manufacturer's instructions. 2. Log into Cisco WebEx Meeting Center. Select Meeting > Options from the menu bar. 3. Select the Video checkbox and choose Single-point to use only one webcam as the presenter or Multi-point to share up to six webcams between all meeting participants. 4. Open the video panel by clicking on the Video button. That's it! You're all connected to streaming live video. Note: Multi-point video is only available if this option has been enabled for your site. If this option is unavailable, contact your site administrator. Click here to view screenshots You and up to 5 other attendees can share webcams in a meeting-allowing you to meet face-to-face. Everyone will need a webcam connected to their computer. You will still need a teleconference or VoIP connection for audio. Steps: 1. Send webcam video to a group: Select the Video Panel, then click Send Video. 2. Give an attendee permission to share webcam video. Click on their name in the drop-down list below the images shared from your camera. 3. In meetings with single-point video, attendees can only send webcam video if the presenter selects their name from the drop-down list. 4. To stop sending webcam video, click Stop Video. 5. You will see "Not Sending" in the drop-down list below the image from your webcam. Other attendees will see the "Not Sending" placeholder. If you have any comments, suggestions or questions about WebEx Meeting Center features, please click here to submit your ideas. More Tips 'n' Tricks 1 of 2 7/27/2009 12:06 PM
- 14. WebEx Tips & Tricks - #6: Incorporate Video http://webexeurope.com/tips-tricks/06.php #1: Sharing Content #2: Collaborate on a document #3: Record a meeting #4: Transfer files #5: Use the whiteboard #6: Using video Watch our "How do I...?" 3-minute video tutorials Visit our support site or Contact a Customer Support specialist: 1-866-863-3903 Sign up for an online class at the WebEx University ©1992-2009 WebEx Communications, Inc. All rights reserved. 2 of 2 7/27/2009 12:06 PM
- 15. WebEx Tips & Tricks - #1: 3 ways to share content http://webexeurope.com/tips-tricks/index.php Bring a presentation, spreadsheet, or any PDF into the meeting for everyone to see. Make changes to the document in real time using the Annotation tools. Choose the Annotation Tools and everyone in the meeting can collaborate in real time. Interact with the document. Mark up changes. Make suggestions. Steps: 1. Click on Share in the top navigation and select Presentation or Document. Allow anyone in the meeting to access all the application functions during your session. Meeting participants can to see the changes you make. You can even pass control to someone else to edit the file in real time. Share only what you want your participants to see. Share an application, and the rest of the desktop is not visible to anyone else. Steps: 1. Click on Share in the top navigation and select Application. Share your entire desktop and everything on it during a meeting. Switch between programs easily and allow all participants to take advantage of full meeting functionality. Protect sensitive information. Be sure to disable instant messaging and email alerts while sharing your desktop. Your WebEx meeting chat and other panels are not visible to attendees. Steps: 1. Choose Share in the top navigation and select Desktop. If you have any comments, suggestions or questions about WebEx Meeting Center features, please click here to submit your ideas. 1 of 2 7/27/2009 11:58 AM
- 16. WebEx Tips & Tricks - #1: 3 ways to share content http://webexeurope.com/tips-tricks/index.php More Tips 'n' Tricks #1: Sharing Content #2: Collaborate on a document #3: Record a meeting #4: Transfer files #5: Use the whiteboard #6: Using video Watch our "How do I...?" 3-minute video tutorials Visit our support site or Contact a Customer Support specialist: 1-866-863-3903 Sign up for an online class at the WebEx University ©1992-2009 WebEx Communications, Inc. All rights reserved. 2 of 2 7/27/2009 11:58 AM
- 17. WebEx Tips & Tricks - #3: Record a meeting http://webexeurope.com/tips-tricks/03.php 1 of 3 7/27/2009 12:01 PM
- 18. WebEx Tips & Tricks - #3: Record a meeting http://webexeurope.com/tips-tricks/03.php Steps: 1. Click on Meeting in the top navigation panel, then select Recorder Settings > Record on Server. 2. Choose Start Recording from the Meeting drop-down menu. 3. Once a connection is established, the Recorder Panel will appear and the recording will begin. 4. Select Stop to end the recording — the Recorder Panel will disappear. Click here to view screenshots Email your recording to anyone. Steps: 1. Find the recorded meeting on your WebEx site. Select the My WebEx tab, navigate to My Files in the left bar, then go to the My Recordings tab. 2. Click on the meeting title under Topic. Tip: Password-protect your recording for additional security. Click the Modify button, enter a password and click Save. Send recipients an email containing a link to the recording. Choose the Send Email button. Enter the recipients’ email addresses. Add a message and Send. Click here to view screenshots If you have any comments, suggestions or questions about WebEx Meeting Center features, please click here to submit your ideas. More Tips 'n' Tricks #1: Sharing Content #2: Collaborate on a document #3: Record a meeting #4: Transfer files #5: Use the whiteboard #6: Using video Watch our "How do I...?" 3-minute video tutorials 2 of 3 7/27/2009 12:01 PM
- 19. WebEx Tips & Tricks - #3: Record a meeting http://webexeurope.com/tips-tricks/03.php Visit our support site or Contact a Customer Support specialist: 1-866-863-3903 Sign up for an online class at the WebEx University ©1992-2009 WebEx Communications, Inc. All rights reserved. 3 of 3 7/27/2009 12:01 PM
- 20. WebEx Tips & Tricks - #4: Transfer files http://webexeurope.com/tips-tricks/04.php Send any file—regardless of size—for participants to download during the meeting. Avoid the hassle and security risks involved with sending large presentations. Send it in real time, securely, right through Cisco WebEx Meeting Center. Steps: 1. From the File menu, select Transfer. 2. Click on the Share File button and select the file you want to transfer. 3. Tell attendees to look for the transfer window on their screen, click on the file, and then select Download File. Click here to view screenshots If you have any comments, suggestions or questions about WebEx Meeting Center features, please click here to submit your ideas. More Tips 'n' Tricks #1: Sharing Content #2: Collaborate on a document #3: Record a meeting #4: Transfer files #5: Use the whiteboard #6: Using video Watch our "How do I...?" 3-minute video tutorials Visit our support site or Contact a Customer Support specialist: 1-866-863-3903 Sign up for an online class at the WebEx University 1 of 2 7/27/2009 12:03 PM
- 21. WebEx Tips & Tricks - #4: Transfer files http://webexeurope.com/tips-tricks/04.php ©1992-2009 WebEx Communications, Inc. All rights reserved. 2 of 2 7/27/2009 12:03 PM
- 22. WebEx Tips & Tricks - #3: Record a meeting http://webexeurope.com/tips-tricks/03.php 1 of 3 7/27/2009 12:01 PM
- 23. WebEx Tips & Tricks - #3: Record a meeting http://webexeurope.com/tips-tricks/03.php Steps: 1. Click on Meeting in the top navigation panel, then select Recorder Settings > Record on Server. 2. Choose Start Recording from the Meeting drop-down menu. 3. Once a connection is established, the Recorder Panel will appear and the recording will begin. 4. Select Stop to end the recording — the Recorder Panel will disappear. Click here to view screenshots Email your recording to anyone. Steps: 1. Find the recorded meeting on your WebEx site. Select the My WebEx tab, navigate to My Files in the left bar, then go to the My Recordings tab. 2. Click on the meeting title under Topic. Tip: Password-protect your recording for additional security. Click the Modify button, enter a password and click Save. Send recipients an email containing a link to the recording. Choose the Send Email button. Enter the recipients’ email addresses. Add a message and Send. Click here to view screenshots If you have any comments, suggestions or questions about WebEx Meeting Center features, please click here to submit your ideas. More Tips 'n' Tricks #1: Sharing Content #2: Collaborate on a document #3: Record a meeting #4: Transfer files #5: Use the whiteboard #6: Using video Watch our "How do I...?" 3-minute video tutorials 2 of 3 7/27/2009 12:01 PM
- 24. WebEx Tips & Tricks - #3: Record a meeting http://webexeurope.com/tips-tricks/03.php Visit our support site or Contact a Customer Support specialist: 1-866-863-3903 Sign up for an online class at the WebEx University ©1992-2009 WebEx Communications, Inc. All rights reserved. 3 of 3 7/27/2009 12:01 PM
- 25. http://webexeurope.com/447/edm/edm-03.htm Dear (First Name), Congratulations on becoming a Cisco WebEx Meeting Center host. Now, schedule and run online meetings with anyone, anywhere. Share ideas, documents, presentations-even your entire desktop. You should have recently received an email containing your WebEx account login details. If you don't have this email, no problem-you can still retrieve your user name and password. Click here. Get Started Get to know WebEx Meeting Center. Take a look at the links below so you can learn the basics and start hosting online meetings right away. Schedule a WebEx meeting 1. Go to test.com and click Log in. 2. Enter your user name and password. 3. Click Schedule Meeting (It's under Host Meetings in the left navigation bar.) 4. Enter the meeting details and click Schedule Meeting. Take a Virtual Tour How do I...? Get Started Join Samantha for a 5-minute These video tutorials show you Schedule and run meetings in tour. She'll introduce you to how to use a single function in three quick steps using this WebEx Meeting Center and just three minutes. Learn how to: Quick Start Guide. show you how it works. Schedule a Meeting Share My Desktop Use Teleconferencing Use Internet Phone (VoIP) To view the videos, make sure View Guide pop-ups display in your browser. Take Tour Schedule a meeting right from your applications. Schedule WebEx meetings from Microsoft® Outlook®, Microsoft Office® applications, popular instant messaging applications, IBM® Lotus Notes® or right from your desktop. Get the Productivity Tools here: » Log in to your WebEx site. » Select My WebEx from the top navigation, then Productivity Tools on the left. » Download and install. Watch your inbox! 1 of 2 7/27/2009 11:53 AM
- 26. http://webexeurope.com/447/edm/edm-03.htm Look for more information soon. You'll learn how to: Transfer a file to attendees Use the Whiteboard Record a meeting Hold a videoconference Questions? Contact Us! Service questions 1-866-863-3908 Technical questions http://support.webex.com Forgot your WebEx password? Retrieve it. © 2009. WebEx Communications, Inc. All rights reserved. Cisco, WebEx, and Cisco WebEx are registered trademarks or trademarks of Cisco Systems, Inc. and/or its affiliates in the United States and certain other countries. All other trademarks are the property of their respective owners. WebEx respects your privacy. http://www.webex.com/webex_privacy.html This email may be an advertisement or solicitation. If you do not wish to receive marketing messages from WebEx, please select this link for removal. View WebEx Terms and Conditions. 2 of 2 7/27/2009 11:53 AM