SlideShare a Scribd company logo
1 of 20
Download to read offline
Research and Development of an
Automated Airbrush Paint Spraying Robot
By James McCloskey
California State University Northridge
MSE 611 – Robotics and Programmable Automation
2
1 CONTENTS
2 Introduction...........................................................................................................................................3
3 Project Planning and Requirements ......................................................................................................4
3.1 Enclosure: .....................................................................................................................................4
3.2 End Effector:.................................................................................................................................4
3.3 Actuators:......................................................................................................................................5
3.4 Electronics: ...................................................................................................................................6
4 Motor Requirements .............................................................................................................................7
4.1 Motor 1..........................................................................................................................................7
4.2 Motor 2..........................................................................................................................................8
4.3 Motor 3..........................................................................................................................................9
4.4 Motor 4..........................................................................................................................................9
5 Electronics Design ..............................................................................................................................10
5.1 RAMPS 1.4.................................................................................................................................10
5.2 Arduino Mega 2560 ....................................................................................................................11
5.3 A4988 driver...............................................................................................................................11
5.4 NEMA 17 Stepper Motor............................................................................................................12
6 Conclusion ..........................................................................................................................................12
7 Acknowledgements.............................................................................................................................12
8 Appendix A - Wiring Diagram ...........................................................................................................13
9 Appendix B - Bill of Materials ...........................................................................................................14
10 Appendix C – Arduino Sketch........................................................................................................14
3
2 INTRODUCTION
One of the main limitations with hobbyist 3D printing is that most printers are single filament extrusion
and print parts using monochromatic filament. Many hobbyists are forced to spend hundreds of dollars
to acquire a collection of multi-colored filaments in order to produce parts in any color. One possible
solution to avoid having to purchase multiple spools of pre-colored filament is to airbrush the produced
3D printed parts.
Airbrushing produces a streak-free, professional coat of paint that is generally superior to hand painting
an object. However, airbrushing a 3D printed part or assembly must be done manually, is time consuming
and is heavily dependent on the skill of the artist. The process is prone to human error and often requires
multiple rounds of touch ups and rework. This can deter many hobbyists from painting their parts.
This project aims to solve these problems by automating the airbrushing of 3D printed parts and
assemblies with a low cost robot.
Figure 1 - Picture of the robot painting a 3D printed four jaw gripper assembly.
4
3 PROJECT PLANNING AND REQUIREMENTS
The initial sketch for the robot encompassed five main features:
1. A box frame with panels will enclose the paint area
2. A filter and a ventilation fan
3. An air compressor and airbrush
4. The airbrush will be mounted to a vertical actuator
5. The work piece will be mounted to a rotational plate
3.1 ENCLOSURE:
After defining these initial criteria I purchased a 20” box fan from Home Depot. The box fan was
measured and an aluminum extrusion 30-30 frame was ordered from MiSUMi using a -$150 promotion,
essentially making the aluminum frame free. Once the aluminum frame was built, I purchased a sheet of
wood, cut it to size and press fit it into place to create the floor of the robot. The aluminum side panels,
plexiglass panel, vinyl cover and Velcro inserts were ordered, cut to size and assembled.
3.2 END EFFECTOR:
After defining the initial criteria I
purchased an airbrush - air compressor kit
from Harbor Freight Tools along with
additional airbrush accessories. The
airbrush was mounted to the vertical belt
drive to spray parts that rotate on the
plate.
Figure 2 - Sketch of the robot
Figure 3 - Robot End Effector (left) and rotating part plate (right)
5
3.3 ACTUATORS:
Figure 4 - Drilling holes to mount the various motors
The next step after building the enclosure was to order a ZLW belt drive from igus as part of their Y.E.S.
program. The belt drive was chosen after calculating the estimated airbrush payload and required motor
torque. The vertical belt drive actuator was mounted in the enclosure and the stepper motors were
installed. The linear guide was a free sample from igus and a machined nut was mounted underneath the
carriage. A motor coupled to a lead screw rotates pulling the carriage toward or away from the vertical
belt drive actuator when given a command from the microcontroller.
6
3.4 ELECTRONICS:
Figure 5 - Arduino wiring and enclosure
An Arduino Mega with a RAMPS 1.4 shield and four A4988 stepper motor drivers were chosen to
control the four stepper motors. Four NEMA-17 stepper motors were chosen because my initial
calculations showed that they were able to move each of the payloads. The stepper motors also allowed
more accuracy if desired when programming. The Arduino is housed inside of a case that I designed and
3d printed on my own 3d printer.
7
4 MOTOR REQUIREMENTS
Figure 6 - Motor positions from top view
4.1 MOTOR 1
1. On when power to system
2. Drives forward until carriage hits a limit switch
a. Calculated that 50 steps = 0.5 inches of vertical movement
3. Once the motor reaches the top it will wait until the start button is hit
Motor 1
Motor 2
Motor 3
Motor 4
Figure 7 - Depiction of paint coverage as motor 1 drives the carriage down
8
4. When the start button is pressed the motor will step down 50 steps for each full revolution of
motor 3
5. Off when reaches the bottom
6. Restart of power required to restart motor
4.2 MOTOR 2
Figure 8 – Depiction of activated motor 2 moving the airbrush side to side
1. On when start button is pressed after the paint cycle has occurred
2. Assumed to be in center at system start
3. Medium speed rotates approx. 30 degrees left of center to 30 degrees right of center
4. Off when the start button is pressed during the paint cycle and returns back to start position center
9
4.3 MOTOR 3
Figure 9 – Depiction of motor 3 on linear guide with lead screw, also underside of lead screw is shown
1. On when motor one reaches top and start button is pressed
2. Rotates continuously in one direction
3. Off when Motor 1 reaches the bottom limit switch
4.4 MOTOR 4
1. On when secondary push button is held down before the paint cycle starts
2. Continuously drives until it hits a limit switch, which causes it to reverse direction
3. If push button is released the next press will drive in the opposite direction
10
5 ELECTRONICS DESIGN
Figure 10 - System Block Diagram
5.1 RAMPS 1.4
The RepRap Mega Pololu Shield (RAMPS) has been
designed to facilitate control of a RepRap 3D printer.
RAMPS interfaces with an Arduino Mega 2560 and
the modular design includes plug in A4988 stepper
drivers and extruder control electronics. For this
project the board is used to control four stepper motors,
4 limit switches and 2 momentary switches.
The RAMPS 1.4 was chosen because of its low cost and its ability to control up to five stepper motors.
Figure 11 - RAMPS 1.4 board
11
5.2 ARDUINO MEGA 2560
The Arduino Mega 2560 is a microcontroller board
based on the ATmega2560. It has 54 digital input/output
pins (of which 15 can be used as PWM outputs), 16
analog inputs, 4 UARTs (hardware serial ports), a 16
MHz crystal oscillator, a USB connection, a power jack,
an ICSP header, and a reset button. For this project I am
powering the board with a 12V 6amp extra laptop power
supply.
The Arduino Mega 2560 was chosen because it is required for the RAMPS 1.4 shield.
5.3 A4988 DRIVER
The A4988 stepper motor driver carrier is a breakout board
for Allegro’s A4988 microstepping bipolar stepper motor
driver. The driver features adjustable current limiting,
overcurrent and over temperature protection, and five
different microstep resolutions (down to 1/16-step). It
operates from 8 – 35 V and can deliver up to
approximately 1 A per phase without a heat sink or forced
air flow (it is rated for 2 A per coil with sufficient additional cooling).
The A4988 drivers were chosen because they are required for the RAMPS 1.4 shield.
Figure 12 - Arduino Mega 2560
Figure 13 - A4988 driver
12
5.4 NEMA 17 STEPPER MOTOR
Stepper motors provide more precise control over projects
because they utilize a separate pulse for each step. The
NEMA-17 will only enter a continuous rotation as the
digital pulses grow in frequencies. The speed of this
rotation is proportionate to the frequency of the pulses.
Here are some of the key characteristics of the motor:
 Step Angle Accuracy: ±5%(full step, no load)
 Frame size 42 x 42mm
 Shaft diameter Φ5mm
 Number of Leads 4
 Step Angle 1.8°
 Holding Torque 59Ncm(83.6oz.in)
 Rated Current/phase 2.0A
6 CONCLUSION
The robot is successfully able to paint 3D printed parts and assemblies. The project as a whole can be
developed further to incorporate advanced kinematics and CAD/CAM geometries. An ideal system
would have software that would allow a user to upload a 3D model of their part. The system would
determine the optimal paint path and when a user fixtured their part with Velcro the robot would then coat
the part.
7 ACKNOWLEDGEMENTS
I would like to thank my father for helping me assemble the enclosure and motor mounts, my girlfriend
for putting up with my countless hours of tinkering in our apartment and my best friend Kevin for his
advice on the Arduino programming.
Figure 14 - NEMA 17 Stepper Motor
13
8 APPENDIX A - WIRING DIAGRAM
This open source wiring diagram for the RAMPS Shield was very helpful when wiring my project.
Figure 15 - Wiring Diagram
14
9 APPENDIX B - BILL OF MATERIALS
10 APPENDIX C – ARDUINO SKETCH
//MOTOR 4
//Low = forward (from motor)
//high = backward (to motor)
#define X_STEP_PIN 54
#define X_DIR_PIN 55
#define X_ENABLE_PIN 38
//Most backwards
#define X_MIN_PIN 3
//Most forwards
#define X_MAX_PIN 2
//MOTOR 1
//Low = up
//High = down
#define Y_STEP_PIN 60
#define Y_DIR_PIN 61
#define Y_ENABLE_PIN 56
15
//Lowest
#define Y_MIN_PIN 14
//Highest
#define Y_MAX_PIN 15
//MOTOR 2
#define Z_STEP_PIN 46
#define Z_DIR_PIN 48
#define Z_ENABLE_PIN 62
#define Z_MIN_PIN 18
#define Z_MAX_PIN 19
//Redefining pins
#define START_PIN Z_MIN_PIN
#define M4_PIN Z_MAX_PIN
//MOTOR 3
#define E_STEP_PIN 26
#define E_DIR_PIN 28
#define E_ENABLE_PIN 24
#define LED_PIN 13
#define PS_ON_PIN 12
#define KILL_PIN -1
#define FULL_REVOLUTION 200
#define MOTOR1_DOWN 50
#define MOTOR2_WIGGLE 15
#define MOTOR2_RETRACT 25
#define DELAY_TIME 1500
#define LOOP_STEPS 20
#define DIR_LEVEL(dir) (dir > 0 ? HIGH : LOW)
int lastXDir = -LOOP_STEPS;
int xDir = 0, yDir = 0, zDir = 0, eDir = 0;
int xCount = 0, yCount = 0, zCount = 0, eCount = 0;
boolean xMinHit = false, xMaxHit = false, yMinHit = false, yMaxHit = false;
enum STATE {
PREP,
PAINT,
PAINT_MOTOR2,
RETRACT,
DONE
16
};
STATE state = PREP;
boolean retractSet = false;
boolean m4Pressed = false;
boolean startPressed = false;
void setup() {
pinMode(LED_PIN , OUTPUT);
pinMode(X_STEP_PIN , OUTPUT);
pinMode(X_DIR_PIN , OUTPUT);
pinMode(X_ENABLE_PIN , OUTPUT);
pinMode(X_MIN_PIN, INPUT_PULLUP);
pinMode(X_MAX_PIN, INPUT_PULLUP);
pinMode(Y_STEP_PIN , OUTPUT);
pinMode(Y_DIR_PIN , OUTPUT);
pinMode(Y_ENABLE_PIN , OUTPUT);
pinMode(Y_MIN_PIN, INPUT_PULLUP);
pinMode(Y_MAX_PIN, INPUT_PULLUP);
pinMode(Z_STEP_PIN , OUTPUT);
pinMode(Z_DIR_PIN , OUTPUT);
pinMode(Z_ENABLE_PIN , OUTPUT);
pinMode(E_STEP_PIN , OUTPUT);
pinMode(E_DIR_PIN , OUTPUT);
pinMode(E_ENABLE_PIN , OUTPUT);
pinMode(START_PIN, INPUT_PULLUP);
pinMode(M4_PIN, INPUT_PULLUP);
digitalWrite(X_ENABLE_PIN , LOW);
digitalWrite(Y_ENABLE_PIN , LOW);
digitalWrite(Z_ENABLE_PIN , LOW);
digitalWrite(E_ENABLE_PIN , LOW);
}
void loop() {
switch(state) {
case PREP:
prepLoop();
break;
case PAINT:
17
case PAINT_MOTOR2:
paintLoop();
break;
case RETRACT:
retractLoop();
break;
case DONE:
return;
}
stepMotors();
}
void prepLoop() {
if(yMaxHit) {
yDir = 0;
} else {
yDir = -LOOP_STEPS;
}
if(digitalRead(M4_PIN)) {
if(!m4Pressed) {
m4Pressed = true;
lastXDir = -lastXDir;
}
if(xMaxHit) {
xMaxHit = false;
lastXDir = LOOP_STEPS;
}
if(xMinHit) {
xMinHit = false;
lastXDir = -LOOP_STEPS;
}
xDir = lastXDir;
} else {
m4Pressed = false;
}
if(digitalRead(START_PIN)) {
state = PAINT;
startPressed = true;
yMinHit = yMaxHit = false;
}
}
void paintLoop() {
eDir = 1;
if(digitalRead(START_PIN)) {
18
if(!startPressed) {
startPressed = true;
if(state == PAINT) {
state = PAINT_MOTOR2;
} else {
state = PAINT;
zDir = -zCount;
}
}
} else {
startPressed = false;
}
if(state == PAINT_MOTOR2) {
if(zDir == 0) {
if(zCount < 0) {
zDir = MOTOR2_WIGGLE - zCount;
} else {
zDir = -MOTOR2_WIGGLE - zCount;
}
}
}
if((eCount % FULL_REVOLUTION) == 0) {
if(yMinHit) {
state = RETRACT;
eDir = 0;
} else {
yDir += MOTOR1_DOWN;
}
}
}
void retractLoop() {
if(!retractSet) {
zDir = zCount >= 0 ? MOTOR2_RETRACT - zCount : -(MOTOR2_RETRACT + zCount);
retractSet = true;
}
if(zDir == 0) {
state = DONE;
}
}
void stepMotors() {
digitalWrite(X_DIR_PIN, DIR_LEVEL(xDir));
digitalWrite(Y_DIR_PIN, DIR_LEVEL(yDir));
digitalWrite(Z_DIR_PIN, DIR_LEVEL(zDir));
digitalWrite(E_DIR_PIN, DIR_LEVEL(eDir));
19
if(zDir) {
digitalWrite(Z_STEP_PIN, HIGH);
}
if(eDir) {
digitalWrite(E_STEP_PIN, HIGH);
}
for(int i = 0; i < 10; i++) {
checkLimitSwitch(Y_MIN_PIN, false, &yDir, &yMinHit);
checkLimitSwitch(Y_MAX_PIN, true, &yDir, &yMaxHit);
if(yDir) {
digitalWrite(Y_STEP_PIN, HIGH);
}
for(int j = 0; j < 2; j++) {
checkLimitSwitch(X_MIN_PIN, false, &xDir, &xMinHit);
checkLimitSwitch(X_MAX_PIN, true, &xDir, &xMaxHit);
if(xDir) {
digitalWrite(X_STEP_PIN, HIGH);
}
delayMicroseconds(DELAY_TIME);
if(xDir) {
digitalWrite(X_STEP_PIN, LOW);
updateCounts(&xCount, &xDir);
}
}
if(yDir) {
digitalWrite(Y_STEP_PIN, LOW);
updateCounts(&yCount, &yDir);
}
}
if(zDir) {
digitalWrite(Z_STEP_PIN, LOW);
updateCounts(&zCount, &zDir);
}
if(eDir) {
digitalWrite(E_STEP_PIN, LOW);
updateCounts(&eCount, &eDir);
}
}
void checkLimitSwitch(int switchPin, boolean isHigh, int* dir, boolean* limitFlag) {
if(digitalRead(switchPin)) {
20
*limitFlag = true;
if(*dir != 0 && ((isHigh && *dir < 0) || (!isHigh && *dir > 0))) {
*dir = 0;
digitalWrite(LED_PIN, HIGH);
} else {
digitalWrite(LED_PIN, LOW);
}
}
}
void updateCounts(int* count, int* dir) {
if(*dir > 0) {
(*count)++;
(*dir)--;
} else {
(*count)--;
(*dir)++;
}
}
void old_loop () {
if (digitalRead(X_MIN_PIN)) {
digitalWrite(X_DIR_PIN , HIGH);
digitalWrite(Y_DIR_PIN , HIGH);
digitalWrite(Z_DIR_PIN , HIGH);
digitalWrite(E_DIR_PIN , HIGH);
}
else {
digitalWrite(X_DIR_PIN , LOW);
digitalWrite(Y_DIR_PIN , LOW);
digitalWrite(Z_DIR_PIN , LOW);
digitalWrite(E_DIR_PIN , LOW);
}
digitalWrite(X_STEP_PIN , HIGH);
digitalWrite(Y_STEP_PIN , HIGH);
digitalWrite(Z_STEP_PIN , HIGH);
digitalWrite(E_STEP_PIN , HIGH);
delay(10);
digitalWrite(X_STEP_PIN , LOW);
digitalWrite(Y_STEP_PIN , LOW);
digitalWrite(Z_STEP_PIN , LOW);
digitalWrite(E_STEP_PIN , LOW);
}

More Related Content

Similar to Research and Developmetn of an Automated Airbrush Paint Spraying Robot

Minor_Project_Report
Minor_Project_ReportMinor_Project_Report
Minor_Project_ReportVansh Kumar
 
Toro multi pro 5700-d sprayer service repair manual
Toro multi pro 5700-d sprayer service repair manualToro multi pro 5700-d sprayer service repair manual
Toro multi pro 5700-d sprayer service repair manualjfskemsemm
 
Toro multi pro 5800 sprayer service repair manual
Toro multi pro 5800 sprayer service repair manualToro multi pro 5800 sprayer service repair manual
Toro multi pro 5800 sprayer service repair manualdhjfjkmmmde
 
Toro multi pro 5800 sprayer service repair manual
Toro multi pro 5800 sprayer service repair manualToro multi pro 5800 sprayer service repair manual
Toro multi pro 5800 sprayer service repair manualfhsjekkdkem
 
Manual de servicio toyota / KIJYANG INNOVA / ONNOVA 1KD/2KD
Manual de servicio toyota / KIJYANG INNOVA / ONNOVA 1KD/2KDManual de servicio toyota / KIJYANG INNOVA / ONNOVA 1KD/2KD
Manual de servicio toyota / KIJYANG INNOVA / ONNOVA 1KD/2KDJordan Felipe Cabrera Nuñez
 
Design and fabrication of geneva mechanism based punching machine
Design and fabrication of geneva mechanism based punching machineDesign and fabrication of geneva mechanism based punching machine
Design and fabrication of geneva mechanism based punching machinechockalingam athilingam
 
Yamaha edl13000 te generator service repair manual
Yamaha edl13000 te generator service repair manualYamaha edl13000 te generator service repair manual
Yamaha edl13000 te generator service repair manualfujdjsfjkskeemem
 
Yamaha edl13000 te generator service repair manual
Yamaha edl13000 te generator service repair manualYamaha edl13000 te generator service repair manual
Yamaha edl13000 te generator service repair manualdfujjsefkemm
 
Yamaha edl13000 te generator service repair manual
Yamaha edl13000 te generator service repair manualYamaha edl13000 te generator service repair manual
Yamaha edl13000 te generator service repair manualfujjfdjjskkfemm
 
Yamaha edl13000 te generator service repair manual
Yamaha edl13000 te generator service repair manualYamaha edl13000 te generator service repair manual
Yamaha edl13000 te generator service repair manualfujsjejfkskekem
 
6.atomatic clutch and breking system 2
6.atomatic clutch and breking system 26.atomatic clutch and breking system 2
6.atomatic clutch and breking system 2Sathis Kumar
 
6.0 l dies
6.0 l dies6.0 l dies
6.0 l diesrukford
 
6.0 l dies
6.0 l dies6.0 l dies
6.0 l diesrukford
 
Toro reelmaster 2000 d mower service repair manual
Toro reelmaster 2000 d mower service repair manualToro reelmaster 2000 d mower service repair manual
Toro reelmaster 2000 d mower service repair manualufjdjfjkskefmme
 
Toro reelmaster 2000 d mower service repair manual
Toro reelmaster 2000 d mower service repair manualToro reelmaster 2000 d mower service repair manual
Toro reelmaster 2000 d mower service repair manualufjjjsejfjksekm
 
Toro reelmaster 2000 d mower service repair manual
Toro reelmaster 2000 d mower service repair manualToro reelmaster 2000 d mower service repair manual
Toro reelmaster 2000 d mower service repair manualfusjfjskefksmem
 
Toro groundsmaster 4500 d service repair manual
Toro groundsmaster 4500 d service repair manualToro groundsmaster 4500 d service repair manual
Toro groundsmaster 4500 d service repair manualkfdjkskdmm
 
Toro groundsmaster 4700 d service repair manual
Toro groundsmaster 4700 d service repair manualToro groundsmaster 4700 d service repair manual
Toro groundsmaster 4700 d service repair manualfjskekmmem
 

Similar to Research and Developmetn of an Automated Airbrush Paint Spraying Robot (19)

Minor_Project_Report
Minor_Project_ReportMinor_Project_Report
Minor_Project_Report
 
Toro multi pro 5700-d sprayer service repair manual
Toro multi pro 5700-d sprayer service repair manualToro multi pro 5700-d sprayer service repair manual
Toro multi pro 5700-d sprayer service repair manual
 
Toro multi pro 5800 sprayer service repair manual
Toro multi pro 5800 sprayer service repair manualToro multi pro 5800 sprayer service repair manual
Toro multi pro 5800 sprayer service repair manual
 
Toro multi pro 5800 sprayer service repair manual
Toro multi pro 5800 sprayer service repair manualToro multi pro 5800 sprayer service repair manual
Toro multi pro 5800 sprayer service repair manual
 
Manual de servicio toyota / KIJYANG INNOVA / ONNOVA 1KD/2KD
Manual de servicio toyota / KIJYANG INNOVA / ONNOVA 1KD/2KDManual de servicio toyota / KIJYANG INNOVA / ONNOVA 1KD/2KD
Manual de servicio toyota / KIJYANG INNOVA / ONNOVA 1KD/2KD
 
Design and fabrication of geneva mechanism based punching machine
Design and fabrication of geneva mechanism based punching machineDesign and fabrication of geneva mechanism based punching machine
Design and fabrication of geneva mechanism based punching machine
 
Yamaha edl13000 te generator service repair manual
Yamaha edl13000 te generator service repair manualYamaha edl13000 te generator service repair manual
Yamaha edl13000 te generator service repair manual
 
Yamaha edl13000 te generator service repair manual
Yamaha edl13000 te generator service repair manualYamaha edl13000 te generator service repair manual
Yamaha edl13000 te generator service repair manual
 
Yamaha edl13000 te generator service repair manual
Yamaha edl13000 te generator service repair manualYamaha edl13000 te generator service repair manual
Yamaha edl13000 te generator service repair manual
 
Yamaha edl13000 te generator service repair manual
Yamaha edl13000 te generator service repair manualYamaha edl13000 te generator service repair manual
Yamaha edl13000 te generator service repair manual
 
6.atomatic clutch and breking system 2
6.atomatic clutch and breking system 26.atomatic clutch and breking system 2
6.atomatic clutch and breking system 2
 
6.0 l dies
6.0 l dies6.0 l dies
6.0 l dies
 
6.0 l dies
6.0 l dies6.0 l dies
6.0 l dies
 
Toro reelmaster 2000 d mower service repair manual
Toro reelmaster 2000 d mower service repair manualToro reelmaster 2000 d mower service repair manual
Toro reelmaster 2000 d mower service repair manual
 
Toro reelmaster 2000 d mower service repair manual
Toro reelmaster 2000 d mower service repair manualToro reelmaster 2000 d mower service repair manual
Toro reelmaster 2000 d mower service repair manual
 
Toro reelmaster 2000 d mower service repair manual
Toro reelmaster 2000 d mower service repair manualToro reelmaster 2000 d mower service repair manual
Toro reelmaster 2000 d mower service repair manual
 
report_komal
report_komalreport_komal
report_komal
 
Toro groundsmaster 4500 d service repair manual
Toro groundsmaster 4500 d service repair manualToro groundsmaster 4500 d service repair manual
Toro groundsmaster 4500 d service repair manual
 
Toro groundsmaster 4700 d service repair manual
Toro groundsmaster 4700 d service repair manualToro groundsmaster 4700 d service repair manual
Toro groundsmaster 4700 d service repair manual
 

Recently uploaded

INFLUENCE OF NANOSILICA ON THE PROPERTIES OF CONCRETE
INFLUENCE OF NANOSILICA ON THE PROPERTIES OF CONCRETEINFLUENCE OF NANOSILICA ON THE PROPERTIES OF CONCRETE
INFLUENCE OF NANOSILICA ON THE PROPERTIES OF CONCRETEroselinkalist12
 
CCS355 Neural Network & Deep Learning Unit II Notes with Question bank .pdf
CCS355 Neural Network & Deep Learning Unit II Notes with Question bank .pdfCCS355 Neural Network & Deep Learning Unit II Notes with Question bank .pdf
CCS355 Neural Network & Deep Learning Unit II Notes with Question bank .pdfAsst.prof M.Gokilavani
 
Why does (not) Kafka need fsync: Eliminating tail latency spikes caused by fsync
Why does (not) Kafka need fsync: Eliminating tail latency spikes caused by fsyncWhy does (not) Kafka need fsync: Eliminating tail latency spikes caused by fsync
Why does (not) Kafka need fsync: Eliminating tail latency spikes caused by fsyncssuser2ae721
 
Study on Air-Water & Water-Water Heat Exchange in a Finned Tube Exchanger
Study on Air-Water & Water-Water Heat Exchange in a Finned Tube ExchangerStudy on Air-Water & Water-Water Heat Exchange in a Finned Tube Exchanger
Study on Air-Water & Water-Water Heat Exchange in a Finned Tube ExchangerAnamika Sarkar
 
CCS355 Neural Networks & Deep Learning Unit 1 PDF notes with Question bank .pdf
CCS355 Neural Networks & Deep Learning Unit 1 PDF notes with Question bank .pdfCCS355 Neural Networks & Deep Learning Unit 1 PDF notes with Question bank .pdf
CCS355 Neural Networks & Deep Learning Unit 1 PDF notes with Question bank .pdfAsst.prof M.Gokilavani
 
Instrumentation, measurement and control of bio process parameters ( Temperat...
Instrumentation, measurement and control of bio process parameters ( Temperat...Instrumentation, measurement and control of bio process parameters ( Temperat...
Instrumentation, measurement and control of bio process parameters ( Temperat...121011101441
 
Work Experience-Dalton Park.pptxfvvvvvvv
Work Experience-Dalton Park.pptxfvvvvvvvWork Experience-Dalton Park.pptxfvvvvvvv
Work Experience-Dalton Park.pptxfvvvvvvvLewisJB
 
Gfe Mayur Vihar Call Girls Service WhatsApp -> 9999965857 Available 24x7 ^ De...
Gfe Mayur Vihar Call Girls Service WhatsApp -> 9999965857 Available 24x7 ^ De...Gfe Mayur Vihar Call Girls Service WhatsApp -> 9999965857 Available 24x7 ^ De...
Gfe Mayur Vihar Call Girls Service WhatsApp -> 9999965857 Available 24x7 ^ De...srsj9000
 
Electronically Controlled suspensions system .pdf
Electronically Controlled suspensions system .pdfElectronically Controlled suspensions system .pdf
Electronically Controlled suspensions system .pdfme23b1001
 
Oxy acetylene welding presentation note.
Oxy acetylene welding presentation note.Oxy acetylene welding presentation note.
Oxy acetylene welding presentation note.eptoze12
 
UNIT III ANALOG ELECTRONICS (BASIC ELECTRONICS)
UNIT III ANALOG ELECTRONICS (BASIC ELECTRONICS)UNIT III ANALOG ELECTRONICS (BASIC ELECTRONICS)
UNIT III ANALOG ELECTRONICS (BASIC ELECTRONICS)Dr SOUNDIRARAJ N
 
Application of Residue Theorem to evaluate real integrations.pptx
Application of Residue Theorem to evaluate real integrations.pptxApplication of Residue Theorem to evaluate real integrations.pptx
Application of Residue Theorem to evaluate real integrations.pptx959SahilShah
 
IVE Industry Focused Event - Defence Sector 2024
IVE Industry Focused Event - Defence Sector 2024IVE Industry Focused Event - Defence Sector 2024
IVE Industry Focused Event - Defence Sector 2024Mark Billinghurst
 
An experimental study in using natural admixture as an alternative for chemic...
An experimental study in using natural admixture as an alternative for chemic...An experimental study in using natural admixture as an alternative for chemic...
An experimental study in using natural admixture as an alternative for chemic...Chandu841456
 
Introduction-To-Agricultural-Surveillance-Rover.pptx
Introduction-To-Agricultural-Surveillance-Rover.pptxIntroduction-To-Agricultural-Surveillance-Rover.pptx
Introduction-To-Agricultural-Surveillance-Rover.pptxk795866
 
What are the advantages and disadvantages of membrane structures.pptx
What are the advantages and disadvantages of membrane structures.pptxWhat are the advantages and disadvantages of membrane structures.pptx
What are the advantages and disadvantages of membrane structures.pptxwendy cai
 
Arduino_CSE ece ppt for working and principal of arduino.ppt
Arduino_CSE ece ppt for working and principal of arduino.pptArduino_CSE ece ppt for working and principal of arduino.ppt
Arduino_CSE ece ppt for working and principal of arduino.pptSAURABHKUMAR892774
 
Heart Disease Prediction using machine learning.pptx
Heart Disease Prediction using machine learning.pptxHeart Disease Prediction using machine learning.pptx
Heart Disease Prediction using machine learning.pptxPoojaBan
 

Recently uploaded (20)

INFLUENCE OF NANOSILICA ON THE PROPERTIES OF CONCRETE
INFLUENCE OF NANOSILICA ON THE PROPERTIES OF CONCRETEINFLUENCE OF NANOSILICA ON THE PROPERTIES OF CONCRETE
INFLUENCE OF NANOSILICA ON THE PROPERTIES OF CONCRETE
 
CCS355 Neural Network & Deep Learning Unit II Notes with Question bank .pdf
CCS355 Neural Network & Deep Learning Unit II Notes with Question bank .pdfCCS355 Neural Network & Deep Learning Unit II Notes with Question bank .pdf
CCS355 Neural Network & Deep Learning Unit II Notes with Question bank .pdf
 
Why does (not) Kafka need fsync: Eliminating tail latency spikes caused by fsync
Why does (not) Kafka need fsync: Eliminating tail latency spikes caused by fsyncWhy does (not) Kafka need fsync: Eliminating tail latency spikes caused by fsync
Why does (not) Kafka need fsync: Eliminating tail latency spikes caused by fsync
 
Study on Air-Water & Water-Water Heat Exchange in a Finned Tube Exchanger
Study on Air-Water & Water-Water Heat Exchange in a Finned Tube ExchangerStudy on Air-Water & Water-Water Heat Exchange in a Finned Tube Exchanger
Study on Air-Water & Water-Water Heat Exchange in a Finned Tube Exchanger
 
CCS355 Neural Networks & Deep Learning Unit 1 PDF notes with Question bank .pdf
CCS355 Neural Networks & Deep Learning Unit 1 PDF notes with Question bank .pdfCCS355 Neural Networks & Deep Learning Unit 1 PDF notes with Question bank .pdf
CCS355 Neural Networks & Deep Learning Unit 1 PDF notes with Question bank .pdf
 
Instrumentation, measurement and control of bio process parameters ( Temperat...
Instrumentation, measurement and control of bio process parameters ( Temperat...Instrumentation, measurement and control of bio process parameters ( Temperat...
Instrumentation, measurement and control of bio process parameters ( Temperat...
 
Work Experience-Dalton Park.pptxfvvvvvvv
Work Experience-Dalton Park.pptxfvvvvvvvWork Experience-Dalton Park.pptxfvvvvvvv
Work Experience-Dalton Park.pptxfvvvvvvv
 
Gfe Mayur Vihar Call Girls Service WhatsApp -> 9999965857 Available 24x7 ^ De...
Gfe Mayur Vihar Call Girls Service WhatsApp -> 9999965857 Available 24x7 ^ De...Gfe Mayur Vihar Call Girls Service WhatsApp -> 9999965857 Available 24x7 ^ De...
Gfe Mayur Vihar Call Girls Service WhatsApp -> 9999965857 Available 24x7 ^ De...
 
Electronically Controlled suspensions system .pdf
Electronically Controlled suspensions system .pdfElectronically Controlled suspensions system .pdf
Electronically Controlled suspensions system .pdf
 
Oxy acetylene welding presentation note.
Oxy acetylene welding presentation note.Oxy acetylene welding presentation note.
Oxy acetylene welding presentation note.
 
UNIT III ANALOG ELECTRONICS (BASIC ELECTRONICS)
UNIT III ANALOG ELECTRONICS (BASIC ELECTRONICS)UNIT III ANALOG ELECTRONICS (BASIC ELECTRONICS)
UNIT III ANALOG ELECTRONICS (BASIC ELECTRONICS)
 
young call girls in Rajiv Chowk🔝 9953056974 🔝 Delhi escort Service
young call girls in Rajiv Chowk🔝 9953056974 🔝 Delhi escort Serviceyoung call girls in Rajiv Chowk🔝 9953056974 🔝 Delhi escort Service
young call girls in Rajiv Chowk🔝 9953056974 🔝 Delhi escort Service
 
Application of Residue Theorem to evaluate real integrations.pptx
Application of Residue Theorem to evaluate real integrations.pptxApplication of Residue Theorem to evaluate real integrations.pptx
Application of Residue Theorem to evaluate real integrations.pptx
 
Call Us -/9953056974- Call Girls In Vikaspuri-/- Delhi NCR
Call Us -/9953056974- Call Girls In Vikaspuri-/- Delhi NCRCall Us -/9953056974- Call Girls In Vikaspuri-/- Delhi NCR
Call Us -/9953056974- Call Girls In Vikaspuri-/- Delhi NCR
 
IVE Industry Focused Event - Defence Sector 2024
IVE Industry Focused Event - Defence Sector 2024IVE Industry Focused Event - Defence Sector 2024
IVE Industry Focused Event - Defence Sector 2024
 
An experimental study in using natural admixture as an alternative for chemic...
An experimental study in using natural admixture as an alternative for chemic...An experimental study in using natural admixture as an alternative for chemic...
An experimental study in using natural admixture as an alternative for chemic...
 
Introduction-To-Agricultural-Surveillance-Rover.pptx
Introduction-To-Agricultural-Surveillance-Rover.pptxIntroduction-To-Agricultural-Surveillance-Rover.pptx
Introduction-To-Agricultural-Surveillance-Rover.pptx
 
What are the advantages and disadvantages of membrane structures.pptx
What are the advantages and disadvantages of membrane structures.pptxWhat are the advantages and disadvantages of membrane structures.pptx
What are the advantages and disadvantages of membrane structures.pptx
 
Arduino_CSE ece ppt for working and principal of arduino.ppt
Arduino_CSE ece ppt for working and principal of arduino.pptArduino_CSE ece ppt for working and principal of arduino.ppt
Arduino_CSE ece ppt for working and principal of arduino.ppt
 
Heart Disease Prediction using machine learning.pptx
Heart Disease Prediction using machine learning.pptxHeart Disease Prediction using machine learning.pptx
Heart Disease Prediction using machine learning.pptx
 

Research and Developmetn of an Automated Airbrush Paint Spraying Robot

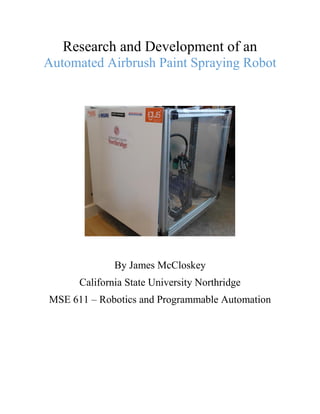
  • 1. Research and Development of an Automated Airbrush Paint Spraying Robot By James McCloskey California State University Northridge MSE 611 – Robotics and Programmable Automation
  • 2. 2 1 CONTENTS 2 Introduction...........................................................................................................................................3 3 Project Planning and Requirements ......................................................................................................4 3.1 Enclosure: .....................................................................................................................................4 3.2 End Effector:.................................................................................................................................4 3.3 Actuators:......................................................................................................................................5 3.4 Electronics: ...................................................................................................................................6 4 Motor Requirements .............................................................................................................................7 4.1 Motor 1..........................................................................................................................................7 4.2 Motor 2..........................................................................................................................................8 4.3 Motor 3..........................................................................................................................................9 4.4 Motor 4..........................................................................................................................................9 5 Electronics Design ..............................................................................................................................10 5.1 RAMPS 1.4.................................................................................................................................10 5.2 Arduino Mega 2560 ....................................................................................................................11 5.3 A4988 driver...............................................................................................................................11 5.4 NEMA 17 Stepper Motor............................................................................................................12 6 Conclusion ..........................................................................................................................................12 7 Acknowledgements.............................................................................................................................12 8 Appendix A - Wiring Diagram ...........................................................................................................13 9 Appendix B - Bill of Materials ...........................................................................................................14 10 Appendix C – Arduino Sketch........................................................................................................14
  • 3. 3 2 INTRODUCTION One of the main limitations with hobbyist 3D printing is that most printers are single filament extrusion and print parts using monochromatic filament. Many hobbyists are forced to spend hundreds of dollars to acquire a collection of multi-colored filaments in order to produce parts in any color. One possible solution to avoid having to purchase multiple spools of pre-colored filament is to airbrush the produced 3D printed parts. Airbrushing produces a streak-free, professional coat of paint that is generally superior to hand painting an object. However, airbrushing a 3D printed part or assembly must be done manually, is time consuming and is heavily dependent on the skill of the artist. The process is prone to human error and often requires multiple rounds of touch ups and rework. This can deter many hobbyists from painting their parts. This project aims to solve these problems by automating the airbrushing of 3D printed parts and assemblies with a low cost robot. Figure 1 - Picture of the robot painting a 3D printed four jaw gripper assembly.
  • 4. 4 3 PROJECT PLANNING AND REQUIREMENTS The initial sketch for the robot encompassed five main features: 1. A box frame with panels will enclose the paint area 2. A filter and a ventilation fan 3. An air compressor and airbrush 4. The airbrush will be mounted to a vertical actuator 5. The work piece will be mounted to a rotational plate 3.1 ENCLOSURE: After defining these initial criteria I purchased a 20” box fan from Home Depot. The box fan was measured and an aluminum extrusion 30-30 frame was ordered from MiSUMi using a -$150 promotion, essentially making the aluminum frame free. Once the aluminum frame was built, I purchased a sheet of wood, cut it to size and press fit it into place to create the floor of the robot. The aluminum side panels, plexiglass panel, vinyl cover and Velcro inserts were ordered, cut to size and assembled. 3.2 END EFFECTOR: After defining the initial criteria I purchased an airbrush - air compressor kit from Harbor Freight Tools along with additional airbrush accessories. The airbrush was mounted to the vertical belt drive to spray parts that rotate on the plate. Figure 2 - Sketch of the robot Figure 3 - Robot End Effector (left) and rotating part plate (right)
  • 5. 5 3.3 ACTUATORS: Figure 4 - Drilling holes to mount the various motors The next step after building the enclosure was to order a ZLW belt drive from igus as part of their Y.E.S. program. The belt drive was chosen after calculating the estimated airbrush payload and required motor torque. The vertical belt drive actuator was mounted in the enclosure and the stepper motors were installed. The linear guide was a free sample from igus and a machined nut was mounted underneath the carriage. A motor coupled to a lead screw rotates pulling the carriage toward or away from the vertical belt drive actuator when given a command from the microcontroller.
  • 6. 6 3.4 ELECTRONICS: Figure 5 - Arduino wiring and enclosure An Arduino Mega with a RAMPS 1.4 shield and four A4988 stepper motor drivers were chosen to control the four stepper motors. Four NEMA-17 stepper motors were chosen because my initial calculations showed that they were able to move each of the payloads. The stepper motors also allowed more accuracy if desired when programming. The Arduino is housed inside of a case that I designed and 3d printed on my own 3d printer.
  • 7. 7 4 MOTOR REQUIREMENTS Figure 6 - Motor positions from top view 4.1 MOTOR 1 1. On when power to system 2. Drives forward until carriage hits a limit switch a. Calculated that 50 steps = 0.5 inches of vertical movement 3. Once the motor reaches the top it will wait until the start button is hit Motor 1 Motor 2 Motor 3 Motor 4 Figure 7 - Depiction of paint coverage as motor 1 drives the carriage down
  • 8. 8 4. When the start button is pressed the motor will step down 50 steps for each full revolution of motor 3 5. Off when reaches the bottom 6. Restart of power required to restart motor 4.2 MOTOR 2 Figure 8 – Depiction of activated motor 2 moving the airbrush side to side 1. On when start button is pressed after the paint cycle has occurred 2. Assumed to be in center at system start 3. Medium speed rotates approx. 30 degrees left of center to 30 degrees right of center 4. Off when the start button is pressed during the paint cycle and returns back to start position center
  • 9. 9 4.3 MOTOR 3 Figure 9 – Depiction of motor 3 on linear guide with lead screw, also underside of lead screw is shown 1. On when motor one reaches top and start button is pressed 2. Rotates continuously in one direction 3. Off when Motor 1 reaches the bottom limit switch 4.4 MOTOR 4 1. On when secondary push button is held down before the paint cycle starts 2. Continuously drives until it hits a limit switch, which causes it to reverse direction 3. If push button is released the next press will drive in the opposite direction
  • 10. 10 5 ELECTRONICS DESIGN Figure 10 - System Block Diagram 5.1 RAMPS 1.4 The RepRap Mega Pololu Shield (RAMPS) has been designed to facilitate control of a RepRap 3D printer. RAMPS interfaces with an Arduino Mega 2560 and the modular design includes plug in A4988 stepper drivers and extruder control electronics. For this project the board is used to control four stepper motors, 4 limit switches and 2 momentary switches. The RAMPS 1.4 was chosen because of its low cost and its ability to control up to five stepper motors. Figure 11 - RAMPS 1.4 board
  • 11. 11 5.2 ARDUINO MEGA 2560 The Arduino Mega 2560 is a microcontroller board based on the ATmega2560. It has 54 digital input/output pins (of which 15 can be used as PWM outputs), 16 analog inputs, 4 UARTs (hardware serial ports), a 16 MHz crystal oscillator, a USB connection, a power jack, an ICSP header, and a reset button. For this project I am powering the board with a 12V 6amp extra laptop power supply. The Arduino Mega 2560 was chosen because it is required for the RAMPS 1.4 shield. 5.3 A4988 DRIVER The A4988 stepper motor driver carrier is a breakout board for Allegro’s A4988 microstepping bipolar stepper motor driver. The driver features adjustable current limiting, overcurrent and over temperature protection, and five different microstep resolutions (down to 1/16-step). It operates from 8 – 35 V and can deliver up to approximately 1 A per phase without a heat sink or forced air flow (it is rated for 2 A per coil with sufficient additional cooling). The A4988 drivers were chosen because they are required for the RAMPS 1.4 shield. Figure 12 - Arduino Mega 2560 Figure 13 - A4988 driver
  • 12. 12 5.4 NEMA 17 STEPPER MOTOR Stepper motors provide more precise control over projects because they utilize a separate pulse for each step. The NEMA-17 will only enter a continuous rotation as the digital pulses grow in frequencies. The speed of this rotation is proportionate to the frequency of the pulses. Here are some of the key characteristics of the motor:  Step Angle Accuracy: ±5%(full step, no load)  Frame size 42 x 42mm  Shaft diameter Φ5mm  Number of Leads 4  Step Angle 1.8°  Holding Torque 59Ncm(83.6oz.in)  Rated Current/phase 2.0A 6 CONCLUSION The robot is successfully able to paint 3D printed parts and assemblies. The project as a whole can be developed further to incorporate advanced kinematics and CAD/CAM geometries. An ideal system would have software that would allow a user to upload a 3D model of their part. The system would determine the optimal paint path and when a user fixtured their part with Velcro the robot would then coat the part. 7 ACKNOWLEDGEMENTS I would like to thank my father for helping me assemble the enclosure and motor mounts, my girlfriend for putting up with my countless hours of tinkering in our apartment and my best friend Kevin for his advice on the Arduino programming. Figure 14 - NEMA 17 Stepper Motor
  • 13. 13 8 APPENDIX A - WIRING DIAGRAM This open source wiring diagram for the RAMPS Shield was very helpful when wiring my project. Figure 15 - Wiring Diagram
  • 14. 14 9 APPENDIX B - BILL OF MATERIALS 10 APPENDIX C – ARDUINO SKETCH //MOTOR 4 //Low = forward (from motor) //high = backward (to motor) #define X_STEP_PIN 54 #define X_DIR_PIN 55 #define X_ENABLE_PIN 38 //Most backwards #define X_MIN_PIN 3 //Most forwards #define X_MAX_PIN 2 //MOTOR 1 //Low = up //High = down #define Y_STEP_PIN 60 #define Y_DIR_PIN 61 #define Y_ENABLE_PIN 56
  • 15. 15 //Lowest #define Y_MIN_PIN 14 //Highest #define Y_MAX_PIN 15 //MOTOR 2 #define Z_STEP_PIN 46 #define Z_DIR_PIN 48 #define Z_ENABLE_PIN 62 #define Z_MIN_PIN 18 #define Z_MAX_PIN 19 //Redefining pins #define START_PIN Z_MIN_PIN #define M4_PIN Z_MAX_PIN //MOTOR 3 #define E_STEP_PIN 26 #define E_DIR_PIN 28 #define E_ENABLE_PIN 24 #define LED_PIN 13 #define PS_ON_PIN 12 #define KILL_PIN -1 #define FULL_REVOLUTION 200 #define MOTOR1_DOWN 50 #define MOTOR2_WIGGLE 15 #define MOTOR2_RETRACT 25 #define DELAY_TIME 1500 #define LOOP_STEPS 20 #define DIR_LEVEL(dir) (dir > 0 ? HIGH : LOW) int lastXDir = -LOOP_STEPS; int xDir = 0, yDir = 0, zDir = 0, eDir = 0; int xCount = 0, yCount = 0, zCount = 0, eCount = 0; boolean xMinHit = false, xMaxHit = false, yMinHit = false, yMaxHit = false; enum STATE { PREP, PAINT, PAINT_MOTOR2, RETRACT, DONE
  • 16. 16 }; STATE state = PREP; boolean retractSet = false; boolean m4Pressed = false; boolean startPressed = false; void setup() { pinMode(LED_PIN , OUTPUT); pinMode(X_STEP_PIN , OUTPUT); pinMode(X_DIR_PIN , OUTPUT); pinMode(X_ENABLE_PIN , OUTPUT); pinMode(X_MIN_PIN, INPUT_PULLUP); pinMode(X_MAX_PIN, INPUT_PULLUP); pinMode(Y_STEP_PIN , OUTPUT); pinMode(Y_DIR_PIN , OUTPUT); pinMode(Y_ENABLE_PIN , OUTPUT); pinMode(Y_MIN_PIN, INPUT_PULLUP); pinMode(Y_MAX_PIN, INPUT_PULLUP); pinMode(Z_STEP_PIN , OUTPUT); pinMode(Z_DIR_PIN , OUTPUT); pinMode(Z_ENABLE_PIN , OUTPUT); pinMode(E_STEP_PIN , OUTPUT); pinMode(E_DIR_PIN , OUTPUT); pinMode(E_ENABLE_PIN , OUTPUT); pinMode(START_PIN, INPUT_PULLUP); pinMode(M4_PIN, INPUT_PULLUP); digitalWrite(X_ENABLE_PIN , LOW); digitalWrite(Y_ENABLE_PIN , LOW); digitalWrite(Z_ENABLE_PIN , LOW); digitalWrite(E_ENABLE_PIN , LOW); } void loop() { switch(state) { case PREP: prepLoop(); break; case PAINT:
  • 17. 17 case PAINT_MOTOR2: paintLoop(); break; case RETRACT: retractLoop(); break; case DONE: return; } stepMotors(); } void prepLoop() { if(yMaxHit) { yDir = 0; } else { yDir = -LOOP_STEPS; } if(digitalRead(M4_PIN)) { if(!m4Pressed) { m4Pressed = true; lastXDir = -lastXDir; } if(xMaxHit) { xMaxHit = false; lastXDir = LOOP_STEPS; } if(xMinHit) { xMinHit = false; lastXDir = -LOOP_STEPS; } xDir = lastXDir; } else { m4Pressed = false; } if(digitalRead(START_PIN)) { state = PAINT; startPressed = true; yMinHit = yMaxHit = false; } } void paintLoop() { eDir = 1; if(digitalRead(START_PIN)) {
  • 18. 18 if(!startPressed) { startPressed = true; if(state == PAINT) { state = PAINT_MOTOR2; } else { state = PAINT; zDir = -zCount; } } } else { startPressed = false; } if(state == PAINT_MOTOR2) { if(zDir == 0) { if(zCount < 0) { zDir = MOTOR2_WIGGLE - zCount; } else { zDir = -MOTOR2_WIGGLE - zCount; } } } if((eCount % FULL_REVOLUTION) == 0) { if(yMinHit) { state = RETRACT; eDir = 0; } else { yDir += MOTOR1_DOWN; } } } void retractLoop() { if(!retractSet) { zDir = zCount >= 0 ? MOTOR2_RETRACT - zCount : -(MOTOR2_RETRACT + zCount); retractSet = true; } if(zDir == 0) { state = DONE; } } void stepMotors() { digitalWrite(X_DIR_PIN, DIR_LEVEL(xDir)); digitalWrite(Y_DIR_PIN, DIR_LEVEL(yDir)); digitalWrite(Z_DIR_PIN, DIR_LEVEL(zDir)); digitalWrite(E_DIR_PIN, DIR_LEVEL(eDir));
  • 19. 19 if(zDir) { digitalWrite(Z_STEP_PIN, HIGH); } if(eDir) { digitalWrite(E_STEP_PIN, HIGH); } for(int i = 0; i < 10; i++) { checkLimitSwitch(Y_MIN_PIN, false, &yDir, &yMinHit); checkLimitSwitch(Y_MAX_PIN, true, &yDir, &yMaxHit); if(yDir) { digitalWrite(Y_STEP_PIN, HIGH); } for(int j = 0; j < 2; j++) { checkLimitSwitch(X_MIN_PIN, false, &xDir, &xMinHit); checkLimitSwitch(X_MAX_PIN, true, &xDir, &xMaxHit); if(xDir) { digitalWrite(X_STEP_PIN, HIGH); } delayMicroseconds(DELAY_TIME); if(xDir) { digitalWrite(X_STEP_PIN, LOW); updateCounts(&xCount, &xDir); } } if(yDir) { digitalWrite(Y_STEP_PIN, LOW); updateCounts(&yCount, &yDir); } } if(zDir) { digitalWrite(Z_STEP_PIN, LOW); updateCounts(&zCount, &zDir); } if(eDir) { digitalWrite(E_STEP_PIN, LOW); updateCounts(&eCount, &eDir); } } void checkLimitSwitch(int switchPin, boolean isHigh, int* dir, boolean* limitFlag) { if(digitalRead(switchPin)) {
  • 20. 20 *limitFlag = true; if(*dir != 0 && ((isHigh && *dir < 0) || (!isHigh && *dir > 0))) { *dir = 0; digitalWrite(LED_PIN, HIGH); } else { digitalWrite(LED_PIN, LOW); } } } void updateCounts(int* count, int* dir) { if(*dir > 0) { (*count)++; (*dir)--; } else { (*count)--; (*dir)++; } } void old_loop () { if (digitalRead(X_MIN_PIN)) { digitalWrite(X_DIR_PIN , HIGH); digitalWrite(Y_DIR_PIN , HIGH); digitalWrite(Z_DIR_PIN , HIGH); digitalWrite(E_DIR_PIN , HIGH); } else { digitalWrite(X_DIR_PIN , LOW); digitalWrite(Y_DIR_PIN , LOW); digitalWrite(Z_DIR_PIN , LOW); digitalWrite(E_DIR_PIN , LOW); } digitalWrite(X_STEP_PIN , HIGH); digitalWrite(Y_STEP_PIN , HIGH); digitalWrite(Z_STEP_PIN , HIGH); digitalWrite(E_STEP_PIN , HIGH); delay(10); digitalWrite(X_STEP_PIN , LOW); digitalWrite(Y_STEP_PIN , LOW); digitalWrite(Z_STEP_PIN , LOW); digitalWrite(E_STEP_PIN , LOW); }