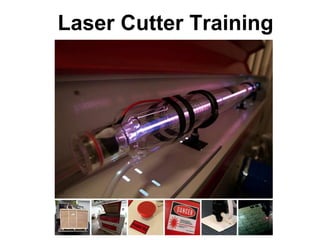
3. The Laser Cutter
●Jinan King Rabbit Technology Development
Co., Ltd. RL-150-1290
●1290 = 1200x900mm = 47.2 x 35.4 inches
cutting bed
●150w CO2 Laser
●Meant for high-power cutting, does engraves
as well
●~4-5x as powerful as most hobbyist laser
cutters
7. Materials You Can Cut
●Acrylic
●Wood/Plywood
●Paper
●Fabric
●Leather
●Nylon
●Felt
8. Cutting Plastics vs Biologicals
●Cut multiple passes on plastics to avoid
melting
●Cut one pass on biologicals (mostly woods)
to not re-burn already burnt material
9. Cutting vs Engraving
●Engraving is a scan function. It cuts lightly,
very fast, in many tiny passes:
●Doesn't need to penetrate entirely.
10. Materials You Can Engrave
●Glass
●Granite
●Ferric Metals
●Non-ferric with a coating (CerMark)
11. CerMark
● $65/bottle spray* that lets
you engrave non-ferric
metals
*http://www.laserbits.com/index.php?main_page=index&cPath=356_487
12. Things with lots of
these make bad gases
Things NEVER to Use in the Laser
13. Things NEVER to Use in the Laser
●Lexan
●Vinyl
●PVC
●Teflon
●Hint: anything that turns yellow when cut:
●If unknown/not on chart, ask before using
20. Datum:
Resets the
Laser Head
Positions
Laser:
Fires Test
laser beam
(*pew*)
Stop:
Halts and
Cancels Cut
Lighting:
Turns on/off
internal
lighting
E-Stop:
FUUUUUU
UUUUUU-
Key:
Turns on/off laser
cutter
Table Up/Down:
Moves work table up/down
to bring items in and out of
focus (like moving
closer/further from a
camera)
Jog Arrows:
Moves focal head around
table
Esc:
Press this all the time to
get the laser to do what
you're telling it to
Start/Pause:
Starts/Pauses the loaded Cut
Test:
Has head trace the
outline of the cut loaded
The Control Panel
21. Focusing the Beam
● Start with table high
● Fire test laser dot
● Move table down
● Fire another test dot
(should be smaller)
● Continue to fire till dot
gets bigger
● Move the table back up a
bit again, now you're in
the middle
23. Lens Cleaning
Cleaning agents:
●Alcohol for wood/paper/particulate
●Acetone for plastics based materials
Process
●Mix Alcohol/Acetone 1:1 and soak the lens
●Open tube, get out lens
●Wipe lens lightly with Q-tips (don't rub!)
●Dry lens by wiping with kimwipes (don't rub!)
●Re-assemble tube, align markings
24. Operation
Laser Cutter
●Main Body
oOpen Compressor Valve
oTurn on Ventillation
oTurn on Laser Cutter
oCheck Refrigerator
oCheck Ventilation unit
●Computer
oStart LaserCut 5.3
25. Design Software
●LaserCut 5.3 (simple, today's training)
●CorelDraw (has laser drivers)
●AutoCad (has laser drivers)
●Inkscape (free)
●Solidworks (on classroom computers)
●Adobe Illustrator
Export to PLT or DXF
26. Select tool:
Use to select, move, change properties
Time:
Show predicted cut time
Simulate:
check to make sure it will do what you plan
Resize:
Resize the selected object
Layers:
Hide/show layers
Drawing tools:
draw stuff!
LaserCut 5.3
File:
Import/export files, save job
settings
“The MSPaint of Laser Cutting”
27. Layers:
Change order, operation
(cut/engrave), cut speed, cut
power, and repetitions
Download:
Download job to laser cutter
Layer Colors:
Change selected object to one of these
layer colors
LaserCut 5.3
“The MSPaint of Laser Cutting”
28. Jobs in laser (none here)
2.) Download current:
Download current job to laser cutter1.) Delete Current Jobs
LaserCut 5.3