Methods in molecular Biology
•
1 gostou•1,507 visualizações


Recomendados
Mais conteúdo relacionado
Mais procurados
Mais procurados (20)
Destaque
Destaque (20)
Semelhante a Methods in molecular Biology
Semelhante a Methods in molecular Biology (20)
Último
Último (20)
Methods in molecular Biology
- 1. EXPERIMENT TRANSFORMATION OF PERIPHERAL BLOOD LYMPHOCYTES (PBLs) BY EPSTEIN-BARR VIRUS Introduction Epstein-Barr virus (EBV) is a double stranded DNA virus that infects human B lymphocytes. It enters the lymphocyte through the CD23 receptor and transforms them into continuously growing lymphoblastoid cell lines which can provide a constant source of DNA. Equipment and Materials Laminar air flow hoods Bench top centrifuges 15 and 50 ml polypropylene centrifuge tubes Cryovials Tissue Culture Medium: RPMI-1640 Fetal Calf Serum (FCS) Histopaque-1077 (Sigma Chem. Co.) Dimethyl Sulphoxide (DMSO) ß-mercapto ethanol (BME) Cyclosporin L- Glutamine Na-Pyruvate Penicillin-G Streptomycin Trypan Blue Sodium bicarbonate Hydrochloric acid EBV supernatant RPMI-1640 Medium Add 103.9 g powder medium to 8 liter deionized water, add 20 g sodium bicarbonate. Allow the solids to dissolve completely by constant stirring. Adjust pH to 7.2 with HCl. Make up the volume to 10 liter. Filter the medium through 0.2 µm membrane filter and dispense 450 ml into sterile bottles (500 ml) using sterile tissue culture techniques. Store the filtered medium at 4oC. GPPS L-Glutamine: 2.922 g Na-Pyruvate: 1.1004 g Penicillin-G: 0.300842 g Streptomycin: 0.5 g Dissolve in deionized water and make up the volume up to 100 ml. Filter the solution through 0.2µm membrane filter and store at -20oC until needed. 1
- 2. Supplemented Culture Medium (10% FCS) To the filtered RPMI-1640 medium (450 ml) add 50 ml FCS and 5 ml GPPS solution. Store at 4oC. Wash Medium (1.0% FCS) To the filtered RPMI-1640 medium (450 ml) add 5 ml FCS and 5 ml GPPS. Store at 4oC. Transformation Medium To 500 ml supplemented culture medium add 500 µl of ß-mercaptoethanol solution (0.05 M stock solution) and 500 µl cyclosporin (200 µg/ml stock). Store at 4oC. Freezing Mix Take equal volumes of RPMI-1640 medium and FCS (90 ml each). Add 10% (20 ml) sterile DMSO. Store at 4oC. Trypan Blue Solution Dissolve 0.016 g of trypan blue in 10 ml normal saline solution (0.9%). Filter through 0.5µm filter paper. Store at room temperature. Procedure 1. Preparation of EBV supernatant Culture B95-8 marmoset cells (1-5 X 10⁶ cells) in tissue culture medium. Grow the cells at 37oC up to a concentration of approximately 5 X 10⁶ cell/ml. Expand the cultures and when cell density reaches 5 X 10⁶-107/ml and the media changes its color (turns yellow) then place the flask at 34oC for a week. Centrifuge the contents of the flask at 300 g for 10 min. Filter the supernatant through a 0.45 µm membrane filter under sterile conditions using a membrane filtration assembly. Aliquot into cryovials and store at -70oC. 2. Sample collection Collect blood samples (3-5 ml) in vacutainers containing acid citrate dextrose (ACD) under sterile conditions (i.e by puncturing the vacutainer rubber top with syringe needle and not by opening the tube outside the laminar air flow hood). 3. Isolation of peripheral blood lymphocytes Take 3 ml Histopaque in a 15 ml falcon tube. Gently layer 5 ml blood on Histopaque and centrifuge at 400g for 20 minutes. Take the buffy layer at the interphase of the plasma and Histopaque into a 15 ml Falcon tube containing 10 ml wash medium. Mix and pellet cells by centrifugation at 300 g for 10 minutes. Discard the supernatant and wash the cell pellet two times with the 5 ml wash medium. 2
- 3. 4. Cell counting and trypan blue exclusion test Resuspend pellet in 1 ml wash medium. Take 10 µl of the cell suspension and mix it with (equal volume) 10 µl of trypan blue solution. Count the cells using a haemacytometer. Count the number of live and dead cells (which are stained blue) in 25 squares in the center of the counting chamber. Calculate the percentage viability by using the following formula: number of live cells/total number of cells X 100. Calculate the number of live cells per ml by using the following formula: live cell count X dilution factor (2.0) X 104. 5. Transformation with EBV Transfer 2-3 X 10⁶ live cells to a 25 cm2 culture flask containing 3 ml transformation medium and 1 ml EBV supernatant. Incubate the flasks at 37oC in a humidified atmosphere of 95% air and 5% CO2. Tighten the flask caps after 24 hours and leave them until visible colonies are formed. Subsequently loosen the culture flask cap by half a turn and observe the cultures periodically. Add supplemented culture medium and subculture into culture flasks when required (medium turns yellow and the cell density increases). 6. Cryopreservation of cultures Check the viability of the cell culture by trypan blue exclusion test. Take an appropriate volume of cell suspension for approximately 5 X 10⁶ cells with a viability of 90% or above. Pellet the cells by centrifugation at 300 g for 10 minute. Mix the pellet with 1 ml freezing mix and transfer into 1 ml cryovials. Place the vials in a polystyrene box and keep at -70oC overnight so that the temperature drop is gradual (1oC per minute.). For long term storage transfer the vials to liquid nitrogen cryostorage system. 7. Revival of frozen cultures Whenever required, revive the frozen cells by transferring the contents of the frozen vial into a 15 ml Falcon tube containing 10 ml wash medium. Mix the suspension and pellet by centrifugation at 300 g for 10 minutes. Wash the pellet twice with 5 ml wash medium. Re-suspend the washed pellet in 5 ml cell culture medium, transfer it into 25 cm2 tissue culture flask and grow the culture at 37oC in a humidified incubator with 5 % CO2 in air mixture. 3
- 4. EXPERIMENT PREPARATION OF GENOMIC DNA FROM EBV TRANSFORMED LYMPHOBLASTOID CELL LINES Introduction Mammalian DNA is extracted by organic methods that involve digestion of cells with proteinase K in the presence of EDTA and a detergent such as SDS, followed by extraction with phenol. Equipment and Materials Refrigerated centrifuges 15 and 50 ml Centrifuge tubes Waterbaths 1M Tris, pH 8.0 1 liter • Trizma Base 121.1 g Dissolve Tris in~800ml dH2O ,adjust pH to 8.0 with concentrated HCl; q.s to 1L dH2O and filter through 0.4µm filter paper .Store at room temperature (0.1M & 10mM Tris are also prepared from this stock). 0.5M EDTA, pH 8.0 1 liter • EDTA 186.15 g Dissolve 186.15g of EDTA in700ml dH2o and adjust pH 8.0 with 4N NaOH. q.s to 1L with dH2O STE (Saline Tris EDTA) pH 8.0 1 liter • 3M NaCl 33.3 ml 100 mM • 1M Tris, pH8.0 50.0 ml 50 mM • 0.5M EDTA pH 8.0 2.0 ml 1 mM Measure reagents mix and q.s to 1L with dH2o place at room temperature. 10% SDS (Laryl Sulfate) 100 ml • SDS 10 g Dissolve in dH2O, filter and store at room temperature. Proteinase K (20 mgml) 1ml • Proteinase K 20 mg Dissolve in 1ml of dH2O & store at -20°C 4
- 5. Phenol Equilibration • Phenol 1 kg • 1.0M Tris, pH 8 2 liter • 0.1M Tris, pH 8 2 liter • 8-hydroxy quinoline 1g • β-mercaptoethanol 2 ml Add 8-hydroxy quinoline to melted distilled phenol. Extract with equal volume of 1M tris, then extract with an equal volume of 0.1M tris, until pH of aqueous layer is 8.0, finally add 100 ml 0.1M Tris containing 0.2% β-mercaptoethanol. RNAse (10mgml) 1ml • RNAse A 10 mg • 10mMTris, pH 7.5 1 ml Dissolve in 1ml of (10mM) Tris, pH 7.5 and store at -20°C Chloroform:isoamy alcohol (24:1) 500 ml • Chloroform 480 ml • Isoamyl alcohol 20 ml Mix the two solution & store at 4°C Isopropanol (extra pure) Store at 4°C 70% ethanol (freshly distilled) Store at 4°C TE (Tris EDTA) 500ml Final conc • 1MTris 5 ml 10 mM • 0.5M EDTA 1 ml 1 mM Mix and raise the volume to 500ml with dH2O, store at room temperature. 5
- 6. Procedure 1. Gently vortex PBMCs obtained from 20 ml blood (buffy coat) or EBV transformed cells (approximately 5x10⁷ in a sterile 50 ml Falcon tube). 2. Add 19 ml 0f STE buffer followed by 1 ml of 10%SDS (drop wise while gently vortexing), add 20 µl of 20 mg/ml Proteinase-K (Sigma), Incubate samples over-night in a shaking water bath at 55°C. 3. On the following day extract with an equal (20 ml) volume of equilibrated phenol, pH 8, mix gently on ice for 10 minutes and place on ice for 10 minutes, centrifuge at 3200 rpm for 40 minutes at 4°C, remove the aqueous layer carefully with cut tip. 4. Extract with an equal volume of ChloroformIsoamylalcohol (24:1), mix gently on ice for 10 minutes and place on ice for 10 minutes and centrifuge again at 3200 rpm for 40 minutes at 4°C, remove aqueous layer in separate tubes. 5. Precipitate nucleic acids by adding one tenth volume of 10 M ammonium acetate followed by 2 volumes of absolute ethanol (or an equal volume of Isopropanol) and store after mixing at -20°C overnight or at -70°C for 15 minutes. Centrifuge at 3200 rpm for 90 minutes at 4°C, decant supernatant. 6. Add 5 ml of 70% ethanol (tap pellet so it floats) and again centrifuge at 3200 rpm for 40 minutes, decant supernatant and vacuum dry for 10 minutes. 7. Add 1 ml of TE and incubate at 37°C in a shaking water bath, for one hour to resuspend the pellet. 8. After one hour add 10 µl of RNaseA (10 mg/ml, Sigma) to digest RNA and incubate at 37°C for 2 hours in a shaking water bath. 9. Add 50 µl of 10% SDS and 5 µl Proteinase-K (Sigma) and incubate at 55°C in a shaking water bath for 1 hour (after incubation sample may be stored overnight at 4°C). 10. Add 4 ml TE and extract with 5 ml of equilibrated phenol, pH 8 and mix gently on ice for 10 minutes and place on ice for 10 minutes. Centrifuge at 3200 rpm for 40 minutes, remove the aqueous layer carefully with cut tip and add 2 ml of TE to remaining phenol, mix gently on ice for 10 minutes and place on ice for 10 minutes. Centrifuge at 3200 rpm for 40 minutes and collect the aqueous layer. 11. Extract with 7 ml Chloroform/Isoamylalcohol (24:1) and mix gently on ice for 10 minutes and place on ice for 10 minutes. Centrifuge at 3200 rpm for 40 minutes, remove aqueous layer. 6
- 7. 12. Precipitate DNA by adding one-tenth volume of 10 M ammonium acetate followed by 2 volumes of absolute ethanol (or an equal volume of isopropanol), mix until DNA is visible. Store at -20°C overnight or at -70°C for 15 minutes. 13. Centrifuge at 3200 rpm for 90 minutes at 4°C, decant supernatant and add 5 ml of 70% ethanol (tap pellet so it floats) and again centrifuge at 3200 rpm for 40 minutes, decant supernatant and vacuum dry for 10 minutes. Add 1 ml of 10 mM Tris to resuspend the DNA. Store at 4°C. 14. Measure optical density (OD) of the sample at 260 nm and 280 nm (ideally 260/280 ratio=1.7-2.0; Ratio >2.0 phenol contamination; ratio< 1.7 protein contamination) Calculate DNA concentration by following formula: Abs 260 x Dilution factor x 50= DNA concentration (µg/ml) (50=correction factor) Transfer sample to a labeled Eppendorf tube. Store at 4°C. 7
- 8. EXPERIMENT LOCALIZATION OF DISEASE GENE FOR INHERITED EYE DISORDERS BY LINKAGE ANALYSIS Introduction Linkage analysis is a powerful method of gene mapping. The primary goal is to determine if two or more genetic traits – i.e. a marker locus (or multiple marker loci) and a disease trait – are co- segregating within a pedigree. The results of linkage analyses are typically shown as “LOD Scores” for a pair of loci at various recombination values. LOD stands for log to base 10 of odds, and odds are that two loci are linked verses the two loci are not linked. LOD score is calculated with help of computer programs: MLINK or LIPED which are part of the linkage analyses package, as described in the Handbook of Human Genetic Linkage. Equipment and Materials 10X PCR Buffer (Sigma) 100 mM Trizma-HCl, pH 8.3; 500 mM KCl; 15 mM MgCl2; 0.01% (w/v) gelatin dNTPs 10 mM dATP; 10 mM dCTP; 10 mM dGTP; 10 mM dTTP Autoclaved deionized H2O aliquot in 1.5 ml eppendorf tubes DNA samples 40 ng/ µl Forward & Reverse Primers 20 µM Taq Polymerase 2.5 U/µl 10X TBE Trizma base (Tris[hydroxymethyl]aminomethane) 70 g/L boric acid 55g/L EDTA (Ethylene diamine tetraacetic acid) 9.04 g/L check pH (if not 8-8.2, then adjust the pH). filter through millipore filter paper (0.45 µm). 40% Acrylamide solution Acrylamide 389.6g/L N,N’-methylone bis-acrylamide 10.4g/L store in dark bottles at 4oC Gel loading dye 7.5% Ficoll 0.01% bromophenol blue 0.01% xylene cyanol 25% APS freshly prepared TEMED 10% ethidium bromide 8
- 9. Procedure 1. Calculate how much master mix is required for the desired number of reactions. 2. Prepare master mix as given below by adding reagents in sequential order (8 µl X number of reactions; include 2-3 extra reactions). master mix final conc. required vol.per reaction 17reactions Deionized H2O 5.0 µl 85.0µl 10X PCR Buffer 1X 1.0 µl 17µl 2.5 mM dNTPs 100 µ M 0.4 6.8µl Taq Polymerase (2.5 U/µl) 2.5 U 1.0 µl 17.0µl 20 µM Forward Primer 600 nM 0.3 µl 5.1µl 20 µM Reverse Primer 600 nM 0.3 µl 5.1µl ______________________________________________________ Total 8.0 µl 3. Add 2 µl DNA (40 ng/µl) to each tube. 4. Add 8 µl master mix to each tube. If required add 1-2 drops of mineral oil in each tube to avoid sample evaporation (not required for PCR machines with heated lids). 5. Set up negative (master mix only) & positive controls (master mix + successfully amplified DNA containing target sequence). 6. Amplify DNA under the following PCR thermal cycler conditions: 9
- 10. PCR Conditions 1 cycle of 95°C x 4 minutes 30 cycles of 95°C x 45 seconds 55°C x 45 seconds 72°C x 1 minute 1 cycle of 72°C x 7 minutes Polyacrylamide Gel Electrophoresis 1. Prepare 8% polyacrylamide gel solution by adding 50 ml of 40% acrylamide solution and 25 ml of 10X TBE q. s. to 250 ml with deionized water. 2. Take 50 ml from the 250 ml of 8% acrylamide solution and add 300 µl of 25% APS and 300 µl of TEMED. Pour into the base of Biorad SequiGen system and allow the gel to polymerize for 2-3 minutes. 3. To the remaining 200 ml of 8% acrylamide solution, add 850 µl 25%APS solution and 150 µl of TEMED. Pour and allow polymerization for at least 2 hours. Use the appropriate comb and spacers (0.75 mm). 4. Add 1X TBE buffer (Total volume required = 2 l) in the upper and lower buffer chambers of the gel unit. Set up the sequencing system and pre-run for 10-15 minutes at 100 watts constant power. 5 Take out the comb and wash wells with 1X TBE buffer. While taking the comb out care should be taken, so as not to break the wells. 6 Add 5 µl gel loading dye to amplified product. Load the DNA molecular weight marker VIII in the first lane of the gel and then load 8 µl of the amplified products in the appropriate wells. 7. Run the gel at 100 watts for 4-5 hours. (depending up on the size of PCR products). Cut the gel according to expected band sizes and stain with ethidium bromide (0.5µg/ml final concentration) for a few minutes. 8. Photograph under UV trans-illumination and analyze the gel photograph to determine alleles. 9. Calculate the lod score. The results are interpreted as follow: LOD score Interpretation 0 Linkage or no linkage are equally likely +ve Possible linkage -ve Possibly no linkage +3 or more Linkage -2 or less No linkage 10
- 11. LINKAGE ANALYSIS (Flow Chart) Linkage analyses packageVersion 5.20 Pedigree File Parameters File By any word processor in ASCII format By program: PREPLINK At the DOS type PREPLINK and press enter Column # Descriptions Set all the parameters 1 Pedigree identifier 2 Individual’s ID Save as *.dat 3 Father’s ID ( 0 =founder) 4 Mother’s ID ( 0 =founder) 5 Sex ( 1 =male, 2 =female) 6 Disease ( 1 =normal, 2 =affected) 7 and 7+ Genotype Save as *.pre MAKEPED At DOS MAKEPED infile.PRE outfile.PED LCP (Linkage Control Program) file.PED At DOS type LCP From MAKEPED Enter both files And Set all the parameters file.DAT Press Pg Down From PREPLINK after every entry Type PEDIN at DOS LRP (Linkage Report Program) At DOS type LRP Set all the parameters Press Pg Down after every entry RESULTS 11
- 12. REFERENCES: 1. Davies KE., Read AP., (1992). Molecular Basis of inherited disease. ED: Rickwood D., 2nd edition. IRL Press, Oxford. 2. Ott J. (1974). Estimation of the recombination fraction in human pedigree: Efficient computation of the likelihood for human linkage studies. Am. J. Hum. Genet. 26: 588-597. 3. Lathrop GM., Lalouel JM., Julier C. and Ott J. (1984). Strategies for multilocus linkage analysis in humans. Proc. Natl. Acad. Sci. USA. 81: 3443-3446. 4. Terwilliger J., OttJ. (1994) Handbook for Human Genetic Linkage. Johns Hopkins University Press Baltimore, MD 12
- 13. EXPERIMENT DETECTION OF MUTATIONS IN INHERITED EYE DISORDERS BY AUTOMATED FLUORESCENT SEQUENCING Introduction Automated sequencing will be performed on an ABI 377 DNA sequencer (Perkin Elmer), using the ABI PRISM™ Amplitaq® DNA polymerase FS, Dye Terminator Cycle Sequencing Ready reaction Kit. Automated cycle sequencing has several advantages over manual radioactive incorporation techniques. Foremost, it is safer as it eliminates the use of radioactive nucleotides. The technique is based on using 4 fluorescent dye-labelled terminators, which are detected by lasers that analyse and convert the DNA sequence to a graphical image on a computer. Reactions are also carried out in single tubes, and do not have to be separated for each terminator nucleotide. Less starting material is required and the sequencing of larger templates is possible. For each sequencing reaction one gel lane is utilized, because the labeled nucleotides can be distinguished by unique fluorescent labels. Equipment and Material PCR machine (Hybaid) PCR Reagents (10X PCR buffer, dNTPs, DNA Taq polymerase, primers). ABI 377 DNA sequencer (Perkin Elmer). ABI PRISM™ Amplitaq® DNA polymerase FS, Dye Terminator Cycle Sequencing Ready reaction Kit. Qiagen (QIAquick gel extraction kit, cat no. 28706). 95% and 70% ethanol. Sequence specific primers. Acrylamide gel (Sequencing Grade). Gel loading buffer (5:1 formamide/dextran blue). Procedure 1. Amplify DNA by polymerase chain reaction in 50µl reaction volume. Reaction mixture include: Reaction component µl per reaction Final concentration Sterile H2O 35 10X PCR buffer 5.0 1X 2.5 mM dNTPs 2.0 100µM DNA Taq polymerase 1.0 2.5 units Primer forward (20µM) 1.0 1.0µM Primer reverse (20µM) 1.0 1.0µM DNA template (10ng/µl) 5.0 50ng 13
- 14. Amplify under following PCR cycling conditions: Step1. 950C for 4 minutes 1 cycle Step2: 950C for 1 minute (denaturation) Step3: 660C for 1 minute (annealing) Step4: 720C for 1 minute (extension) repeat step 2-4 for 35 cycles Step5: 720C for 7 minute (final extension) 1 cycle 2 Purify PCR products by using QIAquick Gel extraction kit (Cat no. 28706) according to manufacture's instructions, to remove primers and unincorporated dNTPs. 3 Setup sequencing reactions by adding: Sterile H2O 2.0 µl Terminator ready reaction mix. (Includes labelled dye terminators, buffer, and dNTPs) 4.0 µl Forward or Reverse sequence specific primer 1.0 µl TemplateDNA (0.5µg) 1.0 µl Total reaction volume 10.0 µl 4. Subject to 25 cycles of 96oC for 10 seconds, 50oC for 5 seconds and 60oC for 4 minutes in a Hybaid thermal cycler. 5. Precipitate the DNA to remove excess unincorporated fluorescent dye with 2.5 volume of 95% ethanol in the presence of 0.3 M sodium acetate. 6. Wash with 70% ethanol and vacuum dry. 7. Resuspend pellet in 5µl of ABI loading buffer, and denature samples at 95oC for two minutes before loading onto the denaturing acrylamide sequencing gel. 14
- 15. EXPERIMENT MICROSATELLITE ANALYSIS OF HUMAN POPULATIONS USING MULTIPLEX PCR Introduction Microsatellite DNA consists of short arrays of tandem repeats which are simple in sequence (1-6 bp) and are dispersed throughout the genome. These are classified as mono, di, tri, tetra, penta and hexanucleotide repeats. These microsatellites provide an insight into the evolutionary relationship between the human and other related species and among the various human populations and have been used extensively for linkage analysis. Equipment and Materials PCR Machine (Hybaid) Electronic Multichannel Dispenser (Biohit) DNA Sequencer (ABI-377) Acrylamide gel casting equipment Tips and Pipettes SuperTaq Polymerase 5U/µl stock Taqstart Antibody Antibody Dilution Buffer 10X PCR Buffer 2.5mMdNTPs 25mM MgCl2 20ng/µl DNA samples 10µM fluorescent dye-labeled primers 10X TBE 40% Acrylamide Solution Loading Dye (Dextran Blue) Internal Lane Standard (Tamra 350 or 500) 10 % APS solution TEMED Urea 10X TBE Tris-Base 108 g Boric Acid 55 g Na2EDTA.2H2O 8.3 g Dissolve Tris, Boric acid and EDTA in about 800 ml of high grade deionized water, check the pH which should be 8.2±0.2. Discard the buffer if the pH is not correct, do not try to adjust the pH. Transfer the buffer to 1 l cylinder, adjust the volume to 1 l with deionized water. Filter through a 0.2 µm filter and store at room temperature. 15
- 16. 40% ACRYLAMIDE SOLUTION (100 ml) Acrylamide 38 g Bis-Acrylamide 2g Dissolve acrylamide and bis-acrylamide in enough water to bring volume to 90 ml. Add 10 g of mixed bed ion-exchange resin and stir at room temperature until all crystals dissolve, then continue to stir for additional 5-10 minutes and filter through 0.2 µm membrane filter. Transfer to 100 ml graduate cylinder and adjust volume to 100 ml with deionized water. The solution is stable for 1 month at 40C. Procedure Multiplex PCR for 10 reactions 1. To 0.52 µl antibody buffer, add 0.20 µl TaqStart antibody and 0.016 µl SuperTaq polymerase and incubate at room temperature for 7 minutes. 2. Prepare primer mixes of 6 to 7 primer pairs by mixing 0.06-0.12 µl of each primer. 3. To the primer mix add 0.6 µl of 10X PCR Buffer, 0.5 µl MgCl2 , 0.72 µl of each dNTP mix, 0.736 µl of Taq /antibody mix as prepared in step 1 and 1.925 µl water to make up volume to 6 µl. 4. Add 1 µl DNA to PCR tube and 5 µl of mix prepared in step 4 and amplify by using the following touch down PCR conditions: 14 Cycles of 940C, 20 seconds 630C decreased by 0.50C per cycle, 1 min 720C, 1 minute 20 Cycles of 940C, 20 seconds 560C, 1 minute 720C, 1 minute 1 Cycle of 40C, 10 minutes 5. The PCR product is saved at 40C until it is loaded on the gel. Gel Electrophoresis Preparation of working gel solution (4 %) Urea 5.4 g 40 % Acrlyamide solution 1.5 ml 10 X TBE 1.5 ml 16
- 17. 1. Disslove 5.4g urea in 5 ml water contained in a 100 ml beaker. Add 1.5 ml 40 % acrlyamide solution, and 2-3 g mix bed ion-exchange resin and stir for a couple of minutes. Filter the solution through a Whatmann No.1 filter paper. 2. Add this solution into a 50 ml graduated cylinder containing 1.5 ml 10X TBE and make up volume to 15 ml. Filter this solution through a 0.2 µm membrane filter using a Millipore vacuum filtration assembly. 3. To the filtered solution add 75 µl of 10 % APS and 10.5 µl of TEMED just before pouring the gel. Gel Pouring 1. Always use absolutely clean plates. Place the rear plate on the gel casting apparatus with the inside of the plate facing up. 2. Moisten the spacers with water and place on the rear plate. Place the front plate on the top of the rear plate. 3. Fill the acrylamide solution into a 50 ml syringe, pour slowly onto the rear plate and simultaneously slide the front plate on the rear plate taking care that no bubbles are introduced during the process. 4. Insert the flat edge of the comb at its place and leave for 15 minutes. After 15 minutes remove the comb and wash the plates with deionized water to remove gel or any other particle present on the outside of the plates. Leave the plates for about 45 minutes before use. Electrophoresis 1. Mix 0.3 of the sample with TAMRA350 internal lane size standard and electrophorese on an ABI377 DNA sequencer for one and a half hours on a 12 cm plate and collect the data using ABI collection software. 2. Size the samples using GeneScan software and assign allele sizes using GenoTyper software. 17
- 18. EXPERIMENT HLA TYPING FOR HLA-A, B, C, DRB1, DRB3, DRB4, DRB5, & DQB1 USING SSP-PCR. Introduction The Human Leukocyte Antigen (HLA) genes of the major histocompatibility complex (MHC) form the most polymorphic genetic system known in humans. It is present on the short arm of chromosome 6 and makes up about 1% of the human genome. HLA is divided into three major regions classified as Class I, Class II and Class III. Genes in the Class I and Class II regions encode highly polymorphic cell surface glycoproteins which are invovled in antigen presentation to the T-cells during an immune response. The Class I consists of HLA-A, HLA-B and HLA-C loci. The Class II is divided into DP, DR and DQ regions. Class I and II can be typed by using the following method. Equipment and Materials PCR Machine (Hybaid) Electronic Multichannel Dispenser (Biohit) Gel Tank & 4 Combs (40 wells each) Power Pack (Bio-Rad Power Pac 3000) Polaroid Photographic System with UV transilluminator (Fotodyne) 96-Well PCR plates (Hybaid) 10X PCR Buffer 20 mM dNTP Mix 1.0 M MgCL2 Taq Polymerase Agarose Gel Orange G Loading Dye 10X TAE Boehringer Marker VIII Ethidium bromide 10X PCR Buffer Tris-base (670mM) 40.568 g (NH4)2SO4 (166mM) 10.96 g Tween 20 (1 %) 5.0 ml Dissolve tris in 400 ml sterile deionized water and adjust the pH to 8.8. Add ammonium Sulfate to the solution and filter through a 0.2 um filter. Add tween 20 and make up the volume to 500 ml. Store at –20oC. 10X TAE ( 0.04M Tris-acetate and 0.001M EDTA) Tris 48.40 g 18
- 19. Glacial Acetic Acid 11.42 g EDTA 0.5 M (pH 8.0) 20 ml Dissolve in 800 ml deionized water and q. s. to 1 L. Filter through a 0.45µm membrane filter. Orange G loading dye (6X) Orange G (0.125%) 50 mg Ficoll (20%) 8g 0.5 M EDTA (100 mM) 8 ml Deionized H2O 32 ml Dissolve Ficoll and Orange G in water and add EDTA to it. TDMH (12 vials) 10 X PCR Buffer 2.444 ml 20mM dNTP Mix 216 µl (final conc. 460 µM) 1.0 M MgCl2 58.7 µl (final conc. 6.25 mM) Autoclaved Deionized H2O 6.684 ml Store at -20oC as 775µl aliquots. Procedure 1. Prepare the master mix (155 reactions) TDMH 775 µl DNA (0.0625 mg/ml) 248 µl (0.1 ng/reaction) Autoclaved Deionized H2O 199 µl Taq Polymerase 18 µl (0.1875 units/reaction) The PCR amplifications are performed in 13 µl final volume in 96 well plates. 5 µl of each of the 144 primers is aliquoted into 0.2 ml appropriately labeled 96 well PCR plates using the multichannel dispenser. 8 µl of the master mix is added to each primer. 2. The following conditions are used for the PCR; 1 min denaturation 96oC 5 cycles of 96 oC for 25 seconds 70 oC for 45 seconds 72 oC for 45 seconds 21 cycles of 96 oC for, 25 seconds 65 oC for 50 seconds 72 oC for 45 seconds 4 cycles of 96 oC for 25 seconds 55 oC for 60 seconds 72 oC for 2 minutes 19
- 20. 1 cycle of 72 oC for 10 minutes 3. Following PCR amplification, the plates are stored at 4 oC until electrophoresis. 5 µl of the Orange G loading dye is added to each tube and the PCR products areloaded onto a 2% agarose gel prepared in 0.5X TAE and run at 120 V for about an hour or till the dye migrates at least 3 cm. 4. The gel is stained in ethidium bromide (0.5µg / ml in deionized water) for 1 hour and photographed under UV light. The positive bands are scored and the haplotype determined. 20
- 21. EXPERIMENT DETECTION OF SRY-8299 G to A POLYMORPHISM USING RESTRICTION FRAMGMENT LENGTH POLYMORPHISM TECHNIQUE (PCR-RFLP) Introduction SRY-8299 is a single nucleotide polymorphism (SNP) found on Yap+ chromosomes. It is a G to A transition that results in the destruction of a BsrBI site. Equipment and Material PCR Machine (Hybaid) Gel Tank and Combs Power Pack (Bio-rad Power Pac 3000) Polaroid Photographic System with UV Transilluminator (Fotodyne) 96 well PCR Plates 10X PCR Buffer 25mM MgCl2 2mM dNTP mix 10 µM Primer mix • -8299f 5’-aca gca cat tag ctg gta tga c- 3’ • -8299r 5’-tct ctt tat ggc aag act tac g- 3’ 2.5 Units/µl Taq Polymerase Autoclaved deionized water 20 ng/µl DNA dilution Agarose gel 10X TAE Buffer Orange G loading dye ethidium bromide 10X PCR Buffer Tris-base (670mM) 40.568 g (NH4)2SO4 (166mM) 10.96 g Tween 20 (1 %) 5.0 ml Dissolve Tris in 400 ml sterile deionized water and adjust the pH to 8.8. Add ammonium sulfate to the solution and filter through a 0.2 um filter. Add Tween 20 and make up the volume to 500 ml. Store at –20oC. 10X TAE (0.04M Tris-acetate and 0.001M EDTA) Tris 48.40 g Glacial acetic acid 11.42 g EDTA 0.5 M (pH 8.0) 20 ml Dissolve in 800 ml deionized water and q. s. to 1 L. Filter through a 0.45 µm membrane filter. 21
- 22. Orange G loading dye (6X) Orange G (0.125%) 50 mg Ficoll (20%) 8g 0.5 M EDTA (100 mM) 8 ml deionized H2O 32 ml Procedure 1. Each reaction tube consists of 25 μl final volume. Prepare master mix as follows: Reagent final conc./reaction μl/reaction 10 x PCR Buffer 1x 2.5 25 mM MgCl2 1.5 mM 1.5 2 mM dNTP mix 200 μM 2.5 10 μM Primer mix 1 μM 2.5 2.5 U/μl Taq Polymerase 1.25U 0.5 Deionized water 13.5 Add 23 μl of the above mix to 2 μl DNA dilution (40 ng/ reaction) 2. Amplify using the following conditions 3 minutes denaturation 94oC 30 cycles of 94 oC for 30 seconds 60 oC for, 30 seconds 72 oC for 60 seconds 1 cycle of 72 oC for 5 minutes 3. Run 10 μl of the PCR product on a 1.5% agarose gel to check for amplification. The product size is 509 base pairs. 4. BsrBI Digestion To 15 μl of the amplified SRY-8299 product add 5.8 μl of the following mix Reagent Final conc./reaction μl/reaction BsrBI (10 units/ μl) 5 units/reaction 0.5 10X buffer 1X 0.6 Deionized water 4.9 22
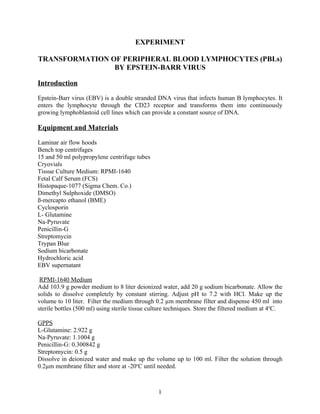
- 23. Digest overnight at 37oC. Run the digested product on a 1.5% agarose gel. Digested fragments sizes are 147 and 362 base pairs and indicate the presence of the ancestral G allele. The loss of BsrBI site indicates the presence of the derived A allele. Lanes 1-6: PCR SRY-8299 digested by BsrBI Lanes 1,2,4,5: A allele without the BsrBI site Lanes 3,6: G allele with the BsrBI site 23
- 24. EXPERIMENT DETECTION OF SRY-8299 G to A POLYMORPHISM BY DENATURING HIGH PERFORMANCE LIQUID CHROMATOGRAPHY (DHPLC) Introduction The Transgenomic WAVETM DNA fragment analysis system is an exceptionally powerful tool for mutation detection and size-based DNA fragment analysis. DNA fragment separation is carried out by use of a specialized DNASep column (Part # 18-621-0546) based upon the principle of ion-pair reversed phase HPLC. After eluting from the cartridge, the separated DNA fragments travel to the detector where they are detected by UV absorption. The system consists of the following instruments stacked on top of each other. The interface, pump, temperature rack (chiller), auto-sampler, column oven and uv detector. The degasser and computer system are placed separately (Figure 1). The pump has four inlets (1-4), which are connected to bottles A (1), B (2), C (3) and D (4), which go directly to the injection valve. Bottles A and B contain the DNA separations buffers A and B respectively. Bottle C contains the column wash solution (75% acetonitrile) and bottle D contains the syringe wash solution (8% acetonitrile). Equipment and Materials Transgenomic WAVETM DNA fragment analysis system. DNA separations buffers A and B Column wash solution (75% acetonitrile); Buffer C Syringe wash solution (8% acetonitrile); Buffer D PCR Machine (Hybaid) Tube-strips (Hybaid) Buffer A (0.1 M triethylammonium acetate (TEAA) solution, pH 7.0) Buffer B (0.1 M TEAA solution containing 25% acetonitrile, pH 7.0) Buffer C (Column Wash Buffer; 75% acetonitrile solution) Buffer D (Syringe Wash Buffer; 8% acetonitrile solution) Procedures 1. To prepare the mutation standard for analysis on the WAVE DNA Fragment Analysis System, transfer approximately 15 to 20 µl of the WAVE optimized UV 209 bp mutation standard (Part#560077) to a microtiter tube and keep at 4oC until ready to use. This standard consists of a combination of two analog 209 bp fragments representing A and G alleles at position 168 of the polymorphic DYS271 locus. Upon heating and renaturation this fragment mixture forms two homoduplexes which are used to check instrument parameters for heteroduplex-based mutation screening. 24
- 25. 2. Combine equal amounts (10 µl) of the previously amplified 509 bp SRY –8299 wildtype and mutant fragments in a single tube. Denature the fragments at 95oC for 5 minutes and carry out heteroduplex annealing by decreasing the temperature by 1.5oC/min until it reaches 25oC. Store the test samples at 4oC if not used immediately. If a 96-well PCR plate is used, simply transfer it from the thermal cycler into the WAVE ®system’s constant temperature rack (Peltier plate) for analysis. This eliminates the requirement for manual sample loading, allowing unattended sample processing. Alternatively, 0.2 ml tube strips containing DNA sample can be loaded in the appropriate slots. Carefully place the tube containing the standard in position 1 at the rear left corner of the 96-well auto-sampler plate (Figure 2). Place the tube containing the wildtype SRY-8299 fragment in position 2 and the heteroduplex in position 3. 3. Based upon the sequence of the wild type DNA determine the correct temperature for mutation scanning empirically, or by using the WaveMaker utility software. Final temperature selection is confirmed experimentally by performing separations at the calculated temperature and at 20C above and below it using the universal gradient. The final retention time for the calculated temperature should then be roughly midway between those obtained at the higher and lower temperatures. 4. Click on the Application button on the Main Tool Bar at the left of the main screen. The Application dialog appears. Highlight the name of the Transgneomic Application Folder and click on Select. Confirm that the name of the selection appears on the title bar of the main screen. 5. Click on the Method Setup button on the main tool bar to open the method for mutation detection. In the File Type box, select Methods. In the Application list box, verify that the selected folder is highlighted. In the Method Name box, highlight the name of the method for e.g Mutation Detection and click OK. A method information window appears in the display area of the main window. 6. Click the left mouse button on the red pump icon to open the Pump Setup window and enter the appropriate method gradient as determined empirically or by WAVE MAKER software. The recommended gradient for mutation detection is a slope of 2% increase in the concentration of Buffer B per minute. The gradient should be run initially at 50 oC under non-denaturing conditions at a flow rate of 0.9 ml/min. For an unknown mutations a universal gradient for mutation detection is shown below: Time % Buffer A % Buffer B 0 65 35 0.1 60 40 16.1 28 72 16.2 0 100 16.7 0 100 16.8 65 35 18.8 65 35 25
- 26. 7. At the end of each series of runs program a clean method followed by column equilibration for 3-5 minutes and a sleep mode as shown below: Time % Buffer % Buffer % Buffer Flow Rate Method A B C 18.9 0 0 100 0.9 ml/min Clean 48.9 0 0 100 0.9 ml/min Clean 49.0 50 50 0 0.9 ml/min Equilibrate 54.0 50 50 0 0.9 ml/min Equilibrate 54.1 50 50 0 0.05 ml/min Sleep 8. Click on the Sample Set Up button on the main tool bar to open the Open File dialog box. In the application list box, verify that the correct folder is selected. In the Sample Table Name box, highlight the name of the Mutation Detection Sample Table and click OK. The Setup Information dialog box appears. Make sure that the standard sample is coming from vial 1, the volume is 5 μl and the number of injections is 1 (Inj per Vial). Enter an appropriate Vial No. and Vol (μl) to be injected and specify the injections per vial (Inj per Vial). Enter an appropriate Sample Name and specify the Method Name. Confirm that the vial number, volume and the number of injections are correct. For each sample and standard make sure that the Max Ch 1 Noise and Max Ch 1 drift is set at 500. 9. Got to File and click on Save sample As… option and give an appropriate name to the Sample Table. 10. Click on the auto-sampler Set up (L-7200) icon and select the injection method. The Cut Method is usually preferred. Make sure the correct syringe volume (500 μl) is selected. 11. Click on the column Oven Setup icon and enter the appropriate temperature for mutation detection. Do not change the Temperature Upper limit which is set at 80oC. 12. Click on Channel 1 Detector Setup (L-7400) and adjust Data Acquisition Stop Time (min) and Doubling Time (min) to the method generated. Leave all other settings unchanged and click on Generate Sampling Period Table. 13. Go to File on the menu bar and select the Save Method As… option and give an appropriate name to the method file. 14. Click on the blue Initialize button to open the Hardware Status Window and click on Initialize to make the instrument operative. This may take a few minutes. 15. The Start Series function is available only when the System Manager program is ready to perform the injections and data acquisition, click the Start Series button at the bottom of the Data Acquisition window. Before the System Manager program starts the first injection, it validates the first row in the Sample Table. Also, the column oven must have reached the correct temperature before Start Series can be performed. 26
- 27. 16. Pressing the “Start Run” button at the bottom of the Data. Acquisition Monitor window will perform only a single injection for the first row listed in the Sample Table. Pressing the “Start Series” button performs the entire series of injections listed in the Sample Table. 17. To view the sample file created at the end of the run, click the Reprocess Data button. This brings up the Open file dialog. In the File Type box, select “Data”. 18. Select the last file name in the list (this corresponds to the last series of runs performed) and click Ok. This brings up the Injection Table for the series. Select (highlight) the first chromatorgram listed in the Injection Table and click the Display button at the bottom of the window to display the data. 19. To adjust the view, click the Chromatogram Display Options button in the horizontal tool bar, or double-click anywhere in the display are of the screen. 20. When the instrument is not in use, it is important to keep the pump running at a very low flow rate. The column can be maintained on the instrument for two to four days by pumping the column at a flow rate of 0.05-0.1 ml/min with 50% Buffer A, 50% Buffer B. 27
- 28. Figure 1. Homo (upper panel) and hetero-duplexes (lower panel ) showing the SRY-8299 ancestral (G) and derived (A) alleles respectively. 28