SlideShare a Scribd company logo
1 of 12
Production Diary.
Week 1:
This week in production, I have created my Business cards using Photoshop. I previously
created some production experiments to help me gather an idea on what the final design
would end up looking like but half way through the week I decided to switch from the
original pastel design using bright colours and patterns to gather the reader’s attention, to a
more mature, more realistic looking one with a neon theme to better capture the reader.
The experiment designs were all created using
simple effects and tools in Photoshop in which I had managed to find out about through
simply playing around until something good happened. I used the polar coordinates tool to
create the flared background designs in different colours which gave my work a vintage
aesthetic (which I was trying to adopt for my business at the time). The font was taken from
the website ‘DaFont’ as most other fonts I will be using have come from. This chosen font
was also picked to further the vintage aesthetic I wanted for my business. Once I changed to
my final design, I decided to instead go for a slicker, professional looking aesthetic however
keeping the vintage theme. I found a tutorial on YouTube that showed me how to create the
neon effect in the text using the blending tools for the realistic glow and partly illuminated
neon piping. I also learnt how to create the wires for the neon lights using the pen tool. I
have linked this video in my project references. My final business card design did not have
enough room for all of the information to fit on comfortably so I decided instead to simply
use the most important contact details so that all of the text used was the same sizing
otherwise the blending tool settings would become redundant and look different to the
rest. I have now finished my business card and have started to move onto my magazine
production. My website is not up to date yet as I am planning on adding all my work in bulk
towards the end of production or until I am told to by my tutors. Next week I will begin to
work on my magazine product and the photography that will play a key role in it. My
photography will be my priority to begin with as without them my magazine will not have all
the necessary content and will not look right. Altogether, I have to say I feel my final design
for the business card matured a lot better and appeals the most to my intended audience
out of all the designs. It has an element of playfulness in the colour scheme and lighting yet
upholds a degree of professionalismin the structured background and neatly organized
wiring behind the lights.
Next week I will be starting production on my photography portfolio and my magazine. By
the end of the week I am aiming to have gathered enough photos to satisfy my
requirements of the portfolio and finished my cover page in my magazine production.
Week 2:
This week in production I have been working on both my magazine and my photography
portfolio, the latter being exclusively at home. The portfolio began smoothly, and I was able
to go out in my own time after college and on my days off to take long walks around
Scarborough and capture photos of the nature and landscapes nearby. I had a time window
during the afternoons of the last weekend to go for extra photography walks around town
as well as what I had planned so I have a lot more photos than I will need. This is great
because it gives me plenty of choice when it comes to using them in my project. Photos that
I don’t use in my magazine will end up on my portfolio that will feature on my Instagram
and my website so that they are not totally useless. The problems during this photography
shooting week arose towards the end of the week when my all my planned friends were
unable to turn up to my photoshoot for various personal and work-related issues. This
slowed down my work pace quite a bit as I originally planned to have a lot more fashion and
modelling photos than any others. Not even my backup dates were available to use so I had
to then simply make do with what I could get, however I was still able to work around this
and instead decided to fully focus on nature shots as I could easily access them. On one of
the days, one of my friends was able to come over last minute to get some modelling photos
shot which benefitted me a lot as it gave me more content to work with and edit. Once I got
the photos, I used Photoshop to manipulate and add effects to them to further resemble
what I saw on my travels. Because I love how vintage photos look and wanted to learn more
about 35mm photography, I tried to replicate the effect that that style of photos has as seen
below in my screenshots. The first image I added a more faded brown gradient with the
opacity turned down considerably. I also added a vignette effect to it and pasted a .png file
of scratches to add some aging effects. The middle photo was one of my favourites. For this,
I simply decreased the saturation, added a noise effect to simulate grain and finally added a
slight blur around the flowers in the background to create a sense of depth. Finally, my last
photo featured here was a nature shot of a deer I saw on one of my walks around
Scarborough. Due to the subject being nature based, I decided to keep this photo relatively
untouched – instead opting to simply increase the contrast slightly to sharpen the photo
and the vibrance to better show off the greenery around the animal.
My magazine production
has been a lot more
complicated for me so far
as I have been creating a
whole new colour scheme,
layout design and all the content for a product that is supposed to be created by a different
company to my own. For the magazine experiment, I decided to attempt to create a more
faded, worn looking design. I followed a tutorial I found online that showed me how to add
scratches and wear and create a vintage filter to give the cover a great starting aesthetic to
build from. At this point, I need to take what I have learnt from this magazine design and
add the necessary elements to my final cover. This may include any filters, fonts and colour
schemes used.
Next week, I will move onto producing the inside front page and contents page of my
magazine and will hopefully have time to recouperate what I want to do with my double
page spread By the end of next week, I’m aiming to have completed some of my magazine
pages and be ready to move onto creating my double page spreads and finishing the
product off.
Week 3:
Production this week has been solely based upon my final magazine design. I have been
creating the cover for my magazine and have decided to change it to a clearer, bolder design
in which the reader can quickly and easily distinguish the subject, motive and brand of the
magazine. I have changed the colour scheme to a much more mature and professional
looking palette featuring more vibrant, eye catching colours to attract more readers and pull
them in. The colours contrast nicely as to help me emphasize the more important areas of
my product and to also catch the attention of the reader in competition with other brands.
To keep the background of my pages interesting, I used some of my actual photography of
my own and faded it out as to not let it take the spotlight of the page. As a final product I
decided to take this modern turn to further differentiate the brand from my planned
website and business card designs as they already donned the vintage aesthetic. No extra
YouTube tutorials were used in the creation of the cover as I had learnt all I needed to know
in my design experiments and could simply apply the knowledge that I already have. I may
look for more techniques for the planned photography guide further into the magazine
design as there will be plenty of content to work with. The screenshots below show the
progression of my colour scheme for my magazine. There is a clear shift from a brighter,
unaccented scheme to a more mature, realistic theme that one would expect from a
photography magazine’s design. The right-side screenshot is my final stage of the colour
scheme for the magazine. There is a clear distinction between it and the first stage on the
left, I feel it looks more mature and cleaner and therefore will hopefully help me create an
experience for my intended target audience.
In the screenshot above, you can see the colour scheme in action and how each colour has
been used in different ways as discussed earlier. I particularly like the red banner on this
cover design as it really sticks out compared to the rest of the features and draws the
reader’s attention in to the reward that the magazine had been ‘given’ in previous years of
‘existing’. I also made sure to use layering to create depth in the cover’s design for example
with the polaroid style photos being placed behind the banner and the banner disappearing
behind the bottom bar.
The background of my cover page was taken by myself and is also featured in my
photography portfolio. I edited the photo featured above using an app on my phone called
SnapSeed. The app is like Photoshop, just easier to navigate with a mobile device. The only
edits I needed to add to the photo to give it the colour and life it boasts on the cover page
were extra contrast to add a bit more vibrance and outlining to the sky and castle, and
finally a vignette to take any emphasis on the border away and to help the subject (the
castle) pop out more. With my cover, I figured the more techniques that are used in
everyday magazines that I manage to fit into the design, the better it would end up and I
feel that there was not too much else I could have done to better myself without making the
cover lose its simple, minimalistic style.
Next week, I am going to be moving onto the inside of my magazine – namely the inside
cover page and the contents page. I want to start the magazine off with an artistic approach
and therefore will be simply adding a photo into the entirety of the inside cover page. I am
unsure what photo or what else I may potentially add to it at this point. By the end of the
week I am hoping to be moving onto the production of my double page spreads and
adverts.
Week 4:
This week, I began following my planned layout for my inside and contents page using
Photoshop. I used one of my photos from my portfolio for the background of the inside
page as the colour palette blended well with the original design of the page planned in my
planning PowerPoint. I edited the photo using Photoshop, adding more contrast and slightly
decreasing the brightness of it to further follow the darker theme. To avoid the content
looking like a filler, I added a website link to the bottom of the page to suggest it was an
advert for a photography business. The link used a font downloaded from Dafont.com and
was simply shrunken down to an appropriate size. My contents page took direct inspiration
from a magazine I found while creating a mood board for magazine layouts during the
research phase, featuring a sectioned off design using lines and dotted lines to differentiate
between different pages and subjects. I decided to keep the background of this page plain
white as to not distract the reader from the content on the page such as the page numbers
and images as seen below.
I used the bottom photo’s layout style in my contents page as I thought it had a very
modern, and easy to read style that I personally think compliments my future magazine
design well – even using similar colour schemes. I wanted to keep the photo pages textless
as to add some interest from the reader as to what the page is about – It also fits nicely with
the simple aesthetic. The text in the contents page about each subject was added to give
the reader a quick oversight into what is to come and how to get to specific topics. I used
the same font as in the cover page for all the writing here as I wanted to keep the magazine
feeling more like a unit as opposed to a random assortment of different things.
My logo at the top of the contents page was created using Wix logo creator online. It was
easy and quick as I already knew the colours, subject and text that I wanted to feature in it
and the surroundings that it would eventually reside in on my page.
The inside cover page was the easiest section of my magazine to create to this date, there
was very little text to add in and the photo almost took up all the space I needed it to – I just
needed to manipulate the photo in Photoshop slightly using the fill and clone tools to
extend the ‘shadows’ and other dark areas realistically and professionally. I eventually
managed it and then simply used the text tool and the same font as the rest of the magazine
in white to add the website URL at the bottom of the page. (This is not an existing website, I
just made it up for the magazine). The original photo was first edited in Photoshop using a
couple of simple manipulation tools – increasing the contrast to further accentuate the
silhouette of the animal and finally the blur tool to lessen the focus on the surrounding
water.
Next week, I am going to be focusing on producing my tutorial double page spreads (two of
them). I will be aiming to have them completed and have some time left to start off some of
my magazine ads that will be featured throughout my work.
Week 5:
This week in production, I managed to finish both of my double page spread tutorials and
begin to think about my adverts. I ended up cutting production time by using the same
layout for both the tutorials which benefitted me a lot. It also seemed to fit the structured
design of my magazine very well too which I am relatively happy about.
In these double page spreads,Iwantedtokeepthe colourscheme’spresence while also
incorporatinganimage-basedbackgroundlikethe coverpage.Obviously,itwouldbe very
distractingforthe readerif I simplypastedinthe raw photosas the colourswouldbe toofull and
blendwiththe textandotherfeatures.Instead,Idecidedtodecrease the opacityof the background
to a mid-range settingtocalmthe wildcoloursdowna bit.Thisimprovedthe accessibilityof the
pagestenfoldandallowedme touse more text-basedcontentwithoutthe fearof itbeing
unreadable.Importantwordsandphrasesthateducate the readerare highlightedredhere much
like the bannerin the coverpage to emphasize contentIwantthemto see the most.It hasmultiple
purposesinmydouble page spreadssuchas alertingthe readerwhenthe nextstepisbeginning,
emphasizingkeywordsinthe descriptionatthe topof the page to give anevenmore brief insight
intowhat theyare about to readand finally,torepresentamore challengingsectionof the tutorials.
As well asred,I broughtback the bold,shadowedyellowtitle tocontrastwiththe ratherdark
palette alreadyfoundaroundthe pages.Ifeltita nice touchto alsoadd some decorative patternsin
the cornersof the double page spreadsasthere wasn’tenoughyellow colouraround.
My favourite quirkyfeature of the tutorial pagesisthe difficultymeter.Icreatedthisentirely
throughPhotoshopeasilybysimplyusingthe shape tool toadda star and the fill tool tochange itto
yellow.The more yellowstars,the harderthe followingtutorial wouldbe forthe user.
To add furthereasyaccessto my tutorials,Idecidedtogoheavyon the photosaccompanyingthe
text.Thiswasto give the readera frame of reference astowhere theyshouldbe andhow their
screensshouldbe lookingatthatstepof the tutorial.Insteadof usingupunnecessarypage space by
featuringall the screenin eachscreenshot,Icroppedthemdowntoonlyshow the importantparts
such as tool menusandselectionsandvalues.Thiscouldmake itharderforsome people tofollow
the tutorial,butI feel itwasa necessarychoice tokeepthe qualityof the magazine lookingstylized
and professional.Insome of the hardertoview screenshots,Iaddedbrightlycolouredredcirclesin
the placesinwhichthe user will be clickingwhentheygettothe stage.I initiallyhadaproblemwith
fittingmycopyintothe double page spreadasI hadtypedtoo much.I triedresizingthe textbut
eventuallyitsimplygottoosmall toreadat all andI had to condense myworkdownto fewerwords.
EventuallyIgotthere,andthe textjustfitin perfectlyenoughtofillinthe pageswithenoughwords
to make sense.
Towardsthe endof the week,Imanagedto begincreatingmyadvertsandevenfinishone of the
simplerstyledones.The one Ihadfinishedisanadvertfora ‘new watch’.Itfeaturesashow-like red
curtainand the watch in front of everythingelsewithaslightreflectionunderneathit.Ioriginally
experimentedwiththe 3dfeature inPhotoshop,butitquicklybecame toocomplicatedforme andI
eventuallydecidedtomove onandstickwithwhat I had.The below screenshotis the finishedwatch
advert.
I tooka re-usable photofromgoogle imagesthatIfoundandcolourizedtolooklike itdoes.Iwanted
the product to reallystandoutfromthe backgroundand therefore made itbrighterandmore shiny
lookingusingflare effectsinPhotoshop.Ideliberatelymade the backgrounddarkerandfadeditout
as it got lowerdownthe page tocreate the effectof a darkroom and to create space for the artistic
styledtexttobe emphasizedmore.Myonlygrope withthe productisthe sharp lookingedges
aroundthe watchas theylookextremelyoutof place andlowerthe professionalismof the product.
Thisis a hard problemforme to solve withthe time Ihave lefttocomplete the productsIneedsoI
will onlycome backand correct itif I have some spare time at some pointinproduction.
Nextweek,Iwill be producingthe restof the advertsformymagazine andbeginningproductionof
my website,startingwithaddinginmyportfolio.Iwill be aimingtofinishall mymagazine adverts
and inturn finishmymagazine product,lettingme move ontomywebsite.
Week6:
ThisweekinproductionIhave beencontinuingmyworkonmymagazine adverts.Intotal,I have
designedthree advertswithone advertisingmybusinesstogive the audience anideaof how my
service wouldlooklikeineverydayproducts.Myfavourite advertisironicallynotmyownbusiness’
but insteadthe vintage cameraadvertinwhichItriedmy besttoadopt a vintage aestheticusing
Photoshoptools.Ibegansimplybyaddingin aphoto of a vintage camerathat I foundonline using
fairrightsand usedthe spiral tool builtintothe software tocreate a vortex effectcommonlyseenin
that time period.The mainthingmissingatthispointwasthe lackof bad qualityimagery,soI
decidedtoadda slightgaussblurto the whole page whichmade the designlookalotmore dated.
To furtherthis,I alsodesaturatedthe page toadd an oldworldblackand white feel.Arguablythe
mostimportanteffectaddedtothisproductwas the grain, or ‘noise’.Thisisa commonstyle often
seeninolderphotosandevennowadaysin35mm photography.Duringmytime producingall of this
workI have become more and more interestedin35mm photographyandthe style of itand have
evenboughtmyownvintage camera.
The fontusedinthe advertis the same as usedinmy coverpage.I likedthe mature,more
sophisticatedstyle of itthatalsohappenedtobe presentinthe 60’s. In a slightlymore uptodate
fashion,Iaddedanotherfake websitetoaccompany the advertas to not make itcompletelyuseless
– andadvertneedssome formof communicationafterall.
The nextadvertI createdwas alsothe lastand was formy ownbusiness.Itboaststhe same style as
the businesscarddesignthatI createdwhichwasan intentional decisionasIwantedthe businessto
have a distinctstyle thatisrecognizable forthe publicwhile goingabouttheirdailylives.The design
processwasliterallythe same asforthe businesscard,usingPhotoshoptoaddneoneffectswitha
mature yetinterestingcolourschemeanda big,darkbrick wall.The onlydifference withthisdesign
isthat I had to fitthe informationfrombothsidesof the businesscardtoone a4 sizedpage.Thiswas
easierthanfirstthoughthoweveranditwas in fact easiertolayeverythingoutinanon-cluttered
and more professionallookingmatter.Istuckwiththe same colourscheme andfontsfor thisadvert
as theyworkedsowell before andIalsowantedsome more colourinthe magazine.Ilike the fact
that the coloursfitthe scheme of the magazine tooas it adds a more structuredand unifiedstyle to
the design.
Duringthisweek,Imanagedto begincreatingmywebsite toowhichhashelpedme shape the
overall designof the website asInowhave a goodideaforthe visual aspects.Nextweek,Iam
planningonworkingsolelyonmywebsite asitismy lastproduct.I will have tocease productionat
the endof nextweeknomatterwhatso I am aimingtoadd as much as I can to it withthe little
experience Ihave.
Week7:
Thislast weekof production,Ihave beenworkinghardonmywebsite tocreate a smoothandsimple
designforall people touse whenbrowsingformyservices.Ididn’twanttoattack myuserswithtoo
manypagesin mywebsite andsodecidedtohouse all mycontenton one mainpage and use
anchors instead.Thiswouldpullthe screendowntothe part of the page that the workis at,making
findingcertainsubjectseasier.There were notmanytechniquesthatwentintocreatingthe product
as it wasas simple asfindingwhatIlikedanddraggingthemintothe correct places.
The onlytime the useris transferredawayfromthe mainhomepage iswhentheyclickonthe
contact button.Thiswill take themtoa new page witha workingcontactbox that asks fortheir
name,companyand email andthenalertsmyemail address.Thispage isstyledthe same asthe
homepage tokeepitall the same.
I usedmyInstagram accountto store myphotographyportfolioasitwouldeasilyreachalarger
audience andIcouldevenembedthe portfoliotomywebsite usingatemplate.The restof the
website consistsof simplydescriptionsof bothmycamerachoice,mypast workand a brief
introductiontome and where myinspirationslie.The website doesn’tfollow the original colour
scheme asmuch but insteadcombinesthe original blueandredwiththe magazine’syellow andred.
Thiswas importanttome as It showstothe audience thatmybusinessexistsinmultiplemedias.

More Related Content

What's hot (19)

7. evaluation Print
7. evaluation Print7. evaluation Print
7. evaluation Print
 
Weekly reflection (auto recovered)
Weekly reflection (auto recovered)Weekly reflection (auto recovered)
Weekly reflection (auto recovered)
 
Question 6
Question 6Question 6
Question 6
 
Fmp evaluation
Fmp evaluationFmp evaluation
Fmp evaluation
 
Evaluation h – skills development
Evaluation h – skills developmentEvaluation h – skills development
Evaluation h – skills development
 
Evaluation K - technologies
Evaluation K  - technologiesEvaluation K  - technologies
Evaluation K - technologies
 
Question7
Question7Question7
Question7
 
Poster Design Process
Poster Design ProcessPoster Design Process
Poster Design Process
 
Reflection
ReflectionReflection
Reflection
 
FMP Evaluation
FMP EvaluationFMP Evaluation
FMP Evaluation
 
Evaluation
EvaluationEvaluation
Evaluation
 
7. fmp evaluation 2
7. fmp evaluation 27. fmp evaluation 2
7. fmp evaluation 2
 
Media evaluation
Media evaluationMedia evaluation
Media evaluation
 
Fmp evaluation real
Fmp evaluation realFmp evaluation real
Fmp evaluation real
 
Evaluation
EvaluationEvaluation
Evaluation
 
5. Evaluation
5. Evaluation5. Evaluation
5. Evaluation
 
Question 7
Question 7Question 7
Question 7
 
Evaluation
EvaluationEvaluation
Evaluation
 
Photoshop front page and contents print screens
Photoshop front page and contents print screensPhotoshop front page and contents print screens
Photoshop front page and contents print screens
 

Similar to Production Diary Week 1-3: Creating Business Cards and Magazine Cover in Photoshop/TITLE

6. production reflection(1) (1) (1)
6. production reflection(1) (1) (1)6. production reflection(1) (1) (1)
6. production reflection(1) (1) (1)amy foster
 
Post production diary magazine
Post production diary magazinePost production diary magazine
Post production diary magazineGrace Crawford
 
Q7 media evaluation
Q7 media evaluationQ7 media evaluation
Q7 media evaluationDelilahMS
 
Evaluation Question 7
Evaluation Question 7Evaluation Question 7
Evaluation Question 7ahtehamid10
 
Evaluation Seven
Evaluation SevenEvaluation Seven
Evaluation Sevengracemay
 
Question 7 powerpoint presentation
Question 7 powerpoint presentationQuestion 7 powerpoint presentation
Question 7 powerpoint presentationboomgag
 
3. experiments finished
3. experiments finished3. experiments finished
3. experiments finishedamy foster
 
Evaluation 7 final
Evaluation 7 finalEvaluation 7 final
Evaluation 7 finallivhill
 
Evaluation Question 7
Evaluation Question 7Evaluation Question 7
Evaluation Question 7Holly Dawson
 
Post production.pptx
Post production.pptxPost production.pptx
Post production.pptxlydiajudge
 
evaluation Question 7
evaluation Question 7 evaluation Question 7
evaluation Question 7 044007
 

Similar to Production Diary Week 1-3: Creating Business Cards and Magazine Cover in Photoshop/TITLE (20)

6. production reflection(1) (1) (1)
6. production reflection(1) (1) (1)6. production reflection(1) (1) (1)
6. production reflection(1) (1) (1)
 
Post production diary magazine
Post production diary magazinePost production diary magazine
Post production diary magazine
 
Q7 media evaluation
Q7 media evaluationQ7 media evaluation
Q7 media evaluation
 
Evaluation Question 7
Evaluation Question 7Evaluation Question 7
Evaluation Question 7
 
Evaluation Question 7
Evaluation Question 7Evaluation Question 7
Evaluation Question 7
 
Evaluation Question 7
Evaluation Question 7Evaluation Question 7
Evaluation Question 7
 
Evaluation Question 7
Evaluation Question 7Evaluation Question 7
Evaluation Question 7
 
Evaluation Seven
Evaluation SevenEvaluation Seven
Evaluation Seven
 
Evaluation 7
Evaluation 7Evaluation 7
Evaluation 7
 
Question 7 powerpoint presentation
Question 7 powerpoint presentationQuestion 7 powerpoint presentation
Question 7 powerpoint presentation
 
3. experiments finished
3. experiments finished3. experiments finished
3. experiments finished
 
Evaluation 7 final
Evaluation 7 finalEvaluation 7 final
Evaluation 7 final
 
Evaluation Question 7
Evaluation Question 7Evaluation Question 7
Evaluation Question 7
 
Post production.pptx
Post production.pptxPost production.pptx
Post production.pptx
 
Presentation2
Presentation2Presentation2
Presentation2
 
evaluation Question 7
evaluation Question 7 evaluation Question 7
evaluation Question 7
 
Question 6
Question 6Question 6
Question 6
 
Production reflection
Production reflectionProduction reflection
Production reflection
 
7. evaluation(1)
7. evaluation(1)7. evaluation(1)
7. evaluation(1)
 
Production Process
Production ProcessProduction Process
Production Process
 

More from Daniel Thompson (20)

Problem solving
Problem solvingProblem solving
Problem solving
 
Evaluation FMP
Evaluation FMPEvaluation FMP
Evaluation FMP
 
Daniel thompson cv
Daniel thompson cvDaniel thompson cv
Daniel thompson cv
 
UCAS
UCASUCAS
UCAS
 
Presentation powerpoint
Presentation powerpointPresentation powerpoint
Presentation powerpoint
 
Evaluation fmp (1)
Evaluation fmp  (1)Evaluation fmp  (1)
Evaluation fmp (1)
 
Feed-Back FMP
Feed-Back FMPFeed-Back FMP
Feed-Back FMP
 
Problem Solving FMP
Problem Solving FMPProblem Solving FMP
Problem Solving FMP
 
Planning & Production
Planning & ProductionPlanning & Production
Planning & Production
 
Secondary research
Secondary researchSecondary research
Secondary research
 
Fmp research
Fmp researchFmp research
Fmp research
 
Fmp proposal
Fmp proposal Fmp proposal
Fmp proposal
 
Client Evaluation
Client EvaluationClient Evaluation
Client Evaluation
 
Planning & Production FMP
Planning & Production FMPPlanning & Production FMP
Planning & Production FMP
 
Fmp theory
Fmp theoryFmp theory
Fmp theory
 
Fmp Proposal Word
Fmp Proposal WordFmp Proposal Word
Fmp Proposal Word
 
Fmp Pre Proposal Word
Fmp Pre Proposal WordFmp Pre Proposal Word
Fmp Pre Proposal Word
 
Fmp ideas Word
Fmp ideas WordFmp ideas Word
Fmp ideas Word
 
Fmp Research
Fmp Research Fmp Research
Fmp Research
 
Secondary Research FMP
Secondary Research FMPSecondary Research FMP
Secondary Research FMP
 

Recently uploaded

INTRODUCTION TO CATHOLIC CHRISTOLOGY.pptx
INTRODUCTION TO CATHOLIC CHRISTOLOGY.pptxINTRODUCTION TO CATHOLIC CHRISTOLOGY.pptx
INTRODUCTION TO CATHOLIC CHRISTOLOGY.pptxHumphrey A Beña
 
4.16.24 21st Century Movements for Black Lives.pptx
4.16.24 21st Century Movements for Black Lives.pptx4.16.24 21st Century Movements for Black Lives.pptx
4.16.24 21st Century Movements for Black Lives.pptxmary850239
 
MS4 level being good citizen -imperative- (1) (1).pdf
MS4 level   being good citizen -imperative- (1) (1).pdfMS4 level   being good citizen -imperative- (1) (1).pdf
MS4 level being good citizen -imperative- (1) (1).pdfMr Bounab Samir
 
BIOCHEMISTRY-CARBOHYDRATE METABOLISM CHAPTER 2.pptx
BIOCHEMISTRY-CARBOHYDRATE METABOLISM CHAPTER 2.pptxBIOCHEMISTRY-CARBOHYDRATE METABOLISM CHAPTER 2.pptx
BIOCHEMISTRY-CARBOHYDRATE METABOLISM CHAPTER 2.pptxSayali Powar
 
Q-Factor General Quiz-7th April 2024, Quiz Club NITW
Q-Factor General Quiz-7th April 2024, Quiz Club NITWQ-Factor General Quiz-7th April 2024, Quiz Club NITW
Q-Factor General Quiz-7th April 2024, Quiz Club NITWQuiz Club NITW
 
4.16.24 Poverty and Precarity--Desmond.pptx
4.16.24 Poverty and Precarity--Desmond.pptx4.16.24 Poverty and Precarity--Desmond.pptx
4.16.24 Poverty and Precarity--Desmond.pptxmary850239
 
Blowin' in the Wind of Caste_ Bob Dylan's Song as a Catalyst for Social Justi...
Blowin' in the Wind of Caste_ Bob Dylan's Song as a Catalyst for Social Justi...Blowin' in the Wind of Caste_ Bob Dylan's Song as a Catalyst for Social Justi...
Blowin' in the Wind of Caste_ Bob Dylan's Song as a Catalyst for Social Justi...DhatriParmar
 
Using Grammatical Signals Suitable to Patterns of Idea Development
Using Grammatical Signals Suitable to Patterns of Idea DevelopmentUsing Grammatical Signals Suitable to Patterns of Idea Development
Using Grammatical Signals Suitable to Patterns of Idea Developmentchesterberbo7
 
Transaction Management in Database Management System
Transaction Management in Database Management SystemTransaction Management in Database Management System
Transaction Management in Database Management SystemChristalin Nelson
 
ROLES IN A STAGE PRODUCTION in arts.pptx
ROLES IN A STAGE PRODUCTION in arts.pptxROLES IN A STAGE PRODUCTION in arts.pptx
ROLES IN A STAGE PRODUCTION in arts.pptxVanesaIglesias10
 
ClimART Action | eTwinning Project
ClimART Action    |    eTwinning ProjectClimART Action    |    eTwinning Project
ClimART Action | eTwinning Projectjordimapav
 
Expanded definition: technical and operational
Expanded definition: technical and operationalExpanded definition: technical and operational
Expanded definition: technical and operationalssuser3e220a
 
ESP 4-EDITED.pdfmmcncncncmcmmnmnmncnmncmnnjvnnv
ESP 4-EDITED.pdfmmcncncncmcmmnmnmncnmncmnnjvnnvESP 4-EDITED.pdfmmcncncncmcmmnmnmncnmncmnnjvnnv
ESP 4-EDITED.pdfmmcncncncmcmmnmnmncnmncmnnjvnnvRicaMaeCastro1
 
Unraveling Hypertext_ Analyzing Postmodern Elements in Literature.pptx
Unraveling Hypertext_ Analyzing  Postmodern Elements in  Literature.pptxUnraveling Hypertext_ Analyzing  Postmodern Elements in  Literature.pptx
Unraveling Hypertext_ Analyzing Postmodern Elements in Literature.pptxDhatriParmar
 
Decoding the Tweet _ Practical Criticism in the Age of Hashtag.pptx
Decoding the Tweet _ Practical Criticism in the Age of Hashtag.pptxDecoding the Tweet _ Practical Criticism in the Age of Hashtag.pptx
Decoding the Tweet _ Practical Criticism in the Age of Hashtag.pptxDhatriParmar
 
How to Fix XML SyntaxError in Odoo the 17
How to Fix XML SyntaxError in Odoo the 17How to Fix XML SyntaxError in Odoo the 17
How to Fix XML SyntaxError in Odoo the 17Celine George
 

Recently uploaded (20)

INTRODUCTION TO CATHOLIC CHRISTOLOGY.pptx
INTRODUCTION TO CATHOLIC CHRISTOLOGY.pptxINTRODUCTION TO CATHOLIC CHRISTOLOGY.pptx
INTRODUCTION TO CATHOLIC CHRISTOLOGY.pptx
 
Mattingly "AI & Prompt Design: Large Language Models"
Mattingly "AI & Prompt Design: Large Language Models"Mattingly "AI & Prompt Design: Large Language Models"
Mattingly "AI & Prompt Design: Large Language Models"
 
4.16.24 21st Century Movements for Black Lives.pptx
4.16.24 21st Century Movements for Black Lives.pptx4.16.24 21st Century Movements for Black Lives.pptx
4.16.24 21st Century Movements for Black Lives.pptx
 
MS4 level being good citizen -imperative- (1) (1).pdf
MS4 level   being good citizen -imperative- (1) (1).pdfMS4 level   being good citizen -imperative- (1) (1).pdf
MS4 level being good citizen -imperative- (1) (1).pdf
 
BIOCHEMISTRY-CARBOHYDRATE METABOLISM CHAPTER 2.pptx
BIOCHEMISTRY-CARBOHYDRATE METABOLISM CHAPTER 2.pptxBIOCHEMISTRY-CARBOHYDRATE METABOLISM CHAPTER 2.pptx
BIOCHEMISTRY-CARBOHYDRATE METABOLISM CHAPTER 2.pptx
 
INCLUSIVE EDUCATION PRACTICES FOR TEACHERS AND TRAINERS.pptx
INCLUSIVE EDUCATION PRACTICES FOR TEACHERS AND TRAINERS.pptxINCLUSIVE EDUCATION PRACTICES FOR TEACHERS AND TRAINERS.pptx
INCLUSIVE EDUCATION PRACTICES FOR TEACHERS AND TRAINERS.pptx
 
Q-Factor General Quiz-7th April 2024, Quiz Club NITW
Q-Factor General Quiz-7th April 2024, Quiz Club NITWQ-Factor General Quiz-7th April 2024, Quiz Club NITW
Q-Factor General Quiz-7th April 2024, Quiz Club NITW
 
4.16.24 Poverty and Precarity--Desmond.pptx
4.16.24 Poverty and Precarity--Desmond.pptx4.16.24 Poverty and Precarity--Desmond.pptx
4.16.24 Poverty and Precarity--Desmond.pptx
 
Blowin' in the Wind of Caste_ Bob Dylan's Song as a Catalyst for Social Justi...
Blowin' in the Wind of Caste_ Bob Dylan's Song as a Catalyst for Social Justi...Blowin' in the Wind of Caste_ Bob Dylan's Song as a Catalyst for Social Justi...
Blowin' in the Wind of Caste_ Bob Dylan's Song as a Catalyst for Social Justi...
 
Using Grammatical Signals Suitable to Patterns of Idea Development
Using Grammatical Signals Suitable to Patterns of Idea DevelopmentUsing Grammatical Signals Suitable to Patterns of Idea Development
Using Grammatical Signals Suitable to Patterns of Idea Development
 
Transaction Management in Database Management System
Transaction Management in Database Management SystemTransaction Management in Database Management System
Transaction Management in Database Management System
 
ROLES IN A STAGE PRODUCTION in arts.pptx
ROLES IN A STAGE PRODUCTION in arts.pptxROLES IN A STAGE PRODUCTION in arts.pptx
ROLES IN A STAGE PRODUCTION in arts.pptx
 
ClimART Action | eTwinning Project
ClimART Action    |    eTwinning ProjectClimART Action    |    eTwinning Project
ClimART Action | eTwinning Project
 
Expanded definition: technical and operational
Expanded definition: technical and operationalExpanded definition: technical and operational
Expanded definition: technical and operational
 
ESP 4-EDITED.pdfmmcncncncmcmmnmnmncnmncmnnjvnnv
ESP 4-EDITED.pdfmmcncncncmcmmnmnmncnmncmnnjvnnvESP 4-EDITED.pdfmmcncncncmcmmnmnmncnmncmnnjvnnv
ESP 4-EDITED.pdfmmcncncncmcmmnmnmncnmncmnnjvnnv
 
prashanth updated resume 2024 for Teaching Profession
prashanth updated resume 2024 for Teaching Professionprashanth updated resume 2024 for Teaching Profession
prashanth updated resume 2024 for Teaching Profession
 
Unraveling Hypertext_ Analyzing Postmodern Elements in Literature.pptx
Unraveling Hypertext_ Analyzing  Postmodern Elements in  Literature.pptxUnraveling Hypertext_ Analyzing  Postmodern Elements in  Literature.pptx
Unraveling Hypertext_ Analyzing Postmodern Elements in Literature.pptx
 
Faculty Profile prashantha K EEE dept Sri Sairam college of Engineering
Faculty Profile prashantha K EEE dept Sri Sairam college of EngineeringFaculty Profile prashantha K EEE dept Sri Sairam college of Engineering
Faculty Profile prashantha K EEE dept Sri Sairam college of Engineering
 
Decoding the Tweet _ Practical Criticism in the Age of Hashtag.pptx
Decoding the Tweet _ Practical Criticism in the Age of Hashtag.pptxDecoding the Tweet _ Practical Criticism in the Age of Hashtag.pptx
Decoding the Tweet _ Practical Criticism in the Age of Hashtag.pptx
 
How to Fix XML SyntaxError in Odoo the 17
How to Fix XML SyntaxError in Odoo the 17How to Fix XML SyntaxError in Odoo the 17
How to Fix XML SyntaxError in Odoo the 17
 

Production Diary Week 1-3: Creating Business Cards and Magazine Cover in Photoshop/TITLE

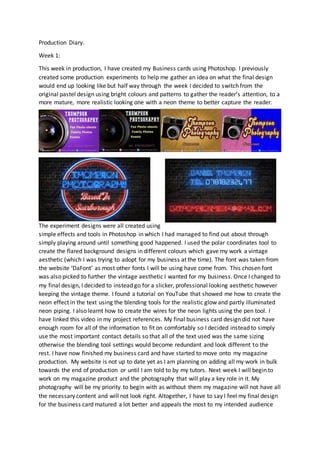
  • 1. Production Diary. Week 1: This week in production, I have created my Business cards using Photoshop. I previously created some production experiments to help me gather an idea on what the final design would end up looking like but half way through the week I decided to switch from the original pastel design using bright colours and patterns to gather the reader’s attention, to a more mature, more realistic looking one with a neon theme to better capture the reader. The experiment designs were all created using simple effects and tools in Photoshop in which I had managed to find out about through simply playing around until something good happened. I used the polar coordinates tool to create the flared background designs in different colours which gave my work a vintage aesthetic (which I was trying to adopt for my business at the time). The font was taken from the website ‘DaFont’ as most other fonts I will be using have come from. This chosen font was also picked to further the vintage aesthetic I wanted for my business. Once I changed to my final design, I decided to instead go for a slicker, professional looking aesthetic however keeping the vintage theme. I found a tutorial on YouTube that showed me how to create the neon effect in the text using the blending tools for the realistic glow and partly illuminated neon piping. I also learnt how to create the wires for the neon lights using the pen tool. I have linked this video in my project references. My final business card design did not have enough room for all of the information to fit on comfortably so I decided instead to simply use the most important contact details so that all of the text used was the same sizing otherwise the blending tool settings would become redundant and look different to the rest. I have now finished my business card and have started to move onto my magazine production. My website is not up to date yet as I am planning on adding all my work in bulk towards the end of production or until I am told to by my tutors. Next week I will begin to work on my magazine product and the photography that will play a key role in it. My photography will be my priority to begin with as without them my magazine will not have all the necessary content and will not look right. Altogether, I have to say I feel my final design for the business card matured a lot better and appeals the most to my intended audience
  • 2. out of all the designs. It has an element of playfulness in the colour scheme and lighting yet upholds a degree of professionalismin the structured background and neatly organized wiring behind the lights. Next week I will be starting production on my photography portfolio and my magazine. By the end of the week I am aiming to have gathered enough photos to satisfy my requirements of the portfolio and finished my cover page in my magazine production. Week 2: This week in production I have been working on both my magazine and my photography portfolio, the latter being exclusively at home. The portfolio began smoothly, and I was able to go out in my own time after college and on my days off to take long walks around Scarborough and capture photos of the nature and landscapes nearby. I had a time window during the afternoons of the last weekend to go for extra photography walks around town as well as what I had planned so I have a lot more photos than I will need. This is great because it gives me plenty of choice when it comes to using them in my project. Photos that I don’t use in my magazine will end up on my portfolio that will feature on my Instagram and my website so that they are not totally useless. The problems during this photography shooting week arose towards the end of the week when my all my planned friends were unable to turn up to my photoshoot for various personal and work-related issues. This slowed down my work pace quite a bit as I originally planned to have a lot more fashion and modelling photos than any others. Not even my backup dates were available to use so I had to then simply make do with what I could get, however I was still able to work around this and instead decided to fully focus on nature shots as I could easily access them. On one of the days, one of my friends was able to come over last minute to get some modelling photos shot which benefitted me a lot as it gave me more content to work with and edit. Once I got the photos, I used Photoshop to manipulate and add effects to them to further resemble what I saw on my travels. Because I love how vintage photos look and wanted to learn more about 35mm photography, I tried to replicate the effect that that style of photos has as seen below in my screenshots. The first image I added a more faded brown gradient with the opacity turned down considerably. I also added a vignette effect to it and pasted a .png file of scratches to add some aging effects. The middle photo was one of my favourites. For this, I simply decreased the saturation, added a noise effect to simulate grain and finally added a slight blur around the flowers in the background to create a sense of depth. Finally, my last photo featured here was a nature shot of a deer I saw on one of my walks around Scarborough. Due to the subject being nature based, I decided to keep this photo relatively untouched – instead opting to simply increase the contrast slightly to sharpen the photo and the vibrance to better show off the greenery around the animal.
  • 3. My magazine production has been a lot more complicated for me so far as I have been creating a whole new colour scheme, layout design and all the content for a product that is supposed to be created by a different company to my own. For the magazine experiment, I decided to attempt to create a more faded, worn looking design. I followed a tutorial I found online that showed me how to add scratches and wear and create a vintage filter to give the cover a great starting aesthetic to build from. At this point, I need to take what I have learnt from this magazine design and add the necessary elements to my final cover. This may include any filters, fonts and colour schemes used. Next week, I will move onto producing the inside front page and contents page of my magazine and will hopefully have time to recouperate what I want to do with my double page spread By the end of next week, I’m aiming to have completed some of my magazine pages and be ready to move onto creating my double page spreads and finishing the product off. Week 3: Production this week has been solely based upon my final magazine design. I have been creating the cover for my magazine and have decided to change it to a clearer, bolder design in which the reader can quickly and easily distinguish the subject, motive and brand of the magazine. I have changed the colour scheme to a much more mature and professional looking palette featuring more vibrant, eye catching colours to attract more readers and pull them in. The colours contrast nicely as to help me emphasize the more important areas of my product and to also catch the attention of the reader in competition with other brands. To keep the background of my pages interesting, I used some of my actual photography of my own and faded it out as to not let it take the spotlight of the page. As a final product I decided to take this modern turn to further differentiate the brand from my planned website and business card designs as they already donned the vintage aesthetic. No extra YouTube tutorials were used in the creation of the cover as I had learnt all I needed to know in my design experiments and could simply apply the knowledge that I already have. I may look for more techniques for the planned photography guide further into the magazine design as there will be plenty of content to work with. The screenshots below show the progression of my colour scheme for my magazine. There is a clear shift from a brighter, unaccented scheme to a more mature, realistic theme that one would expect from a photography magazine’s design. The right-side screenshot is my final stage of the colour scheme for the magazine. There is a clear distinction between it and the first stage on the left, I feel it looks more mature and cleaner and therefore will hopefully help me create an experience for my intended target audience.
  • 4. In the screenshot above, you can see the colour scheme in action and how each colour has been used in different ways as discussed earlier. I particularly like the red banner on this cover design as it really sticks out compared to the rest of the features and draws the reader’s attention in to the reward that the magazine had been ‘given’ in previous years of ‘existing’. I also made sure to use layering to create depth in the cover’s design for example with the polaroid style photos being placed behind the banner and the banner disappearing behind the bottom bar. The background of my cover page was taken by myself and is also featured in my photography portfolio. I edited the photo featured above using an app on my phone called SnapSeed. The app is like Photoshop, just easier to navigate with a mobile device. The only edits I needed to add to the photo to give it the colour and life it boasts on the cover page were extra contrast to add a bit more vibrance and outlining to the sky and castle, and finally a vignette to take any emphasis on the border away and to help the subject (the castle) pop out more. With my cover, I figured the more techniques that are used in
  • 5. everyday magazines that I manage to fit into the design, the better it would end up and I feel that there was not too much else I could have done to better myself without making the cover lose its simple, minimalistic style. Next week, I am going to be moving onto the inside of my magazine – namely the inside cover page and the contents page. I want to start the magazine off with an artistic approach and therefore will be simply adding a photo into the entirety of the inside cover page. I am unsure what photo or what else I may potentially add to it at this point. By the end of the week I am hoping to be moving onto the production of my double page spreads and adverts. Week 4: This week, I began following my planned layout for my inside and contents page using Photoshop. I used one of my photos from my portfolio for the background of the inside page as the colour palette blended well with the original design of the page planned in my planning PowerPoint. I edited the photo using Photoshop, adding more contrast and slightly decreasing the brightness of it to further follow the darker theme. To avoid the content looking like a filler, I added a website link to the bottom of the page to suggest it was an advert for a photography business. The link used a font downloaded from Dafont.com and was simply shrunken down to an appropriate size. My contents page took direct inspiration from a magazine I found while creating a mood board for magazine layouts during the research phase, featuring a sectioned off design using lines and dotted lines to differentiate between different pages and subjects. I decided to keep the background of this page plain white as to not distract the reader from the content on the page such as the page numbers and images as seen below.
  • 6. I used the bottom photo’s layout style in my contents page as I thought it had a very modern, and easy to read style that I personally think compliments my future magazine design well – even using similar colour schemes. I wanted to keep the photo pages textless as to add some interest from the reader as to what the page is about – It also fits nicely with the simple aesthetic. The text in the contents page about each subject was added to give the reader a quick oversight into what is to come and how to get to specific topics. I used the same font as in the cover page for all the writing here as I wanted to keep the magazine feeling more like a unit as opposed to a random assortment of different things. My logo at the top of the contents page was created using Wix logo creator online. It was easy and quick as I already knew the colours, subject and text that I wanted to feature in it and the surroundings that it would eventually reside in on my page. The inside cover page was the easiest section of my magazine to create to this date, there was very little text to add in and the photo almost took up all the space I needed it to – I just needed to manipulate the photo in Photoshop slightly using the fill and clone tools to extend the ‘shadows’ and other dark areas realistically and professionally. I eventually managed it and then simply used the text tool and the same font as the rest of the magazine in white to add the website URL at the bottom of the page. (This is not an existing website, I just made it up for the magazine). The original photo was first edited in Photoshop using a couple of simple manipulation tools – increasing the contrast to further accentuate the silhouette of the animal and finally the blur tool to lessen the focus on the surrounding water.
  • 7. Next week, I am going to be focusing on producing my tutorial double page spreads (two of them). I will be aiming to have them completed and have some time left to start off some of my magazine ads that will be featured throughout my work. Week 5: This week in production, I managed to finish both of my double page spread tutorials and begin to think about my adverts. I ended up cutting production time by using the same layout for both the tutorials which benefitted me a lot. It also seemed to fit the structured design of my magazine very well too which I am relatively happy about.
  • 8. In these double page spreads,Iwantedtokeepthe colourscheme’spresence while also incorporatinganimage-basedbackgroundlikethe coverpage.Obviously,itwouldbe very distractingforthe readerif I simplypastedinthe raw photosas the colourswouldbe toofull and blendwiththe textandotherfeatures.Instead,Idecidedtodecrease the opacityof the background to a mid-range settingtocalmthe wildcoloursdowna bit.Thisimprovedthe accessibilityof the pagestenfoldandallowedme touse more text-basedcontentwithoutthe fearof itbeing unreadable.Importantwordsandphrasesthateducate the readerare highlightedredhere much like the bannerin the coverpage to emphasize contentIwantthemto see the most.It hasmultiple purposesinmydouble page spreadssuchas alertingthe readerwhenthe nextstepisbeginning, emphasizingkeywordsinthe descriptionatthe topof the page to give anevenmore brief insight intowhat theyare about to readand finally,torepresentamore challengingsectionof the tutorials. As well asred,I broughtback the bold,shadowedyellowtitle tocontrastwiththe ratherdark palette alreadyfoundaroundthe pages.Ifeltita nice touchto alsoadd some decorative patternsin the cornersof the double page spreadsasthere wasn’tenoughyellow colouraround. My favourite quirkyfeature of the tutorial pagesisthe difficultymeter.Icreatedthisentirely throughPhotoshopeasilybysimplyusingthe shape tool toadda star and the fill tool tochange itto yellow.The more yellowstars,the harderthe followingtutorial wouldbe forthe user. To add furthereasyaccessto my tutorials,Idecidedtogoheavyon the photosaccompanyingthe text.Thiswasto give the readera frame of reference astowhere theyshouldbe andhow their screensshouldbe lookingatthatstepof the tutorial.Insteadof usingupunnecessarypage space by featuringall the screenin eachscreenshot,Icroppedthemdowntoonlyshow the importantparts such as tool menusandselectionsandvalues.Thiscouldmake itharderforsome people tofollow the tutorial,butI feel itwasa necessarychoice tokeepthe qualityof the magazine lookingstylized and professional.Insome of the hardertoview screenshots,Iaddedbrightlycolouredredcirclesin the placesinwhichthe user will be clickingwhentheygettothe stage.I initiallyhadaproblemwith fittingmycopyintothe double page spreadasI hadtypedtoo much.I triedresizingthe textbut eventuallyitsimplygottoosmall toreadat all andI had to condense myworkdownto fewerwords. EventuallyIgotthere,andthe textjustfitin perfectlyenoughtofillinthe pageswithenoughwords to make sense. Towardsthe endof the week,Imanagedto begincreatingmyadvertsandevenfinishone of the simplerstyledones.The one Ihadfinishedisanadvertfora ‘new watch’.Itfeaturesashow-like red curtainand the watch in front of everythingelsewithaslightreflectionunderneathit.Ioriginally experimentedwiththe 3dfeature inPhotoshop,butitquicklybecame toocomplicatedforme andI eventuallydecidedtomove onandstickwithwhat I had.The below screenshotis the finishedwatch advert.
  • 9. I tooka re-usable photofromgoogle imagesthatIfoundandcolourizedtolooklike itdoes.Iwanted the product to reallystandoutfromthe backgroundand therefore made itbrighterandmore shiny lookingusingflare effectsinPhotoshop.Ideliberatelymade the backgrounddarkerandfadeditout as it got lowerdownthe page tocreate the effectof a darkroom and to create space for the artistic styledtexttobe emphasizedmore.Myonlygrope withthe productisthe sharp lookingedges aroundthe watchas theylookextremelyoutof place andlowerthe professionalismof the product. Thisis a hard problemforme to solve withthe time Ihave lefttocomplete the productsIneedsoI will onlycome backand correct itif I have some spare time at some pointinproduction. Nextweek,Iwill be producingthe restof the advertsformymagazine andbeginningproductionof my website,startingwithaddinginmyportfolio.Iwill be aimingtofinishall mymagazine adverts and inturn finishmymagazine product,lettingme move ontomywebsite. Week6: ThisweekinproductionIhave beencontinuingmyworkonmymagazine adverts.Intotal,I have designedthree advertswithone advertisingmybusinesstogive the audience anideaof how my service wouldlooklikeineverydayproducts.Myfavourite advertisironicallynotmyownbusiness’ but insteadthe vintage cameraadvertinwhichItriedmy besttoadopt a vintage aestheticusing Photoshoptools.Ibegansimplybyaddingin aphoto of a vintage camerathat I foundonline using fairrightsand usedthe spiral tool builtintothe software tocreate a vortex effectcommonlyseenin that time period.The mainthingmissingatthispointwasthe lackof bad qualityimagery,soI decidedtoadda slightgaussblurto the whole page whichmade the designlookalotmore dated. To furtherthis,I alsodesaturatedthe page toadd an oldworldblackand white feel.Arguablythe
  • 10. mostimportanteffectaddedtothisproductwas the grain, or ‘noise’.Thisisa commonstyle often seeninolderphotosandevennowadaysin35mm photography.Duringmytime producingall of this workI have become more and more interestedin35mm photographyandthe style of itand have evenboughtmyownvintage camera. The fontusedinthe advertis the same as usedinmy coverpage.I likedthe mature,more sophisticatedstyle of itthatalsohappenedtobe presentinthe 60’s. In a slightlymore uptodate fashion,Iaddedanotherfake websitetoaccompany the advertas to not make itcompletelyuseless – andadvertneedssome formof communicationafterall. The nextadvertI createdwas alsothe lastand was formy ownbusiness.Itboaststhe same style as the businesscarddesignthatI createdwhichwasan intentional decisionasIwantedthe businessto have a distinctstyle thatisrecognizable forthe publicwhile goingabouttheirdailylives.The design processwasliterallythe same asforthe businesscard,usingPhotoshoptoaddneoneffectswitha mature yetinterestingcolourschemeanda big,darkbrick wall.The onlydifference withthisdesign isthat I had to fitthe informationfrombothsidesof the businesscardtoone a4 sizedpage.Thiswas easierthanfirstthoughthoweveranditwas in fact easiertolayeverythingoutinanon-cluttered and more professionallookingmatter.Istuckwiththe same colourscheme andfontsfor thisadvert as theyworkedsowell before andIalsowantedsome more colourinthe magazine.Ilike the fact that the coloursfitthe scheme of the magazine tooas it adds a more structuredand unifiedstyle to the design.
  • 11. Duringthisweek,Imanagedto begincreatingmywebsite toowhichhashelpedme shape the overall designof the website asInowhave a goodideaforthe visual aspects.Nextweek,Iam planningonworkingsolelyonmywebsite asitismy lastproduct.I will have tocease productionat the endof nextweeknomatterwhatso I am aimingtoadd as much as I can to it withthe little experience Ihave. Week7: Thislast weekof production,Ihave beenworkinghardonmywebsite tocreate a smoothandsimple designforall people touse whenbrowsingformyservices.Ididn’twanttoattack myuserswithtoo manypagesin mywebsite andsodecidedtohouse all mycontenton one mainpage and use anchors instead.Thiswouldpullthe screendowntothe part of the page that the workis at,making
  • 12. findingcertainsubjectseasier.There were notmanytechniquesthatwentintocreatingthe product as it wasas simple asfindingwhatIlikedanddraggingthemintothe correct places. The onlytime the useris transferredawayfromthe mainhomepage iswhentheyclickonthe contact button.Thiswill take themtoa new page witha workingcontactbox that asks fortheir name,companyand email andthenalertsmyemail address.Thispage isstyledthe same asthe homepage tokeepitall the same. I usedmyInstagram accountto store myphotographyportfolioasitwouldeasilyreachalarger audience andIcouldevenembedthe portfoliotomywebsite usingatemplate.The restof the website consistsof simplydescriptionsof bothmycamerachoice,mypast workand a brief introductiontome and where myinspirationslie.The website doesn’tfollow the original colour scheme asmuch but insteadcombinesthe original blueandredwiththe magazine’syellow andred. Thiswas importanttome as It showstothe audience thatmybusinessexistsinmultiplemedias.