
Recommended
More Related Content
Featured
Featured (20)
Cap.2
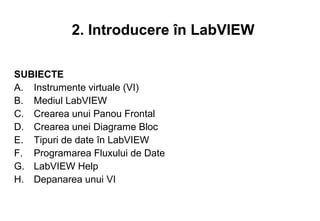
- 1. 2. Introducere în LabVIEW SUBIECTE A. Instrumente virtuale (VI) B. Mediul LabVIEW C. Crearea unui Panou Frontal D. Crearea unei Diagrame Bloc E. Tipuri de date în LabVIEW F. Programarea Fluxului de Date G. LabVIEW Help H. Depanarea unui VI
- 2. A. Instrumente Virtuale (VI) • Aplicatiile (programele) realizate in LabVIEW poarta denumirea de Instrumente Virtuale (în engleza, Virtual Instruments, prescurtat VI). Denumirea provine de la faptul ca, in primele sale versiuni, LabVIEW a fost strict dedicat pentru realizarea unor programe de monitorizare a proceselor. Programele respective inlocuiau o serie de aparate si instrumente electronice - de unde si motto-ul corporatiei National Instruments: The software is the instrument – primind astfel denumirea de Instrumente Virtuale. • Fiecare VI conţine 3 părţi principale: 1. Panoul Frontal – permite interacţionarea utilizatorului cu VI-ul. 2. Diagrama Bloc – Codul care controlează programul. 3. Icoana/Conectorul – Mijloc de conectare a VI-ului cu alte VI-uri. • Utilizatorul poate controla programul, poate modica intrările şi poate urmării updatarea datelor în timp real. • Fiecare control sau indicator al panoului frontal are un terminal corespunzător în diagrama bloc. Când un VI rulează, valorile controalelor trec în diagrama bloc, unde sunt utilizate în funcţionarea diagramei, iar rezultatele sunt trecute în alte funcţii sau indicatoare.
- 3. In order to create a new VI, select “Blank VI” or in order to create a new LabVIEW project, select “Empty project”. When you open a blank VI, an untitled front panel window appears. This window displays the front panel and is one of the two LabVIEW windows you use to build a VI. The other window contains the block diagram. Panou Frontal Controale = Intrări Indicatoare = Ieşiri Diagrama Bloc “Program” ce însoţeşte panoul frontal. Componentele sunt legate împreună
- 5. Panoul Frontal (PF) al VI-ului Uneltele (PF) Icoană Control Boolean Legenda Graficului Indicator Grafic Plot Legenda Legend Scalei
- 6. • Panoul frontal este interfaţa utilizator a VI-ului. Denumirea de PF vine de la faptul ca acesta simulează panoul frontal al unui instrument fizic. Construirea panoului frontal se face cu controale şi indicatoare, care sunt terminalele interactive de intrare şi respectiv de ieşire ale VI-ului. • The difference between a “Numeric Control” and a “Numeric Indicator” is that for a “Numeric Control” you may enter a value, while the “Numeric Indicator” is read-only, i.e., you may only read the value, not change it. • The appearance is also slightly different, the “Numeric Control” has an increment and an decrement button in front, while the “Numeric Indicator” has a darker background color in order to indicate that its read-only.
- 7. • After you build the user interface, you add code using VIs and structures to control the front panel objects. The block diagram contains this code. In some ways, the block diagram resembles a flowchart. • Diagrama Bloc este codul sursă al VI-ului, realizat în limbajul de programare grafică (limbaj G). Obiectele Panoului Frontal apar ca terminale în DB. Suplimentar, DB conţine funcții şi structuri din librăriile LabVIEW, VI-uri de nivel inferior (subVI-uri) sau diferite constante. Firele conectează fiecare nod al DB, inclusiv terminalele control şi indicator, funcţii şi structuri.
- 8. Diagrama Bloc (DB) a VI-ului Uneltele DB Funcţia Divide SubVI Terminalul Grafic Fire de date Structură Constantă Funcţia Terminalul While Loop Numerică Timing Control Boolean
- 9. Front Panel and Block Diagram Toolbars Run button Font ring Continuous Run button Alignment ring Abort button Distribution ring Pause/Continue button Resize ring Additional Buttons on the Reorder ring Block Diagram Toolbar Context Help Button Warning indicator • Execution Highlighting button Enter button • Step Into button • Step Over button Broken Run button • Step Out button
- 10. Tools Palette • LabVIEW automatically selects the tool needed • Available on the front panel and the block diagram • A tool is a special operating mode of the mouse cursor • Use the tools to operate and modify front panel and block diagram objects • To show the tools palette, select Window»Show Tools Palette
- 11. Controls Palette • The Controls and Functions palettes contain sub palettes of objects you can use to create a VI. When you click a sub palette icon, the entire palette changes to the sub palette you selected. To use an object on the palettes, click the object and place it on the front panel or block diagram. The Controls palette is available only on the front panel. The Controls palette contains the controls and indicators you use to build the front panel. • The most used Sub Palettes are the Numeric Sub Palette, the Boolean Sub Palette and the String & Path Sub Palette. • You may change the appearance and the contents of the Controls palette.
- 13. • “Numerical Control” and “Numerical Indicator” are the most used objects in the numeric sub palette. • Boolean sub palette has lots of different buttons you may use. OK, Cancel and Stop buttons are useful.
- 14. • In the String and Path palette we have String Controls, Combo Box, etc.
- 15. Functions Palette • The Functions palette is available only on the block diagram. The Functions palette contains the VIs and functions you use to build the block diagram.
- 16. Searching for Controls, VIs, and Functions • Press the search button to perform text searches of the palettes • Click and drag an item from the search window to the block diagram or double-click an item to open the owning palette
- 17. C. Crearea Panoului Frontal Panoul Frontal se construiește cu controale (intrări) și cu indicatoare (ieșiri) Indicator Numeric Etichete Butoane pentru incrementare Control Control Indicator Numeric Boolean Boolean
- 18. Shortcut Menus for Front Panel Objects Right-click the digital display to access its shortcut menu Right-click the label to access its shortcut menu
- 19. Property Page Right-click a control or indicator on the front panel and select Properties from the shortcut menu to access the property dialog box for that object
- 20. D. Crearea Diagramei Bloc Panou Frontal Diagrama Bloc Control Indicator Terminals Terminals Wires Nodes
- 21. Exercițiu: Se va realiza un VI, care să realizeze conversia din grade °C în grade °F
- 22. VI-uri Express, VI-uri Standard și Funcţii • VI-uri Expres : VI-uri interactive cu pagină dialog configurabilă, ce permite utilizatorului modificarea funcționalității VI-ului expres. • VI-uri Standard : VI-uri modularizate realizate prin fire de legătură. Au PF și DB • Funcţii: elemente fundamentale de operare în LabVIEW; Nu au PF sau DB Funcţie VI Expres VI Standard
- 23. Elementele utilizate la realizarea diagramei bloc • Terminale • Fire • Noduri Terminalele reprezintă „porţi” prin intermediul cărora se realizează transferul datelor: -între panoul frontal şi diagrama bloc (bidirectional); -între nodurile diagramei bloc (unidirectional). Există două tipuri de terminale : -terminale sursă; -terminale destinaţie. Firele, definesc şi reprezintă grafic, fluxul datelor (între noduri se realizează schimbul de informaţii) în diagrama bloc. Fluxul datelor este de la terminalele sursă spre terminalele destinaţie. Firele codifică prin culoare şi stilul liniei tipul datelor transmise; poziţionand unealta de interconectare deasupra unui fir, care realizează o legătură validă, se obţine în fereastra de asistenţă descrierea tipului de dată care se transmite pe acea cale.
- 24. Nodurile sunt elemente de execuţie din programul G. Ele corespund operatorilor, funcţiilor predefinite, instrucţiunilor şi subrutinelor realizate de utilizator din limbajele de programere bazate pe text. Există patru tipuri de noduri: -funcţii -subIV -codul interfeţei nodurilor (CIN) -structuri Funcţiile sunt elemente constructive ale nodurilor care cresc performanţa operaţiilor elementare: de exemplu adunarea numerelor. SubIV sunt instrumente virtuale create anterior şi care se introduc în diagrama bloc a altor instrumente. CIN reprezintă interfaţa dintre diagrama bloc şi codurile scrise în limbajul C. Structurile sunt elemente de control ale programului. Ele controlează transferul datelor în interiorul instrumentului virtual.
- 25. Noduri în Diagrama Bloc Icon Expandable Node Expanded Node • Function Generator VI • Same VI, viewed three different ways • Yellow field designates a standard VI • Blue field designates an Express VI
- 26. Terminale în Diagrama Bloc • Terminals are entry and exit ports that exchange information between the panel and diagram • Terminals are analogous to parameters and constants in text- based programming languages • Right-click and toggle View As Icon to change the icon view
- 27. Legături (fire) în DB Albastru Dynamic
- 28. Tehnici de legare Hot Spot • Automatic Wiring • Use Context Help Window when wiring • Right-click wire and select Clean Up Wire • Tip Strips • Automatic wire routing • Right-click terminals and select Visible Items»Terminals View the terminal connections to a function
- 29. Wiring “Hot Spot” Click To Select Wires Use Automatic Clean Up Wiring Wire Routing
- 30. • Exercise: Acquiring a Signal VI Objective: Explore the LabVIEW environment by creating a VI that generates a signal and displays it on the front panel.
- 31. E. Tipuri de date în LabVIEW • Date numerice: – Întregi – Numere în virgulă mobilă • Date tip string (caractere alfanumerice) • Date Booleene • Date tip forme de undă
- 32. Date numerice întregi Meniurile proprii ale elementelor de control sau indicatoare numerice contin o optiune specifica, Representation, cu ajutorul careia se specifica modul in care valoarea numerica respectiva este stocata in memorie. • Întregi cu semn – 32-bit (I32): de la -2147483648 to 2147483647 – 16-bit (I16): de la -32768 to 32767 – 8-bit (I8): de la -128 to 127 • Întregi fără semn – 32-bit (U32): de la 0 to 4,294,967,295 – 16-bit (U16): de la 0 to 65536 – 8-bit (U8): de la 0 to 255
- 33. Date numerice în virgulă mobilă • Număr real în virgulă mobilă: – Precizie extinsă [EXT]: –1.19e+4932 to 1.19e+4932 – Dublă precizie [DBL]: –1.79e+308 to 1.79e+308 – Simplă precizie [SGL]: –3.40e+38 to 3.40e+38 • Număr complex în virgulă mobilă: – Numărul complex în virgulă mobilă are o reprezentare echivalentă ca și numerele reale în virgulă mobilă. Singura diferență este că numărul complex are o parte reală și una imaginară. CXT (complex extended) = numar complex cu precizie extinsa (32 octeti) CDB (complex double) = numar complex cu precizie dubla (16 octeti) CSG (complex single) = numar complex cu precizie simpla (8 octeti)
- 34. Date de tip string • Un string este o secvență de caractere ASCII. • Câteva dintre multele aplicații ale stringurilor sunt: − Creare unui simplu mesaj text. − Trecerea datelor numerice prin instrumente ca și caractere string și apoi convertirea stringurilor în date numerice. − Înmagazinarea datelor numerice pe disc. Pentru memorarea datelor numerice într-un fișier ASCII, trebuie mai întâi convertite numerele în stringuri. − Cutii de dialog, pentru diferitele atenționări ale utilizatorului. • Există următoarele tipuri de elemente de tip string: − Control String − Indicator String − Funcții String
- 35. Date Booleene • Datele Booleene sunt date de tip logic. Acestea au două valori: ADEVĂRAT și FALS. Datele Booleene sunt reprezentate prin două stări ON și OFF. • Un control Boolean din panoul frontal al unui VI este fie un buton fie un comutator (switch). Un indicator Boolean din panoul frontal al unui VI este un LED. • Butoanele Booleene au asociate mai multe funcții logice. Există șase moduri de operare al acestora. 1. Switch when pressed (Comuntă când este apăsat) 2. Switch when released (Comuntă când este eliberat) 3. Switch until released (Comuntă până când este eliberat) 4. Latch when pressed (Închide când este apăsat) 5. Latch when released (Închide când este eliberat) 6. Latch until released (Închide până când este eliberat)
- 36. Change state on a button press. Remain there until another button press. Switch When Pressed Change state on a button release. Remain there until another button release. Switch When Released Change state on a button press. Change back when the button is released. Switch Until Released Change state on a button press. Change back when the control is read by Latch When Pressed LabVIEW. Change state on a button release. Latch When Released Change back when the control is read by LabVIEW. Latch Until Released Change state on a button press. Change back when released and read by LabVIEW.
- 37. F. Programarea fluxului de date
- 38. • DB este executată în funcţie de fluxul de date • Nodurile sunt executate când datele sunt disponibile la toate intrările terminalelor • Nodurile alimentează cu date toate terminalele de ieşire
- 39. • Exercise: Express Filter VI Objective: Explore the data flow of an example VI.
- 40. • Exercise: Reduce Samples VI Objective: To build a VI that generates a signal, reduces the number of samples in the signal, and displays the resulting data in a table on the front panel.
- 41. G. LabVIEW Documentation: Context Help • To display the Context Help window, select Help»Show Context Help, press the <Ctrl-H> keys, or press the Show Context Help Window button in the toolbar • Move cursor over object to display help • Connections: Required – bold Recommended – normal Optional - dimmed Simple/Detailed Context Help Lock Help More Help
- 42. LabVIEW Help • Click the More Help button in the Context Help window • Select Help»VI, Function, & How-To Help • Click the sentence Click here for more help in the Context Help window. Contains detailed descriptions of most palettes, menus, tools, VIs, and functions, step-by-step instructions for using LabVIEW features, links to the LabVIEW Tutorial, PDF versions of all the LabVIEW manuals and Application Notes, and technical support resources.
- 43. H. Tehnici de reparare • Găsirea erorilor Clic în butonul Run întrerupt Fereastra va arăta erorile apărute • Sublinierea execuţiei Clic în butonul Execution Highlighting; fluxul de date este animat utilizând baloane. Valorile sunt afişate pe fire. • Probe Clic-dreapta pe un fir pentru afişarea probei şi a datelor ce curg prin secţiunea respectivă de fir. Se poate de asemenea selecta unealta Probe din paleta cu unelte, iar apoi se va da clic pe fir
- 44. Step Into, Over, and Out buttons for Single Stepping Click on Step Into button to enable single stepping Once Single Stepping has begun, the button steps into nodes Click on Step Over button to enable single stepping or to step over nodes Click on Step Out button to step out of nodes
- 45. Summary • Virtual instruments (VIs) have three main parts — the front panel, the block diagram, and the icon and connector pane • The front panel is the user interface of a LabVIEW program and the block diagram is the executable code • The block diagram contains the graphical source code composed of nodes, terminals, and wires • Use Express VIs, standard VIs and functions on the block diagram to create your measurement code. For the most common requirements, use Express VIs with interactive configuration dialogs to define your application. • Floating Palettes: Tools Palette, Controls Palette (only when Front Panel Window is active), and Functions Palette (only when Block Diagram Window is active) • There are help utilities including the Context Help Window and LabVIEW Help
- 46. Summary • Place controls (inputs) and indicators (outputs) in the front panel window • Use the Operating tool to manipulate panel objects. Use the Positioning tool to select, move, and resize panel objects. Use the Wiring tool to connect diagram objects • Control terminals have thicker borders than indicator terminals • All front panel objects have property pages and shortcut menus • Wiring is the mechanism to control dataflow and produce LabVIEW programs • Broken Run arrow means a nonexecutable VI • Various debugging tools and options available such as setting probes and breakpoints, execution highlighting, and single stepping
- 47. Tips • Common keyboard shortcuts Windows Sun Linux MacOS <Ctrl-R> <♦-R> <M-R> <-R> Run a VI <Ctrl-F> <♦-F> <M-F> <-F> Find object <Ctrl-H> <♦-H> <M-H> <-H> Activate Context Help window <Ctrl-B> <♦-B> <M-B> <-B> Remove all broken wires <Ctrl-W> <♦-W> <M-W> <-W> Close the active window <Ctrl-E> <♦-E> <M-E> <-E> Toggle btwn Diagram/Panel Window • Access Tools Palette with <shift>-right-click • Increment/Decrement faster using <shift> key • Tools»Options selection — set preferences in LabVIEW • VI Properties (File menu)
Editor's Notes
- This slide shows the startup screen for LabVIEW 7.0 The LabVIEW dialog box includes the following components: A menu bar with standard items such as File»Exit. A set of buttons for creating and opening VIs, configuring DAQ devices, and finding helpful information. Click the New button to create a new VI. Click the arrow on the New button to choose to open a blank VI or to open the New dialog box. Click the Open button to open an existing VI. Click the arrow on the Open button to open recent files. Click the Configure button to configure your DAQ devices. Click the arrow next on the Configure button to configure LabVIEW. Click the Help button to launch LabVIEW Help. Click the arrow on the Help button for other Help options, including the Example Finder.
- Panoul frontal este interfaţa utilizator a VI-ului . Denumirea de PF vine de la faptul ca acesta simulează panoul frontal al unui instrument fizic. Construirea panoului frontal se face cu controale şi indicatoare, care sunt terminalele interactive de intrare şi respectiv de ieşire ale VI-ului .
- Diadrama Bloc este codul sursă al VI-ului, realizat în limbajul de programare grafică (limbaj G) . Obiectele Panoului Frontal apar ca terminale în DB . Suplimentar, DB conţine funcții şi structuri din librăriile LabVIEW, VI-uri de nivel inferior (subVI-uri) sau diferite constante . Firele conectează fiecare nod al DB, inclusiv terminalele control şi indicator, funcţii şi structuri . În această DB, subVI-ul Temp cheamă subrutina care recuperează temperatura de la placa de achiziţie (DAQ) . Această temperatură este afişată împreună cu temperatura medie în graficul Temperature History . Comutatorul Power este controlul boolean din PF care va oprii execuţia Buclei While . De asemenea, Bucla While conţine o funcţie Timing pentru controlul frecvenţei de iteraţie al buclei . The block diagram is the VI's source code, constructed in LabVIEW's graphical programming language, G (see Figure 1.5 ). The block diagram is the actual executable program. The components of a block diagram are lower-level VIs, built-in functions, constants, and program execution control structures. You draw wires to connect the appropriate objects together to define the flow of data between them. Front panel objects have corresponding terminals on the block diagram so data can pass from the user to the program and back to the user.
- Launch LabVIEW and discuss the buttons using the computer; never use the abort button when doing demonstrations. Set a good example! Tools used to create, modify, debug, and execute VIs: Panel Toolbar: Located in the Panel window. Explain each button as described in the manual. Broken Run: Click on it to find errors. Continuous Run: Use for testing sections of code. Should use a while/for loop for repeating parts of a diagram in an application. Stop: Not a clean way to terminate the program. Avoid using it. Use a switch on the panel. Diagram Toolbar: Additional tools to debug the VI. Briefly explain each button. Tell the class we will discuss them in more detail when we talk about debugging. When running a VI, the font, alignment, and distribution rings disappear because they are editing tools.
- Graphical, floating palettes. Tools can be used for editing, debugging, and operating VIs. You can hide/show palettes by enabling or disabling them via the Window menu. Shortcut key (shift-right click - Windows) Although most will use the automatic tool selection, it is important that user understand the difference between the different tools so that they know when to use it. For example, when hovering over a boolean control, you may have the labeling tool, the selection tool or the operating tool depending on where the mouse cursor is. How do you know when to click? Demonstrate! Be sure to know all the correct names for the tools in the palette and take your time familiarizing students with their names. In particular, stress the difference between the Position/Resizing Tool and the Operator as during exercises students will often have the wrong tool and if you can vocally instruct them to get the correct tool it causes much less frustration.
- Graphical, floating palettes. You can access the Controls palette only from the Panel window. If palettes are not displayed, you can access them via the Window menu and select the Show Controls palette. OR, right click on open area of front panel or diagram window to display Controls palette.
- Graphical, floating palettes. You can access the Functions palette only from the Block Diagram window. If palettes are not displayed, you can access them via the Window menu and select the Show Functions palette. OR, right click on open area of front panel or diagram window to display Functions palette.
- Use the buttons on top of the palette windows to navigate, search, and edit the palettes. You can search for controls, VIs, and functions that either contain certain words or start with certain words. Double clicking a search result opens the palette that contains the search result. You also can click and drag the name of the control, VI, or function directly to the front panel or block diagram. You might want to bring out the fact that as the course progresses the manual will not always tell students where the controls/indicators/functions are located. Tell them if they can’t find a tool and you are busy helping someone else that they can always tack down the palette and search for the item they are looking for. Demonstrate doing this and show them how they can learn where the item is by backing through the subpalettes.
- Creating the front panel (user interface): Built with controls and indicators: Controls: Supply data to the VI. Indicators: Display data generated by the VI. They can find out if it is a control or indicator by checking the right-click menu of the object and referring to the third item (Change to Indicator or Change to Control) Explain graphics on slide: Numeric controls: Point out increment buttons. Numeric indicators: No increment buttons. Boolean objects: Ask class which Boolean is a control and which is an indicator. Explain that even though an LED is an indicator in the real world, it can be changed to a control in LabVIEW. Demonstrate.
- Right-click menus: Most often used LabVIEW menus. Most LabVIEW objects have these menus for modification of attributes pertaining to that object. Functions/Controls palettes are available as right-click menus.
- Explain the options available for the numeric control, as shown on the slide. Also explain that property pages will differ dependant on the object selected.
- The block diagram is the “code” for the VI. Note: Wires can cross each other. You will see dots at the wire junctions, and a small gap in the wire showing that wires do not connect. If dots at wire junctions have been turned off, go to Options (Tools menu)»Block Diagram and select Show dots at wire junctions. Point out border difference and arrow direction on controls and indicator terminals. Nodes: Program execution elements (analogous to statements, functions, and subroutines). Functions: Built-in nodes for elementary functions. SubVIs: VIs you design and later call from the diagram of another VI. Structures: Control the program flow.
- Estimate completion time: 20 minutes. The exercise is easy, but since it will be the first VI that we actually create, it is good to allow ample time to explore the LabVIEW environment. Instructions: Build a VI that converts °C to °F. When run, the VI should take an input value (°C), multiply it by 1.8, add 32, and display the result (°F). The front panel should display both the input value and the result. Save the VI as Convert C to F.vi.
- Do not refer to the Express VI as an express block. Note that you can have all functions be placed as expandable nodes by enabling an option in the Tools >> Options >> New to LabVIEW 7.0 menu. You can change from an expandable function/node to an icon view, but if the option is not enabled you cannot change from the icon view to the expandable node.
- Funcţiile pentru valorile alfanumerice sunt grupate în subpaleta String .
- DEMO: Demonstrate wiring by placing two controls, one indicator, and an Add function. Use the Help window (point out how terminals in the Help window flash when the tool passes over the actual function terminal). right-click on the Add function and select Show Terminals. Point out Tip Strips. If students really struggle with wiring, remember that they can enable the Terminal view and that can help. If that is still not enough, they can enable the option to have nodes placed as expandable. That won’t fix all problems, and the last option is to reduce the monitor resolution to something like 800x600.
- The data types in LabVIEW are similar to other programming languages such C++. However, LabVIEW has its unique way to represent the data types such as numeric data type for floating-numbers, integer, unsigned integer, and complex number. The difference among the numeric data types is the number of bits they use to store data and the data values they represent. Users can easily change the type between real number and integer number and different precisions. This is done by right click the icon of numerical control, indicator or constant and choose representation. Users can choose from long integer to extended complex number. Boolean data type has two values, true and false. String type is a collection of characters. The waveform data are the values that represent the waveform. An array of any numeric data type can represent analog waveform data. Generally, the number of data values in the array corresponds directly to the number of scans from a DAQ device.
- LabVIEW has two representations for integer, signed or unsigned. Unsigned integer can only has value greater or equal to zero. Depending on the number of digits used to represent the integer value. The data range varies. For signed integer, the ranges are -128 to 127 for 8-bit, -32768 to 32767 for 16-bit and -2147483648 to 2147483647 for 32-bit. For unsigned integer, the ranges are 0 to 256 for 8-bit, 0 to 65536 for 16-bit and 0 to 4,294,967,295 for 32-bit. It is recommended to use 32-bit integer, signed or unsigned, in LabVIEW because this is the optimal representation in the 32-bit computer architecture. Users can limit the range of the integer in numerical control by right click the relevant control and choose properties. The maximum and minimum values can be set under the tab “range”. This can present illegal values to be input to the program.
- LabVIEW has two types of floating-point numbers, the real number and the complex number. Both number has three levels of precision, single precision, double precision and extended precision. Single precision represents data in the range of ± 3.40e+38. Double precision represents data in the range of ± 1.79e+308. Extended precision represents data in the range of ±1.19e+4932. It is recommended to use double precision in LabVIEW as most functions accept double precision as their input/output data precision. Users can also set the limit on the range of the floating-point number control as in the case of integer. In addition, users can also set the precision and format of the floating number. Just right click the numerical control and indicator and choose “format and precision”.
- LabVIEW follows a dataflow model for running VIs. A block diagram node executes when all its inputs are available. When a node completes execution, it supplies data to its output terminals and passes the output data to the next node in the dataflow path. Visual Basic, C++, JAVA, and most other text-based programming languages follow a control flow model of program execution. In control flow, the sequential order of program elements determines the execution order of a program. Consider the block diagram above. It adds two numbers and then subtracts 50.0 from the result of the addition. In this case, the block diagram executes from left to right, not because the objects are placed in that order, but because one of the inputs of the Subtract function is not valid until the Add function has finished executing and passed the data to the Subtract function. Remember that a node executes only when data are available at all of its input terminals, and it supplies data to its output terminals only when it finishes execution. In the code to the right, consider which code segment would execute first—the Add, Random Number, or Divide function. You cannot know because inputs to the Add and Divide functions are available at the same time, and the Random Number function has no inputs. In a situation where one code segment must execute before another, and no data dependency exists between the functions, use a Sequence structure to force the order of execution.
- If required is unwired, receive error when running program. If recommended is unwired, receive warning when running program. If optional is unwired, no effect when running program. Give examples! The more examples of how you have used things to solve customer problems, the more they will trust you. Something that every LabVIEW supporter uses is Context Help. Explain how we cannot all be responsible for knowing what every function or VI does and we do not expect that of them, either, but that Context Help is our encyclopedia for VIs and functions. This is also a good place to begin getting them to think about good documentation practices of their own VIs so that users of their programs can get the same help.
- Use an example program to demonstrate the help tools.
- When your VI is not executable, a broken arrow is displayed in the Run button in the palette. Finding Errors : To list errors, click on the broken arrow. To locate the bad object, click on the error message. Execution Highlighting : Animates the diagram and traces the flow of the data, allowing you to view intermediate values. Click on the light bulb on the toolbar. Probe : Used to view values in arrays and clusters. Click on wires with the Probe tool or right-click on the wire to set probes. Breakpoint : Set pauses at different locations on the diagram. Click on wires or objects with the Breakpoint tool to set breakpoints. Use Debug Demonstrate VI from BASICS.LLB to demonstrate the options and tools.
- Single stepping: executes the diagram node by node. You can access single stepping from the diagram toolbar by using the step functions found on the diagram toolbar. Use Step Into/Step Over to begin single stepping. Step Into: Steps into a node. If there is a subVI, it will then bring up the subVI diagram and enable single stepping through it. Step Over: Executes nodes but visually does not single step through nodes. Step Out: Steps out of nodes, if the diagram has completed execution; click on Step Out to terminate single stepping mode. DEMO: Demonstrate debugging techniques on the computer with Debug Demonstrate VI. (Exercise Folder)
- Do not immediately display this slide. Suggested questions for class participation: What are the two main windows in the LabVIEW environment? What do the Panel and Diagram Toolbars contain? What are the differences between controls and functions? Where are each located? What are the three palettes in the LabVIEW environment? What are pop-up menus? How are they used? How do you get help? Review slide: The purpose of Lesson One was to introduce the LabVIEW environment and some simple VI concepts, LV help, and debugging techniques. When in doubt, right click!!
- See the tips and tricks and the end of the chapter to practice while doing exercises.
- Demonstrate these techniques so that students can practice them throughout the course. Highlight the following tips: Hot keys (ctrl -b, ctrl-e, etc.) Accessing functions and controls palettes by right-clicking Accessing tools palette temporarily by shift - right-click (Windows) or shift - command - click (Mac) Tab to toggle through toolbars Spacebar to toggle between positioning and operating tool (panel toolbar) Spacebar to toggle between positioning and wiring tools (diagram toolbar) Wiring: spacebar to change direction Wiring: click with right mouse click to terminate wiring once started Undo and Redo in the Edit menu 1 st Day Lunch