SlideShare a Scribd company logo
1 of 9
Download to read offline
Artisan for
BricsCAD Guide
This demonstration will give you an overview of
Lightworks Artisan for BricsCAD. Artisan provides 3D
designers with easy to use tools for the simple creation of
photorealistic images.

Artisan is integrated within BricsCAD so there is no need
to export your CAD files. The basic elements of your
model will be carried across to Artisan at the touch of a
button.


      Contents
Launching Artisan
Using Artisan
SnapShots
Software Rendering
Customisation
Controlling Lighting
Whats in the SnapShots?
Finished Renders

1                                Artisan for BricsCAD User Guide
Launching Artisan
    1      Open our ProductDemo.dwg file in BricsCAD and click on the Artisan logo.


    2
    	       Choose metres as the unit value
    for your model. This step is important,
    as it will affect how your model is
    displayed in Artisan.


    3      Artisan will launch and ask you to choose
    a model type. In this case our demo model is an
    object so we will choose Product.


        The model is displayed on screen as a real time 3D render. Any changes you make
        are displayed instantly.

2                                Artisan for BricsCAD User Guide
Using Artisan
    There are five tabs at the top of the screen (highlighted in red); these will allow you to work
    on different aspects of creating a render. The tool bar (highlighted in green) offers various
    tools to move around your model manually. The categories panel (highlighted in yellow) will
    provide different options depending on your current tab. You can save your own content
    under the ‘Custom’ section. The content panel can be found at the bottom of the screen
    (highlighted in blue).


     Artisan allows you to drag and drop materials, lighting styles and backgrounds displayed in
     the content panel directly onto your model.


      1
      	      Click the materials tab and choose
      “Basic Materials” from the red section of the
      categories panel.
     	
     	2     Now scroll down to the “blue” preset
     from the content panel at the bottom of the
     screen, and drag it on to the model. The
     change is instantly shown in the real time
     render.

     You can select other types of content such
     as lighting styles, backgrounds and camera
     settings by selecting a different tab.

     Try applying some more materials to different
     parts of the model.

3                                   Artisan for BricsCAD User Guide
SnapShots
    Artisan SnapShots store the data associated with your design at a particular point in time.
    SnapShots allow you to create a range of different views, lighting styles and materials so you
    can easily move back and forth between them. You can create as many SnapShots as you like:
    adapt the model in BricsCAD and then view the changes in Artisan using SnapShots. You can
    easily export finished renders of selected SnapShots.


    This demonstration includes some pre made SnapShots


    1
    	     Click on the SnapShots tab and then select Model SnapShots in the categories panel.

    2
    	     Drag the “Start Here” SnapShot anywhere on your model.

    Notice how the materials, camera position, background and lighting styles have all changed.

    3
    	     Now apply “SnapShot1”, immediately the model looks very different.


4                                 Artisan for BricsCAD User Guide
Software Rendering
                                                                    To switch to software rendering
                                                                    click the “Render Scene”
                                                                    button in the tool bar. This
                                                                    will show lighting, shadows,
                                                                    reflections and material
                                                                    finishes, as they will appear in
                                                                    the final rendered files.


     1  	
    	 	 In the categories panel, please ensure Material Quality is set to medium.
    (This will ensure that materials such as glossy will display properly in software rendering.)
       	
      2
    	 	 Apply Snapshot1 and press “Render Scene” Button.

    	 3	   Repeat step 2 with each of the SnapShots 1-5.


                           Rendering Quality   Realtime Render
                                               This is what Artisan will show you in the preview
                                               pane. The render is created instantly and
                                               previews you image with a good level of detail.
                                               Material finishes and bump maps are rendered
                                               at a lower quality to increase speed. This allows
                                               you to quickly make design decisions without
                                               having to spend time waiting for renders to
                                               process.
                                               Software Render
                                               Pressing the ‘Render Scene’ button will create
                                               a quick, high quality render. Any lighting blocks
                                               used in your model will show, as well as high
                                               quality shadow and material finish detail. You
                                               can adjust the quality of software rendering in
                                               the categories panel.


                                               Final Rendered Images
                                               When you have finished working with your
                                               model you will output your renders. These
                                               are photorealistic quality and show accurate
                                               shadows, finishes and lighting. You can
                                               customise the size and quality of these files.


5                                  Artisan for BricsCAD User Guide
Customisation
Artisan provides a huge variety of preset materials, finishes, bump maps, backgrounds and
lighting studios. You can create thousands of combinations of them using Artisan. But it doesn’t
stop there: you can add unlimited custom materials and backgrounds to Artisan. In this example
we will apply a custom background to the SnapShot labeled ‘Custom Background’.

      	
	   1		 Ensure ‘Custom Background’ SnapShot
is selected. You will notice a red gird behind
the model. This is the default background and
we will now change this for an image.

	   2	
     	 From the Backgrounds tab, select
‘Custom Background’ from the Presets tab of
the Categories Panel. Apply ‘Custom Image’
preset from the Content Panel.

	   3	
     	 An Edit Background dialog will appear;
navigate to the ‘Custom Background’ folder
that was included in this demo.

	   4
    	 Apply the included image file and click
Render Scene.

Materials can be added in a similar way by applying the preset labelled ‘texture’ from the Basic
Materials catalogue.


6                                Artisan for BricsCAD User Guide
Controlling Lighting
Lights added to models in BricsCAD will illuminate in Artisan. You can use lights in a product
model to simulate specific environments or to recreate functional lighting such as LED’s and light
bulbs. In this demonstration a small point light has been added to simulate an LED in the model.


                                                                                 The geometry we
                                                                                 have associated
                                                                                 with the point light is
                                                                                 highlighted in blue in
                                                                                 BricsCAD.
Artisan allows you to edit various characteristic of lights including: colour, bulb type, intensity and
cone angle.


                                                         1
                                                         	      Click on the “Edit Light” icon
                                                         in BricsCAD.


                                                         2
                                                         	      Use the checkmarks to turn
                                                         specific lights on and off. Try changing
                                                         the colour of the light to Green. You
                                                         do not need to synchronise Artisan to
                                                         change lighting settings, you will see your
                                                         changes next time you preview render
                                                         your scene.


7                                  Artisan for BricsCAD User Guide
What’s in the SnapShots?
    SnapShot 1
    The predominant material is a basic red material
    with a glossy rough 6 finish. A background from
    the Artisan catalogue has been added. The
    interior - apartment lighting setting has been
    added. A subtle reflection has been added, with
    blur and brightness set to 0.30.


    SnapShot 2
    A colour variation of the glossy rough 8 finish, this
    time in gold. The metal fittings have a chrome
    plate finish. Background is a graduated grey to
    white studio background. The studio - neutral
    2 lighting preset has been applied with light
    shadows on and a subtle reflection with settings
    at 0.30 for brightness and 0.40 for blur.


    SnapShot 3
    This SnapShot has a two tone design, the bare
    metal has brushed steel 7, and the red metal
    has clear lacquer reflect material with a molded
    plastic bump map. The background is the Granite
    2 preset from the 2D- small objects catalogue.
    The lighting setting is Fast Light Studio 4 with the
    light shadows turned on.


    SnapShot 4
    The main body work of this model is Clear
    Lacquer Reflect -1 in a baby blue colour. For
    a paint-like texture, molded plastic 2 finish has
    also been applied. The metal fixtures have a
    brushed aluminium 7 finish. The background is
    the Granite 2 preset from the 2D- Small Objects
    catalogue. The lighting setting is Fast Light
    Studio 2.

    SnapShot 5
    For a more antique look, a green stainless steel
    has been applied to the body work. The buttons
    and fittings have a brushed brass finish. The
    background is the tiles preset from the 2D- Small
    objects catalogue. The lighting is the Fast Studio
    1 preset, with the reflective intensity turned down
    to have a more natural reflection.

8                                   Artisan for BricsCAD User Guide
Finished Renders
                                                                              When you are ready to create your
                                                                              final rendered images choose “Render
                                                                              Scene to File” from the tool bar if you
                                                                              only want to work with your current
                                                                              scene.

                                                                              To render all or some of your SnapShots
                                                                              choose “Render SnapShots to File”.
                                                                              From here you can choose the size and
                                                                              rendering quality of your model.


    We have included finished renders of these SnapShots with this demonstration. Please find
    them in the ‘Finished Renders’ folder.


    All images in this demonstration and document have been created and rendered using Artisan for BricsCAD.


    Copyright © Lightwork Design 2013

    Lightworks, Lightworks Author, Lightworks Aspects, Lightworks Artisan, Lightworks SnapShot, LWA, and LWA-Enabled are trademarks,
    or in some countries, registered trademarks of Lightwork Design Limited, Sheffield, UK. All other trademarks, logos and images remain
    the property of their respective owners. Copyright ©Lightwork Design Ltd. 1989-2013

    Lightwork Design Limited is a privately owned limited company incorporated in England (company number 02336696). Registered Office
    address: Rutledge House, 78 Clarkehouse Road, Sheffield, S10 2LJ, United Kingdom


9                                             Artisan for BricsCAD User Guide

More Related Content

Similar to Artisan for BricsCAD Rendering Guide

Graphics pipeline and rendering
Graphics pipeline and renderingGraphics pipeline and rendering
Graphics pipeline and renderingiain bruce
 
Work_PortFolioRestaurantScene-small
Work_PortFolioRestaurantScene-smallWork_PortFolioRestaurantScene-small
Work_PortFolioRestaurantScene-smallEli Flores
 
Ghosted Illustration from 3D CAD
Ghosted Illustration from 3D CADGhosted Illustration from 3D CAD
Ghosted Illustration from 3D CADMatthias Ahrens
 
3Ds MAX & INTRODUCTION TO ANIMATION IN AUTODESK 3Ds MAX
3Ds MAX & INTRODUCTION TO ANIMATION IN  AUTODESK 3Ds MAX3Ds MAX & INTRODUCTION TO ANIMATION IN  AUTODESK 3Ds MAX
3Ds MAX & INTRODUCTION TO ANIMATION IN AUTODESK 3Ds MAXAbhiram Chakravadhanula
 
V Ray For Sketch Up 2007 Manual
V Ray For Sketch Up 2007 ManualV Ray For Sketch Up 2007 Manual
V Ray For Sketch Up 2007 ManualPheo8x
 
L3 gd ha11_hidden_places_080115_02
L3 gd ha11_hidden_places_080115_02L3 gd ha11_hidden_places_080115_02
L3 gd ha11_hidden_places_080115_02luisfvazquez1
 
GDC 2016 Using Substance in Lumberyard
GDC 2016 Using Substance in LumberyardGDC 2016 Using Substance in Lumberyard
GDC 2016 Using Substance in LumberyardWes McDermott
 
Lightspeed Preprint
Lightspeed PreprintLightspeed Preprint
Lightspeed Preprintjustanimate
 
Introduction to Game Programming: Using C# and Unity 3D - Chapter 2 (Preview)
Introduction to Game Programming: Using C# and Unity 3D - Chapter 2 (Preview)Introduction to Game Programming: Using C# and Unity 3D - Chapter 2 (Preview)
Introduction to Game Programming: Using C# and Unity 3D - Chapter 2 (Preview)noorcon
 
Utilizing Layers in AutoCAD Prototype Package
Utilizing Layers in AutoCAD Prototype PackageUtilizing Layers in AutoCAD Prototype Package
Utilizing Layers in AutoCAD Prototype PackageBrian Mitchell
 
Managing Visual Design in Axure
Managing Visual Design in AxureManaging Visual Design in Axure
Managing Visual Design in AxureFred Beecher
 
GDSC KIIT Huddle Session 4 - "Graphics Pipelining"
GDSC KIIT Huddle Session 4 - "Graphics Pipelining"GDSC KIIT Huddle Session 4 - "Graphics Pipelining"
GDSC KIIT Huddle Session 4 - "Graphics Pipelining"Harshil Gupta
 

Similar to Artisan for BricsCAD Rendering Guide (20)

Graphics pipeline and rendering
Graphics pipeline and renderingGraphics pipeline and rendering
Graphics pipeline and rendering
 
Work_PortFolioRestaurantScene-small
Work_PortFolioRestaurantScene-smallWork_PortFolioRestaurantScene-small
Work_PortFolioRestaurantScene-small
 
Ghosted Illustration from 3D CAD
Ghosted Illustration from 3D CADGhosted Illustration from 3D CAD
Ghosted Illustration from 3D CAD
 
Photoshop cs5
Photoshop cs5Photoshop cs5
Photoshop cs5
 
Seminar5.1
Seminar5.1Seminar5.1
Seminar5.1
 
3Ds MAX & INTRODUCTION TO ANIMATION IN AUTODESK 3Ds MAX
3Ds MAX & INTRODUCTION TO ANIMATION IN  AUTODESK 3Ds MAX3Ds MAX & INTRODUCTION TO ANIMATION IN  AUTODESK 3Ds MAX
3Ds MAX & INTRODUCTION TO ANIMATION IN AUTODESK 3Ds MAX
 
V Ray For Sketch Up 2007 Manual
V Ray For Sketch Up 2007 ManualV Ray For Sketch Up 2007 Manual
V Ray For Sketch Up 2007 Manual
 
Photoshop cs4 studyguide
Photoshop cs4 studyguidePhotoshop cs4 studyguide
Photoshop cs4 studyguide
 
L3 gd ha11_hidden_places_080115_02
L3 gd ha11_hidden_places_080115_02L3 gd ha11_hidden_places_080115_02
L3 gd ha11_hidden_places_080115_02
 
GDC 2016 Using Substance in Lumberyard
GDC 2016 Using Substance in LumberyardGDC 2016 Using Substance in Lumberyard
GDC 2016 Using Substance in Lumberyard
 
pscs3vqp_excerpt
pscs3vqp_excerptpscs3vqp_excerpt
pscs3vqp_excerpt
 
pscs3vqp_excerpt
pscs3vqp_excerptpscs3vqp_excerpt
pscs3vqp_excerpt
 
ha11_hidden_places
ha11_hidden_placesha11_hidden_places
ha11_hidden_places
 
Lightspeed Preprint
Lightspeed PreprintLightspeed Preprint
Lightspeed Preprint
 
Digitization Training
Digitization TrainingDigitization Training
Digitization Training
 
Introduction to Game Programming: Using C# and Unity 3D - Chapter 2 (Preview)
Introduction to Game Programming: Using C# and Unity 3D - Chapter 2 (Preview)Introduction to Game Programming: Using C# and Unity 3D - Chapter 2 (Preview)
Introduction to Game Programming: Using C# and Unity 3D - Chapter 2 (Preview)
 
Utilizing Layers in AutoCAD Prototype Package
Utilizing Layers in AutoCAD Prototype PackageUtilizing Layers in AutoCAD Prototype Package
Utilizing Layers in AutoCAD Prototype Package
 
Managing Visual Design in Axure
Managing Visual Design in AxureManaging Visual Design in Axure
Managing Visual Design in Axure
 
Art of maya
Art of mayaArt of maya
Art of maya
 
GDSC KIIT Huddle Session 4 - "Graphics Pipelining"
GDSC KIIT Huddle Session 4 - "Graphics Pipelining"GDSC KIIT Huddle Session 4 - "Graphics Pipelining"
GDSC KIIT Huddle Session 4 - "Graphics Pipelining"
 

Recently uploaded

Neo4j - How KGs are shaping the future of Generative AI at AWS Summit London ...
Neo4j - How KGs are shaping the future of Generative AI at AWS Summit London ...Neo4j - How KGs are shaping the future of Generative AI at AWS Summit London ...
Neo4j - How KGs are shaping the future of Generative AI at AWS Summit London ...Neo4j
 
The 7 Things I Know About Cyber Security After 25 Years | April 2024
The 7 Things I Know About Cyber Security After 25 Years | April 2024The 7 Things I Know About Cyber Security After 25 Years | April 2024
The 7 Things I Know About Cyber Security After 25 Years | April 2024Rafal Los
 
Tech-Forward - Achieving Business Readiness For Copilot in Microsoft 365
Tech-Forward - Achieving Business Readiness For Copilot in Microsoft 365Tech-Forward - Achieving Business Readiness For Copilot in Microsoft 365
Tech-Forward - Achieving Business Readiness For Copilot in Microsoft 3652toLead Limited
 
WhatsApp 9892124323 ✓Call Girls In Kalyan ( Mumbai ) secure service
WhatsApp 9892124323 ✓Call Girls In Kalyan ( Mumbai ) secure serviceWhatsApp 9892124323 ✓Call Girls In Kalyan ( Mumbai ) secure service
WhatsApp 9892124323 ✓Call Girls In Kalyan ( Mumbai ) secure servicePooja Nehwal
 
The Codex of Business Writing Software for Real-World Solutions 2.pptx
The Codex of Business Writing Software for Real-World Solutions 2.pptxThe Codex of Business Writing Software for Real-World Solutions 2.pptx
The Codex of Business Writing Software for Real-World Solutions 2.pptxMalak Abu Hammad
 
Injustice - Developers Among Us (SciFiDevCon 2024)
Injustice - Developers Among Us (SciFiDevCon 2024)Injustice - Developers Among Us (SciFiDevCon 2024)
Injustice - Developers Among Us (SciFiDevCon 2024)Allon Mureinik
 
08448380779 Call Girls In Friends Colony Women Seeking Men
08448380779 Call Girls In Friends Colony Women Seeking Men08448380779 Call Girls In Friends Colony Women Seeking Men
08448380779 Call Girls In Friends Colony Women Seeking MenDelhi Call girls
 
🐬 The future of MySQL is Postgres 🐘
🐬  The future of MySQL is Postgres   🐘🐬  The future of MySQL is Postgres   🐘
🐬 The future of MySQL is Postgres 🐘RTylerCroy
 
IAC 2024 - IA Fast Track to Search Focused AI Solutions
IAC 2024 - IA Fast Track to Search Focused AI SolutionsIAC 2024 - IA Fast Track to Search Focused AI Solutions
IAC 2024 - IA Fast Track to Search Focused AI SolutionsEnterprise Knowledge
 
SQL Database Design For Developers at php[tek] 2024
SQL Database Design For Developers at php[tek] 2024SQL Database Design For Developers at php[tek] 2024
SQL Database Design For Developers at php[tek] 2024Scott Keck-Warren
 
Data Cloud, More than a CDP by Matt Robison
Data Cloud, More than a CDP by Matt RobisonData Cloud, More than a CDP by Matt Robison
Data Cloud, More than a CDP by Matt RobisonAnna Loughnan Colquhoun
 
04-2024-HHUG-Sales-and-Marketing-Alignment.pptx
04-2024-HHUG-Sales-and-Marketing-Alignment.pptx04-2024-HHUG-Sales-and-Marketing-Alignment.pptx
04-2024-HHUG-Sales-and-Marketing-Alignment.pptxHampshireHUG
 
Mastering MySQL Database Architecture: Deep Dive into MySQL Shell and MySQL R...
Mastering MySQL Database Architecture: Deep Dive into MySQL Shell and MySQL R...Mastering MySQL Database Architecture: Deep Dive into MySQL Shell and MySQL R...
Mastering MySQL Database Architecture: Deep Dive into MySQL Shell and MySQL R...Miguel Araújo
 
08448380779 Call Girls In Greater Kailash - I Women Seeking Men
08448380779 Call Girls In Greater Kailash - I Women Seeking Men08448380779 Call Girls In Greater Kailash - I Women Seeking Men
08448380779 Call Girls In Greater Kailash - I Women Seeking MenDelhi Call girls
 
Handwritten Text Recognition for manuscripts and early printed texts
Handwritten Text Recognition for manuscripts and early printed textsHandwritten Text Recognition for manuscripts and early printed texts
Handwritten Text Recognition for manuscripts and early printed textsMaria Levchenko
 
Maximizing Board Effectiveness 2024 Webinar.pptx
Maximizing Board Effectiveness 2024 Webinar.pptxMaximizing Board Effectiveness 2024 Webinar.pptx
Maximizing Board Effectiveness 2024 Webinar.pptxOnBoard
 
Unblocking The Main Thread Solving ANRs and Frozen Frames
Unblocking The Main Thread Solving ANRs and Frozen FramesUnblocking The Main Thread Solving ANRs and Frozen Frames
Unblocking The Main Thread Solving ANRs and Frozen FramesSinan KOZAK
 
Kalyanpur ) Call Girls in Lucknow Finest Escorts Service 🍸 8923113531 🎰 Avail...
Kalyanpur ) Call Girls in Lucknow Finest Escorts Service 🍸 8923113531 🎰 Avail...Kalyanpur ) Call Girls in Lucknow Finest Escorts Service 🍸 8923113531 🎰 Avail...
Kalyanpur ) Call Girls in Lucknow Finest Escorts Service 🍸 8923113531 🎰 Avail...gurkirankumar98700
 
Histor y of HAM Radio presentation slide
Histor y of HAM Radio presentation slideHistor y of HAM Radio presentation slide
Histor y of HAM Radio presentation slidevu2urc
 
Slack Application Development 101 Slides
Slack Application Development 101 SlidesSlack Application Development 101 Slides
Slack Application Development 101 Slidespraypatel2
 

Recently uploaded (20)

Neo4j - How KGs are shaping the future of Generative AI at AWS Summit London ...
Neo4j - How KGs are shaping the future of Generative AI at AWS Summit London ...Neo4j - How KGs are shaping the future of Generative AI at AWS Summit London ...
Neo4j - How KGs are shaping the future of Generative AI at AWS Summit London ...
 
The 7 Things I Know About Cyber Security After 25 Years | April 2024
The 7 Things I Know About Cyber Security After 25 Years | April 2024The 7 Things I Know About Cyber Security After 25 Years | April 2024
The 7 Things I Know About Cyber Security After 25 Years | April 2024
 
Tech-Forward - Achieving Business Readiness For Copilot in Microsoft 365
Tech-Forward - Achieving Business Readiness For Copilot in Microsoft 365Tech-Forward - Achieving Business Readiness For Copilot in Microsoft 365
Tech-Forward - Achieving Business Readiness For Copilot in Microsoft 365
 
WhatsApp 9892124323 ✓Call Girls In Kalyan ( Mumbai ) secure service
WhatsApp 9892124323 ✓Call Girls In Kalyan ( Mumbai ) secure serviceWhatsApp 9892124323 ✓Call Girls In Kalyan ( Mumbai ) secure service
WhatsApp 9892124323 ✓Call Girls In Kalyan ( Mumbai ) secure service
 
The Codex of Business Writing Software for Real-World Solutions 2.pptx
The Codex of Business Writing Software for Real-World Solutions 2.pptxThe Codex of Business Writing Software for Real-World Solutions 2.pptx
The Codex of Business Writing Software for Real-World Solutions 2.pptx
 
Injustice - Developers Among Us (SciFiDevCon 2024)
Injustice - Developers Among Us (SciFiDevCon 2024)Injustice - Developers Among Us (SciFiDevCon 2024)
Injustice - Developers Among Us (SciFiDevCon 2024)
 
08448380779 Call Girls In Friends Colony Women Seeking Men
08448380779 Call Girls In Friends Colony Women Seeking Men08448380779 Call Girls In Friends Colony Women Seeking Men
08448380779 Call Girls In Friends Colony Women Seeking Men
 
🐬 The future of MySQL is Postgres 🐘
🐬  The future of MySQL is Postgres   🐘🐬  The future of MySQL is Postgres   🐘
🐬 The future of MySQL is Postgres 🐘
 
IAC 2024 - IA Fast Track to Search Focused AI Solutions
IAC 2024 - IA Fast Track to Search Focused AI SolutionsIAC 2024 - IA Fast Track to Search Focused AI Solutions
IAC 2024 - IA Fast Track to Search Focused AI Solutions
 
SQL Database Design For Developers at php[tek] 2024
SQL Database Design For Developers at php[tek] 2024SQL Database Design For Developers at php[tek] 2024
SQL Database Design For Developers at php[tek] 2024
 
Data Cloud, More than a CDP by Matt Robison
Data Cloud, More than a CDP by Matt RobisonData Cloud, More than a CDP by Matt Robison
Data Cloud, More than a CDP by Matt Robison
 
04-2024-HHUG-Sales-and-Marketing-Alignment.pptx
04-2024-HHUG-Sales-and-Marketing-Alignment.pptx04-2024-HHUG-Sales-and-Marketing-Alignment.pptx
04-2024-HHUG-Sales-and-Marketing-Alignment.pptx
 
Mastering MySQL Database Architecture: Deep Dive into MySQL Shell and MySQL R...
Mastering MySQL Database Architecture: Deep Dive into MySQL Shell and MySQL R...Mastering MySQL Database Architecture: Deep Dive into MySQL Shell and MySQL R...
Mastering MySQL Database Architecture: Deep Dive into MySQL Shell and MySQL R...
 
08448380779 Call Girls In Greater Kailash - I Women Seeking Men
08448380779 Call Girls In Greater Kailash - I Women Seeking Men08448380779 Call Girls In Greater Kailash - I Women Seeking Men
08448380779 Call Girls In Greater Kailash - I Women Seeking Men
 
Handwritten Text Recognition for manuscripts and early printed texts
Handwritten Text Recognition for manuscripts and early printed textsHandwritten Text Recognition for manuscripts and early printed texts
Handwritten Text Recognition for manuscripts and early printed texts
 
Maximizing Board Effectiveness 2024 Webinar.pptx
Maximizing Board Effectiveness 2024 Webinar.pptxMaximizing Board Effectiveness 2024 Webinar.pptx
Maximizing Board Effectiveness 2024 Webinar.pptx
 
Unblocking The Main Thread Solving ANRs and Frozen Frames
Unblocking The Main Thread Solving ANRs and Frozen FramesUnblocking The Main Thread Solving ANRs and Frozen Frames
Unblocking The Main Thread Solving ANRs and Frozen Frames
 
Kalyanpur ) Call Girls in Lucknow Finest Escorts Service 🍸 8923113531 🎰 Avail...
Kalyanpur ) Call Girls in Lucknow Finest Escorts Service 🍸 8923113531 🎰 Avail...Kalyanpur ) Call Girls in Lucknow Finest Escorts Service 🍸 8923113531 🎰 Avail...
Kalyanpur ) Call Girls in Lucknow Finest Escorts Service 🍸 8923113531 🎰 Avail...
 
Histor y of HAM Radio presentation slide
Histor y of HAM Radio presentation slideHistor y of HAM Radio presentation slide
Histor y of HAM Radio presentation slide
 
Slack Application Development 101 Slides
Slack Application Development 101 SlidesSlack Application Development 101 Slides
Slack Application Development 101 Slides
 

Artisan for BricsCAD Rendering Guide

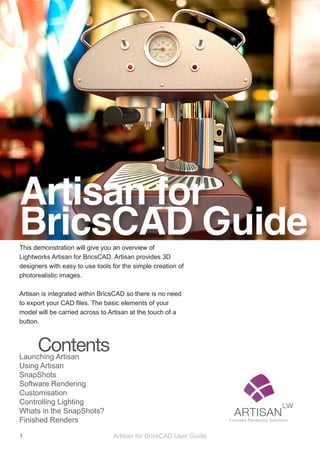
  • 1. Artisan for BricsCAD Guide This demonstration will give you an overview of Lightworks Artisan for BricsCAD. Artisan provides 3D designers with easy to use tools for the simple creation of photorealistic images. Artisan is integrated within BricsCAD so there is no need to export your CAD files. The basic elements of your model will be carried across to Artisan at the touch of a button. Contents Launching Artisan Using Artisan SnapShots Software Rendering Customisation Controlling Lighting Whats in the SnapShots? Finished Renders 1 Artisan for BricsCAD User Guide
  • 2. Launching Artisan 1 Open our ProductDemo.dwg file in BricsCAD and click on the Artisan logo. 2 Choose metres as the unit value for your model. This step is important, as it will affect how your model is displayed in Artisan. 3 Artisan will launch and ask you to choose a model type. In this case our demo model is an object so we will choose Product. The model is displayed on screen as a real time 3D render. Any changes you make are displayed instantly. 2 Artisan for BricsCAD User Guide
  • 3. Using Artisan There are five tabs at the top of the screen (highlighted in red); these will allow you to work on different aspects of creating a render. The tool bar (highlighted in green) offers various tools to move around your model manually. The categories panel (highlighted in yellow) will provide different options depending on your current tab. You can save your own content under the ‘Custom’ section. The content panel can be found at the bottom of the screen (highlighted in blue). Artisan allows you to drag and drop materials, lighting styles and backgrounds displayed in the content panel directly onto your model. 1 Click the materials tab and choose “Basic Materials” from the red section of the categories panel. 2 Now scroll down to the “blue” preset from the content panel at the bottom of the screen, and drag it on to the model. The change is instantly shown in the real time render. You can select other types of content such as lighting styles, backgrounds and camera settings by selecting a different tab. Try applying some more materials to different parts of the model. 3 Artisan for BricsCAD User Guide
  • 4. SnapShots Artisan SnapShots store the data associated with your design at a particular point in time. SnapShots allow you to create a range of different views, lighting styles and materials so you can easily move back and forth between them. You can create as many SnapShots as you like: adapt the model in BricsCAD and then view the changes in Artisan using SnapShots. You can easily export finished renders of selected SnapShots. This demonstration includes some pre made SnapShots 1 Click on the SnapShots tab and then select Model SnapShots in the categories panel. 2 Drag the “Start Here” SnapShot anywhere on your model. Notice how the materials, camera position, background and lighting styles have all changed. 3 Now apply “SnapShot1”, immediately the model looks very different. 4 Artisan for BricsCAD User Guide
  • 5. Software Rendering To switch to software rendering click the “Render Scene” button in the tool bar. This will show lighting, shadows, reflections and material finishes, as they will appear in the final rendered files. 1 In the categories panel, please ensure Material Quality is set to medium. (This will ensure that materials such as glossy will display properly in software rendering.) 2 Apply Snapshot1 and press “Render Scene” Button. 3 Repeat step 2 with each of the SnapShots 1-5. Rendering Quality Realtime Render This is what Artisan will show you in the preview pane. The render is created instantly and previews you image with a good level of detail. Material finishes and bump maps are rendered at a lower quality to increase speed. This allows you to quickly make design decisions without having to spend time waiting for renders to process. Software Render Pressing the ‘Render Scene’ button will create a quick, high quality render. Any lighting blocks used in your model will show, as well as high quality shadow and material finish detail. You can adjust the quality of software rendering in the categories panel. Final Rendered Images When you have finished working with your model you will output your renders. These are photorealistic quality and show accurate shadows, finishes and lighting. You can customise the size and quality of these files. 5 Artisan for BricsCAD User Guide
  • 6. Customisation Artisan provides a huge variety of preset materials, finishes, bump maps, backgrounds and lighting studios. You can create thousands of combinations of them using Artisan. But it doesn’t stop there: you can add unlimited custom materials and backgrounds to Artisan. In this example we will apply a custom background to the SnapShot labeled ‘Custom Background’. 1 Ensure ‘Custom Background’ SnapShot is selected. You will notice a red gird behind the model. This is the default background and we will now change this for an image. 2 From the Backgrounds tab, select ‘Custom Background’ from the Presets tab of the Categories Panel. Apply ‘Custom Image’ preset from the Content Panel. 3 An Edit Background dialog will appear; navigate to the ‘Custom Background’ folder that was included in this demo. 4 Apply the included image file and click Render Scene. Materials can be added in a similar way by applying the preset labelled ‘texture’ from the Basic Materials catalogue. 6 Artisan for BricsCAD User Guide
  • 7. Controlling Lighting Lights added to models in BricsCAD will illuminate in Artisan. You can use lights in a product model to simulate specific environments or to recreate functional lighting such as LED’s and light bulbs. In this demonstration a small point light has been added to simulate an LED in the model. The geometry we have associated with the point light is highlighted in blue in BricsCAD. Artisan allows you to edit various characteristic of lights including: colour, bulb type, intensity and cone angle. 1 Click on the “Edit Light” icon in BricsCAD. 2 Use the checkmarks to turn specific lights on and off. Try changing the colour of the light to Green. You do not need to synchronise Artisan to change lighting settings, you will see your changes next time you preview render your scene. 7 Artisan for BricsCAD User Guide
  • 8. What’s in the SnapShots? SnapShot 1 The predominant material is a basic red material with a glossy rough 6 finish. A background from the Artisan catalogue has been added. The interior - apartment lighting setting has been added. A subtle reflection has been added, with blur and brightness set to 0.30. SnapShot 2 A colour variation of the glossy rough 8 finish, this time in gold. The metal fittings have a chrome plate finish. Background is a graduated grey to white studio background. The studio - neutral 2 lighting preset has been applied with light shadows on and a subtle reflection with settings at 0.30 for brightness and 0.40 for blur. SnapShot 3 This SnapShot has a two tone design, the bare metal has brushed steel 7, and the red metal has clear lacquer reflect material with a molded plastic bump map. The background is the Granite 2 preset from the 2D- small objects catalogue. The lighting setting is Fast Light Studio 4 with the light shadows turned on. SnapShot 4 The main body work of this model is Clear Lacquer Reflect -1 in a baby blue colour. For a paint-like texture, molded plastic 2 finish has also been applied. The metal fixtures have a brushed aluminium 7 finish. The background is the Granite 2 preset from the 2D- Small Objects catalogue. The lighting setting is Fast Light Studio 2. SnapShot 5 For a more antique look, a green stainless steel has been applied to the body work. The buttons and fittings have a brushed brass finish. The background is the tiles preset from the 2D- Small objects catalogue. The lighting is the Fast Studio 1 preset, with the reflective intensity turned down to have a more natural reflection. 8 Artisan for BricsCAD User Guide
  • 9. Finished Renders When you are ready to create your final rendered images choose “Render Scene to File” from the tool bar if you only want to work with your current scene. To render all or some of your SnapShots choose “Render SnapShots to File”. From here you can choose the size and rendering quality of your model. We have included finished renders of these SnapShots with this demonstration. Please find them in the ‘Finished Renders’ folder. All images in this demonstration and document have been created and rendered using Artisan for BricsCAD. Copyright © Lightwork Design 2013 Lightworks, Lightworks Author, Lightworks Aspects, Lightworks Artisan, Lightworks SnapShot, LWA, and LWA-Enabled are trademarks, or in some countries, registered trademarks of Lightwork Design Limited, Sheffield, UK. All other trademarks, logos and images remain the property of their respective owners. Copyright ©Lightwork Design Ltd. 1989-2013 Lightwork Design Limited is a privately owned limited company incorporated in England (company number 02336696). Registered Office address: Rutledge House, 78 Clarkehouse Road, Sheffield, S10 2LJ, United Kingdom 9 Artisan for BricsCAD User Guide