Seed propagation
•Download as PPTX, PDF•
2 likes•3,276 views

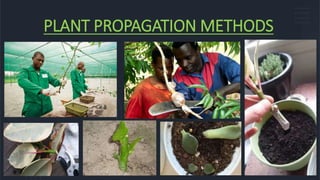
PLANT PROPAGATION METHODS - Seed propagation

Recommended
More Related Content
What's hot
What's hot (20)
Similar to Seed propagation
Similar to Seed propagation (20)
More from Kottakkal farook arts and science college
More from Kottakkal farook arts and science college (20)
Recently uploaded
Recently uploaded (20)
Seed propagation
- 3. • Plant propagation is simply the reproduction or multiplication of plants from a source or mother plant. • The ultimate objective of propagation is to produce more plants identical to the parent. • Most of the flowering plants produce seeds for propagation. • Seeds vary in size, number and other characteristics. • Certain plants do not produce seeds. • Still, they can be propagated vegetatively using plant parts, such as stem cuttings, tuber cuttings, bulbs, suckers, etc. • In some species, seeds as well as vegetative parts are used for propagation. • Both of these methods have advantages and disadvantages.
- 4. Seed propagation • Flowering plants produce seeds for their propagation. • Each seed contains a miniature plant that may be nurtured to life when appropriate conditions are available. • Propagation plants using seeds is more convenient than using vegetative propagules because seeds are relatively less bulky and easy to handle and store. • Plant breeders are now actively engaged in plant improvement programmes by which old cultivars can be made more desirable by making them more disease- resistant, high-yielding and early-flowering through breeding techniques. • Once the breeder has completed the breeding programme, seeds are tested for their improved qualities and are then released to selected farmers for propagation.
- 5. • Seeds should be purchased from reputed growers or shops to ensure their purity and viability. As far as possible, the grower should purchase fresh seeds each time. • The major aspects to be considered in seed propagation are i. determination of the purity and viability of seeds ii. methods to overcome seed dormancy iii. requirements for seed germination iv. seed treatment v. infusion vi. seeding methods vii. sowing of seeds viii.after-sowing care ix. fertilizing x. hardening and xi. transplantation.
- 6. (i) Purity determination • Purity means the percentage or proportion by weight of the desired seeds, or "pure seeds", in the sample. After the working sample has been weighed, it is sorted out visually into four groups, namely a) pure seeds or the seeds of the kind under consideration b) other crop seeds c) weed seeds and d) inert materials, including seed-like structures, empty or broken seeds, chaff, soil, stones, and other debris. • At the time of the purity test, the number of pure seeds per known quantity of the seed sample must be recorded.
- 7. (ii) Viability determination • Seed viability is the potentiality or the degree of pobability of a seed to survive and develop to a seedling. • Viability of seeds can be determined by several tests, such as a) direct germination test b) excised embryo test c) tetrazolium test.
- 8. • In a standard germination test, seeds are placed under optimum environmental conditions of light and temperature to induce germination. • Various techniques are used for germinating the seeds in seed-testing laboratories. • Small seeds are placed on germination trays. • Absorbent paper is cut into small pieces and small seeds are placed on its surface or between two layers. • Other media used for small seeds are absorbent cotton, paper towels, filter paper, etc. • For large seeds, sand, vermiculite, perlite, or soil may be used. • Containers are placed in germinators in which temperature, moisture, and light are controlled appropriately. • To discourage the growth of microorganisms, all materials and equipment should be kept clean and sterilized and the water supply should be carefully regulated. • Relative humidity in the germinator should be 90 percent or more to prevent drying. • Containers with sand should be kept tightly closed and water should not be added during the test. a) Direct germination tests
- 9. • Rolled towel test is commonly used for testing the viability of cereal grains. • Several layers of moist paper toweling, about 11 x 14 inches in size, are folded over the seeds, then rolled into cylinders and placed vertically in a germinator. • Germination test usually runs from one to four weeks. • But, for some slow-germinating and dormant tree seeds, it may last up to three months. • A first count may be taken at the end of the first week. • At the end of the test, the sample is divided into four groups, namely (a) normal seedlings, (b) hard seeds, (c) dormant seeds, and (d) abnormal seedlings plus dead or decaying seeds. • Normal seedlings generally will have well-developed root system and shoot system.
- 10. b) Excised embryo test • Excised embryo test is done to test the seed viability of woody shrubs and trees whose embryos require long periods of dormancy before germination. • In this test, embryo is excised from the seed and germinated. • The moistened seed coats are cut open with a sharp scalpel, razor blade, or knife, under sterile conditions. • The embryo is then carefully removed,The procedure for germinating excised embryos is similar to that for germinating intact seeds. • Petridishes with a moist substratum, such as blotting paper or filter paper, are used. • The embryos are placed on the water-soaked filter paper. • The dishes are kept in the light at a temperature of 18 to 22°C. • The time required for the test varies from three days to three weeks. • Non-viable embryos become soft and brown, and decay within two to ten days. • Viable embryos remain firm and show some indication of viability, depending upon the species.
- 11. c) Tetrazolium test • Tetrazolium test is a biochemical method in which viable seeds appear red, when soaked in 2, 3, 5 triphenyl tetrazolium chloride (TTC) solution. • This is because living tissue changes the TTC to an insoluble red compound, called formazon. • In non-living tissue, the TTC remains colourless. • The test is positive in the presence of dehydrogenase enzymes. • The reaction takes place equally well in dormant and nondormant seeds. • Results can be obtained within 24 hours, and sometimes in two or three hours. TTC dissolves in water, forming a colourless solution. • Although the solution deteriorates with exposure to light, it will remain in good condition for several months if stored in a dark bottle. • The solution should be discarded if it becomes yellow. • A concentration of 0.1 to 1% is commonly used for viability determination. • The pH of the solution should be in between 6 and 7.
- 12. (iii) Seed dormancy • All seeds do not germinate soon after falling from the parent plant, even when environmental conditions are optimal or ideal. • The reason is that a physiological or structural adaptive mechanism, called dormancy, imposes some restrictions on germination. • Seed dormancy is the inability or failure of seeds to germinate due to internal causes. • The length of seed dormancy varies with species, lasting over days, weeks, months, or even years. • It differs from quiescence, which is a state of arrested seed germination due to unfavourable external conditions. • Seeds germinate only after the dormancy is overcome or broken. • Dormancy is desirable in the wild, where plants depend entirely on nature for survival. • It prevents seed germination in adverse weather, which may kill vulnerable seedlings after emergence. • Structural dormancy is imposed via the seed coat (seed coat dormancy). • Hard seed coats are impermeable to the much-needed moisture that is critical for germination.
- 13. Methods to overcome seed dormancy • Different methods have been proposed to overcome seed dormancy. • They fall under four major categories, namely a) mechanical methods b) temperature treatment c) exposure to light d) acid treatment.
- 14. a) Mechanical methods • Mechanical methods include a variety of processes by which thd surface of the seed is rubbed or scratched to soften the seed coat. • This is called scarification. • Seeds may be mechanically rubbed between sheets of abrasive tissues (such as sand paper). • They may also be scratched by tumbling them in a rotating drum, lined with a coarse material (such as emery cloth). • People also mix abrasive materials, such as gravel, with seeds in the drum. • Mechanical bruising of seeds must be done carefully to avoid damaging the embryo.
- 15. b) Temperature treatment • It has been noticed that fire-destroyed forests favour new seedling growth soon after a rainfall, whereas unburnt forests do not favour such a new growth. • The inference is that heat (high temperature) weakens the seed covering and thereby enables it to imbibe moisture. • In horticultural practices, some seeds are placed in boiling water for about 24 hours. • However, some seeds require cold temperature treatment (stratification) to germinate.
- 16. c) Light exposure • The seeds of many weed species and also some small photoblastic seeds, such as lettuce seeds, require exposure to light for germination. • Soil tillage exposes buried seeds to light. • Small seeds should be sown in loose soil and at shallow depths to expose them to light. • Light stimulation for germination is wavelength - dependent. • Exposure of lettuce seeds to red light (about 660 nm.) induces germination, but farred light (730 nm.) inhibits germination.
- 17. d) Acid treatment • Seed dormancy due to a hard seed covering can be lifted by soaking the seed in concentrated sulphuric acid for a period ranging from a few minutes to several hours. • Concentrated acid is very injurious and must be handled with great caution. • It is best to test a small sample first to find out the best duration of soaking before treating the whole lot.
- 18. (iv) Requirements for seed germination • Normally, seeds require a favourable temperature, a certain amount of moisture, and sufficient oxygen for germination. • Generally, a temperature range between 25 and 30°C is ideal for tropical species. • Oxygen is necessary for the biochemical processes, taking place during germination. • Moisture is essential for germination, and it should be available along with oxygen. • Therefore, seeds planted very deeply, or in water-logged soil, fail to germinate until they get exposed to atmospheric oxygen.
- 19. (V) Seed treatment • Seeds are customarily treated by artificial methods for promoting germination, and also for protecting them against pathogens. (a) Treatment of seeds to promote germination • Seed treatment to stimulate or promote germination mainly involves the application of 1) gibberellins 2) cytokinins 3) ethylene 4) seed-priming systems.
- 20. 1. Treatment with gibberellins • Gibberellins comprise a group of plant hormones that have significant role in seed physiology. • Of all the natural gibberellins in plants, gibberellic acid (GA) is the most widely used one for exogenous applications. • Treatment with GA, helps many seeds to overcome physiological dormancy. • Also, it stimulates the germination of those seeds with dormant embryos. • In seed-testing laboratories, the germination medium is usually moistened with 500 mg/1 GA, At concentrations above 800 mg/l, addition of a buffer solution is recommended. • K-salt formulation of GA, is readily water-soluble. • For large seeds, a 12-hour long soaking in 500 to 1000 mg/l GA, is recommended.
- 21. 2. Treatment with cytokinins • Cytokinins are the natural growth hormones which can counter the effects of germionation inhibitors and stimulate the germination of some kinds of seeds. • For practical application, a commercial preparation, called kinetin (No- furfurylamino purine), is first dissolved in a small amount of HCl and then diluted with water. • In higher plants, the synthetic cytokinin BAP (6-benzyl amino purine) is more active than kinetin. • Cytokinins are effective in promoting germination when they are applied in combination with gibberellic acid and ethylene-producing compounds.
- 22. 3. Treatment with ethylene • Ethylene is a gaseous plant hormone which is active in breaking the dormancy of seeds and buds. • Commercial ethylene-generating chemicals, such as ethephon (ethrel), are available for application.
- 23. 4. Treatment with seed priming systems (SPS) • Priming system, also known as osmo-conditioning system, is the system which promotes the hydration of seeds and thereby initiates the pre-germination metabolic activities. • At the same time, it prevents the actual emergence of the radicle. • After treatment with SPS, the seeds are dried and then sowed by usual methods. • Control is applied through i. soaking the seeds at 15 to 20°C in aerated solutions of high osmotic strengths for 7 to 21 days, ii. rinsing the seeds with distilled water, and iii. air drying the seeds at 25°C and then storing until use. • The principal compoundsused to control the hydration of seeds are 20 to 30 percent polyethylene glycol (PEG) and various salt solutions, such as KNO, K,HPO, NaCl, etc. • This procedure has the potential to promote emergence under field conditions, to shorten the time of emergence, and to overcome certain environmental constraints in the field, including cold injury. • Seeds with SPS can be stored for only limited periods of time before seed viability drops considerably.
- 24. (b) Treatment of seeds for protection against pathogens • Seeds are protected against pathogens by 1. thermotherapy (hot water treatment) 2. chemotherapy (chemical treatment).
- 25. 1. Thermotherapy • Thermotherapy, or hot water treatment, can be employed as a disinfection procedure. • Dry seeds are immersed in hot water (49 to 57°C) for 15 to 30 minutes, depending upon the species. • After treatment, the seeds are cooled and then spread out and dried. • To avoid heat injury to seeds, temperature and the duration of treatment must be regulated precisely. • Hot water treatment is effective against specific seedborne diseases of vegetables. • Aerated steam treatment is an alternative method. • It is less expensive, easy to manage, and less likely to injure seeds. • In this method, seeds are treated in special machines in which steam and air are mixed and passed through the seed mass. • This rapidly raises the temperature of the seeds to the desired level. • The treatment temperature and the time of treatment vary with species and the kinds of seeds. • Usually, the treatment time is 30 minutes, but in some cases, it is only 10 or 15 minutes. • Temperature ranges from 46 to 57°C. • At the end of the treatment, temperature must be lowered rapidly to 32°C. • Keeping the seeds in moisture-saturated air at room temperature for one to three days prior to treatment, will improve the effectiveness of the treatment.
- 26. 2. Chemotherapy • Chemotherapy, or chemical treatment, involves the application of chemical disinfestants, disinfectants and protectants. • Disinfestants are the chemicals which would eliminate pathogens from the surface of seeds, whereas disinfectants eliminate pathogens from within the seeds. • Protectants are the chemicals, which would protect seeds from the pathogenic fungi in the soil. • Several compounds are commercially available, under various trade names, for seed treatment. • Manufacturer's directions should be followed carefully, since improper use can cause injury or death of the seedlings of some plants. • Since some protectants are hazardous to human beings, they should be handled carefully avoiding their contact or inhalation of their dust. • In many cases, special machinesmust be used for treating the seeds. • Other methods of seed treatments include the applications of insecticides, fungicides, bird-repellents and rodent-repellents.
- 27. (vi) Infusion • This is the introduction of chemicals, such as growth regulators, fungicides, insecticides, antibiotics, and herbicidal antidotes, into seeds by means of organic solvents. • Seeds are immersed for one to four hours in acetone and dichloromethane solution which contain the chemical to be infused. • The solvent is then removed by evaporation, and the seeds are spread out in a shallow container for one to two hours for drying in a vacuum desiccator. • The incorporated chemical gets directly absorbed into the embryo upon soaking in water.
- 28. (vii) Methods of seeding • There are two methods for establishing or propagating a plant by seeding. They are direct seeding and indirect seeding.
- 29. (a) Direct seeding • Direct seeding is a one-step planting method in which seeds are placed permanently in the field where they will germinate, grow, and go through the entire reproductive cycle • Direct seeding has both advantages and disadvantages.
- 30. Advantages 1. Direct seeding is a convenient method since seeds are easy to handle, transport, and store. They can be stored longer than vegetative materials. Unlike vegetative materials, seeds do not require any special packaging and environemtal control in transit. Even at destination, vegetative materials may require refrigeration to avoid drying, but seeds require no such precaution. 2. Seeds are easy to plant, either by broadcasting or by spot placement. In the latter, a hole is dug for each seed (or for several seeds). Polarity of the seed is not important. 3. A small packet of seeds can be used to plant a large area. Disadvantages 1. Species with tiny seeds are difficult to seed directly. • Tiny seeds should not be planted deep in the soil. • They fail to germinate if they are not planted at the right depth, or if they do not have good contact with soil to imbibe water.
- 31. (b) Indirect seeding • Indirect seeding is a two-stage process for establishing plants in the field. • Instead of placing seeds in places where they will grow to maturity, they are first grown else where up to the seedling stage. • Healthy seedlings are then transplanted to their permanent locations in the field. • Home gardeners may produce their own seedlings. • However, the horticultural industry offers professionally grown seedlings for a vanety of crops.
- 32. Advantages 1. Indirect seeding ensures nearly 100% initial establishment, since only healthy seedlings are transplanted; in direct seeding, some seeds may not germinate even if highest quality seeds are used. 2. Promotes early maturity. 3. Requires only short period of field - growth. During adverse conditions, seed lings may be raised indoors for several weeks. On the advent of good weather and favourable conditions, these seedlings can be transplanted into the field for an early crop. Disadvantages 1. Nursery care is an additional production activity and it increases production cost. 2. Seedlings are not as readily amenable as seeds to mechanized planting, because vegetative planting materials are more delicate than seeds. 3. Seedlings are bulky to handle and they have to be transported to the field.
- 33. (viii) Sowing of seeds • Seed packets provide information about the cultivars and instructions regarding their cultivation. • For sowing, the soil surface should be of fine tilth. • Instead of broadcasting over the entire soil surface, it is better to plant the seeds in rows. • This strategy would be much helpful in transplanting the seedlings. • For this, a number of shallow grooves are made in the soil. • If the seeds are not too small, they can be evenly distributed in the grooves. • With care, the seeds can also be distributed almost evenly in the grooves by tilting the opened packet and gently tapping it while it is moved along the groove. • A folded paper, or even the seed envelope itself, may be used to drill seeds. • Most seeds must be covered lightly after sowing. • Sowing by mechanized seeders has revolutionized the bedding plant industry.
- 34. (ix) After-sowing care • Seeds should be watered immediately after sowing, using a fine mist of water to avoid washing the seeds away, or burying them deep. • Excessive moisture is undesirable. • If possible, the container may be watered from the bottom (sub irrigation) by placing it in water. • If cavity seeding trays are used, water may be added to the bottom of the holding tray. • The flat may be covered with a glass pane or plastic sheet to retain moisture in the soil. • It is important to keep the soil surface moist throughout the germination period, until seedlings emerge. • Seeds will die if allowed to dry after water imbibition or initial sprouting.
- 35. • Temperature will not be a limiting factor of seedling establishment in tropical countries. • But, in temperate countries, the soil should be kept warm for good germination. • For this, the flat has to be kept in a warm place at a temperature between 20 and 26°C, depending on the species. • Even though 21°C may be sufficient, a warmer temperature of about 24°C will favour rapid germination. • Temperature fluctuations in the seed bed are caused by evaporation and irrigation of water. • Evaporation of moisture may cool the soil surface by about 1 to 3°C. • When cold water 17 to 10°C 1 used in watering, soil temperature may drop. A cold soil takes a long time to regain its heat. • To stabilize soil temperature, some growers use hot bed cables. Some smallscale propagation boxes have heating coils. • In commercial greenhouses, hot water tubes are used to provide heat from the bottom.
- 36. (x) Fertilizing • Fertilizers are not required until seed germination. • The stored food in the cotyledon is usually adequate for germination. • High fertility in the germination medium may result in weak seedlings. • The soil medium should have a good pH (6.0 to 6.8). • Once the seeds germinate, the seedlings should be provided with low- level application of a complete fertilizer, such as 20-20-20, at the rate of 30 grams per 12 liters of water. • Fertilizer should be applied only weekly, and not more often, to avoid the development of weak seedlings. • Weak seedlings are difficult to transplant and are less likely to survive the operation.
- 37. (xi) Hardening • Hardening is a horticultural practice whereby seedlings are conditioned for transplanting to the field. • If proper care is not taken, the transplants may become prone to transplanting shock (stress suffered by the transplanted seedlings). • Hardening is usually accomplished by manipulating the temperature and moisture levels. • Seedlings are gradually exposed to normal field temperatures and reduced moisture.
- 38. (xii) Transplantation of seedlings • Seedlings may be transplanted from the nursery bed to the field. • If the seedlings are for sale, they are first transplanted to containers, such as pots or cavity seedling trays, and then nurtured to marketable size. • In the second stage, they are again transplanted to the field by the gardener or grower. • In any case, seedlings should be transplanted only after the first true leaves have developed. Seedlings are fragile and must be handled with care. • Instead of pulling them out from the soil, a trowel or hand fork may be used to dig them up. • Watering the plants before transplanting makes the operation easier. • Seedlings should have some soil around the roots to aid in re-establishment. • Seedlings are placed in holes in the receiving medium. • Once in place, soil is added and gently patted down around the base of the stem. • After transplanting, the plants should be watered.
- 39. • Freshly transplanted seedlings need time to establish themselves and to resume normal activities. • Their roots will not immediately conduct moisture as they do in pots. • Hence, the plants are under moisture stress. • Transplantation in the mid-noon worsens this danger. • Seedlings should be transplanted in the late afternoon so that they may get enough time to recover before the next day's noon temperature. • Usually, transplantation has to be done in the evening or in the late afternoon. • Once the seedlings have grown sufficiently, the bed or seed pan should be soaked in water 1 or 2 hours before pulling the seedlings. • This is to avoid the breaking or injury of the roots fixrd in the soil. • Seedlings are lifted along with their roots, with the help of a trowel or any other short and flat implement. • Then, they are separated and planted in places (flower-beds or pots) where they have to grow permanently.
- 40. • Seedlings need to be watered immediately and protected against direct sun for a day or two. • Watering is usually done in the evening with a water can. • If the bed is to be filled with a single variety of ornamental or vegetable plant, the seedlings are best placed in triangular rows. • Again, the distance between two seedlings varies, depending on the species. • The seedlings of trees and shrubs, raised from seed stock, are first transferred to the soil packed in small, loosely woven bamboo baskets, 20-25 cm in height. • Then, they are allowed to grow. • Later, the whole basket is placed in a pit, dug for the plant and finally covered with soil. • Alternatively, special earthen pots of 10 cm diameter and 20 cm height with proper drainage holes are used for raising seedlings individually. • The pots are broken before transplantation. • Polythene covers or bags are also used to raise seedlings of most shrubs and trees. • These covers are removed before planting in the permanent site.