SlideShare uma empresa Scribd logo
1 de 63
Baixar para ler offline
GTK+ 2.0 App -
Desktop App Chooser
(GNU gettext & Doxygen included)
William.L
wiliwe@gmail.com
2008-09-25
Index
About Desktop App Chooser ......................................................................................................................... 3
Developing Environment & Build................................................................................................................. 5
Install Library for Development............................................................................................................ 5
Build & Run............................................................................................................................................. 5
About the Memory Management in GTK+ 2.0............................................................................................ 7
GUI Programming Concept <1>: Event-Driven........................................................................................... 8
GUI Programming Concept <2>: MVC...................................................................................................... 10
GTK+ 2.0 Tree View ............................................................................................................................. 12
freedesktop.org / XDG.................................................................................................................................. 15
Base Directory specification................................................................................................................. 15
Desktop Entry specification ................................................................................................................. 16
The Format of Desktop Entry...................................................................................................... 18
Desktop Menu specification ................................................................................................................. 19
Install Locations............................................................................................................................ 20
Add Submenu................................................................................................................................ 21
A Desktop Menu Editor - Alacarte.............................................................................................. 22
Find .desktop & .directory Files in Linux................................................................................... 22
Icons of Applications (Icon Theme)..................................................................................................... 23
GNOME Menus Library - accessing Desktop Entry/Menu in program ................................................. 24
i18n - GNU gettext ........................................................................................................................................ 29
Locale ..................................................................................................................................................... 29
Usage ...................................................................................................................................................... 32
GNU gettext in GLib/GTK+ Program................................................................................................ 37
Doxygen.......................................................................................................................................................... 39
Tools........................................................................................................................................................ 40
Configuration File................................................................................................................................. 41
Documenting the Code ......................................................................................................................... 44
Special Command ......................................................................................................................... 45
Putting documentation after members ....................................................................................... 48
Documentation at other places .................................................................................................... 50
Generate Diagrams/Graphs................................................................................................................. 52
Desktop-App-Chooser Internals.................................................................................................................. 55
Resources ....................................................................................................................................................... 62
About Desktop App Chooser
In the Linux desktop environment, all installed GUI applications (either user installed or system inbuilt)
could be browsed and launched through the application menu(likes MS-Windows "Start" menu) on the
panel (as below figures).
If a Linux application wants to have capabilities to show, choose and launch installed desktop applications,
it needs to provide an application menu UI to user. This UI could be custom as LXLauncher of LXDE
project (as below snapshots). LXLauncher is an open source clone of Asus launcher for EeePC. It
outperformes the original launcher developed by Xandros.
Download example from GitHub:
https://github.com/wiliwe/gtk2-desktop-app-chooser.git
Using Git tool (http://git-scm.com/downloads) to fork this repo:
git clone https://github.com/wiliwe/gtk2-desktop-app-chooser.git
Another example of Linux desktop application launcher is Ubuntu Remix/Netbook Launcher (see below
sites).
* https://launchpad.net/netbook-remix-launcher
* https://launchpad.net/ubuntu/+source/netbook-launcher
All desktop applications, either in GNOME or KDE desktop environments, follow specifications from
freedesktop.org (formerly known as the X Desktop Group or XDG) for specifying the path to install of
application's executable, icon(representing that application and being show in menu or launcher) and its
profile file called Desktop Entry and the format of Desktop Entry file.
A Desktop Entry file(with ".desktop" file extension) contains information about the location of executable,
where to load icon and what category the application belongs to. The way to know what desktop
applications are installed is to find installed desktop entry files in specific paths and parse found desktop
entry files.
Desktop App Chooser is a GTK+2 program that can 1)find and parse desktop entry files and list all
installed desktop applications in a visual tree by using the GtkTreeView widget and 2)return the content of
the desktop entry of a chosen desktop application to the caller for execution or other purpose.
Desktop App Chooser could be as a component in a large GTK+2 program when it wants to show all
installed desktop applications likes desktop application menu(shown as below steps). Desktop App
Chooser was written in C++ and runs as a modal dialog.
GtkTreeView widget:
* https://developer.gnome.org/gtk2/stable/GtkTreeView.html
* http://www.zetcode.com/tutorials/gtktutorial/gtktreeview/
* http://www.zetcode.com/tutorials/gtktutorial/chinese/gtktreeview/ 中文中文中文中文
Developing Environment & Build
* Ubuntu 8.04 Hardy Heron LTS
* GTK+ 2.0
* GNOME Menus Library v2.22
* Doxygen v1.5.5
Install Library for Development
<GLib>
Ubuntu
sudo apt-get -y install libglib2.0-dev
CentOS 6
su yum -y install glib2-devel-*
<GTK+ 2.0>
GTK+2 development library includes "gdk-pixbuf" development library.
Ubuntu
sudo apt-get -y install libgtk2.0-dev
CentOS 6
su yum -y install gtk2-devel-*
<GNOME Menus>
Ubuntu
sudo apt-get -y install libgnome-menu-dev
CentOS 6
yum -y install gnome-menus*
Build & Run
In the source root of Desktop App Chooser program, just run “make” command to build program. If the
build process succeed, it will generate a executable file name DesktopAppChooser under the source root.
To invoke Desktop App Chooser program by entering below command.
./DesktopAppChooser
In Desktop App Chooser, unfold the top-level node, e.g. the menu directory, choose the wanted application
by clicking it, then click the button “Apply” to close the chooser dialogue and you can see the content of
desktop entry of the chosen application in the console (as below snapshot).
If you change locale attribute(an environment variable) LANG to the language other than English, the value
of Comment field of desktop entry will be shown in the language you selected (as below snapshot).
About the Memory Management in GTK+ 2.0
GTK+2 depends on GLib which uses GObject system to achieve object-oriented programming. The
GObject system provides a memory management model based on Reference Counting(Counter)
mechanism( the same as the one used in Microsoft COM technology) for applications to do
garbage-collection(GC).
Reference Counting means that an object has a counter that can be increased (ref-ed, referenced) or
decreased (unref-ed, unreferenced). If the counter is unref-ed to zero, the object is automatically destroyed.
This is useful, because other object or application programmers only have to think about whether they
themselves are still using that object or not, without knowing anything about others also using it. The object
is simply automatically destroyed when no one is using it any more.
XXX_new() and XXX_unref() are for creation and deletion of an object separately. When an object is
created, its reference counter will be increased from zero to one. XXX_unref() is used to decrease the
reference counter of the object. If the reference counter of the object is decreased to zero, the object will be
delete, e.g. the memory of the object will be released.
More detailed information about GObject could be found in below sites:
* https://developer.gnome.org/gobject/
* http://files.myeburg.net/gobject-book-a4.pdf
GUI Programming Concept <1>: Event-Driven
For GUI (Graphic User Interface) programming, one important concept is Event-Driven model:
The GUI applications start a main loop, which continuously checks for
newly generated events. If there is no event, the application waits and
does nothing(idle mode).
All GUI applications are developed based on event driven.
In the event-driven model, the operating system is the Event Manager that monitors events from hardware
devices or other widgets and dispatches events to GUI applications for processing. And the application is the
Event Handler whose function is to wait for an event to occur and then perform the corresponding action.
The software routine in the application for waiting for and processing events is called Event Loop or Main
(Event) Loop. When there has no more events to process, the application will be in idle state (mode).
Most events come from user's operations such as mouse button click or keyboard keystrokes. Events are
used to signal the changing state of a component (widget) in graphical user interfaces.
The event-driven model is usually implemented by means of messages passed among the participants. For
example, user clicks mouse button, the mouse sends a message to the operating system, which in turn, sends
a message to GUI application. The application processes messages one by one, and the messages not be
processed yet are put in an queue called Event Queue or Message Queue, in the order it was sent to the
application.
User Input Event
Operating System
(event manager)
GUI Application
(event handler)
/* Event Loop */
MSG msg;
while(1)
{
GetMsg(msg);
switch(msg.type)
{
case 1:
action1;
break;
...
default:
DoNothing;
} // end of switch
} // end of while(1)
GTK+2 depends on GLib mainloop to manage all the available sources of events. The GMainLoop data
type represents a main event loop. A GMainLoop is created with g_main_loop_new(). After adding the
initial event sources, g_main_loop_run() is called. This continuously checks for new events from each of
the event sources and dispatches them. Finally, the processing of an event from one of the sources leads to a
call to g_main_loop_quit() to exit the main loop, and g_main_loop_run() returns.
GTK+2 contains wrappers of some of GLib mainloop functions:
* gtk_main()
* gtk_main_quit()
* gtk_events_pending().
On UNIX, the GLib mainloop is incompatible with fork(). Any program using the mainloop must either
exec() or exit() from the child without returning to the mainloop.
On Linux platform, an event in GTK+2 is a message from the X server. When the event reaches a widget,
it may react to this event by emitting a signal. The GTK+2 programmer can connect a specific callback to
a signal. The callback is a handler function, that reacts to a signal (P.S: Qt framework uses similar
method for processing widget events, it calls Signal-Slot).
More detailed information about GLib/GTK+ message loop could be found in sites:
* https://developer.gnome.org/glib/stable/glib-The-Main-Event-Loop.html
* https://developer.gnome.org/gtk2/stable/gtk2-General.html
X Server Widget Event Handlersignal
(event)
message
GUI Programming Concept <2>: MVC
Another important concept of GUI (Graphic User Interface) programming is Model-View-Controller,
abbreviated as MVC.
The Model-View-Controller architecture is a well-known object-oriented user interface software
architecture design paradigm/pattern and decomposition and was first introduced into object-oriented
programming language Smalltalk in the 1970s. Its concept is that complete separation between data and
how that data is displayed on the screen. Basically, MVC breaks a GUI component into three elements
(roles): model, view and controller. MVC is an example of the Observer design pattern (also known as
Dependents, Publish/Subscribe or Publisher/Subscriber) where model is the Subject and views are
Observers that can register to get notified of any change to the model.
Model
The model stores data of various type (strings, numbers, images, etc). Generally, Model is constructed first
and is the most important of all three elements: the data is the core of an application and is what an
application mainly focuses on. Moreover, data identifies the state of an application: if the data is changed,
it means the state of the application is changed.
The data remains the same no matter how the UI component is painted on the screen; model data is always
independent of the component's visual representation. Upon the model (data) is changed, the model will
send update notifications to all views that are interested in(depend on) it, so that views can retrieve the
updated data and refresh themselves; this way could be said that there has a Subscribe-Notify protocol
between model and view.
In practice, it may have many kinds of model in a GUI framework or library for different classes of
view(visual component, e.g. widget, control) and the model is implemented in some kinds of data structure
written in the programming language the GUI framework or library uses.
View
The view is told which data to display, where to display it, and how to display it by model. The view
determines the visual representation of the component’s model. This is a component’s “look.”
Controller
The controller is the portion of the user interface (view) and is responsible for determining whether the
component should react to any user action(i.e. input events from keyboard or mouse) that affects the
model or views. The controller is the “feel” of the UI component, and it determines what actions are
performed when the UI component is used.
In this separation, the view and controller depend on the model, while the model does NOT depend on
either of the two making it so the model can be independent of the visual presentation when building and
testing.
The three elements of a model-view-controller architecture
From book - Java Swing 2/e, 2002, O’Reilly
Communication through the Model-View-Controller architecture
One of advantages of this approach is that you can have multiple views that display the same data in
different ways, or in the same way in multiple times, with only one copy of the underlying data. This
avoids duplication of data and programming effort if the same data is re-used in different contexts and the
UI component can be updated with a new look or visual style without having to change the data model or
the controller. Also, it keeps the program modularized, allowing for high cohesion and loose coupling.
The MVC concept has been adopted into many frameworks, such as:
* Microsoft MFC Document/View Model
GUI Tool
user
Controller View
Model
The model passes its
data to the view
for rendering.
The controller
updates the model
based on the events
seesuses
Update view such
as menu selected
< user action>
The view determines
which events are
passed to the controller.
Document is model and CFrameWnd class is controller dispatching window messages to programmer
implemented methods
* Java Swing Framework (precisely speaking, it uses a variation of MVC pattern, Model/Delegate)
Here using table view for example. For the table view widget, JTable, it needs to set the model object
of a class derived from AbstractTableModel abstract class; when model's content is changed, it needs to
call model’s method fireTableXXX() (from AbstractTableModel class) to notify JTable to
refresh/repaint table view display depending on the changed model content
* Apache Struts (written in Java)
* Apple Mac OS X Cocoa / iOS Cocoa Touch Framework (written in Objective-C).
GTK+ 2.0 Tree View
The GtkTreeView is a widget that displays single- or multi-columned lists and trees. It replaces the old
Gtk+-1.2 GtkCList and GtkCTree widgets. The GtkTreeView widget is designed based on MVC model.
To create a tree or list in GTK+2, use the GtkTreeModel interface in conjunction with the GtkTreeView
widget. GtkTreeModel is an abstract interface to the data store and defines generic tree or list interfaces
used by the GtkTreeView widget; it only provides a way to query a data store's characteristics and to
retrieve existing data. It does not provide a way to remove rows from or add rows to the store or put data
into the store, this is done using functions of the specific store implementing GtkTreeModel interface. The
model is represented as a hierarchical tree of strongly-typed, columned data.
The programmer needs not to implement GtkTreeModel by him(her)self, two models implementing
GtkTreeModel are provided:
* GtkTreeStore is used to model tree widgets
* GtkListStore is used to model list widgets.
A list is basically just a special case of a tree with none of the items having any children, so one could use
a tree store to maintain a simple list of items as well. The only reason GtkListStore exists is in order to
provide an easier interface that does not need to cater for child-parent relationships, and because a simple
list model can be optimized for the special case where no children exist, which makes it faster and more
efficient. To use these model data structures, the developer simply pushes data into these models as
necessary. GtkListStore is internally a simple linked list and stores a list node in one of pointers.
GtkListStore and GtkTreeStore are GObjects and have a reference count of one after creation. The tree
view will add its own reference to the model when you add the model with gtk_tree_view_set_model(),
and will unref it again when you replace the model with another model, unset the model by passing NULL
as a model, or when the tree view is destroyed. This means that you need to take care of "your" reference
yourself, otherwise the model will NOT be destroyed properly when you disconnect it from the tree view,
and its memory will not be freed (which does not matter much if the same model is connected to the tree
view from application start to end).
If you plan to use the same model for a tree view for the whole duration of the application, you can get rid
of "your" reference right after you have connected the model to the view - then the model will be destroyed
automatically when the tree view is destroyed (which will be automatically destroyed when the window it
is in is destroyed).
There are several other components that are used with the GtkTreeView widget:
GtkTreeViewColumn A GtkTreeView is made up of tree view columns.
A model column represents a certain data field of an item that has a fixed data type
but does NOT display any data. It is only used as a device to represent the user-side
of the tree view and serves as packing widgets for the components that do the
actual rendering of data onto the screen, namely the GtkCellRenderer family of
objects.
You need to know what kind of data you want to store when you create a list store
or a tree store, as you can NOT add new fields later on.
GtkCellRenderer Cell renderers are packed into tree view columns to display data.
The GtkCellRenderer determines, how the data is going to be displayed in the
GtkTreeViewColumn. There are a number of different cell renderers that
specialize in rendering certain data like strings, pixbufs, or toggle buttons.
A tree view column needs to contain at least one cell renderer, but can contain
multiple cell renderers.
Note that the tree view will not resize icons for you, but displays them in their
original size.
GtkTreeIter A structure used to refer to a row in the GtkTreeView.
GtkTreeSelection A structure that handles selections
There has an alternative view widget to show list model (GtkListStore). This kind of the widget is
GtkIconView which is similar to GtkTreeView.
Basic Usage of Tree View
* Creating a tree view widget.
* Construct the tree model for tree view.
* Connect tree model to tree view widget by calling function gtk_tree_view_set_model().
Basic Usage of Icon View
* Creating a icon view widget.
* Construct the list model(store) for icon view.
* Connect tree model to icon view widget by calling function gtk_icon_view_set_model().
freedesktop.org / XDG
freedesktop.org is open source / open discussion software projects working on interoperability and shared
technology for X Window System desktops. freedesktop.org was formerly known as the X Desktop
Group, and the abbreviation XDG.
An X desktop is a graphical environment designed to give a technologically advanced, user-friendly face
to the X Window System running on UNIX-like operating systems. Most X desktops also provide a
development infrastructure for writing applications that integrate well with the desktop.
In general there are two flavors of X desktop: “heavyweight” and "lightweight". The two most famous
"heavyweight" desktop projects are GNOME and KDE (these two are the desktops with the most support
from Linux distribution vendors); these include both a desktop environment and an application
development framework.
A desktop environment bundles together a variety of X clients(e.g. applications) to provide common
graphical user interface elements such as icons, toolbars, wallpapers, and desktop widgets and includes a
window manager(a special X client), help browser, file manager, task bar, also. A development framework
includes any number of libraries to ease application development, perhaps most importantly a GUI toolkit.
The second flavor ("lightweight") of X desktop includes a desktop environment ONLY; NO
development framework is included.
freedesktop.org publishes many specifications for X desktop applications such as:
* Base Directory
http://www.freedesktop.org/wiki/Specifications/basedir-spec/
* Desktop Entry
http://www.freedesktop.org/wiki/Specifications/desktop-entry-spec/
* Desktop Menu
http://www.freedesktop.org/wiki/Specifications/menu-spec/
* MIME Applications Associations
http://www.freedesktop.org/wiki/Specifications/mime-apps-spec/
* Icon Naming
http://www.freedesktop.org/wiki/Specifications/icon-naming-spec/
* Icon Themes
http://www.freedesktop.org/wiki/Specifications/icon-theme-spec/ .
Base Directory specification
This specification defines default paths and environment variables containing the default paths to place
applications data (configurations or resources).
Description Environment Variable Environment Variable
Default Value
(if the environment variable is
either not set or empty)
There is a single base directory relative to
which user-specific data files should be
written.
$XDG_DATA_HOME $HOME/.local/share
There is a single base directory relative to
which user-specific configuration files
should be written.
$XDG_CONFIG_HOME $HOME/.config
There is a set of preference-ordered
base directories to search data
files in addition to $XDG_DATA_HOME.
The directories in should be separated
with a colon ':'.
$XDG_DATA_DIRS /usr/local/share/:/usr/share/
There is a set of preference ordered
base directories to search
configuration files in addition to the
$XDG_CONFIG_HOME base directory.
$XDG_CONFIG_DIRS /etc/xdg
There is a single base directory relative to
which user-specific non-essential
(cached) data should be written.
$XDG_CACHE_HOME $HOME/.cache
The order of base directories denotes their importance: the first directory listed is the most important.
When the same information is defined in multiple places the information defined relative to the more
important base directory takes precedent.
The base directory defined by $XDG_DATA_HOME is considered more important than any of the base
directories defined by $XDG_DATA_DIRS. The base directory defined by $XDG_CONFIG_HOME is
considered more important than any of the base directories defined by $XDG_CONFIG_DIRS.
Desktop Entry specification
Desktop Entry is a standard of freedesktop.org for specifying the behavior of programs running on X
Window Systems. It is a configuration/data file that describe 1)how an application is launched and
2)how it appears in an application menu with its icon. Desktop entry files have “.desktop“ or
“.directory“ extensions.
Both the KDE and GNOME desktop environments have adopted a similar format for desktop entries. It is
a unified standard be agreed upon by all parties such that interoperation between the two environments, and
indeed any additional environments that implement the specification, becomes simpler.
The desktop entry specifies the details for a item (application) such as a name, a command to run, an icon,
and so on. The desktop entry file also contains keywords(categories) which determine the location of the
item in the menu hierarchy.
The .desktop file fills two primary functions:
* First, it informs the desktop environment how the file is to be handled by the desktop environment with
regard to menu placement, display, environmental variables, and similar. In this function, it resides
globally in $XDG_DATA_DIRS/applications/ directory (most likely /usr/share/applications/)
and for specific users in $HOME/.local/applications/ directory.
* The second function is the direct shortcut on the desktop itself. In this function, it resides in
$HOME/Desktop/. The same file fills both functions, so if you want to have an application both in
the menu and on your desktop, you’ll need to put the .desktop file in two places.
An application launcher can be added to the desktop by installing a *.desktop file as below snapshots.
The directory file with .directory extension file name represents a submenu and provides the name and
icon for a submenu. The name of the directory file is used to identify the submenu. Directory files follow
the syntax defined by the Desktop Entry specification.
The Format of Desktop Entry
A desktop entry file consists of a [Desktop Entry] header followed by several Key=Value lines. The
following is a sample desktop entry file:
Desktop Entry Key Description
Encoding Specifies the encoding of the desktop entry file.
Name Specifies the name of the item. This name is displayed on the item in the
menu.
Comment Specifies a short description of the item. The comment is displayed as a tooltip
when you point to the item in the menu.
Exec Specifies a command to execute when you choose the item from the menu.
Icon Specifies the filename of an icon that represents the item. Does NOT specify
the path to the filename, or the filename extension.
Terminal Specifies whether the command in the Exec key runs in a terminal window. If
the value is true the command runs in a terminal window.
If the command does not create a window in which to run, the value of this
key must be true.
Type Specifies the type of item. This value is one of the following:
[Desktop Entry]
Encoding=UTF-8
Name=Calculator
Comment=Perform simple calculations
Exec=gnome-calculator
Icon=gnome-calc3.png
Terminal=false
Type=Application
X-GNOME-DocPath=gnome-calculator/gnome-calculator.xml
Categories=GNOME;Application;Utility;Desktop application shortcut or launcher.
Directories
Application - For an item that starts an application. This is a shortcut to an
application.
Link - For an item that links to a file, folder, or Web site.
Directory - For a container of meta data of a menu entry.
X-GNOME-DocPath Specifies the help file to display when you choose Help
on application-name from the menu item popup menu.
Categories Specifies the keywords that describe the item. The keywords are separated
with semicolons (;). To see a list of the standard category keywords, see the
appendix A, "Registered Categories", of Desktop Menu specification.
To validate a desktop entry file, run the below command and it will give you very verbose and useful
warnings and error messages
Desktop Menu specification
This specification defines how to construct a user-visible hierarchy of applications, typically displayed as a
menu (tree-style). It allows third-party software to add menu items that work for all desktops, and allows
system administrators to edit menus in a way that affects all desktops.
The basic scheme is very simple. Information about each menu item (application) is stored in a desktop
entry file. Then an XML configuration file defines the hierarchical arrangement (layout) of menu items,
and which menu items are actually displayed.
Here are the files defined by this specification:
$XDG_CONFIG_DIRS/menus/${XDG_MENU_PREFIX}applications.menu
This file contains the XML definition of the main application menu layout. Implementations may chose
to use .menu files with other names for tasks or menus other than the main application menu.
$XDG_CONFIG_DIRS/menus/applications-merged/
The default merge directories included in the <DefaultMergeDirs> element. By convention, third parties
may add new <Menu> files in this location to create their own sub-menus.
Implementations may chose to use .menu files with names other than applications.menu for tasks or
menus other than the main application menu. In that case the first part of the name of the default merge
directory is derived from the name of the .menu file.
$ desktop-file-validate <your desktop file>
$XDG_DATA_DIRS/applications/
This directory contains a .desktop file for each possible menu item. Each directory in the
$XDG_DATA_DIRS search path should be used (i.e. desktop entries are collected from all of them, not
just the first one that exists). When two desktop entries have the same name, the one appearing earlier in
the path is used.
The <DefaultAppDirs> element in a menu file indicates that this default list of desktop entry locations
should be scanned at that point. If a menu file does NOT contain <DefaultAppDirs>, then these
locations are NOT scanned.
$XDG_DATA_DIRS/desktop-directories/
This directory contains directory entries which may be associated with folders in the menu layout. Each
directory in the search path should be used. Only files ending in .directory are used; other files are
ignored.
The <DefaultDirectoryDirs> element in a menu file indicates that this default list of directory entry
locations should be scanned at that point. If a menu file does not contain <DefaultDirectoryDirs>, then
these locations are not scanned.
Install Locations
If an application is intended to be installed by root on a system wide basis then /usr/share is
recommended to be used as value for datadir and /etc/xdg is recommended to be used as value for
sysconfdir. In case the /usr/share hierarchy is not writable it is recommended to use /usr/local/share
as value for datadir instead.
If an application is intended to be installed by an unprivileged user for exclusive use by that user only then
$XDG_DATA_HOME should be used as value for datadir and $XDG_CONFIG_HOME should be used
as value for sysconfdir.
* If $XDG_DATA_HOME is not set, the default value of $HOME/.local/share should be used for it.
* If $XDG_CONFIG_HOME is not set, the default value of $HOME/.config should be used for it.
Add Submenu
The following steps describe how a third party application can add menu items to the menu system:
1) Install desktop entries to datadir/applications/ for each menu item(application). Please nam the
filename, as in "vendor-foo.desktop", or use a subdirectory of datadir/applications/ so you have
"vendor/foo.desktop." Please be sure all desktop entries are valid.
2) Install an XML menu file to sysconfdir/desktop/menus/applications-merged/ to add any
submenus, if your desktop entries aren't already included in some common categories.
3) Install any directory entries needed for your submenus to datadir/desktop-directories/, taking care
to namespace and validate the directory entries.
The following is an example to show adding a submenu “Programming” for LXLauncher:
1) The screenshot of the original layout.
2) LXLauncher does NOT use the default main application menu layout, applications.menu. Instead, it
uses its application menu called launcher.menu.
In launcher.menu, add a submenu called Development.directory.
3) Run LXLauncher again, it will show the new added submenu (category).
A Desktop Menu Editor - Alacarte
Alacarte (previously the Simple Menu Editor for GNOME or SMEG) is an application menu editor for
the GNOME desktop, written in Python. It has been part of GNOME since the 2.16 release. Alacarte
source code could be downloaded from http://ftp.gnome.org/pub/gnome/sources/alacarte/.
After changing the application menu, it will see resulting menu in the menu bar of desktop panel.
An alternative to Alacarte is MenuLibre (https://launchpad.net/menulibre).
Find .desktop & .directory Files in Linux
If you want to find all .desktop and .directory files in Linux system, it could use command “locate”.
Step 1) Update database for locate command in Super User mode.
# updatedb
Step 2) Run “locate” command with parameter “*.desktop” or “*.directory”.
# locate *.desktop
or
# locate *.directory
Below figure shows the searching result of *.directory files.
Icons of Applications (Icon Theme)
The supported icon(image) file formats are PNG, XPM and SVG.
* PNG is the recommended bitmap format. The extension file name is ".png".
* SVG is for vectorized icons. The extension file name is ".svg". Support for SVGs is optional.
* XPM is supported due to backwards compatibility reasons, and it is not recommended that new themes
use XPM files. The extension file name is ".xpm".
By default, apps should look in following directories in order:
* $HOME/.icons (for backwards compatibility)
* $XDG_DATA_HOME/icons
* $XDG_DATA_DIRS/icons
* /usr/share/pixmaps .
GNOME Menus Library - accessing Desktop
Entry/Menu in program
GNOME has a C library based on Desktop Entry/Menu specifications for accessing desktop menus and
desktop entries, the library is called GNOME Menus or GMenus or gnome-menus. The library source
code could be downloaded from one of following links:
* http://ftp.gnome.org/pub/GNOME/sources/gnome-menus/
* http://gnome-menus.sourcearchive.com/
* https://download.gnome.org/sources/gnome-menus/
* https://github.com/GNOME/gnome-menus/
For the usage of GNOME Menus library, there are two good references:
<1> LXDE LXLauncher source code :
http://sourceforge.net/projects/lxde/files/LXLauncher%20(for%20Asus%20EeePC)/
<2> Gnome-Menus_SourceCode/src/util/test-menu-spec.c .
Usage
The following steps are the basic call flow to use GNOME Menus library APIs.
1) In the main entry file (including main() function), add GNOME Menus library header a define.
The define could be added in the Makefile using -D parameter other than in source file.
If this define is absent, it will cause compile error!
2) Set the main application menu used in your application by calling below function with wanted main
application menu file name as a parameter. If you want to use the system default main application menu,
just set parameter "applications.menu". The function returns a pointer to the type of GMenuTree,
to declare a variable named tree to hold this pointer.
3) Read and parse assigned main application menu, store read desktop directories(categories) information
in tree structure(e.g. build out menu's layout) by calling below function. The function returns a pointer
to the type of GMenuTreeDirectory, declare a variable named root to hold this pointer.
#define GMENU_I_KNOW_THIS_IS_UNSTABLE
#include "gmenu-tree.h"
-DGMENU_I_KNOW_THIS_IS_UNSTABLE
gmenu_tree_lookup()
gmenu_tree_get_root_directory()
4) To iterate all nodes in application menu tree by calling below functions in a loop block.
<I> Return a linked-list representing application menu tree (layout).
<II> Return the type of current node of tree.
The kind of types(defined in Gnome-Menus_Src/libmenu/gmenu-tree.h) is as below.
The types we are interested in are GMENU_TREE_ITEM_ENTRY and
GMENU_TREE_ITEM_DIRECTORY.
When meeting the type you are interested in(directory or item entry), you could do operations for
that type. This is similar to the behavior of XML SAX (Event Driven) parser: when meeting wanted
XML tag, then do something, otherwise just skip it.
<III> If the type of current node of tree is GMENU_TREE_ITEM_ENTRY, calling below functions to
retrieve the value of wanted keys.
Key The function to retrieve key's value
Name gmenu_tree_entry_get_name()
Comment gmenu_tree_entry_get_comment()
Exec gmenu_tree_entry_get_exec()
Icon gmenu_tree_entry_get_icon()
5) Finally, to release memory of application menu tree by calling following functions with .
The variables passed to functions are those ones created in step 2 and 3.
Followings are some function call flow tracings:
gmenu_tree_directory_get_contents()
gmenu_tree_item_get_type()
gmenu_tree_item_unref(root);
gmenu_tree_unref(tree);
gmenu_tree_lookup() gmenu_tree_lookup_absolute()
gmenu_tree_lookup_basename()
Is a Absolute path
Is Not an Absolute path
gmenu_tree_get_root_director()
gmenu_tree_build_from_layout()
desktop_entry_set_new()
gmenu_tree_load_layout()
process_layout()
gmenu_tree_lookup_absolute() gmenu_tree_lookup_from_cache()
menu_canonicalize_file_name()
gmenu_tree_lookup_from_cache()
gmenu_tree_new()
gmenu_tree_lookup_basename() gmenu_tree_lookup_from_cache()
gmenu_tree_new()
gmenu_tree_load_layout()
(1)
menu_layout_load()
Indeed reading the .meun content thru
g_file_get_contents()
g_markup_parse_context_new()
g_markup_parse_context_parse()
g_markup_parse_context_end_parse()
g_markup_parse_context_free()
(2)
(3)
(4)
(5)
(1)
gmenu_tree_strip_duplicate_children()
gmenu_tree_execute_moves()
(2)
(3)
menu_layout_node_menu_get_app_dirs()
process_layout()
menu_layout_node_menu_get_directory_dirs()
MENU_LAYOUT_NODE_DIRECTORY
ensure_dir_lists()
ensure_dir_lists()
entry_directory_new() entry_directory_new_legacy()
entry_directory_new_full()
cached_dir_load_entries_recursive()
cached_dir_add_entry()
desktop_entry_new()
MENU_LAYOUT_NODE_APPLICATION
desktop_entry_new()
desktop_entry_load()
g_key_file_load_from_file()
g_key_file_has_group()
g_key_file_has_key()
i18n - GNU gettext
If a software can display texts/strings in different natural languages for users using different mother
tongues, the software is said to be multilingual (or internationalized) software. If the software wants to have
multilingual functionality, it needs to be considered how to achieve it and what mechanism to be adopted
during design phase and adding corresponding codes when developing. Here using GNU gettext framework,
a widely used framework for internationalization, to achieve it. Before doing it, it needs to introduce some
terms relative to the development of the multilingual program.
Internationalization, i18n, is the process of making the software be able to use localization (l10n) easily
for users that vary in culture, region, or language without further any engineering changes. This is a kind of
generalization on part of the software that hard-coded information(ex: text strings) are pulled out to
external files as resource bundle and the software will load proper resource file based on the locale type set
on machine(where the software is running on) at runtime. It lets software be completely independent of any
culture specific information.
Localization, l10n, is the process of customizing the software for that it can display its messages in an
appropriately translated form for a particular locale. Internationalization and localization are the first phase
and the second phase of Globalization (g11n), the process of developing and marketing multilingual
software products to a global market.
Native Language Support, or merely NLS, is for speaking of the overall activity or feature encompassing
both internationalization and localization, allowing for multi-lingual interactions in a program.
Locale
Locale is used to define a set of information or attributes (characters and code sets, currency, dates,
numbers and messages) corresponding to a given language & country. “Messages” attribute is where GNU
gettext provides the means for developers and users to easily change the language that the software uses to
communicate to the user. The locale used by GUI programs in desktop environment can be specified in a
configuration program called “control center”, “language settings” or “country settings”.
Users achieve localization of programs by setting proper values to special environment variables, prior to
executing those programs, identifying which locale should be used. When a program looks up locale
dependent values, it does this according to following environment variables in priority order:
<1st> LANGUAGE
<2nd> LC_ALL
<3rd> LC_xxx
according to selected locale category: LC_CTYPE, LC_NUMERIC, LC_TIME,
LC_COLLATE, LC_MONETARY, LC_MESSAGES, ...
<4th> LANG .
Variables whose value is set but is empty are ignored in this lookup.
LANG is the normal environment variable for specifying a locale. As a user, if your language has been
installed for this package, you only have to set the LANG environment variable to the appropriate ‘ll_CC’
combination (unless some of the other variables have already been set by the system, in /etc/profile or
similar initialization files).‘ll’ is an ISO 639-1 two-letter Language code, and ‘CC’ is an ISO 3166
two-letter Country code(see below URLs).
* Language Code - http://www.loc.gov/standards/iso639-2/php/code_list.php
* Country Code - http://www.iso.org/iso/english_country_names_and_code_elements
At the shell prompt, merely execute:
CSH shell
# setenv LANG en_US
SH shell
# export LANG; LANG= en_US
BASH shell
# export LANG= en_US
or
# LANG= en_US
. This can be done from your .login or .profile file under your home directory, “/home/YourLoginName/”.
Many locale names have an extended syntax ‘ll_CC.encoding’ that also specifies the character encoding.
Most users have switched to locales in UTF-8 encoding. For example, “zh_TW.UTF-8” is for Chinese
Traditional with UTF-8 character encoding.
For a software that has been internationalized (generalized), if a user sets a particular locale, the software
will show proper information (text string) based on the language described by the locale variable when the
software is being run. This is done using the concept of Message Catalog, which is a database of strings in
some file.
GNU gettext framework is one approach supporting Message Catalog to do text i18n. This framework
refers to a collection of tools used to internationalize and localize an application or package. Apart from
internationalization of applications or packages, these tools assist in translating the strings on menus,
messages boxes or icons on the applications in the language that the user is interested in.
The below figure shows the flow to use GNU gettext tools.
( From GNU gettext manual - https://www.gnu.org/software/gettext/manual/gettext.html )
The following figure shows what files would be generated when using gettext to do internationalization.
( From Wikipedia - http://en.wikipedia.org/wiki/Gettext#mediaviewer/File:Gettext.svg )
In the above figures:
* POT - Portable Object Template (.pot). This file contains all original program strings(extracted by
gettext tool xgettext). It has sets of pointers to exactly where in C sources each string is used. All
translations are set to empty. For example,
"Content-Type: text/plain; charset=CHARSETn"
"Content-Transfer-Encoding: 8bitn"
#: helloworld.c:16
#, c-format
msgid "Hello, world! n"
msgstr ""
* PO - Portable Object (.po). This file is made up of many entries, each entry holding the relation between
an original string and its corresponding translation. All entries in a given PO file
usually pertain to a single project, and all translations are expressed in a single target language. Also,
it needs to change character encoding for your language by setting the field “charset”. For
example:
The string after msgid is original string and the string after msgstr is translated string.
* MO - Machine Object (.mo). This file is used to support Message Catalog. This kind of files are meant to
be read by programs, and are binary in nature. The content of the file is generated by gettext tool
msgfmt. This file could be put into your project directory or system default directory:
/usr/local/share/locale/LocaleName/LC_MESSAGES/
, where "LocaleName" is the name of the locale category such as "en", "zh", "zh_TW", etc.
Usage
Step 1. Mark texts to be internationalized
<I> Adding following headers and macros in the file containing the main() function.
* The header "libintl.h" is for the setlocale() function.
* _(String) macro is for the convenience of using gettext() on those text needs to be translated.
* PACKAGE represents package name, the name of MO file without file extension
“.mo”.
* LOCALEDIR represents the locale directory containing LC_MESSAGE folder which has
“Package Name.mo” files. This is usually as "/usr/share/locale."
#include <libintl.h>
#include <locale.h>
#define _(String) gettext (String)
#define PACKAGE MO_File_Name
#define LOCALEDIR Path_to_MO_File
"Content-Type: text/plain; charset=UTF-8n"
"Content-Transfer-Encoding: 8bitn"
#: helloworld.c:16
#, c-format
msgid "Hello, world! n"
msgstr "哈囉哈囉哈囉哈囉, 世界世界世界世界! n"
<II> Adding following gettext functions at the very beginning of the main() function body (but after the
variable declarations) to initialize locale data.
When it is going to compile code, remember to define "ENABLE_NLS " to use i18n/gettext.
<III> To use "_()" to enclose any string that must be translated(shown as below example).
In case you can't use "_()" (like in array declarations), use "N_()" where the original English string is
and then call "_()" at real display time(show as below example).
Step 2. Parse source files and extract marked strings as msgids and put it into
POT(.pot) file
Using GNU gettext tool, xgettext, to extract marked strings from source and store it into the POT(.pot)
file. For example:
"helloworld" is the package (domain) name assigned as the value of the macro PACKAGE in Step 1. The
keyword (-k) to mark original string as gettext string is underscore character "_." Output file is
"helloworld.pot."
Note that if it does NOT assign output file name using -o parameter, it will generate a PO file be named
after “package (domain) name” assigned using -d parameter. In this example, it will be “helloworld.po”
#ifdef ENABLE_NLS
/* Clear out LC_ALL environment variable. */
setlocale(LC_ALL, "");
/* To designate where to search for message catalogs, e.g. MO files. */
bindtextdomain (PACKAGE, LOCALEDIR);
/* (Optional) To specify the output character set(encoding) for message
catalogs for the designated domain */
bind_textdomain_codeset (PACKAGE, "UTF-8");
/* To select domain, e.g. the name of MO file */
textdomain (PACKAGE);
#endif
#define ENABLE_NLS 1
printf(_("Hello Worldn"));
char *foo[]={ N_("aaaaa"), N_("bbbb") };
int i;
for (i=0;i<2;i++) printf( _(foo[i]) );
xgettext -d helloworld -o helloworld.pot -k_ -s helloworld.c
file and then rename the generated file to “helloworld.pot”.
Step 3. Translate POT(.pot) file into a PO(.po) file
Copy the POT(.pot) file and change copied file's extension to ".po", this copied file becomes a PO file.
In the copied PO file, set information about your PO file by changing following fields.
Then, set proper character encoding by setting “charset” field and add translated string to “msgstr” field.
For example, the content of “helloworld.po” would be:
Finally, remove the Fuzzy Mark shown below.
The fuzzy mark is used to denote the messages in current PO file are fuzzy messages that are NOT been
validated / translated by a human translator.
If each PO file entry for which the msgstr field has been filled with a translation, and which is not marked
as fuzzy, is said to be a translated entry. Only translated entries will later be compiled by GNU msgfmt
and become usable in programs. Other entry types will be excluded.
"Content-Type: text/plain; charset=UTF-8n"
"Content-Transfer-Encoding: 8bitn"
#: helloworld.c:16
#, c-format
msgid "Hello, world! n"
msgstr "哈囉哈囉哈囉哈囉, 世界世界世界世界! n"
# FIRST AUTHOR <EMAIL@ADDRESS>, YEAR.
"Project-Id-Version: PACKAGE VERSIONn"
"PO-Revision-Date: YEAR-MO-DA HO:MI+ZONEn"
"Last-Translator: FULL NAME <EMAIL@ADDRESS>n"
"Language-Team: LANGUAGE <LL@li.org>n"
# William.L <wiliwe@gmail.com>, 2008.
"Project-Id-Version: helloworld 1.0n"
"PO-Revision-Date: 2008-10-22 18:55+0800 n"
"Last-Translator: William.L <wiliwe@gmail.com>n"
"Language-Team: Chinese Traditional <LL@li.org>n"
#, fuzzy
After the translation work is done, you could verify the PO file’s content by below command.
Step 4. Convert PO(.po) files into binary resource file, MO(.mo) file.
Using GNU gettext tool, msgfmt, to generates a binary Message Catalog from a textual translation
description, e.g. PO file.
Then put the generated MO files into the path designated as the macro LOCALEDIR in Step 1.
For example,
Step 5. Set locale environment variable to the language type you want and run your
program.
Set the locale environment variable, LANG, as described in “Locale” section of this chapter and then
launch your program. The following example shows results of wrong encoding type and correct encoding
type.
Note that when gettext does not find a translation for msgid, it returns msgid unchanged independently of
the current output character set.
Note that when it wants to show strings in a language other than English, it needs to have other Language
Packages installed in the system where the program will run on. Below steps show how to install language
package in Linux Ubuntu.
Steps to install wanted language package:
1) On desktop panel, click System -> Administration -> Language Support .
msgfmt helloworld.po -o helloworld.mo
msgfmt -cv helloworld.po
2) In "Language & Text" setting dialog, click button "Install/Remove Languages..."
3) Select and check languages you want install and click "Apply Changes" button.
Alternatively, it could install language packages in Synaptic Package Manager.
GNU gettext in GLib/GTK+ Program
For the program using GLib or GTK+ libraries, 1)it could replace the header "libintl.h" with "gi18n.h" or
"gi18n-lib.h" and 2)it needs not to declare macros for GNU gettext APIs.
The contents of headers "gi18n.h" or "gi18n-lib.h" are shown below:
#include <glib/gi18n.h> #include <glib/gi18n-lib.h>
* /usr/include/glib-2.0/glib/gi18n.h
* /usr/include/glib-2.0/glib/gi18n-lib.h
The difference of using these two headers is that one header uses fixed macro(GETTEXT_PACKAGE) to
represent the package(domain) name and the other let the macro definition to users.
#include < glib/gi18n.h >
#include <locale.h>
#define PACKAGE MO_File_Name
#define LOCALEDIR Path_to_MO_File
#define GETTEXT_PACKAGE MO_File_Name
#include < glib/ gi18n-lib.h >
#include <locale.h>
(it MUST define GETTEXT_PACKAGE before
including gi18n-lib.h header)
Doxygen
When viewing source codes written by others or sharing codes to others, it would be better for readers if
there have documents to comment or explain codes and show architecture(relationship of each part, such as
files, modules, packages, functions, classes, in codes) using graph or diagram. This may let readers get idea
(overview, a big picture) of codes quickly.
There have many tools to generate documents of source codes by adding special markings in comment
blocks, this kind of tool is called Document Generator. For a programmer, if he or she can add comments
while coding, the work to document codes could be accomplished when code is done, it would save much
time compared to that adding comments after code is done. Comments about code's implementation are
called Implementation comments. Comments describe the specification of the code, from an
implementation-free perspective to be read by developers who might not have the source code at hand, are
called Documentation comments. Tools such as JavaDoc, Doxygen, DOC++, Qt Qdoc(for Qt Project
itself only) are well-known. Doxygen is used to generate documents for Desktop App Chooser program..
Doxygen (http://www.doxygen.org/) is for generating documentation from annotated C++ sources, but it
also supports other popular programming languages such as C, Objective-C, C#, PHP, Java, Python, IDL
(Corba, Microsoft, and UNO/OpenOffice flavors), Fortran, VHDL, Tcl, and to some extent D. It runs on
most Unix systems as well as on Windows and Mac OS X.
Doxygen is written in Qt (http://qt-project.org/). Initially doxygen was specifically designed to be used for
projects that make use of Troll Tech’s Qt toolkit. So it is ‘Qt-compatible’:
doxygen can read the documentation contained in the Qt source code and create a class browser that
looks quite similar to the one that is generated by Troll Tech. Doxygen understands the C++
extensions used by Qt such as signals and slots and many of the markup commands used in the Qt
sources.
How did the name "Doxygen" come from? From Doxygen FAQ of the official site, its solution is that:
" Doxygen got its name from playing with the words documentation and generator.
At the time I was looking into lex and yacc, where a lot of things start with "yy", so the "y" slipped in
and made things pronounceable (the proper pronouncement is Docs-ee-gen, so with a long "e")."
Doxygen FAQ link: http://www.stack.nl/~dimitri/doxygen/manual/faq.html
It can generate an on-line documentation browser (in HTML) and/or an off-line reference manual (in
LATEX) from a set of documented source files. There is also support for generating output in RTF
(MS-Word), PostScript, hyperlinked PDF, compressed HTML(.chm), and Unix man pages. The
documentation is extracted directly from the sources, which makes it much easier to keep the documentation
consistent with the source code.
documentation -> docs -> dox
generator -> gen
The following figure shows the relation between the tools and the flow of information between them.
( From doxygen site - http://www.stack.nl/~dimitri/doxygen/manual/starting.html )
Doxygen looks at the file's extension to selects the proper parser to parse a file. Extension types
recognized by doxygen is listed in http://www.stack.nl/~dimitri/doxygen/manual/starting.html
Tools
The executable doxygen is the main program that parses the sources and generates the documentation.
To generate a manual for your project you typically need to follow these steps:
<1> Document your source code with special documentation blocks , or called special command blocks.
See http://www.stack.nl/~dimitri/doxygen/manual/docblocks.html
<2> Generate a template configuration file by running doxygen with the -g option:
doxygen -g <config_file>
<3> Edit the configuration file so it matches your project. In the configuration file you can specify the input
files and a lot of optional information.
<4> Let doxygen generate the documentation, based on the settings in the configuration file. The default
output directory is the directory in which doxygen is started.
<5> If you have a configuration file generated with an older version of doxygen, you can upgrade it to the
current version by running doxygen with the -u option.
All configuration settings in the original configuration file will be copied to the new configuration file.
Any new options will have their default value. Note that comments that you may have added in the
original configuration file will be lost.
More detailed information about doxygen tool is here:
http://www.stack.nl/~dimitri/doxygen/manual/doxygen_usage.html
Optionally, the doxywizard tool which is a graphical front-end written in Qt can be used for editing the
configuration file that is used by doxygen and for running doxywizard in a graphical environment. More
detailed usage information about doxywizard is here:
http://www.stack.nl/~dimitri/doxygen/manual/doxywizard_usage.html
Configuration File
A configuration file is a free-form ASCII text file with a structure that is similar to that of a Makefile, with
the default name Doxyfile. It is parsed by doxygen tool.
The file essentially consists of a list of assignment statements.
* Each statement consists of a TAG_NAME written in capitals, followed by the equal sign (=) and one
or more values.
* If the same tag is assigned more than once, the last assignment overwrites any earlier assignment.
* For tags that take a list as their argument, the += operator can be used instead of = to append new values
to the list.
* Values are sequences of non-blanks.
* If the value should contain one or more blanks it must be surrounded by quotes ("..."). Multiple lines
can be concatenated by inserting a backslash () as the last character of a line.
* Environment variables can be expanded using the pattern $(ENV_VARIABLE_NAME).
* The statements in the file are case-sensitive.
The file may contain tabs and newlines for formatting purposes.
The default encoding used for all characters in the configuration file is UTF-8 and it could be changed by
setting the tag DOXYFILE_ENCODING. Doxygen uses libiconv (or the iconv built into libc) for
doxygen <config_file>
doxygen -u <config_file>
transcoding. See http://www.gnu.org/software/libiconv for the list of possible encodings.
Here listing some tags usually used in project:
Tag Name Description Default
Value
Depending Tag
PROJECT_NAME A single word (or a sequence of
words surrounded by
double-quotes) that should
identify the project.
PROJECT_NUMBER Project or revision number
PROJECT_BRIEF To provide an optional one line
description for a project that
appears at the top of each page
and should give viewer a quick
idea about the purpose of the
project.
OUTPUT_DIRECTORY To specify the (relative or
absolute) path into which the
generated documentation will
be written.
OUTPUT_LANGUAGE To specify the language in
which all documentation
generated by doxygen is
written.
English
INPUT To specify the files and/or
directories that contain
documented source files.
You may enter file names like
myfile.cpp or directories like
/usr/src/myproject.
Separate the files or directories
with spaces.
If this tag is
empty the
current
directory is
searched.
RECURSIVE Be used to specify whether or
not subdirectories should be
searched for input files as well.
No
EXTRACT_ALL Assume all entities in
documentation are
documented, even if no
documentation was available.
No
EXTRACT_ANON_NSPACES Include the members of
anonymous namespaces
No
EXTRACT_LOCAL_CLASSES Include classes (and structs)
defined locally in source files.
Yes
EXTRACT_LOCAL_METHODS Include local methods, which
are defined in the
implementation section but not
in the interface
No
EXTRACT_PRIVATE Include private members of
a class
No
EXTRACT_STATIC Include static members of a
class
No
SORT_MEMBER_DOCS Sort the (detailed)
documentation of file and
class members alphabetically
by member name.
Yes
GENERATE_HTML Generate HTML output Yes
HTML_HEADER
HTML_FOOTER A footer typically contains the
author of the document,
copyright information, links to
terms of use, contact
information, etc.
HTML_OUTPUT Specify output folder
HTML_FILE_EXTENSION Specify the file extension .html
GENERATE_TREEVIEW No
GENERATE_HTM
L
HAVE_DOT To use dot tool to generate
diagrams and graphs
No
CALL_GRAPH Generate a call dependency
graph for every global function
or class method.
No
CALLER_GRAPH Generate a caller dependency
graph for every global function
or class method
No
GENERATE_LEGEND Yes
GRAPHICAL_HIERARCHY Yes
DIRECTORY_GRAPH Yes
UML_LOOK No
UML_LIMIT_NUM_FIELDS Threshold limits the number of
items for each type to make the
size more manageable.
Set this to 0 for no limit.
Minimum value: 0
Maximum value: 100
10
CLASS_GRAPH Yes
COLLABORATION_GRAPH Yes
HAVE_DOT
For a small project consisting of a few C and/or C++ source and header files, you can leave INPUT tag
empty and doxygen will search for sources in the current directory.
If you have a larger project consisting of a source directory or tree you should assign the root directory or
directories to the INPUT tag, and add one or more file patterns to the FILE_PATTERNS tag (for instance
*.cpp *.h). Only files that match one of the patterns will be parsed (if the patterns are omitted a list of source
extensions is used). For recursive parsing of a source tree you must set the RECURSIVE tag to YES.
If you start using doxygen for an existing project (thus without any documentation that doxygen is aware
of), you can still get an idea of what the structure is and how the documented result would look like. To
do so, you must set the EXTRACT_ALL tag in the configuration file to YES. Then, doxygen will pretend
everything in your sources is documented. Please note that as a consequence warnings about undocumented
members will not be generated as long as EXTRACT_ALL is set to YES.
If the EXTRACT_ALL option is set to NO in the configuration file (the default), then doxygen will only
generate documentation for documented members, files, structs, classes and namespaces.
To analyze an existing piece of software it is useful to cross-reference a (documented) entity with its
definition in the source files. Doxygen will generate such cross-references if you set the
SOURCE_BROWSER tag to YES. It can also include the sources directly into the documentation by
setting INLINE_SOURCES to YES (this can be handy for code reviews for instance).
More detailed usage information about configuration file is here:
http://www.stack.nl/~dimitri/doxygen/manual/config.html
Documenting the Code
For members, structs, classes and namespaces there are basically two options to document codes:
1. Place a special documentation block in front of the declaration or definition of the member, struct,
class or namespace. For file, struct, class and namespace members it is also allowed to place the
documentation directly after the member.
2. Place a special documentation block somewhere else (another file or another location) and put a
structural command in the documentation block. A structural command links a documentation
block to a certain entity that can be documented (e.g. a member, struct, class, namespace or file).
Files can only be documented using the second option, since there is no way to put a documentation block
before a file. Of course, file members (functions, variables, typedefs, defines) do not need an explicit
structural command; just putting a special documentation block in front or behind them will work fine.
The text inside a special documentation block is parsed before it is written to the HTML and/or LaTeX
output files.
GENERATE_LATEX Yes
During parsing the following steps take place:
* Markdown formatting is replaced by corresponding HTML or special commands.
* The special commands inside the documentation are executed.
* If a line starts with some whitespace followed by one or more asterisks (*) and then optionally more
white space, then all whitespace and asterisks are removed.
* All resulting blank lines are treated as a paragraph separators. This saves you from placing
new-paragraph commands yourself in order to make the generated documentation readable.
* Links are created for words corresponding to documented classes (unless the word is preceded by a %;
then the word will not be linked and the % sign is removed).
* Links to members are created when certain patterns are found in the text. This link is called Automatic
Link ( http://www.stack.nl/~dimitri/doxygen/manual/autolink.html .)
* HTML tags that are in the documentation are interpreted. More information could be found in
http://www.stack.nl/~dimitri/doxygen/manual/htmlcmds.html .
The following doxygen documenting commands are used in comment blocks for C-like languages(C, C++,
C#, Objective-C, PHP, Java).
Special Command
A special documentation block is a C or C++ style comment block with some additional markings, so
doxygen knows it is a piece of documentation that needs to end up in the generated documentation.
For each code item there are two (or in some cases three) types of descriptions, which together form the
documentation: a brief description and detailed description, both are optional.
For methods and functions there is also a third type of description, the so called ”in body” description,
which consists of the concatenation of all comment blocks found within the body of the method or
function.
Having more than one brief or detailed description is allowed (but NOT recommended, as the order in
which the descriptions will appear is not specified).
As the name suggest, a brief description is a short one-liner, whereas the detailed description provides
longer, more detailed documentation. An ”in body” description can also act as a detailed description or
can describe a collection of implementation details. For the HTML output brief descriptions are also use
to provide tooltips at places where an item is referenced.
There are several ways to mark a comment block as a detailed description:
<1> JavaDoc style
/**
* ... text ...
*/
<2> Qt style(e.g. Qdoc, )
In both cases the intermediate * (asterisk)’s are optional, so below example is also valid.
<3> A block of at least two C++ comment lines, where each line starts with an additional slash or an
exclamation mark.
or
<4> To make their comment blocks more visible in the documentation.
(note the 2 slashes to end the normal comment block and start a special comment block)
or
For the brief description there are also several possibilities:
<1> One could use the brief command with one of the above comment blocks. This command ends at
the end of a paragraph, so the detailed description follows after an empty line.
<2> If JAVADOC_AUTOBRIEF is set to YES in the configuration file, then using JavaDoc style
comment blocks will automatically start a brief description which ends at the first dot followed by a
/*!
* ... text ...
*/
/*!
... text ...
*/
///
/// ... text ...
///
//!
//! ... text ...
//!
/********************************************//**
* ... text
***********************************************/
/////////////////////////////////////////////////
/// ... text ...
/////////////////////////////////////////////////
/*! brief Brief description.
* Brief description continued.
*
* Detailed description starts here.
*/
space or new line.
The option has the same effect for multi-line special C++ comments:
<3> To use a special C++ style comment which does not span more than one line.
or
(Note the blank line in the last example, which is required to separate the brief description from the
block containing the detailed description. The JAVADOC_AUTOBRIEF should also be set to NO
for this case.)
If you have multiple detailed descriptions (as below example), they will be joined. Note that this is also the
case if the descriptions are at different places in the code! In this case the order will depend on the order in
which doxygen parses the code.
Furthermore, if there is one brief description before a declaration and one before a definition of a code
item, only the one before the declaration will be used. If the same situation occurs for a detailed
description, the one before the definition is preferred and the one before the declaration will be ignored.
Unlike most other documentation systems, doxygen also allows you to put the documentation of members
(including global functions) in front of the definition. This way the documentation can be placed in the
source file instead of the header file. This keeps the header file compact, and allows the implementer of the
members more direct access to the documentation.
/** Brief description which ends at this dot. Details follow
* here.
*/
/// Brief description which ends at this dot. Details follow
/// here.
/// Brief description.
/** Detailed description. */
//! Brief descripion.
//! Detailed description
//! starts here.
//! Brief description, which is
//! really a detailed description since it spans multiple lines.
/*! Another detailed description!
*/
Putting documentation after members
If you want to document the members of a file, struct, union, class, or enum, it is sometimes desired to
place the documentation block after the member instead of before. For this purpose you have to put an
additional < marker in the comment block. Note that this also works for the parameters of a function.
(This block can be used to put a Qt style detailed documentation block after a member.)
or
or
or
Most often one only wants to put a brief description after a member. This is done as follows:
or
For functions one can use the @param command to document the parameters and then use [in], [out],
[in,out] to document the direction. For inline documentation this is also possible by starting with the
direction attribute, e.g.
Note that these blocks have the same structure and meaning as the special comment blocks, only the <
indicates that the member is located in front of the block instead of after the block.
[Warning]
These blocks can only be used to document members and parameters. They cannot be used to document
files, classes, unions, structs, groups, namespaces and enums themselves. Furthermore, the structural
commands are NOT allowed inside these comment blocks.
int var; /*!< Detailed description after the member */
int var; /**< Detailed description after the member */
int var; //!< Detailed description after the member
//!<
int var; ///< Detailed description after the member
///<
int var; //!< Brief description after the member
int var; ///< Brief description after the member
void foo(int v /**< [in] docs for input parameter v. */);
An example of C++ code using the Qt style:
The one-line comments contain a brief description, whereas the multi-line comment blocks contain a more
detailed description.
The brief descriptions are included in the member overview of a struct, class, namespace or file and are
printed using a small italic font (this description can be hidden by setting BRIEF_MEMBER_DESC to
NO in the configuration file).
By default the brief descriptions become the first sentence of the detailed descriptions (but this can be
changed by setting the REPEAT_BRIEF tag to NO). Both the brief and the detailed descriptions are
optional for the Qt style.
By default a JavaDoc style documentation block behaves the same way as a Qt style documentation block.
This is not according the JavaDoc specification however, where the first sentence of the documentation
//! A test class.
/*!
A more elaborate class description.
*/
class Test
{
public:
//! An enum.
/*! More detailed enum description. */
enum TEnum {
TVal1, /*!< Enum value TVal1. */
TVal2, /*!< Enum value TVal2. */
TVal3 /*!< Enum value TVal3. */
}
//! Enum pointer.
/*! Details. */
*enumPtr,
//! Enum variable.
/*! Details. */
enumVar;
.....................................................
//! A function variable.
/*!
Details.
*/
int (*handler)(int a,int b);
};
block is automatically treated as a brief description. To enable this behavior you should set
JAVADOC_AUTOBRIEF to YES in the configuration file. If you enable this option and want to put a dot
in the middle of a sentence without ending it, you should put a backslash and a space after it as below
example.
Here is the same piece of code as shown above, this time documented using the JavaDoc style and
JAVADOC_AUTOBRIEF set to YES:
Similarly, to set QT_AUTOBRIEF to YES in the configuration file to take the first sentence of a Qt style
documentation block to automatically be treated as a brief description.
Documentation at other places
In above examples the comment blocks were always located in front of the declaration or definition of a
file, class or namespace or in front or after one of its members. Although this is often comfortable, there
may sometimes be reasons to put the documentation somewhere else.
/** Brief description (e.g. using only a few words). Details follow. */
/**
* A test class. A more elaborate class description.
*/
class Test
{
public:
/**
* An enum.
* More detailed enum description.
*/
enum TEnum {
TVal1, /**< enum value TVal1. */
TVal2, /**< enum value TVal2. */
TVal3 /**< enum value TVal3. */
}
*enumPtr, /**< enum pointer. Details. */
enumVar; /**< enum variable. Details. */
.....................................................
/**
* a function variable.
* Details.
*/
int (*handler)(int a,int b);
};
Doxygen allows you to put your documentation blocks practically anywhere (the exception is inside the
body of a function or inside a normal C style comment block).
The price you pay for not putting the documentation block directly before (or after) an item is the need to
put a structural command inside the documentation block, which leads to some duplication of information.
So in practice you should avoid the use of structural commands unless other requirements force you to do
so.
Structural commands (like all other commands) start with a backslash (), or an at-sign (@) if you prefer
JavaDoc style, followed by a command name and one or more parameters. The below example is for
class Test using command “class”:
Below list shows some structural commands:
FileFileFileFile ((((HeaderHeaderHeaderHeader //// SourceSourceSourceSource)))) comments
filefilefilefile Source code file name with extension file name.
datedatedatedate Date
authorauthorauthorauthor Author of this program
versionversionversionversion Program version
b Change_Historyb Change_Historyb Change_Historyb Change_History Date and contents of changing or modifying
MacroMacroMacroMacro comments
defdefdefdef To document a #define#define#define#define.
FucntionFucntionFucntionFucntion comment
fnfnfnfn to document a function.
param[in]param[in]param[in]param[in] InputInputInputInput parameter
Format: VariableName + Space + Description
param[param[param[param[outoutoutout]]]] OutputOutputOutputOutput parameter
Format: VariableName + Space + Description
returnreturnreturnreturn Function return value.
NamespaceNamespaceNamespaceNamespace comment
namespacenamespacenamespacenamespace To document a namespace.
ClassClassClassClass comment
classclassclassclass To document a class.
InterfaceInterfaceInterfaceInterface comment
interfaceinterfaceinterfaceinterface To document an IDLIDLIDLIDL interface.
NoteNoteNoteNote: InterfaceInterfaceInterfaceInterfaces in C++C++C++C++ are implemented using Abstract ClassAbstract ClassAbstract ClassAbstract Class.
EnumEnumEnumEnum comment
/*! class Test
brief A test class.
A more detailed class description.
*/
enumenumenumenum To document an enumeration type.
StuctStuctStuctStuct comment
structstructstructstruct To document a C-struct.
UnUnUnUnionionionion comment
unionunionunionunion To document a union.
PackagePackagePackagePackage comment
packagepackagepackagepackage To document a Java package.
OtherOtherOtherOther comment
varvarvarvar To document a variablevariablevariablevariable or typedeftypedeftypedeftypedef or enumenumenumenum value.
briefbriefbriefbrief Shore description.
nnnn New line
cccc Convert font type.
More information about structural commands could be found in the page:
http://www.stack.nl/~dimitri/doxygen/manual/commands.html
Note:
1) To document a member of a C++ class, you must also document the class itself. The same holds for
namespaces.
2) To document a global C function, variable, typedef, enum or preprocessor definition you must first
document the file that contains it (usually this will be a header file, because that file contains the
information that is exported to other source files). Using a comment block containing a file or @file
command to document the file in which those commands are located.
or
3) Alternatively, you can put all members in a group (or module) using the ingroup command and then
document the group using a comment block containing the defgroup command. For member
functions or functions that are part of a namespace you should document either the class or
namespace.
Generate Diagrams/Graphs
Doxygen can use the "dot" tool from GraphViz (Graph Visualization Software) to generate more
advanced diagrams and graphs. GraphViz is an open-source, cross-platform graph drawing toolkit and can
be found at http://www.graphviz.org/
To install GraphViz tool, run below commands in two Linux distro separately:
Ubuntu
sudo apt-get -y install graphviz
/*! file */
/* * @file */
The below screenshot shows installed graphviz tool in Synaptic Package Manager program.
CentOS 6
$ su
# yum -y install graphviz
(prompt $ is for Regular user and prompt # is for Super user)
To view details about GraphViz package, run command:
# rpminfo graphviz
If you have the "dot" tool in the path, you can set tag HAVE_DOT to YES in the configuration file to let
doxygen use it.
Desktop-App-Chooser Internals
In this program, it uses GtkTreeView widget as the main component for visual display of menu of X
desktop applications installed in Linux system.
The following steps show how to build tree nodes corresponding to desktop menu directories and entries in
the main application menu (applications.menu).
<I> If the current node is GMENU_TREE_ITEM_DIRECTORY type, add a top level node.
<II> If the current node is GMENU_TREE_ITEM_ENTRY type, add a child node(application) to the
corresponding directory (top level node)
The GLib type system(GType) is used to indicate what type of data is stored in a model column. In Desktop
App Chooser program, it used the following types:
* G_TYPE_STRING - stores a string in the store (makes a copy of the original string)
* GDK_TYPE_PIXBUF - stores a GdkPixbuf in the store (increases the pixbuf's refcount, see below)
* G_TYPE_POINTER - stores a pointer value (does NOT copy any data into the store, just stores the
pointer value!)
Desktop App Chooser applies GNU gettext on 1)the dialog/window title and 2)the label on the button.
Below screenshots show the result. The string of each menu entry (e.g. application), is shown in the
language you set automatically, cause to that its name had been internationalized by default.
In Desktop App Chooser program, the special mark used in comment blocks for Doxygen document
generation is Qt style.
or
The doxygen configuration files are in the “doxygen“ folder under Desktop App Chooser program source
root. There are two configuration files, one for generating documents with graphs(this needs graphivz tool
to be installed) and the other is for the document without graphs. By running command “doxygen
Conf-File” to generate documents.
If it succeeds to generate documents, it will have a folder named “html“ in the doxygen folder.
/*!
* ... text ...
*/
/*!
... text ...
*/
The main Web page of the generated HTML document is “index.html”.
The below figures show screenshots of Desktop App Chooser program HTML documents generated by
doxygen.
(If you want to let the document include your source codes for browsing, remember to
set the variable “SOURCE_BROWSER” to YES in the doxygen configuration file.)
Resources
LXDE Project
(Lightweight X11 Desktop Environment)
# http://lxde.org/
# http://sourceforge.net/projects/lxde/
# http://sourceforge.net/projects/lxde/files/
LXDE - LXLauncher
# http://wiki.lxde.org/en/LXLauncher
# http://lxde.org/lxlauncher
freedesktop.org Specs
# http://www.freedesktop.org/wiki/Specifications/
Desktop Entry/Menu
# https://developer.gnome.org/integration-guide/stable/desktop-files.html.en
# http://en.wikibooks.org/wiki/Using_GNOME/Application_menus
# https://wiki.archlinux.org/index.php/Gnome_Menu_tweaking#GNOME_menu_tips
# http://www.ibm.com/developerworks/cn/linux/l-cn-dtef/ 中文中文中文中文
GTK+ 2.0
# https://developer.gnome.org/gtk2/stable/
# http://www.dgsiegel.net/files/tog2dg.pdf The Official GNOME 2 Developer's Guide
# http://www.yolinux.com/TUTORIALS/GTK+ProgrammingTips.html
# http://www.zetcode.com/tutorials/gtktutorial/
# http://www.zetcode.com/tutorials/gtktutorial/chinese/ 中文中文中文中文
# http://tetralet.luna.com.tw/index.php?op=ViewArticle&articleId=188&blogId=1 中文中文中文中文
# http://pcman.sayya.org/tnlug-2006.02.18/tnlug.pdf Introducing GTK+ by PCMan (洪任諭洪任諭洪任諭洪任諭)
# http://www.gtkbook.com/
# http://book.huihoo.com/gtk+-gnome-application-development/
GTK+ 2.0 Tree View
# https://developer.gnome.org/gtk2/stable/TreeWidgetObjects.html
# http://scentric.net/tutorial/treeview-tutorial.html
# http://scentric.net/tutorial/treeview-tutorial.pdf
# http://scentric.net/tutorial/treeview-tutorial.tar.gz Example code for Treeview tutorial
# http://chingyichan.tw.googlepages.com/gtk_tree_view_tutorial.html 中文中文中文中文
# http://www.zetcode.com/tutorials/gtktutorial/gtktreeview/
# http://www.zetcode.com/tutorials/gtktutorial/chinese/gtktreeview/ 中文中文中文中文
# http://inti.sourceforge.net/tutorial/libinti/treeandlistwidget.html
# http://en.wikibooks.org/wiki/GTK%2B_By_Example/Tree_View
GNU gettext (l10n / i18n)
# https://www.gnu.org/software/gettext/
# http://fedoraproject.org/wiki/How_to_do_I18N_through_gettext GNU gettext tutorial with example
# http://nkumar.fedorapeople.org/helloi18n GNU gettext examples
# http://people.linux.org.tw/~pofeng/free-doc/linuxi18n/gtk.html Internationalize Gtk+ programs

Mais conteúdo relacionado

Mais procurados

Programming Without Coding Technology (PWCT) - Compress Files using PolarZipL...
Programming Without Coding Technology (PWCT) - Compress Files using PolarZipL...Programming Without Coding Technology (PWCT) - Compress Files using PolarZipL...
Programming Without Coding Technology (PWCT) - Compress Files using PolarZipL...Mahmoud Samir Fayed
 
Events and Listeners in Android
Events and Listeners in AndroidEvents and Listeners in Android
Events and Listeners in Androidma-polimi
 
Android apps development
Android apps developmentAndroid apps development
Android apps developmentRaman Pandey
 
Android Components & Manifest
Android Components & ManifestAndroid Components & Manifest
Android Components & Manifestma-polimi
 
JAVA GUI PART III
JAVA GUI PART IIIJAVA GUI PART III
JAVA GUI PART IIIOXUS 20
 
Programming Without Coding Technology (PWCT) - Play Flash Movie
Programming Without Coding Technology (PWCT) - Play Flash MovieProgramming Without Coding Technology (PWCT) - Play Flash Movie
Programming Without Coding Technology (PWCT) - Play Flash MovieMahmoud Samir Fayed
 
The Glass Class - Tutorial 3 - Android and GDK
The Glass Class - Tutorial 3 - Android and GDKThe Glass Class - Tutorial 3 - Android and GDK
The Glass Class - Tutorial 3 - Android and GDKGun Lee
 
Programming Without Coding Technology (PWCT) - Adding controls to windows.
Programming Without Coding Technology (PWCT) - Adding controls to windows.Programming Without Coding Technology (PWCT) - Adding controls to windows.
Programming Without Coding Technology (PWCT) - Adding controls to windows.Mahmoud Samir Fayed
 
Android programming
Android programmingAndroid programming
Android programmingvijay_uttam
 
Programming Without Coding Technology (PWCT) - RMChart ActiveX
Programming Without Coding Technology (PWCT) - RMChart ActiveXProgramming Without Coding Technology (PWCT) - RMChart ActiveX
Programming Without Coding Technology (PWCT) - RMChart ActiveXMahmoud Samir Fayed
 

Mais procurados (17)

Programming Without Coding Technology (PWCT) - Compress Files using PolarZipL...
Programming Without Coding Technology (PWCT) - Compress Files using PolarZipL...Programming Without Coding Technology (PWCT) - Compress Files using PolarZipL...
Programming Without Coding Technology (PWCT) - Compress Files using PolarZipL...
 
Android session 3
Android session 3Android session 3
Android session 3
 
Events and Listeners in Android
Events and Listeners in AndroidEvents and Listeners in Android
Events and Listeners in Android
 
Android apps development
Android apps developmentAndroid apps development
Android apps development
 
Android session 1
Android session 1Android session 1
Android session 1
 
Android Components & Manifest
Android Components & ManifestAndroid Components & Manifest
Android Components & Manifest
 
Widgets
WidgetsWidgets
Widgets
 
Android session 2
Android session 2Android session 2
Android session 2
 
JAVA GUI PART III
JAVA GUI PART IIIJAVA GUI PART III
JAVA GUI PART III
 
Programming Without Coding Technology (PWCT) - Play Flash Movie
Programming Without Coding Technology (PWCT) - Play Flash MovieProgramming Without Coding Technology (PWCT) - Play Flash Movie
Programming Without Coding Technology (PWCT) - Play Flash Movie
 
Ppt 2 android_basics
Ppt 2 android_basicsPpt 2 android_basics
Ppt 2 android_basics
 
The Glass Class - Tutorial 3 - Android and GDK
The Glass Class - Tutorial 3 - Android and GDKThe Glass Class - Tutorial 3 - Android and GDK
The Glass Class - Tutorial 3 - Android and GDK
 
Android UI Fundamentals part 1
Android UI Fundamentals part 1Android UI Fundamentals part 1
Android UI Fundamentals part 1
 
Android
AndroidAndroid
Android
 
Programming Without Coding Technology (PWCT) - Adding controls to windows.
Programming Without Coding Technology (PWCT) - Adding controls to windows.Programming Without Coding Technology (PWCT) - Adding controls to windows.
Programming Without Coding Technology (PWCT) - Adding controls to windows.
 
Android programming
Android programmingAndroid programming
Android programming
 
Programming Without Coding Technology (PWCT) - RMChart ActiveX
Programming Without Coding Technology (PWCT) - RMChart ActiveXProgramming Without Coding Technology (PWCT) - RMChart ActiveX
Programming Without Coding Technology (PWCT) - RMChart ActiveX
 

Semelhante a GTK+ 2.0 App - Desktop App Chooser

Introduction to git and Github
Introduction to git and GithubIntroduction to git and Github
Introduction to git and GithubWycliff1
 
Developing and Benchmarking Qt applications on Hawkboard with Xgxperf
Developing and Benchmarking Qt applications on Hawkboard with XgxperfDeveloping and Benchmarking Qt applications on Hawkboard with Xgxperf
Developing and Benchmarking Qt applications on Hawkboard with XgxperfPrabindh Sundareson
 
BLUG 2012 Version Control for Notes Developers
BLUG 2012 Version Control for Notes DevelopersBLUG 2012 Version Control for Notes Developers
BLUG 2012 Version Control for Notes DevelopersMartin Jinoch
 
Gnome Architecture
Gnome ArchitectureGnome Architecture
Gnome Architecture동수 장
 
Introduction to Git for Network Engineers (Lab Guide)
Introduction to Git for Network Engineers (Lab Guide)Introduction to Git for Network Engineers (Lab Guide)
Introduction to Git for Network Engineers (Lab Guide)Joel W. King
 
How to keep Eclipse on the bleeding edge in the Linux world
How to keep Eclipse on the bleeding edge in the Linux worldHow to keep Eclipse on the bleeding edge in the Linux world
How to keep Eclipse on the bleeding edge in the Linux worldArun Kumar Thondapu
 
git github PPT_GDSCIIITK.pptx
git github PPT_GDSCIIITK.pptxgit github PPT_GDSCIIITK.pptx
git github PPT_GDSCIIITK.pptxAbelPhilipJoseph
 
Graphics Programming in C under GNU Linux (Ubuntu distribution)
Graphics Programming in C under GNU Linux (Ubuntu distribution)Graphics Programming in C under GNU Linux (Ubuntu distribution)
Graphics Programming in C under GNU Linux (Ubuntu distribution)Tushar B Kute
 
The Ring programming language version 1.7 book - Part 82 of 196
The Ring programming language version 1.7 book - Part 82 of 196The Ring programming language version 1.7 book - Part 82 of 196
The Ring programming language version 1.7 book - Part 82 of 196Mahmoud Samir Fayed
 
The journey to GitOps
The journey to GitOpsThe journey to GitOps
The journey to GitOpsNicola Baldi
 
Creating new Tizen profiles using the Yocto Project
Creating new Tizen profiles  using the Yocto ProjectCreating new Tizen profiles  using the Yocto Project
Creating new Tizen profiles using the Yocto ProjectLeon Anavi
 
Git cheat sheet
Git cheat sheetGit cheat sheet
Git cheat sheetLam Hoang
 
Javascript, the GNOME way (JSConf EU 2011)
Javascript, the GNOME way (JSConf EU 2011)Javascript, the GNOME way (JSConf EU 2011)
Javascript, the GNOME way (JSConf EU 2011)Igalia
 
Rc094 010d-git 2 - desconocido
Rc094 010d-git 2 - desconocidoRc094 010d-git 2 - desconocido
Rc094 010d-git 2 - desconocidoLuis Bertel
 
Kubernetes GitOps featuring GitHub, Kustomize and ArgoCD
Kubernetes GitOps featuring GitHub, Kustomize and ArgoCDKubernetes GitOps featuring GitHub, Kustomize and ArgoCD
Kubernetes GitOps featuring GitHub, Kustomize and ArgoCDSunnyvale
 
Hackaton for health 2015 - Sharing the Code we Make
Hackaton for health 2015 - Sharing the Code we MakeHackaton for health 2015 - Sharing the Code we Make
Hackaton for health 2015 - Sharing the Code we Makeesben1962
 
Build and run embedded apps faster from qt creator with docker
Build and run embedded apps faster from qt creator with dockerBuild and run embedded apps faster from qt creator with docker
Build and run embedded apps faster from qt creator with dockerQt
 

Semelhante a GTK+ 2.0 App - Desktop App Chooser (20)

Introduction to git and Github
Introduction to git and GithubIntroduction to git and Github
Introduction to git and Github
 
Developing and Benchmarking Qt applications on Hawkboard with Xgxperf
Developing and Benchmarking Qt applications on Hawkboard with XgxperfDeveloping and Benchmarking Qt applications on Hawkboard with Xgxperf
Developing and Benchmarking Qt applications on Hawkboard with Xgxperf
 
BLUG 2012 Version Control for Notes Developers
BLUG 2012 Version Control for Notes DevelopersBLUG 2012 Version Control for Notes Developers
BLUG 2012 Version Control for Notes Developers
 
Gnome Architecture
Gnome ArchitectureGnome Architecture
Gnome Architecture
 
Introduction to Git for Network Engineers (Lab Guide)
Introduction to Git for Network Engineers (Lab Guide)Introduction to Git for Network Engineers (Lab Guide)
Introduction to Git for Network Engineers (Lab Guide)
 
How to keep Eclipse on the bleeding edge in the Linux world
How to keep Eclipse on the bleeding edge in the Linux worldHow to keep Eclipse on the bleeding edge in the Linux world
How to keep Eclipse on the bleeding edge in the Linux world
 
git github PPT_GDSCIIITK.pptx
git github PPT_GDSCIIITK.pptxgit github PPT_GDSCIIITK.pptx
git github PPT_GDSCIIITK.pptx
 
Graphics Programming in C under GNU Linux (Ubuntu distribution)
Graphics Programming in C under GNU Linux (Ubuntu distribution)Graphics Programming in C under GNU Linux (Ubuntu distribution)
Graphics Programming in C under GNU Linux (Ubuntu distribution)
 
The Ring programming language version 1.7 book - Part 82 of 196
The Ring programming language version 1.7 book - Part 82 of 196The Ring programming language version 1.7 book - Part 82 of 196
The Ring programming language version 1.7 book - Part 82 of 196
 
The journey to GitOps
The journey to GitOpsThe journey to GitOps
The journey to GitOps
 
Creating new Tizen profiles using the Yocto Project
Creating new Tizen profiles  using the Yocto ProjectCreating new Tizen profiles  using the Yocto Project
Creating new Tizen profiles using the Yocto Project
 
Git cheat sheet
Git cheat sheetGit cheat sheet
Git cheat sheet
 
Git introduction
Git introductionGit introduction
Git introduction
 
Qt
QtQt
Qt
 
Javascript, the GNOME way (JSConf EU 2011)
Javascript, the GNOME way (JSConf EU 2011)Javascript, the GNOME way (JSConf EU 2011)
Javascript, the GNOME way (JSConf EU 2011)
 
Rc094 010d-git 2 - desconocido
Rc094 010d-git 2 - desconocidoRc094 010d-git 2 - desconocido
Rc094 010d-git 2 - desconocido
 
Kubernetes GitOps featuring GitHub, Kustomize and ArgoCD
Kubernetes GitOps featuring GitHub, Kustomize and ArgoCDKubernetes GitOps featuring GitHub, Kustomize and ArgoCD
Kubernetes GitOps featuring GitHub, Kustomize and ArgoCD
 
Using Qt under LGPLv3
Using Qt under LGPLv3Using Qt under LGPLv3
Using Qt under LGPLv3
 
Hackaton for health 2015 - Sharing the Code we Make
Hackaton for health 2015 - Sharing the Code we MakeHackaton for health 2015 - Sharing the Code we Make
Hackaton for health 2015 - Sharing the Code we Make
 
Build and run embedded apps faster from qt creator with docker
Build and run embedded apps faster from qt creator with dockerBuild and run embedded apps faster from qt creator with docker
Build and run embedded apps faster from qt creator with docker
 

Mais de William Lee

Usage Note of Apache Thrift for C++ Java PHP Languages
Usage Note of Apache Thrift for C++ Java PHP LanguagesUsage Note of Apache Thrift for C++ Java PHP Languages
Usage Note of Apache Thrift for C++ Java PHP LanguagesWilliam Lee
 
Usage Note of Qt ODBC Database Access on Linux
Usage Note of Qt ODBC Database Access on LinuxUsage Note of Qt ODBC Database Access on Linux
Usage Note of Qt ODBC Database Access on LinuxWilliam Lee
 
Usage Note of SWIG for PHP
Usage Note of SWIG for PHPUsage Note of SWIG for PHP
Usage Note of SWIG for PHPWilliam Lee
 
Upgrade GCC & Install Qt 5.4 on CentOS 6.5
Upgrade GCC & Install Qt 5.4 on CentOS 6.5 Upgrade GCC & Install Qt 5.4 on CentOS 6.5
Upgrade GCC & Install Qt 5.4 on CentOS 6.5 William Lee
 
Usage Notes of The Bro 2.2 / 2.3
Usage Notes of The Bro 2.2 / 2.3Usage Notes of The Bro 2.2 / 2.3
Usage Notes of The Bro 2.2 / 2.3William Lee
 
Viewing Android Source Files in Eclipse (Chinese)
Viewing Android Source Files in Eclipse  (Chinese)Viewing Android Source Files in Eclipse  (Chinese)
Viewing Android Source Files in Eclipse (Chinese)William Lee
 
Usage Note of Microsoft Dependency Walker
Usage Note of Microsoft Dependency WalkerUsage Note of Microsoft Dependency Walker
Usage Note of Microsoft Dependency WalkerWilliam Lee
 
Usage Note of PlayCap
Usage Note of PlayCapUsage Note of PlayCap
Usage Note of PlayCapWilliam Lee
 
Qt4 App - Sliding Window
Qt4 App - Sliding WindowQt4 App - Sliding Window
Qt4 App - Sliding WindowWilliam Lee
 
Note of CGI and ASP
Note of CGI and ASPNote of CGI and ASP
Note of CGI and ASPWilliam Lee
 
Moblin2 - Window Manager(Mutter) Plugin
Moblin2 - Window Manager(Mutter) PluginMoblin2 - Window Manager(Mutter) Plugin
Moblin2 - Window Manager(Mutter) PluginWilliam Lee
 
Asterisk (IP-PBX) CDR Log Rotation
Asterisk (IP-PBX) CDR Log RotationAsterisk (IP-PBX) CDR Log Rotation
Asterisk (IP-PBX) CDR Log RotationWilliam Lee
 
L.A.M.P Installation Note --- CentOS 6.5
L.A.M.P Installation Note --- CentOS 6.5L.A.M.P Installation Note --- CentOS 6.5
L.A.M.P Installation Note --- CentOS 6.5William Lee
 
C Program Runs on Wrong Target Platform(CPU Architecture)
C Program Runs on Wrong Target Platform(CPU Architecture)C Program Runs on Wrong Target Platform(CPU Architecture)
C Program Runs on Wrong Target Platform(CPU Architecture)William Lee
 
Internationalization(i18n) of Web Page
Internationalization(i18n) of Web PageInternationalization(i18n) of Web Page
Internationalization(i18n) of Web PageWilliam Lee
 
Notes for SQLite3 Usage
Notes for SQLite3 UsageNotes for SQLite3 Usage
Notes for SQLite3 UsageWilliam Lee
 
Cygwin Install How-To (Chinese)
Cygwin Install How-To (Chinese)Cygwin Install How-To (Chinese)
Cygwin Install How-To (Chinese)William Lee
 
Android Storage - StorageManager & OBB
Android Storage - StorageManager & OBBAndroid Storage - StorageManager & OBB
Android Storage - StorageManager & OBBWilliam Lee
 
Study of Chromium OS
Study of Chromium OSStudy of Chromium OS
Study of Chromium OSWilliam Lee
 

Mais de William Lee (20)

Usage Note of Apache Thrift for C++ Java PHP Languages
Usage Note of Apache Thrift for C++ Java PHP LanguagesUsage Note of Apache Thrift for C++ Java PHP Languages
Usage Note of Apache Thrift for C++ Java PHP Languages
 
Usage Note of Qt ODBC Database Access on Linux
Usage Note of Qt ODBC Database Access on LinuxUsage Note of Qt ODBC Database Access on Linux
Usage Note of Qt ODBC Database Access on Linux
 
Usage Note of SWIG for PHP
Usage Note of SWIG for PHPUsage Note of SWIG for PHP
Usage Note of SWIG for PHP
 
Upgrade GCC & Install Qt 5.4 on CentOS 6.5
Upgrade GCC & Install Qt 5.4 on CentOS 6.5 Upgrade GCC & Install Qt 5.4 on CentOS 6.5
Upgrade GCC & Install Qt 5.4 on CentOS 6.5
 
Usage Notes of The Bro 2.2 / 2.3
Usage Notes of The Bro 2.2 / 2.3Usage Notes of The Bro 2.2 / 2.3
Usage Notes of The Bro 2.2 / 2.3
 
Viewing Android Source Files in Eclipse (Chinese)
Viewing Android Source Files in Eclipse  (Chinese)Viewing Android Source Files in Eclipse  (Chinese)
Viewing Android Source Files in Eclipse (Chinese)
 
Usage Note of Microsoft Dependency Walker
Usage Note of Microsoft Dependency WalkerUsage Note of Microsoft Dependency Walker
Usage Note of Microsoft Dependency Walker
 
Usage Note of PlayCap
Usage Note of PlayCapUsage Note of PlayCap
Usage Note of PlayCap
 
Qt4 App - Sliding Window
Qt4 App - Sliding WindowQt4 App - Sliding Window
Qt4 App - Sliding Window
 
Note of CGI and ASP
Note of CGI and ASPNote of CGI and ASP
Note of CGI and ASP
 
Moblin2 - Window Manager(Mutter) Plugin
Moblin2 - Window Manager(Mutter) PluginMoblin2 - Window Manager(Mutter) Plugin
Moblin2 - Window Manager(Mutter) Plugin
 
MGCP Overview
MGCP OverviewMGCP Overview
MGCP Overview
 
Asterisk (IP-PBX) CDR Log Rotation
Asterisk (IP-PBX) CDR Log RotationAsterisk (IP-PBX) CDR Log Rotation
Asterisk (IP-PBX) CDR Log Rotation
 
L.A.M.P Installation Note --- CentOS 6.5
L.A.M.P Installation Note --- CentOS 6.5L.A.M.P Installation Note --- CentOS 6.5
L.A.M.P Installation Note --- CentOS 6.5
 
C Program Runs on Wrong Target Platform(CPU Architecture)
C Program Runs on Wrong Target Platform(CPU Architecture)C Program Runs on Wrong Target Platform(CPU Architecture)
C Program Runs on Wrong Target Platform(CPU Architecture)
 
Internationalization(i18n) of Web Page
Internationalization(i18n) of Web PageInternationalization(i18n) of Web Page
Internationalization(i18n) of Web Page
 
Notes for SQLite3 Usage
Notes for SQLite3 UsageNotes for SQLite3 Usage
Notes for SQLite3 Usage
 
Cygwin Install How-To (Chinese)
Cygwin Install How-To (Chinese)Cygwin Install How-To (Chinese)
Cygwin Install How-To (Chinese)
 
Android Storage - StorageManager & OBB
Android Storage - StorageManager & OBBAndroid Storage - StorageManager & OBB
Android Storage - StorageManager & OBB
 
Study of Chromium OS
Study of Chromium OSStudy of Chromium OS
Study of Chromium OS
 

Último

Maximizing Board Effectiveness 2024 Webinar.pptx
Maximizing Board Effectiveness 2024 Webinar.pptxMaximizing Board Effectiveness 2024 Webinar.pptx
Maximizing Board Effectiveness 2024 Webinar.pptxOnBoard
 
Histor y of HAM Radio presentation slide
Histor y of HAM Radio presentation slideHistor y of HAM Radio presentation slide
Histor y of HAM Radio presentation slidevu2urc
 
🐬 The future of MySQL is Postgres 🐘
🐬  The future of MySQL is Postgres   🐘🐬  The future of MySQL is Postgres   🐘
🐬 The future of MySQL is Postgres 🐘RTylerCroy
 
Google AI Hackathon: LLM based Evaluator for RAG
Google AI Hackathon: LLM based Evaluator for RAGGoogle AI Hackathon: LLM based Evaluator for RAG
Google AI Hackathon: LLM based Evaluator for RAGSujit Pal
 
SQL Database Design For Developers at php[tek] 2024
SQL Database Design For Developers at php[tek] 2024SQL Database Design For Developers at php[tek] 2024
SQL Database Design For Developers at php[tek] 2024Scott Keck-Warren
 
WhatsApp 9892124323 ✓Call Girls In Kalyan ( Mumbai ) secure service
WhatsApp 9892124323 ✓Call Girls In Kalyan ( Mumbai ) secure serviceWhatsApp 9892124323 ✓Call Girls In Kalyan ( Mumbai ) secure service
WhatsApp 9892124323 ✓Call Girls In Kalyan ( Mumbai ) secure servicePooja Nehwal
 
Tech-Forward - Achieving Business Readiness For Copilot in Microsoft 365
Tech-Forward - Achieving Business Readiness For Copilot in Microsoft 365Tech-Forward - Achieving Business Readiness For Copilot in Microsoft 365
Tech-Forward - Achieving Business Readiness For Copilot in Microsoft 3652toLead Limited
 
Finology Group – Insurtech Innovation Award 2024
Finology Group – Insurtech Innovation Award 2024Finology Group – Insurtech Innovation Award 2024
Finology Group – Insurtech Innovation Award 2024The Digital Insurer
 
How to convert PDF to text with Nanonets
How to convert PDF to text with NanonetsHow to convert PDF to text with Nanonets
How to convert PDF to text with Nanonetsnaman860154
 
Mastering MySQL Database Architecture: Deep Dive into MySQL Shell and MySQL R...
Mastering MySQL Database Architecture: Deep Dive into MySQL Shell and MySQL R...Mastering MySQL Database Architecture: Deep Dive into MySQL Shell and MySQL R...
Mastering MySQL Database Architecture: Deep Dive into MySQL Shell and MySQL R...Miguel Araújo
 
FULL ENJOY 🔝 8264348440 🔝 Call Girls in Diplomatic Enclave | Delhi
FULL ENJOY 🔝 8264348440 🔝 Call Girls in Diplomatic Enclave | DelhiFULL ENJOY 🔝 8264348440 🔝 Call Girls in Diplomatic Enclave | Delhi
FULL ENJOY 🔝 8264348440 🔝 Call Girls in Diplomatic Enclave | Delhisoniya singh
 
How to Troubleshoot Apps for the Modern Connected Worker
How to Troubleshoot Apps for the Modern Connected WorkerHow to Troubleshoot Apps for the Modern Connected Worker
How to Troubleshoot Apps for the Modern Connected WorkerThousandEyes
 
[2024]Digital Global Overview Report 2024 Meltwater.pdf
[2024]Digital Global Overview Report 2024 Meltwater.pdf[2024]Digital Global Overview Report 2024 Meltwater.pdf
[2024]Digital Global Overview Report 2024 Meltwater.pdfhans926745
 
Breaking the Kubernetes Kill Chain: Host Path Mount
Breaking the Kubernetes Kill Chain: Host Path MountBreaking the Kubernetes Kill Chain: Host Path Mount
Breaking the Kubernetes Kill Chain: Host Path MountPuma Security, LLC
 
GenCyber Cyber Security Day Presentation
GenCyber Cyber Security Day PresentationGenCyber Cyber Security Day Presentation
GenCyber Cyber Security Day PresentationMichael W. Hawkins
 
08448380779 Call Girls In Civil Lines Women Seeking Men
08448380779 Call Girls In Civil Lines Women Seeking Men08448380779 Call Girls In Civil Lines Women Seeking Men
08448380779 Call Girls In Civil Lines Women Seeking MenDelhi Call girls
 
Boost PC performance: How more available memory can improve productivity
Boost PC performance: How more available memory can improve productivityBoost PC performance: How more available memory can improve productivity
Boost PC performance: How more available memory can improve productivityPrincipled Technologies
 
Strategies for Unlocking Knowledge Management in Microsoft 365 in the Copilot...
Strategies for Unlocking Knowledge Management in Microsoft 365 in the Copilot...Strategies for Unlocking Knowledge Management in Microsoft 365 in the Copilot...
Strategies for Unlocking Knowledge Management in Microsoft 365 in the Copilot...Drew Madelung
 
Understanding the Laravel MVC Architecture
Understanding the Laravel MVC ArchitectureUnderstanding the Laravel MVC Architecture
Understanding the Laravel MVC ArchitecturePixlogix Infotech
 
A Call to Action for Generative AI in 2024
A Call to Action for Generative AI in 2024A Call to Action for Generative AI in 2024
A Call to Action for Generative AI in 2024Results
 

Último (20)

Maximizing Board Effectiveness 2024 Webinar.pptx
Maximizing Board Effectiveness 2024 Webinar.pptxMaximizing Board Effectiveness 2024 Webinar.pptx
Maximizing Board Effectiveness 2024 Webinar.pptx
 
Histor y of HAM Radio presentation slide
Histor y of HAM Radio presentation slideHistor y of HAM Radio presentation slide
Histor y of HAM Radio presentation slide
 
🐬 The future of MySQL is Postgres 🐘
🐬  The future of MySQL is Postgres   🐘🐬  The future of MySQL is Postgres   🐘
🐬 The future of MySQL is Postgres 🐘
 
Google AI Hackathon: LLM based Evaluator for RAG
Google AI Hackathon: LLM based Evaluator for RAGGoogle AI Hackathon: LLM based Evaluator for RAG
Google AI Hackathon: LLM based Evaluator for RAG
 
SQL Database Design For Developers at php[tek] 2024
SQL Database Design For Developers at php[tek] 2024SQL Database Design For Developers at php[tek] 2024
SQL Database Design For Developers at php[tek] 2024
 
WhatsApp 9892124323 ✓Call Girls In Kalyan ( Mumbai ) secure service
WhatsApp 9892124323 ✓Call Girls In Kalyan ( Mumbai ) secure serviceWhatsApp 9892124323 ✓Call Girls In Kalyan ( Mumbai ) secure service
WhatsApp 9892124323 ✓Call Girls In Kalyan ( Mumbai ) secure service
 
Tech-Forward - Achieving Business Readiness For Copilot in Microsoft 365
Tech-Forward - Achieving Business Readiness For Copilot in Microsoft 365Tech-Forward - Achieving Business Readiness For Copilot in Microsoft 365
Tech-Forward - Achieving Business Readiness For Copilot in Microsoft 365
 
Finology Group – Insurtech Innovation Award 2024
Finology Group – Insurtech Innovation Award 2024Finology Group – Insurtech Innovation Award 2024
Finology Group – Insurtech Innovation Award 2024
 
How to convert PDF to text with Nanonets
How to convert PDF to text with NanonetsHow to convert PDF to text with Nanonets
How to convert PDF to text with Nanonets
 
Mastering MySQL Database Architecture: Deep Dive into MySQL Shell and MySQL R...
Mastering MySQL Database Architecture: Deep Dive into MySQL Shell and MySQL R...Mastering MySQL Database Architecture: Deep Dive into MySQL Shell and MySQL R...
Mastering MySQL Database Architecture: Deep Dive into MySQL Shell and MySQL R...
 
FULL ENJOY 🔝 8264348440 🔝 Call Girls in Diplomatic Enclave | Delhi
FULL ENJOY 🔝 8264348440 🔝 Call Girls in Diplomatic Enclave | DelhiFULL ENJOY 🔝 8264348440 🔝 Call Girls in Diplomatic Enclave | Delhi
FULL ENJOY 🔝 8264348440 🔝 Call Girls in Diplomatic Enclave | Delhi
 
How to Troubleshoot Apps for the Modern Connected Worker
How to Troubleshoot Apps for the Modern Connected WorkerHow to Troubleshoot Apps for the Modern Connected Worker
How to Troubleshoot Apps for the Modern Connected Worker
 
[2024]Digital Global Overview Report 2024 Meltwater.pdf
[2024]Digital Global Overview Report 2024 Meltwater.pdf[2024]Digital Global Overview Report 2024 Meltwater.pdf
[2024]Digital Global Overview Report 2024 Meltwater.pdf
 
Breaking the Kubernetes Kill Chain: Host Path Mount
Breaking the Kubernetes Kill Chain: Host Path MountBreaking the Kubernetes Kill Chain: Host Path Mount
Breaking the Kubernetes Kill Chain: Host Path Mount
 
GenCyber Cyber Security Day Presentation
GenCyber Cyber Security Day PresentationGenCyber Cyber Security Day Presentation
GenCyber Cyber Security Day Presentation
 
08448380779 Call Girls In Civil Lines Women Seeking Men
08448380779 Call Girls In Civil Lines Women Seeking Men08448380779 Call Girls In Civil Lines Women Seeking Men
08448380779 Call Girls In Civil Lines Women Seeking Men
 
Boost PC performance: How more available memory can improve productivity
Boost PC performance: How more available memory can improve productivityBoost PC performance: How more available memory can improve productivity
Boost PC performance: How more available memory can improve productivity
 
Strategies for Unlocking Knowledge Management in Microsoft 365 in the Copilot...
Strategies for Unlocking Knowledge Management in Microsoft 365 in the Copilot...Strategies for Unlocking Knowledge Management in Microsoft 365 in the Copilot...
Strategies for Unlocking Knowledge Management in Microsoft 365 in the Copilot...
 
Understanding the Laravel MVC Architecture
Understanding the Laravel MVC ArchitectureUnderstanding the Laravel MVC Architecture
Understanding the Laravel MVC Architecture
 
A Call to Action for Generative AI in 2024
A Call to Action for Generative AI in 2024A Call to Action for Generative AI in 2024
A Call to Action for Generative AI in 2024
 

GTK+ 2.0 App - Desktop App Chooser

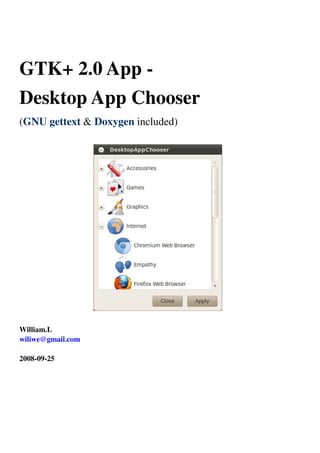
  • 1. GTK+ 2.0 App - Desktop App Chooser (GNU gettext & Doxygen included) William.L wiliwe@gmail.com 2008-09-25
  • 2. Index About Desktop App Chooser ......................................................................................................................... 3 Developing Environment & Build................................................................................................................. 5 Install Library for Development............................................................................................................ 5 Build & Run............................................................................................................................................. 5 About the Memory Management in GTK+ 2.0............................................................................................ 7 GUI Programming Concept <1>: Event-Driven........................................................................................... 8 GUI Programming Concept <2>: MVC...................................................................................................... 10 GTK+ 2.0 Tree View ............................................................................................................................. 12 freedesktop.org / XDG.................................................................................................................................. 15 Base Directory specification................................................................................................................. 15 Desktop Entry specification ................................................................................................................. 16 The Format of Desktop Entry...................................................................................................... 18 Desktop Menu specification ................................................................................................................. 19 Install Locations............................................................................................................................ 20 Add Submenu................................................................................................................................ 21 A Desktop Menu Editor - Alacarte.............................................................................................. 22 Find .desktop & .directory Files in Linux................................................................................... 22 Icons of Applications (Icon Theme)..................................................................................................... 23 GNOME Menus Library - accessing Desktop Entry/Menu in program ................................................. 24 i18n - GNU gettext ........................................................................................................................................ 29 Locale ..................................................................................................................................................... 29 Usage ...................................................................................................................................................... 32 GNU gettext in GLib/GTK+ Program................................................................................................ 37 Doxygen.......................................................................................................................................................... 39 Tools........................................................................................................................................................ 40 Configuration File................................................................................................................................. 41 Documenting the Code ......................................................................................................................... 44 Special Command ......................................................................................................................... 45 Putting documentation after members ....................................................................................... 48 Documentation at other places .................................................................................................... 50 Generate Diagrams/Graphs................................................................................................................. 52 Desktop-App-Chooser Internals.................................................................................................................. 55 Resources ....................................................................................................................................................... 62
  • 3. About Desktop App Chooser In the Linux desktop environment, all installed GUI applications (either user installed or system inbuilt) could be browsed and launched through the application menu(likes MS-Windows "Start" menu) on the panel (as below figures). If a Linux application wants to have capabilities to show, choose and launch installed desktop applications, it needs to provide an application menu UI to user. This UI could be custom as LXLauncher of LXDE project (as below snapshots). LXLauncher is an open source clone of Asus launcher for EeePC. It outperformes the original launcher developed by Xandros. Download example from GitHub: https://github.com/wiliwe/gtk2-desktop-app-chooser.git Using Git tool (http://git-scm.com/downloads) to fork this repo: git clone https://github.com/wiliwe/gtk2-desktop-app-chooser.git
  • 4. Another example of Linux desktop application launcher is Ubuntu Remix/Netbook Launcher (see below sites). * https://launchpad.net/netbook-remix-launcher * https://launchpad.net/ubuntu/+source/netbook-launcher All desktop applications, either in GNOME or KDE desktop environments, follow specifications from freedesktop.org (formerly known as the X Desktop Group or XDG) for specifying the path to install of application's executable, icon(representing that application and being show in menu or launcher) and its profile file called Desktop Entry and the format of Desktop Entry file. A Desktop Entry file(with ".desktop" file extension) contains information about the location of executable, where to load icon and what category the application belongs to. The way to know what desktop applications are installed is to find installed desktop entry files in specific paths and parse found desktop entry files. Desktop App Chooser is a GTK+2 program that can 1)find and parse desktop entry files and list all installed desktop applications in a visual tree by using the GtkTreeView widget and 2)return the content of the desktop entry of a chosen desktop application to the caller for execution or other purpose. Desktop App Chooser could be as a component in a large GTK+2 program when it wants to show all installed desktop applications likes desktop application menu(shown as below steps). Desktop App Chooser was written in C++ and runs as a modal dialog. GtkTreeView widget: * https://developer.gnome.org/gtk2/stable/GtkTreeView.html * http://www.zetcode.com/tutorials/gtktutorial/gtktreeview/ * http://www.zetcode.com/tutorials/gtktutorial/chinese/gtktreeview/ 中文中文中文中文
  • 5. Developing Environment & Build * Ubuntu 8.04 Hardy Heron LTS * GTK+ 2.0 * GNOME Menus Library v2.22 * Doxygen v1.5.5 Install Library for Development <GLib> Ubuntu sudo apt-get -y install libglib2.0-dev CentOS 6 su yum -y install glib2-devel-* <GTK+ 2.0> GTK+2 development library includes "gdk-pixbuf" development library. Ubuntu sudo apt-get -y install libgtk2.0-dev CentOS 6 su yum -y install gtk2-devel-* <GNOME Menus> Ubuntu sudo apt-get -y install libgnome-menu-dev CentOS 6 yum -y install gnome-menus* Build & Run In the source root of Desktop App Chooser program, just run “make” command to build program. If the build process succeed, it will generate a executable file name DesktopAppChooser under the source root. To invoke Desktop App Chooser program by entering below command. ./DesktopAppChooser
  • 6. In Desktop App Chooser, unfold the top-level node, e.g. the menu directory, choose the wanted application by clicking it, then click the button “Apply” to close the chooser dialogue and you can see the content of desktop entry of the chosen application in the console (as below snapshot). If you change locale attribute(an environment variable) LANG to the language other than English, the value of Comment field of desktop entry will be shown in the language you selected (as below snapshot).
  • 7. About the Memory Management in GTK+ 2.0 GTK+2 depends on GLib which uses GObject system to achieve object-oriented programming. The GObject system provides a memory management model based on Reference Counting(Counter) mechanism( the same as the one used in Microsoft COM technology) for applications to do garbage-collection(GC). Reference Counting means that an object has a counter that can be increased (ref-ed, referenced) or decreased (unref-ed, unreferenced). If the counter is unref-ed to zero, the object is automatically destroyed. This is useful, because other object or application programmers only have to think about whether they themselves are still using that object or not, without knowing anything about others also using it. The object is simply automatically destroyed when no one is using it any more. XXX_new() and XXX_unref() are for creation and deletion of an object separately. When an object is created, its reference counter will be increased from zero to one. XXX_unref() is used to decrease the reference counter of the object. If the reference counter of the object is decreased to zero, the object will be delete, e.g. the memory of the object will be released. More detailed information about GObject could be found in below sites: * https://developer.gnome.org/gobject/ * http://files.myeburg.net/gobject-book-a4.pdf
  • 8. GUI Programming Concept <1>: Event-Driven For GUI (Graphic User Interface) programming, one important concept is Event-Driven model: The GUI applications start a main loop, which continuously checks for newly generated events. If there is no event, the application waits and does nothing(idle mode). All GUI applications are developed based on event driven. In the event-driven model, the operating system is the Event Manager that monitors events from hardware devices or other widgets and dispatches events to GUI applications for processing. And the application is the Event Handler whose function is to wait for an event to occur and then perform the corresponding action. The software routine in the application for waiting for and processing events is called Event Loop or Main (Event) Loop. When there has no more events to process, the application will be in idle state (mode). Most events come from user's operations such as mouse button click or keyboard keystrokes. Events are used to signal the changing state of a component (widget) in graphical user interfaces. The event-driven model is usually implemented by means of messages passed among the participants. For example, user clicks mouse button, the mouse sends a message to the operating system, which in turn, sends a message to GUI application. The application processes messages one by one, and the messages not be processed yet are put in an queue called Event Queue or Message Queue, in the order it was sent to the application. User Input Event Operating System (event manager) GUI Application (event handler) /* Event Loop */ MSG msg; while(1) { GetMsg(msg); switch(msg.type) { case 1: action1; break; ... default: DoNothing; } // end of switch } // end of while(1)
  • 9. GTK+2 depends on GLib mainloop to manage all the available sources of events. The GMainLoop data type represents a main event loop. A GMainLoop is created with g_main_loop_new(). After adding the initial event sources, g_main_loop_run() is called. This continuously checks for new events from each of the event sources and dispatches them. Finally, the processing of an event from one of the sources leads to a call to g_main_loop_quit() to exit the main loop, and g_main_loop_run() returns. GTK+2 contains wrappers of some of GLib mainloop functions: * gtk_main() * gtk_main_quit() * gtk_events_pending(). On UNIX, the GLib mainloop is incompatible with fork(). Any program using the mainloop must either exec() or exit() from the child without returning to the mainloop. On Linux platform, an event in GTK+2 is a message from the X server. When the event reaches a widget, it may react to this event by emitting a signal. The GTK+2 programmer can connect a specific callback to a signal. The callback is a handler function, that reacts to a signal (P.S: Qt framework uses similar method for processing widget events, it calls Signal-Slot). More detailed information about GLib/GTK+ message loop could be found in sites: * https://developer.gnome.org/glib/stable/glib-The-Main-Event-Loop.html * https://developer.gnome.org/gtk2/stable/gtk2-General.html X Server Widget Event Handlersignal (event) message
  • 10. GUI Programming Concept <2>: MVC Another important concept of GUI (Graphic User Interface) programming is Model-View-Controller, abbreviated as MVC. The Model-View-Controller architecture is a well-known object-oriented user interface software architecture design paradigm/pattern and decomposition and was first introduced into object-oriented programming language Smalltalk in the 1970s. Its concept is that complete separation between data and how that data is displayed on the screen. Basically, MVC breaks a GUI component into three elements (roles): model, view and controller. MVC is an example of the Observer design pattern (also known as Dependents, Publish/Subscribe or Publisher/Subscriber) where model is the Subject and views are Observers that can register to get notified of any change to the model. Model The model stores data of various type (strings, numbers, images, etc). Generally, Model is constructed first and is the most important of all three elements: the data is the core of an application and is what an application mainly focuses on. Moreover, data identifies the state of an application: if the data is changed, it means the state of the application is changed. The data remains the same no matter how the UI component is painted on the screen; model data is always independent of the component's visual representation. Upon the model (data) is changed, the model will send update notifications to all views that are interested in(depend on) it, so that views can retrieve the updated data and refresh themselves; this way could be said that there has a Subscribe-Notify protocol between model and view. In practice, it may have many kinds of model in a GUI framework or library for different classes of view(visual component, e.g. widget, control) and the model is implemented in some kinds of data structure written in the programming language the GUI framework or library uses. View The view is told which data to display, where to display it, and how to display it by model. The view determines the visual representation of the component’s model. This is a component’s “look.” Controller The controller is the portion of the user interface (view) and is responsible for determining whether the component should react to any user action(i.e. input events from keyboard or mouse) that affects the model or views. The controller is the “feel” of the UI component, and it determines what actions are performed when the UI component is used. In this separation, the view and controller depend on the model, while the model does NOT depend on either of the two making it so the model can be independent of the visual presentation when building and testing.
  • 11. The three elements of a model-view-controller architecture From book - Java Swing 2/e, 2002, O’Reilly Communication through the Model-View-Controller architecture One of advantages of this approach is that you can have multiple views that display the same data in different ways, or in the same way in multiple times, with only one copy of the underlying data. This avoids duplication of data and programming effort if the same data is re-used in different contexts and the UI component can be updated with a new look or visual style without having to change the data model or the controller. Also, it keeps the program modularized, allowing for high cohesion and loose coupling. The MVC concept has been adopted into many frameworks, such as: * Microsoft MFC Document/View Model GUI Tool user Controller View Model The model passes its data to the view for rendering. The controller updates the model based on the events seesuses Update view such as menu selected < user action> The view determines which events are passed to the controller.
  • 12. Document is model and CFrameWnd class is controller dispatching window messages to programmer implemented methods * Java Swing Framework (precisely speaking, it uses a variation of MVC pattern, Model/Delegate) Here using table view for example. For the table view widget, JTable, it needs to set the model object of a class derived from AbstractTableModel abstract class; when model's content is changed, it needs to call model’s method fireTableXXX() (from AbstractTableModel class) to notify JTable to refresh/repaint table view display depending on the changed model content * Apache Struts (written in Java) * Apple Mac OS X Cocoa / iOS Cocoa Touch Framework (written in Objective-C). GTK+ 2.0 Tree View The GtkTreeView is a widget that displays single- or multi-columned lists and trees. It replaces the old Gtk+-1.2 GtkCList and GtkCTree widgets. The GtkTreeView widget is designed based on MVC model. To create a tree or list in GTK+2, use the GtkTreeModel interface in conjunction with the GtkTreeView widget. GtkTreeModel is an abstract interface to the data store and defines generic tree or list interfaces used by the GtkTreeView widget; it only provides a way to query a data store's characteristics and to retrieve existing data. It does not provide a way to remove rows from or add rows to the store or put data into the store, this is done using functions of the specific store implementing GtkTreeModel interface. The model is represented as a hierarchical tree of strongly-typed, columned data. The programmer needs not to implement GtkTreeModel by him(her)self, two models implementing GtkTreeModel are provided: * GtkTreeStore is used to model tree widgets * GtkListStore is used to model list widgets. A list is basically just a special case of a tree with none of the items having any children, so one could use a tree store to maintain a simple list of items as well. The only reason GtkListStore exists is in order to provide an easier interface that does not need to cater for child-parent relationships, and because a simple list model can be optimized for the special case where no children exist, which makes it faster and more efficient. To use these model data structures, the developer simply pushes data into these models as necessary. GtkListStore is internally a simple linked list and stores a list node in one of pointers. GtkListStore and GtkTreeStore are GObjects and have a reference count of one after creation. The tree view will add its own reference to the model when you add the model with gtk_tree_view_set_model(), and will unref it again when you replace the model with another model, unset the model by passing NULL as a model, or when the tree view is destroyed. This means that you need to take care of "your" reference yourself, otherwise the model will NOT be destroyed properly when you disconnect it from the tree view, and its memory will not be freed (which does not matter much if the same model is connected to the tree view from application start to end). If you plan to use the same model for a tree view for the whole duration of the application, you can get rid
  • 13. of "your" reference right after you have connected the model to the view - then the model will be destroyed automatically when the tree view is destroyed (which will be automatically destroyed when the window it is in is destroyed). There are several other components that are used with the GtkTreeView widget: GtkTreeViewColumn A GtkTreeView is made up of tree view columns. A model column represents a certain data field of an item that has a fixed data type but does NOT display any data. It is only used as a device to represent the user-side of the tree view and serves as packing widgets for the components that do the actual rendering of data onto the screen, namely the GtkCellRenderer family of objects. You need to know what kind of data you want to store when you create a list store or a tree store, as you can NOT add new fields later on. GtkCellRenderer Cell renderers are packed into tree view columns to display data. The GtkCellRenderer determines, how the data is going to be displayed in the GtkTreeViewColumn. There are a number of different cell renderers that specialize in rendering certain data like strings, pixbufs, or toggle buttons. A tree view column needs to contain at least one cell renderer, but can contain multiple cell renderers. Note that the tree view will not resize icons for you, but displays them in their original size. GtkTreeIter A structure used to refer to a row in the GtkTreeView. GtkTreeSelection A structure that handles selections There has an alternative view widget to show list model (GtkListStore). This kind of the widget is GtkIconView which is similar to GtkTreeView. Basic Usage of Tree View * Creating a tree view widget. * Construct the tree model for tree view. * Connect tree model to tree view widget by calling function gtk_tree_view_set_model(). Basic Usage of Icon View * Creating a icon view widget. * Construct the list model(store) for icon view.
  • 14. * Connect tree model to icon view widget by calling function gtk_icon_view_set_model().
  • 15. freedesktop.org / XDG freedesktop.org is open source / open discussion software projects working on interoperability and shared technology for X Window System desktops. freedesktop.org was formerly known as the X Desktop Group, and the abbreviation XDG. An X desktop is a graphical environment designed to give a technologically advanced, user-friendly face to the X Window System running on UNIX-like operating systems. Most X desktops also provide a development infrastructure for writing applications that integrate well with the desktop. In general there are two flavors of X desktop: “heavyweight” and "lightweight". The two most famous "heavyweight" desktop projects are GNOME and KDE (these two are the desktops with the most support from Linux distribution vendors); these include both a desktop environment and an application development framework. A desktop environment bundles together a variety of X clients(e.g. applications) to provide common graphical user interface elements such as icons, toolbars, wallpapers, and desktop widgets and includes a window manager(a special X client), help browser, file manager, task bar, also. A development framework includes any number of libraries to ease application development, perhaps most importantly a GUI toolkit. The second flavor ("lightweight") of X desktop includes a desktop environment ONLY; NO development framework is included. freedesktop.org publishes many specifications for X desktop applications such as: * Base Directory http://www.freedesktop.org/wiki/Specifications/basedir-spec/ * Desktop Entry http://www.freedesktop.org/wiki/Specifications/desktop-entry-spec/ * Desktop Menu http://www.freedesktop.org/wiki/Specifications/menu-spec/ * MIME Applications Associations http://www.freedesktop.org/wiki/Specifications/mime-apps-spec/ * Icon Naming http://www.freedesktop.org/wiki/Specifications/icon-naming-spec/ * Icon Themes http://www.freedesktop.org/wiki/Specifications/icon-theme-spec/ . Base Directory specification This specification defines default paths and environment variables containing the default paths to place applications data (configurations or resources).
  • 16. Description Environment Variable Environment Variable Default Value (if the environment variable is either not set or empty) There is a single base directory relative to which user-specific data files should be written. $XDG_DATA_HOME $HOME/.local/share There is a single base directory relative to which user-specific configuration files should be written. $XDG_CONFIG_HOME $HOME/.config There is a set of preference-ordered base directories to search data files in addition to $XDG_DATA_HOME. The directories in should be separated with a colon ':'. $XDG_DATA_DIRS /usr/local/share/:/usr/share/ There is a set of preference ordered base directories to search configuration files in addition to the $XDG_CONFIG_HOME base directory. $XDG_CONFIG_DIRS /etc/xdg There is a single base directory relative to which user-specific non-essential (cached) data should be written. $XDG_CACHE_HOME $HOME/.cache The order of base directories denotes their importance: the first directory listed is the most important. When the same information is defined in multiple places the information defined relative to the more important base directory takes precedent. The base directory defined by $XDG_DATA_HOME is considered more important than any of the base directories defined by $XDG_DATA_DIRS. The base directory defined by $XDG_CONFIG_HOME is considered more important than any of the base directories defined by $XDG_CONFIG_DIRS. Desktop Entry specification Desktop Entry is a standard of freedesktop.org for specifying the behavior of programs running on X Window Systems. It is a configuration/data file that describe 1)how an application is launched and 2)how it appears in an application menu with its icon. Desktop entry files have “.desktop“ or “.directory“ extensions. Both the KDE and GNOME desktop environments have adopted a similar format for desktop entries. It is a unified standard be agreed upon by all parties such that interoperation between the two environments, and indeed any additional environments that implement the specification, becomes simpler.
  • 17. The desktop entry specifies the details for a item (application) such as a name, a command to run, an icon, and so on. The desktop entry file also contains keywords(categories) which determine the location of the item in the menu hierarchy. The .desktop file fills two primary functions: * First, it informs the desktop environment how the file is to be handled by the desktop environment with regard to menu placement, display, environmental variables, and similar. In this function, it resides globally in $XDG_DATA_DIRS/applications/ directory (most likely /usr/share/applications/) and for specific users in $HOME/.local/applications/ directory. * The second function is the direct shortcut on the desktop itself. In this function, it resides in $HOME/Desktop/. The same file fills both functions, so if you want to have an application both in the menu and on your desktop, you’ll need to put the .desktop file in two places. An application launcher can be added to the desktop by installing a *.desktop file as below snapshots. The directory file with .directory extension file name represents a submenu and provides the name and icon for a submenu. The name of the directory file is used to identify the submenu. Directory files follow the syntax defined by the Desktop Entry specification.
  • 18. The Format of Desktop Entry A desktop entry file consists of a [Desktop Entry] header followed by several Key=Value lines. The following is a sample desktop entry file: Desktop Entry Key Description Encoding Specifies the encoding of the desktop entry file. Name Specifies the name of the item. This name is displayed on the item in the menu. Comment Specifies a short description of the item. The comment is displayed as a tooltip when you point to the item in the menu. Exec Specifies a command to execute when you choose the item from the menu. Icon Specifies the filename of an icon that represents the item. Does NOT specify the path to the filename, or the filename extension. Terminal Specifies whether the command in the Exec key runs in a terminal window. If the value is true the command runs in a terminal window. If the command does not create a window in which to run, the value of this key must be true. Type Specifies the type of item. This value is one of the following: [Desktop Entry] Encoding=UTF-8 Name=Calculator Comment=Perform simple calculations Exec=gnome-calculator Icon=gnome-calc3.png Terminal=false Type=Application X-GNOME-DocPath=gnome-calculator/gnome-calculator.xml Categories=GNOME;Application;Utility;Desktop application shortcut or launcher. Directories
  • 19. Application - For an item that starts an application. This is a shortcut to an application. Link - For an item that links to a file, folder, or Web site. Directory - For a container of meta data of a menu entry. X-GNOME-DocPath Specifies the help file to display when you choose Help on application-name from the menu item popup menu. Categories Specifies the keywords that describe the item. The keywords are separated with semicolons (;). To see a list of the standard category keywords, see the appendix A, "Registered Categories", of Desktop Menu specification. To validate a desktop entry file, run the below command and it will give you very verbose and useful warnings and error messages Desktop Menu specification This specification defines how to construct a user-visible hierarchy of applications, typically displayed as a menu (tree-style). It allows third-party software to add menu items that work for all desktops, and allows system administrators to edit menus in a way that affects all desktops. The basic scheme is very simple. Information about each menu item (application) is stored in a desktop entry file. Then an XML configuration file defines the hierarchical arrangement (layout) of menu items, and which menu items are actually displayed. Here are the files defined by this specification: $XDG_CONFIG_DIRS/menus/${XDG_MENU_PREFIX}applications.menu This file contains the XML definition of the main application menu layout. Implementations may chose to use .menu files with other names for tasks or menus other than the main application menu. $XDG_CONFIG_DIRS/menus/applications-merged/ The default merge directories included in the <DefaultMergeDirs> element. By convention, third parties may add new <Menu> files in this location to create their own sub-menus. Implementations may chose to use .menu files with names other than applications.menu for tasks or menus other than the main application menu. In that case the first part of the name of the default merge directory is derived from the name of the .menu file. $ desktop-file-validate <your desktop file>
  • 20. $XDG_DATA_DIRS/applications/ This directory contains a .desktop file for each possible menu item. Each directory in the $XDG_DATA_DIRS search path should be used (i.e. desktop entries are collected from all of them, not just the first one that exists). When two desktop entries have the same name, the one appearing earlier in the path is used. The <DefaultAppDirs> element in a menu file indicates that this default list of desktop entry locations should be scanned at that point. If a menu file does NOT contain <DefaultAppDirs>, then these locations are NOT scanned. $XDG_DATA_DIRS/desktop-directories/ This directory contains directory entries which may be associated with folders in the menu layout. Each directory in the search path should be used. Only files ending in .directory are used; other files are ignored. The <DefaultDirectoryDirs> element in a menu file indicates that this default list of directory entry locations should be scanned at that point. If a menu file does not contain <DefaultDirectoryDirs>, then these locations are not scanned. Install Locations If an application is intended to be installed by root on a system wide basis then /usr/share is recommended to be used as value for datadir and /etc/xdg is recommended to be used as value for sysconfdir. In case the /usr/share hierarchy is not writable it is recommended to use /usr/local/share as value for datadir instead. If an application is intended to be installed by an unprivileged user for exclusive use by that user only then $XDG_DATA_HOME should be used as value for datadir and $XDG_CONFIG_HOME should be used as value for sysconfdir. * If $XDG_DATA_HOME is not set, the default value of $HOME/.local/share should be used for it. * If $XDG_CONFIG_HOME is not set, the default value of $HOME/.config should be used for it.
  • 21. Add Submenu The following steps describe how a third party application can add menu items to the menu system: 1) Install desktop entries to datadir/applications/ for each menu item(application). Please nam the filename, as in "vendor-foo.desktop", or use a subdirectory of datadir/applications/ so you have "vendor/foo.desktop." Please be sure all desktop entries are valid. 2) Install an XML menu file to sysconfdir/desktop/menus/applications-merged/ to add any submenus, if your desktop entries aren't already included in some common categories. 3) Install any directory entries needed for your submenus to datadir/desktop-directories/, taking care to namespace and validate the directory entries. The following is an example to show adding a submenu “Programming” for LXLauncher: 1) The screenshot of the original layout. 2) LXLauncher does NOT use the default main application menu layout, applications.menu. Instead, it uses its application menu called launcher.menu. In launcher.menu, add a submenu called Development.directory. 3) Run LXLauncher again, it will show the new added submenu (category).
  • 22. A Desktop Menu Editor - Alacarte Alacarte (previously the Simple Menu Editor for GNOME or SMEG) is an application menu editor for the GNOME desktop, written in Python. It has been part of GNOME since the 2.16 release. Alacarte source code could be downloaded from http://ftp.gnome.org/pub/gnome/sources/alacarte/. After changing the application menu, it will see resulting menu in the menu bar of desktop panel. An alternative to Alacarte is MenuLibre (https://launchpad.net/menulibre). Find .desktop & .directory Files in Linux If you want to find all .desktop and .directory files in Linux system, it could use command “locate”. Step 1) Update database for locate command in Super User mode. # updatedb Step 2) Run “locate” command with parameter “*.desktop” or “*.directory”. # locate *.desktop or # locate *.directory Below figure shows the searching result of *.directory files.
  • 23. Icons of Applications (Icon Theme) The supported icon(image) file formats are PNG, XPM and SVG. * PNG is the recommended bitmap format. The extension file name is ".png". * SVG is for vectorized icons. The extension file name is ".svg". Support for SVGs is optional. * XPM is supported due to backwards compatibility reasons, and it is not recommended that new themes use XPM files. The extension file name is ".xpm". By default, apps should look in following directories in order: * $HOME/.icons (for backwards compatibility) * $XDG_DATA_HOME/icons * $XDG_DATA_DIRS/icons * /usr/share/pixmaps .
  • 24. GNOME Menus Library - accessing Desktop Entry/Menu in program GNOME has a C library based on Desktop Entry/Menu specifications for accessing desktop menus and desktop entries, the library is called GNOME Menus or GMenus or gnome-menus. The library source code could be downloaded from one of following links: * http://ftp.gnome.org/pub/GNOME/sources/gnome-menus/ * http://gnome-menus.sourcearchive.com/ * https://download.gnome.org/sources/gnome-menus/ * https://github.com/GNOME/gnome-menus/ For the usage of GNOME Menus library, there are two good references: <1> LXDE LXLauncher source code : http://sourceforge.net/projects/lxde/files/LXLauncher%20(for%20Asus%20EeePC)/ <2> Gnome-Menus_SourceCode/src/util/test-menu-spec.c . Usage The following steps are the basic call flow to use GNOME Menus library APIs. 1) In the main entry file (including main() function), add GNOME Menus library header a define. The define could be added in the Makefile using -D parameter other than in source file. If this define is absent, it will cause compile error! 2) Set the main application menu used in your application by calling below function with wanted main application menu file name as a parameter. If you want to use the system default main application menu, just set parameter "applications.menu". The function returns a pointer to the type of GMenuTree, to declare a variable named tree to hold this pointer. 3) Read and parse assigned main application menu, store read desktop directories(categories) information in tree structure(e.g. build out menu's layout) by calling below function. The function returns a pointer to the type of GMenuTreeDirectory, declare a variable named root to hold this pointer. #define GMENU_I_KNOW_THIS_IS_UNSTABLE #include "gmenu-tree.h" -DGMENU_I_KNOW_THIS_IS_UNSTABLE gmenu_tree_lookup() gmenu_tree_get_root_directory()
  • 25. 4) To iterate all nodes in application menu tree by calling below functions in a loop block. <I> Return a linked-list representing application menu tree (layout). <II> Return the type of current node of tree. The kind of types(defined in Gnome-Menus_Src/libmenu/gmenu-tree.h) is as below. The types we are interested in are GMENU_TREE_ITEM_ENTRY and GMENU_TREE_ITEM_DIRECTORY. When meeting the type you are interested in(directory or item entry), you could do operations for that type. This is similar to the behavior of XML SAX (Event Driven) parser: when meeting wanted XML tag, then do something, otherwise just skip it. <III> If the type of current node of tree is GMENU_TREE_ITEM_ENTRY, calling below functions to retrieve the value of wanted keys. Key The function to retrieve key's value Name gmenu_tree_entry_get_name() Comment gmenu_tree_entry_get_comment() Exec gmenu_tree_entry_get_exec() Icon gmenu_tree_entry_get_icon() 5) Finally, to release memory of application menu tree by calling following functions with . The variables passed to functions are those ones created in step 2 and 3. Followings are some function call flow tracings: gmenu_tree_directory_get_contents() gmenu_tree_item_get_type() gmenu_tree_item_unref(root); gmenu_tree_unref(tree);
  • 26. gmenu_tree_lookup() gmenu_tree_lookup_absolute() gmenu_tree_lookup_basename() Is a Absolute path Is Not an Absolute path gmenu_tree_get_root_director() gmenu_tree_build_from_layout() desktop_entry_set_new() gmenu_tree_load_layout() process_layout() gmenu_tree_lookup_absolute() gmenu_tree_lookup_from_cache() menu_canonicalize_file_name() gmenu_tree_lookup_from_cache() gmenu_tree_new() gmenu_tree_lookup_basename() gmenu_tree_lookup_from_cache() gmenu_tree_new()
  • 27. gmenu_tree_load_layout() (1) menu_layout_load() Indeed reading the .meun content thru g_file_get_contents() g_file_get_contents() g_markup_parse_context_new() g_markup_parse_context_parse() g_markup_parse_context_end_parse() g_markup_parse_context_free() (2) (3) (4) (5) (1) gmenu_tree_strip_duplicate_children() gmenu_tree_execute_moves() (2) (3)
  • 29. i18n - GNU gettext If a software can display texts/strings in different natural languages for users using different mother tongues, the software is said to be multilingual (or internationalized) software. If the software wants to have multilingual functionality, it needs to be considered how to achieve it and what mechanism to be adopted during design phase and adding corresponding codes when developing. Here using GNU gettext framework, a widely used framework for internationalization, to achieve it. Before doing it, it needs to introduce some terms relative to the development of the multilingual program. Internationalization, i18n, is the process of making the software be able to use localization (l10n) easily for users that vary in culture, region, or language without further any engineering changes. This is a kind of generalization on part of the software that hard-coded information(ex: text strings) are pulled out to external files as resource bundle and the software will load proper resource file based on the locale type set on machine(where the software is running on) at runtime. It lets software be completely independent of any culture specific information. Localization, l10n, is the process of customizing the software for that it can display its messages in an appropriately translated form for a particular locale. Internationalization and localization are the first phase and the second phase of Globalization (g11n), the process of developing and marketing multilingual software products to a global market. Native Language Support, or merely NLS, is for speaking of the overall activity or feature encompassing both internationalization and localization, allowing for multi-lingual interactions in a program. Locale Locale is used to define a set of information or attributes (characters and code sets, currency, dates, numbers and messages) corresponding to a given language & country. “Messages” attribute is where GNU gettext provides the means for developers and users to easily change the language that the software uses to communicate to the user. The locale used by GUI programs in desktop environment can be specified in a configuration program called “control center”, “language settings” or “country settings”. Users achieve localization of programs by setting proper values to special environment variables, prior to executing those programs, identifying which locale should be used. When a program looks up locale dependent values, it does this according to following environment variables in priority order: <1st> LANGUAGE <2nd> LC_ALL <3rd> LC_xxx according to selected locale category: LC_CTYPE, LC_NUMERIC, LC_TIME, LC_COLLATE, LC_MONETARY, LC_MESSAGES, ... <4th> LANG . Variables whose value is set but is empty are ignored in this lookup.
  • 30. LANG is the normal environment variable for specifying a locale. As a user, if your language has been installed for this package, you only have to set the LANG environment variable to the appropriate ‘ll_CC’ combination (unless some of the other variables have already been set by the system, in /etc/profile or similar initialization files).‘ll’ is an ISO 639-1 two-letter Language code, and ‘CC’ is an ISO 3166 two-letter Country code(see below URLs). * Language Code - http://www.loc.gov/standards/iso639-2/php/code_list.php * Country Code - http://www.iso.org/iso/english_country_names_and_code_elements At the shell prompt, merely execute: CSH shell # setenv LANG en_US SH shell # export LANG; LANG= en_US BASH shell # export LANG= en_US or # LANG= en_US . This can be done from your .login or .profile file under your home directory, “/home/YourLoginName/”. Many locale names have an extended syntax ‘ll_CC.encoding’ that also specifies the character encoding. Most users have switched to locales in UTF-8 encoding. For example, “zh_TW.UTF-8” is for Chinese Traditional with UTF-8 character encoding. For a software that has been internationalized (generalized), if a user sets a particular locale, the software will show proper information (text string) based on the language described by the locale variable when the software is being run. This is done using the concept of Message Catalog, which is a database of strings in some file. GNU gettext framework is one approach supporting Message Catalog to do text i18n. This framework refers to a collection of tools used to internationalize and localize an application or package. Apart from internationalization of applications or packages, these tools assist in translating the strings on menus, messages boxes or icons on the applications in the language that the user is interested in. The below figure shows the flow to use GNU gettext tools.
  • 31. ( From GNU gettext manual - https://www.gnu.org/software/gettext/manual/gettext.html ) The following figure shows what files would be generated when using gettext to do internationalization. ( From Wikipedia - http://en.wikipedia.org/wiki/Gettext#mediaviewer/File:Gettext.svg ) In the above figures: * POT - Portable Object Template (.pot). This file contains all original program strings(extracted by gettext tool xgettext). It has sets of pointers to exactly where in C sources each string is used. All translations are set to empty. For example, "Content-Type: text/plain; charset=CHARSETn" "Content-Transfer-Encoding: 8bitn" #: helloworld.c:16 #, c-format msgid "Hello, world! n" msgstr ""
  • 32. * PO - Portable Object (.po). This file is made up of many entries, each entry holding the relation between an original string and its corresponding translation. All entries in a given PO file usually pertain to a single project, and all translations are expressed in a single target language. Also, it needs to change character encoding for your language by setting the field “charset”. For example: The string after msgid is original string and the string after msgstr is translated string. * MO - Machine Object (.mo). This file is used to support Message Catalog. This kind of files are meant to be read by programs, and are binary in nature. The content of the file is generated by gettext tool msgfmt. This file could be put into your project directory or system default directory: /usr/local/share/locale/LocaleName/LC_MESSAGES/ , where "LocaleName" is the name of the locale category such as "en", "zh", "zh_TW", etc. Usage Step 1. Mark texts to be internationalized <I> Adding following headers and macros in the file containing the main() function. * The header "libintl.h" is for the setlocale() function. * _(String) macro is for the convenience of using gettext() on those text needs to be translated. * PACKAGE represents package name, the name of MO file without file extension “.mo”. * LOCALEDIR represents the locale directory containing LC_MESSAGE folder which has “Package Name.mo” files. This is usually as "/usr/share/locale." #include <libintl.h> #include <locale.h> #define _(String) gettext (String) #define PACKAGE MO_File_Name #define LOCALEDIR Path_to_MO_File "Content-Type: text/plain; charset=UTF-8n" "Content-Transfer-Encoding: 8bitn" #: helloworld.c:16 #, c-format msgid "Hello, world! n" msgstr "哈囉哈囉哈囉哈囉, 世界世界世界世界! n"
  • 33. <II> Adding following gettext functions at the very beginning of the main() function body (but after the variable declarations) to initialize locale data. When it is going to compile code, remember to define "ENABLE_NLS " to use i18n/gettext. <III> To use "_()" to enclose any string that must be translated(shown as below example). In case you can't use "_()" (like in array declarations), use "N_()" where the original English string is and then call "_()" at real display time(show as below example). Step 2. Parse source files and extract marked strings as msgids and put it into POT(.pot) file Using GNU gettext tool, xgettext, to extract marked strings from source and store it into the POT(.pot) file. For example: "helloworld" is the package (domain) name assigned as the value of the macro PACKAGE in Step 1. The keyword (-k) to mark original string as gettext string is underscore character "_." Output file is "helloworld.pot." Note that if it does NOT assign output file name using -o parameter, it will generate a PO file be named after “package (domain) name” assigned using -d parameter. In this example, it will be “helloworld.po” #ifdef ENABLE_NLS /* Clear out LC_ALL environment variable. */ setlocale(LC_ALL, ""); /* To designate where to search for message catalogs, e.g. MO files. */ bindtextdomain (PACKAGE, LOCALEDIR); /* (Optional) To specify the output character set(encoding) for message catalogs for the designated domain */ bind_textdomain_codeset (PACKAGE, "UTF-8"); /* To select domain, e.g. the name of MO file */ textdomain (PACKAGE); #endif #define ENABLE_NLS 1 printf(_("Hello Worldn")); char *foo[]={ N_("aaaaa"), N_("bbbb") }; int i; for (i=0;i<2;i++) printf( _(foo[i]) ); xgettext -d helloworld -o helloworld.pot -k_ -s helloworld.c
  • 34. file and then rename the generated file to “helloworld.pot”. Step 3. Translate POT(.pot) file into a PO(.po) file Copy the POT(.pot) file and change copied file's extension to ".po", this copied file becomes a PO file. In the copied PO file, set information about your PO file by changing following fields. Then, set proper character encoding by setting “charset” field and add translated string to “msgstr” field. For example, the content of “helloworld.po” would be: Finally, remove the Fuzzy Mark shown below. The fuzzy mark is used to denote the messages in current PO file are fuzzy messages that are NOT been validated / translated by a human translator. If each PO file entry for which the msgstr field has been filled with a translation, and which is not marked as fuzzy, is said to be a translated entry. Only translated entries will later be compiled by GNU msgfmt and become usable in programs. Other entry types will be excluded. "Content-Type: text/plain; charset=UTF-8n" "Content-Transfer-Encoding: 8bitn" #: helloworld.c:16 #, c-format msgid "Hello, world! n" msgstr "哈囉哈囉哈囉哈囉, 世界世界世界世界! n" # FIRST AUTHOR <EMAIL@ADDRESS>, YEAR. "Project-Id-Version: PACKAGE VERSIONn" "PO-Revision-Date: YEAR-MO-DA HO:MI+ZONEn" "Last-Translator: FULL NAME <EMAIL@ADDRESS>n" "Language-Team: LANGUAGE <LL@li.org>n" # William.L <wiliwe@gmail.com>, 2008. "Project-Id-Version: helloworld 1.0n" "PO-Revision-Date: 2008-10-22 18:55+0800 n" "Last-Translator: William.L <wiliwe@gmail.com>n" "Language-Team: Chinese Traditional <LL@li.org>n" #, fuzzy
  • 35. After the translation work is done, you could verify the PO file’s content by below command. Step 4. Convert PO(.po) files into binary resource file, MO(.mo) file. Using GNU gettext tool, msgfmt, to generates a binary Message Catalog from a textual translation description, e.g. PO file. Then put the generated MO files into the path designated as the macro LOCALEDIR in Step 1. For example, Step 5. Set locale environment variable to the language type you want and run your program. Set the locale environment variable, LANG, as described in “Locale” section of this chapter and then launch your program. The following example shows results of wrong encoding type and correct encoding type. Note that when gettext does not find a translation for msgid, it returns msgid unchanged independently of the current output character set. Note that when it wants to show strings in a language other than English, it needs to have other Language Packages installed in the system where the program will run on. Below steps show how to install language package in Linux Ubuntu. Steps to install wanted language package: 1) On desktop panel, click System -> Administration -> Language Support . msgfmt helloworld.po -o helloworld.mo msgfmt -cv helloworld.po
  • 36. 2) In "Language & Text" setting dialog, click button "Install/Remove Languages..." 3) Select and check languages you want install and click "Apply Changes" button.
  • 37. Alternatively, it could install language packages in Synaptic Package Manager. GNU gettext in GLib/GTK+ Program For the program using GLib or GTK+ libraries, 1)it could replace the header "libintl.h" with "gi18n.h" or "gi18n-lib.h" and 2)it needs not to declare macros for GNU gettext APIs. The contents of headers "gi18n.h" or "gi18n-lib.h" are shown below: #include <glib/gi18n.h> #include <glib/gi18n-lib.h>
  • 38. * /usr/include/glib-2.0/glib/gi18n.h * /usr/include/glib-2.0/glib/gi18n-lib.h The difference of using these two headers is that one header uses fixed macro(GETTEXT_PACKAGE) to represent the package(domain) name and the other let the macro definition to users. #include < glib/gi18n.h > #include <locale.h> #define PACKAGE MO_File_Name #define LOCALEDIR Path_to_MO_File #define GETTEXT_PACKAGE MO_File_Name #include < glib/ gi18n-lib.h > #include <locale.h> (it MUST define GETTEXT_PACKAGE before including gi18n-lib.h header)
  • 39. Doxygen When viewing source codes written by others or sharing codes to others, it would be better for readers if there have documents to comment or explain codes and show architecture(relationship of each part, such as files, modules, packages, functions, classes, in codes) using graph or diagram. This may let readers get idea (overview, a big picture) of codes quickly. There have many tools to generate documents of source codes by adding special markings in comment blocks, this kind of tool is called Document Generator. For a programmer, if he or she can add comments while coding, the work to document codes could be accomplished when code is done, it would save much time compared to that adding comments after code is done. Comments about code's implementation are called Implementation comments. Comments describe the specification of the code, from an implementation-free perspective to be read by developers who might not have the source code at hand, are called Documentation comments. Tools such as JavaDoc, Doxygen, DOC++, Qt Qdoc(for Qt Project itself only) are well-known. Doxygen is used to generate documents for Desktop App Chooser program.. Doxygen (http://www.doxygen.org/) is for generating documentation from annotated C++ sources, but it also supports other popular programming languages such as C, Objective-C, C#, PHP, Java, Python, IDL (Corba, Microsoft, and UNO/OpenOffice flavors), Fortran, VHDL, Tcl, and to some extent D. It runs on most Unix systems as well as on Windows and Mac OS X. Doxygen is written in Qt (http://qt-project.org/). Initially doxygen was specifically designed to be used for projects that make use of Troll Tech’s Qt toolkit. So it is ‘Qt-compatible’: doxygen can read the documentation contained in the Qt source code and create a class browser that looks quite similar to the one that is generated by Troll Tech. Doxygen understands the C++ extensions used by Qt such as signals and slots and many of the markup commands used in the Qt sources. How did the name "Doxygen" come from? From Doxygen FAQ of the official site, its solution is that: " Doxygen got its name from playing with the words documentation and generator. At the time I was looking into lex and yacc, where a lot of things start with "yy", so the "y" slipped in and made things pronounceable (the proper pronouncement is Docs-ee-gen, so with a long "e")." Doxygen FAQ link: http://www.stack.nl/~dimitri/doxygen/manual/faq.html It can generate an on-line documentation browser (in HTML) and/or an off-line reference manual (in LATEX) from a set of documented source files. There is also support for generating output in RTF (MS-Word), PostScript, hyperlinked PDF, compressed HTML(.chm), and Unix man pages. The documentation is extracted directly from the sources, which makes it much easier to keep the documentation consistent with the source code. documentation -> docs -> dox generator -> gen
  • 40. The following figure shows the relation between the tools and the flow of information between them. ( From doxygen site - http://www.stack.nl/~dimitri/doxygen/manual/starting.html ) Doxygen looks at the file's extension to selects the proper parser to parse a file. Extension types recognized by doxygen is listed in http://www.stack.nl/~dimitri/doxygen/manual/starting.html Tools The executable doxygen is the main program that parses the sources and generates the documentation. To generate a manual for your project you typically need to follow these steps: <1> Document your source code with special documentation blocks , or called special command blocks. See http://www.stack.nl/~dimitri/doxygen/manual/docblocks.html <2> Generate a template configuration file by running doxygen with the -g option: doxygen -g <config_file>
  • 41. <3> Edit the configuration file so it matches your project. In the configuration file you can specify the input files and a lot of optional information. <4> Let doxygen generate the documentation, based on the settings in the configuration file. The default output directory is the directory in which doxygen is started. <5> If you have a configuration file generated with an older version of doxygen, you can upgrade it to the current version by running doxygen with the -u option. All configuration settings in the original configuration file will be copied to the new configuration file. Any new options will have their default value. Note that comments that you may have added in the original configuration file will be lost. More detailed information about doxygen tool is here: http://www.stack.nl/~dimitri/doxygen/manual/doxygen_usage.html Optionally, the doxywizard tool which is a graphical front-end written in Qt can be used for editing the configuration file that is used by doxygen and for running doxywizard in a graphical environment. More detailed usage information about doxywizard is here: http://www.stack.nl/~dimitri/doxygen/manual/doxywizard_usage.html Configuration File A configuration file is a free-form ASCII text file with a structure that is similar to that of a Makefile, with the default name Doxyfile. It is parsed by doxygen tool. The file essentially consists of a list of assignment statements. * Each statement consists of a TAG_NAME written in capitals, followed by the equal sign (=) and one or more values. * If the same tag is assigned more than once, the last assignment overwrites any earlier assignment. * For tags that take a list as their argument, the += operator can be used instead of = to append new values to the list. * Values are sequences of non-blanks. * If the value should contain one or more blanks it must be surrounded by quotes ("..."). Multiple lines can be concatenated by inserting a backslash () as the last character of a line. * Environment variables can be expanded using the pattern $(ENV_VARIABLE_NAME). * The statements in the file are case-sensitive. The file may contain tabs and newlines for formatting purposes. The default encoding used for all characters in the configuration file is UTF-8 and it could be changed by setting the tag DOXYFILE_ENCODING. Doxygen uses libiconv (or the iconv built into libc) for doxygen <config_file> doxygen -u <config_file>
  • 42. transcoding. See http://www.gnu.org/software/libiconv for the list of possible encodings. Here listing some tags usually used in project: Tag Name Description Default Value Depending Tag PROJECT_NAME A single word (or a sequence of words surrounded by double-quotes) that should identify the project. PROJECT_NUMBER Project or revision number PROJECT_BRIEF To provide an optional one line description for a project that appears at the top of each page and should give viewer a quick idea about the purpose of the project. OUTPUT_DIRECTORY To specify the (relative or absolute) path into which the generated documentation will be written. OUTPUT_LANGUAGE To specify the language in which all documentation generated by doxygen is written. English INPUT To specify the files and/or directories that contain documented source files. You may enter file names like myfile.cpp or directories like /usr/src/myproject. Separate the files or directories with spaces. If this tag is empty the current directory is searched. RECURSIVE Be used to specify whether or not subdirectories should be searched for input files as well. No EXTRACT_ALL Assume all entities in documentation are documented, even if no documentation was available. No EXTRACT_ANON_NSPACES Include the members of anonymous namespaces No EXTRACT_LOCAL_CLASSES Include classes (and structs) defined locally in source files. Yes
  • 43. EXTRACT_LOCAL_METHODS Include local methods, which are defined in the implementation section but not in the interface No EXTRACT_PRIVATE Include private members of a class No EXTRACT_STATIC Include static members of a class No SORT_MEMBER_DOCS Sort the (detailed) documentation of file and class members alphabetically by member name. Yes GENERATE_HTML Generate HTML output Yes HTML_HEADER HTML_FOOTER A footer typically contains the author of the document, copyright information, links to terms of use, contact information, etc. HTML_OUTPUT Specify output folder HTML_FILE_EXTENSION Specify the file extension .html GENERATE_TREEVIEW No GENERATE_HTM L HAVE_DOT To use dot tool to generate diagrams and graphs No CALL_GRAPH Generate a call dependency graph for every global function or class method. No CALLER_GRAPH Generate a caller dependency graph for every global function or class method No GENERATE_LEGEND Yes GRAPHICAL_HIERARCHY Yes DIRECTORY_GRAPH Yes UML_LOOK No UML_LIMIT_NUM_FIELDS Threshold limits the number of items for each type to make the size more manageable. Set this to 0 for no limit. Minimum value: 0 Maximum value: 100 10 CLASS_GRAPH Yes COLLABORATION_GRAPH Yes HAVE_DOT
  • 44. For a small project consisting of a few C and/or C++ source and header files, you can leave INPUT tag empty and doxygen will search for sources in the current directory. If you have a larger project consisting of a source directory or tree you should assign the root directory or directories to the INPUT tag, and add one or more file patterns to the FILE_PATTERNS tag (for instance *.cpp *.h). Only files that match one of the patterns will be parsed (if the patterns are omitted a list of source extensions is used). For recursive parsing of a source tree you must set the RECURSIVE tag to YES. If you start using doxygen for an existing project (thus without any documentation that doxygen is aware of), you can still get an idea of what the structure is and how the documented result would look like. To do so, you must set the EXTRACT_ALL tag in the configuration file to YES. Then, doxygen will pretend everything in your sources is documented. Please note that as a consequence warnings about undocumented members will not be generated as long as EXTRACT_ALL is set to YES. If the EXTRACT_ALL option is set to NO in the configuration file (the default), then doxygen will only generate documentation for documented members, files, structs, classes and namespaces. To analyze an existing piece of software it is useful to cross-reference a (documented) entity with its definition in the source files. Doxygen will generate such cross-references if you set the SOURCE_BROWSER tag to YES. It can also include the sources directly into the documentation by setting INLINE_SOURCES to YES (this can be handy for code reviews for instance). More detailed usage information about configuration file is here: http://www.stack.nl/~dimitri/doxygen/manual/config.html Documenting the Code For members, structs, classes and namespaces there are basically two options to document codes: 1. Place a special documentation block in front of the declaration or definition of the member, struct, class or namespace. For file, struct, class and namespace members it is also allowed to place the documentation directly after the member. 2. Place a special documentation block somewhere else (another file or another location) and put a structural command in the documentation block. A structural command links a documentation block to a certain entity that can be documented (e.g. a member, struct, class, namespace or file). Files can only be documented using the second option, since there is no way to put a documentation block before a file. Of course, file members (functions, variables, typedefs, defines) do not need an explicit structural command; just putting a special documentation block in front or behind them will work fine. The text inside a special documentation block is parsed before it is written to the HTML and/or LaTeX output files. GENERATE_LATEX Yes
  • 45. During parsing the following steps take place: * Markdown formatting is replaced by corresponding HTML or special commands. * The special commands inside the documentation are executed. * If a line starts with some whitespace followed by one or more asterisks (*) and then optionally more white space, then all whitespace and asterisks are removed. * All resulting blank lines are treated as a paragraph separators. This saves you from placing new-paragraph commands yourself in order to make the generated documentation readable. * Links are created for words corresponding to documented classes (unless the word is preceded by a %; then the word will not be linked and the % sign is removed). * Links to members are created when certain patterns are found in the text. This link is called Automatic Link ( http://www.stack.nl/~dimitri/doxygen/manual/autolink.html .) * HTML tags that are in the documentation are interpreted. More information could be found in http://www.stack.nl/~dimitri/doxygen/manual/htmlcmds.html . The following doxygen documenting commands are used in comment blocks for C-like languages(C, C++, C#, Objective-C, PHP, Java). Special Command A special documentation block is a C or C++ style comment block with some additional markings, so doxygen knows it is a piece of documentation that needs to end up in the generated documentation. For each code item there are two (or in some cases three) types of descriptions, which together form the documentation: a brief description and detailed description, both are optional. For methods and functions there is also a third type of description, the so called ”in body” description, which consists of the concatenation of all comment blocks found within the body of the method or function. Having more than one brief or detailed description is allowed (but NOT recommended, as the order in which the descriptions will appear is not specified). As the name suggest, a brief description is a short one-liner, whereas the detailed description provides longer, more detailed documentation. An ”in body” description can also act as a detailed description or can describe a collection of implementation details. For the HTML output brief descriptions are also use to provide tooltips at places where an item is referenced. There are several ways to mark a comment block as a detailed description: <1> JavaDoc style /** * ... text ... */
  • 46. <2> Qt style(e.g. Qdoc, ) In both cases the intermediate * (asterisk)’s are optional, so below example is also valid. <3> A block of at least two C++ comment lines, where each line starts with an additional slash or an exclamation mark. or <4> To make their comment blocks more visible in the documentation. (note the 2 slashes to end the normal comment block and start a special comment block) or For the brief description there are also several possibilities: <1> One could use the brief command with one of the above comment blocks. This command ends at the end of a paragraph, so the detailed description follows after an empty line. <2> If JAVADOC_AUTOBRIEF is set to YES in the configuration file, then using JavaDoc style comment blocks will automatically start a brief description which ends at the first dot followed by a /*! * ... text ... */ /*! ... text ... */ /// /// ... text ... /// //! //! ... text ... //! /********************************************//** * ... text ***********************************************/ ///////////////////////////////////////////////// /// ... text ... ///////////////////////////////////////////////// /*! brief Brief description. * Brief description continued. * * Detailed description starts here. */
  • 47. space or new line. The option has the same effect for multi-line special C++ comments: <3> To use a special C++ style comment which does not span more than one line. or (Note the blank line in the last example, which is required to separate the brief description from the block containing the detailed description. The JAVADOC_AUTOBRIEF should also be set to NO for this case.) If you have multiple detailed descriptions (as below example), they will be joined. Note that this is also the case if the descriptions are at different places in the code! In this case the order will depend on the order in which doxygen parses the code. Furthermore, if there is one brief description before a declaration and one before a definition of a code item, only the one before the declaration will be used. If the same situation occurs for a detailed description, the one before the definition is preferred and the one before the declaration will be ignored. Unlike most other documentation systems, doxygen also allows you to put the documentation of members (including global functions) in front of the definition. This way the documentation can be placed in the source file instead of the header file. This keeps the header file compact, and allows the implementer of the members more direct access to the documentation. /** Brief description which ends at this dot. Details follow * here. */ /// Brief description which ends at this dot. Details follow /// here. /// Brief description. /** Detailed description. */ //! Brief descripion. //! Detailed description //! starts here. //! Brief description, which is //! really a detailed description since it spans multiple lines. /*! Another detailed description! */
  • 48. Putting documentation after members If you want to document the members of a file, struct, union, class, or enum, it is sometimes desired to place the documentation block after the member instead of before. For this purpose you have to put an additional < marker in the comment block. Note that this also works for the parameters of a function. (This block can be used to put a Qt style detailed documentation block after a member.) or or or Most often one only wants to put a brief description after a member. This is done as follows: or For functions one can use the @param command to document the parameters and then use [in], [out], [in,out] to document the direction. For inline documentation this is also possible by starting with the direction attribute, e.g. Note that these blocks have the same structure and meaning as the special comment blocks, only the < indicates that the member is located in front of the block instead of after the block. [Warning] These blocks can only be used to document members and parameters. They cannot be used to document files, classes, unions, structs, groups, namespaces and enums themselves. Furthermore, the structural commands are NOT allowed inside these comment blocks. int var; /*!< Detailed description after the member */ int var; /**< Detailed description after the member */ int var; //!< Detailed description after the member //!< int var; ///< Detailed description after the member ///< int var; //!< Brief description after the member int var; ///< Brief description after the member void foo(int v /**< [in] docs for input parameter v. */);
  • 49. An example of C++ code using the Qt style: The one-line comments contain a brief description, whereas the multi-line comment blocks contain a more detailed description. The brief descriptions are included in the member overview of a struct, class, namespace or file and are printed using a small italic font (this description can be hidden by setting BRIEF_MEMBER_DESC to NO in the configuration file). By default the brief descriptions become the first sentence of the detailed descriptions (but this can be changed by setting the REPEAT_BRIEF tag to NO). Both the brief and the detailed descriptions are optional for the Qt style. By default a JavaDoc style documentation block behaves the same way as a Qt style documentation block. This is not according the JavaDoc specification however, where the first sentence of the documentation //! A test class. /*! A more elaborate class description. */ class Test { public: //! An enum. /*! More detailed enum description. */ enum TEnum { TVal1, /*!< Enum value TVal1. */ TVal2, /*!< Enum value TVal2. */ TVal3 /*!< Enum value TVal3. */ } //! Enum pointer. /*! Details. */ *enumPtr, //! Enum variable. /*! Details. */ enumVar; ..................................................... //! A function variable. /*! Details. */ int (*handler)(int a,int b); };
  • 50. block is automatically treated as a brief description. To enable this behavior you should set JAVADOC_AUTOBRIEF to YES in the configuration file. If you enable this option and want to put a dot in the middle of a sentence without ending it, you should put a backslash and a space after it as below example. Here is the same piece of code as shown above, this time documented using the JavaDoc style and JAVADOC_AUTOBRIEF set to YES: Similarly, to set QT_AUTOBRIEF to YES in the configuration file to take the first sentence of a Qt style documentation block to automatically be treated as a brief description. Documentation at other places In above examples the comment blocks were always located in front of the declaration or definition of a file, class or namespace or in front or after one of its members. Although this is often comfortable, there may sometimes be reasons to put the documentation somewhere else. /** Brief description (e.g. using only a few words). Details follow. */ /** * A test class. A more elaborate class description. */ class Test { public: /** * An enum. * More detailed enum description. */ enum TEnum { TVal1, /**< enum value TVal1. */ TVal2, /**< enum value TVal2. */ TVal3 /**< enum value TVal3. */ } *enumPtr, /**< enum pointer. Details. */ enumVar; /**< enum variable. Details. */ ..................................................... /** * a function variable. * Details. */ int (*handler)(int a,int b); };
  • 51. Doxygen allows you to put your documentation blocks practically anywhere (the exception is inside the body of a function or inside a normal C style comment block). The price you pay for not putting the documentation block directly before (or after) an item is the need to put a structural command inside the documentation block, which leads to some duplication of information. So in practice you should avoid the use of structural commands unless other requirements force you to do so. Structural commands (like all other commands) start with a backslash (), or an at-sign (@) if you prefer JavaDoc style, followed by a command name and one or more parameters. The below example is for class Test using command “class”: Below list shows some structural commands: FileFileFileFile ((((HeaderHeaderHeaderHeader //// SourceSourceSourceSource)))) comments filefilefilefile Source code file name with extension file name. datedatedatedate Date authorauthorauthorauthor Author of this program versionversionversionversion Program version b Change_Historyb Change_Historyb Change_Historyb Change_History Date and contents of changing or modifying MacroMacroMacroMacro comments defdefdefdef To document a #define#define#define#define. FucntionFucntionFucntionFucntion comment fnfnfnfn to document a function. param[in]param[in]param[in]param[in] InputInputInputInput parameter Format: VariableName + Space + Description param[param[param[param[outoutoutout]]]] OutputOutputOutputOutput parameter Format: VariableName + Space + Description returnreturnreturnreturn Function return value. NamespaceNamespaceNamespaceNamespace comment namespacenamespacenamespacenamespace To document a namespace. ClassClassClassClass comment classclassclassclass To document a class. InterfaceInterfaceInterfaceInterface comment interfaceinterfaceinterfaceinterface To document an IDLIDLIDLIDL interface. NoteNoteNoteNote: InterfaceInterfaceInterfaceInterfaces in C++C++C++C++ are implemented using Abstract ClassAbstract ClassAbstract ClassAbstract Class. EnumEnumEnumEnum comment /*! class Test brief A test class. A more detailed class description. */
  • 52. enumenumenumenum To document an enumeration type. StuctStuctStuctStuct comment structstructstructstruct To document a C-struct. UnUnUnUnionionionion comment unionunionunionunion To document a union. PackagePackagePackagePackage comment packagepackagepackagepackage To document a Java package. OtherOtherOtherOther comment varvarvarvar To document a variablevariablevariablevariable or typedeftypedeftypedeftypedef or enumenumenumenum value. briefbriefbriefbrief Shore description. nnnn New line cccc Convert font type. More information about structural commands could be found in the page: http://www.stack.nl/~dimitri/doxygen/manual/commands.html Note: 1) To document a member of a C++ class, you must also document the class itself. The same holds for namespaces. 2) To document a global C function, variable, typedef, enum or preprocessor definition you must first document the file that contains it (usually this will be a header file, because that file contains the information that is exported to other source files). Using a comment block containing a file or @file command to document the file in which those commands are located. or 3) Alternatively, you can put all members in a group (or module) using the ingroup command and then document the group using a comment block containing the defgroup command. For member functions or functions that are part of a namespace you should document either the class or namespace. Generate Diagrams/Graphs Doxygen can use the "dot" tool from GraphViz (Graph Visualization Software) to generate more advanced diagrams and graphs. GraphViz is an open-source, cross-platform graph drawing toolkit and can be found at http://www.graphviz.org/ To install GraphViz tool, run below commands in two Linux distro separately: Ubuntu sudo apt-get -y install graphviz /*! file */ /* * @file */
  • 53. The below screenshot shows installed graphviz tool in Synaptic Package Manager program. CentOS 6 $ su # yum -y install graphviz (prompt $ is for Regular user and prompt # is for Super user) To view details about GraphViz package, run command: # rpminfo graphviz
  • 54. If you have the "dot" tool in the path, you can set tag HAVE_DOT to YES in the configuration file to let doxygen use it.
  • 55. Desktop-App-Chooser Internals In this program, it uses GtkTreeView widget as the main component for visual display of menu of X desktop applications installed in Linux system. The following steps show how to build tree nodes corresponding to desktop menu directories and entries in the main application menu (applications.menu). <I> If the current node is GMENU_TREE_ITEM_DIRECTORY type, add a top level node. <II> If the current node is GMENU_TREE_ITEM_ENTRY type, add a child node(application) to the corresponding directory (top level node) The GLib type system(GType) is used to indicate what type of data is stored in a model column. In Desktop App Chooser program, it used the following types: * G_TYPE_STRING - stores a string in the store (makes a copy of the original string)
  • 56. * GDK_TYPE_PIXBUF - stores a GdkPixbuf in the store (increases the pixbuf's refcount, see below) * G_TYPE_POINTER - stores a pointer value (does NOT copy any data into the store, just stores the pointer value!) Desktop App Chooser applies GNU gettext on 1)the dialog/window title and 2)the label on the button. Below screenshots show the result. The string of each menu entry (e.g. application), is shown in the language you set automatically, cause to that its name had been internationalized by default. In Desktop App Chooser program, the special mark used in comment blocks for Doxygen document generation is Qt style. or The doxygen configuration files are in the “doxygen“ folder under Desktop App Chooser program source root. There are two configuration files, one for generating documents with graphs(this needs graphivz tool to be installed) and the other is for the document without graphs. By running command “doxygen Conf-File” to generate documents. If it succeeds to generate documents, it will have a folder named “html“ in the doxygen folder. /*! * ... text ... */ /*! ... text ... */
  • 57. The main Web page of the generated HTML document is “index.html”. The below figures show screenshots of Desktop App Chooser program HTML documents generated by doxygen.
  • 58.
  • 59. (If you want to let the document include your source codes for browsing, remember to set the variable “SOURCE_BROWSER” to YES in the doxygen configuration file.)
  • 60.
  • 61.
  • 62. Resources LXDE Project (Lightweight X11 Desktop Environment) # http://lxde.org/ # http://sourceforge.net/projects/lxde/ # http://sourceforge.net/projects/lxde/files/ LXDE - LXLauncher # http://wiki.lxde.org/en/LXLauncher # http://lxde.org/lxlauncher freedesktop.org Specs # http://www.freedesktop.org/wiki/Specifications/ Desktop Entry/Menu # https://developer.gnome.org/integration-guide/stable/desktop-files.html.en # http://en.wikibooks.org/wiki/Using_GNOME/Application_menus # https://wiki.archlinux.org/index.php/Gnome_Menu_tweaking#GNOME_menu_tips # http://www.ibm.com/developerworks/cn/linux/l-cn-dtef/ 中文中文中文中文 GTK+ 2.0 # https://developer.gnome.org/gtk2/stable/ # http://www.dgsiegel.net/files/tog2dg.pdf The Official GNOME 2 Developer's Guide # http://www.yolinux.com/TUTORIALS/GTK+ProgrammingTips.html # http://www.zetcode.com/tutorials/gtktutorial/ # http://www.zetcode.com/tutorials/gtktutorial/chinese/ 中文中文中文中文 # http://tetralet.luna.com.tw/index.php?op=ViewArticle&articleId=188&blogId=1 中文中文中文中文 # http://pcman.sayya.org/tnlug-2006.02.18/tnlug.pdf Introducing GTK+ by PCMan (洪任諭洪任諭洪任諭洪任諭) # http://www.gtkbook.com/ # http://book.huihoo.com/gtk+-gnome-application-development/ GTK+ 2.0 Tree View # https://developer.gnome.org/gtk2/stable/TreeWidgetObjects.html # http://scentric.net/tutorial/treeview-tutorial.html # http://scentric.net/tutorial/treeview-tutorial.pdf # http://scentric.net/tutorial/treeview-tutorial.tar.gz Example code for Treeview tutorial
  • 63. # http://chingyichan.tw.googlepages.com/gtk_tree_view_tutorial.html 中文中文中文中文 # http://www.zetcode.com/tutorials/gtktutorial/gtktreeview/ # http://www.zetcode.com/tutorials/gtktutorial/chinese/gtktreeview/ 中文中文中文中文 # http://inti.sourceforge.net/tutorial/libinti/treeandlistwidget.html # http://en.wikibooks.org/wiki/GTK%2B_By_Example/Tree_View GNU gettext (l10n / i18n) # https://www.gnu.org/software/gettext/ # http://fedoraproject.org/wiki/How_to_do_I18N_through_gettext GNU gettext tutorial with example # http://nkumar.fedorapeople.org/helloi18n GNU gettext examples # http://people.linux.org.tw/~pofeng/free-doc/linuxi18n/gtk.html Internationalize Gtk+ programs