
Recomendados
Mais conteúdo relacionado
Último
Último (20)
Destaque
Destaque (20)
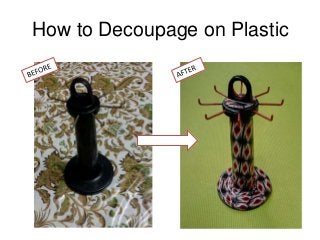
How to decoupage on plastic
- 1. How to Decoupage on Plastic
- 2. SUPPLIES • Desired surface - I used a plastic spoon stand • Decoupaging material (wrapping paper, wallpaper, tissue paper, or fabric) - I used Fabric • Mod Pod (See step 2 to know about mod podge) • Flat Brush or Sponge Brush • Cutter • Scissors • Surgical Spirit to clean the surface
- 3. STEP ONE: Prepare your surface. • Almost any surface can be used to create a decoupage project. Suitable surfaces include wood, paper mache, terra cotta, tin, cardboard and glass. • Decoupage on plastic - Only some plastics are okay for decoupage – I recommend testing a small area before completing your entire project to make sure that the Mod Podge will adhere and not peel away when dry.
- 4. STEP TWO: Pick your Mod Podge • Mod Podge is a milky white liquid that can be applied with a brush or foam brush and dries transparent in less than 10 minutes. It is water soluble and easy to clean up with a damp cloth. You can use Homemade or Commercial.
- 5. STEP THREE: Prepare Items to be Mod Podged. • You can use pictures from magazines or books, wrapping paper, wallpaper, tissue paper, or even fabric as possible material. Craft stores even sell specially made paper for decoupage. If you have a good printer, surf the Internet and print out your own pictures or personal photos.
- 6. List of Materials • Napkins Due to the designs that napkins come with and the lighter paper they are made out of, napkins are a great option to use for decoupage. Cut out the design before taking apart the layers of the napkins and then use a single layer for the decoupage. It can look more like painting than other papers. • Cardstock Cardstock comes in many designs and colours making it a great option for Mod Podge. • Photos Decoupage will work perfectly for adhering your own photos to a project. When decoupaging with photos make sure they are from a laser printer rather than an ink-jet printer as a photo from a ink-jet printer can smudge with the decoupage application. • Fabric A lighter fabric will work better as it will allow the decoupage to seep into the fabric and stay sealed. To ensure less wrinkles make sure to make the fabric tight and press it onto your surface a little bit at a time. Make sure to seal your fabric with a sealer (I used Varnish). Wash and dry the fabric, Iron (if necessary) • To avoid frayed edges of fabric- Using a brush, paint a light coat of Fabric Mod Podge onto your fabric. Allow to dry. This will allow you to cut the fabric like paper without frayed edges.
- 7. STEP FOUR: Cut your items to fit your surface. • Measure as necessary, with a ruler and a pencil, and trim your items to fit. You’ll be much happier if you cut everything to fit before Mod Podging as opposed to after.
- 8. STEP FIVE: Adhere each element with your Mod Podge. • Apply a medium coat of Mod Podge to the surface or your material. Too little Mod Podge and you will get wrinkles but you can always wipe away excess Mod Podge. • Place your item(s) to be decoupaged on top of the Mod Podge and move onto step six.
- 9. STEP SIX: Smooth, Smooth, Smooth. • Keep smoothing until all of the bubbles are removed. Then, AND THIS IS IMPORTANT, let your project dry for 15 – 20 minutes. Don’t put a top coat on right away.
- 10. STEP SEVEN: Add a protective coat • After it dries up completely, add a protective coat of Mod Podge to your project using a sponge or flat brush. • Allow to dry and then repeat. • The number of coats you finish with is up to you, but I recommend at least two to get the desired finish. Let it dry for another 20 mins.
- 11. STEP EIGHT: Apply Varnish(Optional) • If you want your thing to be more sturdy or it need to come in contact of water, apply a coat of Varnish over it. Let it dry for at least 24 hours. You are Done!