SlideShare uma empresa Scribd logo
1 de 23
Baixar para ler offline


Creating
a
First
Person
Shooter
(FPS)
                                                Part
2


                           Author:
Graham
McAllister
                          Revised
by:
Jeff
Aydelotte
&
                                        Amir
Ebrahimi

                          Time
to
complete:
3­4
hours


                           Last
Revision:
10­July­2009
Contents


1. Part
2:
Enhancements
   Prerequisites
                    3
   Before
we
begin
­
level
setup
    3
   Weapon
switching
                 4
   Rocket
Launcher
                  5
   Hit
Points
                      16
   Sentry
Gun
                      20
   Skybox
                          22
   Acknowledgments
                 23
Part
2:
Enhancements

This
intermediate­level

tutorial
extends
upon
the

Basic
FPS
tutorial
by

introducing
game
elements

such
as
multiple
weapons,

damage
and
enemies.


Prerequisites
This
tutorial
assumes
that
you
are
familiar
with
the
Unity
interface
and
basic
scripting

concepts.
Additionally,
you
should
already
be
familiar
with
the
concepts
discussed
in

Part
1
of
the
FPS
tutorial
series.

Before
we
begin
­
level
setup
      Download
FPS_Tutorial.zip,
unzip,
and
open
the
project
folder
in
Unity.
If
you

      have
completed
Part
1,
then
unzip
the
files
to
a
new
folder.

      Import
the
Standard
Assets
Unity
Package.

      Add
the
mainLevelMesh
and
FPS
controller
prefab
to
the
scene.

NOTE
 In
this
tutorial
no
new
scripts
need
to
created.
We’ll
be
using
the
ones
that

      were
downloaded
from
the
Unity
Package.


Weapon
switching
Before
we
discuss
how
to
create
each
individual
weapon,
we
need
to
write
some
code

to
manage
how
the
weapons
are
initialized
and
switched
from
one
to
another. 
Let’s

look
at
the
Javascript
for
PlayerWeapons.js:


function Awake()
{
   // Select the first weapon
   SelectWeapon(0);
}


This
function
initializes
weapon
0
as
the
default
weapon.


function Update()
{
    // Did the user press fire?
    if (Input.GetButton ("Fire1"))
         BroadcastMessage("Fire");

    if (Input.GetKeyDown("1"))
    {
        SelectWeapon(0);
    }
    else if (Input.GetKeyDown("2"))
    {
        SelectWeapon(1);


                                                                                 4
}
}


This
function
detects
keyboard
input;
the
fire
button,
the
“1”
button
for
weapon
1
or

the
“2”
button
for
weapon
2. 
The
weapons
will
be
children
objects
of
the
Main
Cam­
era.


function SelectWeapon(index : int)
{
   for (var i=0;i<transform.childCount;i++)
    {
         // Activate the selected weapon
         if (i == index)
               transform.GetChild(i).gameObject.SetActiveRecursively(true);
         // Deactivate all other weapons
         else
             transform.GetChild(i).gameObject.SetActiveRecursively(false);
    }
}


This
activates
the
corresponding
weapon
depending
on
keyboard
input.

Let’s
use
the
above
code.

        Create
an
empty
game
object
called
Weapons. 
Move
this
so
that
it
is
a
child
ob­
        ject
to
Main
Camera
(inside
FPS
controller). 
Our
weapons
will
be
added
as
chil­
        dren
of
this
object.

        Assign
the
PlayerWeapons.js
script
to
the
Weapons
game
object
under
Main

        Camera.

We’ll
now
create
our
first
weapon.

Rocket
Launcher
This
section
will
describe
how
to
make
a
rocket
launcher
style
weapon. 

Launcher
The
rocket
launcher
is
responsible
for
instantiating
a
rocket
and
giving
it
an
initial
ve­
locity.
The
rocket
will
be
launched
directly
at
wherever
the
user
is
pointing
and
will
be

destroyed
whenever
it
collides
with
another
collider.

        Add
an
empty
game
object
and
name
it
RocketLauncher. 
Position
the
game
ob­
        ject
in
the
approximate
position
where
the
FPS
Controller’s
hands
would
be.


                                                                                        5
Add
the
RocketLauncher
as
a
child
to
the
Weapons
game
object
inside
the
Main

        Camera
in
the
Hierarchy
View.
This
allows
us
to
shoot
wherever
the
camera
is

        pointing
and
also
makes
sure
that
the
RocketLauncher
game
object
follows
the

        FPS
Controller
as
it
moves
around
(as
Main
Camera
is
a
child
of
FPS
Controller).

        Click
on
Objects/weapons/rocketLauncher
in
the
Project
window
and
make
sure

        that
the
FBXImporter
Scale
Factor
is
set
to
1,
otherwise
the
model
will
import
at

        a
very
small
scale.

        Drag
Objects/weapson/rocketLauncher
model
so
that
it
is
a
child
of
the
Rocket­
        Launcher
game
object.

The
code
for
the
RocketLauncher.js
script
is
as
follows:


var projectile : Rigidbody;
var initialSpeed = 20.0;
var reloadTime = 0.5;
var ammoCount = 20;
private var lastShot = -10.0;


function Fire ()
{
   // Did the time exceed the reload time?
   if (Time.time > reloadTime + lastShot && ammoCount > 0)
   {
         // create a new projectile, use the same position and rotation as the Launcher.
         var instantiatedProjectile : Rigidbody = Instantiate (projectile,
             transform.position, transform.rotation);

         // Give it an initial forward velocity. The direction is along the z-axis of
         // the missile launcher's transform.
         instantiatedProjectile.velocity = transform.TransformDirection(
             Vector3 (0, 0, initialSpeed));

         // Ignore collisions between the missile and the character controller
         Physics.IgnoreCollision(instantiatedProjectile.collider, transform.root.collider);

         lastShot = Time.time;
         ammoCount--;
    }
}


This
code
ensures
that
the
weapon
can’t
fire
faster
than
reloadTime. 
It
also
checks

that
the
user
can
fire
only
when
they
have
sufficient
ammo.


                                                                                              6
The
behavior
for
the
RocketLauncher
is
similar
to
that
in
the
previous
FPS
tutorial
with

the
exception
of
the
reload
time
and
ammo
count
described
above.

      Attach
the
RocketLauncher.js
script
to
the
RocketLauncher
game
object.
Make

      sure
that
you
are
not
attaching
this
script
to
the
rocketLauncher
child
game
ob­
      ject.

Rocket
We
will
now
build
the
rocket
in
the
scene
and
upload
the
final
version
to
a
prefab.

      Click
on
Objects/weapons/rocket
in
the
Project
window
and
make
sure
that
the

      FBXImporter
Scale
Factor
is
set
to
1,
otherwise
the
model
will
import
at
a
very

      small
scale.

      Drag
the
Objects/weapons/rocket
model
into
the
Scene
view.

      Attach
the
WeaponScripts/Rocket.js
script
to
it.

      Add
a
box
collider
to
the
rocket
game
object. Make
the
box
collider
slightly

      larger
than
the
actual
rocket
to
prevent
tunneling
of
collisions. 
Tunneling
of

      collisions
is
what
happens
when
small,
fast
game
objects
avoid
collision
detec­
      tion
due
to
their
size
and
speed. 
Making
the
box
collider
z­axis
larger
ensures

      collisions
work
correctly
for
these
objects.

      In
the
Rigidbody
of
the
rocket
game
object,
deselect
Use
Gravity. 
This
ensures

      that
the
rocket
does
not
fall
under
gravity.

      Create
a
particle
system:
Game
Object
­>
Create
Other
­>
Particle
System.

      Modify
the
Ellipsoid
x,y,z
sizes
to
0.1.

      Modify
the
Rnd
Velocity
to
0.1
in
each
axis
also.

      Change
the
particle
emitter
Min
Size
and
Max
Size
to
0.5.

      Change
the
number
of
particles
emitted
to
100
(Min
and
Max
Emission).

      Drag
the
Particle
Effects/smoke
onto
the
particle
system.

      In
the
Particle
Animator
section,
set
each
of
the
World
Rotation
Axis
values
to

      0.5.

      Set
the
Size
Grow
variable
to
3.

      Enable
Autodestruct
on
the
particle
system. 
This
ensures
that
the
particle
sys­
      tem
is
removed
from
the
game
after
the
rocket
has
been
destroyed.

      Drag
the
particle
system
in
the
Hierarchy
View
so
that
it
is
a
child
of
the
rocket. 

      Reset
the
transform
of
the
particle
system
so
that
it
is
centred
on
the
rocket,

      then
modify
the
position
so
that
it
is
at
the
rear
of
the
rocket.


                                                                                          7
Select
the
rocket
in
the
Hierarchy
view
and
check
that
the
smoke
trail
follows
it

      around
in
the
Scene
view
if
you
move
it
around.

We’ve
now
made
our
rocket,
complete
with
smoke
trail. 
We’re
now
ready
to
upload

our
changes
to
the
prefab.

      Firstly,
create
an
empty
prefab
to
upload
our
changes
to. 
Call
the
prefab

      ‘Rocket’.

      Select
the
rocket
in
the
Hierarchy
view
and
drag
it
onto
the
new
Rocket
prefab. 

      Create
a
new
directory
in
the
Project
view
called
‘WeaponPrefabs’
to
store
our

      weapon
prefabs
in.

Here’s
the
Javascript
for
Rocket.js:


// The reference to the explosion prefab
var explosion : GameObject;
var timeOut = 3.0;

// Kill the rocket after a while automatically
function Start () {
   Invoke("Kill", timeOut);
}


The
Kill
function,
firstly,
finds
the
particle
emitter
in
the
child
hierarchy
and
turns
its 

emitter
off. 
Next,
it
detaches
any
children
(e.g.
Smoke
trail
particle
system)
from
the

object
the
script
is
attached
to
(the
rocket)
and
destroys
the
rocket.


                                                                                        8
function OnCollisionEnter (collision : Collision) {
   // Instantiate explosion at the impact point and rotate the explosion
     // so that the y-axis faces along the surface normal
     var contact : ContactPoint = collision.contacts[0];
     var rotation = Quaternion.FromToRotation(Vector3.up, contact.normal);
    Instantiate (explosion, contact.point, rotation);


    // And kill our selves
    Kill ();
}

function Kill ()
{
    // Stop emitting particles in any children
    var emitter : ParticleEmitter= GetComponentInChildren(ParticleEmitter);
    if (emitter)
         emitter.emit = false;


    // Detach children - We do this to detach the trail rendererer which
    // should be set up to auto destruct
    transform.DetachChildren();


The
most
important
line
is
the
transform.DetachChildren()
function. 
This
is

called
prior
to
destroying
the
gameObject
(the
rocket)
so
that
when
the
rocket
is
de­
stroyed
the
trail
will
now
remain
as
it
is
no
longer
a
child.


    // Destroy the projectile
    Destroy(gameObject);
}

@script RequireComponent (Rigidbody)


The
@script
command
ensures
that
a
Rigidbody
is
attached
to
the
component
that

the
script
is
attached
to
(as
the
script
requires
a
Rigidbody).

Once
a
rocket
instance
collides
with
another
collider,
we
want
to
destroy
the
rocket

game
object. 
However,
if
the
trail
is
directly
attached
to
the
rocket,
this
will
be
de­
stroyed
also,
and
the
trail
will
disappear
suddenly. 
It
is
important
to
detach
the
smoke

trail
from
the
rocket
before
destroying
the
rocket.

Notice
that
the
rocket
can
be
killed
in
one
of
two
ways,
either
it
is
destroyed
if
it
has

survived
for
more
then
3
seconds
(e.g.
shot
into
the
air),
or
it
is
destroyed
if
it
collides

with
an
object.


                                                                                            9
Select
the
RocketLauncher
game
object.

      Drag
the
Rocket
prefab
from
WeaponPrefabs
onto
the
Projectile
slot
in
the
In­
      spector.

      Play
the
game,
when
you
fire
a
rocket,
it
should
have
a
smoke
trail
following
it. 

Explosions
You
probably
noticed
that
when
you
fired
a
rocket
there
was
no
explosion
when
it

collided.
We’ll
add
one
in
now.

      Drag
the
Standard
Assets/Particles/Small
explosion
prefab
onto
the
exposed

      variable
Explosion
in
the
Rocket
component
of
the
Rocket
prefab.

We
still
need
to
define
the
behavior
of
our
explosion.
Here’s
the
code
for
the

Explosion­Simple.js
script:

var explosionRadius = 5.0;
var explosionPower = 10.0;
var explosionDamage = 100.0;

var explosionTime = 1.0;


function Start () {

   var explosionPosition = transform.position;
   var colliders : Collider[] = Physics.OverlapSphere (explosionPosition,
       explosionRadius);


This
returns
an
array
of
colliders
within
the
volume
of
the
sphere.


   for (var hit in colliders) {
       if (!hit)
           continue;

       if (hit.rigidbody)
       {
            hit.rigidbody.AddExplosionForce(explosionPower,
               explosionPosition, explosionRadius, 3.0);


This
adds
an
upward
force
to
all
rigidbodies
within
range
of
the
explosion
(the

sphere). 

Basically
this
makes
the
explosion
look
good!


                                                                                    10
var closestPoint = hit.rigidbody.ClosestPointOnBounds(explosionPosition);
               var distance = Vector3.Distance(closestPoint, explosionPosition);


               // The hit points we apply fall decrease with distance from the hit point
               var hitPoints = 1.0 - Mathf.Clamp01(distance / explosionRadius);
               hitPoints *= explosionDamage;


  This
calculates
how
much
damage
to
apply
to
each
rigidbody
caught
in
the
explosion.

  The
degree
of
damage
decreases
the
further
a
rigidbody
is
from
the
centre
of
the
ex­
  plosion.


               // Tell the rigidbody or any other script attached to the hit object
               // how much damage is to be applied!
               hit.rigidbody.SendMessageUpwards("ApplyDamage", hitPoints,
                    SendMessageOptions.DontRequireReceiver);


  This
sends
a
message
to
apply
the
damage
to
the
rigidbody.

           }
      }

      // stop emitting ?
      if (particleEmitter) {
          particleEmitter.emit = true;
           yield WaitForSeconds(0.5);
           particleEmitter.emit = false;
      }


      // destroy the explosion
       Destroy (gameObject, explosionTime);
  }


          Add
the
Explosion­Simple
script
as
a
component
to
the
Small
explosion
prefab.

  This
explosion
script
can
be
used
as
a
generic
explosion
script
for
any
game
object
that

  requires
explosions. 
To
tailor
the
script
to
suit
each
specific
case,
just
modify
variables

  such
as:

• explosionPower
­
the
degree
of
force
with
which
the
explosion
will
cause
nearby
ob­
  jects
to
move.

• explosionDamage
­
how
many
hit
points
the
explosion
will
cause.


                                                                                           11
• explosionRadius
­
the
effect
radius
of
the
explosion.

  The
Explosion
script
is
very
similar
to
that
used
in
the
previous
FPS
tutorial
with
the

  main
difference
being
the
introduction
of
hit
points. 
The
hit
points
variable
scales
the

  explosionDamage
variable
based
on
distance,
with
object
at
the
outer
edge
of
the

  radius
having
lesser
damage
than
those
at
the
center
of
the
explosion.

  This
means
it’s
now
possible
for
an
explosion
to
inflict
damage
to
objects
near
to

  where
it
collided. 
How
to
use
hit
points
for
each
object
will
be
discussed
in
more
de­
  tail
later.

           Play
the
game.

  Machine
Gun
  The
machine
gun
style
weapon
offers
a
faster
rate
of
fire
than
the
rocket
launcher

  however
each
bullet
impact
does
less
damage.

           Create
an
empty
game
object
and
name
it
MachineGun. 
Add
this
as
a
child
ob­
           ject
to
Weapons
in
the
Hierarchy
View.

           Add
Objects/weapons/machineGun
to
the
empty
MachineGun
game
object.

           Assign
the
MachineGun.js
script
to
the
MachineGun
game
object.

           Assign
muzzle_flash
(it’s
a
child
of
machineGun)
to
the
Muzzle
Flash
variable
of

           the
Machine
Gun
component
of
the
MachineGun
game
object. 

  Here’s
the
complete
code
for
MachineGun.js:


  var   range = 100.0;
  var   fireRate = 0.05;
  var   force = 10.0;
  var   damage = 5.0;
  var bulletsPerClip = 40;
  var clips = 20;
  var reloadTime = 0.5;
  private var hitParticles : ParticleEmitter;
  var muzzleFlash : Renderer;


  private var bulletsLeft : int = 0;
  private var nextFireTime = 0.0;
  private var m_LastFrameShot = -1;


  function Start ()
  {
     hitParticles = GetComponentInChildren(ParticleEmitter);

        // We don't want to emit particles all the time, only when we hit something.
        if (hitParticles)


                                                                                         12
hitParticles.emit = false;
    bulletsLeft = bulletsPerClip;
}


The
Start
function
is
really
just
initializing
the
particle
emitter
(bullet
spark)
so
that

it
is
turned
off.


function LateUpdate()
{
   if (muzzleFlash)
   {
       // We shot this frame, enable the muzzle flash
        if (m_LastFrameShot == Time.frameCount)
        {
            muzzleFlash.transform.localRotation =
               Quaternion.AngleAxis(Random.Range(0, 359), Vector3.forward);
            muzzleFlash.enabled = true;


            if (audio)
            {
                 if (!audio.isPlaying)
                      audio.Play();
                audio.loop = true;
            }
        }
        // We didn't, disable the muzzle flash
        else
        {
            muzzleFlash.enabled = false;
            enabled = false;

            // Play sound
            if (audio)
            {
                 audio.loop = false;
            }
        }
    }
}


The
LateUpdate
function
is
automatically
called
after
an
Update
function
is
called. 

Note
that
the
Update
function
is
called
in
the
PlayWeapons
script
which
is
attached

to
the
Weapons
game
object
(it’s
a
parent
of
MachineGun).
Generally
the
LateUp-


                                                                                         13
date
function
will
be
used
whenever
you
want
to
react
to
something
that
happened

in
Update. 
In
this
case,
the
player
if
firing
in
the
Update
function,
and
in
LateUp-
date
we’re
applying
the
muzzle
flash.


function Fire ()
{
   if (bulletsLeft == 0)
        return;


    // If there is more than one bullet between the last and this frame
    // Reset the nextFireTime
    if (Time.time - fireRate > nextFireTime)
         nextFireTime = Time.time - Time.deltaTime;


    // Keep firing until we used up the fire time
    while( nextFireTime < Time.time && bulletsLeft != 0)
    {
        FireOneShot();
        nextFireTime += fireRate;
    }
}


The
Fire
function
calculates
if
the
player
should
be
able
to
fire
based
on
the
fire
rate

of
the
machine
gun.


function FireOneShot ()
{
   var direction = transform.TransformDirection(Vector3.forward);
   var hit : RaycastHit;


    // Did we hit anything?
    if (Physics.Raycast (transform.position, direction, hit, range))
    {
         // Apply a force to the rigidbody we hit
        if (hit.rigidbody)
             hit.rigidbody.AddForceAtPosition(force * direction, hit.point);

        // Place the particle system for spawing out of place where we hit the surface!
        // And spawn a couple of particles
        if (hitParticles)
        {
             hitParticles.transform.position = hit.point;
             hitParticles.transform.rotation =
                 Quaternion.FromToRotation(Vector3.up, hit.normal);


                                                                                          14
hitParticles.Emit();
        }


        // Send a damage message to the hit object
        hit.collider.SendMessageUpwards("ApplyDamage", damage,
            SendMessageOptions.DontRequireReceiver);
    }


    bulletsLeft--;

    // Register that we shot this frame,
    // so that the LateUpdate function enabled the muzzleflash renderer for one frame
    m_LastFrameShot = Time.frameCount;
    enabled = true;

    // Reload gun in reload Time
    if (bulletsLeft == 0)
        Reload();
}


The
FireOneShot
function
starts
by
casting
out
a
ray
in
front
of
the
FPS
Controller

to
determine
if
the
bullet
has
hit
anything. 
We’ll
limit
the
range
of
the
bullet
to
a
cer­
tain
distance.

If
the
raycast
did
intersect
with
a
rigidbody,
then
a
force
is
applied
in
the
forward
di­
rection
to
that
rigidbody
(a
small
force
as
it’s
only
a
machine
gun).
Next
the
bullet

spark
is
instantiated
at
the
location
where
the
bullet
(ray)
struck.
The
particle
emitter

is
oriented
so
that
it
is
along
the
normal
of
the
surface
it
struck.

Next,
damage
is
applied
to
the
object
by
sending
a
damage
message
to
the
object
that

was
hit.


function Reload () {

    // Wait for reload time first - then add more bullets!
    yield WaitForSeconds(reloadTime);


    // We have a clip left reload
    if (clips > 0)
    {
         clips--;
        bulletsLeft = bulletsPerClip;
    }
}

function GetBulletsLeft () {


                                                                                        15
return bulletsLeft;
}


The
Reload
function
reloads
a
clip
of
ammo
(if
there
are
any
left
of
course). 
The

amount
of
time
taken
to
reload
can
be 
tweaked
in
the
inspector.

Configuring
the
particle
emitter
The
MachineGun
needs
a
spark
effect
when
bullets
collide
with
rigidbodies,
let’s
cre­
ate
one.

        Drag
the
Sparks
prefab
from
the
Standard
Assets/Particles
folder
so
that
it’s
a

        child
of
machineGun
(not
MachineGun)
in
the
Hierarchy
View.

        That’s
it! 
Play
the
game.
Don’t
forget
that
1
and
2
on
the
keyboard
are
used
to

        switch
weapons.

Hit
Points
The
Explosion
and
MachineGun
Javascripts
have
already
shown
how
to
calculate
the

degree
of
damage
caused
by
a
projectile
(rocket
or
bullet),
and
send
this
value
to
all

nearby
game
objects.
However,
game
objects
do
not
yet
know
how
to
respond
to
this

value.

Game
objects
can
keep
track
of
how
healthy
they
are
by
using
a
hitPoints
variable. 

Each
object
will
be
initialized
to
its
own
value
(depending
on
how
strong
it
is).
Each

game
object
that
should
respond
to
damage
should
also
have
an
ApplyDamage()

function
(note
this
is
the
function
called
from
the
Explosion
and
MachineGun
scripts

to
apply
the
damage). 
This
function
will
decrement
hit
points
from
the
game
object

as
necessary
and
call
functions
to
handle
what
happens
when
the
hit
points
reach
0

(typically
a
death
or
explosion
state).

The
next
section
will
demonstrate
how
hitPoints
and
ApplyDamage()
are
used.

Exploding
Barrels
The
code
we’re
about
to
look
at
is
generic,
so
the
Javascript
can
be
added
as
a
com­
ponent
to
any
object
that
can
have
damage
applied
to
it. 
Here
is
the
complete
code

for
DamageReceiver.js:


var   hitPoints = 100.0;
var   detonationDelay = 0.0;
var   explosion : Transform;
var   deadReplacement : Rigidbody;


function ApplyDamage (damage : float)
{
   // We already have less than 0 hitpoints, maybe we got killed already?


                                                                                           16
if (hitPoints <= 0.0)
         return;


    hitPoints -= damage;
    if (hitPoints <= 0.0)
    {
         // Start emitting particles
        var emitter : ParticleEmitter = GetComponentInChildren(ParticleEmitter);
        if (emitter)
             emitter.emit = true;

        Invoke("DelayedDetonate", detonationDelay);
    }
}


This
function
applies
the
damage
to
the
game
object
which
has
been
shot
or
caught
in

an
explosion. 
If
the
object’s
hit
points
are
already
0
or
less,
then
nothing
is
done,
oth­
erwise
the
hit
point
counter
is
decremented
by
the
value
passed
in
(damage). 
If
the

resulting
hit
points
are
now
less
than
0
the
DelayedDetonate
function
is
called
(de­
lays
can
make
the
explosion
look
cool;
no
other
reason).


function DelayedDetonate ()
{
   BroadcastMessage ("Detonate");
}


This
calls
the
Detonate
method
on
the
game
object
and
its
children.


function Detonate ()
{
   // Destroy ourselves
    Destroy(gameObject);

    // Create the explosion
    if (explosion)
         Instantiate (explosion, transform.position, transform.rotation);


If
there’s
an
explosion
prefab
attached
to
the
barrel,
then
display
that
when
the
bar­
rel’s
hit
points
reach
zero.


                                                                                       17
// If we have a dead barrel then replace ourselves with it!
    if (deadReplacement)
    {
         var dead : Rigidbody = Instantiate(deadReplacement, transform.position,
             transform.rotation);


         // For better effect we assign the same velocity to the exploded barrel
         dead.rigidbody.velocity = rigidbody.velocity;
         dead.angularVelocity = rigidbody.angularVelocity;
    }


If
the
game
object
has
a
dead
equivalent,
in
this
case
a
barrel
which
looks
burnt
out,

then
replace
the
normal
game
object
with
its
dead
equivalent. 
We
make
sure
the
ob­
ject
keeps
traveling
in
the
direction
that
it
was
going
when
its
hit
points
reached
zero.


    // If there is a particle emitter stop emitting and detach so it doesnt get destroyed
    // right away
    var emitter : ParticleEmitter = GetComponentInChildren(ParticleEmitter);
    if (emitter)
    {
         emitter.emit = false;
         emitter.transform.parent = null;
    }
}


// We require the barrel to be a rigidbody, so that it can do nice physics
@script RequireComponent (Rigidbody)


Let’s
set
up
our
game
to
use
the
DamageReceiver
script
on
some
barrels. 
Let’s
start
by

importing
some
assets.

        Drag
Objects/crateAndBarrel/barrel
into
the
Scene
View.

        Add
a
Rigidbody
component
to
the
barrel.

        Add
a
box
collider
to
the
barrel
(Component
­>
Physics
­>
Box
Collider). 
You

        may
want
to
tune
the
size
of
the
box
collider
so
that
it
is
a
better
fit
to
the

        barrel. 
Do
this
by
altering
the
Size
properties
of
Box
Collider
in
the
Inspector

        View.

        Attach
the
DamageReceiver
script
to
Barrel
in
the
Hierarchy
View.

        Assign
the
Standard
Assets/Particles/explosion
prefab
to
the
Explosion
property

        (in
the
Damage
Receiver
component
of
Barrel).


                                                                                             18
Create
a
new
prefab
called
Barrel
(note
capital
B,
the
imported
barrel
has
a

      small
‘b’).

      Drag
the
barrel
we
have
configured
from
the
Hierarchy
View
into
the
newly

      created
prefab
in
the
Project
View.

      Add
several
Barrels
to
the
Scene
View
(use
duplicate
as
it’s
easier).

      Play
the
game. 


You’ll
notice
when
the
barrels
explode
they
just
disappear,
we’ll
now
add
a
dead
re­
placement
barrel
(a
barrel
that
looks
blown
up).

      Create
another
prefab
called
Barrel­dead.

      Assign
the
original
barrel
to
the
prefab
(the
one
we
imported
from
Objects/
      crateAndBarrel).

At
the
moment,
the
Barrel
and
Barrel­dead
objects
look
the
same,
they
both
have
a

texture
in
common
(barrel1). 

We
want
Barrel­dead
to
have
a
texture
that
looks
different
from
Barrel,
so
the
user

will
know
when
it
has
exploded,
something
that
looks
burnt
out
would
do. 
If
we

modify
barrel1
texture
to
give
this
effect,
then
the
Barrel
object
will
also
be
modified,

as
Barrel
and
Barrel­dead
both
share
this
same
texture.  
To
solve
this
problem,
we

must
create
a
new
texture
and
assign
that
to
Barrel­dead.
We’ll
do
this
by
firstly
copy­
ing
the
barrel1
material
and
modifying
it
to
resemble
a
burned
out
look.

      Select
Barrel­dead
in
the
Project
View
and
click
on
barrel1
under
the
Mesh
Ren­
      derer
Materials
section
of
the
Inspector
View. 
The
barrel1
material
will
highlight

      in
the
Project
View.


                                                                                      19
Duplicate
the
barrel1
material
(inside
the
Materials
folder)
(command/ctrl+D)

     and
name
the
copy
barrelDead. 
Note
that
duplicate
will
likely
be
named
bar­
     rel2.

     We’ll
now
modify
the
look
of
this
texture
so
it
looks
burnt
out. 
Make
sure
the

     barrelDead
material
is
still
selected
and
click
on
Main
Color
in
the
Inspector

     View. 
Drag
each
of
the
R,G,B
sliders
to
the
left­hand
side
(close
to
0),
this
will

     give
the
texture
a
black
(or
burnt)
appearance.

     Assign
this
new
material
to
Barrel­
     dead
by
firstly
selecting
Barrel­dead

     in
the
Project
View,
then
expanding

     the
Materials
section
in
the
Inspector

     View.
Now
select
the
drop­down

     menu
next
to
barrel1
and
assign
the

     material
we
just
created,
barrelDead.

     Verify
that
Barrel
and
Barrel­dead

     both
look
different
by
dragging
them

     into
the
Scene
View
and
comparing

     them. 
Delete
BarrelDead
from
the

     Scene
View
again,
as
it
should
only
appear
once
a
barrel
has
been
blown
up.

     Next,
add
Box
Collider
and
Rigidbody
components
to
the
Barrel­dead
prefab

     (the
Barrel
prefab
should
already
have
them,
check
anyway).

     Assign
the
Barrel­dead
prefab
to
the
Dead
Replacement
property
of
Barrel.

     Play
the
game,
the
barrels
should
now
explode
and
have
the
burned
out
effect.

Sentry
Gun
Finally
we’ll
add
an
enemy
opponent
to
our
game,
a
sentry
gun.
The
sentry
gun
object

will
look
for
the
player
and
shoot
at
them.

Let’s
start
by
importing
the
sentry
gun
weapon.

     Drag
the
Objects/weapons/sentryGun
onto
the
Scene
View.

     Add
a
box
collider
and
a
rigidbody
to
the
sentryGun.

     Adjust
the
size
and
shape
of
the
box
collider
so
that
it
resembles
a
thin
column

     which
covers
the
turret
of
the
gun. 
The
tall,
thin,
column
will
make
sure
that

     the
gun
has
a
high
centre
of
gravity
and
will
fall
over
easily
when
shot.

     Attach
the
DamageReceiver
script
to
the
sentryGun.


We’re
now
ready
to
examine
the
code
for
the
sentry
gun. 
Here’s
the
full
code
for

SentryGun.js:


                                                                                       20
var attackRange = 30.0;
var shootAngleDistance = 10.0;
var target : Transform;

function Start () {
   if (target == null && GameObject.FindWithTag("Player"))
       target = GameObject.FindWithTag("Player").transform;
}


The
Start
function
checks
to
see
if
a
target
has
been
assigned
for
the
gun
(this
can

be
done
in
the
inspector),
but
it’s
much
easier
to
assign
the
Player
tag
to
the
FPS
con­
troller
using
the
inspector
(we’ll
do
this
shortly). 


function Update () {
   if (target == null)
        return;


    if (!CanSeeTarget ())
         return;

    // Rotate towards target
    var targetPoint = target.position;
    var targetRotation = Quaternion.LookRotation (targetPoint - transform.position,
        Vector3.up);
    transform.rotation = Quaternion.Slerp(transform.rotation, targetRotation,
        Time.deltaTime * 2.0);


If
the
player
is
within
range,
and
the
sentry
gun
can
see
the
player,
the
gun
turret
will

rotate
from
the
its
current
rotation
angle
to
the
rotation
angle
of
the
player.

    // If we are almost rotated towards target - fire one clip of ammo
    var forward = transform.TransformDirection(Vector3.forward);
    var targetDir = target.position - transform.position;
    if (Vector3.Angle(forward, targetDir) < shootAngleDistance)
         SendMessage("Fire");
}


If
the
angle
of
rotation
between
the
player
and
the
current
position
of
the
sentry
gun

is
less
than
shootAngleDistance,
the
sentry
starts
firing.


                                                                                       21
function CanSeeTarget () : boolean
{
    if (Vector3.Distance(transform.position, target.position) > attackRange)
         return false;

    var hit : RaycastHit;
    if (Physics.Linecast (transform.position, target.position, hit))
         return hit.transform == target;

    return false;
}


The
CanSeeTarget
function
works
out
if
the
the
sentry
gun
can
see
the
target
(in

this
case
the
player).

Let’s
finish
setting
up
the
sentry
gun.

      Assign
the
target
for
the
sentry
gun. 
To
do
this,
select
FPS
Controller
in
the
Hi­
      erarchy
View
and
then
in
the
Tag
drop
down
box,
select
Player.

      Attach
the
SentryGun
script
to
the
sentryGunRotateY
child
of
sentryGun. 
This

      ensures
that
only
the
top
of
the
sentry
rotates
and
the
tripod
part
remains
sta­
      tionary.

      Assign
the
explosion
prefab
to
the
Explosion
property
of
the
DamageReceiver

      component
of
sentryGun.

      Assign
the
sentryGun
to
the
Dead
Replacement
property
of
the
DamageReceiver

      component
(or
you
can
create
an
alternative
dead
replcement
if
you
wish).

      Assign
the
MachineGun
script
to
sentryGunRotateY.

      Assign
the
Muzzle
Flash
property
of
the
Machine
Gun
component
with
the

      muzzleflash
asset
which
is
a
child
of
sentryGunTop.

      Click
on
muzzleflash
in
the
Hierarchy
View,
change
its
shader
to
Particles/
      Additive.

      Play
the
game. 
You
should
now
be
able
to
shoot
the
barrels
and
sentry
gun.

Skybox 
Let’s
add
a
sky
effect
to
our
scene.

      Select
Edit­>Render
Settings. 
Drag
the
skyBoxTest
onto
the
Skybox
Material

      property.
You
now
have
sky.


                                                                                       22
Acknowledgments
Special
thanks
go
to
Joachim
Ante
(code)
and
Ethan
Vosburgh
(graphics)
for
their
help

in
the
making
of
this
tutorial.


The
next
tutorial
in
the
FPS
series
will
demonstrate
advanced
concepts
such
as

ragdoll
character
animation,
advanced
AI,
and
adding
polish
to
our
game.


                                                                                  23

Mais conteúdo relacionado

Mais procurados

Rapid prototyping with ScriptableObjects
Rapid prototyping with ScriptableObjectsRapid prototyping with ScriptableObjects
Rapid prototyping with ScriptableObjectsGiorgio Pomettini
 
Unity遊戲程式設計 - 2D Platformer遊戲
Unity遊戲程式設計 - 2D Platformer遊戲Unity遊戲程式設計 - 2D Platformer遊戲
Unity遊戲程式設計 - 2D Platformer遊戲吳錫修 (ShyiShiou Wu)
 
HoloLens Programming Tutorial: AirTap & Spatial Mapping
HoloLens Programming Tutorial: AirTap & Spatial MappingHoloLens Programming Tutorial: AirTap & Spatial Mapping
HoloLens Programming Tutorial: AirTap & Spatial MappingTakashi Yoshinaga
 
Style & Design Principles 03 - Component-Based Entity Systems
Style & Design Principles 03 - Component-Based Entity SystemsStyle & Design Principles 03 - Component-Based Entity Systems
Style & Design Principles 03 - Component-Based Entity SystemsNick Pruehs
 
School For Games 2015 - Unity Engine Basics
School For Games 2015 - Unity Engine BasicsSchool For Games 2015 - Unity Engine Basics
School For Games 2015 - Unity Engine BasicsNick Pruehs
 
Unity introduction for programmers
Unity introduction for programmersUnity introduction for programmers
Unity introduction for programmersNoam Gat
 
Task two workflow by tom crook
Task two workflow by tom crookTask two workflow by tom crook
Task two workflow by tom crookTomCrook
 
Cmd unity withc
Cmd unity withcCmd unity withc
Cmd unity withcumairnoora
 
Android game engine
Android game engineAndroid game engine
Android game engineJulian Chu
 
Flash Prototyping Workbook - Part 1 and 2
Flash Prototyping Workbook - Part 1 and 2Flash Prototyping Workbook - Part 1 and 2
Flash Prototyping Workbook - Part 1 and 2Alexa Andrzejewski
 
Unity遊戲程式設計(15) 實作Space shooter遊戲
Unity遊戲程式設計(15) 實作Space shooter遊戲Unity遊戲程式設計(15) 實作Space shooter遊戲
Unity遊戲程式設計(15) 實作Space shooter遊戲吳錫修 (ShyiShiou Wu)
 
Gameloft: Recommandations for Starfront collision and Nova 2
Gameloft: Recommandations for Starfront collision and Nova 2Gameloft: Recommandations for Starfront collision and Nova 2
Gameloft: Recommandations for Starfront collision and Nova 2Khai Nguyen
 
Introduction to html5 game programming with impact js
Introduction to html5 game programming with impact jsIntroduction to html5 game programming with impact js
Introduction to html5 game programming with impact jsLuca Galli
 
Augmented Reality - Let’s Make Some Holograms! (UXD Version)
Augmented Reality - Let’s Make Some Holograms! (UXD Version)Augmented Reality - Let’s Make Some Holograms! (UXD Version)
Augmented Reality - Let’s Make Some Holograms! (UXD Version)Cameron Vetter
 
Nighthawk Controller
Nighthawk ControllerNighthawk Controller
Nighthawk ControllerBen Speer
 
Galactic Wars XNA Game
Galactic Wars XNA GameGalactic Wars XNA Game
Galactic Wars XNA GameSohil Gupta
 
Unite seoul 2016 Rooms2 mobile to VR
Unite seoul 2016 Rooms2 mobile to VRUnite seoul 2016 Rooms2 mobile to VR
Unite seoul 2016 Rooms2 mobile to VRSangYun Yi
 

Mais procurados (20)

Rapid prototyping with ScriptableObjects
Rapid prototyping with ScriptableObjectsRapid prototyping with ScriptableObjects
Rapid prototyping with ScriptableObjects
 
Unity遊戲程式設計 - 2D Platformer遊戲
Unity遊戲程式設計 - 2D Platformer遊戲Unity遊戲程式設計 - 2D Platformer遊戲
Unity遊戲程式設計 - 2D Platformer遊戲
 
Unity 13 space shooter game
Unity 13 space shooter gameUnity 13 space shooter game
Unity 13 space shooter game
 
HoloLens Programming Tutorial: AirTap & Spatial Mapping
HoloLens Programming Tutorial: AirTap & Spatial MappingHoloLens Programming Tutorial: AirTap & Spatial Mapping
HoloLens Programming Tutorial: AirTap & Spatial Mapping
 
Style & Design Principles 03 - Component-Based Entity Systems
Style & Design Principles 03 - Component-Based Entity SystemsStyle & Design Principles 03 - Component-Based Entity Systems
Style & Design Principles 03 - Component-Based Entity Systems
 
School For Games 2015 - Unity Engine Basics
School For Games 2015 - Unity Engine BasicsSchool For Games 2015 - Unity Engine Basics
School For Games 2015 - Unity Engine Basics
 
Unity introduction for programmers
Unity introduction for programmersUnity introduction for programmers
Unity introduction for programmers
 
Presentación Unity
Presentación UnityPresentación Unity
Presentación Unity
 
Task two workflow by tom crook
Task two workflow by tom crookTask two workflow by tom crook
Task two workflow by tom crook
 
Cmd unity withc
Cmd unity withcCmd unity withc
Cmd unity withc
 
Android game engine
Android game engineAndroid game engine
Android game engine
 
Flash Prototyping Workbook - Part 1 and 2
Flash Prototyping Workbook - Part 1 and 2Flash Prototyping Workbook - Part 1 and 2
Flash Prototyping Workbook - Part 1 and 2
 
Unity遊戲程式設計(15) 實作Space shooter遊戲
Unity遊戲程式設計(15) 實作Space shooter遊戲Unity遊戲程式設計(15) 實作Space shooter遊戲
Unity遊戲程式設計(15) 實作Space shooter遊戲
 
Gameloft: Recommandations for Starfront collision and Nova 2
Gameloft: Recommandations for Starfront collision and Nova 2Gameloft: Recommandations for Starfront collision and Nova 2
Gameloft: Recommandations for Starfront collision and Nova 2
 
Introduction to html5 game programming with impact js
Introduction to html5 game programming with impact jsIntroduction to html5 game programming with impact js
Introduction to html5 game programming with impact js
 
Augmented Reality - Let’s Make Some Holograms! (UXD Version)
Augmented Reality - Let’s Make Some Holograms! (UXD Version)Augmented Reality - Let’s Make Some Holograms! (UXD Version)
Augmented Reality - Let’s Make Some Holograms! (UXD Version)
 
Nighthawk Controller
Nighthawk ControllerNighthawk Controller
Nighthawk Controller
 
Galactic Wars XNA Game
Galactic Wars XNA GameGalactic Wars XNA Game
Galactic Wars XNA Game
 
Unite seoul 2016 Rooms2 mobile to VR
Unite seoul 2016 Rooms2 mobile to VRUnite seoul 2016 Rooms2 mobile to VR
Unite seoul 2016 Rooms2 mobile to VR
 
Unity workshop
Unity workshopUnity workshop
Unity workshop
 

Semelhante a Fps tutorial 2

Unity3d scripting tutorial
Unity3d scripting tutorialUnity3d scripting tutorial
Unity3d scripting tutorialhungnttg
 
How tomakea gameinunity3d
How tomakea gameinunity3dHow tomakea gameinunity3d
How tomakea gameinunity3dDao Tung
 
ARTDM 170, Week 11: User Interaction
ARTDM 170, Week 11: User InteractionARTDM 170, Week 11: User Interaction
ARTDM 170, Week 11: User InteractionGilbert Guerrero
 
Y1 gd level_designworkflow
Y1 gd level_designworkflowY1 gd level_designworkflow
Y1 gd level_designworkflowcrisgalliano
 
Working with Layout Managers. Notes 1. In part 2, note that the Gam.pdf
Working with Layout Managers. Notes 1. In part 2, note that the Gam.pdfWorking with Layout Managers. Notes 1. In part 2, note that the Gam.pdf
Working with Layout Managers. Notes 1. In part 2, note that the Gam.pdfudit652068
 
38199728 multi-player-tutorial
38199728 multi-player-tutorial38199728 multi-player-tutorial
38199728 multi-player-tutorialalfrecaay
 
Unity - Add components to 3D GameObjects
Unity - Add components to 3D GameObjectsUnity - Add components to 3D GameObjects
Unity - Add components to 3D GameObjectsNexusEdgesupport
 
Game Development Session - 3 | Introduction to Unity
Game Development Session - 3 | Introduction to  UnityGame Development Session - 3 | Introduction to  Unity
Game Development Session - 3 | Introduction to UnityKoderunners
 
Using traits in PHP
Using traits in PHPUsing traits in PHP
Using traits in PHPMaksym Hopei
 
Useful Tools for Making Video Games - XNA (2008)
Useful Tools for Making Video Games - XNA (2008)Useful Tools for Making Video Games - XNA (2008)
Useful Tools for Making Video Games - XNA (2008)Korhan Bircan
 
Getting started with Verold and Three.js
Getting started with Verold and Three.jsGetting started with Verold and Three.js
Getting started with Verold and Three.jsVerold
 
Unreal Engine Basics 03 - Gameplay
Unreal Engine Basics 03 - GameplayUnreal Engine Basics 03 - Gameplay
Unreal Engine Basics 03 - GameplayNick Pruehs
 
Building your first game in Unity 3d by Sarah Sexton
Building your first game in Unity 3d  by Sarah SextonBuilding your first game in Unity 3d  by Sarah Sexton
Building your first game in Unity 3d by Sarah SextonBeMyApp
 
Introduction to Unity3D and Building your First Game
Introduction to Unity3D and Building your First GameIntroduction to Unity3D and Building your First Game
Introduction to Unity3D and Building your First GameSarah Sexton
 
Augmented Reality With FlarToolkit and Papervision3D
Augmented Reality With FlarToolkit and Papervision3DAugmented Reality With FlarToolkit and Papervision3D
Augmented Reality With FlarToolkit and Papervision3DRoman Protsyk
 
Read mepdf v3_0_07_02meleeweaponcontrol
Read mepdf v3_0_07_02meleeweaponcontrolRead mepdf v3_0_07_02meleeweaponcontrol
Read mepdf v3_0_07_02meleeweaponcontrolMatumit Sombunjaroen
 
JetBot basic motion
JetBot basic motionJetBot basic motion
JetBot basic motionPeiJia5
 
Lightweight Multiplayer HTML5 Games with PubNub
Lightweight Multiplayer HTML5 Games with PubNubLightweight Multiplayer HTML5 Games with PubNub
Lightweight Multiplayer HTML5 Games with PubNubPubNub
 
Run and jump tutorial (part 3) behaviours
Run and jump tutorial (part 3)   behavioursRun and jump tutorial (part 3)   behaviours
Run and jump tutorial (part 3) behavioursMuhd Basheer
 

Semelhante a Fps tutorial 2 (20)

Unity3d scripting tutorial
Unity3d scripting tutorialUnity3d scripting tutorial
Unity3d scripting tutorial
 
How tomakea gameinunity3d
How tomakea gameinunity3dHow tomakea gameinunity3d
How tomakea gameinunity3d
 
ARTDM 170, Week 11: User Interaction
ARTDM 170, Week 11: User InteractionARTDM 170, Week 11: User Interaction
ARTDM 170, Week 11: User Interaction
 
Y1 gd level_designworkflow
Y1 gd level_designworkflowY1 gd level_designworkflow
Y1 gd level_designworkflow
 
Working with Layout Managers. Notes 1. In part 2, note that the Gam.pdf
Working with Layout Managers. Notes 1. In part 2, note that the Gam.pdfWorking with Layout Managers. Notes 1. In part 2, note that the Gam.pdf
Working with Layout Managers. Notes 1. In part 2, note that the Gam.pdf
 
38199728 multi-player-tutorial
38199728 multi-player-tutorial38199728 multi-player-tutorial
38199728 multi-player-tutorial
 
Unity - Add components to 3D GameObjects
Unity - Add components to 3D GameObjectsUnity - Add components to 3D GameObjects
Unity - Add components to 3D GameObjects
 
Game Development Session - 3 | Introduction to Unity
Game Development Session - 3 | Introduction to  UnityGame Development Session - 3 | Introduction to  Unity
Game Development Session - 3 | Introduction to Unity
 
Using traits in PHP
Using traits in PHPUsing traits in PHP
Using traits in PHP
 
Useful Tools for Making Video Games - XNA (2008)
Useful Tools for Making Video Games - XNA (2008)Useful Tools for Making Video Games - XNA (2008)
Useful Tools for Making Video Games - XNA (2008)
 
Getting started with Verold and Three.js
Getting started with Verold and Three.jsGetting started with Verold and Three.js
Getting started with Verold and Three.js
 
Unreal Engine Basics 03 - Gameplay
Unreal Engine Basics 03 - GameplayUnreal Engine Basics 03 - Gameplay
Unreal Engine Basics 03 - Gameplay
 
Building your first game in Unity 3d by Sarah Sexton
Building your first game in Unity 3d  by Sarah SextonBuilding your first game in Unity 3d  by Sarah Sexton
Building your first game in Unity 3d by Sarah Sexton
 
Introduction to Unity3D and Building your First Game
Introduction to Unity3D and Building your First GameIntroduction to Unity3D and Building your First Game
Introduction to Unity3D and Building your First Game
 
Augmented Reality With FlarToolkit and Papervision3D
Augmented Reality With FlarToolkit and Papervision3DAugmented Reality With FlarToolkit and Papervision3D
Augmented Reality With FlarToolkit and Papervision3D
 
Read mepdf v3_0_07_02meleeweaponcontrol
Read mepdf v3_0_07_02meleeweaponcontrolRead mepdf v3_0_07_02meleeweaponcontrol
Read mepdf v3_0_07_02meleeweaponcontrol
 
JetBot basic motion
JetBot basic motionJetBot basic motion
JetBot basic motion
 
Lightweight Multiplayer HTML5 Games with PubNub
Lightweight Multiplayer HTML5 Games with PubNubLightweight Multiplayer HTML5 Games with PubNub
Lightweight Multiplayer HTML5 Games with PubNub
 
Run and jump tutorial (part 3) behaviours
Run and jump tutorial (part 3)   behavioursRun and jump tutorial (part 3)   behaviours
Run and jump tutorial (part 3) behaviours
 
Box2D and libGDX
Box2D and libGDXBox2D and libGDX
Box2D and libGDX
 

Último

TeamStation AI System Report LATAM IT Salaries 2024
TeamStation AI System Report LATAM IT Salaries 2024TeamStation AI System Report LATAM IT Salaries 2024
TeamStation AI System Report LATAM IT Salaries 2024Lonnie McRorey
 
The Role of FIDO in a Cyber Secure Netherlands: FIDO Paris Seminar.pptx
The Role of FIDO in a Cyber Secure Netherlands: FIDO Paris Seminar.pptxThe Role of FIDO in a Cyber Secure Netherlands: FIDO Paris Seminar.pptx
The Role of FIDO in a Cyber Secure Netherlands: FIDO Paris Seminar.pptxLoriGlavin3
 
From Family Reminiscence to Scholarly Archive .
From Family Reminiscence to Scholarly Archive .From Family Reminiscence to Scholarly Archive .
From Family Reminiscence to Scholarly Archive .Alan Dix
 
How to write a Business Continuity Plan
How to write a Business Continuity PlanHow to write a Business Continuity Plan
How to write a Business Continuity PlanDatabarracks
 
"Debugging python applications inside k8s environment", Andrii Soldatenko
"Debugging python applications inside k8s environment", Andrii Soldatenko"Debugging python applications inside k8s environment", Andrii Soldatenko
"Debugging python applications inside k8s environment", Andrii SoldatenkoFwdays
 
WordPress Websites for Engineers: Elevate Your Brand
WordPress Websites for Engineers: Elevate Your BrandWordPress Websites for Engineers: Elevate Your Brand
WordPress Websites for Engineers: Elevate Your Brandgvaughan
 
How AI, OpenAI, and ChatGPT impact business and software.
How AI, OpenAI, and ChatGPT impact business and software.How AI, OpenAI, and ChatGPT impact business and software.
How AI, OpenAI, and ChatGPT impact business and software.Curtis Poe
 
Scanning the Internet for External Cloud Exposures via SSL Certs
Scanning the Internet for External Cloud Exposures via SSL CertsScanning the Internet for External Cloud Exposures via SSL Certs
Scanning the Internet for External Cloud Exposures via SSL CertsRizwan Syed
 
Merck Moving Beyond Passwords: FIDO Paris Seminar.pptx
Merck Moving Beyond Passwords: FIDO Paris Seminar.pptxMerck Moving Beyond Passwords: FIDO Paris Seminar.pptx
Merck Moving Beyond Passwords: FIDO Paris Seminar.pptxLoriGlavin3
 
Gen AI in Business - Global Trends Report 2024.pdf
Gen AI in Business - Global Trends Report 2024.pdfGen AI in Business - Global Trends Report 2024.pdf
Gen AI in Business - Global Trends Report 2024.pdfAddepto
 
Connect Wave/ connectwave Pitch Deck Presentation
Connect Wave/ connectwave Pitch Deck PresentationConnect Wave/ connectwave Pitch Deck Presentation
Connect Wave/ connectwave Pitch Deck PresentationSlibray Presentation
 
Streamlining Python Development: A Guide to a Modern Project Setup
Streamlining Python Development: A Guide to a Modern Project SetupStreamlining Python Development: A Guide to a Modern Project Setup
Streamlining Python Development: A Guide to a Modern Project SetupFlorian Wilhelm
 
Developer Data Modeling Mistakes: From Postgres to NoSQL
Developer Data Modeling Mistakes: From Postgres to NoSQLDeveloper Data Modeling Mistakes: From Postgres to NoSQL
Developer Data Modeling Mistakes: From Postgres to NoSQLScyllaDB
 
Nell’iperspazio con Rocket: il Framework Web di Rust!
Nell’iperspazio con Rocket: il Framework Web di Rust!Nell’iperspazio con Rocket: il Framework Web di Rust!
Nell’iperspazio con Rocket: il Framework Web di Rust!Commit University
 
Advanced Computer Architecture – An Introduction
Advanced Computer Architecture – An IntroductionAdvanced Computer Architecture – An Introduction
Advanced Computer Architecture – An IntroductionDilum Bandara
 
What's New in Teams Calling, Meetings and Devices March 2024
What's New in Teams Calling, Meetings and Devices March 2024What's New in Teams Calling, Meetings and Devices March 2024
What's New in Teams Calling, Meetings and Devices March 2024Stephanie Beckett
 
Take control of your SAP testing with UiPath Test Suite
Take control of your SAP testing with UiPath Test SuiteTake control of your SAP testing with UiPath Test Suite
Take control of your SAP testing with UiPath Test SuiteDianaGray10
 
DevEX - reference for building teams, processes, and platforms
DevEX - reference for building teams, processes, and platformsDevEX - reference for building teams, processes, and platforms
DevEX - reference for building teams, processes, and platformsSergiu Bodiu
 
Ensuring Technical Readiness For Copilot in Microsoft 365
Ensuring Technical Readiness For Copilot in Microsoft 365Ensuring Technical Readiness For Copilot in Microsoft 365
Ensuring Technical Readiness For Copilot in Microsoft 3652toLead Limited
 
"ML in Production",Oleksandr Bagan
"ML in Production",Oleksandr Bagan"ML in Production",Oleksandr Bagan
"ML in Production",Oleksandr BaganFwdays
 

Último (20)

TeamStation AI System Report LATAM IT Salaries 2024
TeamStation AI System Report LATAM IT Salaries 2024TeamStation AI System Report LATAM IT Salaries 2024
TeamStation AI System Report LATAM IT Salaries 2024
 
The Role of FIDO in a Cyber Secure Netherlands: FIDO Paris Seminar.pptx
The Role of FIDO in a Cyber Secure Netherlands: FIDO Paris Seminar.pptxThe Role of FIDO in a Cyber Secure Netherlands: FIDO Paris Seminar.pptx
The Role of FIDO in a Cyber Secure Netherlands: FIDO Paris Seminar.pptx
 
From Family Reminiscence to Scholarly Archive .
From Family Reminiscence to Scholarly Archive .From Family Reminiscence to Scholarly Archive .
From Family Reminiscence to Scholarly Archive .
 
How to write a Business Continuity Plan
How to write a Business Continuity PlanHow to write a Business Continuity Plan
How to write a Business Continuity Plan
 
"Debugging python applications inside k8s environment", Andrii Soldatenko
"Debugging python applications inside k8s environment", Andrii Soldatenko"Debugging python applications inside k8s environment", Andrii Soldatenko
"Debugging python applications inside k8s environment", Andrii Soldatenko
 
WordPress Websites for Engineers: Elevate Your Brand
WordPress Websites for Engineers: Elevate Your BrandWordPress Websites for Engineers: Elevate Your Brand
WordPress Websites for Engineers: Elevate Your Brand
 
How AI, OpenAI, and ChatGPT impact business and software.
How AI, OpenAI, and ChatGPT impact business and software.How AI, OpenAI, and ChatGPT impact business and software.
How AI, OpenAI, and ChatGPT impact business and software.
 
Scanning the Internet for External Cloud Exposures via SSL Certs
Scanning the Internet for External Cloud Exposures via SSL CertsScanning the Internet for External Cloud Exposures via SSL Certs
Scanning the Internet for External Cloud Exposures via SSL Certs
 
Merck Moving Beyond Passwords: FIDO Paris Seminar.pptx
Merck Moving Beyond Passwords: FIDO Paris Seminar.pptxMerck Moving Beyond Passwords: FIDO Paris Seminar.pptx
Merck Moving Beyond Passwords: FIDO Paris Seminar.pptx
 
Gen AI in Business - Global Trends Report 2024.pdf
Gen AI in Business - Global Trends Report 2024.pdfGen AI in Business - Global Trends Report 2024.pdf
Gen AI in Business - Global Trends Report 2024.pdf
 
Connect Wave/ connectwave Pitch Deck Presentation
Connect Wave/ connectwave Pitch Deck PresentationConnect Wave/ connectwave Pitch Deck Presentation
Connect Wave/ connectwave Pitch Deck Presentation
 
Streamlining Python Development: A Guide to a Modern Project Setup
Streamlining Python Development: A Guide to a Modern Project SetupStreamlining Python Development: A Guide to a Modern Project Setup
Streamlining Python Development: A Guide to a Modern Project Setup
 
Developer Data Modeling Mistakes: From Postgres to NoSQL
Developer Data Modeling Mistakes: From Postgres to NoSQLDeveloper Data Modeling Mistakes: From Postgres to NoSQL
Developer Data Modeling Mistakes: From Postgres to NoSQL
 
Nell’iperspazio con Rocket: il Framework Web di Rust!
Nell’iperspazio con Rocket: il Framework Web di Rust!Nell’iperspazio con Rocket: il Framework Web di Rust!
Nell’iperspazio con Rocket: il Framework Web di Rust!
 
Advanced Computer Architecture – An Introduction
Advanced Computer Architecture – An IntroductionAdvanced Computer Architecture – An Introduction
Advanced Computer Architecture – An Introduction
 
What's New in Teams Calling, Meetings and Devices March 2024
What's New in Teams Calling, Meetings and Devices March 2024What's New in Teams Calling, Meetings and Devices March 2024
What's New in Teams Calling, Meetings and Devices March 2024
 
Take control of your SAP testing with UiPath Test Suite
Take control of your SAP testing with UiPath Test SuiteTake control of your SAP testing with UiPath Test Suite
Take control of your SAP testing with UiPath Test Suite
 
DevEX - reference for building teams, processes, and platforms
DevEX - reference for building teams, processes, and platformsDevEX - reference for building teams, processes, and platforms
DevEX - reference for building teams, processes, and platforms
 
Ensuring Technical Readiness For Copilot in Microsoft 365
Ensuring Technical Readiness For Copilot in Microsoft 365Ensuring Technical Readiness For Copilot in Microsoft 365
Ensuring Technical Readiness For Copilot in Microsoft 365
 
"ML in Production",Oleksandr Bagan
"ML in Production",Oleksandr Bagan"ML in Production",Oleksandr Bagan
"ML in Production",Oleksandr Bagan
 

Fps tutorial 2

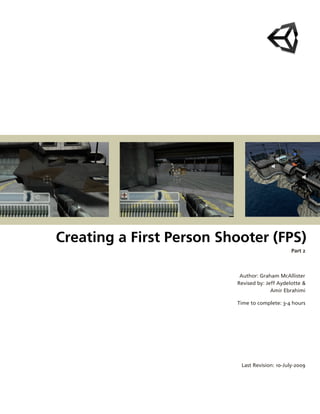
  • 1. 
 Creating
a
First
Person
Shooter
(FPS) Part
2 Author:
Graham
McAllister Revised
by:
Jeff
Aydelotte
& Amir
Ebrahimi Time
to
complete:
3­4
hours Last
Revision:
10­July­2009
  • 2. Contents 1. Part
2:
Enhancements Prerequisites
 3 Before
we
begin
­
level
setup
 3 Weapon
switching
 4 Rocket
Launcher
 5 Hit
Points
 16 Sentry
Gun
 20 Skybox
 22 Acknowledgments
 23
  • 3. Part
2:
Enhancements This
intermediate­level
 tutorial
extends
upon
the
 Basic
FPS
tutorial
by
 introducing
game
elements
 such
as
multiple
weapons,
 damage
and
enemies. Prerequisites This
tutorial
assumes
that
you
are
familiar
with
the
Unity
interface
and
basic
scripting
 concepts.
Additionally,
you
should
already
be
familiar
with
the
concepts
discussed
in
 Part
1
of
the
FPS
tutorial
series. Before
we
begin
­
level
setup Download
FPS_Tutorial.zip,
unzip,
and
open
the
project
folder
in
Unity.
If
you
 have
completed
Part
1,
then
unzip
the
files
to
a
new
folder. Import
the
Standard
Assets
Unity
Package. Add
the
mainLevelMesh
and
FPS
controller
prefab
to
the
scene. NOTE
 In
this
tutorial
no
new
scripts
need
to
created.
We’ll
be
using
the
ones
that
 were
downloaded
from
the
Unity
Package.
  • 4.   Weapon
switching Before
we
discuss
how
to
create
each
individual
weapon,
we
need
to
write
some
code
 to
manage
how
the
weapons
are
initialized
and
switched
from
one
to
another. 
Let’s
 look
at
the
Javascript
for
PlayerWeapons.js: function Awake() { // Select the first weapon SelectWeapon(0); } This
function
initializes
weapon
0
as
the
default
weapon. function Update() { // Did the user press fire? if (Input.GetButton ("Fire1")) BroadcastMessage("Fire"); if (Input.GetKeyDown("1")) { SelectWeapon(0); } else if (Input.GetKeyDown("2")) { SelectWeapon(1); 4
  • 5. } } This
function
detects
keyboard
input;
the
fire
button,
the
“1”
button
for
weapon
1
or
 the
“2”
button
for
weapon
2. 
The
weapons
will
be
children
objects
of
the
Main
Cam­ era. function SelectWeapon(index : int) { for (var i=0;i<transform.childCount;i++) { // Activate the selected weapon if (i == index) transform.GetChild(i).gameObject.SetActiveRecursively(true); // Deactivate all other weapons else transform.GetChild(i).gameObject.SetActiveRecursively(false); } }   This
activates
the
corresponding
weapon
depending
on
keyboard
input. Let’s
use
the
above
code. Create
an
empty
game
object
called
Weapons. 
Move
this
so
that
it
is
a
child
ob­ ject
to
Main
Camera
(inside
FPS
controller). 
Our
weapons
will
be
added
as
chil­ dren
of
this
object. Assign
the
PlayerWeapons.js
script
to
the
Weapons
game
object
under
Main
 Camera. We’ll
now
create
our
first
weapon. Rocket
Launcher This
section
will
describe
how
to
make
a
rocket
launcher
style
weapon.  Launcher The
rocket
launcher
is
responsible
for
instantiating
a
rocket
and
giving
it
an
initial
ve­ locity.
The
rocket
will
be
launched
directly
at
wherever
the
user
is
pointing
and
will
be
 destroyed
whenever
it
collides
with
another
collider. Add
an
empty
game
object
and
name
it
RocketLauncher. 
Position
the
game
ob­ ject
in
the
approximate
position
where
the
FPS
Controller’s
hands
would
be. 5
  • 6. Add
the
RocketLauncher
as
a
child
to
the
Weapons
game
object
inside
the
Main
 Camera
in
the
Hierarchy
View.
This
allows
us
to
shoot
wherever
the
camera
is
 pointing
and
also
makes
sure
that
the
RocketLauncher
game
object
follows
the
 FPS
Controller
as
it
moves
around
(as
Main
Camera
is
a
child
of
FPS
Controller). Click
on
Objects/weapons/rocketLauncher
in
the
Project
window
and
make
sure
 that
the
FBXImporter
Scale
Factor
is
set
to
1,
otherwise
the
model
will
import
at
 a
very
small
scale. Drag
Objects/weapson/rocketLauncher
model
so
that
it
is
a
child
of
the
Rocket­ Launcher
game
object. The
code
for
the
RocketLauncher.js
script
is
as
follows: var projectile : Rigidbody; var initialSpeed = 20.0; var reloadTime = 0.5; var ammoCount = 20; private var lastShot = -10.0; function Fire () { // Did the time exceed the reload time? if (Time.time > reloadTime + lastShot && ammoCount > 0) { // create a new projectile, use the same position and rotation as the Launcher. var instantiatedProjectile : Rigidbody = Instantiate (projectile, transform.position, transform.rotation); // Give it an initial forward velocity. The direction is along the z-axis of // the missile launcher's transform. instantiatedProjectile.velocity = transform.TransformDirection( Vector3 (0, 0, initialSpeed)); // Ignore collisions between the missile and the character controller Physics.IgnoreCollision(instantiatedProjectile.collider, transform.root.collider); lastShot = Time.time; ammoCount--; } }   This
code
ensures
that
the
weapon
can’t
fire
faster
than
reloadTime. 
It
also
checks
 that
the
user
can
fire
only
when
they
have
sufficient
ammo. 6
  • 7. The
behavior
for
the
RocketLauncher
is
similar
to
that
in
the
previous
FPS
tutorial
with
 the
exception
of
the
reload
time
and
ammo
count
described
above. Attach
the
RocketLauncher.js
script
to
the
RocketLauncher
game
object.
Make
 sure
that
you
are
not
attaching
this
script
to
the
rocketLauncher
child
game
ob­ ject. Rocket We
will
now
build
the
rocket
in
the
scene
and
upload
the
final
version
to
a
prefab. Click
on
Objects/weapons/rocket
in
the
Project
window
and
make
sure
that
the
 FBXImporter
Scale
Factor
is
set
to
1,
otherwise
the
model
will
import
at
a
very
 small
scale. Drag
the
Objects/weapons/rocket
model
into
the
Scene
view. Attach
the
WeaponScripts/Rocket.js
script
to
it. Add
a
box
collider
to
the
rocket
game
object. Make
the
box
collider
slightly
 larger
than
the
actual
rocket
to
prevent
tunneling
of
collisions. 
Tunneling
of
 collisions
is
what
happens
when
small,
fast
game
objects
avoid
collision
detec­ tion
due
to
their
size
and
speed. 
Making
the
box
collider
z­axis
larger
ensures
 collisions
work
correctly
for
these
objects. In
the
Rigidbody
of
the
rocket
game
object,
deselect
Use
Gravity. 
This
ensures
 that
the
rocket
does
not
fall
under
gravity. Create
a
particle
system:
Game
Object
­>
Create
Other
­>
Particle
System. Modify
the
Ellipsoid
x,y,z
sizes
to
0.1. Modify
the
Rnd
Velocity
to
0.1
in
each
axis
also. Change
the
particle
emitter
Min
Size
and
Max
Size
to
0.5. Change
the
number
of
particles
emitted
to
100
(Min
and
Max
Emission). Drag
the
Particle
Effects/smoke
onto
the
particle
system. In
the
Particle
Animator
section,
set
each
of
the
World
Rotation
Axis
values
to
 0.5. Set
the
Size
Grow
variable
to
3. Enable
Autodestruct
on
the
particle
system. 
This
ensures
that
the
particle
sys­ tem
is
removed
from
the
game
after
the
rocket
has
been
destroyed. Drag
the
particle
system
in
the
Hierarchy
View
so
that
it
is
a
child
of
the
rocket. 
 Reset
the
transform
of
the
particle
system
so
that
it
is
centred
on
the
rocket,
 then
modify
the
position
so
that
it
is
at
the
rear
of
the
rocket. 7
  • 8. Select
the
rocket
in
the
Hierarchy
view
and
check
that
the
smoke
trail
follows
it
 around
in
the
Scene
view
if
you
move
it
around. We’ve
now
made
our
rocket,
complete
with
smoke
trail. 
We’re
now
ready
to
upload
 our
changes
to
the
prefab. Firstly,
create
an
empty
prefab
to
upload
our
changes
to. 
Call
the
prefab
 ‘Rocket’. Select
the
rocket
in
the
Hierarchy
view
and
drag
it
onto
the
new
Rocket
prefab.  Create
a
new
directory
in
the
Project
view
called
‘WeaponPrefabs’
to
store
our
 weapon
prefabs
in. Here’s
the
Javascript
for
Rocket.js: // The reference to the explosion prefab var explosion : GameObject; var timeOut = 3.0; // Kill the rocket after a while automatically function Start () { Invoke("Kill", timeOut); } The
Kill
function,
firstly,
finds
the
particle
emitter
in
the
child
hierarchy
and
turns
its 
 emitter
off. 
Next,
it
detaches
any
children
(e.g.
Smoke
trail
particle
system)
from
the
 object
the
script
is
attached
to
(the
rocket)
and
destroys
the
rocket. 8
  • 9. function OnCollisionEnter (collision : Collision) { // Instantiate explosion at the impact point and rotate the explosion // so that the y-axis faces along the surface normal var contact : ContactPoint = collision.contacts[0]; var rotation = Quaternion.FromToRotation(Vector3.up, contact.normal); Instantiate (explosion, contact.point, rotation); // And kill our selves Kill (); } function Kill () { // Stop emitting particles in any children var emitter : ParticleEmitter= GetComponentInChildren(ParticleEmitter); if (emitter) emitter.emit = false; // Detach children - We do this to detach the trail rendererer which // should be set up to auto destruct transform.DetachChildren(); The
most
important
line
is
the
transform.DetachChildren()
function. 
This
is
 called
prior
to
destroying
the
gameObject
(the
rocket)
so
that
when
the
rocket
is
de­ stroyed
the
trail
will
now
remain
as
it
is
no
longer
a
child. // Destroy the projectile Destroy(gameObject); } @script RequireComponent (Rigidbody)   The
@script
command
ensures
that
a
Rigidbody
is
attached
to
the
component
that
 the
script
is
attached
to
(as
the
script
requires
a
Rigidbody). Once
a
rocket
instance
collides
with
another
collider,
we
want
to
destroy
the
rocket
 game
object. 
However,
if
the
trail
is
directly
attached
to
the
rocket,
this
will
be
de­ stroyed
also,
and
the
trail
will
disappear
suddenly. 
It
is
important
to
detach
the
smoke
 trail
from
the
rocket
before
destroying
the
rocket. Notice
that
the
rocket
can
be
killed
in
one
of
two
ways,
either
it
is
destroyed
if
it
has
 survived
for
more
then
3
seconds
(e.g.
shot
into
the
air),
or
it
is
destroyed
if
it
collides
 with
an
object. 9
  • 10. Select
the
RocketLauncher
game
object. Drag
the
Rocket
prefab
from
WeaponPrefabs
onto
the
Projectile
slot
in
the
In­ spector. Play
the
game,
when
you
fire
a
rocket,
it
should
have
a
smoke
trail
following
it.  Explosions You
probably
noticed
that
when
you
fired
a
rocket
there
was
no
explosion
when
it
 collided.
We’ll
add
one
in
now. Drag
the
Standard
Assets/Particles/Small
explosion
prefab
onto
the
exposed
 variable
Explosion
in
the
Rocket
component
of
the
Rocket
prefab. We
still
need
to
define
the
behavior
of
our
explosion.
Here’s
the
code
for
the
 Explosion­Simple.js
script: var explosionRadius = 5.0; var explosionPower = 10.0; var explosionDamage = 100.0; var explosionTime = 1.0; function Start () { var explosionPosition = transform.position; var colliders : Collider[] = Physics.OverlapSphere (explosionPosition, explosionRadius); This
returns
an
array
of
colliders
within
the
volume
of
the
sphere. for (var hit in colliders) { if (!hit) continue; if (hit.rigidbody) { hit.rigidbody.AddExplosionForce(explosionPower, explosionPosition, explosionRadius, 3.0); This
adds
an
upward
force
to
all
rigidbodies
within
range
of
the
explosion
(the
 sphere).  Basically
this
makes
the
explosion
look
good!


 10
  • 11. var closestPoint = hit.rigidbody.ClosestPointOnBounds(explosionPosition); var distance = Vector3.Distance(closestPoint, explosionPosition); // The hit points we apply fall decrease with distance from the hit point var hitPoints = 1.0 - Mathf.Clamp01(distance / explosionRadius); hitPoints *= explosionDamage; This
calculates
how
much
damage
to
apply
to
each
rigidbody
caught
in
the
explosion.
 The
degree
of
damage
decreases
the
further
a
rigidbody
is
from
the
centre
of
the
ex­ plosion. // Tell the rigidbody or any other script attached to the hit object // how much damage is to be applied! hit.rigidbody.SendMessageUpwards("ApplyDamage", hitPoints, SendMessageOptions.DontRequireReceiver); This
sends
a
message
to
apply
the
damage
to
the
rigidbody. } } // stop emitting ? if (particleEmitter) { particleEmitter.emit = true; yield WaitForSeconds(0.5); particleEmitter.emit = false; } // destroy the explosion Destroy (gameObject, explosionTime); } Add
the
Explosion­Simple
script
as
a
component
to
the
Small
explosion
prefab. This
explosion
script
can
be
used
as
a
generic
explosion
script
for
any
game
object
that
 requires
explosions. 
To
tailor
the
script
to
suit
each
specific
case,
just
modify
variables
 such
as: • explosionPower
­
the
degree
of
force
with
which
the
explosion
will
cause
nearby
ob­ jects
to
move. • explosionDamage
­
how
many
hit
points
the
explosion
will
cause. 11
  • 12. • explosionRadius
­
the
effect
radius
of
the
explosion. The
Explosion
script
is
very
similar
to
that
used
in
the
previous
FPS
tutorial
with
the
 main
difference
being
the
introduction
of
hit
points. 
The
hit
points
variable
scales
the
 explosionDamage
variable
based
on
distance,
with
object
at
the
outer
edge
of
the
 radius
having
lesser
damage
than
those
at
the
center
of
the
explosion. This
means
it’s
now
possible
for
an
explosion
to
inflict
damage
to
objects
near
to
 where
it
collided. 
How
to
use
hit
points
for
each
object
will
be
discussed
in
more
de­ tail
later. Play
the
game. Machine
Gun The
machine
gun
style
weapon
offers
a
faster
rate
of
fire
than
the
rocket
launcher
 however
each
bullet
impact
does
less
damage. Create
an
empty
game
object
and
name
it
MachineGun. 
Add
this
as
a
child
ob­ ject
to
Weapons
in
the
Hierarchy
View. Add
Objects/weapons/machineGun
to
the
empty
MachineGun
game
object. Assign
the
MachineGun.js
script
to
the
MachineGun
game
object. Assign
muzzle_flash
(it’s
a
child
of
machineGun)
to
the
Muzzle
Flash
variable
of
 the
Machine
Gun
component
of
the
MachineGun
game
object.  Here’s
the
complete
code
for
MachineGun.js: var range = 100.0; var fireRate = 0.05; var force = 10.0; var damage = 5.0; var bulletsPerClip = 40; var clips = 20; var reloadTime = 0.5; private var hitParticles : ParticleEmitter; var muzzleFlash : Renderer; private var bulletsLeft : int = 0; private var nextFireTime = 0.0; private var m_LastFrameShot = -1; function Start () { hitParticles = GetComponentInChildren(ParticleEmitter); // We don't want to emit particles all the time, only when we hit something. if (hitParticles) 12
  • 13. hitParticles.emit = false; bulletsLeft = bulletsPerClip; } The
Start
function
is
really
just
initializing
the
particle
emitter
(bullet
spark)
so
that
 it
is
turned
off. function LateUpdate() { if (muzzleFlash) { // We shot this frame, enable the muzzle flash if (m_LastFrameShot == Time.frameCount) { muzzleFlash.transform.localRotation = Quaternion.AngleAxis(Random.Range(0, 359), Vector3.forward); muzzleFlash.enabled = true; if (audio) { if (!audio.isPlaying) audio.Play(); audio.loop = true; } } // We didn't, disable the muzzle flash else { muzzleFlash.enabled = false; enabled = false; // Play sound if (audio) { audio.loop = false; } } } } The
LateUpdate
function
is
automatically
called
after
an
Update
function
is
called. 
 Note
that
the
Update
function
is
called
in
the
PlayWeapons
script
which
is
attached
 to
the
Weapons
game
object
(it’s
a
parent
of
MachineGun).
Generally
the
LateUp- 13
  • 14. date
function
will
be
used
whenever
you
want
to
react
to
something
that
happened
 in
Update. 
In
this
case,
the
player
if
firing
in
the
Update
function,
and
in
LateUp- date
we’re
applying
the
muzzle
flash. function Fire () { if (bulletsLeft == 0) return; // If there is more than one bullet between the last and this frame // Reset the nextFireTime if (Time.time - fireRate > nextFireTime) nextFireTime = Time.time - Time.deltaTime; // Keep firing until we used up the fire time while( nextFireTime < Time.time && bulletsLeft != 0) { FireOneShot(); nextFireTime += fireRate; } } The
Fire
function
calculates
if
the
player
should
be
able
to
fire
based
on
the
fire
rate
 of
the
machine
gun. function FireOneShot () { var direction = transform.TransformDirection(Vector3.forward); var hit : RaycastHit; // Did we hit anything? if (Physics.Raycast (transform.position, direction, hit, range)) { // Apply a force to the rigidbody we hit if (hit.rigidbody) hit.rigidbody.AddForceAtPosition(force * direction, hit.point); // Place the particle system for spawing out of place where we hit the surface! // And spawn a couple of particles if (hitParticles) { hitParticles.transform.position = hit.point; hitParticles.transform.rotation = Quaternion.FromToRotation(Vector3.up, hit.normal); 14
  • 15. hitParticles.Emit(); } // Send a damage message to the hit object hit.collider.SendMessageUpwards("ApplyDamage", damage, SendMessageOptions.DontRequireReceiver); } bulletsLeft--; // Register that we shot this frame, // so that the LateUpdate function enabled the muzzleflash renderer for one frame m_LastFrameShot = Time.frameCount; enabled = true; // Reload gun in reload Time if (bulletsLeft == 0) Reload(); } The
FireOneShot
function
starts
by
casting
out
a
ray
in
front
of
the
FPS
Controller
 to
determine
if
the
bullet
has
hit
anything. 
We’ll
limit
the
range
of
the
bullet
to
a
cer­ tain
distance. If
the
raycast
did
intersect
with
a
rigidbody,
then
a
force
is
applied
in
the
forward
di­ rection
to
that
rigidbody
(a
small
force
as
it’s
only
a
machine
gun).
Next
the
bullet
 spark
is
instantiated
at
the
location
where
the
bullet
(ray)
struck.
The
particle
emitter
 is
oriented
so
that
it
is
along
the
normal
of
the
surface
it
struck. Next,
damage
is
applied
to
the
object
by
sending
a
damage
message
to
the
object
that
 was
hit. function Reload () { // Wait for reload time first - then add more bullets! yield WaitForSeconds(reloadTime); // We have a clip left reload if (clips > 0) { clips--; bulletsLeft = bulletsPerClip; } } function GetBulletsLeft () { 15
  • 16. return bulletsLeft; } The
Reload
function
reloads
a
clip
of
ammo
(if
there
are
any
left
of
course). 
The
 amount
of
time
taken
to
reload
can
be 
tweaked
in
the
inspector. Configuring
the
particle
emitter The
MachineGun
needs
a
spark
effect
when
bullets
collide
with
rigidbodies,
let’s
cre­ ate
one. Drag
the
Sparks
prefab
from
the
Standard
Assets/Particles
folder
so
that
it’s
a
 child
of
machineGun
(not
MachineGun)
in
the
Hierarchy
View. That’s
it! 
Play
the
game.
Don’t
forget
that
1
and
2
on
the
keyboard
are
used
to
 switch
weapons. Hit
Points The
Explosion
and
MachineGun
Javascripts
have
already
shown
how
to
calculate
the
 degree
of
damage
caused
by
a
projectile
(rocket
or
bullet),
and
send
this
value
to
all
 nearby
game
objects.
However,
game
objects
do
not
yet
know
how
to
respond
to
this
 value. Game
objects
can
keep
track
of
how
healthy
they
are
by
using
a
hitPoints
variable. 
 Each
object
will
be
initialized
to
its
own
value
(depending
on
how
strong
it
is).
Each
 game
object
that
should
respond
to
damage
should
also
have
an
ApplyDamage()
 function
(note
this
is
the
function
called
from
the
Explosion
and
MachineGun
scripts
 to
apply
the
damage). 
This
function
will
decrement
hit
points
from
the
game
object
 as
necessary
and
call
functions
to
handle
what
happens
when
the
hit
points
reach
0
 (typically
a
death
or
explosion
state). The
next
section
will
demonstrate
how
hitPoints
and
ApplyDamage()
are
used. Exploding
Barrels The
code
we’re
about
to
look
at
is
generic,
so
the
Javascript
can
be
added
as
a
com­ ponent
to
any
object
that
can
have
damage
applied
to
it. 
Here
is
the
complete
code
 for
DamageReceiver.js: var hitPoints = 100.0; var detonationDelay = 0.0; var explosion : Transform; var deadReplacement : Rigidbody; function ApplyDamage (damage : float) { // We already have less than 0 hitpoints, maybe we got killed already? 16
  • 17. if (hitPoints <= 0.0) return; hitPoints -= damage; if (hitPoints <= 0.0) { // Start emitting particles var emitter : ParticleEmitter = GetComponentInChildren(ParticleEmitter); if (emitter) emitter.emit = true; Invoke("DelayedDetonate", detonationDelay); } } This
function
applies
the
damage
to
the
game
object
which
has
been
shot
or
caught
in
 an
explosion. 
If
the
object’s
hit
points
are
already
0
or
less,
then
nothing
is
done,
oth­ erwise
the
hit
point
counter
is
decremented
by
the
value
passed
in
(damage). 
If
the
 resulting
hit
points
are
now
less
than
0
the
DelayedDetonate
function
is
called
(de­ lays
can
make
the
explosion
look
cool;
no
other
reason). function DelayedDetonate () { BroadcastMessage ("Detonate"); } This
calls
the
Detonate
method
on
the
game
object
and
its
children. function Detonate () { // Destroy ourselves Destroy(gameObject); // Create the explosion if (explosion) Instantiate (explosion, transform.position, transform.rotation); If
there’s
an
explosion
prefab
attached
to
the
barrel,
then
display
that
when
the
bar­ rel’s
hit
points
reach
zero. 17
  • 18. // If we have a dead barrel then replace ourselves with it! if (deadReplacement) { var dead : Rigidbody = Instantiate(deadReplacement, transform.position, transform.rotation); // For better effect we assign the same velocity to the exploded barrel dead.rigidbody.velocity = rigidbody.velocity; dead.angularVelocity = rigidbody.angularVelocity; } If
the
game
object
has
a
dead
equivalent,
in
this
case
a
barrel
which
looks
burnt
out,
 then
replace
the
normal
game
object
with
its
dead
equivalent. 
We
make
sure
the
ob­ ject
keeps
traveling
in
the
direction
that
it
was
going
when
its
hit
points
reached
zero. // If there is a particle emitter stop emitting and detach so it doesnt get destroyed // right away var emitter : ParticleEmitter = GetComponentInChildren(ParticleEmitter); if (emitter) { emitter.emit = false; emitter.transform.parent = null; } } // We require the barrel to be a rigidbody, so that it can do nice physics @script RequireComponent (Rigidbody)   Let’s
set
up
our
game
to
use
the
DamageReceiver
script
on
some
barrels. 
Let’s
start
by
 importing
some
assets. Drag
Objects/crateAndBarrel/barrel
into
the
Scene
View. Add
a
Rigidbody
component
to
the
barrel. Add
a
box
collider
to
the
barrel
(Component
­>
Physics
­>
Box
Collider). 
You
 may
want
to
tune
the
size
of
the
box
collider
so
that
it
is
a
better
fit
to
the
 barrel. 
Do
this
by
altering
the
Size
properties
of
Box
Collider
in
the
Inspector
 View. Attach
the
DamageReceiver
script
to
Barrel
in
the
Hierarchy
View. Assign
the
Standard
Assets/Particles/explosion
prefab
to
the
Explosion
property
 (in
the
Damage
Receiver
component
of
Barrel). 18
  • 19. Create
a
new
prefab
called
Barrel
(note
capital
B,
the
imported
barrel
has
a
 small
‘b’). Drag
the
barrel
we
have
configured
from
the
Hierarchy
View
into
the
newly
 created
prefab
in
the
Project
View. Add
several
Barrels
to
the
Scene
View
(use
duplicate
as
it’s
easier). Play
the
game.    You’ll
notice
when
the
barrels
explode
they
just
disappear,
we’ll
now
add
a
dead
re­ placement
barrel
(a
barrel
that
looks
blown
up). Create
another
prefab
called
Barrel­dead. Assign
the
original
barrel
to
the
prefab
(the
one
we
imported
from
Objects/ crateAndBarrel). At
the
moment,
the
Barrel
and
Barrel­dead
objects
look
the
same,
they
both
have
a
 texture
in
common
(barrel1).  We
want
Barrel­dead
to
have
a
texture
that
looks
different
from
Barrel,
so
the
user
 will
know
when
it
has
exploded,
something
that
looks
burnt
out
would
do. 
If
we
 modify
barrel1
texture
to
give
this
effect,
then
the
Barrel
object
will
also
be
modified,
 as
Barrel
and
Barrel­dead
both
share
this
same
texture.  
To
solve
this
problem,
we
 must
create
a
new
texture
and
assign
that
to
Barrel­dead.
We’ll
do
this
by
firstly
copy­ ing
the
barrel1
material
and
modifying
it
to
resemble
a
burned
out
look. Select
Barrel­dead
in
the
Project
View
and
click
on
barrel1
under
the
Mesh
Ren­ derer
Materials
section
of
the
Inspector
View. 
The
barrel1
material
will
highlight
 in
the
Project
View. 19
  • 20. Duplicate
the
barrel1
material
(inside
the
Materials
folder)
(command/ctrl+D)
 and
name
the
copy
barrelDead. 
Note
that
duplicate
will
likely
be
named
bar­ rel2. We’ll
now
modify
the
look
of
this
texture
so
it
looks
burnt
out. 
Make
sure
the
 barrelDead
material
is
still
selected
and
click
on
Main
Color
in
the
Inspector
 View. 
Drag
each
of
the
R,G,B
sliders
to
the
left­hand
side
(close
to
0),
this
will
 give
the
texture
a
black
(or
burnt)
appearance. Assign
this
new
material
to
Barrel­ dead
by
firstly
selecting
Barrel­dead
 in
the
Project
View,
then
expanding
 the
Materials
section
in
the
Inspector
 View.
Now
select
the
drop­down
 menu
next
to
barrel1
and
assign
the
 material
we
just
created,
barrelDead. Verify
that
Barrel
and
Barrel­dead
 both
look
different
by
dragging
them
 into
the
Scene
View
and
comparing
 them. 
Delete
BarrelDead
from
the
 Scene
View
again,
as
it
should
only
appear
once
a
barrel
has
been
blown
up. Next,
add
Box
Collider
and
Rigidbody
components
to
the
Barrel­dead
prefab
 (the
Barrel
prefab
should
already
have
them,
check
anyway). Assign
the
Barrel­dead
prefab
to
the
Dead
Replacement
property
of
Barrel. Play
the
game,
the
barrels
should
now
explode
and
have
the
burned
out
effect. Sentry
Gun Finally
we’ll
add
an
enemy
opponent
to
our
game,
a
sentry
gun.
The
sentry
gun
object
 will
look
for
the
player
and
shoot
at
them. Let’s
start
by
importing
the
sentry
gun
weapon. Drag
the
Objects/weapons/sentryGun
onto
the
Scene
View. Add
a
box
collider
and
a
rigidbody
to
the
sentryGun. Adjust
the
size
and
shape
of
the
box
collider
so
that
it
resembles
a
thin
column
 which
covers
the
turret
of
the
gun. 
The
tall,
thin,
column
will
make
sure
that
 the
gun
has
a
high
centre
of
gravity
and
will
fall
over
easily
when
shot. Attach
the
DamageReceiver
script
to
the
sentryGun. We’re
now
ready
to
examine
the
code
for
the
sentry
gun. 
Here’s
the
full
code
for
 SentryGun.js: 20
  • 21. var attackRange = 30.0; var shootAngleDistance = 10.0; var target : Transform; function Start () { if (target == null && GameObject.FindWithTag("Player")) target = GameObject.FindWithTag("Player").transform; } The
Start
function
checks
to
see
if
a
target
has
been
assigned
for
the
gun
(this
can
 be
done
in
the
inspector),
but
it’s
much
easier
to
assign
the
Player
tag
to
the
FPS
con­ troller
using
the
inspector
(we’ll
do
this
shortly).  function Update () { if (target == null) return; if (!CanSeeTarget ()) return; // Rotate towards target var targetPoint = target.position; var targetRotation = Quaternion.LookRotation (targetPoint - transform.position, Vector3.up); transform.rotation = Quaternion.Slerp(transform.rotation, targetRotation, Time.deltaTime * 2.0); If
the
player
is
within
range,
and
the
sentry
gun
can
see
the
player,
the
gun
turret
will
 rotate
from
the
its
current
rotation
angle
to
the
rotation
angle
of
the
player. // If we are almost rotated towards target - fire one clip of ammo var forward = transform.TransformDirection(Vector3.forward); var targetDir = target.position - transform.position; if (Vector3.Angle(forward, targetDir) < shootAngleDistance) SendMessage("Fire"); } If
the
angle
of
rotation
between
the
player
and
the
current
position
of
the
sentry
gun
 is
less
than
shootAngleDistance,
the
sentry
starts
firing. 21
  • 22. function CanSeeTarget () : boolean { if (Vector3.Distance(transform.position, target.position) > attackRange) return false; var hit : RaycastHit; if (Physics.Linecast (transform.position, target.position, hit)) return hit.transform == target; return false; }   The
CanSeeTarget
function
works
out
if
the
the
sentry
gun
can
see
the
target
(in
 this
case
the
player). Let’s
finish
setting
up
the
sentry
gun. Assign
the
target
for
the
sentry
gun. 
To
do
this,
select
FPS
Controller
in
the
Hi­ erarchy
View
and
then
in
the
Tag
drop
down
box,
select
Player. Attach
the
SentryGun
script
to
the
sentryGunRotateY
child
of
sentryGun. 
This
 ensures
that
only
the
top
of
the
sentry
rotates
and
the
tripod
part
remains
sta­ tionary. Assign
the
explosion
prefab
to
the
Explosion
property
of
the
DamageReceiver
 component
of
sentryGun. Assign
the
sentryGun
to
the
Dead
Replacement
property
of
the
DamageReceiver
 component
(or
you
can
create
an
alternative
dead
replcement
if
you
wish). Assign
the
MachineGun
script
to
sentryGunRotateY. Assign
the
Muzzle
Flash
property
of
the
Machine
Gun
component
with
the
 muzzleflash
asset
which
is
a
child
of
sentryGunTop. Click
on
muzzleflash
in
the
Hierarchy
View,
change
its
shader
to
Particles/ Additive. Play
the
game. 
You
should
now
be
able
to
shoot
the
barrels
and
sentry
gun. Skybox  Let’s
add
a
sky
effect
to
our
scene. Select
Edit­>Render
Settings. 
Drag
the
skyBoxTest
onto
the
Skybox
Material
 property.
You
now
have
sky. 22