

Recomendados
Mais conteúdo relacionado
Mais procurados
Mais procurados (19)
Destaque
Destaque (20)
Semelhante a Scatec 10 - 15 - amirada gmb h
Semelhante a Scatec 10 - 15 - amirada gmb h (20)
Último
Último (20)
Scatec 10 - 15 - amirada gmb h
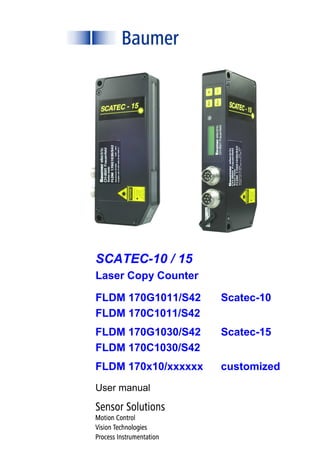
- 1. SCATEC-10 / 15 Laser Copy Counter FLDM 170G1011/S42 Scatec-10 FLDM 170C1011/S42 FLDM 170G1030/S42 Scatec-15 FLDM 170C1030/S42 FLDM 170x10/xxxxxx customized User manual
- 2. User manual Scatec-10 / -15 2 / 44 Baumer Electric AG Version 2011-03 www.baumer.com Frauenfeld, Switzerland General notes Rules for proper usage This product represents a precision measuring device which has been designed for the detection of objects and parts. It generates and provides measured values issued as electrical signals for following systems. Unless this product has not been specifically marked it may not be used in hazardous areas. Set-up Installation, mounting and adjustment of this product may only be executed by skilled employees. Installation Only mounting devices and accessories specifically provided for this product may be used for installation. Unused outputs may not be connected. Unused strands of hard-wired sensors must be isolated. Do not exceed the maximum permissible bending radius of the cable. Before connecting the product electrically the system must be powered down. Where screened cables are mandatory, they have to be used in order to assure EMI protection. When assembling connectors and screened cables at customer site the screen of the cable must be linked to the connector housing via a large contact area.
- 3. User manual Scatec-10 / -15 3 / 44 Baumer Electric AG Version 2011-03 www.baumer.com Frauenfeld, Switzerland Table of contents 1 Safety information 2 Certifications 3 Introduction 4 Principle of operation 5 Part identification 6 Terms and definitions 7 Signal sequence 8 Installation 9 Setting the operational parameters 10 Display and user menu 11 Specifications 12 Accessories 13 Maintenance 14 Troubleshooting 15 Varying data for customized FLDM 170x10/xxxxxx 16 Supplements customized FLDM 170x10/xxxxxx: Data and information varying from the standard manual are listed in section 15 !
- 4. User manual Scatec-10 / -15 4 / 44 Baumer Electric AG Version 2011-03 www.baumer.com Frauenfeld, Switzerland 1 Safety information The laser diode installed in the Scatec-10 / -15 emits visible red light. This laser belongs to the Class 2 laser standard specified by the IEC 60825-1 / 2007. Avoid looking directly into the beam for long periods. Brief irradiation of the eye (0.25 sec) that can occur during an accidental glance is not regarded to be dangerous. However, the laser should not be aimed deliberately at people. The laser beam should also be blocked at the end of its intended path. 2 Certifications Scatec-10 / -15 complies with the following safety standards: Complies with 21CFR 1040.10 and 1040.11
- 5. User manual Scatec-10 / -15 5 / 44 Baumer Electric AG Version 2011-03 www.baumer.com Frauenfeld, Switzerland 3 Introduction As a member of the Scatec family, the Scatec-10 / -15 generally provides a means of detecting object edges. These sensors are best suited for non-contact counting of overlapping paper sheets and newspapers in the printing industry. If an object with an edge facing the laser beam passes through the beam, the sensor reacts with an electrical output pulse. The user has several options to set the Scatec-10 / -15 in such a way that certain edges are recognized as “false edges” and consequently do not initiate an output pulse. This option of suppressing certain edges allows the sensor to count newspapers to the highest degree of accuracy. Within the Scatec family, the Scatec-10 and the Scatec-15 distinguish themselves by the following features: Scatec-10 FLDM 170x1011/S42 Scatec-15 FLDM 170x1030/S42 • detects edges from a thickness of 0.1mm and thicker • detects edges from a thickness of 0.1mm and thicker • optimum working distance: 70 mm • optimum working distance: 100 mm • reliable gap detection via the built-in retro- reflective sensor (allowing consistent recognition of certain edges as “false edges”) • can be synchronized to the conveying speed (allowing for enhanced false pulse suppression) • high precision timing of pulse output • counting rate up to 1.5 million copies per hour • keypad and display for easy parameter setting • with interface for remote control and data collection (allowing analysis of product conditions while production is running. Indispensable for test and “trouble shooting” • with CAN-interface for remote control
- 6. User manual Scatec-10 / -15 6 / 44 Baumer Electric AG Version 2011-03 www.baumer.com Frauenfeld, Switzerland 4 Principle of operation Described simply, the SCATEC-10 / -15 consists of a laser light source and two photo detectors. The beam is aimed diagonally at the objects to be detected. The photodetectors V and R detect laser light scattered by an object in the forward and backward direction, respectively. The ratio of light received by these two detectors differs widely depending on whether the beam strikes a flat surface or an edge. Compared to a flat surface, an edge obstructs the direct line of sight from the point of contact of the laser to the detector V and hence detector V receives less light. At the same time, an edge scatters more light toward detector R than a flat surface. Both effects cause the ratio of forward to backward scattered light v/r to become substantially smaller than with a flat surface. Therefore an edge is characterized by a value of this ratio below a specific threshold. This principle of operation clearly demonstrates that: • The orientation of the object to the beam is significant. An edge facing towards the beam creates a small ratio v/r, in contrast to an edge facing away from the beam. • Edge detection is independent of the color, as only the ratio of the light intensities and not the absolute value is used for detection.
- 7. User manual Scatec-10 / -15 7 / 44 Baumer Electric AG Version 2011-03 www.baumer.com Frauenfeld, Switzerland 5 Part identification Frontwindow Lower edge of sensor Display Keypad Protection cap for Interface connector Interface connectorMain connector Line focus (transverse to the Scatec) Laser beam Edge-LED (amber)
- 8. User manual Scatec-10 / -15 8 / 44 Baumer Electric AG Version 2011-03 www.baumer.com Frauenfeld, Switzerland 6 Terms and definitions Mounting height h Distance between the lower edge of the sensor and the conveying plane. Working distance d Distance between the lower edge of the sensor and the plane where the edge lies on. Note that the working distance equals the mounting height only if the edge lies directly on the conveying plane. Overlap a Interval between two successive edges, measured along the conveying plane. Edge thickness k Thickness of the copy at the point where the edge is to be detected. Front edge The edge of an object which faces the laser beam. In principle, edges facing the laser beam can be detected by the Scatec, independently of the running direction. Tail edge The edge of an object which faces away from the laser beam. Edges facing away from the laser beam cannot be detected by the Scatec and do not initiate output pulses no matter the running direction is. Running direction For Scatec-10 / -15 both running directions are allowed, with the front edge leading (a) or trailing (b). A front edge is detected independently of the running direction. However, for certain false pulse suppression modes to operate properly, the running direction must be set correctly. Interfering edge Folds, fissures, creases, or other imperfections on a newspaper can form edges which will be detected by the Scatec but should not be counted. Such edges are termed “interfering edges” and cause so called “false pulses”. Scatec-10 / -15 offers several possibilities to efficiently suppress these false pulses. Front edge: detectable Tail edge: non-detectable Laser beam Running direction of copy: (a) leading (b) trailing Laser beam k dh a Beam blocker Conveying plane Front edge Tail edge Interfering edge Scatec-1x Running direction
- 9. User manual Scatec-10 / -15 9 / 44 Baumer Electric AG Version 2011-03 www.baumer.com Frauenfeld, Switzerland 7 Signal sequence The yellow edge indicator LED lights as long as the laser beam strikes an edge. The end of an edge (amber edge LED turns off) triggers the output pulse and the dead time. The dead time starts immediately with the trigger, while the delivery of the output pulse can be delayed (pulse delay adjustable by the customer). During the dead time, SCATEC-10 /-15 is inactive, i.e. an edge ending during the dead time will not initiate an output pulse and is therefore suppressed. As a consequence output pulses are separated in time by at least the length of the dead time. Please note, the Scatec-10 / -15 cannot deliver the next pulse before the preceding output pulse has elapsed. Therefore, an edge following after a time shorter than the output pulse length will be suppressed, even when the dead time is set to zero. Suppressed edges do not trigger a dead time. The schematic below shows a pulse sequence where output pulses are delivered with no pulse delay and where some edges are suppressed because they occur during a dead time. For in-depth explanations of pulse length and dead time, please refer to section 9.2 Comments on the operational parameters. amber edge-LED output pulse (pulse period: p) dead time (period: t ) Running direction on off high low on off time t p
- 10. User manual Scatec-10 / -15 10 / 44 Baumer Electric AG Version 2011-03 www.baumer.com Frauenfeld, Switzerland 8 Installation 8.1 Electrical connection Make the electrical connections as specified in Sections 11.2 Electrical data, 11.3 Pin assignment, and 11.6 Wiring instructions. 8.2 Mounting (1) Scatec-10: Mount the sensor at a mounting height h of 70 +/-2mm above or below the conveying plane with the front windows parallel (+/-3°) to the conveying plane. Scatec-15: Mount the sensor at a mounting height h of 100 +/-2mm above or below the conveying plane with the front windows parallel (+/-3°) to the conveying plane. (2) Adjust the sensor so that the laser beam is aimed towards the edges to be counted. Note that the laser beam is focused into a line which must be aligned in parallel to the edges to be detected! (3) Block the laser beam after the objects whenever possible. (4) Keep the window clean (no fingerprints). (5) A direct line of sight from the laser impact point to the entire front window must be ensured. Comments: Mounting height: h Scatec-10: 70 +/-2mm above or below the conveyor belt The resolution depends on the working distance. The highest resolution of 0.10 mm edge thickness is achieved at a working distance d of 68 – 72 mm. (See also section 11.8 Application data) Scatec-15: 100 +/-2mm above or below the conveyor belt The resolution depends on the working distance. The highest resolution of 0.15 mm edge thickness is achieved at a working distance d of 97 – 103 mm. (See also section 11.8 Application data) Tilting tolerance max. +/- 3° Overlap orientation The edges to be counted must face toward the laser beam (front edges) whether they are leading or trailing. Make sure, that the laser line is parallel to the edge to be detected! Front windows The direct line of sight from the impact point of the laser to the entire front window must not be obstructed by any hardware for potential laser impact points in a distance range d of 0 – 150 mm (for Scatec-10) or 0 – 200 mm (for Scatec-15) If mounting brackets or other components are close, consult a technician from Baumer Electric. Scatec-1x Scatec-15: d=200 mm Scatec-10: d=150 mm d Beam blocker +/- 3° 1 3 2 1 Clean windows 4 Scatec-1x 5 Scatec-15: h=100 mm Scatec-10: h= 70 mm Laser line focus transverse to the Scatec
- 11. User manual Scatec-10 / -15 11 / 44 Baumer Electric AG Version 2011-03 www.baumer.com Frauenfeld, Switzerland 8.3 Beam blocker Uncontrolled reflections of the laser beam can cause malfunctioning of the sensor or disturb people. Therefore, a beam blocker should be fitted whenever possible to block the beam when there is no target present. A beam blocker is a flat surface (at least 25mm x 25mm) made of any matte non-reflecting material. It is mounted parallel to the sensor at any convenient distance. The amber edge-LED must not light while the laser beam hits a beam blocker! 8.4 Retro-reflective foil (Part # FTDF 025F025) Gaps in a lap stream can be clearly detected by a Scatec-10 / -15 if the retro-reflective foil (part number FTDF 025F025, shipped with the sensor) is mounted as a beam blocker. Certain false pulse suppression modes are based on a clear gap detection (for detailed explanation of these modes, refer to section 9.2 Comments on the operational parameters.) Correct mounting of the retro-reflective foil: 1.) One side of the foil must be aligned parallel to the laser line. CORRECT FALSE 2.) Scatec-10: Mounting distance: 70mm – 120mm away from the sensor’s lower edge. Tilt: 10° - 60° relative to the conveying plane Scatec-15: Mounting distance: 100mm – 150mm away from the sensor’s lower edge. Tilt: 0° - 45° relative to the conveying plane The amber edge-LED must light while the laser beam hits the retro-reflective foil! 47° Retro-reflective foil Tilt : 10°- 60° Scatec-10 70 – 120 mm 61° Tilt : 0°- 45° Scatec-15 100 – 150 mm Retro-reflective foil Conveying plane Conveying plane
- 12. User manual Scatec-10 / -15 12 / 44 Baumer Electric AG Version 2011-03 www.baumer.com Frauenfeld, Switzerland 8.5 Cleaning the front windows Fingerprints, dust and other forms of dirt on the front window can impair the function of the sensor. It is normally sufficient to wipe the glass pane dry with a clean (!), soft cloth. Alcohol may be used for heavier soiling. 9 Setting the operational parameters Various parameters allow the customer to fully adjust the Scatec-10 / -15 to the specific demands of the actual application. Parameter adjusting can be done in the following ways: • via a PC, an interface, and the application software ScaDiag (consult the ScaDiag-manual) • via the CAN-interface (only for Scatec-15) (consult the Scatec CAN-manual) • via the sensor’s key pad and display (described below) Parameter setting via the sensor’s key pad and display The setting of the operational parameters is done within a user’s menu, using the four key pads [set], [Esc], [+], and [–]. The user’s menu and the navigation are described in detail in section 10 Display and user menu of this manual. The Scatec’s operational parameters are all grouped together in menu C. This section of the manual describes in detail the characteristics of all the operational parameters. The procedure of how to enter a specific parameter value by means of the key-pad is described in section 10 Display and user menu of this manual. Note that usually the input has to be unlocked before any operational parameters can be changed. The unlocking is done by setting setting parameter [B1] to off as follows: 1.) press [+] until B Locks is shown in the display 2.) press [set] : the display shows now B1: 1 = on Input lock 3.) press [set] : 1 = on is blinking 4.) press [+] until 0 = off is shown blinking in the display 5.) keep [set] pressed until blinking stops Now the input is unlocked and the desired operational parameters can be set in menu C. The input will be locked again if no key is pressed for 30 minutes.
- 13. User manual Scatec-10 / -15 13 / 44 Baumer Electric AG Version 2011-03 www.baumer.com Frauenfeld, Switzerland Flow chart for setting the operational parameters FLDM 170G.... FLDM 170C.... C2 False Pulse Suppression 0 = off 1 = on C3 Suppression Mode 00 dynamic 01 synchronous 02 fixed 03 reflective C4 Dead Time [%] value 18 C7 Encoder A/B 0 = off (A only) 1 = on (A/B) C8 Dead Time [ms] value 20 C9 Pulse Delay 0 = off 1 = on C10 Pulse Delay [ms] value 100 C11 Pulse Delay [mm] value 100 C14 Short Pulse Suppression 0 = off 1 = on C13 Tail Edge Suppression 0 = standard 1 = extended C9 Pulse Delay 0 = off 1 = on C12 Output at End of Pulse Train 0 = first 1 = last C0 Pulse Length [msec] value 10.0 Operational parameters are set ! C Parameters C1 Running Direction 0 = leading 1 = trailing C15 Sensitivity Mode 0 = standard 1 = customized C16 Sensitivity Setting 01 high 02 medium 03 low 04 very low C17 Threshold value 179 C18 Hysteresis value 32 Operational parameters are set ! C5 Encoder resolution [mm/pulse] value 1 C6 Dead Path [mm] value 20 Default values are underlined. In most cases, the default setting will provide good results. The factory preset default values can be reset anytime in submenu F4. The names in the flow chart appear on the display as shown in square brackets in the next section.
- 14. User manual Scatec-10 / -15 14 / 44 Baumer Electric AG Version 2011-03 www.baumer.com Frauenfeld, Switzerland 9.1 Explanations on the operational parameters Default values are either the underlined input values or the input value in [square brackets]. C0: Pulse Length [Pulse Length] Input values: 0.3ms – 99.9ms in increments of 0.1ms [10ms] Function: to set the duration of an output pulse Comments: On the one hand, the duration of an output pulse must be long enough so that the customer’s control system can process it. On the other hand, the length of the output pulse limits the maximum counting rate. Because output pulses must not overlap, the interval between edges must be at least as long as one output pulse length. If the interval is shorter, then this edge will be suppressed meaning that the edge will not initiate an output pulse. The following figure illustrates how every other edge is suppressed because of a too long of an output pulse length. The maximum acceptable output pulse length for a given production rate can be read from the diagram below. Scatec-1x amber edge-LED output pulse pulse length p < interval a on off high low time p high low output pulse pulse length p > interval a some edges are suppressed! a p a 0 5 10 15 20 25 30 35 40 0.010 0.100 1.000 10.000 production rate [million copies / h] maximumoutputpulselength[ms] Maximum acceptable output pulse length and production rate t: theoretical r: recommendedt r
- 15. User manual Scatec-10 / -15 15 / 44 Baumer Electric AG Version 2011-03 www.baumer.com Frauenfeld, Switzerland A helpful rule of thumb is: Output pulse length p in milliseconds must be shorter than 1.2 million divided by the intended production rate given in copies per hour Example: production rate: 130,000 copies/hour resulting maximum output pulse length: 1,200,000 / 130,000 = 9.2 This relation is represented by the solid line in the diagram above. The theoretical value (dashed line) represents the case where the interval between copies becomes equal to the length of an output pulse. Exceeding the recommended value of the output pulse length increases the risk of missing edges due to irregular intervals between copies. Very often the reason for missed copies is not a flaw of the sensor but such fluctuations of the interval in combination with too long an output pulse length. C1: Running direction [RunDirection] Input values: 0 = lead leading 1 = trail trailing Function: to define the direction in which the copies are transported. Comments: A front edge (i.e. an edge facing the laser beam) is detected independently of the running direction. However, for certain false pulse suppression modes to operate properly, the running direction must be set correctly. The terms leading and trailing are used according to the following sketch: Running direction of copies leading trailing Front edge (detectable) Tail edge (non-detectable) Scatec-1x trailing Tail edge (non-detectable) Scatec-1x Front edge (detectable) leading Running direction of copies mounted above conveyor: mounted below conveyor: conveyor conveyor
- 16. User manual Scatec-10 / -15 16 / 44 Baumer Electric AG Version 2011-03 www.baumer.com Frauenfeld, Switzerland C2: False pulse suppression [FP-Suppress.] Input values: 0 = off no false pulse suppression mode will be activated 1 = on a false pulse suppression mode as defined in C3 will be activated Function: To specify whether or not any kind of false pulse suppression mode will be activated. Comments: The specific mode of the false pulse suppression will be defined in menu C3. C3: Suppression mode [Suppr. Mode] Input values: 00 = dyn dynamic dead time 01 = sync synchronous dead time 02 = fixed fixed dead time 03 = refl retro-reflective foil only Function: To select the type of dead time to be used or if the Scatec should react exclusively to the retro-reflective foil. Comments: This menu is accessible only if menu C2 false pulse suppression was previously activated (C2 = 1) General concept of dead time: The time span during which the Scatec does not respond to any occuring edges (output set inactive) is named dead time. By starting a dead time by the end of an edge, a minimum interval between output pulses can be enforced because edges occurring during the dead time will be suppressed, i.e. do not initiate an output pulse nor trigger a dead time. For example, setting a dead time allows counting the cut side of a newspaper, because the multiple edges formed by the individual sheets do not initiate multiple output pulses as long as they occur within the dead time triggered by the first edge as illustrated in the following sketch. The dead time always starts with the end of an edge. The amber edge-LED lights as long as the laser beam strikes an edge. Nevertheless, not every flash of the edge-LED is followed by an output pulse, because the edge might be suppressed! amber edge-LED output pulse (pulse length: p) dead time (length: t) on off Running direction time t p high low high low with deadtime no deadtime Scatec-1x on off output pulse (pulse length: p) on off dead time (length: t = 0)
- 17. User manual Scatec-10 / -15 17 / 44 Baumer Electric AG Version 2011-03 www.baumer.com Frauenfeld, Switzerland There are three different types of dead time depending on how the dead time is specified. Dynamic dead time (00 = dyn): The length of the dead time corresponds to a certain percentage of the mean interval between copies. If dynamic dead time is set as the suppression mode, then the percentage will be set subsequentely in menu C4 (dead time %) . The mean interval between copies is calculated continuously by the internal micro controller of the Scatec-10 / -15 itself and is therefore simultaneously adapted to changes of the conveyor speed. This type of dead time is recommended as long as there is no possibility to synchronize the Scatec. With dynamic dead time as the suppression mode, occasionally, a counting error may occur if the lap-stream starts up very quickly from a standstill (particularly if the conveyor belt initially runs with no load and accelerates to maximum speed before copies appear on the conveyor belt) or when the conveyor belt stops abruptly. Do not use the dynamic dead time mode if the lap stream is highly irregular (i.e. highly varying intervals between copies). Taking single copies out of the otherwise regular lap stream does not cause any problems. Synchronous dead time (01 = sync): The output does not become active again until the conveyor has run a defined distance (regardless of the time it takes the conveyor to do this!). Scatec-10 / -15 can be connected to an encoder, which permits synchronization of the sensor to the conveyor speed. The big advantage of synchronization is that a false pulse suppression mode can be set which is completely independent of the conveyor speed, because now the output is set inactive not for a specific time but for a specifc distance. In the synchronous dead time mode, the output is not set active again until the conveyor has run the dead path defined in menu C6. For example, the problem of multiple pulses generated by vibrations if the conveyor comes to a stand still with an edge exactly in the laser beam can be easily solved this way. Note: Whenever possible, use the synchronous dead time mode! If in menu C3 the synchronous dead time mode has been choosen, then subsequently in menu C5 the encoder resolution in millimeters per encoder pulse, in menu C6 the dead path, and in menu C7 the type of encoder (encoder with A/B- channel or A-channel only) has to be set. Based on the values for the encoder resolution and the dead path, the sensor will calculate internally for how many encoder pulses possible false pulses will be suppressed. Note, that with encoder type A/B choosen, the direction of transportation is taken into account. After an edge, the output is not set active again until the conveyor has run the dead path in the forward direction. If a Scatec-10 / -15 with C7 set on (encoder with A/B-channel) does not give out any pulses although it detects edges (amber LED lights up), then the connections of the A/B channels have been mixed up. In his case the application software ScaDiag would display the warning “conveyor in reverse”. Fixed dead time (02 = fixed): The length of the dead time is set to a fixed value in milliseconds. Note: A fixed dead time imposes a limit to the maximum counting rate in the same way as the output pulse length. The same rule of thumb given in the describtion of C0 applies also to the fixed dead time, just substitute output pulse length by fixed dead time. Retro-reflective foil only (03 = refl): The Scatec-10 / -15 reacts only to the retro-reflective foil and no longer to any edges. Because the Scatec-10 / -15 is equipped with a retro-reflective sensor, the sensor can unambiguously detect gaps in a lap stream, provided that there is a retro- reflecting tape (part number: FTDF 020F020) mounted as a beam blocker. This built-in retro-reflective sensor allows for a counting mode on its own. In the reflective mode, Scatec- / -15 no longer detects edges, but reacts only to shadowing the retro-reflecting tape. As soon as the laser beam no longer strikes the retro-reflecting
- 18. User manual Scatec-10 / -15 18 / 44 Baumer Electric AG Version 2011-03 www.baumer.com Frauenfeld, Switzerland tape, an output pulse is generated. This mode makes it possible to reliably count copies as long as each copy is preceded by a gap. The advantage of reacting solely to the retro-reflective tape is, that copies may have a surface and form of any kind, even heavily wrinkled (such as thick newspapers in a bag), without causing any false pulses, because the sensor does not react to edges in this mode. With the running direction leading, the pulse is issued as soon as the copy enters the laser beam, whereas with the running direction trailing, the pulse issue occurs as soon as the copy exits the laser beam. With retro-reflective foil only as false pulse suppression mode, copies are counted correctly only if every copy is preceded by a gap and if the retro-reflective foil is mounted as beam blocker. C4: Dead time in % [Dead time %] Input values: 0 to 50 in steps of 1 [18%] Function: defines the duration of the dead time as percentage of the mean interval between copies. Comments: This parameter is accessible only if menu C3 dynamic dead time (C3 = 00) was previously activated. Note: Be careful setting this parameter to a value higher than 35%. Otherwise, fast reduction of the conveyor speed might lead to unintentional suppression of edges. C5: Encoder resolution (mm/pulse) [Encodr Resol] Input values: 0.10 to 9.99 in steps of 0.01 [1mm/step] Function: to define the resolution of the encoder given as distance in millimeters which the conveyor travels per encoder pulse. Comments: This parameter is accessible only if menu C3 synchronous dead time (C3 = 01) was previously activated. Make sure that the frequency of the synchronization input does not exceed the specified maximum of 50 kHz. With an encoder resolution of 0.10mm/pulse this frequency is reached at a conveyor speed of 5m/s. C6: Dead Path (mm) [Dead Path mm] Input values: 0 to 499 in steps of 1 [20mm] Function: to define the path in millimeters which the conveyor first has to travel before the output is set active again. Comments: This parameter is accessible only if previously in menu C3 synchronous dead time (C3 = 01) was activated. C7: Encoder A/B [Encoder A/B] Input values: 0 = A only A-channel of the encoder is used 1 = A/B A- and B-channel of the encoder are used (not applicable in case of a FLDM 170C…) Function: to define the type of encoder connected to the Scatec-10 / -15 for synchronization Comments: This parameter is accessible only if menu C3 synchronous dead time (C3 = 01) was previously activated. With A- and B-channel of the encoder used, Scatec will take into account the moving direction of the conveyor and count the distance traveled by the conveyor either positive or negative. The regular running direction of the conveyor has to be positive. The application software ScaDiag shows if the conveyor is moving in reverse direction. If a Scatec-10 / -15 with C7 set on (encoder with A/B-channel) does not give out any pulses although it detects edges (amber LED lights up), then the connections of the A/B channels might have been mixed up. In this case the application software
- 19. User manual Scatec-10 / -15 19 / 44 Baumer Electric AG Version 2011-03 www.baumer.com Frauenfeld, Switzerland ScaDiag would display the warning “conveyor in reverse”. C8: Dead time (msec) [Dead time ms] Input values: 0 to 999 in steps of 1 [20ms] Function: to define the dead time as fixed value in milliseconds. Comments: This parameter is accessible only if previously in menu C3 fixed dead time (C3 = 02) was activated. C9: Pulse delay [Pulse Delay] Input values: 0 = off output pulse issued immediately after end of the edge 1 = on output pulse issued with delay relative to end of the edge Function: to define whether the output pulse is issued right after the end of an edge or with the delay as specified in menu C10 or C11. Comments: A delayed output pulse is required in the following two applications: 1.) to trigger an action which is delayed relative to the end of the edge (for example: to trigger an ink jet printer for labeling newspapers) 2.) to suppress tail edges (for details see C13) This parameter is accessible only if menu C2 false pulse suppression was previously activated (C2 = on). Depending on the mode of false pulse suppression choosen in menu C3, the output pulse delay will be specified in menu C10 in milliseconds or in menu C11 in millimeters. The following sketch shows schematically the signal sequence of undelayed and delayed output pulse sequences. Note that both dead time and the output pulse are triggered with the end of an edge. However, the output pulse issue might be delayed while the dead time always starts right with the trigger. C10: Pulse delay (msec) [Pulse Delay ms] Input values: 0 to 999 in steps of 1 [100ms] Function: to define the value of the output pulse delay in milliseconds. amber edge-LED dead time (length t) Running direction on off high low on off t p undelayed output pulse (pulse length p) Scatec-1x time high low z delayed output pulse (delay z) z
- 20. User manual Scatec-10 / -15 20 / 44 Baumer Electric AG Version 2011-03 www.baumer.com Frauenfeld, Switzerland Comments: This parameter is accessible only if previously in menu C9 delayed output pulse (C9 = on) and in menu C3 either dynamic dead time (C3 = 00) or fixed dead time (C3 = 02) was chosen. A maximum of 10 further edges may occur between the end of an edge and the delayed output pulse. C11: Pulse delay (mm) [Pulse Delay mm] Input values: 0 to 999 in steps of 1 [100mm] Function: to define the value of the output pulse delay in millimeters. Comments: This parameter is accessible only if menu C9 delayed output pulse (C9 = on) and menu C3 synchronous dead time (C3 = 01) were previously activated. A maximum of 10 further edges may occur between the end of an edge and the delayed output pulse. C12: Output pulse triggered by last edge [Out@PlsTrain] Input values: 0 = first output pulse triggered by first edge of edge train 1 = last output pulse triggered by last edge of edge train Function: to define whether the output pulse is triggered by the first or the last edge of a group of multiple edges occurring within one dead time. Comments: This parameter is accessible only if menu C9 delayed output pulse (C9 = on) and menu C3 synchronous dead time (C3 = 01) were previously activated. This parameter should be set to on if thick copies are processed and the Scatec is used to trigger another action (for example: labeling) where as little jitter as possible of the trigger point is required. The following sketch shows the case where the fold of a thick newspaper breaks up into two edges because of a slight indentation. The second edge falls within the dead time triggered by the first edge. With parameter C12 set to 0=first, the output pulse is triggered by the end of the first edge and the second edge is suppressed. If parameter C12 is set to 1=last, the output pulse is initiated by the second edge while it is the first edge which is suppressed. This way, it has been achieved that although the fold is split up into two edges, it is still at the end of the fold where the output pulse is initiated as if the fold would form only one continuous edge. amber edge-LED dead time (length t) Running direction on off high low on off t C12 = first : output pulse triggered by the first edge Scatec-1x time high low z C12 = last : output pulse triggered by the second edge z z z delayedoutputpulse (delay:z)
- 21. User manual Scatec-10 / -15 21 / 44 Baumer Electric AG Version 2011-03 www.baumer.com Frauenfeld, Switzerland C13: Tail edge suppression [Tail Suppr.] Input values: 0 = stand edge suppressed if it is followed by a retro-reflective foil within the dead time 1 = extnd edge suppressed if it is followed by a retro-reflective foil within the output pulse delay time Function: to define whether the area checked for tail edges extends for a dead time (0 = stand) or for an output pulse delay time (1 = extnd). Comments: This parameter is accessible only if menu C9 delayed output pulse (C9 = on) was previously activated. Delaying the output pulse (C9 = on) also automatically activates a tail edge suppression. Parameter C13 decides which area is checked for tail edges. Tail edge suppression does not only suppress tail edges that are sticking up, but also edges generated by small paper scraps on the otherwise empty conveyor. • Tail edge suppression works only with a mounted retro-reflective foil. • Extended tail edge suppression works only with the front edges leading. This configuration is sketched below. Usually newspapers are conveyed shingled and with the folded side facing the laser beam. As a consequence, the cut side of a copy is covered by the next copy and exposed to the laser beam only if there is a gap in the lap stream. The cut side of the newspaper is facing away from the laser beam, forming a tail edge and usually not detectable by the Scatec. However, some of these cut pages might be bent up. In the case of gaps in the lap stream, there is a risk of tail edges generating output pulses. Such bent up tail edges can not be suppressed by means of a dead time because the dead time would be triggered by the fold and had to practically cover the whole length of a copy. But that means a dead time bigger than the overlap leading to the unacceptable suppression of regular copies. However, if the pulse output is delayed and a retro-reflective foil mounted, then the Scatec-10 / -15 can nevertheless be set in such a way that bent up tail edges are completely suppressed. Therefore Scatec-10 / -15 is able to suppress interfering tail edges provided: a retro-reflective foil mounted is mounted the output pulse is delayed (C9 = on) a suitable zone checked for tail edges is chosen (C13 = on or off) A bent up tail edge is suppressed if it is followed by a gap within a specific time (or distance). This time or distance therefore defines a zone on the copy where edges will be suppressed as tail edges and can be set either equal to the dead time (dead path) or equal to the ouput pulse delay chosen earlier. In order to set the tail edge suppression correctly, follow the subsequent flowchart and refer to the sketch below. conveyor Bent up tail edges Fold Cut side of the newspaper Retro-reflective foil Scatec-1x running direction
- 22. User manual Scatec-10 / -15 22 / 44 Baumer Electric AG Version 2011-03 www.baumer.com Frauenfeld, Switzerland is the intended tail edge suppression zone shorter than the dead path or the distance run by the conveyor within a dead time set in menu C4, C6, or C8 ? yes is this intended zone shorter than 2/3 of the copy length ? no yes no invalid configuration ! set C10 or C11 Output pulse delay to value bigger than dead time C4, C6, or C8 set C9 Output pulse delay to 1 = on Edge will be suppressed if it is followed by a gap in the lap stream within the dead time or the dead path set C13 Tail edge suppression to 0 = standard set C10 or C11 Output pulse delay to value equal to the intended tail edge suppression zone set C13 Tail edge suppression to 1 = extended Edge will be suppressed if it is followed by a gap in the lap stream within the output pulse delay no is C1 Running direction set to 0 = leading ? yes Retro-reflective foil Laser beam Overlap Dead time Copy length Tail edge suppression zone Interfering edges Running direction
- 23. User manual Scatec-10 / -15 23 / 44 Baumer Electric AG Version 2011-03 www.baumer.com Frauenfeld, Switzerland C14: Short pulse suppression [ShrtP.Suppr.] Input values: 0 = off short edges are not suppressed 1 = on short pulses are suppressed Function: to define whether short edges should be considered as interfering edges and be suppressed (1 = on) or not (0 =off). An edge is short if its duration is shorther than 25% of the mean edge duration. Comments: This parameter is accessible only if menu C2 False pulse suppression was previously activated (C2 = on). The duration of an edge can be a characteristic which clearly shows whether an edge should be suppressed or not. For example: thick newspapers will always generate long edges, so that a rather short edge within many long edges will most likely be an edge caused by some imperfections on the newspaper. With C14 short pulse suppression activated (C14 = on), edges with a duration of less than 25% of the mean edge duration will be suppressed. The mean edge duration is continuously calculated by the sensor and adapted to the conveyor speed. Short pulse suppression works properly only if the running direction is leading! C15: Sensitivity mode [Sensvty Mode] Input values: 0 = stand standard 1 = custm customized Function: to define whether one of the standard sensitivity levels defined in C16 will be activated or if the sensitivity level will be set specifically by the customer in C17 and C18. Comments: A sensitivity level other than standard should be choosen only if the signals can be controlled by the application software ScaDiag. C16: Sensitivity setting [Sensvt Settg] Input values: 01 = high highest sensitivity 02 = mid medium sensitivity 03 = low low sensitivity 04 = v. low very low sensitivity Function: to define the actual sensitivity of the sensor. Comments: This parameter is accessible only if previously in menu C15 standard sensitivity mode was activated (C15 = 0). Paper sheets of at least 0.1 mm thick will be detected with the Scatec-10 set to its highest sensitivity and mounted at a distance of 68mm to 72mm. The Scatec-15 set to the highest sensitivity will detect sheets 0.15mm thick and larger at a distance of 97mm to 103mm. However, if set to the highest sensitivity, folds or wrinkles could cause interfering edges. If the edges to be detected are thick enough, than it might be an advantage to reduce the sensitivity to become less sensitive to interferences. Note: The sensitivity is dependant on the working distance. Please refer to the diagram in section 11.7 Application data.
- 24. User manual Scatec-10 / -15 24 / 44 Baumer Electric AG Version 2011-03 www.baumer.com Frauenfeld, Switzerland C17 Threshold [Threshold] Input values: 20 to 799 in steps of 1 Function: to define the value which marks the beginning of an edge when the ratio v/r drops below this value. Comments: This parameter is accessible only if menu C16 customized sensitivity mode was previously activated (C15 = 1). C18: Hysteresis [Sens. Hyster.] Input values: 1 to 499 in steps of 1 Function: to define how much the ratio v/r must rise above threshold in order to initiate the end of an edge. Comments: This parameter is accessible only if previously in menu C16 customized sensitivity mode was activated (C16 = 1). 10 Display and user menu Scatec-10 /-15 allows the user to set the parameters in two ways: - manually by means of the keypad and the display (described in this manual) - by means of a PC, an adapter set, and the application software ScaDiag (refer to the ScaDiag-manual) 10.1 General In its normal state, the 2-line LCD- display shows the total number of detected edges on the upper line since the last counter reset and the name of the sensor (either Scatec-15 or Scatec-10) on the lower line. The parameter setting is performed within a user menu. To navigate to a submenu in order to change a parameter value is shown in section 10.2 Navigation. time Threshold Scatec-1x VR Laser v/r Hysteresis Beginning of edge End of edge
- 25. User manual Scatec-10 / -15 25 / 44 Baumer Electric AG Version 2011-03 www.baumer.com Frauenfeld, Switzerland 10.2 Navigation The graph below illustrates how to navigate and change a parameter value based on an example where the value of the pulse length is changed from 12.3ms to 45.6ms in submenu C0. • Submenus not applicable in the present setting will be skipped on the display! • Before parameters can be changed, the key pads have to be unlocked in menu B. With locked key pads, upon pressing set, the reminder input locked will be displayed. 12345678 SCATEC10 A Summary A1: ----------------- ----------------- A5: --------------- ------------------- B1: --------------- ------------------- C0: 12.3 ms Pulse Length D1: ---------------- ------------------ D3: --------------- ------------------- E1: --------------- ------------------- E4: -------------- -------------------- F1: --------------- ------------------- F6: --------------- ------------------- B Locks C Parametrs D Interface E Counters F Options C18: ------------- --------------------- C0: 12.3 ms Pulse Length C0: 45.6 ms Pulse Length C0: 45.6 ms Pulse Length C0: 45.6 ms Pulse Length Esc Set + - S E S E S E S E S E S E S E S E S E S Normal state Menu Submenu Push set until blinking stops blinking S
- 26. User manual Scatec-10 / -15 26 / 44 Baumer Electric AG Version 2011-03 www.baumer.com Frauenfeld, Switzerland 10.3 Menus 10.3.1 Menu A: Summary [Summary] Menu A presents a summary of the current parameter setting. In menu A, no parameters can be set. It serves only as a display. Submenus that are not applicable in the current setting are not shown. For example: submenu A3 does not show up if a factory preset level was chosen for sensitivity. If you have to contact a technician from Baumer Electric because of a problem with the Scatec, always have the parameter values on hand shown in this summary menu. Submenu Values Comments A1: abcd efg hhhhh iiiii a False pulse suppression mode 0 = dynamic dead time 1 = synchronous dead time 2 = fixed dead time 3 = retro-reflective foil only * = not activated b Pulse delay 0 = immediate pulse delivery 1 = delayed pulse delivery * = not activated c running direction 0 = leading 1 = trailing * = not activated d Output pulse triggered by last edge 0 = first edge triggers output pulse 1 = last edge triggers output pulse * = not activated e Short pulse suppression 0 = no short pulse suppression 1 = short pulses will be suppressed * = not activated f A/B Encoder 0 = only A-channel of the encoder is used 1 = A- and B-channel of the encoder are used * = not activated g Sensitivity level 1 = highest 2 = medium 3 = low 4 = very low * = customized h Dead time or path xxxyy length of dead time or path with unit i Output pulse delay xxxyy delay of the output pulse with unit A2: Length Resol aa.a b.bb Output pulse length and encoder resolution aa.a output pulse length in milliseconds b.bb encoder resolution in millimeters / pulse A3: Thresh/Hyst. aaa bbb Threshold and hysteresis aaa customized threshold bbb customized hysteresis
- 27. User manual Scatec-10 / -15 27 / 44 Baumer Electric AG Version 2011-03 www.baumer.com Frauenfeld, Switzerland A4: SW-Revision aaaaaaa Version of the Scatec operation software version consists of 6 numbers plus one letter (example: 060421a) A5: Type FLDM170 Scatec type A6: Remote Param abcd CAN CAN Interface a CAN mode 0 = value of CAN Object 2000 is 3 1 = value of CAN Object 2000 is not 3 b Compensation of synchronization point (CAN-object2300, subindex 02, bit 0) 0 = off 1 = on c Inserting missing counts (CAN-object2300, subindex 02, bit 1) 0 = off 1 = on d Automatic sensitivity adjustment (CAN-object2300, subindex 02, bit 2) 0 = off 1 = on 10.3.2 Menu B: Locks [Locks] To protect the sensor against accidental or unauthorized manipulation of the parameter settings, the input can be blocked in this menu. With a locked sensor, navigation is still possible. There are two security levels. By default, the sensor is on the lower security level where unlocking is done by setting parameter [B1] to off. The sensor will be locked again if no key is pressed for 30 minutes On a higher security level, the sensor can be protected against unauthorized tampering by requiring the user to enter an ID code before the sensor will be unlocked. This higher security level can be activated by setting parameter [F5], Lock-ID-code, to on. The ID-code (which is asked for) is 55 and cannot be changed. Submenu Values Comments B1: Input Lock 0 = off 1 = on sensor unlocked sensor locked B2: Unlock Code xxx ID-code is 55 and can not be changed. (the ID-code-locking is activated in submenu F5).
- 28. User manual Scatec-10 / -15 28 / 44 Baumer Electric AG Version 2011-03 www.baumer.com Frauenfeld, Switzerland 10.3.3 Menu C: Parameters [Parametrs] Operational parameters are set in menu C. A detailed description of these parameters is given in section 9 Setting the operational parameters. • Submenus not applicable in the present setting will be skipped in the display! • With the sensor locked, no parameters can be changed while navigation is still possible. The sensor can be unlocked in menu B. When trying to change a parameter of a locked Scatec, the message “input locked” will show up as reminder. • The sensor will be locked again if no key is pressed for 30 minutes Submenu values Comments C0: Pulse Length xx.x ms Output pulse length in ms value of output pulse length in milliseconds C1: RunDirection 0 = lead 1 = trail Running direction of the copies leading trailing C2: Fp-Suppress 0 = off 1 = on False pulse suppression no false pulse suppression mode will be activated a false pulse suppression mode as defined in [C3] will be activated C3: Suppr.Mode 00 = dyn 01 = sync 02 = fixed 03 = reflx False pulse suppression mode dynamic synchronous fixed retro-reflective foil only C4: Dead Time % xxx Dead time in percentage value of dynamic dead time in percentage of the mean interval between copies C5: Encodr Resol x.xx mm Encoder resolution in mm/pulse value of encoder resolution in millimeters per encoder pulse C6: Dead Path mm xxx mm Dead path in mm value of synchronized dead path mm C7: Encoder A/B 0 = off 1 = on Encoder A/B only A-channel of encoder is used A- and B-channels of encoder are used C8: Dead Time ms xxx ms Dead time in ms value of fixed dead time in milliseconds C9: Pulse Delay 0 = off 1 = on Output pulse delay output pulse issued immediately after end of the edge output pulse issued with delay relative to end of the edge
- 29. User manual Scatec-10 / -15 29 / 44 Baumer Electric AG Version 2011-03 www.baumer.com Frauenfeld, Switzerland C10: Pulse Delay xxx ms Output pulse delay in ms value of output pulse delay in milliseconds C11: Pulse Delay xxx mm Output pulse delay in mm value of output pulse delay in millimeters C12: Out@PlsTrain 0 = first 1 = last Output pulse triggered by last edge output pulse triggered by first edge of edge train output pulse triggered by last edge of edge train C13: Tail.Suppr. 0 = stand 1 = extnd Tail edge suppression edge suppressed if it is followed by a retro- reflective foil within the dead time edge suppressed if it is followed by a retro- reflective foil within the output pulse delay time C14: ShrtP.Suppr. 0 = off 1 = on Short pulse suppression short edges will not be suppressed short edges will be suppressed C15: Sensvty Mode 0 = stand 1 = custm Sensitivity mode standard sensitivity levels as defined in C16 will be activated sensitivity as defined by customer in C17 and in C18 will be activated C16: Sensvt Level 01 = high 02 = mid 03 = low 04 = v.low Sensitivity level highest medium low very low C17: Threshold xxx Threshold C18: Hysteresis xxx Hysteresis value of the hysteresis
- 30. User manual Scatec-10 / -15 30 / 44 Baumer Electric AG Version 2011-03 www.baumer.com Frauenfeld, Switzerland 10.3.4 Menu D: Interface [Interface] Parameters concerning the CAN-interface are set in menu C Only Scatec-15 is equipped with a CAN interface. Submenu Values Comments D2: CAN Baud 00 = 10 kBaud 01 = 20 kBaud 02 = 50 kBaud 03 = 100 kBaud 04 = 125 kBaud 05 = 250 kBaud 06 = 500 kBaud 07 = 800 kBaud 08 = 1000 kBaud CAN Baudrate default value: 01 = 20 kBaud D3: CAN-Node-Id xxx CAN-Node-Id Node-ID must be a number between 1 and 127 (default value: 1) 10.3.5 Menu E: Counter [Counters] In menu E, several counters can be read and reset. Submenu Values Comments E1: Copy Counter xxxxxxxx Copy counter Total number of counted edges or output pulses since last reset E2: marg.counted xxxxxxxx Marginally counted edges Total number of edges which where counted but which dropped only marginally below threshold E3: marg. missed xxxxxxxx Marginally missed edges Total number of edges which were not counted because they marginally missed the threshold E4: Reset Cntrs. 0 = no 1 = yes Counter reset counters will not be reset counters will be reset to 0 The counters are automatically reset upon power up of the sensor
- 31. User manual Scatec-10 / -15 31 / 44 Baumer Electric AG Version 2011-03 www.baumer.com Frauenfeld, Switzerland 10.3.6 Menu F: Options [Options] In menu F, the operational parameters (set in menu C) can be reset to the factory preset default values. Such a reset does not affect any CAN parameters set in menu D. In addition, this menu contains a security code that can be activated to lock the key pad securely. Submenu Values Comments F4: SensrDefault 0 = no 1 = yes Reset of the operational parameters No reset is initiated The factory preset default operational parameter values are loaded F5: Lock-ID-Code 0 = no 1 = yes Sensor locking by ID-Code sensor not locked by ID-Code sensor locked by ID-Code F6: Code Confirm xxx ID-Code confirmation The code is 55 and can not be changed.
- 32. User manual Scatec-10 / -15 32 / 44 Baumer Electric AG Version 2011-03 www.baumer.com Frauenfeld, Switzerland 11 Specifications 11.1 Mechanical and thermal data Sensor size 170 x 70 x 30 mm Housing material zinc die-cast Front windows glass Weight approximately 700 g Protection class IP 54 Working temperature range 0°C to +50°C (non-condens ing) Storage temperature -20°C to +60°C Scatec-10: Scatec-15: 30 70 6 17 6M 170 6158 68 47° ∅06.4 12 13 Laser beam Keypad and display Interface connector Main connector 61° 30 70 6 170 6 59 6M 17 158 ∅6.4 Keypad and display Interface connector Main connector Laser beam13
- 33. User manual Scatec-10 / -15 33 / 44 Baumer Electric AG Version 2011-03 www.baumer.com Frauenfeld, Switzerland 11.2 Electrical data Operating voltage VS Limits: +10 VDC to +30VDC Reverse-protected yes Ripple VS 10% within the limits of VS Power consumption < 2 W Current consumption Average: < 170 mA Peak (after switching on) < 180 mA Connectors Main connector DIN 45322, 6-pole, male Interface connector DIN 45326, 8-pole, male Output circuit FLDM 170G... push-pull normal state low FLDM 170C... opto-isolated switchable voltage maximum 40 V Load resistance maximum 50 kOhm Current load: max. 100 mA Short-circuit protected yes Output pulse length selectable 0.3 … 100ms 11.3 Pin assignment (looking at connector on Scatec) Main connector DIN 45322, 6 pole, male Interface connector DIN 45326, 8 pole, male Pin Assignment 1 output signal +Vout 2 encoder input B (FLDM 170G...) output signal -Vout (FLDM 170C...) 3 operating voltage +Vs 4 encoder GND 5 encoder input A 6 operating voltage GND (0V) Pin Assignment 1 CAN_H 2 not connected 3 serial TxD (sensor) 4 CAN_L 5 serial RxD (sensor) 6 CAN_GND 7 serial GND 8 GND 3 42 1 5 6 6 4 1 2 3 5 7 8
- 34. User manual Scatec-10 / -15 34 / 44 Baumer Electric AG Version 2011-03 www.baumer.com Frauenfeld, Switzerland 11.4 Output connection 11.4.1 Push-pull output (FLDM 170G...) 11.4.2 Opto-isolated output (FLDM 170C...) Polyfuse Pin 3Sensor Load Load Output voltage at VS = 24V Output connected as Current source Current sink VOut GND GND VOut max. 1 V min. 19 V min. 23 V max. 4.5 V 24 V 24 V Output + VS Pin 1 GND +Vs Operating voltage (+10VDC ... +30VDC) Vout Output signal I Load maximum 100 mA Main connector Pin 6 V +VS V +VS load load Output connected as Current source Current sink V2 GND GND V1 typ. 0V min. Vout - 4V typ. Vout max. 4V Vout Polyfuse Pin 6 Pin 2 Pin 1 Pin 3 V +Vout +Vout V +Vout -Vout Sensor +VS GND +VS Operating voltage (+10VDC ... +30VDC) +Vout Output signal + -Vout Output signal - GND 0 V R Load maximum 50 kOhm I Load maximum 100 mA Switchable voltage (+Vout minus -Vout) maximum 40 V Pin 1 Pin 2 Main connector
- 35. User manual Scatec-10 / -15 35 / 44 Baumer Electric AG Version 2011-03 www.baumer.com Frauenfeld, Switzerland 11.5 Synchronization input • opto-isolated input • input signals between 5V and 30 V • for NPN- or PNP-open collector, push-pull, or TTL encoder output • Scatec FLDM 170G…… (push-pull output) accepts an A/B-channel encoder • Scatec FLDM 170C…… (opto-isolated output) accepts an A-channel encoder only. • synchronization input signal levels logical high: > 3.8 V (> 2.2 mA) logical low: < 1.8 V (< 0.7 mA) • frequency max. 50 kHz • reverse polarity: protected 11.6 Wiring instructions In order to achieve optimum protection of the Scatec against electromagnetic interference • use shielded cables • keep the ground impedance sufficiently low We suggest the following two grounding schemes: Version 1 • Scatec housing is grounded (use teeth lock washers when mounting the Sactec). • Cable shield not grounded at the controller end. • Cable shield properly attached to the connector plugging into the Scatec. Pin 5 ( Pin 2 ) Scatec Pin 4 Pin 2 (FLDM 170G... only! ) positive negative positive Pin 4 Pin 5 ( Pin 2 ) Pin 4 + VE + VE Pin 5 ( Pin 2 ) Pin 4 + VE Pin 5 GND E GND E GND E Pin 5 ( Pin 2 ) Pin 4 + VE GND E NPN open collector PNP open collector Push-pull TTL Scatec-10/ -15 Main connector + VE : Output voltage of the encoder GND E : GND of the encoder Scatec-10/-15 Mainconnector Scatec-10/-15 Mainconnector Scatec-10/-15 Mainconnector Scatec-10/-15 Mainconnector Scatec-1x Controller Main connector
- 36. User manual Scatec-10 / -15 36 / 44 Baumer Electric AG Version 2011-03 www.baumer.com Frauenfeld, Switzerland Version 2 • Scatec housing is grounded (use teeth lock washers when mounting the Sactec) • Cable shield properly grounded at the controller end • Cable shield properly attached to the connector plugging into the Scatec. • Keep the impedance of the interconnection between the control unit’s ground and the Scatec ground sufficiently low. 11.7 Optical data Laser Wavelength 650 nm - 680 nm (visible red) Pulse frequency 50 kHz Duty cycle 50% Average power < 1.0 mW Laser class 2 (to IEC 60825-1 / 2007) Beam dimensions at emission point about 2.5 x 4.0 mm Scatec-10: 70 mm beneath sensor Line focus, 6 mm long Scatec-15: 100 mm beneath sensor Line focus, 8 mm long Focus position Scatec-10: 70 mm beneath sensor Scatec-15: 100 mm beneath sensor Optical receiver equipped with near infrared suppression and daylight suppression filter 11.8 Application data Measuring range Scatec-10: 0 to 90 mm beneath sensor Scatec-15: 0 to 120 mm beneath sensor Mounting height Scatec-10: 70 mm Scatec-15: 100 mm Object speed 2 m/s maximum (5 m/s maximum for thicker edges) Minimum object spacing 10 mm @ v = 1 m/s and output pulse length 10 ms, or proportional to the speed and output pulse length Counting rate 1.5 million maximum copies/h (@ 2 ms output pulse length and 0 ms dead time) Product orientation Folded or cut edge facing laser beam Output pulse length 0.2 … 100 ms adjustable Scatec-1x Control unit Main connector Low-impedance interconnection
- 37. User manual Scatec-10 / -15 37 / 44 Baumer Electric AG Version 2011-03 www.baumer.com Frauenfeld, Switzerland Sensitivity Scatec-10: edge thickness 0.1 mm and greater highest sensitivity 68 … 72 mm beneath sensor product speed for edge thickness 0.10 mm … 0.2 mm slower than 1 m/s Scatec-15: edge thickness 0.15 mm and greater highest sensitivity 97 … 103 mm beneath sensor product speed for edge thickness 0.15 mm … 0.2 mm slower than 1 m/s The sensitivity is dependant on distance and product speed. Typical sensitivity characteristic see diagram below. 11.9 Default values Operational parameters see section 9.1 Flow chart for setting the operational parameters CAN-interface parameters refer to the Scatec-15 CAN-Manual 0.0 0.2 0.4 0.6 0.8 1.0 1.2 20 30 40 50 60 70 80 90 100 110 120 130 Working distance d [mm] Edgethicknessk[mm] Scatec-10 FLDM 170x1011/S42 Sensitivity highest mediumlow How to read the graphics: An edge with thickness k at distance d will typically be detected if the corresponding point in the graphics is above the curve representing the configured sensitivity level. Test objects: cleanly trimmed flat matt paper sheet tightly lying on a flat matt white sheet of paper. typical sensitivity characteristics for object speed < 2m/s
- 38. User manual Scatec-10 / -15 38 / 44 Baumer Electric AG Version 2011-03 www.baumer.com Frauenfeld, Switzerland 12 Accessories Article-Nr. Connectors Straight connector (6-pin) 10104236 (enclosed) Straight connector (8-pin) 10153202 Right angle connector (6-pin) 10153094 Right angle connector (8-pin) 10153095 (all connectors metal casing and shielded) Cables ESG 16DP1000G 10156266 Main-cable; 10m long, shielded, with straight connector (6-pin) Retro-reflective foil FTDF 025F025 10156653 retro-reflective foil; 25mx25mm; self adhesive ScaDiag-Kits ScaDiag-Kit SCATEC-10 10156490 complete set for connecting a Scatec-10 to a PC ScaDiag-Kit SCATEC-15 10156491 complete set for connecting a Scatec-15 to a PC 13 Maintenance The Scatec-10 / -15 requires no maintenance apart from keeping the front windows clean. Dust or fingerprints can impair the sensor function. It is normally sufficient to wipe the windows dry with a clean (!) soft cloth. Alcohol may be used for heavy soiling. 14 Troubleshooting Whenever possible use the application software ScaDiag for troubleshooting! The software ScaDiag allows the user to record and to graphically display data without interfering with the running production. This is a tremendous help if there is a need to take a closer look at certain aspects of a production run. The collected data can be analyzed by the customer himself or they can be forwarded by e- mail to Baumer electric for that purpose. Troubleshooting is considerably faster if there is real data available of the production causing problems.
- 39. User manual Scatec-10 / -15 39 / 44 Baumer Electric AG Version 2011-03 www.baumer.com Frauenfeld, Switzerland 15 Varying data for customized FLDM 170x10/xxxxxx
- 40. User manual Scatec-10 / -15 40 / 44 Baumer Electric AG Version 2011-03 www.baumer.com Frauenfeld, Switzerland
- 41. User manual Scatec-10 / -15 41 / 44 Baumer Electric AG Version 2011-03 www.baumer.com Frauenfeld, Switzerland
- 42. User manual Scatec-10 / -15 42 / 44 Baumer Electric AG Version 2011-03 www.baumer.com Frauenfeld, Switzerland 16 Supplements
- 43. User manual Scatec-10 / -15 43 / 44 Baumer Electric AG Version 2011-03 www.baumer.com Frauenfeld, Switzerland
- 44. User manual Scatec-10 / -15 44/44 Baumer Electric AG Version 2011-03 dnalreztiwS,dlefneuarFmoc.remuab.www Denmark Baumer A/S DK-8210 Aarhus V Phone +45 (0)450 392 466 France Baumer SAS FR-74250 Fillinges Phone +33 (0)450 392 466 Germany Baumer GmbH DE-61169 Friedberg Phone +49 (0)6031 60 07 0 Italy Baumer Italia S.r.l. IT-20090 Assago, MI Phone +39 (0)245 70 60 65 Sweden Baumer A/S SE-56122 Huskvarna Phone +46 (0)36 13 94 30 Switzerland Baumer Electric AG CH-8501 Frauenfeld Phone +41 (0)52 728 1122 United Kingdom Baumer Ltd. GB-Watchfield, Swindon, SN6 8TZ Phone +44 (0)1793 783 839 Canada Baumer Inc. CA-Burlington, ON L7M 4B9 Phone +1 (1)905 335-8444 USA Baumer Ltd. US-Southington , CT 06489 Phone +1 (1)860 621-2121 China Baumer (China) Co., Ltd. CN-201612 Shanghai Phone +86 (0)21 6768 7095 India Baumer India Private Limited IN-411038 Pune Phone +91 20 2528 6833/34 Singapore Baumer (Singapore) Pte. Ltd. SG-339412 Singapore Phone +65 6396 4131 Austria Baumer GmbH AT-2514 Traiskirchen Phone 0800 0700020 Brasil Baumer do Brasil Ltda BR-04726-001 São Paulo-Capital Phone +55 11 56410204 www.baumer.com/worldwide Technical data subject to change Printed in Switzerland No. 10159883