Step by step guide to Creating a Google+ Brand Page
•Transferir como ZIP, PDF•
0 gostou•858 visualizações


Recomendados
Recomendados
Mais conteúdo relacionado
Último
Último (20)
Destaque
Destaque (20)
Step by step guide to Creating a Google+ Brand Page
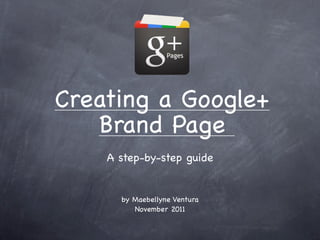
- 1. Creating a Google+ Brand Page A step-by-step guide by Maebellyne Ventura November 2011
- 2. Getting started Sign in to your Google+ account and head to: http://www.google.com/+/business/ or On the lower right hand side of your home page, click on the option to start creating your brand page...
- 3. Select which category your business fits into. For my own business, Piggybanker, I chose “Product or Brand”.
- 4. Piggybanker www.piggybanker.it Select what type of Google+ user you would like to access your page. You can restrict the age limit to “18 and older” or “21 or older” if your business deals with age-restricted material or content.
- 5. Create your own tag line. For Google+, there are no character limits but there is a 10-word limit. Be creative. Make it stand out. Upload your company logo. It doesn’t matter too much how big your photo is. The minimum size you should upload is 200x200 pixels as this is the display size for your profile photo.
- 6. When you’ve finished creating your page, Google+ will ask you if you want to start spreading the word. If you choose to do so, an update will be posted on your stream with a link to your new fan page. Personally I would wait until you’ve fully customised the page before you drive traffic to it. If your brand page looks nice and polished, people would be more motivated to add it to their circles.
- 7. You will then be brought to a screen like this. You can either start posting on your page stream or select any of the other options suggested.
- 8. If you want to continue editing your page... On your homepage, click on the button just below your name. Your brand page/s should appear. Click on “Manage your pages” Select the brand page you would like to edit
- 9. On your brand profile page, click on the “Edit Profile” button. Hover on the individual section that you want to edit. The section would then be highlighted in blue. Fill in the sections when the pop-up box appears. You can then select who can see each piece of information that you post on your page.
- 10. On the top right hand corner of your profile, you will see an option to add “Recommended Links”. Here you can add links to your website pages, etc. You can also customise the labels for each link, which you can see in the example opposite. To add photos, just click on the “Photos” tab. You can then start uploading photos into different albums.
- 11. You can also customise the “Scrapbook” above your profile by adding photos. This is a feature that is similar to Facebook’s photo strip. Just click on “Edit Profile” and an option to add photos will appear above your profile tabs. Note that unlike on Facebook, Google+ will condense the whole image to fit into a 125x125 pixel thumbnail. To make things easy, simply upload square photos. The images will then appear in the order you specify.
- 12. Voila! This is the finished product.
Notas do Editor
- \n
- \n
- \n
- \n
- \n
- \n
- \n
- \n
- \n
- \n
- \n
- \n