Tips for optimizing structural masonry
•
10 likes•4,580 views

This presentation provides tips for optimizing structural masonry, including: - Using concrete masonry units and specifying a compressive strength above the minimum required by ASTM C90 can significantly improve a masonry structure's strength. - Properly specifying mortar type and proportions according to ASTM C270 is important for sufficient bond strength. - Calculating grout quantities, ensuring proper clearances around reinforcement, and removing mortar fins are key to optimizing grout fill in masonry walls. - ASTM standards like C476 and C1019 provide requirements and testing procedures to ensure grout meets the minimum 2000 psi compressive strength.

Recommended
More Related Content
What's hot
What's hot (20)
Viewers also liked
Viewers also liked (20)
Similar to Tips for optimizing structural masonry
Similar to Tips for optimizing structural masonry (20)
More from Scott Conwell, FAIA, FCSI
Recently uploaded
Recently uploaded (20)
Tips for optimizing structural masonry
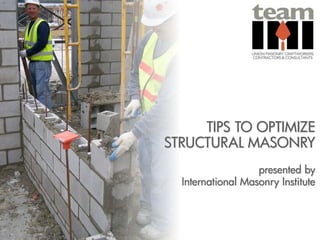
- 1. TIPS TO OPTIMIZE STRUCTURAL MASONRY presented by International Masonry Institute
- 2. INTERNATIONAL MASONRY INSTITUTE APPRENTICESHIP & TRAINING MARKET DEVELOPMENT & TECHNICAL SERVICE
- 3. ILLINOIS STRUCTURAL MASONRY COALTION
- 4. Course Evaluations In order to maintain high-quality learning experiences, please access the evaluation for this course by logging into CES Discovery and clicking on the Course Evaluation link on the left side of the page.
- 5. This presentation is protected by US and International copyright laws. Reproduction, distribution, display and use of the presentation without written permission of the speaker is prohibited. © International Masonry Institute 2010 Copyright Materials This presentation is intended for the use of industry professionals who are competent to evaluate the significance and limitations of the information provided herein. This publication should not be used as the sole guide for masonry design and construction, and IMI disclaims any and all legal responsibility for the consequences of applying the information.
- 6. IMI is a Registered provider with the American Institute of Architects Continuing Education Systems. Credit earned on completion of this program will be reported to CES Records for AIA members. Certificates of Completion for non-AIA members are available on request. This program is registered with the AIA/CES for continuing professional education. As such, it does not include content that may be deemed or construed to be an approval or endorsement by the AIA of any material of construction or any method or manner of handling, using, distributing or dealing in any material or product. Questions related to specific materials, methods and services will be addressed at the conclusion of this presentation.
- 7. Learning Objectives • Understand interrelationship between masonry materials, architecture, engineering, and construction. • Learn how a few simple decisions can lead to more efficient and economical structures. • Discover some non- traditional structural masonry materials and systems. • Apply code, specification and standards provisions appropriately.
- 8. Using masonry for the building’s structural support – Bearing walls – Shear walls – Combination bearing & shear – Hybrid! – Partition walls (not structural)
- 9. Theater at Ostia Antica, Rome c. 200 AD
- 10. Colosseum, Rome, c. 80 AD
- 11. Versatile structural system Fast, efficient & economical Masonry may be on the project already – use it structurally!
- 12. Finish trade – so tighter tolerances are held No lead time for production, review and approval of shop drawings Adapts easily to field changes – “with masonry you just pick up the phone and the change can be done”
- 13. Local materials, local employment Using material efficiently – one material for structure, finish, fire resistance, blast resistance, acoustics and more… Masonry is “Green” And it looks good too!
- 14. Get started right… MSJC Documents Building Code Requirements for Masonry Structures TMS 402-08 / ACI 530-08 / ASCE 5-08 Specification for Masonry Structures TMS 602-08 / ACI 530.1-08 / ASCE 6-08 International Building Code 2009 ASTM Masonry Standards More than 75 under the masonry committees jurisdiction Another 15 new ones under development Narrow down to a few basic ones
- 16. Tip 2 – Use the right ASTM Standard ASTM C 90 Standard Specification for Loadbearing Concrete Masonry Units Use for projects requiring loadbearing CMU Sets minimum requirements Include the edition Example: ASTM C 90-09 Defaults to version referenced by local building code if not specified
- 17. Tip 3 – Unit Compressive Strength & Density ASTM C 90-09 Table 2 Compressive strength requirements are independent of unit density Example: Lightweight units are required to meet the same compressive strength minimum requirements as Medium weight and Normal weight units
- 18. Tip 4 – Remember, Minimum Requirements ASTM C 90-09 Minimum compressive strength requirements in Table 2 No maximum compressive strength limit Permissible to specify higher unit strength which leads to higher compressive strength for the masonry wall Check local availability before specifying higher strength units
- 19. Tip 5 – Specify Above C90 Minimum Strength If higher strength units are available, the effect on the structural design can be significant Often very little, if any cost penalty for units with strengths above the ASTM C 90 minimum May already be on the job – so use what you already have! for example…
- 20. Tip 5 – Specify above C90 Minimum Strength Checking the test report
- 21. Tip 5 – Specify Above C90 Minimum Strength Finding the average unit compressive strength
- 22. Tip 5 – Specify Above C 90 Minimum Strength Unit Strength Method to determine Masonry Compressive Strength 3067 ASTM C90 Minimum unit strength Average unit compressive strength from testing report 2140
- 23. Tip 5 – Specify Above C 90 Minimum Strength
- 24. Masonry Compressive Strength Options Increase the compressive strength of masonry Check actual compressive strength of the units Specify higher compressive strength units Consider prism testing on larger projects Consider larger width units if necessary
- 25. MORTAR
- 26. © 2009 INTERNATIONAL MASONRY INSTITUTE ELEVATIONS DIAGRAM 01.410.0311 REV. 08/10/09 MORTAR JOINT MATERIAL TAKEOFF UTILITY BRICK, RUNNING BONDMODULAR BRICK, RUNNING BOND 4 @ 12” x 3/8” = 18.000 SQ. IN.BED JOINTS HEAD JOINTS 8 @ 2.3125” x 3/8” = 6.938 SQ. IN. 2 @ 1.3125” x 3/8” = 0.984 SQ. IN. 25.922 SQ. IN. MORTAR 3 @ 12” x 3/8” = 13.500 SQ. IN. 3 @ 3.625” x 3/8” = 4.078 SQ. IN. 17.578 SQ. IN. MORTAR 18.00% MORTAR 12.21% MORTAR ONE SQUARE FOOT ONE SQUARE FOOT 18% 12%
- 28. ASTM C 270 Mortar Options: - Portland Cement and Lime - Masonry Cement - Mortar Cement Mortar Types: M, S, N, and O Mortar Quality Control ASTM C 270 MASONRY MORTARS MORTAR
- 29. M S N O Krwoa ASTM C 270 MASONRY MORTARS MORTAR
- 30. ASTM C 270 TABLE 1 – PROPORTION SPECIFICATION MORTAR
- 31. ASTM C 270 TABLE 2 – PROPERTY SPECIFICATION MORTAR
- 32. M S N O K general ratio cement : lime : sand 1:½:4½ 1:1:6 1:2:9 1:3:121:¼:3¾ Refer to ASTM C 270 for acceptable ranges PROPORTION RULES-OF-THUMB MORTAR
- 34. Preblended grout mixed from dry ingredients in silo PREBLENDED MORTAR & GROUT
- 35. TEMPERING MORTAR
- 38. STANDARD SPECIFICATION FOR GROUT FOR MASONRY ASTM C476-10
- 39. Grout is NOT mortar NOR concrete and is a cementitious material unique to masonry. • Grout can be mixed on-site or obtained from transit or Redi-mix suppliers. • Grout can be placed by hand or pumped with specifically designed grout pumps. • Grout quantities can be determined from reference charts such as the one shown on the next slide. GROUT
- 40. 6” Thick Walls All Cells Filled 16” o.c. 24” o.c. 32” o.c. 40” o.c. 48” o.c. 0.93 0.55 0.42 0.35 0.31 0.28 0.83 0.49 0.37 0.31 0.28 0.25 120 205 270 320 360 396 8” Thick Walls All Cells Filled 16” o.c. 24” o.c. 32” o.c. 40” o.c. 48” o.c. 1.12 0.65 0.50 0.43 0.37 0.34 1.00 0.58 0.44 0.38 0.33 0.30 100 171 225 267 300 330 10” Thick Walls All Cells Filled 16” o.c. 24” o.c. 32” o.c. 40” o.c. 48” o.c. 1.38 0.82 0.63 0.53 0.47 0.43 1.23 0.73 0.56 0.47 0.42 0.38 80 137 180 214 240 264 12” Thick Walls All Cells Filled 16” o.c. 24” o.c. 32” o.c. 40” o.c. 48” o.c. 1.73 1.01 0.76 0.64 0.57 0.53 1.54 0.90 0.68 0.57 0.51 0.47 65 111 146 174 195 215 Standard Two Cell Block Grouted Cells Vertical Steel Spacing Cu. Yds. Of Grout Per 100 Sq. Ft. of Wall Cu. Yds. Per 100 Block (8”h X 16”w) Block Per Cu. Yd. (8”h X 16”w)
- 43. FINE & COARSE GROUT Grout Specimen Fine Aggregate Grout Specimen Coarse Aggregate
- 45. 3. Materials 3.1.1 Cementitious Materials 3.1.1.1 Portland Cement 3.1.1.2 Blended Cements 3.1.1.3 Quicklime 3.1.1.4 Hydrated Lime 3.1.1.5 Coal Fly Ash or Raw Calcined Natural Pozzolan 3.1.1.6 Granulated Blast Furnace Slag 3.1.2 Air Entraining Admixtures 3.1.3 Aggregates 3.1.4 Water 3.1.5 Admixtures 3.1.5.1 Admixtures for SCG 3.1.6 Pumping Aids 3.1.7 Antifreeze Compounds 3.1.8 Storage of Materials MATERIALS Clean & potable iwr, accelerators, etc. Not permitted Protect from moisture ASTM C476-10 water-reducers, viscocity modifiers
- 46. GROUT TYPE & PROPORTIONS 4. Grout Type and Proportions 4.1 Type 4.1.1 Fine grout 4.1.2 Coarse grout 4.2 Proportions of Ingredients 4.2.1 Conventional Grout 4.2.1.1 Table 1 4.2.1.2 Specified Compressive Strength 4.2.2 Self-consolidating Grout 4.2.2.1 Specified Compressive Strength 2,000 psi at 28 days Per astm c1019 Fine aggregate Coarse and Fine aggregates 24-30 in. slump flow; 2,000 psi at 28 days Per astm c1019 Vsi < 1 ASTM C476-10
- 47. • Coarse grout is typically more economical than fine grout and is usually preferred. • Both coarse and fine grout can be designed to achieve necessary strength requirements. • Space consumed by mortar fins must be subtracted from the clear space. • Minimum clear cross-sectional dimensions of the cells to be grouted are shown in the chart on the next slide. FINE GROUT vs. COARSE GROUT
- 48. Table 3.1.2-Grout space requirements * Grout type1 Maximum grout pour height, Ft. Minimum width of grout space, In. Minimum grout space dimensions for grouting cells of hollow unit in. x in. Fine Fine Fine Fine 1 5 12 24 3/4 2 21/2 3 1 ½ x 2 2 x 3 2 ½ x 3 3 x 3 Coarse Coarse Coarse Coarse 1 5 12 24 1 ½ 2 2 ½ 3 1 ½ x 3 2 ½ x 3 3 x 3 3 x 4 * MSJC Code FINE GROUT vs. COARSE GROUT
- 49. 1/2” MAX. MORTAR FIN MORTAR PROTRUSION TOLERANCE DIAGRAM 02.410.0121 REV. 02/22/09 MORTAR FINS
- 50. Mortar Fins (protrusions) Mortar fins restrict the flow of grout into cells and can actually trap air. They must be removed before grouting takes place. The best time to do this is during wall construction. MORTAR FINS
- 51. MASONRY PRISM Masonry Prism Sectioned prism, (2) CMU, Mortar Joint, Grout, Rebar
- 52. MASONRY PRISM Masonry Prism Sectioned prism, (2) CMU, Mortar Joint, Grout, Rebar
- 53. However, remaining fins should be broken free and dropped to the cleanouts and removed before grouting takes place. Proper technique in the application of mortar and the setting of the CMU should minimize mortar fins. MORTAR FINS
- 54. Grout should be able to flow completely around the rebar. Clearance must be provided between the: • Face shells of the CMU • Other rebar Masonry & grout coverage also protects the rebar from corrosion or weather. MINIMUM MASONRY COVER
- 55. 1 1/2 inch minimum cover for interior face. 2 inch minimum cover for exterior face exposed to earth or weather MINIMUM MASONRY COVER .
- 56. 1/2” MIN. FOR COURSE GROUT 1/4” MIN. FOR FINE GROUT MINIMUM DISTANCE FROM ANY PROTRUSION: REINFORCEMENT PLACEMENT TOLERANCE DIAGRAM 02.410.0123 REV. 02/22/09 MINIMUM GROUT CLEARANCE
- 58. MSJC 2008 Specification for Masonry Structures “Grout compressive strength equals or exceeds f’m but not less than 2000 psi.” (Article 1.4 B.2.a.3)b) and 1.4 B.2.b.3)b)) “Grout compressive strength equals or exceeds f’aac but compressive strength is not less than 2000 psi.” (Article 1.4 B.c.3)b)) “unless otherwise required, provide grout that conforms to the requirements of ASTM C 476, or ” (Article 2.2 A.1) “…attains the specified compressive strength or 2000 psi, whichever is greater, at 28 days when tested…” (for self-consolidating grout) (Article 2.2 A).2) ASTM C 476-10 Standard Specification for Grout for Masonry “…and shall have a minimum compressive strength of 2000 psi at 28 days.” (Section 4.2.1.1 (Conventional grout)) …”The grout shall have a minimum compressive strength of 2000 psi at 28 days.” (Section 4.2.2.1 (Self-consolidating grout)) GROUT TYPE & PROPORTIONSASTM C476-10
- 59. STANDARD TEST METHOD FOR SAMPLING AND TESTING GROUT ASTM C1019-09
- 60. SCOPE; SIGNIFICANCE & USEASTM C1019-09 1. Scope 1.1 This test method covers procedures for both field and laboratory sampling and compression testing of grout used in masonry construction. 3. Significance & Use 3.1 Grout used in masonry is a fluid mixture of cementitious materials and aggregate with a high water content for ease of placement. 3.1.1 During construction, grout is placed within or between absorptive masonry units. Excess water must be removed from the grout specimens in order to provide compressive strength test results more nearly indicative of the grout strength in the wall.
- 61. TEST SPECIMENSASTM C1019-09 PROCEDURES 5. Test Specimens 5.1 Each grout specimen shall have a square cross section, 3 in. or larger on the sides and twice as high as its width. 5.2 Test at least three specimens at each age specified. Note 4: frequency of sampling and age of test is to be determined by the specifier, and is usually found in the construction documents; for example, one set of specimens may be specified for every 5,000 s.f. of wall. EXAMPLE: IF SPECIMENS ARE TO BE TESTED AT 7, 14, AND 28 DAYS, THEN MAKE 9 SPECIMENS.
- 62. GROUT SPECIMEN MOLDSASTM C1019-09
- 63. SCOPEASTM C1019-09 6. Grout Specimen Molds 6.1 Molds from Masonry Units 6.1.1 Select a level location where the molds remain undisturbed for up to 48 hours. 6.1.2 The construction of the mold shall simulate the in-situ construction. If the grout is placed between two different types of masonry units, both types shall be used to construct the mold. 6.1.3 Form a space with a square cross-section, 3 in. or larger on each side and twice as high as its width, by stacking masonry units of the same type and moisture condition as those being used in the construction. The surface of the unit in contact with the grout specimen shall not have been previously used to mold specimens. Place non- absorbent block, cut to proper size and of the proper thickness or quantity, at the bottom of the space to achieve the necessary height of specimen. 5% tolerance on dims.
- 64. Filling Slump Cone Hold cone firmly in position so grout does not escape while filling the cone. Slump cones are for testing grout consistency prior to grouting. SLUMP TEST, CONVENTIONAL GROUT
- 65. 1/3 Fill the bottom 1/3 and rod 25 times with the puddle rod. Straight in and Straight out… do not stir. Filling Slump Cone SLUMP TEST, CONVENTIONAL GROUT
- 66. 2/3 Fill the middle 1/3 and rod 25 times. Penetrate bottom 1/3 only slightly. Filling Slump Cone SLUMP TEST, CONVENTIONAL GROUT
- 67. 3/3 Fill the top 1/3 and rod 25 times. Penetrate middle 1/3 only slightly. Filling Slump Cone SLUMP TEST, CONVENTIONAL GROUT
- 68. Grout should slump 8 to 11 inches. Lift the cone slowly and straight up. Do not twist or turn. Remove Slump Cone SLUMP TEST, CONVENTIONAL GROUT
- 69. Conventional Grout ASTM C 143 8 - 11” slump SCG ASTM C1611 24” to 30” slump flow VSI < 1 SLUMP vs. SLUMP FLOW
- 70. ALTERNATIVE METHODSASTM C1019-09 6. Grout Specimen Molds 6.2 Alternative Methods - … used only with approval of the specifier. Note 7: fill compartments in slotted corrugated cardboard boxes specifically manufactured to provide grout specimens.
- 71. CALCULATIONSASTM C1019-09 11. Calculations 11.1 Determine the average cross- sectional area by measuring the width of each face at its mid-height, calculating the average width of opposite faces, and multiplying the averages. 11.2 For specimens from molds of masonry units, calculate the compressive strength by dividing the maximum load by the average cross-sectional area and express the result to the nearest 10 psi. x2 x1 y1 y2 P Average cross-sectional Area = x1 + x2 2 2 y1 + y2.
- 72. Tip 10 – Understand Grout Pours and Lifts Often confused or used interchangeably. MSJC Definitions: Grout Pour – The total height of masonry to be grouted prior to erection of additional masonry. A grout pour consists of one or more grout lifts. Grout lift – An increment of grout height within a total grout pour. A grout pour consists of one or more grout lifts. Maximum pour height – function of grout type (fine or coarse), minimum grout space dimensions, use of cleanouts, conventional grout or SCG. Maximum pour heights are established by MSJC Table 7. Maximum lift height – default is 5’, may increase to 12’-8” under some circumstances. SCG may be increased to pour height under some circumstances.
- 73. 1999 MSJC – 5’ lift height limitation. 2002 MSJC – demonstration panel option permitting any construction procedures that produce proper installation. 2005 MSJC – lift height increased to 12’-8” subject to conditions. 2008 MSJC – Self-consolidating grout provisions Tip 10 – Understand Grout Pours and Lifts
- 74. Grout lift height – A.) Where the following conditions are met, place grout in lifts not exceeding 12.67ft 1.The masonry has cured for at least 4 hours. 2. The grout slump is maintained between 10 and 11 in. 3. No intermediate reinforced bond beams are placed between the top and the bottom of the pour height. B.) As above but intermediate bond beam, then lift height can extend to the bottom of the bond beam but not to exceed 12.67’. C.) Otherwise, place grout in lifts not exceeding 5ft. D.) Demonstration panel option may result in increases. E.) SCG may, under some circumstances be permitted to have the grout lift equal the pour height. Tip 10 – Understand Grout Pours and Lifts
- 99. HIGH LIFT GROUTING - SCG
- 100. Self Consolidating Grout Demonstration
- 101. LOW LIFT GROUTING PROCEDURES DETAIL 02.410.0131 REV. 06/30/10 VERTICAL REINFORCEMENT FOR CLOSED-END CONCRETE MASONRY UNITS CAN BE SET AFTER WALL HAS BEEN LAID. REBAR POSITIONER, WALL TIE, OR OTHER DEVICE TO POSTION VERTICAL REINFORCEMENT HORIZONTAL REINFORCEMENT PLACED IN BOND BEAMS AS WALL IS LAID UP METAL LATH, MESH, OR WIRE SCREEN PLACED IN MORTAR JOINTS UNDER KNOCK- OUT BOND BEAM COURSES TO PREVENT FILLING OF UNGROUTED CELLS OPTION 2: STANDARD CMU W/ CROSS WEBS KNOCKED OUT AT BOND BEAM COURSE OPTION 1: U-BLOCK UNITS W/ SOLID BOTTOM AT BOND BEAM COURSE GROUT IN BOND BEAMS & REINFORCED VERTICAL CELLS PLACED IN TOP OF WALL AFTER WALL HAS BEEN LAID UP STOP GROUT 1” FROM TOP OF POUR TO CREATE SHEAR KEY CELLS CONTAINING REINFORCEMENT ARE FILLED SOLIDLY W/ GROUT; VERTICAL CELLS SHOULD PROVIDE A CONTINUOUS CAVITY FREE OF MORTAR DROPPINGS NOTE: GROUT PLACED IN POURS & LIFTS NOT TO EXCEED 5 FT. CONSOLIDATE LIFTS OVER 12” USING MECH. VIBRATION. LIFTS LESS THAN 12” MAY BE PUDDLED.
- 102. HIGH LIFT GROUTING PROCEDURES DIAGRAM 02.410.0131 REV. 07/06/10 VERTICAL REINFORCEMENT FOR CLOSED-END CONCRETE MASONRY UNITS CAN BE SET AFTER WALL HAS BEEN LAID. REBAR POSITIONER, WALL TIE, OR OTHER DEVICE TO POSTION VERTICAL REINFORCEMENT HORIZONTAL REINFORCEMENT PLACED IN BOND BEAMS AS WALL IS LAID UP METAL LATH, MESH, OR WIRE SCREEN PLACED IN MORTAR JOINTS UNDER KNOCK- OUT BOND BEAM COURSES TO PREVENT FILLING OF UNGROUTED CELLS OPTION 2: STANDARD CMU W/ CROSS WEBS KNOCKED OUT AT BOND BEAM COURSE OPTION 1: U-BLOCK UNITS W/ SOLID BOTTOM AT BOND BEAM COURSE GROUT IN BOND BEAMS & REINFORCED VERTICAL CELLS PLACED IN TOP OF WALL AFTER WALL HAS BEEN LAID UP STOP GROUT 1” FROM TOP OF POUR TO CREATE SHEAR KEY CELLS CONTAINING REINFORCEMENT ARE FILLED SOLIDLY W/ GROUT; VERTICAL CELLS SHOULD PROVIDE A CONTINUOUS CAVITY FREE OF MORTAR DROPPINGS NOTE: GROUT LIFTS NOT TO EXCEED 5 FT. SEE STRUCTURAL DWGS FOR MAX. HEIGHT OF POUR. MECH. CONSOLIDATE & RECONSOLIDATE GROUT CLEANOUT OPENINGS @ BASE OF VERTICALLY REINF. CELLS, 32” O.C. MAX. SPACING FOR SOLID GROUTED WALLS. REMOVE MORTAR DROPPINGS THROUGH CLEANOUTS AND VERIFY PLACEMENT & LOCATION OF VERTICAL REINF.; FORM OVER OPEN’GS BEFORE PLACING GROUT
- 103. Tip – Consider Cleanout options Multiple options for cleanout construction Does not have to be a full face shell high Minimum size is 3” Can be concealed easily on interior walls with base molding Cleanout
- 104. BRACE CLEANOUT AND PLACE GROUT CUT PORTION OF FACE SHELL TO CREATE CLEANOUT REINSERT FACE SHELL AND MORTAR IN PLACE PLACE REINFORCING AND INSPECT WALL FOR OBSTRUCTIONS REMOVE BRACING BLOCK CLEANOUT DIAGRAM 02.410.0111 REV. 06/12/09
- 105. CUT FACE SHELL FOR CLEANOUT WOOD BRACING GROUT & REINFORCEMENT BLOCK CLEANOUT DIAGRAM 02.410.0112 REV. 06/12/09
- 106. REINSERT FACE SHELL PIECE TO RESIST GROUT PRESSURE CUT WEDGE-SHAPED PORTION OF FACE SHELL TO CREATE CLEANOUT CLEANOUT MORTAR FACE SHELL EDGES IF NECESSARY BLOCK CLEANOUT DIAGRAM 02.410.013 REV. 06/12/09
- 107. 1. CUT OUT PORTION OF FACE SHELL 2. PLACE ACRYLIC GROUT STOP INTEGRALLY BRACED AGAINST INSIDE OF FACE SHELL 3. HAND-TIGHTEN BRACE 5. REMOVE ACRYLIC AND BREAK OFF PLASTIC BRACE 4. PLACE REBAR & GROUT BLOCK CLEANOUT DIAGRAM 02.410.0114 REV. 06/12/09
- 108. Tip 11 – Give the Contractor Some Latitude Give the contractor some latitude in the…. Selection of Fine or Coarse Grout Technical considerations Grout space dimensions Pour height limitations Compressive strength independent of type Constructability considerations Ease of use/Personal preference Cost implications – material, placement Issues related to pour height (next slide) Fine Grout might be better suited here Coarse or Fine Grout here
- 109. Tip 11 – Give the Contractor Some Latitude Give the contractor some latitude in the…. Determination of Pour and Lift height Technical considerations Code/Spec compliance Inspection options Other Constructability considerations Cleanouts Bracing Site constraints Coordination of trades Placement procedures Other
- 110. Tip 11 – Give the Contractor Some Latitude Give the contractor some latitude in the…. Use of self-consolidating grout Technical considerations New material comfort level Grout spaces and pour heights Inspection and testing capabilities Local supplier experience More Constructability considerations Cost Availability Experience with the product Grout space/height • More
- 111. SLAB EDGE
- 112. SLAB EDGE
- 113. FOUNDATION DOWELS
- 114. VERTICAL REINFORCEMENT AS REQ’D GROUT AS REQ’D HORIZONTAL JOINT REINFORCEMENT CMU SHOWN IN LONGITUDINAL SECTION DOWELS MAY BE BENT UP TO 1” LATERALLY PER 6” VERTICALLY FOUNDATION FOUNDATION DOWEL ALIGNMENT DETAIL 02.010.0301 REV. 02/22/09
- 116. SPACING OF VERTICAL REINFORCEMENT ±1/2” IF d ≤ 8” d ±1” IF 8”< d ≤ 24” ±1¼” IF d > 24” ±2” REINFORCEMENT PLACEMENT TOLERANCE DIAGRAM 02.410.0122 REV. 02/24/09
- 117. PARTITIONS
- 118. PARTITIONS
- 119. PARTITIONS
- 121. SPANNING OPENINGS DOUBLE ANGLES AT BLOCK
- 122. SPANNING OPENINGS Massive steel sections can be expensive and inefficient STEEL BEAM and PLATE
- 123. LINTELS
- 124. LINTELS
- 125. LINTELS
- 126. SPANNING OPENINGS CONCRETE MASONRY LINTEL
- 127. SPANNING OPENINGS Poly-wrapped steel angles used for temporary support CAST-IN-PLACE MASONRY LINTEL © 2009 INTERNATIONAL MASONRY INSTITUTE
- 128. SPANNING OPENINGS Precast masonry lintel fabricated on the ground PRECAST LINTELS © 2009 INTERNATIONAL MASONRY INSTITUTE
- 129. SPANNING OPENINGS Lintel is hoisted by lift PRECAST LINTELS © 2009 INTERNATIONAL MASONRY INSTITUTE
- 130. © 2009 INTERNATIONAL MASONRY INSTITUTE SPANNING OPENINGS Precast lintel set into place PRECAST LINTELS
- 131. © 2009 INTERNATIONAL MASONRY INSTITUTE SPANNING OPENINGS 10-foot span PRECAST LINTELS
- 132. U-BLOCK CMU BOND BEAMS DIAGRAM 02.410.0142 REV. 07/08/10 CMU BOND BEAM MADE FROM U-BLOCK UNITS VERTICAL REINFORCEMENT AS REQ’D HORIZONTAL REINFORCEMENT AS REQ’D U-BLOCK NOTCHED TO ACCEPT VERTICAL REINFORCEMENT SPECIAL SHAPE U-BLOCK
- 133. KNOCK-OUT CMU BOND BEAMS DIAGRAM 02.410.0141 REV. 07/08/10 VIEW OF STANDARD BLOCK BEFORE CROSS WEBS ARE KNOCKED OUT VIEW OF BLOCK AFTER CROSS WEBS ARE KNOCKED OUT TO ACCOMMODATE HORIZONTAL REINFORCEMENT METAL LATH, MESH, OR WIRE SCREEN PLACED IN BED JOINTS UNDER KNOCK-OUT BOND BEAM COURSES TO PREVENT FILLING OF UNGROUTED CELLS VERTICAL REINFORCEMENT AS REQ’D HORIZONTAL REINFORCEMENT AS REQ’D
- 134. BOND BEAM
- 135. BOND BEAM
- 136. BOND BEAM
- 137. BOND BEAM
- 138. Structural Options & Efficiencies Use masonry as Lintels Deep beams
- 139. INTERSECTING WALLS
- 140. VIEW OF INTERSECTING BOND BEAMS PRIOR TO GROUT PLACEMENT LENGTH AS REQUIRED TO DEVELOP REINFORCEMENT GROUT AND REINFORCING AS REQ’D KNOCK OUT FACE SHELL OF BOND BEAM UNIT FOR CONT. GROUT & REINFORCEMENT NOTE: SEE BUILDING CODE REQUIREMENTS FOR REINFORCEMENT DEVELOPMENT LENGTHS AND MINIMUM AREA OF REINFORCEMENT REQ’D RAKE OUT MORTAR FOR CONTROL JOINT FLANGE WALL WEB WALL RAKE OUT MORTAR FOR VERTICAL C.J. INTERSECTING WALLS DETAIL 02.120.1523 REV. 02/22/08 BOND BEAMS
- 141. FLANGE WALL WEB WALL CONTROL JOINT 50% INTERLOCKING UNITS REQ’D TO BOND WALLS CONTROL JOINT GROUT AND REINFORCING AS REQ’D INTERSECTING WALLS DETAIL 02.120.1521 REV. 02/22/08 50% INTERLOCKING UNITS
- 142. RAKE OUT MORTAR AND CAULK GROUT STOP WEB WALL FLANGE WALL MIN. 24” L x 1½” W x ¼” THICK Z-STRAP CONNECTOR W/ 2” EXTENSIONS EA. END STEEL CONNECTOR CONNECTOR EMBEDDED INTO GROUT-FILLED CORES @ EACH END GROUT AND REINFORCING AS REQ’D INTERSECTING WALLS DETAIL 02.120.1522 REV. 02/22/08 STEEL CONNECTOR
- 144. Options, options and more options! Hybrid masonry/steel frame Reinforced Masonry infill Combined with structural steel frame Masonry acts as bracing Eliminates cutting infill around steel cross bracing
- 145. c) TYPE I HYBRID ∆= 0.02” (0.5 mm) a) RIGID FRAME 10 KIPS W12x35 ∆ W12x40 ∆= 4” (100 mm) W8x24 W8x15 W8x15 10 KIPS b) BRACED FRAME ∆= 0.04” (1 mm) W8x15 W8x24 10 KIPS W12x40 W8x15 Note detailing issues due to frame deflection CMU cuts around brace not shown
- 146. GAPS 1, 2: NO IN-PLANE LOAD TRANSFER GAP 2GAP 1 GAP 3 TYPE I BEAM OR GIRDER COLUMN SHEAR WALL SHEAR (IN-PLANE) GAP 3: TRANSFERS IN-PLANE SHEAR LOAD; NO AXIAL LOAD COLUMN
- 147. GAPS 1, 2: NO IN-PLANE LOAD TRANSFER (SOFT JOINTS) GAP 2GAP 1 NO GAP TYPE II BEAM OR GIRDER COLUMN SHEAR WALL SHEAR (IN-PLANE) BEAM/GIRDER TRANSFERS IN-PLANE SHEAR LOAD COLUMN AXIAL LOAD
- 148. NO GAPNO GAP NO GAP TYPE III BEAM OR GIRDER COLUMN SHEAR WALL SHEAR (IN-PLANE) COLUMN SHEAR (IN-PLANE) SHEAR (IN-PLANE) AXIAL LOAD not yet included in building codes
- 149. HYBRID MASONRY & STEEL
- 150. HYBRID MASONRY & STEEL
- 151. HYBRID MASONRY & STEEL Garden Hills Elementary School, Champaign, IL BLDD Architects
- 153. Tip 14 – Consider Structural Brick Reinforced hollow brick masonry Reinforced structural veneer
- 156. Innovations Loadbearing CMU Pilasters & Columns
- 157. SPECIAL SHAPE PILASTER BLOCK CMU PILASTER W/ GROUT & REINFORCEMENT PER STRUCTURAL ENGINEER REBAR POSITIONER GROUTED CELLS PER STRUCTURAL ENGINEER LOAD BEARING PILASTER DETAIL 02.010.1101 REV. 06/17/08
- 158. REINFORCED COLUMN
- 159. REINFORCED COLUMN
- 160. REINFORCED COLUMN
- 161. REINFORCED COLUMN
- 162. REINFORCED COLUMN
- 164. AAC Craftworker Certification Training
- 165. Design provisions in Appendix A of MSJC Strength Design provisions similar to MSJC Chapter 3 MSJC Specification contains construction provisions IBC force resisting system limited to SDC A, B, C IRC not limited Locally adopted code may differ Tip 15 – Consider AAC Masonry
- 166. 8x8x16 normal weight block (140 pcf) 8x8x16 light weight block (105 pcf) 38 lbs 28 lbs 8x8x16 AAC AC-4 block (31 pcf) 18 lbs UNIT WEIGHT COMPARISONS
- 167. 14,000 s.f. addition 8” loadbearing AAC wall 12” loadbearing AAC wall
- 170. 8”-12” T. x 8” H. x 24” L. AAC block have one 4”Ø core to accept a #6 bar @ 24” o.c.
- 171. LOADBEARING AAC MASONRY WALL DETAIL 13.120.0101 REV. 04/23/10 12” THICK x 8” H. x 24” L. AC-4 AUTOCLAVED AERATED CONCRETE (AAC) MASONRY UNITS JOIST GIRDERS @ 5’-0” O.C. PER STRUCTURAL #6 VERTICAL REINFORCING & GROUT IN 4”Ø CORES @ 24” O.C. 16” H. BOND BEAM W/ (2) #5 REBAR @ EA. COURSE NOTE: THIS DRAWING REPRESENTS A BASIC STRUCTURAL AAC MASONRY WALL; IT IS NOT INTENDED FOR CONSTRUCTION WITHOUT PROPER ENGINEERING DESIGN AND CALCULATIONS.
- 173. Tip 16 – Include Splice Lengths in Project Documents Question: Why should the splice lengths and locations be included on the project drawings? Answer: The design professional has the information necessary to calculate lap lengths, the contractor does not. Contractors cannot be expected to know which lap length equation is applicable nor the variables that are included in some lap splice equations. Consider that laps may vary based on: Bar diameter Design method (ASD or SD) Locally adopted building code Specified cover Specified f’m and more…
- 174. PLANK AT BEARING WALL DETAIL 02.120.0751 REV. 11/25/08 INTERMEDIATE ELEVATION 2’-0 HORIZ. x 2’-0” VERT. #4 DOWELS AND GROUT AT PLANK KEYWAYS – SEE DETAIL 20.P02 3” MIN. BEARING & BEARING STRIP BOND BEAM W/ (2) #5, CONT, OR AS REQ’D GROUT PLANK SOLID AT BEARING GROUT & VERTICAL REINFORCING AS REQUIRED SOLID CMU PRECAST CONCRETE PLANK NOTE: VENEER & AIR/ MOISTURE BARRIER NOT SHOWN HORIZONTAL. JOINT REINFORCEMENT TOPPING IF REQ’D LAP VERTICAL BAR SPLICE ABOVE PLANK LEVEL
- 175. #6 vertical bars in wall required 48 bar dia. lap length = 36 in. SPLICE LENGTHS
- 176. #6 vertical bars in wall required 48 bar dia. lap length = 36 in. SPLICE LENGTHS
- 177. Options to avoid long lap lengths: Use smaller diameter bars at closer spacing. Cover distance is key – maximize cover for minimum lap lengths. Minimize laps by permitting higher grout lifts Use specified f’m, not just minimum value… MSJC Equations & IBC SD requirements Lap length INCREASES as: •Bar size increases, •Cover decreases Lap length DECREASES as: •Bar size decreases, •Cover increases, •Masonry compressive strength increases Tip 17 – Reduce Splice Length when Appropriate
- 178. Question: Which of the above is the better choice? Answer: Either one could be fine, so consider: • Bar weight • Quantity of grout and difficulty in placement • Are lap splices being used (longer for the #6 bar) • Generally smaller bars closer together produce more cohesive behavior for the wall as a whole. • But, too close together and more grout is needed. • Is the wall going to be fully grouted for other reasons? Tip 17 – Reduce Splice Length when Appropriate Balance bar size & spacing to optimize the design, example: #4 bar @ 24”c/c is equivalent to #6 bar @ 48”c/c
- 180. 32” spacing Various spacing 24” spacing REINFORCEMENT SPACING
- 181. Lap splices Mechanical splices Becoming more common Develop 125% of specified bar yield strength. Welded splices Specify weldable reinforcement Bars butted and must develop 125% specified bar yield strength. Difficult, expensive, not recommended for most applications Tip 18 – Consider other Splicing Options
- 182. Tip 19 – Think joint reinforcement not bond beams… Joint reinforcement may be used to meet horizontal reinforcement requirements Bond beams are more expensive option but may offer more steel reinforcement area For crack control, joint reinforcement may not be needed with bond beams Can use both in the building to suit different needs
- 183. Options, options and more options! Prefabricated masonry
- 184. And even more…. Software for structural analysis
- 185. Bottom Line
- 188. Masonry as structure and finish Structural masonry…
- 190. Structural masonry… Fire & Blast Resistant
- 191. Structural masonry… Think structural masonry for your next project
- 192. BAC CONTRACTORS IMI-TRAINED CRAFTWORKERS International Union of Bricklayers and Allied Craftworkers International Masonry Institute
- 193. TIPS TO OPTIMIZE STRUCTURAL MASONRY presented by International Masonry Institute