NewTek Lightwave 3D - Modeler I
•Transferir como PPTX, PDF•
0 gostou•844 visualizações

Covering the basics of Lightwave 3D Modeler. This is lecture 1 of 2. Learn how to select and manipulate points and polygons.

Recomendados
Recomendados
Mais conteúdo relacionado
Mais de Samuel Edsall
Mais de Samuel Edsall (20)
NewTek Lightwave 3D - Modeler I
- 2. Working in 3D Space What is an object in 3D space made of? Points Building blocks where lines can be joined together Like a TinkerToy hub Polygons Surface created when 3 or more points are joined together by a line The form of the polygons makes the object’s shape
- 3. Modeling in 3D Space Making a 3D object Made by creating, combining, and modifying simple shapes into more complex shapes Basic building blocks Called ‘primitives’ Cubes, spheres, cylinders, etc. Before making a model Think about what primitive shapes compose your object
- 4. Modeler Interface Workspace divided into 4 views Each view is looking at the same object at a different angle Default settings Top, back, right, perspective You can change any view to your liking
- 5. Let’s Get Started Start up Modeler Select File > Load Object In the Characters folder select ‘Big Ted’
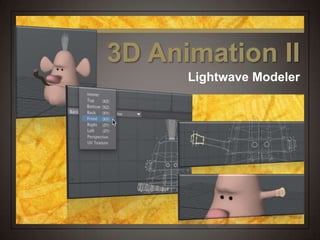
- 6. Modeler Interface Menu tabs on the top Selectable items on the left based on the selected tab Upper right of each view Viewport position controls
- 7. Change Your Point of View In the Back viewport change the view to Front Click & hold on the Dolly and Zoom button to change your view Notice how this changes your other views as well
- 8. Change Your Point of View Click on the last icon (Expand button) Now you can focus on just one view at a time with more room to move around Click on the same button to return to the default view
- 9. Working with Layers Works like Photoshop Separate pieces of the same object kept in separate layers Can work on one layer while seeing other layers Allows you to create, size and align one piece of your object to another without effecting other pieces
- 10. Active & Inactive Layers If the top part of the layer is selected The layer is active and can be modified If the bottom part of the layer is selected It can be seen, but it cannot be modified Handy for lining up pieces of your object
- 11. Change Your Layers In the layers section, click on the top part of layer 2 Notice that Ted is gone Nothing in this layer Click on the bottom part of layer 1 Ted is back, but you can’t change him Now you can make a hat!
- 12. Change Your Layers In the layers section, click on the top part of layer 1 Now Ted is ready to be modified
- 13. Loading & Saving Objects Loading Objects File > Load Objects If the object was saved in more than one layer, those layers will also load Most finished objects are saved into one layer
- 14. Loading & Saving Objects Saving objects File > Save Object Saves the object in the active layer(s) Warning If you load a default object and change it, be sure to save the modified object as something else! Otherwise the original will forever be modified File > Save Object As
- 15. Save a Version of Ted Select File > Save Object As… In the Characters folder save as Big Ted 2 Now we can tweak with Ted and not mess up the original
- 16. Selecting Parts of an Object The Golden Rule When nothing is selected, everything’s selected! If no points or polygons in an object are selected, then whatever you do will effect the entire object in the active layer
- 17. Selecting Parts of an Object The Golden Rule If part of an object is selected, only that part will be modified
- 18. Selecting Parts of an Object Polygon selection Selected points are highlighted in yellow Polygon de-selection Once you have selected points and release the mouse button, drag the mouse over the selected points to de-select them
- 19. Selecting Ted with Polygons Click on the horizontal dividing line and pull down so the top view is bigger Click on the zoom tool to make Ted fill the space
- 21. Selecting Ted with Polygons Click on the Selection tab On the left, click on Sel Polys
- 22. Selecting Methods Hold the mouse down and drag over the polygons you wish to select Hold down the Command key and draw a circle around the polygons you wish to select
- 23. Selecting & Deselecting Once you select a part of your object and release the mouse, you are in deselect mode If you need to select more points or polys, hold down the Shift key
- 24. Deselect Everything To deselect any points or polygons click inside the numerics box in the lower left
- 25. Selecting Ted with Polygons Hold down the mouse and drag over the outer part of Ted’s cigar The polygons you select become highlighted
- 26. Modifying Parts of an Object Select what you want to change Select a tool from the Modify tab Find the viewport that works best for the modification Have at it!
- 27. Modifying Ted Select the Modify tab Under Translate, select Move (t) Cursor now a plus sign Choose a viewport and move the selected polys to make the cigar longer
- 28. Modifying Ted Select Rotate (y) Cursor now a curly arrow Give the cigar a twist Switch back to Move (t) and tweak your cigar to your liking
- 29. Modifying Ted
- 30. Modifying Ted In the Modify tab, whatever tool you have selected, turn that tool off Cursor is now in selection mode Looks like an X Drag over a row of polys to deselect them Hold the Shift key down to re-select them
- 31. Modifying Ted By selecting and deselecting polygons, select & deselect parts of Ted’s cigar then move and rotate different parts to whatever shape you would like
- 32. Selecting Ted with Points Works the same way as selecting polygons Drag over the points you wish to select or hold the Command key and draw a circle over the points you wish to select Selected points are highlighted in orange
- 33. Selecting Ted Select the Selection tab On the left click on Sel Points Hold the Command key and draw a circle around Ted’s left ear
- 34. Modifying Ted Select the Modify tab Select Move (t) tool Drag Ted’s ear out
- 35. Modifying Ted Select the Size tool (H) Put your cursor inside the selected points and drag your cursor
- 36. Modifying Ted Using the selection tools, select and deselect what parts of Ted you wish to modify to complete your finished Ted!
- 37. Saving Your Work Don’t forget to save what you are working on Select File > Save Object As To name your object as something different If this is a default object DO THIS File > Save Do this if you have already saved your object previously
- 38. Saving Ted Since we have already saved Ted as Ted 2, all we need to do is update our object. Select File > Save Or press Command S If you HAVEN’T saved a Ted 2 version then be sure you Save As your object
- 39. Save a Copy for your Homework Select File > Save As Make a copy of your modified Ted object to the desktop Later, attach this file to an email to me