
Recomendados
Mais conteúdo relacionado
Mais procurados
Mais procurados (17)
Semelhante a Magic cube final
Semelhante a Magic cube final (20)
Último
Último (20)
Magic cube final
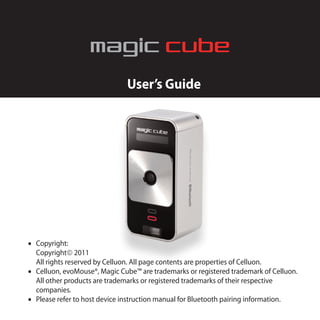
- 1. User’s Guide • Copyright: Copyright 2011 All rights reserved by Celluon. All page contents are properties of Celluon. • Celluon, evoMouse®, Magic Cube™ are trademarks or registered trademark of Celluon. All other products are trademarks or registered trademarks of their respective companies. • Please refer to host device instruction manual for Bluetooth pairing information.
- 2. Safety Precautions surfaces. Place the product on a flat surface. Avoid table or surface that is as transparent or reflective as glass or 1. Avoid exposing this product to direct sunlight for extend- mirror. ed periods of time, and keep it away from heat sources. 2. There is a risk of malfunction if product is used in places where sudden or extreme temperature changes occur. FCC Compliance Information 3. Applying excessive force or impact to this product may result in product damage, and will void warranty. 4. To ensure safety and prevent damage, use only the dedi- cated mini-USB to USB cable supplied with this product. This device complies with Part 15 of the FCC Rules. 5. Never attempt to disassemble or service this product Operation is subject to the following two conditions: yourself. Doing so can result in electrical shock and will 1. This device may not cause harmful interference to another void the warranty. device, and 6. This Class 1 laser product is certified by FDA safety regula- 2. This device must accept any interference received, includ- tion. For your safety, please do not stare directly into the ing interference that may cause undesired operation. laser source. Doing so could damage your eyes. 7. Avoid placing any object within the space between the main unit and the laser projection keyboard layout. 8. Please do not use this product on uneven or irregular 2 3
- 3. FCC Class B Notice - Reorient or relocate the receiving antenna. - Increase separation between the equipment and receiver. This equipment has been tested and found to comply within - Connect the equipment to an outlet on a circuit different the limits for a Class B digital device, pursuant to Part 15 of from which the receiver is connected. the FCC Rules. - Consult the dealer or an experienced radio/TV technician These limits are designed to provide reasonable protection against harmful interference when the equipment is oper- ated in a residential environment. FCC Warning This equipment generates, uses, and radiates radio fre- quency energy, and if not installed and used in accordance This equipment generates and uses radio frequency energy. with the instructions, may cause harmful interference to If this equipment is changed or modified in any way except radio communications. for modifications approved in this manual, it may cause However, there is no guarantee that interference will not harmful interference. Any unauthorized changes or modifica- occur with special tions to this equipment could void the user’s authority to installation. If this equipment does cause interference to operate this device. radio or television reception, which can be determined by turning the equipment off and on, the user is encouraged to correct the interference by one of the following measures: 4 5
- 4. RF Exposure Information possibility of exceeding the FCC radio frequency exposure limit. The antenna used for this transmitter must be installed to provide a separation distance of at least 20 cm from all per- ❏ Laser Safety sons and must not be co-located or operating in conjunction IEC 60825 : CLASS I with any other antenna or transmitter. FDA : CLASS II ❏ Caution : Battery may explode if replaced with an in- compatible battery. Dispose the used batteries according to the instructions. “ This transmitter Class 2 Laser Product must not be co-located or operated in conjunc- tion with any other antenna or transmitter.” KCC-CMM-CLK- RoHS compliant MagicCube ❏ Caution : Antenna shall be mounted in such a manner to minimize the potential for human contact during normal operation. The antenna should not be touched during operation to avoid the 6 7
- 5. ❏ Environmentally Friendly Disposal and Recycling About the Built-in Battery Rechargeable Lithium Polymer Battery: Battery Operating Time: Approx. 150 minutes (with con- tinuous use) Capacity: 700mAh (Max)@3.7V Charging the Battery: Use supplied USB cable to begin charging the battery. When the charging is complete, bat- tery status LED turns green. Charging Time: Approx.240 minutes This product does not contain any substances known to be Note hazardous to human health. To protect the environment, Charging time increases if product is used while charging. dispose of this product separately from household waste once it has reached its end of life, or take it to your nearest Celluon Service Center. 8 9
- 6. Cautions Contents 1. For safety reasons, be sure to use only the mini USB to 1. Product Features ........................................................12 USB cable specified for this product. 2. Make sure to fully charge the battery before using the 2. Package Contents ......................................................12 product for the first time. 3. How this Product Works .........................................13 3. Battery charging times may vary slightly depending on the ambient temperature. 4. Identifying Parts and their Functions. ................17 4. The battery may not be charge to 100 percent of its 5. Using the Projection Keyboard .............................21 rated cell capacity even when the battery status LED indicates green light. 5.1 Connecting via USB HID ..................................21 5. Using or storing the battery in high temperature, 5.2 Connecting via Bluetooth HID ......................22 humidity and pressure environments may cause the Specification .....................................................................44 battery to explode. 6. Since the battery is a consumable item, its storage capacity decreases gradually as time passes. 10 11
- 7. 1. Product Features 3. How this Product Works • English QWERTY keyboard layout. This product emits infrared light from the lower end • Compact size for portability – perfect for on-the-go of the product to detect objects such as fingers. When • Function icons and shortcut keys for ease of operation an object passes through the area illuminated by the • Non-mechanical optical mechanism for superior infrared light source, any infrared light reflecting off the durability object is detected by the sensor. Information on the • Built-in Lithium Polymer rechargeable battery for position and movement of the object is then analyzed to mobility and perform the product’s role as a keyboard. convenience Sensitivity: difference in thickness, shape, and color of • Compatible with latest devices: Window XP/Vista/7, the user’s fingers or operating environment result in Windows Phone 7, iOS4 (iPhone3GS/4, iPad), and differences in the amount of reflected infrared light. If Android 2.2 or higher the amount of reflected infrared light is appropriate, the sensor will have no problem detecting objects such as 2. Package Contents fingers. However, if the amount of reflected infrared light • Projection Keyboard becomes low because of the causes mentioned above • USB Cable or some other cause, the keystroke recognition rate may decrease or your keystrokes may not be recognized at • User’s guide all. On the other hand, if the amount of reflected infrared 12 13
- 8. light is too high, the keystroke recognition may become Conditions to Avoid: too sensitive or a “hovering” effect may occur. 1. Avoid direct sunlight (Hovering: keystroke is recognized before your finger 2. Avoid low color temperature light source, such as tung- touches the projection surface.) sten, halogen, or incandescent lamp is used. 3. Avoid uneven or irregular surfaces. Place the product on Therefore, it is necessary to compensate for differences in flat surfaces. finger characteristics or operating environment, and this 4. Avoid a table or surface that is as transparent or reflec- can be accomplished by adjusting the sensitivity of your tive as glass or mirror. projection keyboard. 5. Avoid placing any objects within the space between the Given the same amount of reflected infrared light, in- main unit and the laser projected keyboard layout. creasing the sensitivity will produce the effect of a higher amount of reflection, whereas decreasing the sensitivity Note will produce the effect of a lower amount of reflection. Because this product uses infrared rays, strong infrared With the sensitivity set to its minimum value, repeatedly radiation from direct or reflected sunlight or from tungsten press a key that is relatively far from the sensor (Spacebar, (halogen or incandescent) lighting may cause operating error. CTRL, etc.) to increase the sensitivity. As soon as your keystroke is recognized, stop adjusting the sensitivity and set the final setting value to one or two notches above original setting. 14 15
- 9. Caution 4. Identifying Parts and their Functions. Although this equipment is classified as Class 1 laser product, (1) Projector: Uses a red laser to project the image of a for your safety, do not directly expose your eyes to pattern keyboard onto a flat surface in front of the typist. projection beams or infrared rays. (2) Sensor: Picks up the infrared light reflected off the typist’s fingers and triangulates the location of the reflected light to determine which key was pressed. This sensor provides a keyboard function. (3) IR Light Window: Uses an infrared laser to emit an invisible plane of light a few millimeters above the projection surface so that the infrared light can be reflected off of the typist’s fingers to the sensor. Caution If one or more of the above modules are blocked by some cause, the projected keyboard image may not be displayed correctly or, the location and movement of the typist’s fingers may not be recognize correctly. 16 17
- 10. Front View Rear View Pattern Projector STRAP LOOP Sensor POWER SWITCH Battery / Bluetooth/ Keyboard/ Mouse/ Charging/ Operating Status LED Battery Lower LED USB USB Upper LED Charging Red Connected Green Green HID/SPP MODE MINI USB PORT Full Green Keyboard Upper LED SWITCH Low Orange Connected via USB Green HID Upper LED Connected via HID Bright Blue Searching last device Bright Blue(blinking) Connected via SPP Bright Blue Searching new device Dark Blue(blinking) Mouse Mode Upper LED Successful pairing Bright Blue Connected via USB Green (blinking) Disconnected Blue and Green(alternating) Connected via HID Bright Blue(blinking) SPP Upper LED Connected via SPP Bright Blue(blinking) Searching for device Dark Blue(blinking) Successful pairing Bright Blue Disconnected Blue and Green(alternating) 18 19
- 11. USB Connection Terminal 5. Using the Projection Keyboard 1. Purpose: USB device connection or power supply. This product is used as a keyboard and mouse via Blue- 2. USB Connector: Standard USB Mini-B type tooth HID and USB HID connection. 3. Interface Specification: Compliant with USB HID class specification version 1.11 5.1 Connecting via USB HID 4. Input Power: 0.5A 5V dedicated DC adapter or USB Bus This device is compatible with all USB HID capable oper- power from a host device. ating system. Bluetooth Connection Switches USB HID connection allows plug-n-play, without install- 1. Bluetooth HID Switch (Top) ing a separate driver. 2. Bluetooth SPP Switch (Bottom) 1) Connect Magic Cube™ and host device using supplied USB cable. Host device must support USB HID. Note: Most Windows devices support USB HID. 2) Turn on Magic Cube™. 3) Green LED indicates proper connection. If LED indi- cates blue, please check the connection. 20 21
- 12. 5.2 Connecting via Bluetooth HID Bluetooth HID compatible devices Magic Cube™ supports two types of Bluetooth: • iOS4 (iPhone 3GS/4/iPad and later) • Connection via Bluetooth HID does not require installa- • Android 2.2 and later tion of separate driver. * Some restrictions apply to Android devices. Please • Connection via Bluetooth SPP requires installation of visit our website www.celluon.com for more informa- diver, in the installation CD. tion on connecting Magic Cube™ to Android devices. • Windows XP/Vista/7 User must identify and use correct Bluetooth profile prior • Windows Phone 7 to connection. • Mac OS (using Keyboard only) Bluetooth profiles can be selected through slide switch behind the device: Bluetooth connection instruction - HID mode: Slide the switch up 1. Power on Magic Cube™ - SPP mode: Slide the switch down 2. Blue LED will blink in steady interval, an indication - (HID mode is set as default) that the device is ready to pair. Note When Blue LED indicates one long, followed by two Choosing the right Bluetooth mode quick blinks, the device is searching for previously paired device within its proximity. 22 23
- 13. This will last 30 seconds. This feature is added for con- ■ Changing keyboard mode to mouse mode venience, assuming there is a single host device. On the keyboard, press and hold “FN” key and tap Upon successful pairing, Blue LED will stop blinking and (do not press and hold the button) the mouse cursor become solid blue. key, located adjacent to space bar. A green LED will indicate successful change of mode. If Magic Cube™ cannot locate previously paired host ■ Changing mouse mode to keyboard mode. device within 30 seconds, it will delete previously stored Tap only mouse cursor button once (do not press and connection information and revert to pair mode. hold the button). • SPP Mode: Blue LED will blink in intervals, indicating ■ Adjusting key stroke sound level that the device is ready to pair • Increasing key stroke sound level 3. Upon successful pairing, Blue LED will stop blinking Press and hold “FN” key and press up arrow key. and become solid blue. • Lowering keystroke sound level Please refer to the host device manual for pairing Press and hold “FN” key and press the down arrow instructions. key. There are total 6 levels of sound, including 4. After successful pairing of host device and Magic mute. Cube™, keyboard function is default mode. • Sound level remains as adjusted when device is turned off and on. Please consider the environment when adjusting sound level. 24 25
- 14. ■ Adjusting keyboard brightness ■ Connecting to iPhone and iPad • Press and hold “FN” key and press right arrow key to iPhone and iPad connects to Magic Cube™ via Blue- increase brightness. tooth HID and a driver is not required. • Press and hold “FN” key and press left arrow key to 1) Make sure the Magic Cube™ is on a HID mode. (Slid- lower brightness. ing button should be pushed to ‘up’ position). • There are three levels of brightness. Default bright- 2) Turn on Magic Cube™ by sliding the power button ness is set at second level during power on. to the right. A blinking blue LED indicates that the device is ready to pair. Note 3) On iPhone/iPad, tap on Settings-General-Bluetooth. FN key is not a repeat key. FN key must be clicked once for each adjustment. 26 27
- 15. 4) Turn Bluetooth on by tapping the ON button. 6) Locate “Celluon” under Device. 5) iPhone/iPad will now search for pairing device. 7) Select “Celluon” by tapping “Celluon”. 28 29
- 16. 8) A message will pop up “Celluon would like to pair 10) Successful pairing is indicated by “Connected” with your phone. Enter the passkey “xxxx” on Cel- message, and blue LED on Magic Cube™ becomes luon”. solid. 9) Type passkey on Magic Cube keyboard and press ENTER. 11) To turn off Magic Cube™, slide power button to the left. 12) With iPhone/iPad Bluetooth on, Magic Cube™ will connect automatically upon power on. 30 31
- 17. 13) With Magic Cube™ ON from initial connection, ■ Connecting to Android devices iPad/iPhone will connect automatically when Some Android 2.2 and higher devices support Bluetooth is turned back on from host device. Bluetooth HID and it does not require installation of 14) Please turn off Magic Cube™ when keyboard is not separate driver. Please visit our website www.celluon. in use. com for more information on Android drivers. Note Pairing your Android device iPhone/iPad OS (iOS4) does not support mouse function. 1) Make sure the Magic Cube™ is on SPP mode by slid- When keyboard does not function with successful pairing, ing the slide button to lower position. please make sure the device is in keyboard mode. If device 2) Turn on Magic Cube™ by sliding the power button is in mouse mode, tap the cursor button located adjacent to the right. A blinking blue LED indicates that the to spacebar to change back to keyboard mode. device is ready to pair. 32 33
- 18. 3) Navigate through Android as follows: 4) Turn on Bluetooth on Android by checking the box. Home → Main Menu → Settings → Wireless and Network → Bluetooth setting. 34 35
- 19. 5) From the same screen, with Bluetooth ON, tap on 6) Android device will detect “Celluon” and display Scan devices. message “Pair with this device”. 7) Tap on “Pair with this device”. 8) A new message will display on your Android device: “Bluetooth pairing request. Enter PIN xxxxxx to pair with ‘Celluon’.” 36 37
- 20. 9) Type passkey on Magic Cube™ and press ENTER. ■ Connecting to PC When correct passkey is entered, the Android Windows 7 supports Bluetooth HID and installation of device is paired. separate driver is not required. Connecting via Bluetooth HID Note 1) Please make sure Magic Cube™ is on HID mode by Android OS supports mouse function. To switch from sliding the switch to the up position. keyboard to mouse mode, press and hold “FN” button 2) Turn on Magic Cube™ by sliding the power button and tap the cursor button, located adjacent to space to the right. A blinking blue LED indicates that the bar. To change back to keyboard mode, tap cursor device is ready to pair. button once. 3) Please check your PC and make sure Bluetooth is on. 4) With Bluetooth on, click on Bluetooth icon on the task bar. Windows will search and locate “Keyboard.” Highlight keyboard by clicking on found device and press next. 5) Enter passkey on Magic Cube™ and press ENTER. 6) If you choose “create passkey” option, it will display an 8-digit passkey. 7) Press the passkey on the Magic Cube and press 38 39
- 21. ENTER. Note 8) Successful paring will be indicated by solid blue LED Windows 7 supports multi-touch mouse function. To on the Magic Cube™ device. switch from keyboard to mouse mode, press and hold 9) To turn off Magic Cube™, slide the power button to “FN” button and tap the cursor button, located adjacent the left (OFF). to space bar. To change back to keyboard mode, tap the 10) Magic Cube™ will connect to host PC automatically cursor button once. when turned back on. Additional features: Connecting via USB HID for Windows and Mac (Plug-n- Volume adjustment (key click feedback sound) – play) 1. Press and hold FN and tap ‘up’ arrow to raise volume 1) Connect the host device and Magic Cube™ using mini- 2. Press and hold FN and tap ‘down’ arrow to lower USB to USB cable. volume 2) Turn on Magic Cube™ by slide the power button to the * Note: There are 6 stages of adjustments. Each adjust- right (ON). ment requires repeated steps. 3) Successful connection is indicated by solid green LED. Projection keyboard brightness adjustment – 1. Press and hold FN and tap ‘right’ arrow to increase brightness 40 41
- 22. 2. Press and hold FN and tap ‘left’ arrow to lower bright- 2. From mouse mode, tap on cursor button to switch ness back to keyboard mode. Solid LED indicates keyboard * Note: There are 3 stages of adjustments. Each adjust- mode. ments requires repeated steps. * Please note: mouse function is only available on Power save mode – devices that support cursor/mouse function. 1. Press and hold FN and tap BACK key to disable laser projection Special keys – 2. To reactivate laser projection, tap in the operation area 1. Please note that not all keys displayed on projection with 3 fingers (3 fingers must be separated). keyboard layout correspond to input keys on host device. For example, MENU key will not function on a Switching between keyboard and mouse mode – host device that does not support the MENU function. (Note: default mode is keyboard function) Same applies to FN and ALT function keys. 1. From keyboard mode, press and hold FN and tap on cursor button, located adjacent to space bar to switch to mouse function. Blinking LED indicates mouse mode. 42 43
- 23. Specification ■ Electrical Characteristics Item Specification ■ Pattern Projector External Power Item Specification USB Power / less than 5V 500mA Supply Light Source Red Laser Diode Lithium-polymer battery, Battery & Capacity Keyboard Layout 19mm Pitch, QWERTY Layout 700mAH(MAX)@3.7V Keyboard Size Width : 240mm, Height : 100mm Battery Operating Approx. 150min 100mm from the Bottom of the Time keyboard Location Device Battery Charging Approx. 240min Project Surface Non-reflective, opaque flat surface Time USB 1.1 & 2.0, USB HID Ver 1.0, SPP USB Interface ■ Keyboard Sensor Ver 1.2 Item Specification Bluetooth v1.1 class 2, HID/SPP Profile Approx. up to 350 characters per Frequency Range 2402-2480MHz Recognition Rate minute Channel 79 Operating Surface Any firm flat surface Modulation GSFK 44 45
- 24. ■ Environmental Conditions Item Specification Operating Tem- 0 ~ 35°C perature Storage Tempera- -5 ~ 35°C (with Batteries included) ture ■ Dimensions and Weight Specifications Item Specification Size(mm) 38mm x 75mm x 29mm Weight (g) Max. 78 g Celluon, Inc. Ace High-End Tower 918, 235-2 Guro-dong, Guro-gu, Seoul, Korea (152-740) sales@celluon.com , support@celluon.com 46