This document provides templates and guidance for creating an engaged learning project with three components: a scenario, presentation page, and student pages. The scenario template guides the creation of a narrative describing what students and teachers would experience participating in the project. The presentation template outlines key elements to include about the project such as abstract, learner outcomes, structure of learning, assessment, and standards alignment. The student page template demonstrates how to design pages that provide students with materials and guidance to complete project tasks. Templates are provided for consistency but customization is encouraged. Overall the document aims to help educators design effective engaged learning projects.
1. Project Design Guide
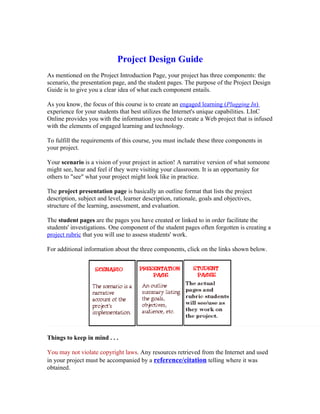
As mentioned on the Project Introduction Page, your project has three components: the
scenario, the presentation page, and the student pages. The purpose of the Project Design
Guide is to give you a clear idea of what each component entails.
As you know, the focus of this course is to create an engaged learning (Plugging In)
experience for your students that best utilizes the Internet's unique capabilities. LInC
Online provides you with the information you need to create a Web project that is infused
with the elements of engaged learning and technology.
To fulfill the requirements of this course, you must include these three components in
your project.
Your scenario is a vision of your project in action! A narrative version of what someone
might see, hear and feel if they were visiting your classroom. It is an opportunity for
others to "see" what your project might look like in practice.
The project presentation page is basically an outline format that lists the project
description, subject and level, learner description, rationale, goals and objectives,
structure of the learning, assessment, and evaluation.
The student pages are the pages you have created or linked to in order facilitate the
students' investigations. One component of the student pages often forgotten is creating a
project rubric that you will use to assess students' work.
For additional information about the three components, click on the links shown below.
Things to keep in mind . . .
You may not violate copyright laws. Any resources retrieved from the Internet and used
in your project must be accompanied by a reference/citation telling where it was
obtained.
2. Make certain you are familiar with the guidelines for naming an HTML file. Following
these rules will make linking your pages and images easier.
Before you begin writing your pages think about the qualities of a good Web page. Visit
our page on Web page design for guidelines.
To save time in creating your pages, your facilitator can guide you to templates which
you should use for your project Web pages. Contact your facilitator for directions on how
to obtain these templates when you are ready to begin designing your Web pages.
Note: If you will be drafting in a word processor, be sure to keep all of your work in
plain text. Formatting text at this time may create problems when you paste your work
into an HTML editor.
Click below to see the format you should use when creating your project. These are
provided to help you get started writing your own page.
• Presentation Template
• Scenario Template
• Student Page Template
• Rubric Template
• Unit Implementation before Link
Project Presentation Framework
One of the components of your project is to create a project presentation page. This page
serves several purposes. It is a planning tool, an organizational tool, and a tool to present
your project. Some people enjoy starting this page before they begin the scenario. This
page is written in outline form for a quick reference of important project information.
Included on this page is a brief description of the rationale for the project and who the
audience will be.
Title of Project/Unit:
Subject:
Grade Level:
Abstract:
Three- or four-sentence description of your project and audience
3. Learner Description/Environment:
Characteristics of the learner and description of the class setting
Time Frame:
Learner Outcomes:
What do you want the students to know and be able to do when they complete the
project/unit?
Structure of the Learning:
Content:
The content is framed within a student scenario that contains an authentic student task,
a challenging problem and requires multidisciplinary inquiry and investigation. The task
will require collaboration with peers and possibly mentors. The hook you create
captivates the learner and creates an intrinsic need to know.
Process:
The process is the way you structure the learning to engage students in the project/unit
goals and objectives. How are they going to accomplish the task? What are the students
doing? What is the teacher doing? How are you assessing the process of learning? How is
the student directing the learning?
Product:
What is the end-product the students will produce? How is technology integrated within
this product? How will you assess the product?
Best Use of Technology:
How is technology integrated within this project? How is the technology supporting the
engaged learning? How are you using two way communication with mentors or experts?
How are you collaborating with other classrooms or students?
Assessment:
Assessment is not a test at the end of a unit. It is found in all three learning components:
the content, the process, and the product. It is performance-based, seamless, generative,
and ongoing. Students need multiple opportunities to demonstrate their learning.
Project/Unit Evaluation:
4. After facilitating and guiding your students through the project/unit, ask yourself the
following questions: What worked well? What wasn't as successful as I had hoped? What
would I modify or change before I use the project/unit again?
Alignment with Standards:
What local, state, and/or national standards have you addressed?
There are three templates available to use when creating your project. Click below to see
them. When you view them you will notice that the presentation and scenario pages have
buttons at the top that link to the other components of your project. It is not appropriate
for your student pages to link to the presentation page or scenario page. The pages
include a footer that identifies the tag lines describing the funding organizations for the
course, author of the document, and the date.
To save time in creating your pages, we have developed templates for you to use.
Contact your facilitator for instructions on how to obtain and begin using these
templates.
Click below to see the format you should use when creating your project.
• Presentation Template
• Scenario Template
• Student Page Template
Examples of some of the project presentation pages are listed below. Click on them to
view.
• We Never Promised you a Greenhouse
• All about Water
• Lead It Be
• Exploring our Past: the Revolutionary War
Click here to view the rubric we will use to assess your presentation page.
Presentation Rubric
Project Name:
5. Project Authors:
Evaluator:
Author E-mail Addresses (one per line):
Evaluator E-mail Addresses (one per line):
Purpose: The purpose of this rubric is to assess the participants' presentation pages
as well as to help guide them in the development of their presentation page.
First Section - each worth one point. "Yes" answers earn one point; "No"
answers earn zero points.
Criteria Yes No
Title of Project/Unit
Link to Scenario Page
Link to Student Pages
Subject and Grade Level
Time Frame
2 1 0
Criteria
Developed Attempted Not Present
Includes Abstract
Abstract Summarizes Project Clearly and
Concisely
Learner Description/Environment
Goals and Objectives
Alignment with Standards
6. Structure of the Learning:
Challenging Content
Engaged Learning Evident
Best Use of Technology Evident
Assessment/Rubric
Project/Unit Evaluation
Total Points: 25
Comments:
Your Project Title Here
Summary
Scenario Student Pages Rubric Index of Projects
Subject:
Grade Level:
Abstract:
Three- to six-sentence description of your project and audience. A good abstract is very
important because your abstract will be listed on the same page as a dozen or more other
project abstracts. Your abstract needs to be descriptive enough that an educator looking at
this page of abstracts will want to click on your project link to learn more about it.
Describe the overall investigation your students will be doing. An abstract that says "This
is an engaged learning multidisciplinary, authentic, challenging project that effectively
7. uses technology," contains lots of buzzwords, but does not tell the reader anything about
your project that will make him/her want to see more.
Learner Description/Environment:
Characteristics of the learner and description of the class setting
Time Frame:
Duration of your project, i.e., weeks of study, time needed per week
Learner Outcomes:
1. What do you want the students to know and be able to do when they complete the
project/unit?
2. These outcomes need to be consistent with the content/process of your project and
the assessment rubric for students.
3. Good learner outcomes are measureable. They will help you assess your
students.
4. A few good verbs for learner outcomes are: construct, draw, identify, perform,
collect, interpret, analyze, organize, apply, demonstrate understanding by, and
compare.
5. Some examples of verbs to avoid are: understand, cover, learn, and know.
6. Create more list items as needed.
Structure of the Learning:
Content:
Describe the authentic student task and hook. The content is framed within a student
scenario that contains an authentic student task, a challenging problem and requires
multidisciplinary inquiry and investigation. The task will require collaboration with peers
and possibly mentors. The hook you create captivates the learner and creates an intrinsic
need to know.
Process:
Include the opportunities for student direction. The process is the way you structure the
learning to engage students in the project/unit goals and objectives. How are they going
to accomplish the task? What are the students doing? How are groups used? What is the
teacher doing? How is the student directing the learning?
Product:
What is the end product(s) the students will produce? Why is the product(s) original,
useful, meaningful, and/or important to the students and to other people?
8. Best Use of Technology:
What does technology add to this project that would not be possible without the
technology? What equipment, software, and connection are required in order to do this
project? How is technology integrated within this project? How is the technology
supporting the engaged learning? How is technology used for intermediate and/or end
product(s)? How are you using technology to find recent or frequently changing
information? How and why are you collaborating with other classrooms or students?
How and why are you using two-way communication with mentors or experts? How are
you using technology to publish student work to a wider audience?
Assessment:
Assessment of your student's work is not a test at the end of a unit. It is found in all three
learning components: the content, the process, and the product. It is performance-based,
seamless, generative, and ongoing. Students need multiple opportunities to demonstrate
their learning. List the opportunities for assessment of student work. What strategies will
you use to assess students' prior understandings related to project content and their
previous skill development? How are you assessing the process of learning? What
discussions, intermediate products, or checkpoints will provide opportunities for students
to receive or request feedback during the project? How will students be encouraged to
reflect on their progress? How will you assess the end product? How will students be
graded? How will students have the opportunity to review or provide input on the rubric
or other grading procedures? Please provide a link to your rubric for students in this
section.
Project Evaluation:
How will you evaluate the effectiveness of your project? How will you determine what
worked well? How will you determine what modifications should be made in the project
before it is used again?
Alignment with Standards:
1. What local, state, and/or national standards have you addressed?
2. When possible, make links to the relevant standards on the Web.
3. Use the LInC Web page with resource links to standards to help you.
4. Create more list items as needed.
Your Project Title Here
Scenario
9. Summary Student Pages Rubric Index of Projects
Note on using this template: Past participants have found it easier to get
started on the scenario by thinking of it in terms of what happens at the
beginning, in the middle and at the culmination of the project. So we
have included these headings in this example template. However, you
are welcome to use different headings, different number of sections, a
different organization/layout altogether, graphics, backgrounds, tables,
etc., as long as you describe your vision of what is taking place in your
classroom as students participate in the project. See the "Writing a
Project Scenario" page for examples of different scenario formats. The
only formatting they have in common is the header and footer from this
template.
Background/Context
You may wish to include a few introductory sentences to establish the context before
launching into the narrative. What subject and grade level is it? What curriculum area(s)
and specific topics are being addressed? What is the length of unit? What else would
another educator need to know to understand your scenario?
The next sections should be a narrative version of what someone might see, hear and
feel if they were visiting your classroom. Use third person, active voice. What would
the teacher(s) be seeing, doing and saying? And with what result? What would the
students be doing or saying? And with what result? Who else is involved besides the
teacher(s) and students?
Beginning/Getting Started
How is the project introduced and how does it get started? How is the project "hooked
into the task?" How are prior knowledge and skills assessed? How do students determine
the topic, aspect of the topic, problem or issue about the topic to be investigated? How do
students come up with questions, concerns, issues, hypotheses, or problem-solving
suggestions that guide their investigation and overall participation in the project? How do
you turn the problem over to the students so they begin their action plan? How are the
students grouped?
Middle/In Progress
Describe the typical activities students and teachers are doing. Describe the roles students
and teacher play during the project. Describe how the teacher is coaching,
troubleshooting, and providing feedback. What tools, materials and resources are students
using? How is technology being used? What twists or new challenges are introduced to
10. maintain the focus on your goals and continue to keep your students involved? What
intermediate products are being worked on and how are the students being assessed?
End/Culmination
What is happening at the end/culmination of the project? What are the students producing
to reflect their learning? What aspects of the projects are brought to closure? What
aspects are ongoing? How are the students being assessed? How are the products shared
with the class, local community, or the Internet community?
Your Project Title Here
Note on using this template: We encourage you to be creative with your
Web pages for students. They do not need to look just like this template.
Organize them as you like and add colors, graphics, backgrounds,
tables, etcetera that are inviting to your students and relevant to the
project. See the "student page" links on the "LInC Project Examples"
page for examples of many different kinds of Web pages for students.
The only things they have in common are:
• The project title appears somewhere prominently on the page.
• The LInC footer is at the bottom of each Web page.
It is considered good design to organize pages with some structure so students can find
what they need and to include ample whitespace such as indenting blocks of text so the
pages do not seem too dense. Have fun with your pages as you try out your design ideas!
Your Heading Here
Your materials for students to view go here.
You may wish to design a page with the look you want and then use that page as a
template for other Web pages you create for your students.
Another Heading
Your Web pages for students need to provide enough information, guidance, and
resources so that a student who is not in your class could do the project by using these
Web pages. Your Web pages should also be sufficient for a teacher who is not in your
building to be able to use this project with his or her students. Web pages for students
should be directed at student readers of the selected grade level (as opposed to being
11. directed at a teacher reader). Take care to use good Web design principles when
designing your pages.
Subject: Physical Science, Construction Technology II and III
Grade Level: Grades 9, 11, and 12
Abstract:
The Greenhouse Project consists of the design and construction of a working greenhouse
for the Plymouth Regional High School science department. The students will be taking
charge of all facets of the project, including needs assessment, greenhouse basics,
building design, funding proposal, project proposal presentation, and construction. It will
be a multi-disciplinary project joining freshman physical science students and junior and
senior vocational building trades students.
Learner Description/Environment:
Plymouth Regional High School is located in central New Hampshire and serves a
student population of about 850 students from seven towns. The attached regional
vocational center accepts students from two other high schools, in addition to our own
students.
The students in this project will be guided by a physical science teacher, a construction
technology teacher, and a library media specialist. Additional assistance, as needed, may
be provided by the computer coordinator, business technology teacher, grant coordinator,
library and audiovisual staff, and other students from various classes.
In addition to a small number of computers in their classrooms, the students also have
access to computers, internet, scanners, LCD panels and video projection, and a variety
of print and non-print resources in the Library Media Center and in the Curriculum Lab
across the hall. The Curriculum Lab has 25 networked Internet accessible computers and
is accessible by individual students or may be scheduled for use by a whole class.
12. Time Frame:
The stages from needs assessment through project presentation to the school board will
take approximately six to eight weeks in the spring. Actual construction of the
greenhouse will be accomplished by the Construction Technology II and III students
during the following school year.
Learner Outcomes:
1. Students will conduct a needs assessment and apply knowledge gained to the
solution of a real world problem.
2. Students will apply scientific knowledge in a design and manufacturing process.
3. Students will access, critically evaluate and utilize information from a variety of
sources (technical journals, curriculum standards, professionals in the science and
construction fields).
4. Students will communicate via e-mail, list serve, and chat.
5. Students will use CAD software, spreadsheets and scheduling software to plan the
design and construction of the greenhouse.
6. Students will draft a construction plan from concept to completion.
7. Students will locate, pursue, and secure funding.
8. Students will create and present a proposal to an outside agency (school board)
for approval.
9. Students will utilize a blueprint to build a structure satisfying architectural
specifications.
Structure of the Learning:
Content:
A recently approved bond issue at the high school includes, among other things, a major
renovation of the science facilities. Early in the process, the science staff recommended
that a greenhouse be included to address a variety of curriculum goals. However, the
greenhouse was eventually eliminated from the bond proposal. Now the students from
physical science and construction technology are being given the opportunity to become
consultants and contractors for a greenhouse project. By combining their knowledge and
skills in science and construction fields, the students will carry the project from needs
assessment through to the actual construction of a new facility on their school grounds.
Process:
The project starts with the science students conducting a needs assessment, to identify
why a green house is needed. The construction technology students are simultaneously
investigating the basic designs, requirements and location issues of a typical greenhouse.
From that point, the successive stages involve a variety of interdisciplinary groups, with
each stage building on the information gathered in the previous stage. Student "experts"
from a previous group reform into new group combinations to analyze and build upon the
13. previous research and reach a new set of conclusions for their topic, to be presented
orally (and in writing) to the next group. Each group or series of groups includes a
different mix of science and construction technology students, with each student having
the experience of being a group leader. The process of "backward planning" is also to be
used within the groups.
Although the instructors have planned groups for each of the major sections, the size and
number of students in these groups are subject to modification. For example, if, as a
result of research into design basics, a fourth style of greenhouse is discovered that
students would like to pursue, the project could easily be modified to utilize four teams of
six, instead of three teams of eight. By the same token, the Needs Assessment,
Greenhouse Basics and Funding groups could also be modified per student request.
Product:
Each group is responsible for compiling the results of its research and presenting the
group's conclusions orally and in writing to the students who will be members of the
groups for the next step. Additionally, the information and conclusions compiled by one
group become the foundation upon which the next group(s) builds. For example, the
Building Design groups use information from the Needs Assessment and Greenhouse
Basics groups to create a design and determine a site for the greenhouse. The conclusions
of all the groups become the comprehensive proposal which is presented to the School
Board. The culminating, and very visible, product will be the greenhouse itself,
constructed by students on school grounds and used by students in support of the
curriculum.
Best Use of Technology:
Computers and the internet provide access to a great deal of information for this project --
from researching state curriculum standards, to contacting other schools with
greenhouses, to contacting greenhouse professionals and suppliers. It also provides the
major means of communication, such as e-mailing a school to determine how they
planned, built and used their greenhouse; or joining a listserv of greenhouse professionals
to elicit advice on greenhouse features; or contacting suppliers for prices of materials.
The construction technology students also use CD-ROM programs to research
greenhouse designs and CAD software, spreadsheets and scheduling software to plan the
design and construction of the greenhouse. Intermediate reports by the groups and the
final presentation to the School Board will involve a variety of technology, from word
processing and graphics design for written components, web page design for the school
website (with FrontPage), presentation software (such as PowerPoint), LCD panel,
overhead projector, and/or AverKey.
Assessment:
Assessment of the students' work will involve rubrics designed for each group's set of
tasks, i.e., Needs Assessment, Greenhouse Basics, Building Design, Funding, Project
14. Approval, and Leadership. The major components within the rubrics address research,
oral presentation and written summary (including effectiveness as a resource for
subsequent components of the project). Students will become acquainted with the rubrics
in advance and can use them as checkpoints for themselves as their work progresses. The
majority of the rubrics will be scored by the instructors. However, the oral presentation
rubric will combine assessment by the instructors and the students' peers.
Project Evaluation:
As this project has four sequential components, at the completion of each component the
three instructors will meet as a team to discuss what worked well and any necessary
modifications to the plan for the remainder of the project. Data to be accessed for this
meeting would include student feedback as provided on the oral presentation evaluation
forms as well as student success/failure as indicated by scores on the rubric for that
particular component. Modifications in terms of the amount of guidance to be provided
could easily be made at each juncture.
In the students' eyes, school board approval of the project and completion of the
construction of the greenhouse will probably be the primary indicator of project sucess.
The instructors' evaluation however, will focus more on the students' development of
skills in the areas of research, presentation, and use of technology.
The opportunities to use this particular project at our school again are slim. If we are
successful in obtaining approval for and constructing a greenhouse that will meet
curriculum needs, there should be little need for a second greenhouse in the near future.
However, with minor modifications, the project could be used to construct other facilities
for our school. One idea that comes immediately to mind is a "student lounge" for earned
time students as currently they have no area in which to gather except the library.
Alignment with Standards:
Construction Technology Standards
Developed by Plymouth Regional High School Building Trades Instructors and
Craft Committee
Building Trades I
• Score 100% on Safety test
• Score 85% on Construction Vocabulary test
• Understand and exhibit good work attitudes and work ethic
• Identify parts of a house (interior and exterior)
• Identify different kinds of wood
• Understand lumber dimensions
• Identify hand tools, understand their use and develop skill in using them
• Develop skill using shop machines
• Identify types of fasteners and their use
15. • Understand proper nailing patterns and techniques
• Measure accurately to 1/16"
• Lay out and build a wall section including both a window and door opening
• Correctly make a leader for a 2 x 6 wall
• Be able to square to a wall using Pythagorean theorem
• Be able to square a deck using diagonals
• Set up and level staging on both level and sloped terrain
• Set up and use a transit
• Be able to solder pipes together
• Understand and be able to wire a basic switch and outlet
• Understand how to safely use ladders, pump jacks, etc.
Building Trades II
• Understand and use formulas for estimating materials
• Problem solving techniques as they relate to building construction
• Develop experience in many of the following areas:
o site layout
o foundations
o framing
o masonry/chimneys
o roofing
o stair construction
o electrical (telephone, cable TV, thermostats)
o plumbing/heating
o insulation
o sheet rock
o install exterior windows and doors
o siding
o cabinet installation
o interior trim and finish
o painting/staining
o landscaping
Building Trades III
• Gain further experience in Building Trades II areas
• Act as lead carpenter
• Understand role of general contractor
• Understand and be able to write basic construction specifications
• Basic blueprint reading
• Be able to develop a timeline for job completion
New Hampshire K-12 Science Curriculum Framework
16. 1a. Students will demonstrate an increasing understanding of how the scientific enterprise
operates.
• Formulate questions and use appropriate concepts to guide scientific
investigations and to solve real world problems
• Use ratios as a means of comparing very large/very small numbers, e.g., building
scale models
• Explain how scientific knowledge is applied in the design and manufacture of
products or technological processes, e.g., water purification systems, sewage
treatment systems, microwave ovens, resistors
2c. Students will demonstrate an increasing ability to analyze, synthesize, and
communicate scientific information using technology.
• Compile and display classroom data on a computer
• Use technology to share data with classmates or other groups of students
• Store data in an appropriate technological device
• Manipulate data on a database, e.g., rearranging, sorting, selecting, using a
spreadsheet
• Analyze data graphically with technological assistance, e.g., graphing calculator
• Communicate data through an electronic medium, e.g., camera, tape recorder,
computer modem
2d. Students will demonstrate an increasing ability to understand how technology is used
to synthesize new products.
• Construct simple projects from readily available materials found at home **
• choose appropriate common materials for mechanical construction of simple
models **
• Make safe electrical connections with various electrical components **
• Assemble and/or take apart a device to identify how it works, e.g., simple motor,
door bell, telephone, ice cream maker **
• Create and/or reassemble technological models and identify how they work **
5c. Students will demonstrate an increasing ability to understand the relationships among
different types and forms of energy.
• Recognize and give examples of the various forms of energy, e.g., heat, light,
sound, electrical, mechanical, magnetic, chemical and nuclear **
• Show by examples how types of energy are used for specific purposes **
• Observe and describe how one form of energy may be transformed into another
**
• Build or design a device to demonstrate energy transfer and apply the knowledge
gained to how energy transfer impacts on the operation of devices found in the
home, e.g., home heating systems, refrigerators **
17. • Collect observations to show that transformations of energy involve the
production of heat **
• Experimentally perform the transformation of one energy form to another, e.g., by
building a simple electric motor
5d. Students will demonstrate an increasing understanding of how electrical and magnetic
systems interact with matter and energy.
• Plan, conduct, and explain an investigation which demonstrates a complete simple
circuit with wires, bulbs, switches, and a power source **
• Describe and practice appropriate safety precautions, particularly in regard to
electricity **
• Construct a simple series, parallel or compound circuit
• Measure all circuit values in a compound circuit
5f. Students will demonstrate an increasing understanding that energy can be transmitted
by waves, using light and sound as examples.
• Conduct investigations to demonstrate the properties of reflection, refraction and
diffraction of light
6a. Students will demonstrate an increasing ability to recognize parts of any object or
system, and understand how the parts interrelate in the operation of that object or system.
• Identify and describe the essentials parts of any object or system **
• Relate structure and function of parts of any object in a system to the system as a
whole **
• Describe the interrelationships among the parts of an object or system **
• Demonstrate and describe how parts of a system influence each other, including
feedback
• Demonstrate how systems include processes as well as parts, e.g. human body,
telephone system, solar system
• Show how one system can be part of another system, and how systems influence
each other
• Predict how certain changes in the system will/will not affect the operation of the
system
6c. Students will understand the meaning of models, their appropriate use and limitations,
and how models can help them in understanding the natural world
• Define and describe various physical models and their uses, e.g., cell model,
model card **
• Use graphs, geometric figures, number and time lines, and other devices to
represent events and processes in the natural world **
18. • Construct one or more physical models representative of objects or processes in
the natural world, and explain how the elements of the model are representative of
the real object, e.g., solar system, dinosaurs, telephone **
• Recognize that a model is a representation of an object or process and is not
identical to the object or process **
• Distinguish among physical (e.g., DNA), mathematical (e.g., D=RT), and
conceptual (e.g., atom) models and give examples of each
• Use different models to represent the same object or process
• Illustrate how models allow scientists to better understand the natural world
6d. Students will increasingly quantify their interactions with phenomena in the natural
world, use these results to understand differences of scale in objects and systems, and
determine how changes in scale affect various properties of those objects and systems.
• Measure properties of objects, to a reasonable degree of accuracy, using standard
scientific instruments such as a ruler, balance, clock, and thermometer **
• Calculate derived measurements of objects, such as area, volume, and density
from direct measurements made in the laboratory **
• Determine that increases in linear dimensions (length) have a large effect on area
and volume **
• Calculate from direct measurements, many of the derived measurements of
objects such as density, velocity, inner and surface areas, volumes, perimeters,
and changes in heat content
• Calculate averages and ranges of measurement values for certain properties or
processes in a system
• Correlate the mathematical relationships among length, area, volume, surface
area, mass, etc.
• Convert data collected from measurements into graphs and derive mathematical
relationships from the data and graphs
• Determine the degree of error in any measurement given the accuracy of the
instruments used
• Express relationships among measurements in the form of a ratio, proportion, or
percentage when appropriate
** All specific proficiency standards apply to 10th grade except those marked with the double asterisk.
Those standards are actually proficiency standards at the 6th grade level. They are included here as they
will be addressed as part of this project and are not currently taught within the elementary/middle school
science curriculums.
These standards are also closely associated with the National Science Education Standards.
Information Power: The Nine Literacy Standards for Student Learning
(ALA/AASL)
Standard 1: The student who is information literate accesses information efficiently and
effectively.
19. Standard 2: The students who is information literate evaluates information critically and
competently.
Standard 3: The student who is information literate uses information accurately and
creatively.
Standard 6: The student who is an independent learner is information literate and strives
for excellence in information seeking and knowledge generation.
Standard 8: The student who contributes positively to the learning community and to
society is information literate and practices ethical behavior in regard to information and
information technology.
Standard 9: The student who contributes positively to the learning community and to
society is information literate and participates effectively in groups to pursue and
generate information.
Substrate
The Greenhouse Project consists of the design and construction of a greenhouse for
Plymouth Regional High School. The students will be taking charge of all facets of the
project, including needs assessment, building design, fund raising, project presentation
and construction. It will be a multi-disciplinary task joining freshmen physical science
students and junior and senior vocational building trades students. The stages up through
project presentation will take approximately six to eight weeks in the spring. Actual
construction of the greenhouse will be accomplished by the Construction Technology II
& III students during the following school year. The primary teachers are Ina Ahern
(Science), Douglas Ross (Construction Technology) and Mardean Badger (Library Media
Specialist).
Planting the Seed
The project will be introduced to each class separately by the respective instructors: "As
you know, we've been working on getting an addition to our building for the last few
years. On Saturday, March 20, on our third attempt, the public approved the $6.3 million
bond issue at the school district meeting. One of the primary areas being addressed in the
building is the science facility — we will be renovating the current classrooms and
adding four new classrooms at the back of the building. In the normal building design
process from concept to finished plan, many hard decisions and choices are made as to
20. what to include or exclude — and one that affected us was the elimination of a
greenhouse early in the process. But we have two groups of students right in this building
who can become the consultants and contractors for this project — Ms. Ahern’s Physical
Science class and Mr. Ross’s Construction Technology III class."
Both classes gain an understanding of the overall project (needs assessment, design
considerations, selection of a design, funding research, public presentation and actual
construction) and understand their specific role(s) in the project. During the course of the
project, students work on different teams that are responsible for different facets of the
program. Some of these teams include students from only one class, while others have
representatives from both classes. Each team has a leader or, in the case of joint teams,
co-leaders.
The physical science class is primarily responsible for conducting the needs assessment.
Mary asks "What is a needs assessment?" John responds, "It's a kind of survey; we need
to find out why we need a greenhouse." "We could ask all the science teachers why they
need it for what they are teaching — and what should be in the greenhouse, too." "Are
there other schools in the state that have greenhouses?" "Maybe we could get some
information from businesses that have greenhouses." As the discussion continues and
ideas begin to gel, the students realize that they may need three or four groups to gather
all the information needed — from science and other teachers; from state curriculum
standards; from other schools that have greenhouses; and from greenhouse professionals.
Ms. Ahern schedules the Curriculum Lab upstairs for a few periods and, after Mrs.
Badger reviews some basic procedures, the students begin their research. The teacher
survey group starts looking for some tips on how to write surveys (they find the librarian
has put some tips for survey writing on the project website). The students investigating
other schools discover that Webster, the state website, has a listing of schools with links
to their respective web sites — and they begin composing some questions to e-mail to the
science departments (or vocational agricultural programs) in those schools. And after
working with different combinations of terms, one of the students finds some references
to school greenhouses in other states by using one of the web search tools. Another
student asks if there are standards for what has to be taught in biology class, and Ms.
Ahern shows them how to find New Hampshire's science curriculum frameworks on-line.
As each group begins their work and accumulates information, they begin to organize the
information so they can present their findings to the construction technology students for
the next step — and they also realize that this summary will be important later in the
process, because the administration and school board will want to know why a
greenhouse is needed before they approve the final project for construction.
While the physical science class works on the needs assessment, the Construction
Technology II & III class has been informed that this year's project, a greenhouse, will be
constructed in cooperation with science students and they will be designing, estimating
materials, pricing materials and, again, building the structure.
21. Mr. Ross opens up the floor for discussion. "What are your thoughts, questions, or
concerns?" Jason asks, "How can we design a greenhouse without knowing what kind
they want? How big do they want it? Where is it going?" Steve wants to know what kind
of material we will be constructing the greenhouse out of. Mike asks, "Will we be
installing the heating and/or ventilation if it is needed?" At this point, Mr. Ross stops
them to bring up one of the students, Jim, to write down all of the questions. The
questions continue -- "How long of a project is this going to be?" asks Dave. Mike wants
to know where we can get the information to design the greenhouse. Will there be electric
and plumbing considerations? Jessica wants to know if the kind of plants they want to
grow will have an effect. And Tim wants to know, "What exactly is our role in this
project with the science class?"
"These are all good questions," comments Mr. Ross. "What you first need to know is that
the science students are conducting a needs assessment at this time, so their exact needs
are not yet known. What this means to us is that we will research a number of different
designs using a number of different resources. I would like to see all of you first use the
Internet. We also have a few designs on CD-ROM. While on the internet, see if you can
locate any architects, builders, listserves, magazines, or businesses that may be of use to
you in this project. Copy down the URL and bring it and the rest of your notes back to
class with you. What exactly is our role, Tim? Well, we will be the consumer with the
science department, the architect drafting the print using CADD, the general contractor
putting the materials package and prices together, the builder constructing the greenhouse
to the specifications in the print. Note, again, you will be doing this project in cooperation
with the science students, in mixed groups, so you may be only responsible for a few of
the phases of the whole project."
"You must know that each phase involves some form of presentation to another group
that will lead into the next phase, so keep all of your information clear and concise and
list all of your references. We would like your presentations to be done using PowerPoint
and an LCD projector. After your research on design is complete, you will get into
groups with the science department, draft a plan using any of the CADD packages
available here at school, build a 3D model, and share your designs telling us the
advantages and disadvantages. After all of the groups have made their presentations, the
whole group at large will discuss and choose a design that best meets the needs of the
science department. This may include future needs. Plan for the future! What we have
covered today is definitely enough to take us through a couple of days. What I would like
you to do for the rest of the class is to break into groups and discuss the questions up on
the board amongst yourselves, choose a recorder and hand in your notes at the end of
class. Tomorrow we are scheduled for the Curriculum Lab, so bring your Internet cards
with you."
About half way through the work on these first two sections of the project, students and
teachers come to the realization that it would be helpful to have a joint, "face-to-face"
meeting between the groups and with someone who is a professional in this area.
Students prepare a list of topics and questions they would like addressed, and these are e-
mailed to a professor at a local university who has agreed to come speak to the group
22. about this project. In the joint meeting students have an opportunity to discuss questions
and concerns with their counterparts in the other class, as well as brainstorm ideas and
seek guidance from the professional.
Cultivating
Once the groups in both classes have organized the results of their research, they present
their findings to a joint session of the physical science/construction technology classes.
After these presentations, three teams of eight are formed, with each team preparing a
detailed design and model for one of the basic styles of greenhouses. Each group consists
of students from both physical science and construction technology, and have one
representative (an "expert") from each of the sub-groups which conducted the initial
needs assessment and design work. Part of the time, students work in their eight-person
teams, while at other times they work during class-time in four-person groups. During
this stage of the project, communication between the physical science and construction
technology members of the team is critical. On each design team, a representative from
each class is selected as team leader and becomes responsible for facilitating the work
and communication.
Let's listen in on the design team working on the lean-to style plan. During this time
period, the eight students are working together to begin looking at the design. Cory,
physical science team leader, starts the conversation. "Okay, since we're looking at the
lean-to design, the siting of the greenhouse in relation to the building is critical. What
factors do we need to consider?" "It should be near the science facilities," comments
Andrea. "We need to consider sunlight," suggests Phil. "What direction should it face?"
"Did we decide how wide it has to be?" asks Harry. "The science teachers stated they
wanted to be able to control the amount and type of light. What if we located it on a
corner?" "Does someone have the blueprint of the school?" "How do we tell which
direction is north?" By the end of the period, the students have come up with two possible
sites for the greenhouse and figured the dimensions necessary at each site to meet the size
requirements of the science department. Each member of the team has specific tasks to
research and complete prior to the next work session.
As the design and model work nears completion, a third set of teams is formed to
research and secure possible funding sources to enable building the greenhouse. "Do we
have any money in the school budget for this?" Jennifer asks. "No," respond both Ms.
Ahern and Mr. Ross. "The budget was already developed for the school year before this
project was planned, so we need to get creative about funding." Students from both
classes begin brainstorming some possible funding sources and partnerships. "Maybe
some local businesses would be willing to donate some money....," suggests Carolyn. "Or
maybe donate some of the materials that we need," Tim adds. "I could explain our project
to my boss at work -- maybe he would be interested in helping." "Is there any grant
money we could apply for? I heard Mrs. Dreyer helps with our school's grants," says
Jessica. "Can I go see her secretary to set up an appointment to meet with her?" "What if
we see if some of the greenhouse suppliers have lower prices for schools -- or might be
willing to contribute something." "And maybe Mr. York, our School-to-Work
23. coordinator, would have some ideas or connections." After the brainstorming, the
students begin to organize their ideas and divide them into three or four groups. And the
research begins......And the contacts are made.....by phone, by e-mail, by fax, and in
person. The local newspaper has even picked up the story, and the interest grows. The
financial package begins to come together, from several sources, and including donations
in money, materials, and time.
Reaping What We Have Sown
The students are now ready to pull all their team reports and data together into a
comprehensive proposal, including goals and justification for the greenhouse, design
options, site options, financial package, materials lists, time line, etc. The students request
some extra advice and tips from other teachers and students. Some of the Business
Technology students share what they have learned about personal manner and appearance
in business situations. Some of the Computer Skills students give assistance in putting
part of the presentation into PowerPoint. Handouts are prepared, transparencies are made,
the computer and LCD panel are set up, and parts are practiced. Presentation day arrives
and the students meet with the Facilities Committee of the Pemi-Baker Regional School
Board. Approval for actual construction is finally obtained for the following school year.
Memo to Students
As you know, we have been working on getting an addition to our building for the last
few years. On Saturday, March 20, on our third attempt, the public approved the $6.3
million bond issue at the school district meeting. One of the primary areas being
addressed in the building is the science facility — we will be renovating the current
classrooms and adding four new classrooms at the back of the building.
In the normal process of taking a building from concept to finished plan, many hard
decisions and choices are made as to what to include or exclude — and one that affected
us was the elimination of a greenhouse early in the process. Often, however, there are
ways to accomplish building projects (especially a smaller project) other than through
bond issues.
After a careful review of several options, the school has decided to work with an in-house
team. Therefore, Ms. Ahern's Physical Science class and Mr. Ross's Construction
Technology II & III class have been appointed as the consultants and contractors for the
Plymouth Regional High School Greenhouse Project.
As consultants and contractors for the project, you have been assigned the following tasks
to complete.
24. Needs Assessment
1. Determine why a greenhouse is necessary to meet curriculum needs.
Determine what features are necessary in the greenhouse to meet curriculum
2.
needs.
Greenhouse Basics
3. Understand the different styles and features common to a greenhouse.
4. Evaluate possible sites for the greenhouse.
Building Design
5. Determine the best site for the greenhouse.
6. Create a design for the greenhouse.
Funding
Research and secure funding for construction of the greenhouse and
7.
the implementation of the curriculum
Project Approval
8. Prepare a final project proposal.
Present the building proposal to the Facilities Committee of the Pemi-Baker
9.
Regional School Board for approval.
Construction
10. Construct the greenhouse.
At some point during the project, you will need to take a leadership role on one of the
committees. As a leader, you will be responsible for communication with the instructors
and between physical science and construction technology students and for ensuring that
the project component is completedon schedule.
To assist you in this project, we have provided you with some General Resources, along
with guidelines and resources for each of the tasks above. Also be sure to view the
rubrics which will be used to evaluate your work.
Your grade on this project will be based on a variety of tasks and evaluation will take
place at various points in the project. The major sections of the project are:
Task Points
Needs Assessment (Physical Science) or Greenhouse Basics (Building 50
25. Trades)
Building Design 100
Funding 50
Approval 100
Leadership 50
Each of these sections has its own rubric that can be accessed through the hyperlink. It is
recommended that you reference these rubrics as you work on each section of the overall
project.
Winter 1999 Course Homework Projects
The following projects were created as homework during a Winter 1999 Leadership
Institute Integrating Internet, Curriculum, and Instruction pilot online course.
Elementary School Projects
LInC Online Home Page Middle School
Adopting an Endangered Species in Our Area
This project involves groups of students in an investigation of endangered species at the
Indiana Dunes National Lakeshore. Students are asked to take a field trip (either virutal
or actual) to discover what species are in jeopardy and what resources are in place to save
the population. Students use technology to communicate with experts and research the
most current statistics. The ultimate goal of the mission is to adopt an endangered species
and disseminate relevant information about the species to the neighboring community.
The project can be used as a model to investigate any community's endangered species
and provide the community with information.
Summary
Scenario Student Pages and Rubric
Pre-LInC Description
All about Water
This project encourages students to research the drinking water delivery system in the
local area, recognize the importance of political action regarding water conservation
issues, communicate with a variety of subject matter experts, and collaborate with ninth
grade science students in aggregating collected data and reporting findings. Third grade
students take water samples and analyze them using test kits. They develop a system to
catalog their samples and submit the results to project collaborators, ninth grade high
26. school science students. This science class is to determine if there are any trends in the
data. They graph the results of their testing and summarize their investigations in a report
to their third grade collaborators. The high school classes locate the source of
contaminants and the students identify sources of information that will help them
investigate the problem and devise methods to remove the pollutants from the water. The
filtration methods are tested, and appropriate officials are contacted if the situation
warrants.
Student Pages, 3rd Grade
Summary
Scenario Rubric and 9th Grade
Pre-LInC Description
Rubric
Middle School Projects
LInC Online Home Page Elementary School
Knowing the Western Hemisphere - A Student-Guided
Study of Countries in the Western Hemisphere
A class of 6th grade bilingual students will use the Internet and e-mail, as well as more
traditional methods, to research a selected group of countries from Central and South
America and the Caribbean. Students will contact real people to learn about the
geography, history, culture, current events and other interesting facts about particular
countries. They will prepare reports and share them orally and on a classroom Web site.
Information will be appropriate for middle school students including other LEP/Spanish
speaking students who are studying the Western Hemisphere.
Summary
Scenario Student Pages and Rubric
Pre-LInC Description
Video Game Hall of Fame
Students are asked to investigate what makes videogames popular by a videogame
conglomerate with poor sales. Students will produce a report for the company with data,
conclusions, and suggestions for designing a new videogame. The students will create
surveys and graphs to base their conclusions on. They will use the Internet to
communicate with students in other schools in the U.S. and to contact major
manufacturers and distributors of videogames.
Summary Student Pages and Rubric 1,
Scenario
Pre-LInC Description Rubric 2
High School Projects
LInC Online Home Page Teacher
A View with No Slant
Student will compare and contrast how historical events are taught in different cultures.
27. In the process students will communicate with experts and other students of the target
culture using high technology such as e-mail and Internet. The final result of what they
found will be displayed in the method of their choice such as play performance and Web
page. The display will be presented at the annual Foreign Language Festival in the spring.
Summary
Scenario Student Pages and Rubric
Pre-LInC Description
All about Water
This project encourages students to research the drinking water delivery system in the
local area, recognize the importance of political action regarding water conservation
issues, communicate with a variety of subject matter experts, and collaborate with ninth
grade science students in aggregating collected data and reporting findings. Third grade
students take water samples and analyze them using test kits. They develop a system to
catalog their samples and submit the results to project collaborators, ninth grade high
school science students. This science class is to determine if there are any trends in the
data. They graph the results of their testing and summarize their investigations in a report
to their third grade collaborators. The high school classes locate the source of
contaminants and the students identify sources of information that will help them
investigate the problem and devise methods to remove the pollutants from the water. The
filtration methods are tested, and appropriate officials are contacted if the situation
warrants.
Student Pages, 3rd Grade
Summary
Scenario Rubric and 9th Grade
Pre-LInC Description
Rubric
Budget Bonanza
Students will participate in a unit on financial planning that will feature the use of
electronic resources, as well as including traditional resources. They will investigate the
necessity of sound financial planning. Students will be randomly assigned 'families' and
accompanying 'fates' which they will then work with to plan their financial futures. This
project will teach the skills, vocabulary, and concepts of personal economics in a 'hands-
on' authentic manner that is not as intimidating to students as the traditional 'textbook'
approach. Supplemental information and prizes will be provided by professional
community experts. Guest speakers from the field of financial planning will also act as
judges of the final presentations.
Summary Student Pages and Rubric
Scenario
Pre-LInC Description Project Table of Contents
Community Heritage Project
Learning to be a contributing citizen in ones' community often means learning to make
connections. In this project students investigate the idea of connectiveness to their local
community. They look at the connections they will make to become contributing
28. members as well as looking at what connections cause people to remain in a community
or move "back home." The project takes the idea of connections one step further in
engaging students to create a video and/or promotional brochure about their community
to help connect it to others in the world. The ultimate goal is for students' contributions to
their community help their improve their community's economy.
Summary
Scenario Student Pages and Rubric
Pre-LInC Description
Exploring Our Past: The Revolutionary War
High school students are challenged to explore and research Revolutionary War soldiers
buried within our county. During the project, student groups will research and write fact-
based reports and multimedia presentations about the soldiers, the era in which they
lived, and the effects of war in general. Their challenge is to create Web sites with images
and fictionalized stories, letters, journals and accounts of these soldiers based on
collaboration with experts, interviews with local historians, research through on-line
museums and schools, and interviews with local veterans. These fictionalized stories of
war and its effects will be posted on the Internet along with photographs and art relating
to their report.
Summary
Scenario Student Pages and Rubric
Pre-LInC Description
Lead It Be
Urban students are seldom interested in anything that does not effect them directly. They
can avoid the water in lakes and streams, however, they cannot avoid water which they
consume. Water quality in Milwaukee is always an issue. Remember cryptosporidium?
This unit will be a collaboration between the Chemistry Department and the Technology
Department, as well as, incorporate collaboration between various schools to pool data
gathered. Students will be asked to help design and run tests dealing with the
concentration of lead that might be found in drinking water.
Summary
Scenario 1, Scenario 2 Student Pages and Rubric
Pre-LInC Description
Roller Coaster Design
This is an interdisciplinary project that involves industrial technology classes and physics
classes in designing, building and critiquing roller coasters and other amusement park
rides. The first semester physics class will research the safety standards and the
components of a ride that make it "fun" via Web sites and post these results on this Web
site. The CAD (computer-assisted drafting) classes will research ride designs on the
internet and then design their own based on the safety and "fun" criteria set up by the first
physics class. The material processing classes will build the design after researching
structural properties of materials on the Internet. The second semester physics class will
29. critique these models by comparing them to the standards determined by the first physics
class.
Student Page 1, Student
Summary
Scenario Page 2, Student Page 3,
Pre-LInC Description
Student Page 4 and Rubric
We Never Promised You a Greenhouse . . . .
The Greenhouse Project consists of the design and construction of a working greenhouse
for the Plymouth Regional High School Science Department. The students will be taking
charge of all facets of the project, including needs assessment, greenhouse basics,
building design, funding proposal, project proposal presentation, and construction. It will
be a multi-disciplinary project joining freshman physical science students and junior and
senior vocational building trades students.
Summary
Scenario Student Pages and Rubric
Pre-LInC Description
What Happened to the Nuclear Promise?
This is a unit to last three weeks and intended to be implemented later in the school year.
Students will use the Internet and e-mail to communicate with many other scientist,
experts, educators, and instititutions around the world. Students will share information
with each other to help set and guide their projects.
Summary
Scenario Student Pages and Rubric
Pre-LInC Description
Teacher Projects
LInC Online Home Page High School
Educational MUVES
The Educational MUVE Project introduces educators to a critical yet often overlooked
area of the Internet: Educational Multi-User Virtual Environments (MUVEs). Although a
large number of "EdMUVEs" exist in a wide range of subject matters, many have never
heard of, let alone visited these important online communities. It is the hope of this
project to facilitate, educate and motivate K-12 educators to utilize this vital tool for
bringing education into the next millennium.
Summary
Scenario Student Pages and Rubric
Pre-LInC Description (NA)
G. R. I. D. (Guided Relevant Internet Discovery)
K-5 teachers will be active participants in creating lesson plans that interweave
technology objectives with the teaching of core curricular areas. The participants will
30. design, select, and construct technology-enriched lesson plans. The results will be an
interactive site that contains a grid featuring teacher-selected web sites organized by
grade level and subject. Engaged users will have the opportunity to publish critiques,
suggest classroom applications and recommend additional web sites for the grid.
Furthermore, learners will be given the opportunity to submit lesson plans to the
Michigan Department of Education for publication on the "Best Practices in
Technology:" CD.
Summary
Scenario Student Pages and Rubric
Pre-LInC Description
Multiple Intelligences and Technology
This is a workshop that provides professional development in instructional technology
and Multiple Intelligences. Teachers will meet both physically and virtually. The
participants will be challenged to work in teams to develop a lesson for their discipline
that reflects the Michigan Curriculum Framework, contains more than two multiple
intelligences and involves than two uses of technology including the Internet. Teachers
will make a home page as the final project that will be posted to a larger database and
shared with educators around the world. The projects will also be submitted to the "Best
Practice in Teaching" contest sponsored by the Michigan Association of Intermediate
School Administrators and the REMC Association of Michigan.
Summary
Scenario Student Pages and Rubric
Pre-LInC Description
Staff Development Plans
St. Ignace, MI - Budget Bonanza
Carrollton, IL - Exploring Our Past: The Revolutionary War
Green Bay, WI - A View with No Slant
Mahtomedi, MN - Roller Coaster Design
Milwaukee, WI - Lead It Be
Plymouth, NH - We Never Promised You a Greenhouse . . . .
Paterson, NJ - Knowing the Western Hemisphere - A Student-Guided Study of Countries in
the Western Hemisphere
El Cerrito, CA - Educational MUVES
Chicago, IL - Adopting an Endangered Species in Our Area
Detroit, MI - Multiple Intelligences and Technology
Fort Benton, MT - Community Heritage Project
Farmington, MI - G.R.I.D. (Guided Relevant Internet Discovery)
Project Design Guide
31. As mentioned on the Project Introduction Page, your project has three components: the
scenario, the presentation page, and the student pages. The purpose of the Project Design
Guide is to give you a clear idea of what each component entails.
As you know, the focus of this course is to create an engaged learning (Plugging In)
experience for your students that best utilizes the Internet's unique capabilities. LInC
Online provides you with the information you need to create a Web project that is infused
with the elements of engaged learning and technology.
To fulfill the requirements of this course, you must include these three components in
your project.
Your scenario is a vision of your project in action! A narrative version of what someone
might see, hear and feel if they were visiting your classroom. It is an opportunity for
others to "see" what your project might look like in practice.
The project presentation page is basically an outline format that lists the project
description, subject and level, learner description, rationale, goals and objectives,
structure of the learning, assessment, and evaluation.
The student pages are the pages you have created or linked to in order facilitate the
students' investigations. One component of the student pages often forgotten is creating a
project rubric that you will use to assess students' work.
For additional information about the three components, click on the links shown below.
Things to keep in mind . . .
You may not violate copyright laws. Any resources retrieved from the Internet and used
in your project must be accompanied by a reference/citation telling where it was
obtained.
Make certain you are familiar with the guidelines for naming an HTML file. Following
these rules will make linking your pages and images easier.
32. Before you begin writing your pages think about the qualities of a good Web page. Visit
our page on Web page design for guidelines.
To save time in creating your pages, your facilitator can guide you to templates which
you should use for your project Web pages. Contact your facilitator for directions on how
to obtain these templates when you are ready to begin designing your Web pages.
Note: If you will be drafting in a word processor, be sure to keep all of your work in
plain text. Formatting text at this time may create problems when you paste your work
into an HTML editor.
Click below to see the format you should use when creating your project. These are
provided to help you get started writing your own page.
• Presentation Template
• Scenario Template
• Student Page Template
• Rubric Template
• Unit Implementation before Link
Your Project Title Here
Rubric
The rubric for your project goes here.
Try using a table with your learner outcomes listed in the left column or top row and
descriptors for different levels of accomplishing each of those outcomes in the rest of the
table.
Your Project Title Here
Unit Description before LInC
Summary Scenario Student Pages Rubric Index of Projects
33. Please fill in this description of how your project was conducted before LInC. Please do
not describe your current LInC project. If your project was not used before, describe
activities used to accomplish the same learner outcomes and content as your LInC project
or describe a unit or activity used instead of your LInC project. This should be short: one-
half to one page in length.
Grade Level:
Subject:
Learner Outcomes:
1. Outcome 1
2. Outcome 2
3. ...
Assessment: Explain how you will assessment the learner outcomes.
Student Task: Briefly describe the activities/tasks the students were involved in.
Teacher Role: Describe the role/activities the teacher had.
Grouping: Describe whether students worked individually or in teams. If in teams, what
was each student responsible for?
Hook: Describe the method you used (if any) to create a need for your students to want
to learn this content and complete the project/task.
Student-Directed Learning: Describe opportunities (if any) students had to choose or
plan their learning in this project/task.
Use of Technology: Describe whether and how technology and the Internet were used.
Assessment: Describe how students were assessed/graded. (e.g., test, report, journaling,
rubric, presentation, . . .)
Example: Civil War (Delete this example when you are done.)
Grade Level: 6
Subject: Social Studies
Learner Outcomes:
1. Students will be able to list important events and causes of the U.S. Civil War.
34. 2. Students will be able to identify key people and their roles in the Civil War.
3. Students will understand how war affects people.
Student Task: Students read from their textbook, read short stories and saw a movie
about the Civil War. The short stories were written from opposing points of view. Then
the students participated in a large group discussion about the causes and effects of the
Civil War and slavery. After this, the students wrote a report about causes and effects of a
past or current civil war and compared it to the U.S. Civil War. The students were given a
research plan to follow, which included using specific types of research sources at the
library and instructions for creating a HyperStudio presentation for the class at the end of
the unit.
Teacher Role: The teacher gave lectures, made assignments, lead the group discussion,
and helped students who had questions getting started with their research.
Grouping: Students worked in pairs on their reports and individually otherwise. No
specific roles were assigned for the reports. Both students were responsible for the
content.
Hook: None.
Student-Directed Learning: Students chose which civil war to do their report on.
Use of Technology: A movie was used and students used CD-ROMs for their research.
The Internet was not used for this project. Students used HyperStudio for their
presentations and were provided computer lab time to do so.
Assessment: Students took a short-answer test on U.S. Civil War on the last day of the
project. They were graded based on their test, report, presentation, and classroom
participation.
Guidelines for Naming HTML Files and Folders
These tips are intended to save you time as you create and edit your Web pages.
1. HTML file names should end in the suffix ".html" or ".htm". Whichever suffix
you decide to use, please talk to your team members and use the same suffix on
all your project html pages. Otherwise it is hard to remember which is which and
your project will likely have more broken links in it. Example:
myhomepage.html
35. In addition, use a consistent and standard suffix on other file formats indicating
the format (.jpg, .gif, .wav, . . .).
2. The file name should be no more than 32 characters, including the ".html" or
".htm" file suffix. Because your filename will become part of your Web page's
URL, it is better to use a slightly longer file name that will have an easier URL to
remember than a jumble of unpronounceable letters. For example: Which of these
would be easier to remember and give to a friend as a URL: hurricanes.html or
hrrcns.html ? More examples:
kennedy.html
shakespeare.htm
3. The first character of the file name should be a letter.
4. File names and folder names should contain only letters, digits, and
underscores—no spaces, punctuation, or funny characters. We want to really
emphasize this because people who do not follow these guidelines end up
spending much more time fixing broken links, which can be a source of
frustration. This is a "conservative" guideline with the goal that you should not
have to spend extra time redoing your links if you move your files from one type
of computer to another. This has been an issue for some past LInC participants
when moving or copying their LInC project Web pages from the LInC class Web
site to their school Web site.
5. Whenver possible, make relative links for links from your project Web pages to
other Web pages that are in that same project. This will make it possible to move
your LInC project Web site to your school Web server without having to fix
dozens of links. A relative link to a file in the same folder as the web page you are
editing looks like: "shakespeare.html". In contrast, an "absolute" link looks like:
"http://ed.fnal.gov/lincon/projects/essays/shakespeare.shtml". You can see that if
your project was copied onto a different web server, you would have to fix all
those absolute links. You will need to use absolute links when linking to Web
pages for external resources that are not inside your project folder.
6. We strongly suggest using all lower case letters because people make fewer
mistakes. Web authors (such as yourself) make fewer mistakes when creating
links to your pages. Web readers make fewer mistakes when typing in the
addresses to access your pages.
7. Use relatively short names that are indicative of the content of the page. Nothing
"cute" because you probably won't remember it six months from now when you
need to edit it.
8. Also name your files with images, sounds, etc., with names that will help you
remember what is in them. Participants who name their images something like
picture1.jpg through picture20.jpg are frequently frustrated later because they
have to open five or ten files later to find the image they want to edit. If you
instead name your images something more descriptive, they will be easier to find
later. Examples:
36. lightbulb.gif
book.jpg
bluebullet.gif
redline.jpg
stopsign.gif
9. Be sure to create a graphics folder (directory) inside the folder (directory) you are
using for all your Web pages. It should be titled "graphics"--all lower case letters.
Past participants who did not do this have told us they wish they did because it
was harder to keep their files organized with so many pictures in with the Web
pages.
10. Name your anchors in your pages something descriptive. An anchor named
"#assessment" is easier to link to and tell others about than an anchor named
"#anchor82904872".
This means that in your file names, folder names, and anchor names there should be:
No SPACES or TABS
No COMMAS or APOSTROPHES
No SLASHES or QUOTES
No # & % + * = @ ~ ^ $
No < > ( ) [ ] { } : ; ? !
No Other Unusual Characters
Are these HTML file names OK? If not, why?
1. district123_home_page
2. my homepage.html
3. linc_home.html