SlideShare uma empresa Scribd logo
1 de 18
Baixar para ler offline
Content
Introduction 1
Getting Started 2
Implementing the lightingmodell
How lighting works 4
Implementation of our own Lighting Model 6
Getting the UV to the Lightingfunction 9
Finally Shading 10
Some improvements to the lighting 12
Finalizing the Lighting 13
The rim-lighting
Explanation 15
Implementing 16
Sources 17
1. Introduction
In this tutorial we will create a Unity3d
Surface shader which tries to achieve a
cartoony look beyond simply using a ramp
texture in the lighting function.
Instead I will try to create the look by
determing the shading of the area
between bright and dark areas with a
greyscale mask. That‘s what the main part
of this tutorial will be about. Later on we
will add a rim-effect to further improve the
visual appeal. I will also try to explain the
concepts behind the things we will be
doing.
Introduction - Cartoon Shader Tutorial 1
Getting Started - Cartoon Shader Tutorial 2
1. Getting Started
Setting Up the Project
Create a new Projectstep 1
Import the AssetPackage you can download here.
https://dl.dropboxusercontent.com/u/28326381/shader%20dnload%20package.unit
ypackage
step 2
Fig1.: How to import a custom package to unity
step 3 Place the „ImprodLowPoly“-model in the
scene. (Drag & Drop from the project view)
step 4 Create a new Shader.
Assets > Create > Shader
Name it „CartoonShader“.
step 5 Create a new Material.
Assets > Create > Material
Name it „CartoonMaterial“.
step 6 Apply the Cartoon Material to the model
you‘ve placed in the scene in step 3.
step 7 Create a direction Light.
GameObject > Create Other > Directional Light
You can adjust the light-angle by rotating the light.
Your Unityproject should look about like this right now. You
should have:
• Imported the downloaded Assets
• Created the shader and the material and applied the material to the
model
• Created a directional light
Assign the CartoonShader
to the CartoonMaterial.
Select the
CartoonMaterial in the
project view and hit the
button next to „shader“
and select
„CartoonShader“ from
the Custom section.
step 9 Open the shader by double
Clicking the
„CartoonShader“ in your
project view. Monodevelop
should open. Give it a few
seconds and you should see
something like in this
image.
This is our shader code.
step 10
Getting Started - Cartoon Shader Tutorial 3
2. Lighting Model
Let‘s begin with the most important part of this shader – the shading. Since the
goal of this shader is to mix the diffuse texture with greyscale textures based on
the lighting, we will write our own lightingfunction and use it in our shader.
How the Surface Shader works
Since we use a surface shader, we calculate the actual color of the surface in the
void surf (Input IN, inout SurfaceOutput o) – function. This function gets called
for each surface fragment the engine is rendering. The function recieves
important data via the IN struct. We take this data und use it, to calculate the
colors, normals, and anything else needed in the SurfaceOutPut-struct which gets
passed on the next step, the lighting function. Here the data can be changed and
used to let each light in the scene, modify our rendering fragment.
This, off course, is only a very simplified explanation of a surface shader in
Unity3d.
Read More about how a Surfaceshader works here:
http://docs.unity3d.com/Documentation/Components/SL-SurfaceShaders.html
What is a surface?
What we are basically trying to do is, coloring and shading
surfaces.
A surface always has direction it is facing to. This direction is
stored as a vector – the surface normal. A 3d mesh in our
rendering pipeline consists of many triangles each with its
own normal (Fig 2).
What is a light?
In terms of rendering the key elements forming a light are:
• The position / direction of the light Source
• The color
That‘s basically it. And that‘s all we need to compute our
lighting.
How lighting works
Fig2.: surface normals of a mesh
Lighting Model - Cartoon Shader Tutorial 4
How lighting is computed
The shading of a surface is the result of a calculation between the incoming light direction
and the surface normal. Different lighting models calculate this differently. But most models
resemble the way lighting works in real life.
The formula is easy
The more a surface is facing towards the light direction, the brighter it will
appear.
Or more mathematically speaking:
The bigger the angle between the surface normal and the light
direction gets, the less lightcolor is applied to the already calculated
surface color.
By calculating the dot product of two vectors we get the angle between two vectors as a
scalar between 0 and 1. While dot(v1, v2) returns 1 when both vectors are facing towards
each other.
We then use this value to
multiply it with our surface
color (red in fig.3). The more
the surface normals direction
points towards the light
direction, the higher the
lightValue gets thus increasing
the amount of surfaceColor.
Lighting Model - Cartoon Shader Tutorial 5
2. Implementation of our own Lighting Model
step 1 Declaration of our own Lighting Model
Open the editor with the shader code we have opened previously. (or just
double-click the shader again).
We can either use a built-in lighting model from unity like Lambert, Phong
etc. but we also have the option to write our own little lighting function.
In order to do that, we simply declare a new function after the Input Code-
Block. By putting this code after the Input Struct-declaration:
half4 LightingCartoon(SurfaceOutput s, half3 dir, half attend){
}
• Half4 means that this function will return a four-component vector (which will be used as
color – (Red,Green,Blue,Alpha)
• When naming the function LightingCartoon we tell Unity that this function may be used
to compute lighting
• SurfaceOutput provides all the data previously calculated in the surf function
• Dir is the light direction
This part of the code, should look like this right now:
Shader "Custom/CartoonShader" {
Properties {
_MainTex ("Base (RGB)", 2D) = "white" {}
}
SubShader {
Tags { "RenderType"="Opaque" }
LOD 200
CGPROGRAM
#pragma surface surf Lambert
sampler2D _MainTex;
struct Input {
float2 uv_MainTex;
};
half4 LightingCartoon(SurfaceOutput s, half3 dir, half attend){
}
void surf (Input IN, inout SurfaceOutput o) {
half4 c = tex2D (_MainTex, IN.uv_MainTex);
o.Albedo = c.rgb;
o.Alpha = c.a;
}
ENDCG
}
FallBack "Diffuse"
}
Lighting Model- Cartoon Shader Tutorial 6
step 2 Lets return some stuff
Since this function returns a color, we should write some code in order to test our own
lighting model.
Our final lighting model will be based on a so called „Wrap-Lambert“ which only lets a
portion of the light affect the surface color.
In our in Step1 declared LightingCartoon function we put the following :
dir = normalize(dir);
half NdotL = saturate( dot (s.Normal, dir));
This will normalize our light-direction vector leaving it with a
magnitude of 1.0. Otherwise this will mess up the dot-product
Calculate the dot product. Saturate(float) makes sure, the value is clamped
between 0 and 1 because we don‘t want to multiply our surface colors with
negative values)
Actually return a color, first we declar it.Then the Albedo (diffuse) – Color
from the surface shader gets multiplied with our light-angle. And finally we
let the Lightcolor have a shot to modify or final color. _LightColor0 is a
global value, describing the currently rendered lightcolor
half4 c;
c.rgb = ((NdotL * 0.2f)+0.8f) * s.Albedo * _LightColor0;
c.a = s.Alpha;
return c;
Now we need to tell unity to use our lightingmodel – we do this in the pragma section.
The default lightingmodel is the lambert lighting model. So we will change that by
changing lambert > Cartoon.
half4 LightingCartoon(SurfaceOutput s, half3 dir, half attend){
dir = normalize(dir);
half NdotL = saturate( dot (s.Normal, dir));
half4 c;
c.rgb = ((NdotL * 0.2f)+0.8f) * s.Albedo * _LightColor0;
c.a = s.Alpha;
return c;
}
The LightingFunction should now like this:
#pragma surface surf Cartoon
Lighting Model - Cartoon Shader Tutorial 7
step 2.1
Save the shader, and switch back to the unity3d Editor, the shader will now compile and the material in
the viewport will update as soon as it‘s done giving you result looking like this:
Notice how even the dark areas aren‘t
totally black that‘s because of this
piece of code we have just written:
(NdotL * 0.2f)+0.8f)
Making sure, there is at least 20%
lighting.
Additionally we have still some fair
amount of Ambient light in the scene.
Which we will turn of now…
step 3 Turning off the ambient light
Go to Edit > Render Settings and
Assign black to the Ambient Light Color-Slot
step 4 Declaring some properties
What we are trying to achieve is having a a shading color for the bright and for the dark side. And a texture
for the transition zone.
Lets start with the hardest part, getting the zones right.
Just a reminder – this is our
plan:
_BrightColor("Bright Color", Color) = (1,0,0)
_Threshold1("Threshold Bright to Dark", range(0,1)) = 0.2
_DarkColor("Dark Color", Color) = (0,1,0)
_Threshold2("Threshold Middle to Dark", range(0,1)) = 0.9
_TransitionTexture("Transition Texture", 2D) = "white" {}
First we declare new properties for
the two colors. In our properties
codeblock we put this code:
sampler2D _TransitionTexture;
half4 _BrightColor;
half4 _DarkColor;
half _Threshold1;
half _Threshold2;
Then we need to add the respective
shader variables to get the
properties values to the shader. Add
this before the INPUT struct.
Lighting Model - Cartoon Shader Tutorial 8
Save the file. Go to the editor and check the material.
The properties of the material on your object should
look like this (fig. 4)
Unfortunately these colors don’t affect our shader
much at the moment.
Let’s change that!
step 5 Getting the UV to the Lightingfunction
We do not have access to the uv-coordinates of the current rendered surface piece in
the lighting function. We will code our own struct which gets passed on through all the
functions and use this one instead of the „SurfaceOutput“ struct. Let‘s declare the
SurfaceOutputCustom struct right after the Input-struct declaration.
struct SurfaceOutputCustom {
fixed3 Albedo;
fixed3 Normal;
fixed3 Emission;
half Specular;
fixed Gloss;
fixed Alpha;
fixed viewFallof;
half2 UV;
};
Getting our struct to work
This struct actually contains the usual data plus
the UV part. We will write the UV to the struct
which will then get passed to the lighting
function. We need to change the arguments of
the lighting and surface function to make this
happen.
Change the lighting function declaration now to this
step 5.1
And we will change the surface function to this:
half4 LightingCartoon(SurfaceOutputCustom s, half3 dir, half attend)
void surf (Input IN, inout SurfaceOutputCustom o)
Also add this line to the surf function – this will write the UV values to our struct so
we can access is it in the lighting.
o.UV = IN.uv_MainTex;
Lighting Models - Cartoon Shader Tutorial 9
step 6 Finally Shading!
First I have to introduce ternary expressions. You are probably familiar with the if-else structure in
conditional statements. Although the shader code is able to handle if-else structures in this case we
need to express our conditions with a ternary operation.
It works like this:
We will use the treshold to determine which color for the light based shading we will use.
ShadowColor = NdotL < _Threshold1 ? _DarkColor : NdotL < _Threshold2 ? lerp(_DarkColor,
_BrightColor, tex2D(_TransitionTexture, s.UV)) : _BrightColor;
In code – it looks like this (I‘ve left out the texturing for _BrightColor and _DarkColor for
now)
lerp(DarkColor, BrightColor, tex2D(_TransitionTexture, s.UV) )
Lerp(value1, value2, percent);
Interpolates between Color1 and Color2
using the percent value
tex2D(texture, UV);
We will get the percent value from our
transitionTexture @ the current UV
position
c.rgb = ((NdotL * 0.2f)+0.8f) * s.Albedo * _LightColor0 * ShadowColor;
half3 ShadowColor = NdotL < _Threshold1 ? _DarkColor : NdotL < _Threshold2 ?
lerp(_DarkColor, _BrightColor, tex2D(_TransitionTexture, s.UV)) : _BrightColor;
Add this line to the LightingCartoon funcion, right after the NdotL declaration.
… and multiply our previously calculated ShadowColor to the output color by changing it to this:
Lighting Model - Cartoon Shader Tutorial 10
Step 6 |CODE
Shader "Custom/CartoonShader"{
Properties {
_MainTex ("Base (RGB)", 2D) = "white" {}
_BrightColor("Bright Color", Color) = (1,0,0)
_Threshold1("ThresholdBright to Dark", range(0,1)) = 0.2
_DarkColor("Dark Color", Color) = (0,1,0)
_Threshold2("ThresholdMiddle to Dark", range(0,1)) = 0.9
_TransitionTexture("Transition Texture", 2D) = "white" {}
}
SubShader {
Tags { "RenderType"="Opaque" }
LOD 200
CGPROGRAM
#pragma surface surf Cartoon
sampler2D _MainTex;
sampler2D _TransitionTexture;
half4 _BrightColor;
half4 _DarkColor;
half _Threshold1;
half _Threshold2;
struct Input {
float2 uv_MainTex;
};
struct SurfaceOutputCustom{
fixed3 Albedo;
fixed3 Normal;
fixed3 Emission;
half Specular;
fixed Gloss;
fixed Alpha;
fixed viewFallof;
half2 UV;
};
half4 LightingCartoon(SurfaceOutputCustom s, half3 dir, half attend){
dir = normalize(dir);
half NdotL = saturate( dot (s.Normal, dir));
half3 ShadowColor = NdotL < _Threshold1 ? _DarkColor : NdotL <
_Threshold2 ? lerp(_DarkColor, _BrightColor, tex2D(_TransitionTexture, s.UV)) :
_BrightColor;
half4 c;
c.rgb = ((NdotL * 0.4f)+0.6f) * s.Albedo * _LightColor0 * ShadowColor;
c.a = s.Alpha;
return c;
}
void surf (Input IN, inout SurfaceOutputCustom o) {
half4 c = tex2D (_MainTex, IN.uv_MainTex);
o.UV = IN.uv_MainTex;
o.Albedo = c;
o.Alpha = c.a;
}
ENDCG
}
FallBack "Diffuse"
}
Let‘s wrap it.
The code should look like this at the moment.
Assign tex1 to the transition texture slot in the material – which should
produce something like this:
Lighting Model - Cartoon Shader Tutorial 11
Step 7 Some improvements to the lighting.
We definitely need to be able to influence the transitiontextures size.
Since I don’t want to add a variable to our custom struct for each UV, we will simply
add a float and scale the UV accordingly.
Add this property right after the existing ones:
_TransitionTextureSize("Transition Texture Size", range(0.1, 50)) = 1
And the shader variable.. Just after “half Treshhold1”
half _TransitionTextureSize;
Now we will use this value to scale the transition texture. By changing the texture
lookup in our ternary expresion
half3 ShadowColor = NdotL < _Threshold1 ? _DarkColor : NdotL < _Threshold2 ?
lerp(_DarkColor, _BrightColor, tex2D(_TransitionTexture, s.UV *_TransitionTextureSize)) :
_BrightColor;
Now we will use this value to scale the transition texture. By changing the texture
lookup in our ternary expression.
Step 7.1 Adding Textures
To have more artistic control over the shading to make the colors look painted for
example, we are going to multiply the shades with a texture. Again, first – the
properties. Add those:
_BrightTexture("Bright Color Texture", 2D) = "white"{}
_BrightTextureSize("Bright Texture Size", range(0.1,50)) = 1
_BrightTextureIntensity("Bright Texture Intensity", range(0.0,1)) = 0.5
_DarkTexture("Dark Color Texture", 2D) = "white"{}
_DarkTextureSize("Dark Texture Size", range(0.1,50)) = 1
half _DarkTextureSize;
half _BrightTextureSize;
half _BrightTextureIntensity;
sampler2D _BrightTexture;
sampler2D _DarkTexture;
Let’s add the Shader variables as well. Right before the Input
struct, after the shader variable from step 7.
Whenever we look up the _BrightColor or _DarkColor. We will multiply it
with a value from its texture. We Also want to set the intensity of the
_BrightTexture. We need to change a lot of stuff in our LightingCartoon
function. Between the NdotL and _Shadowcolor declaration!
ADD
half4 darkColor = _DarkColor * tex2D(_DarkTexture, s.UV * _DarkTextureSize);
half4 brightColor = _BrightColor * ( tex2D(_BrightTexture, s.UV * _BrightTextureSize) * _BrightTextureIntensity +
(1-_BrightTextureIntensity));
With these lines we declare a new Color-Vector and multiply the Colors from the properties with the values from the
texture at that spot. While the darkColor is a simple multiplication. We craft in the _BrightTextureIntensity as a sort of
weight for the TextureValue of the brightColor.
Now we only need to add the new colors to the ternary expression.
half3 ShadowColor = NdotL < _Threshold1 ? darkColor : NdotL < _Threshold2 ? lerp(darkColor,
brightColor, tex2D(_TransitionTexture, s.UV * _TransitionTextureSize)) : brightColor;
Lighting Model - Cartoon Shader Tutorial 12
Step 7.2 Finalizing the Lighting
Add some textures
for the different
shading zones, and
play around with the
colors, and texture
sizes. Settings used
for this Screenshot:
BrightColor:
(255,215,178)
BrightTexture:
Pencil_stroke_02
DarkColor::
(99,79,66)
DarkTexture:
Pencil_stroke_01
TransitionTexture:
Pencil_strokes_03
Lighting Model - Cartoon Shader Tutorial 13
CODE
Shader "Custom/CartoonShader" {
Properties {
_MainTex ("Base (RGB)", 2D) = "white" {}
_BrightColor("Bright Color", Color) = (1,0,0)
_Threshold1("Threshold Bright to Dark", range(0,1)) = 0.2
_DarkColor("Dark Color", Color) = (0,1,0)
_Threshold2("Threshold Middle to Dark", range(0,1)) = 0.9
_TransitionTexture("Transition Texture", 2D) = "white" {}
_TransitionTextureSize("Transition Texture Size", range(0.1, 50)) = 1
_BrightTexture("Bright Color Texture", 2D) = "white"{}
_BrightTextureSize("Bright Texture Size", range(0.1,50)) = 1
_BrightTextureIntensity("Bright Texture Intensity", range(0.0,1)) =
0.5
_DarkTexture("Dark Color Texture", 2D) = "white"{}
_DarkTextureSize("Dark Texture Size", range(0.1,50)) = 1
}
SubShader {
Tags { "RenderType"="Opaque" }
LOD 200
CGPROGRAM
#pragma surface surf Cartoon
sampler2D _MainTex;
sampler2D _TransitionTexture;
half4 _BrightColor;
half4 _DarkColor;
half _Threshold1;
half _Threshold2;
half _TransitionTextureSize;
half _DarkTextureSize;
half _BrightTextureSize;
half _BrightTextureIntensity;
sampler2D _BrightTexture;
sampler2D _DarkTexture;
struct Input {
float2 uv_MainTex;
};
struct SurfaceOutputCustom {
fixed3 Albedo;
fixed3 Normal;
fixed3 Emission;
half Specular;
fixed Gloss;
fixed Alpha;
fixed viewFallof;
half2 UV;
};
half4 LightingCartoon(SurfaceOutputCustom s, half3 dir, half
attend){
dir = normalize(dir);
half NdotL = saturate( dot (s.Normal, dir));
half4 darkColor = _DarkColor * tex2D(_DarkTexture, s.UV *
_DarkTextureSize);
half4 brightColor = _BrightColor * ( tex2D(_BrightTexture, s.UV *
_BrightTextureSize) * _BrightTextureIntensity + (1-
_BrightTextureIntensity));
half3 ShadowColor = NdotL < _Threshold1 ? darkColor : NdotL <
_Threshold2 ? lerp(darkColor, brightColor, tex2D(_TransitionTexture,
s.UV * _TransitionTextureSize)) : brightColor;
half4 c;
c.rgb = ((NdotL * 0.4f)+0.6f) * s.Albedo * _LightColor0 *
ShadowColor;
c.a = s.Alpha;
return c;
}
void surf (Input IN, inout SurfaceOutputCustom o) {
half4 c = tex2D (_MainTex, IN.uv_MainTex);
o.UV = IN.uv_MainTex;
o.Albedo = c;
o.Alpha = c.a;
}
ENDCG
}
FallBack "Diffuse"
}
Lighting Model - Cartoon Shader Tutorial 14
Step 13. Rim Effect Properties
To improve the visual appeal of the shader we are going to add some Rim-Lighting.
Polygons facing away from the Camera are going to get tinted. Usually this technique is
used to simulate backlighting. But we will hijack the effect for our own purpose. Let‘s
meet an old friend. The dot product. This time our scalar will reflect the angle between
the view Direction and the surface normal. The more a surface is facing away from the
viewer the smaller the dot product will become.
As usual we will calculate the dot product. We then
multiply a Color, declared for this purpose, with this
value and finally we will output this color in the
emission color of the surface.
In a later step we will modify the Albedo color based
on the rim lighting so we can even use the rim-effect
to darken the rims.
Powering the dot product!
We will modify the scalar with a pow() function to
take control over the dispersion.
We need some properties first.
_RimColor
This will be the color the surface is going to get
be tinted with.
_RimPower
The value we are using in pow to flatten our
curve.
_RimStrength
How much of the calculated Color is going to be
applied
When looking at a
sphere, the dot product
„looks“ like this. From
inner to outer
polygons.
We can modify this
curve using the pow
function
_RimColor("Rim Color", Color) = (1,0,0)
_RimPower("Rim Position", range(0,3)) = 1
_RimStrength("Rim Strength", range(0,1)) = 1
Declare these properties in the properties block.
And those in our shader code (Bevor the Input struct):
half4 _RimColor;
half _RimPower;
half _RimStrength;
Step 2 Getting the view direction
We have to tell Unity to provide a vector containing the view direction first.
To do that, we simply modify the input struct. Add „float3 viewDir“ to the Input struct.
struct Input {
float2 uv_MainTex;
float3 viewDir;
};
From now on, unity will write
the viewdirection to the Input
struct so we can use it.
There is even more data you can
add to your Input. Check out the
reference:
http://docs.unity3d.com/Docum
entation/Components/SL-
SurfaceShaders.html
Rim Effect- Cartoon Shader Tutorial 15
Step 3 Let‘s Rim
half NdotView = 1 - dot(normalize(IN.viewDir), o.Normal);
With the viewdirection ready to use in our Input data, we can start adding code to the
Surf function.
The first step is to get the dot product between the view direction and the rendered
piece.
It‘s very important to normalize the viewDir, because it actually reflects a vector FROM
the rendered piece TO the camera. So probably this vectors magnitude is quite long, or
short. However – to calculate a reasonable dot product we need both vectors to have
a magnitude of 1. That‘s exaclty what normalize() does.
The 1-dotProduct kind of „inverts“ the value. Meaning: The more the Normal is
pointing away from the viewDir the larger our value gets.
Facing Away = dot product = 0
Facing Towards = dot product = 1
The rim-effect should INCREASE when the faces are facing away. So we need an
Increasing value.
NdotView = pow(NdotView, _RimPower);
According to the last page we „power“-the resulting value to determine the size of the
rim-effect.
o.Emission = NdotView * _RimColor * _RimStrength;
Save the shader and go to the
editor. Hopefully it looks
something like this.
This is quite much the effect I
wanted to achieve. Although I
would like to do a small
improvment.
Right now, we actually cannot do
a rim effect which darkens the
model. That‘s because we are
applying the color to the emission
channel. Which by nature gets
multiplied with the color.
Step 4 Test
Step 5 Messing with the Albedo
The way we‘ll be working around
this, will be to reduce the albedo
strength on faces because the
Emission will illuminate these
areays anyway. Change the
assignment of the Albedo Color
In the surf function) to this.
o.Albedo = c * ( 1 - NdotView * _RimStrength);
Rim Effect - Cartoon Shader Tutorial 16
According to the last page we „power“-the resulting value to determine the size of the
rim-effect.
FINAL CODE
Shader "Custom/CartoonShader" {
Properties {
_MainTex ("Base (RGB)", 2D) = "white" {}
_BrightColor("Bright Color", Color) = (1,0,0)
_Threshold1("Threshold Bright to Dark", range(0,1)) = 0.2
_DarkColor("Dark Color", Color) = (0,1,0)
_Threshold2("Threshold Middle to Dark", range(0,1)) = 0.9
_TransitionTexture("Transition Texture", 2D) = "white" {}
_TransitionTextureSize("Transition Texture Size", range(0.1, 50)) = 1
_BrightTexture("Bright Color Texture", 2D) = "white"{}
_BrightTextureSize("Bright Texture Size", range(0.1,50)) = 1
_BrightTextureIntensity("Bright Texture Intensity", range(0.0,1)) = 0.5
_DarkTexture("Dark Color Texture", 2D) = "white"{}
_DarkTextureSize("Dark Texture Size", range(0.1,50)) = 1
_RimColor("Rim Color", Color) = (1,0,0)
_RimPower("Rim Position", range(0,4)) = 2
_RimStrength("Rim Strength", range(0,1)) = 1
}
SubShader {
Tags { "RenderType"="Opaque" }
LOD 200
CGPROGRAM
#pragma surface surf Cartoon
sampler2D _MainTex;
sampler2D _TransitionTexture;
half4 _BrightColor;
half4 _DarkColor;
half _Threshold1;
half _Threshold2;
half _TransitionTextureSize;
half _DarkTextureSize;
half _BrightTextureSize;
half _BrightTextureIntensity;
sampler2D _BrightTexture;
sampler2D _DarkTexture;
half4 _RimColor;
half _RimPower;
half _RimStrength;
struct Input {
float2 uv_MainTex;
float3 viewDir;
};
struct SurfaceOutputCustom {
fixed3 Albedo;
fixed3 Normal;
fixed3 Emission;
half Specular;
fixed Gloss;
fixed Alpha;
fixed viewFallof;
half2 UV;
};
half4 LightingCartoon(SurfaceOutputCustom s, half3 dir, half attend){
dir = normalize(dir);
half NdotL = saturate( dot (s.Normal, dir));
half4 darkColor = _DarkColor * tex2D(_DarkTexture, s.UV *
_DarkTextureSize);
half4 brightColor = _BrightColor * ( tex2D(_BrightTexture, s.UV *
_BrightTextureSize) * _BrightTextureIntensity + (1-
_BrightTextureIntensity));
half3 ShadowColor = NdotL < _Threshold1 ? darkColor : NdotL <
_Threshold2 ? lerp(darkColor, brightColor, tex2D(_TransitionTexture, s.UV *
_TransitionTextureSize)) : brightColor;
half4 c;
c.rgb = ((NdotL * 0.4f)+0.6f) * s.Albedo * _LightColor0 *
ShadowColor;
c.a = s.Alpha;
return c;
}
void surf (Input IN, inout SurfaceOutputCustom o) {
half4 c = tex2D (_MainTex, IN.uv_MainTex);
o.UV = IN.uv_MainTex;
half NdotView = 1 - dot(normalize(IN.viewDir), o.Normal);
NdotView = pow(NdotView, _RimPower);
o.Emission = NdotView * _RimColor * _RimStrength;
o.Albedo = c * ( 1 - NdotView * _RimStrength);
o.Alpha = c.a;
}
ENDCG
}
FallBack "Diffuse"
}
Sources
DOWNLOADS
Tutorial Package – the stuff you need to start with this tuorial
Finished Tutorial Package – everything is already done 
Links:
The maker of the awesome model we‘re using through the tutorial:
http://www.parkparkin.com/
Sources - Cartoon Shader Tutorial 18
https://dl.dropboxusercontent.com/u/28326381/shader%20tutorial%20final.unitypackage
https://dl.dropboxusercontent.com/u/28326381/shader%20download%20package.unitypackage

Mais conteúdo relacionado

Destaque

ReactJS | 서버와 클라이어트에서 동시에 사용하는
ReactJS | 서버와 클라이어트에서 동시에 사용하는ReactJS | 서버와 클라이어트에서 동시에 사용하는
ReactJS | 서버와 클라이어트에서 동시에 사용하는Taegon Kim
 
The big bang theory
The big bang theoryThe big bang theory
The big bang theorymreedy
 
Writing shaders - YOU can do it!
Writing shaders - YOU can do it!Writing shaders - YOU can do it!
Writing shaders - YOU can do it!Nordeus
 
Cg shaders with Unity3D
Cg shaders with Unity3DCg shaders with Unity3D
Cg shaders with Unity3DMichael Ivanov
 
The Big Bang Theory
The Big Bang TheoryThe Big Bang Theory
The Big Bang Theoryrose_aries15
 
Google's Avinash Kaushik on Web Analytics
Google's Avinash Kaushik on Web AnalyticsGoogle's Avinash Kaushik on Web Analytics
Google's Avinash Kaushik on Web AnalyticsLennart Svanberg
 
Manchester city
Manchester cityManchester city
Manchester cityofrancis
 
Waldorf Education
Waldorf EducationWaldorf Education
Waldorf EducationxMerodi
 

Destaque (18)

Tesco
TescoTesco
Tesco
 
ReactJs
ReactJsReactJs
ReactJs
 
intel core i7
intel core i7intel core i7
intel core i7
 
Oprah Winfrey
Oprah WinfreyOprah Winfrey
Oprah Winfrey
 
ReactJS | 서버와 클라이어트에서 동시에 사용하는
ReactJS | 서버와 클라이어트에서 동시에 사용하는ReactJS | 서버와 클라이어트에서 동시에 사용하는
ReactJS | 서버와 클라이어트에서 동시에 사용하는
 
Bill Gates, Who is he?
Bill Gates, Who is he?Bill Gates, Who is he?
Bill Gates, Who is he?
 
The big bang theory
The big bang theoryThe big bang theory
The big bang theory
 
Tesco
TescoTesco
Tesco
 
Writing shaders - YOU can do it!
Writing shaders - YOU can do it!Writing shaders - YOU can do it!
Writing shaders - YOU can do it!
 
David guetta
David guettaDavid guetta
David guetta
 
Growth Hacking
Growth HackingGrowth Hacking
Growth Hacking
 
Cg shaders with Unity3D
Cg shaders with Unity3DCg shaders with Unity3D
Cg shaders with Unity3D
 
The Big Bang Theory
The Big Bang TheoryThe Big Bang Theory
The Big Bang Theory
 
Machine Learning
Machine LearningMachine Learning
Machine Learning
 
Google's Avinash Kaushik on Web Analytics
Google's Avinash Kaushik on Web AnalyticsGoogle's Avinash Kaushik on Web Analytics
Google's Avinash Kaushik on Web Analytics
 
Tesco
TescoTesco
Tesco
 
Manchester city
Manchester cityManchester city
Manchester city
 
Waldorf Education
Waldorf EducationWaldorf Education
Waldorf Education
 

Último

Connecting the Dots for Information Discovery.pdf
Connecting the Dots for Information Discovery.pdfConnecting the Dots for Information Discovery.pdf
Connecting the Dots for Information Discovery.pdfNeo4j
 
Generative AI for Technical Writer or Information Developers
Generative AI for Technical Writer or Information DevelopersGenerative AI for Technical Writer or Information Developers
Generative AI for Technical Writer or Information DevelopersRaghuram Pandurangan
 
From Family Reminiscence to Scholarly Archive .
From Family Reminiscence to Scholarly Archive .From Family Reminiscence to Scholarly Archive .
From Family Reminiscence to Scholarly Archive .Alan Dix
 
Testing tools and AI - ideas what to try with some tool examples
Testing tools and AI - ideas what to try with some tool examplesTesting tools and AI - ideas what to try with some tool examples
Testing tools and AI - ideas what to try with some tool examplesKari Kakkonen
 
UiPath Community: Communication Mining from Zero to Hero
UiPath Community: Communication Mining from Zero to HeroUiPath Community: Communication Mining from Zero to Hero
UiPath Community: Communication Mining from Zero to HeroUiPathCommunity
 
(How to Program) Paul Deitel, Harvey Deitel-Java How to Program, Early Object...
(How to Program) Paul Deitel, Harvey Deitel-Java How to Program, Early Object...(How to Program) Paul Deitel, Harvey Deitel-Java How to Program, Early Object...
(How to Program) Paul Deitel, Harvey Deitel-Java How to Program, Early Object...AliaaTarek5
 
TeamStation AI System Report LATAM IT Salaries 2024
TeamStation AI System Report LATAM IT Salaries 2024TeamStation AI System Report LATAM IT Salaries 2024
TeamStation AI System Report LATAM IT Salaries 2024Lonnie McRorey
 
The Ultimate Guide to Choosing WordPress Pros and Cons
The Ultimate Guide to Choosing WordPress Pros and ConsThe Ultimate Guide to Choosing WordPress Pros and Cons
The Ultimate Guide to Choosing WordPress Pros and ConsPixlogix Infotech
 
Decarbonising Buildings: Making a net-zero built environment a reality
Decarbonising Buildings: Making a net-zero built environment a realityDecarbonising Buildings: Making a net-zero built environment a reality
Decarbonising Buildings: Making a net-zero built environment a realityIES VE
 
TrustArc Webinar - How to Build Consumer Trust Through Data Privacy
TrustArc Webinar - How to Build Consumer Trust Through Data PrivacyTrustArc Webinar - How to Build Consumer Trust Through Data Privacy
TrustArc Webinar - How to Build Consumer Trust Through Data PrivacyTrustArc
 
The Role of FIDO in a Cyber Secure Netherlands: FIDO Paris Seminar.pptx
The Role of FIDO in a Cyber Secure Netherlands: FIDO Paris Seminar.pptxThe Role of FIDO in a Cyber Secure Netherlands: FIDO Paris Seminar.pptx
The Role of FIDO in a Cyber Secure Netherlands: FIDO Paris Seminar.pptxLoriGlavin3
 
How to write a Business Continuity Plan
How to write a Business Continuity PlanHow to write a Business Continuity Plan
How to write a Business Continuity PlanDatabarracks
 
The Fit for Passkeys for Employee and Consumer Sign-ins: FIDO Paris Seminar.pptx
The Fit for Passkeys for Employee and Consumer Sign-ins: FIDO Paris Seminar.pptxThe Fit for Passkeys for Employee and Consumer Sign-ins: FIDO Paris Seminar.pptx
The Fit for Passkeys for Employee and Consumer Sign-ins: FIDO Paris Seminar.pptxLoriGlavin3
 
A Journey Into the Emotions of Software Developers
A Journey Into the Emotions of Software DevelopersA Journey Into the Emotions of Software Developers
A Journey Into the Emotions of Software DevelopersNicole Novielli
 
Passkey Providers and Enabling Portability: FIDO Paris Seminar.pptx
Passkey Providers and Enabling Portability: FIDO Paris Seminar.pptxPasskey Providers and Enabling Portability: FIDO Paris Seminar.pptx
Passkey Providers and Enabling Portability: FIDO Paris Seminar.pptxLoriGlavin3
 
Use of FIDO in the Payments and Identity Landscape: FIDO Paris Seminar.pptx
Use of FIDO in the Payments and Identity Landscape: FIDO Paris Seminar.pptxUse of FIDO in the Payments and Identity Landscape: FIDO Paris Seminar.pptx
Use of FIDO in the Payments and Identity Landscape: FIDO Paris Seminar.pptxLoriGlavin3
 
Potential of AI (Generative AI) in Business: Learnings and Insights
Potential of AI (Generative AI) in Business: Learnings and InsightsPotential of AI (Generative AI) in Business: Learnings and Insights
Potential of AI (Generative AI) in Business: Learnings and InsightsRavi Sanghani
 
The State of Passkeys with FIDO Alliance.pptx
The State of Passkeys with FIDO Alliance.pptxThe State of Passkeys with FIDO Alliance.pptx
The State of Passkeys with FIDO Alliance.pptxLoriGlavin3
 
Digital Identity is Under Attack: FIDO Paris Seminar.pptx
Digital Identity is Under Attack: FIDO Paris Seminar.pptxDigital Identity is Under Attack: FIDO Paris Seminar.pptx
Digital Identity is Under Attack: FIDO Paris Seminar.pptxLoriGlavin3
 
Enhancing User Experience - Exploring the Latest Features of Tallyman Axis Lo...
Enhancing User Experience - Exploring the Latest Features of Tallyman Axis Lo...Enhancing User Experience - Exploring the Latest Features of Tallyman Axis Lo...
Enhancing User Experience - Exploring the Latest Features of Tallyman Axis Lo...Scott Andery
 

Último (20)

Connecting the Dots for Information Discovery.pdf
Connecting the Dots for Information Discovery.pdfConnecting the Dots for Information Discovery.pdf
Connecting the Dots for Information Discovery.pdf
 
Generative AI for Technical Writer or Information Developers
Generative AI for Technical Writer or Information DevelopersGenerative AI for Technical Writer or Information Developers
Generative AI for Technical Writer or Information Developers
 
From Family Reminiscence to Scholarly Archive .
From Family Reminiscence to Scholarly Archive .From Family Reminiscence to Scholarly Archive .
From Family Reminiscence to Scholarly Archive .
 
Testing tools and AI - ideas what to try with some tool examples
Testing tools and AI - ideas what to try with some tool examplesTesting tools and AI - ideas what to try with some tool examples
Testing tools and AI - ideas what to try with some tool examples
 
UiPath Community: Communication Mining from Zero to Hero
UiPath Community: Communication Mining from Zero to HeroUiPath Community: Communication Mining from Zero to Hero
UiPath Community: Communication Mining from Zero to Hero
 
(How to Program) Paul Deitel, Harvey Deitel-Java How to Program, Early Object...
(How to Program) Paul Deitel, Harvey Deitel-Java How to Program, Early Object...(How to Program) Paul Deitel, Harvey Deitel-Java How to Program, Early Object...
(How to Program) Paul Deitel, Harvey Deitel-Java How to Program, Early Object...
 
TeamStation AI System Report LATAM IT Salaries 2024
TeamStation AI System Report LATAM IT Salaries 2024TeamStation AI System Report LATAM IT Salaries 2024
TeamStation AI System Report LATAM IT Salaries 2024
 
The Ultimate Guide to Choosing WordPress Pros and Cons
The Ultimate Guide to Choosing WordPress Pros and ConsThe Ultimate Guide to Choosing WordPress Pros and Cons
The Ultimate Guide to Choosing WordPress Pros and Cons
 
Decarbonising Buildings: Making a net-zero built environment a reality
Decarbonising Buildings: Making a net-zero built environment a realityDecarbonising Buildings: Making a net-zero built environment a reality
Decarbonising Buildings: Making a net-zero built environment a reality
 
TrustArc Webinar - How to Build Consumer Trust Through Data Privacy
TrustArc Webinar - How to Build Consumer Trust Through Data PrivacyTrustArc Webinar - How to Build Consumer Trust Through Data Privacy
TrustArc Webinar - How to Build Consumer Trust Through Data Privacy
 
The Role of FIDO in a Cyber Secure Netherlands: FIDO Paris Seminar.pptx
The Role of FIDO in a Cyber Secure Netherlands: FIDO Paris Seminar.pptxThe Role of FIDO in a Cyber Secure Netherlands: FIDO Paris Seminar.pptx
The Role of FIDO in a Cyber Secure Netherlands: FIDO Paris Seminar.pptx
 
How to write a Business Continuity Plan
How to write a Business Continuity PlanHow to write a Business Continuity Plan
How to write a Business Continuity Plan
 
The Fit for Passkeys for Employee and Consumer Sign-ins: FIDO Paris Seminar.pptx
The Fit for Passkeys for Employee and Consumer Sign-ins: FIDO Paris Seminar.pptxThe Fit for Passkeys for Employee and Consumer Sign-ins: FIDO Paris Seminar.pptx
The Fit for Passkeys for Employee and Consumer Sign-ins: FIDO Paris Seminar.pptx
 
A Journey Into the Emotions of Software Developers
A Journey Into the Emotions of Software DevelopersA Journey Into the Emotions of Software Developers
A Journey Into the Emotions of Software Developers
 
Passkey Providers and Enabling Portability: FIDO Paris Seminar.pptx
Passkey Providers and Enabling Portability: FIDO Paris Seminar.pptxPasskey Providers and Enabling Portability: FIDO Paris Seminar.pptx
Passkey Providers and Enabling Portability: FIDO Paris Seminar.pptx
 
Use of FIDO in the Payments and Identity Landscape: FIDO Paris Seminar.pptx
Use of FIDO in the Payments and Identity Landscape: FIDO Paris Seminar.pptxUse of FIDO in the Payments and Identity Landscape: FIDO Paris Seminar.pptx
Use of FIDO in the Payments and Identity Landscape: FIDO Paris Seminar.pptx
 
Potential of AI (Generative AI) in Business: Learnings and Insights
Potential of AI (Generative AI) in Business: Learnings and InsightsPotential of AI (Generative AI) in Business: Learnings and Insights
Potential of AI (Generative AI) in Business: Learnings and Insights
 
The State of Passkeys with FIDO Alliance.pptx
The State of Passkeys with FIDO Alliance.pptxThe State of Passkeys with FIDO Alliance.pptx
The State of Passkeys with FIDO Alliance.pptx
 
Digital Identity is Under Attack: FIDO Paris Seminar.pptx
Digital Identity is Under Attack: FIDO Paris Seminar.pptxDigital Identity is Under Attack: FIDO Paris Seminar.pptx
Digital Identity is Under Attack: FIDO Paris Seminar.pptx
 
Enhancing User Experience - Exploring the Latest Features of Tallyman Axis Lo...
Enhancing User Experience - Exploring the Latest Features of Tallyman Axis Lo...Enhancing User Experience - Exploring the Latest Features of Tallyman Axis Lo...
Enhancing User Experience - Exploring the Latest Features of Tallyman Axis Lo...
 

Cartoon Shader in Unity3d Tutorial

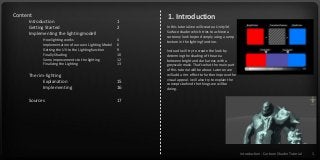
  • 1. Content Introduction 1 Getting Started 2 Implementing the lightingmodell How lighting works 4 Implementation of our own Lighting Model 6 Getting the UV to the Lightingfunction 9 Finally Shading 10 Some improvements to the lighting 12 Finalizing the Lighting 13 The rim-lighting Explanation 15 Implementing 16 Sources 17 1. Introduction In this tutorial we will create a Unity3d Surface shader which tries to achieve a cartoony look beyond simply using a ramp texture in the lighting function. Instead I will try to create the look by determing the shading of the area between bright and dark areas with a greyscale mask. That‘s what the main part of this tutorial will be about. Later on we will add a rim-effect to further improve the visual appeal. I will also try to explain the concepts behind the things we will be doing. Introduction - Cartoon Shader Tutorial 1
  • 2. Getting Started - Cartoon Shader Tutorial 2 1. Getting Started Setting Up the Project Create a new Projectstep 1 Import the AssetPackage you can download here. https://dl.dropboxusercontent.com/u/28326381/shader%20dnload%20package.unit ypackage step 2 Fig1.: How to import a custom package to unity step 3 Place the „ImprodLowPoly“-model in the scene. (Drag & Drop from the project view) step 4 Create a new Shader. Assets > Create > Shader Name it „CartoonShader“. step 5 Create a new Material. Assets > Create > Material Name it „CartoonMaterial“. step 6 Apply the Cartoon Material to the model you‘ve placed in the scene in step 3. step 7 Create a direction Light. GameObject > Create Other > Directional Light You can adjust the light-angle by rotating the light.
  • 3. Your Unityproject should look about like this right now. You should have: • Imported the downloaded Assets • Created the shader and the material and applied the material to the model • Created a directional light Assign the CartoonShader to the CartoonMaterial. Select the CartoonMaterial in the project view and hit the button next to „shader“ and select „CartoonShader“ from the Custom section. step 9 Open the shader by double Clicking the „CartoonShader“ in your project view. Monodevelop should open. Give it a few seconds and you should see something like in this image. This is our shader code. step 10 Getting Started - Cartoon Shader Tutorial 3
  • 4. 2. Lighting Model Let‘s begin with the most important part of this shader – the shading. Since the goal of this shader is to mix the diffuse texture with greyscale textures based on the lighting, we will write our own lightingfunction and use it in our shader. How the Surface Shader works Since we use a surface shader, we calculate the actual color of the surface in the void surf (Input IN, inout SurfaceOutput o) – function. This function gets called for each surface fragment the engine is rendering. The function recieves important data via the IN struct. We take this data und use it, to calculate the colors, normals, and anything else needed in the SurfaceOutPut-struct which gets passed on the next step, the lighting function. Here the data can be changed and used to let each light in the scene, modify our rendering fragment. This, off course, is only a very simplified explanation of a surface shader in Unity3d. Read More about how a Surfaceshader works here: http://docs.unity3d.com/Documentation/Components/SL-SurfaceShaders.html What is a surface? What we are basically trying to do is, coloring and shading surfaces. A surface always has direction it is facing to. This direction is stored as a vector – the surface normal. A 3d mesh in our rendering pipeline consists of many triangles each with its own normal (Fig 2). What is a light? In terms of rendering the key elements forming a light are: • The position / direction of the light Source • The color That‘s basically it. And that‘s all we need to compute our lighting. How lighting works Fig2.: surface normals of a mesh Lighting Model - Cartoon Shader Tutorial 4
  • 5. How lighting is computed The shading of a surface is the result of a calculation between the incoming light direction and the surface normal. Different lighting models calculate this differently. But most models resemble the way lighting works in real life. The formula is easy The more a surface is facing towards the light direction, the brighter it will appear. Or more mathematically speaking: The bigger the angle between the surface normal and the light direction gets, the less lightcolor is applied to the already calculated surface color. By calculating the dot product of two vectors we get the angle between two vectors as a scalar between 0 and 1. While dot(v1, v2) returns 1 when both vectors are facing towards each other. We then use this value to multiply it with our surface color (red in fig.3). The more the surface normals direction points towards the light direction, the higher the lightValue gets thus increasing the amount of surfaceColor. Lighting Model - Cartoon Shader Tutorial 5
  • 6. 2. Implementation of our own Lighting Model step 1 Declaration of our own Lighting Model Open the editor with the shader code we have opened previously. (or just double-click the shader again). We can either use a built-in lighting model from unity like Lambert, Phong etc. but we also have the option to write our own little lighting function. In order to do that, we simply declare a new function after the Input Code- Block. By putting this code after the Input Struct-declaration: half4 LightingCartoon(SurfaceOutput s, half3 dir, half attend){ } • Half4 means that this function will return a four-component vector (which will be used as color – (Red,Green,Blue,Alpha) • When naming the function LightingCartoon we tell Unity that this function may be used to compute lighting • SurfaceOutput provides all the data previously calculated in the surf function • Dir is the light direction This part of the code, should look like this right now: Shader "Custom/CartoonShader" { Properties { _MainTex ("Base (RGB)", 2D) = "white" {} } SubShader { Tags { "RenderType"="Opaque" } LOD 200 CGPROGRAM #pragma surface surf Lambert sampler2D _MainTex; struct Input { float2 uv_MainTex; }; half4 LightingCartoon(SurfaceOutput s, half3 dir, half attend){ } void surf (Input IN, inout SurfaceOutput o) { half4 c = tex2D (_MainTex, IN.uv_MainTex); o.Albedo = c.rgb; o.Alpha = c.a; } ENDCG } FallBack "Diffuse" } Lighting Model- Cartoon Shader Tutorial 6
  • 7. step 2 Lets return some stuff Since this function returns a color, we should write some code in order to test our own lighting model. Our final lighting model will be based on a so called „Wrap-Lambert“ which only lets a portion of the light affect the surface color. In our in Step1 declared LightingCartoon function we put the following : dir = normalize(dir); half NdotL = saturate( dot (s.Normal, dir)); This will normalize our light-direction vector leaving it with a magnitude of 1.0. Otherwise this will mess up the dot-product Calculate the dot product. Saturate(float) makes sure, the value is clamped between 0 and 1 because we don‘t want to multiply our surface colors with negative values) Actually return a color, first we declar it.Then the Albedo (diffuse) – Color from the surface shader gets multiplied with our light-angle. And finally we let the Lightcolor have a shot to modify or final color. _LightColor0 is a global value, describing the currently rendered lightcolor half4 c; c.rgb = ((NdotL * 0.2f)+0.8f) * s.Albedo * _LightColor0; c.a = s.Alpha; return c; Now we need to tell unity to use our lightingmodel – we do this in the pragma section. The default lightingmodel is the lambert lighting model. So we will change that by changing lambert > Cartoon. half4 LightingCartoon(SurfaceOutput s, half3 dir, half attend){ dir = normalize(dir); half NdotL = saturate( dot (s.Normal, dir)); half4 c; c.rgb = ((NdotL * 0.2f)+0.8f) * s.Albedo * _LightColor0; c.a = s.Alpha; return c; } The LightingFunction should now like this: #pragma surface surf Cartoon Lighting Model - Cartoon Shader Tutorial 7 step 2.1
  • 8. Save the shader, and switch back to the unity3d Editor, the shader will now compile and the material in the viewport will update as soon as it‘s done giving you result looking like this: Notice how even the dark areas aren‘t totally black that‘s because of this piece of code we have just written: (NdotL * 0.2f)+0.8f) Making sure, there is at least 20% lighting. Additionally we have still some fair amount of Ambient light in the scene. Which we will turn of now… step 3 Turning off the ambient light Go to Edit > Render Settings and Assign black to the Ambient Light Color-Slot step 4 Declaring some properties What we are trying to achieve is having a a shading color for the bright and for the dark side. And a texture for the transition zone. Lets start with the hardest part, getting the zones right. Just a reminder – this is our plan: _BrightColor("Bright Color", Color) = (1,0,0) _Threshold1("Threshold Bright to Dark", range(0,1)) = 0.2 _DarkColor("Dark Color", Color) = (0,1,0) _Threshold2("Threshold Middle to Dark", range(0,1)) = 0.9 _TransitionTexture("Transition Texture", 2D) = "white" {} First we declare new properties for the two colors. In our properties codeblock we put this code: sampler2D _TransitionTexture; half4 _BrightColor; half4 _DarkColor; half _Threshold1; half _Threshold2; Then we need to add the respective shader variables to get the properties values to the shader. Add this before the INPUT struct. Lighting Model - Cartoon Shader Tutorial 8
  • 9. Save the file. Go to the editor and check the material. The properties of the material on your object should look like this (fig. 4) Unfortunately these colors don’t affect our shader much at the moment. Let’s change that! step 5 Getting the UV to the Lightingfunction We do not have access to the uv-coordinates of the current rendered surface piece in the lighting function. We will code our own struct which gets passed on through all the functions and use this one instead of the „SurfaceOutput“ struct. Let‘s declare the SurfaceOutputCustom struct right after the Input-struct declaration. struct SurfaceOutputCustom { fixed3 Albedo; fixed3 Normal; fixed3 Emission; half Specular; fixed Gloss; fixed Alpha; fixed viewFallof; half2 UV; }; Getting our struct to work This struct actually contains the usual data plus the UV part. We will write the UV to the struct which will then get passed to the lighting function. We need to change the arguments of the lighting and surface function to make this happen. Change the lighting function declaration now to this step 5.1 And we will change the surface function to this: half4 LightingCartoon(SurfaceOutputCustom s, half3 dir, half attend) void surf (Input IN, inout SurfaceOutputCustom o) Also add this line to the surf function – this will write the UV values to our struct so we can access is it in the lighting. o.UV = IN.uv_MainTex; Lighting Models - Cartoon Shader Tutorial 9
  • 10. step 6 Finally Shading! First I have to introduce ternary expressions. You are probably familiar with the if-else structure in conditional statements. Although the shader code is able to handle if-else structures in this case we need to express our conditions with a ternary operation. It works like this: We will use the treshold to determine which color for the light based shading we will use. ShadowColor = NdotL < _Threshold1 ? _DarkColor : NdotL < _Threshold2 ? lerp(_DarkColor, _BrightColor, tex2D(_TransitionTexture, s.UV)) : _BrightColor; In code – it looks like this (I‘ve left out the texturing for _BrightColor and _DarkColor for now) lerp(DarkColor, BrightColor, tex2D(_TransitionTexture, s.UV) ) Lerp(value1, value2, percent); Interpolates between Color1 and Color2 using the percent value tex2D(texture, UV); We will get the percent value from our transitionTexture @ the current UV position c.rgb = ((NdotL * 0.2f)+0.8f) * s.Albedo * _LightColor0 * ShadowColor; half3 ShadowColor = NdotL < _Threshold1 ? _DarkColor : NdotL < _Threshold2 ? lerp(_DarkColor, _BrightColor, tex2D(_TransitionTexture, s.UV)) : _BrightColor; Add this line to the LightingCartoon funcion, right after the NdotL declaration. … and multiply our previously calculated ShadowColor to the output color by changing it to this: Lighting Model - Cartoon Shader Tutorial 10
  • 11. Step 6 |CODE Shader "Custom/CartoonShader"{ Properties { _MainTex ("Base (RGB)", 2D) = "white" {} _BrightColor("Bright Color", Color) = (1,0,0) _Threshold1("ThresholdBright to Dark", range(0,1)) = 0.2 _DarkColor("Dark Color", Color) = (0,1,0) _Threshold2("ThresholdMiddle to Dark", range(0,1)) = 0.9 _TransitionTexture("Transition Texture", 2D) = "white" {} } SubShader { Tags { "RenderType"="Opaque" } LOD 200 CGPROGRAM #pragma surface surf Cartoon sampler2D _MainTex; sampler2D _TransitionTexture; half4 _BrightColor; half4 _DarkColor; half _Threshold1; half _Threshold2; struct Input { float2 uv_MainTex; }; struct SurfaceOutputCustom{ fixed3 Albedo; fixed3 Normal; fixed3 Emission; half Specular; fixed Gloss; fixed Alpha; fixed viewFallof; half2 UV; }; half4 LightingCartoon(SurfaceOutputCustom s, half3 dir, half attend){ dir = normalize(dir); half NdotL = saturate( dot (s.Normal, dir)); half3 ShadowColor = NdotL < _Threshold1 ? _DarkColor : NdotL < _Threshold2 ? lerp(_DarkColor, _BrightColor, tex2D(_TransitionTexture, s.UV)) : _BrightColor; half4 c; c.rgb = ((NdotL * 0.4f)+0.6f) * s.Albedo * _LightColor0 * ShadowColor; c.a = s.Alpha; return c; } void surf (Input IN, inout SurfaceOutputCustom o) { half4 c = tex2D (_MainTex, IN.uv_MainTex); o.UV = IN.uv_MainTex; o.Albedo = c; o.Alpha = c.a; } ENDCG } FallBack "Diffuse" } Let‘s wrap it. The code should look like this at the moment. Assign tex1 to the transition texture slot in the material – which should produce something like this: Lighting Model - Cartoon Shader Tutorial 11
  • 12. Step 7 Some improvements to the lighting. We definitely need to be able to influence the transitiontextures size. Since I don’t want to add a variable to our custom struct for each UV, we will simply add a float and scale the UV accordingly. Add this property right after the existing ones: _TransitionTextureSize("Transition Texture Size", range(0.1, 50)) = 1 And the shader variable.. Just after “half Treshhold1” half _TransitionTextureSize; Now we will use this value to scale the transition texture. By changing the texture lookup in our ternary expresion half3 ShadowColor = NdotL < _Threshold1 ? _DarkColor : NdotL < _Threshold2 ? lerp(_DarkColor, _BrightColor, tex2D(_TransitionTexture, s.UV *_TransitionTextureSize)) : _BrightColor; Now we will use this value to scale the transition texture. By changing the texture lookup in our ternary expression. Step 7.1 Adding Textures To have more artistic control over the shading to make the colors look painted for example, we are going to multiply the shades with a texture. Again, first – the properties. Add those: _BrightTexture("Bright Color Texture", 2D) = "white"{} _BrightTextureSize("Bright Texture Size", range(0.1,50)) = 1 _BrightTextureIntensity("Bright Texture Intensity", range(0.0,1)) = 0.5 _DarkTexture("Dark Color Texture", 2D) = "white"{} _DarkTextureSize("Dark Texture Size", range(0.1,50)) = 1 half _DarkTextureSize; half _BrightTextureSize; half _BrightTextureIntensity; sampler2D _BrightTexture; sampler2D _DarkTexture; Let’s add the Shader variables as well. Right before the Input struct, after the shader variable from step 7. Whenever we look up the _BrightColor or _DarkColor. We will multiply it with a value from its texture. We Also want to set the intensity of the _BrightTexture. We need to change a lot of stuff in our LightingCartoon function. Between the NdotL and _Shadowcolor declaration! ADD half4 darkColor = _DarkColor * tex2D(_DarkTexture, s.UV * _DarkTextureSize); half4 brightColor = _BrightColor * ( tex2D(_BrightTexture, s.UV * _BrightTextureSize) * _BrightTextureIntensity + (1-_BrightTextureIntensity)); With these lines we declare a new Color-Vector and multiply the Colors from the properties with the values from the texture at that spot. While the darkColor is a simple multiplication. We craft in the _BrightTextureIntensity as a sort of weight for the TextureValue of the brightColor. Now we only need to add the new colors to the ternary expression. half3 ShadowColor = NdotL < _Threshold1 ? darkColor : NdotL < _Threshold2 ? lerp(darkColor, brightColor, tex2D(_TransitionTexture, s.UV * _TransitionTextureSize)) : brightColor; Lighting Model - Cartoon Shader Tutorial 12
  • 13. Step 7.2 Finalizing the Lighting Add some textures for the different shading zones, and play around with the colors, and texture sizes. Settings used for this Screenshot: BrightColor: (255,215,178) BrightTexture: Pencil_stroke_02 DarkColor:: (99,79,66) DarkTexture: Pencil_stroke_01 TransitionTexture: Pencil_strokes_03 Lighting Model - Cartoon Shader Tutorial 13
  • 14. CODE Shader "Custom/CartoonShader" { Properties { _MainTex ("Base (RGB)", 2D) = "white" {} _BrightColor("Bright Color", Color) = (1,0,0) _Threshold1("Threshold Bright to Dark", range(0,1)) = 0.2 _DarkColor("Dark Color", Color) = (0,1,0) _Threshold2("Threshold Middle to Dark", range(0,1)) = 0.9 _TransitionTexture("Transition Texture", 2D) = "white" {} _TransitionTextureSize("Transition Texture Size", range(0.1, 50)) = 1 _BrightTexture("Bright Color Texture", 2D) = "white"{} _BrightTextureSize("Bright Texture Size", range(0.1,50)) = 1 _BrightTextureIntensity("Bright Texture Intensity", range(0.0,1)) = 0.5 _DarkTexture("Dark Color Texture", 2D) = "white"{} _DarkTextureSize("Dark Texture Size", range(0.1,50)) = 1 } SubShader { Tags { "RenderType"="Opaque" } LOD 200 CGPROGRAM #pragma surface surf Cartoon sampler2D _MainTex; sampler2D _TransitionTexture; half4 _BrightColor; half4 _DarkColor; half _Threshold1; half _Threshold2; half _TransitionTextureSize; half _DarkTextureSize; half _BrightTextureSize; half _BrightTextureIntensity; sampler2D _BrightTexture; sampler2D _DarkTexture; struct Input { float2 uv_MainTex; }; struct SurfaceOutputCustom { fixed3 Albedo; fixed3 Normal; fixed3 Emission; half Specular; fixed Gloss; fixed Alpha; fixed viewFallof; half2 UV; }; half4 LightingCartoon(SurfaceOutputCustom s, half3 dir, half attend){ dir = normalize(dir); half NdotL = saturate( dot (s.Normal, dir)); half4 darkColor = _DarkColor * tex2D(_DarkTexture, s.UV * _DarkTextureSize); half4 brightColor = _BrightColor * ( tex2D(_BrightTexture, s.UV * _BrightTextureSize) * _BrightTextureIntensity + (1- _BrightTextureIntensity)); half3 ShadowColor = NdotL < _Threshold1 ? darkColor : NdotL < _Threshold2 ? lerp(darkColor, brightColor, tex2D(_TransitionTexture, s.UV * _TransitionTextureSize)) : brightColor; half4 c; c.rgb = ((NdotL * 0.4f)+0.6f) * s.Albedo * _LightColor0 * ShadowColor; c.a = s.Alpha; return c; } void surf (Input IN, inout SurfaceOutputCustom o) { half4 c = tex2D (_MainTex, IN.uv_MainTex); o.UV = IN.uv_MainTex; o.Albedo = c; o.Alpha = c.a; } ENDCG } FallBack "Diffuse" } Lighting Model - Cartoon Shader Tutorial 14
  • 15. Step 13. Rim Effect Properties To improve the visual appeal of the shader we are going to add some Rim-Lighting. Polygons facing away from the Camera are going to get tinted. Usually this technique is used to simulate backlighting. But we will hijack the effect for our own purpose. Let‘s meet an old friend. The dot product. This time our scalar will reflect the angle between the view Direction and the surface normal. The more a surface is facing away from the viewer the smaller the dot product will become. As usual we will calculate the dot product. We then multiply a Color, declared for this purpose, with this value and finally we will output this color in the emission color of the surface. In a later step we will modify the Albedo color based on the rim lighting so we can even use the rim-effect to darken the rims. Powering the dot product! We will modify the scalar with a pow() function to take control over the dispersion. We need some properties first. _RimColor This will be the color the surface is going to get be tinted with. _RimPower The value we are using in pow to flatten our curve. _RimStrength How much of the calculated Color is going to be applied When looking at a sphere, the dot product „looks“ like this. From inner to outer polygons. We can modify this curve using the pow function _RimColor("Rim Color", Color) = (1,0,0) _RimPower("Rim Position", range(0,3)) = 1 _RimStrength("Rim Strength", range(0,1)) = 1 Declare these properties in the properties block. And those in our shader code (Bevor the Input struct): half4 _RimColor; half _RimPower; half _RimStrength; Step 2 Getting the view direction We have to tell Unity to provide a vector containing the view direction first. To do that, we simply modify the input struct. Add „float3 viewDir“ to the Input struct. struct Input { float2 uv_MainTex; float3 viewDir; }; From now on, unity will write the viewdirection to the Input struct so we can use it. There is even more data you can add to your Input. Check out the reference: http://docs.unity3d.com/Docum entation/Components/SL- SurfaceShaders.html Rim Effect- Cartoon Shader Tutorial 15
  • 16. Step 3 Let‘s Rim half NdotView = 1 - dot(normalize(IN.viewDir), o.Normal); With the viewdirection ready to use in our Input data, we can start adding code to the Surf function. The first step is to get the dot product between the view direction and the rendered piece. It‘s very important to normalize the viewDir, because it actually reflects a vector FROM the rendered piece TO the camera. So probably this vectors magnitude is quite long, or short. However – to calculate a reasonable dot product we need both vectors to have a magnitude of 1. That‘s exaclty what normalize() does. The 1-dotProduct kind of „inverts“ the value. Meaning: The more the Normal is pointing away from the viewDir the larger our value gets. Facing Away = dot product = 0 Facing Towards = dot product = 1 The rim-effect should INCREASE when the faces are facing away. So we need an Increasing value. NdotView = pow(NdotView, _RimPower); According to the last page we „power“-the resulting value to determine the size of the rim-effect. o.Emission = NdotView * _RimColor * _RimStrength; Save the shader and go to the editor. Hopefully it looks something like this. This is quite much the effect I wanted to achieve. Although I would like to do a small improvment. Right now, we actually cannot do a rim effect which darkens the model. That‘s because we are applying the color to the emission channel. Which by nature gets multiplied with the color. Step 4 Test Step 5 Messing with the Albedo The way we‘ll be working around this, will be to reduce the albedo strength on faces because the Emission will illuminate these areays anyway. Change the assignment of the Albedo Color In the surf function) to this. o.Albedo = c * ( 1 - NdotView * _RimStrength); Rim Effect - Cartoon Shader Tutorial 16 According to the last page we „power“-the resulting value to determine the size of the rim-effect.
  • 17. FINAL CODE Shader "Custom/CartoonShader" { Properties { _MainTex ("Base (RGB)", 2D) = "white" {} _BrightColor("Bright Color", Color) = (1,0,0) _Threshold1("Threshold Bright to Dark", range(0,1)) = 0.2 _DarkColor("Dark Color", Color) = (0,1,0) _Threshold2("Threshold Middle to Dark", range(0,1)) = 0.9 _TransitionTexture("Transition Texture", 2D) = "white" {} _TransitionTextureSize("Transition Texture Size", range(0.1, 50)) = 1 _BrightTexture("Bright Color Texture", 2D) = "white"{} _BrightTextureSize("Bright Texture Size", range(0.1,50)) = 1 _BrightTextureIntensity("Bright Texture Intensity", range(0.0,1)) = 0.5 _DarkTexture("Dark Color Texture", 2D) = "white"{} _DarkTextureSize("Dark Texture Size", range(0.1,50)) = 1 _RimColor("Rim Color", Color) = (1,0,0) _RimPower("Rim Position", range(0,4)) = 2 _RimStrength("Rim Strength", range(0,1)) = 1 } SubShader { Tags { "RenderType"="Opaque" } LOD 200 CGPROGRAM #pragma surface surf Cartoon sampler2D _MainTex; sampler2D _TransitionTexture; half4 _BrightColor; half4 _DarkColor; half _Threshold1; half _Threshold2; half _TransitionTextureSize; half _DarkTextureSize; half _BrightTextureSize; half _BrightTextureIntensity; sampler2D _BrightTexture; sampler2D _DarkTexture; half4 _RimColor; half _RimPower; half _RimStrength; struct Input { float2 uv_MainTex; float3 viewDir; }; struct SurfaceOutputCustom { fixed3 Albedo; fixed3 Normal; fixed3 Emission; half Specular; fixed Gloss; fixed Alpha; fixed viewFallof; half2 UV; }; half4 LightingCartoon(SurfaceOutputCustom s, half3 dir, half attend){ dir = normalize(dir); half NdotL = saturate( dot (s.Normal, dir)); half4 darkColor = _DarkColor * tex2D(_DarkTexture, s.UV * _DarkTextureSize); half4 brightColor = _BrightColor * ( tex2D(_BrightTexture, s.UV * _BrightTextureSize) * _BrightTextureIntensity + (1- _BrightTextureIntensity)); half3 ShadowColor = NdotL < _Threshold1 ? darkColor : NdotL < _Threshold2 ? lerp(darkColor, brightColor, tex2D(_TransitionTexture, s.UV * _TransitionTextureSize)) : brightColor; half4 c; c.rgb = ((NdotL * 0.4f)+0.6f) * s.Albedo * _LightColor0 * ShadowColor; c.a = s.Alpha; return c; } void surf (Input IN, inout SurfaceOutputCustom o) { half4 c = tex2D (_MainTex, IN.uv_MainTex); o.UV = IN.uv_MainTex; half NdotView = 1 - dot(normalize(IN.viewDir), o.Normal); NdotView = pow(NdotView, _RimPower); o.Emission = NdotView * _RimColor * _RimStrength; o.Albedo = c * ( 1 - NdotView * _RimStrength); o.Alpha = c.a; } ENDCG } FallBack "Diffuse" }
  • 18. Sources DOWNLOADS Tutorial Package – the stuff you need to start with this tuorial Finished Tutorial Package – everything is already done  Links: The maker of the awesome model we‘re using through the tutorial: http://www.parkparkin.com/ Sources - Cartoon Shader Tutorial 18 https://dl.dropboxusercontent.com/u/28326381/shader%20tutorial%20final.unitypackage https://dl.dropboxusercontent.com/u/28326381/shader%20download%20package.unitypackage