Creating Fire - Creando Fuego
•
1 like•1,066 views

Este documento te enseña la manera avanzada de crear un efecto visual de un texto en flamas de fuego. Originalmente es un tutorial realizado en el conocido programa Photoshop por Mr. Greg Vander Houwen y lo he convertido a CorelPhotopaint X4 para que se pueda observar el proceso a seguir en otro programa tan bueno y que a veces por desconocimiento no lo aplicamos al máximo.

Recommended
More Related Content
What's hot
What's hot (15)
Similar to Creating Fire - Creando Fuego
More from Pedro Espinoza Hurtado
More from Pedro Espinoza Hurtado (20)
Recently uploaded
Recently uploaded (20)
Creating Fire - Creando Fuego
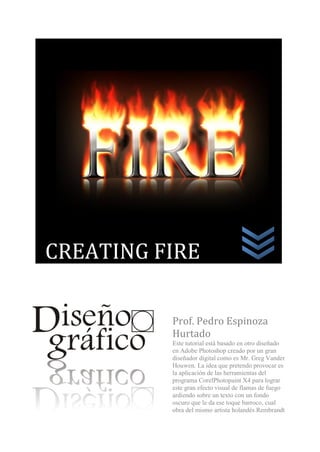
- 1. CREATING FIRE Prof. Pedro Espinoza Hurtado Este tutorial está basado en otro diseñado en Adobe Photoshop creado por un gran diseñador digital como es Mr. Greg Vander Houwen. La idea que pretendo provocar es la aplicación de las herramientas del programa CorelPhotopaint X4 para lograr este gran efecto visual de flamas de fuego ardiendo sobre un texto con un fondo oscuro que le da ese toque barroco, cual obra del mismo artista holandés Rembrandt Van Rijn.
- 2. Colegio América - Callao High School Prof. Pedro Espinoza Hurtado CREANDO FUEGO We need a new document, go to File and set the document size to 800 x 500 pixels see additional settings shown. Make a copy of the background by dragging the background layer to icon NEW OBJECT at the bottom the object docker. Write the word FIRE using Times New Roman Font (24 points) white color. I used Font High Tower Text which is very much alike. Make a copy of FIRE word and paint it black and go to EFFECTS/ TEXTURE/PLASTIC Highlight: 90 Depth: 25 Smoothness: 25 Light color: white Light direction: 315 grades
- 3. Colegio América - Callao High School Prof. Pedro Espinoza Hurtado Using SHIFT select the two -the FIRE word and the copy of the background in black – and combine them by using icon COMBINE OBJECTS TOGETHER and the bottom of the objects docker. Once the two objects are combined go to EFFECTS/DISTORT/WIND
- 4. Colegio América - Callao High School Prof. Pedro Espinoza Hurtado Go to EFFECTS/REPEAT/REPEAT WIND repeat it until it gets high and notorious
- 5. Colegio América - Callao High School Prof. Pedro Espinoza Hurtado Now go to EFFECTS/BLUR/ GAUSSIAN BLUR ( radius : 3.6 pixels) Check in IMAGE/COLOR MODE /RGB COLOR and activate this option In ADJUST/COLOR BALANCE Range: All actives except SHADOWS and HIGHLIGHTS and set Color Channels as shown below.
- 6. Colegio América - Callao High School Prof. Pedro Espinoza Hurtado Add more color with ADJUST/HUE-SATURATION-LIGHTNESS Channels: Master (activated) write 100 in Saturation.
- 7. Colegio América - Callao High School Prof. Pedro Espinoza Hurtado Make a copy of this object and paint it in yellow ADJUST/HUE-SATURATION- LIGHTNESS/ Click in Master Channel Hue: 47 Saturation: 100 MERGE MODE: Hard Light Now these two objects the yellow and the red one must be combined all together.
- 8. Colegio América - Callao High School Prof. Pedro Espinoza Hurtado Use the EFFECT TOOL choosing the option effect I recommend you in the list below to get the best for your flames. Place the copy of text FIRE - we made at the beginning -above the flames object and make a copy of the flames layer.
- 9. Colegio América - Callao High School Prof. Pedro Espinoza Hurtado Use INTERACTIVE TRANSPARENCY TOOL choose: Linear (apply the transparency from up to down but place the tool at the very edge of the letters and drag it down)
- 10. Colegio América - Callao High School Prof. Pedro Espinoza Hurtado Up to now this is a map of the Object palette every step is reflected here. Check yours and watch if you are doing it right. Group all the objects and duplicate the group and combine all together apply Gaussian Blur in Radius: 20 but you may repeat it once or twice again to produce a better outcome. Remember for grouping objects you´ve got to click every object pressing Control Key and after you have all the objects (except background) use contextual menu (right click) and choose “Group”. After this you apply again right click to this object for duplicating and combine them all together to convert as one object only. MERGE MODE: SCREEN / Opacity: 72 This is the image of the object with Gaussian blur.
- 11. Colegio América - Callao High School Prof. Pedro Espinoza Hurtado With THE ERASER TOOL (X) using transparency: 60 or 72 Shape: Nib Shape try to get free some zones of the letters from an excess of lightness or blur to make darker some parts at the bottom of the letters. Select all the layers or objects using CONTROL and Group them and make a copy then combine them to create the reflex of the FIRE text on the floor. You´d better use rectangle selection tool to extract the part of this new object you need. Use transformation tool to put upside-down the text and use Interactive Fill Tool to get a true real effect by selecting the option from paint to transparent and dragging from the bottom of the object upward.
- 12. Colegio América - Callao High School Prof. Pedro Espinoza Hurtado Use Painting tool bar (Window/Tool bar/painting tool bar) option: airbrush this is to paint using black color to correct any shape - bordering- making flames very much alike. Try to cover some shining parts if necessary. FIRE is burning!!!