Carrots Gardening
•
0 gostou•308 visualizações

Carrots Gardening

Recomendados
Recomendados
Mais conteúdo relacionado
Mais de School Vegetable Gardening - Victory Gardens
Mais de School Vegetable Gardening - Victory Gardens (20)
Último
Último (20)
Carrots Gardening
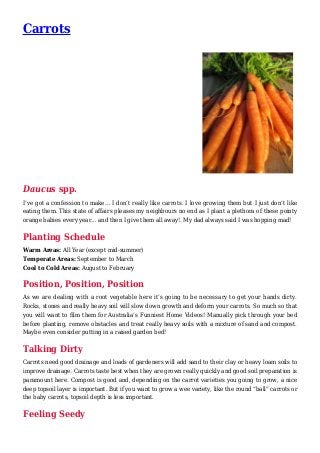
- 1. Carrots Daucus spp. I’ve got a confession to make… I don’t really like carrots. I love growing them but I just don’t like eating them. This state of affairs pleases my neighbours no end as I plant a plethora of these pointy orange babies every year… and then I give them all away!. My dad always said I was hopping mad! Planting Schedule Warm Areas: All Year (except mid-summer) Temperate Areas: September to March Cool to Cold Areas: August to February Position, Position, Position As we are dealing with a root vegetable here it’s going to be necessary to get your hands dirty. Rocks, stones and really heavy soil will slow down growth and deform your carrots. So much so that you will want to film them for Australia’s Funniest Home Videos! Manually pick through your bed before planting, remove obstacles and treat really heavy soils with a mixture of sand and compost. Maybe even consider putting in a raised garden bed! Talking Dirty Carrots need good drainage and loads of gardeners will add sand to their clay or heavy loam soils to improve drainage. Carrots taste best when they are grown really quickly and good soil preparation is paramount here. Compost is good and, depending on the carrot varieties you going to grow, a nice deep topsoil layer is important. But if you want to grow a wee variety, like the round “ball” carrots or the baby carrots, topsoil depth is less important. Feeling Seedy
- 2. Carrots are best planted from seed rather than seedlings as they don’t transplant well. This is what is known as “direct sowing” and here’s how to do it. Firstly make a trench about 2cm deep and as long as you like. Then sow your carrot seed by tapping them out of the packet along the row. Fill this trench halfway up with a soil/sand mix or a shop bought seed raising mix – it’s pretty much the same thing. Press lightly on the covering mix to ensure contact with the soil and seed. Water it in gently so you don’t blast them out of the ground. Cover the bed with a light sprinkling of straw mulch. Keep the bed damp until your carrots pop their little heads through… this should take about 2 – 3 weeks. Once the seedlings are 5cm high it’s time to go “Jenny Craig” and thin them out. This means pulling out the weaker or smaller seedlings and leaving about 3cm between each of your carrots. You will need to do this again when they get to about 12 – 15cm high, at which time you need to leave about 5cm between them. While this may seem a bit wasteful and unsustainable (heavens no!), it isn’t really. Seedlings from the first thinning can be composted or feed to the chooks, and the carrots pulled at the second thinning can actually be eaten (hooray!). Feed Me Carrots don’t mind a feed, just as long as it is not high in nitrogen. High nitrogen fertilisers will make big, bushy carrot tops but do nothing for the all-important root zones! I give mine a liquid feed of fertiliser tea every few weeks just to speed up the process – impatience and laziness are not good traits for a gardener. They really don’t need much these carrots! What about the Water? Like a couple of other Yummy Yard plants, over watering is a more serious issue than under watering. Seeds need to be kept damp when germinating but of course damp doesn’t mean floating away, or dying of thirst! Free draining soil is a must, as is using your soil moisture indicator (your favourite finger) to test the amount of water in the soil. Dry = bad; soaked = bad; slightly damp = perfect! Inconsistent watering regimes, especially allowing the soil to dry right out and then flooding it with water, will cause carrots to crack or split… a very ordinary result for all concerned! Are We There Yet? Often I am asked, “How can I tell if my carrots are ready?” and always I respond, “When did you plant them?” Keep track of when you sowed your carrot seed because you can start harvesting them after about 8 weeks. I harvest what neighbours need, when they need it -remember I don’t actually like them! This harvesting technique prolongs my crop and means all my carrots don’t come (and go) at once. However, you’ll want to get them all out of the ground before the sugars turn to starch, which happens at about 16 – 18 weeks. Pests and the Rest Pest and disease problems are almost non-existent for carrots apart from the carrot fly. Carrot flies lay their eggs in the young seedlings and their larvae eat and tunnel their way through the growing root. They can be deterred by using plenty of compost as well as by using some good companion plants, like spring onions, to act as decoys. Carrots, like coriander, can bolt, which means they have a tendency to run to seed before producing
- 3. their roots, generally when unusually cool weather is experienced in early spring. Hot Tip Here it is…breaking news set to revolutionise vegetable growing as we know it… carrots can be grown in pots! I know, you’re shocked, but it’s true. Some of the small “golf ball” carrots are awesome in pots, as are baby carrots. They’re an excellent addition to any Yummy Yard as they offer a really high yield to space ratio. Check out the many varieties of carrots available. You’ll be amazed at the shapes, sizes and even colours that abound. Eat Me Carrot Cumin Salad Such a simple salad yet so delicious. It goes with everything from a curry to a chicken parma. Whip this up in the morning before work! It’s a great lunch. A couple of handfuls of homegrown spinach, lettuce, rocket or other greens A carrot or two, plus their green tops. A handful of walnuts and sultanas Dressing: 1 tsp cumin Juice of ½ lemon 1 tbsp honey 2 tbsp oil of your choice Salt and pepper Coarsely chop or tear greens and the carrot tops. Peel strips off the carrot using your vegetable peeler. Combine greens and carrot peel strips in a large bowl. Place all dressing ingredients in a jar. Shake well then pour over salad. Toss so that everything is coated. For more awesome info on growing your own sustainable vegies and herbs at home, why not check out the Yummy Yards book at our secure online shop.