SlideShare uma empresa Scribd logo
1 de 80
Baixar para ler offline
Guide to Setting Up
Your Own Edible Rooftop Garden
Published by Alternatives and the Rooftop Garden Project
Guide to Setting Up
Your Own Edible Rooftop Garden
Published by Alternatives and the Rooftop Garden Project
Published by Alternatives and the Rooftop Gardens Project
3720, avenue du Parc, suite 300
Montreal, QC
H2X 2J1
www.alternatives.ca/www.rooftopgardens.ca
Contributing Authors
Amélie Germain, landscape architect
Benjamin Grégoire, biologist
Ismaël Hautecoeur, landscape architect
Rotem Ayalon, urban planning consultant
André Bergeron, engineer
Layout and Illustrations: Todd Stewart
Correction
Julie Lanctôt (French)
Rotem Ayalon, Benjamin Grégoire (English)
Translation: Jamie Herd
Photography : Rooftop Gardens Project; Page 10: Anne Whiteside
Special thanks to Alex Hill, Jane Rabinowicz, Vanessa Reid, Sanou Issiaka, Megan Thom, Emmanuelle Brunet, Sam
Makgoka, Gerardo Sierra, Emily Doyle, Sarah Finley and many others for their inspired and inspiring involvement and
their support for the project.
A warm thank you as well to our two founding partners, Santropol Roulant and Maison de quartier Villeray (MQV)
with whom we dream of turning the city into a vast garden, and to our institutional partners, Université du Québec,
the Patro le Prévost, the Institut de tourisme et d’hôtellerie du Québec (ITHQ), UQAM and McGill University who
loaned us their roofs.
Finally, we’d like to express our abounding gratitude to our community of volunteer gardeners, without whom our rooftop
gardening experiment, which lead up to the writing of this guide, would not have been so rich and stimulating.
This publication was realized thanks to financing from the Public Health Agency of Canada (PHAC).
The opinions expressed in this publication are those of the authors and do not necessarily reflect the
official standpoint of the Public Health Agency of Canada.
© 2008. Any reproduction, in part or in total, is desirable on the condition that the source is indicated.
This document was printed on recycled paper with vegetal ink.
978-2-9809931-1-4
Legal deposit – Bibliothèque et Archives nationales du Québec, 2008
Legal deposit – Library and Archives Canada, 2008
table OF CONTENTS
Preface
Introduction
Why garden on rooftops in the city?
Forgotten spaces rendered fertile for healthy communities
Why take up urban agriculture?
A simple source of joy and a socially engaged life style
Why did we create a guide?
A tool to encourage the spreading of rooftop vegetable gardens
1. Defining Your Project
Where should we start in order to launch our garden project?
1.1 Describe the Roles and Goals of the Garden
1.2 Define the Scale and Document the Project Site
1.3 Select the Type of Garden
1.4 Make a List of People Involved in the Project
1.5 Evaluate the Project according to Accessible Resources
2. Choosing the Site
What factors should be examined when choosing a site?
2.1 Loading Capacity
2.2 Municipal Regulations
2.3 Sunlight and Wind Exposure
2.4 Access and Security
2.5 Specific Needs
2.6 Other Options
3. Designing the Garden
Two Possible Choices
	 a. Hire a design professional
	 b. Do it yourself
7
9
11
11
12
12
13
14
15
15
16
16
17
17
18
19
How do I design and construct a garden on my own?
3.1 Prepare the Rooftop for Setting up the Garden
3.2 Imagine and Draw the Garden
	 a. Site Analysis Plan
	 b. Garden Uses
	 c. Conceptual Plan
	 d. Development Plan
3.3 Build the Infrastructure and Lay out the Garden
	 a. Building the core infrastructure
	 b. Build Garden Features 
	 c. Construct Growers
	 d. Put the Various Features into Place
4. Coordinating the Garden
How to coordinate a group of gardeners?
4.1 Find out about Group Gardening Models in Montreal
	 a. Two basic models
	 	 Community Gardening
	 	 Collective Gardening
	 b. Leadership possibilities in the garden
4.2. Launch and Recruit
	 a. Form an organizational committee
	 b. Spread the word and mobilize
4.3 Ensure Good Communication throughout the Season
4.4 Ensure horticultural follow-up
4.5 Multiply Garden Activities
5. Making Healthy Choices
How to grow in order to eat well
5.1 Gardening Ecologically
5.2 Diversifying Edible Plants
5.3 Putting Medicinal Plants in the Garden
5.4 Understanding Risks Associated with Urban Pollution
	 a. Soil Pollution
	 b. Air Pollution
	 c. Water Pollution
6. Growing in Containers on the Rooftop: A Technical Guide
How to choose, construct and maintain growers
6.1 Traditional Container Gardening
6.2 Classic Hydroponic Container
	 6.2.1 Recipe to Create a “Venturi” Hydroponic Grower
6.3 The Grower with Water Reservoir
	 6.3.1 Recipe for a Bucket Grower with Water reservoir
	 6.3.2 Recipe for a Half-Barrel with Water Reservoir
19
20
22
 
	
23
23
	
	
24
25
25
25
27
27
27
28
28
31
31
32
36
6.3.3 Choosing Plants
	 6.3.4 Growing Mix and Compost
	 6.3.5 Fertilization
	 6.3.6 Mulch
	 6.3.7 Closing the Garden in the Fall
	 6.3.8 Next Spring
6.4 A Garden of Connected Containers
	 6.4.1 Recipe for Constructing a Garden of Connected Containers
6.5 Collecting Rainwater
	 6.5.1 Recipe for Constructing a Rainwater Collection System
6.6 Seedling Table with Water Reservoir
	 6.6.1 Recipe for Building a Seedling Table with Water Reservoir
References
Annex A : Descriptions of Our Garden Projects
Annex B : The Santropol Roulant Garden Experience
Annex C : Pamphlet on the Rooftop Gardens and Green Roofs
Annex D : Moveable Panel Model
Annex E : Media Coverage
50
55
58
61
63
66
71
72
73
Summer Team 2006
Standing, from left to right: Sanou Issiaka, Amélie Germain, Sam Makgoka, Alex Hill, Megan Thom and Rotem Ayalon.
In front, from left to right: Benjamin Grégoire, Ismaël Hautecoeur and Emmanuel Brunet.
preface 
PREFACE
After five seasons of gardening and experimenting, the Rooftop Garden project team is happy to share the fruits of its
labor with you. The Guide to Setting up Your Own Edible Rooftop Garden comes from our wish to see new gardens
and partners take root in the fertile soil of Montreal but also in other parts of the world.
By exploring new ways to interact with each other, with the built environment, the urban ecosystem and the food
chain, we have discovered that change can happen in a manner that is participative, pleasant and inclusive. This observa-
tion comes from designing and participating in different rooftop gardens with the community. Each garden is a unique
space that is maintained with care by volunteers from a meals-on-wheels program, meticulously cultivated by seniors, ex-
perimented on and brought to life by young urbanites or appropriated by families. Together, we strive for a better world,
cities that breathe, a slower pace, sustainable management of resources and a more respectful and ecological way of life.
In our opinion, the renewed and infinite amazement that edible gardening brings is an excellent starting point on
the path to that better world. The pleasure of discovering how the world that surrounds us works, how things like rain,
wind, sun, the seasons, insects, migrations and new varieties of plants are interrelated brings us closer to the land, even
from the extraordinary heights of rooftops. A greater understanding of urban ecosystems can only motivate us to culti-
vate diversity and appreciate complexity.
We hope that our humble acts of planting, upkeeping, harvesting, eating and sharing will bring as much pleasure
to you as they have brought to our community of gardeners.
Ismaël Hautecoeur
Project Manager
The gardener’s tool box, a garden in the making!
introduction 11
INTRODUCTION
Why garden on rooftops in the city?
Forgotten spaces rendered fertile for healthy communities
Gardening on rooftops in ever-increasingly dense and sprawling cities is an original way to take back unused and
sterile spaces like rooftops, patios and balconies and to transform them into livable spaces that are lush, productive
and purifying. In addition to embellishing the urban landscape with food-producing gardens at the tops of buildings and
producing fresh food, these new spaces for the community enable us to reduce the ecological footprint of the houses and
institutions of which we are an integral part. Recovering and decontaminating water, cultivating organic food, compost-
ing organic waste as well as filtering and cooling down air are all part of a mindset to make our established landscape
more sustainable. Therefore, in the current context of environmental degradation, over-consumption and junk food
culture, taking care of ourselves and our environment enables us to take a step down the path to healthy cities and com-
munities.
Rooftop gardening means taking up an inspiring, ecological and productive activity, and developing new links with
the food chain, the seasons, the environment and the community. This utopia’s vision is to turn the city into a garden
and its inhabitants into gardeners.
Why take up urban agriculture?
A simple source of joy and a socially engaged life style
The daily pleasures of gardening are simple, inexpensive and profoundly satisfying: eating a head of lettuce that was
cultivated with care among friends, taking in the morning perfume of a flower clinging to the banister of a balcony,
biting into a strawberry warmed by the sun. Urban agriculture is a veritable way of life and enables the population, col-
lectively or individually, to take pleasure in new, green spaces that meet its needs for relaxation and leisure.
Far from a marginal expression or an anachronism doomed to disappear, urban agriculture is destined to play an
ever greater role in feeding city dwellers. It currently feeds 700 million people, a fourth of the world’s urban population
(FAO, 2005). It provides an answer to food insecurity and an avenue for cultural expression and citizen involvement. It
also enables people get a taste of the pure enchantment of growing food for themselves and for the community. In this
time of climatic changes and the multiple, harmful consequences of urban living on health and the environment, we
need to rethink the way we live. In light of this, urban gardening is a powerful agent for change.
12 guide to setting up your own edible rooftop garden
Why did we create a guide?
A tool to encourage the spreading of rooftop vegetable gardens
The Rooftop Garden Project team presents this step-by-step guide to help you start and maintain your own edible
rooftop garden both socially and horiculturally. This guide is for groups, individuals and institutions that would
like to set up an urban rooftop garden for educational, social, therapeutic or environmental ends and do not have the
ground space necessary to do so.
The guide is divided into six chapters that cover the main factors to consider when developing a rooftop garden
project: project definition, choice of site, setting up the garden, coordination of gardening activity, health choices and a
detailed technical guide on rooftop container gardening. Depending on your goals and your gardening experience, you
may be more interested in and nourished by the first chapters than by the technical guide on container gardening and
vice versa. In the annexes, you will find descriptions of our gardens and some additional information.
Our goal is to make planting these oases of edible nature in the city easier so that more and more people will start
gardening on rooftops and discovering its benefits.
A smile says a lot about the sheer joy of picking the first
broccoli of the season on the roof. A way of life to be cultivated!
defining your project 13
1. DEFINING YOUR projet
The first thing to do when you want to start a garden is to develop and refine the idea behind the project. This is the
step where we describe our intentions and expectations, choose the scope of the project, select the type of garden,
target the garden’s community and partners and evaluate the project according to accessible resources. The five steps sug-
gested below may be carried out simultaneously. The reflection necessary for one step can often nourish or be nourished
by other steps. Here’s to the beginning of a beautiful project.
Where should we start
in order to launch our garden project?
1.1 Describe the Roles and Goals of the Garden
You should make an outline of your garden here. Think about its goals
and what factors motivate the project. There are many possibilities. For ex-
ample, you can create a garden with aims that are:
social and community-based: Gardening favors contacts
and exchanges and betters the quality of life. For seniors,
gardens stimulate social encounters, physical activity. It can
mean getting back to the earth for some and participating in
a lively project that comes with various therapeutic benefits.
The community in contact with the garden will benefit from
the feeling that comes from helping others, commitment to
a project and socializing with one another;
educational: As a place for experimentation with nature,
the garden can be a space for pedagogical and recreational
activities that will reinforce scholastic materials or themes
from day camps (ecology, botany, health, alimentation,
cooking, gardening, biology, etc.) and increase the spirit of
initiative, teamwork, patience, etc.;
based on food security: Gardening will favor the production
of food for a meals-on- wheels program or a food bank, or
for personal use;
economic : A rooftop garden can improve a building’s energy
efficiency and increase its value for little cost by expanding
the useable space. Food cultivation also diminishes expenses
related to acquiring food;
•
•
•
•
14 guide to setting up your own edible rooftop garden
environmental: Here, we are referring of the improvement
of air quality through the absorption of carbon dioxide and
the production of oxygen by plants.The consequent increase
in humidity and evaporation will bring down the ambient
temperature, biodiversity will attract birds and insects; and
plants will absorb ambient noise. Using rainwater to irrigate
plants will reduce pressure on the municipal waterworks and
can be integrated in a system that uses household wastewater.
Eating organic and local will reduce the quantity of chemical
products used to grow plants and to transport food;
horticultural:Experimentingwithnewgardeningtechniques
or developing a new model for urban gardening to spread
urban agriculture could be on the menu;
personal: Te simple pleasure of gardening and being able to
benefit from a relaxing space at home will be the foremost
motivation.
Groups should clearly mark out their project goals when planning be-
gins to ensure that all the concerned participants have the same expectations.
Plan discussion sessions. They will enable you to work efficiently at building
the project. It is also recommended that you involve the team that will use
and look after the garden as early as possible to get their ideas, know their
needs and stimulate their interest!
1.2 Define the scale and document the project site
Determining the project scale to be developed is important: a temporary
project, a project that will evolve over a few years or a project that will put in
place permanently.
This decision may be influenced by available resources (see section 1.5).
Your site choice may also influence the scale of the project, or it could be in-
fluenced by the scale if a decision has not been made yet (see Chapter 2).
To help you document your site, examine the envisioned project’s real
conditions:
site characteristics (geographical situation, clientele, type of
neighborhood, hardiness zone, etc.);
description of the targeted building: height, access, barriers,
type of roofing, etc.; and of neighboring buildings: adjoining
areas, facade, back, alleys, streets, traffic, etc.;
implications and consequences of implementing the project
in the neighborhood.
1.3 Select the type of garden
Rooftop gardens may be designed in various ways.The most well-known
are green or vegetated roofs as well as balcony gardening in containers. Green
roofs, whether intensive or extensive (accessible or not), are covered with soil
in which plants take root. Container gardens refer to ornamental and edible
plants grown in containers. The costs, ecological advantages and versatility of
crops differ according to each type of organization (see Annex C).
•
•
•
•
•
•
I am involved in the garden to
meet people that have interest-
ing social values. I find that it is
also a zen activity that does not
require you to be productive as
in most types of work.
Volunteer, age 41
defining your project 15
As this guide is based on our expertise, it deals mainly with gardens cul-
tivated in containers. If you are interested in green roofs, we suggest you get
in touch with professionals in green roof construction (see references).
1.4 Make a List of People Involved in the Project
a. Pick the team of gardeners (and the beneficiaries)
Who will the project managers
and participants be?
To start the project correctly, form a design team (resource people)
that will, if possible, bring together architects, landscape architects, struc-
tural engineers, construction professionals, roofing professionals, commu-
nicators, etc.
Define who will do the gardening: volunteers, beneficiaries, residents, a
group of friends, neighbors, an organization, etc. You must know the size of
group as it will influence needs and garden organization.
Within the group, you should clearly determine who will tend the gar-
den and who will receive the harvests. These groups might be the same, or
they could be two different groups. You must also know the people who will
take care of the garden well. Are they specialists, amateurs or beginners in
gardening? This will influence how you coordinate gardening activity. (see
chapter 4).
b. Determine who your partners are
Who should we contact?
When you define the project, be sure to talk with the various partners
(site owner, management, community, benefactors, unions, employees, etc.).
When you have to negotiate with a group, prepare good arguments ahead of
time in order to sell the project. Be convinced and convincing; the potential
partner must quickly understand the advantages to investing in such a proj-
ect. When possible, find an ally within the group you are negotiating with to
get support.
The step can be laborious. Therefore, be prepared, patient and
persistent.
1.5 Evaluate the Project according to Accessible Resources
You should take inventory of your human, financial and material re-
sources. To accomplish this task, create a calendar of required resources for
the different project phases: setting up, beginning of activities, period of use,
end of activities, winter clean up. Think of what is needed to get the project
on its feet and to set up and take care of the garden in terms of space, volun-
teer labor, outside expertise, gardening equipment and material for cultiva-
tion, for fixtures, for financial sources, etc.
Next, sort materials in order to make a list of resources in your posses-
sion and resources you have to find. You can then decide, according to the
16 guide to setting up your own edible rooftop garden
group’s energy, what missing resources can be found easily (recovery, recy-
cling, volunteer time, rentals, fundraising, etc.).
	 Once inventory is finished, you may feel the need to upscale or
downscale the goals and size of the project. The goal is to launch a realistic
project that matches accessible resources. This will avoid disappointments
along the way.
I simply love being on the roof-
top, gardening and learning new
things about gardening.
Volunteer, age 10.
Discover the great surprises hiding in the soil!
An extraordinary way to get in touch with nature in the city.
choosing the site 17
2. CHOOSING THE site
Once the project has been well defined, you can choose the site. Several factors should be considered. The possible
site or sites must be evaluated to verify safety levels and to make sure gardening activities could be functional and
pleasant in the area. Keep your eyes open!
What factors should be examined
when choosing a site?
2.1 Loading Capacity
The first step is to evaluate the roof’s loading capacity, the load that the
roof can support. This is important as the weight of crops, equipment and
people that the garden will take on must be considered.
To undertake this structural analysis, you must call on a structural en-
gineer. You should inform the engineer of the type (container or green roof)
and surface area of the garden you would like to create. This will greatly influ-
ence the structural needs.
The engineer can:
determine the type of roof (flat or having different levels) and
the framework used;
determine the type of construction (wood, steel, concrete);
evaluate the possibility of carrying out the project;
determine the influence of obstacles and the possibility of
getting rid of or moving them (vents, chimneys, vent ducts,
etc.);
study existing plans or make a survey sketch and map out the
current conditions;
verify the real load capacity according to the survey sketch or
plans provided.
	 After studying the situation, the engineer can either mark out certain
parts of the roof where the garden can be set up or propose a framework for
reinforcement. The latter solution will undoubtedly mean costs that may lead
you to turn to another site. Therefore, proceeding with a structural analysis at
the very beginning of the project is recommended.
•
•
•
•
•
•
18 guide to setting up your own edible rooftop garden
2.2 Municipal Regulations 
Before starting construction of a rooftop garden, you must get infor-
mation on regulations from your city. Regulations vary from city to city and
sometimes from borough to borough.
In addition to building codes that regulate materials and ensure con-
formity to the building code norms, you must also check the zoning regu-
lations for setbacks, use of space and maximum height of the building.
Certain buildings may also be classified as historical monuments or as being
part of a historical sector, which also limits some types of possible actions.
Get information concerning railing, access and security limits. These
are important points you should pay attention. Very often, railing must not
be visible from the street at a distance equivalent to two times the height
from the edge. Height from the edge is also regulated. Access is often regu-
lated by fire codes (emergency exits). You should make sure regulations do
not require two exits for this particular project, in which case you may need
to add a staircase. There may also be restrictions on flammable materials
and on the height of structures like pergolas and pavilions.
In certain cases, you may be able to request an exemption from local
authorities that would allow you to carry out the project even if it is not ex-
actly up to municipal codes. This will, however, add extra delays and costs,
and there is no guarantee you will obtain the exemption.
Architects and architectural technicians are professionals who are
qualified to do this research and verify project conformity to norms and
regulations in force.
2.3 Sunlight and Wind Exposure
Sunlight
Light is a fundamental need for plants. A study on the hours of sunlight
on the roof must be carried out. As roofs are elevated, they generally offer
sunlight conditions superior to most urban areas on the ground. Food culti-
vation necessitates long hours of daily sunlight, meaning ten hours a day for
the most heliophilous plants (e.g. tomatoes).
Depending on the chosen plants and features you would like to incor-
porate in your garden (reading corner, composting area, etc. – see section
3.2), you should plan the garden in the area(s) (full sun, part shade) that cor-
respond to your needs.
If you observe a quantity of sunlight that is too great for the plants
you would like to grow, you can decrease it by creating structures that
produce lighter or darker shade: a shade wall, an arbor, a trellis, a row of
tall plants, etc.
Wind
Wind is often stronger at rooftop heights than at ground level. A light
breeze is very pleasant for gardeners, but strong winds could seriously damage
plants. Creating a wind breaker (vegetal walls, structures, canvases, etc.) is
recommended if there are strong winds or gusts of wind.
If the structure must be attached to the roof, you should make sure the
parts of the frame are resistant. The structure must be sturdy but must not
change the roof’s water resistance or framework.
choosing the site 19
2.4 Access and Security
Several elements related to gardener’s access and safety must be analyzed
before choosing the site.
Access
Practical Access and Roof Safety
There should be an official access to the roof (stairway, elevator) to
make the garden accessible to everyone. This access should be functional for
transporting material to the garden.
Access to Water for Plants
Like sun, water is a fundamental need for plants. As rain does not al-
ways come on time, an access to municipal water is essential. You can also
install a rainwater collection system by rerouting a gutter to a reservoir, for
example. This solution will create a heavy load of water on the roof at random
times, and the structural engineer should check the loading capacity in the
designated place.
Access to Electricity
An electrical source is very practical for construction work and develop-
ment or for the simple pleasure of listening to music in the garden.
Access to a Storage Area
Plan an access to an area sheltered from inclement weather to store
equipment, material and gardening tools.
Safety
Peripheral Surveillance
Informal (neighboring windows, passersby) or official (security guards,
security cameras) surveillance will ensure the safety of gardeners and help
avoid incidents in the garden (e.g. vandalism).
Installation of an Enclosure or a Banister
An enclosure or a banister should be 42 inches (1067 mm) tall and
encircle the space designated as a garden. These protections must conform to
regulations as mentioned in section 2.2
2.5 Specific Needs
If the garden’s clientele has specific needs, you must account for them
from the beginning. Easy access will be an important issue if the garden is
destined for elderly people or people with handicaps. Installing shady areas is
recommended if seniors or young children use the garden.
2.6 Other Options
Note that if you plan a garden somewhere other than a roof, such as
a terrace or a balcony, you must consider the same factors but on a smaller
scale.
A good start means having a structure that is up to
norms, a space that is safe and functional and plenty
of water and sun.
20 guide to setting up your own edible rooftop garden
Don’t forget to plant perennials in your garden!
They’ll attract helpful insects.
designing the garden 21
3. DESIGNING THE garden
Once the project has been defined and the site has been chosen, you can think about how to set up your garden.
This step calls for the most imagination and creativity because your garden will take form at this time. Get out
your pens and paper!
Two possible choices
a. Hire a design professional who is part of an association or an order,
such as :
L’Association des architectes paysagistes du Québec (AAPQ),
www.aapq.org;
L’Association des paysagistes professionnels du Québec
(APPQ), www.appq.org;
L’Ordre des architectes du Québec (OAQ), www.oaq.com;
L’Ordre des technologues professionnels du Québec
(OTPQ), www.otpq.qc.ca
Using the engineer’s plans and estimate, a professional, such as a land-
scape architect, can:
create an aesthetic and functional development plan based
on the possibilities and constraints of the site, according to
your tastes, your needs, and your budget;
advise you on the choices of flowering and food producing
plants;
draw up plans and a labor estimate;
supervise work that will be carried out by the professional
of your choice.
b. Do it Yourself
If you would like to do this step yourself, here are some notions to guide
you in creating your garden.
How do I design and construct a garden on my
own?
•
•
•
•
•
•
•
•
22 guide to setting up your own edible rooftop garden
3.1 Prepare the Rooftop for Setting up the Garden
If necessary, make a building plan (plans and general estimates) to pre-
pare the rooftop for the garden and for gardening activities and to make cer-
tain it fits your budget. As this step must conform to certain building and
safety norms, we suggest you call on professionals (see step 2).
The plan must be designed in direct relation to the framing plan. The
distribution of weight should be approved by the structural engineer, who
can, if needed, identify structural modifications to be made. The framing
plan is often completed by a short estimate that shows construction to be car-
ried out, materials to be used and norms to be respected.
As a general rule, heavy loads must be located near columns and beams
located on the existing roof plans as they were drawn by the engineer.
Once the plans have been drawn up (terrace site, access, construction
details, location of equipment to be used, etc.) and approved by the structural
engineer or completed using separate plans by the engineer, you must obtain
a building permit from the city.
Get information from your insurance company about changes to be
made to your home insurance.
Ideally, this step should be done simultaneously with step 3.2. Each phase
will give you food for thought on the other.
3.2 Imagine and Draw the Garden
a. Site Analysis Plan
On paper or using drafting software, place the basic features as well as
possibilities for and constraints of the site: sun areas (full sun, partial sun,
shade), access to water and electricity, interior and exterior access, circulation
areas, railing, special features related to safety, etc.
Step 2 will be useful for creating the site analysis plan.
b. Garden Uses
Make up a list of utilitarian and recreational uses that you would like to
have in your garden: food production, relaxation and contemplation, gather-
ings, storage, rainwater recovery, area for doing manual labor, composting, etc.
You can also use general concepts (permaculture, ecosystems, education-
al garden) as inspiration or create thematic spaces (herbs, medicinal plants,
children, horticultural experiments, First Nations, production, etc.).
c. Conceptual Plan
On the analysis plan, place different uses and thematic spaces you have
chosen for the garden by drawing and annotating areas or bubbles.
Determine the size of areas according to your needs and priorities.
Make sure that the finished product is functional and, or course, inspiring.
	
d. Development Plan
	 You now have everything you need to give shape to your garden. On
a new drawing, copy the conceptual plan and draw the real shape and loca-
tion of different spaces (production, relaxation and storage areas; butterfly
garden, etc.) and features (benches, compost bin, pergola, etc.) in detail.
designing the garden 23
Conceptual Plan and Design Plan
Be creative! Think about the unity
and balance of the garden, about how to
highlight features, about lines and forms,
about textures and colors. You can create
an overall theme or personalized spaces.
Work to scale. The most common
scales are: ¼ in. = 1 ft. or 1:50 in metric
values. You can use grid paper when you
are doing the rough sketches to make the
task easier.
Leave sufficient space around gar-
den beds or containers to make garden-
ing easier.
Take the location of a drain on the
roof into account. It should be accessible
at all times to drain water from the sur-
face. Water must not be obstructed from
reaching the drain.
Make several drawings while brain-
storming. Don’t hesitate to work in
groups. Choose the most stimulating and
most functional plan afterward. Keep in
mind that you can always change the de-
sign as things progress if necessary.
There is a wide selection of books
on landscaping and garden design. Visit
your library or a local bookstore for in-
spiration.
Conceptual plan
Avoid overdoing it
Your garden can be developed in
different steps, spread out over several
months or years. Be careful not to over-
estimate your time and energy. Keep in
mind that gardening should be a source
of enjoyment!
storage
relaxation
area
experimental
production
zone
composting area
seedlings
railing
climbing plants
gathering
area
circulation
garden’s central walkway
food
production
area
hydro-
ponic
system
climbing
plants
climbing
plants
rainwater
recovery
rows of
growers
with water
reservoir
central
walkway
garden of
connected
containers
seedling
table
compost
garden
shed 2
garden
shed 1
pergola rainwater
barrel
benches
climbing
plant dome
rainwater
barrels
wall covered
in plants
Development plan
24 guide to setting up your own edible rooftop garden
3.3 Build the Infrastructure and Lay Out the Garden
a. Building the core infrastructure
Start construction using plans approved by your city. If major work on
the access, the terrace or the railing is to be done, we recommend you hire a
building professional (a general contractor that will take care of all the con-
struction). It is always preferable to request bids from three contractors to
ensure you get a fair market price.
If you do not have a contractor, look for a person with experience in
construction or someone who is handy that can supervise and coordinate
volunteers’ work.
Sometimes it is very practical to establish a construction schedule so that
combined efforts converge on an opening date for the garden. Look out for
late work, delays, bad surprises, extra costs and other unexpected problems.
The infrastructure could be made of modular, detachable parts to allow
access to the rooftop at all times in case there is a leak or maintenance must
be done. You will find an example of such parts in Annex D.
To optimize use of materials and reduce costs, use recycled or reused
materials as often as possible. For better longevity, use treated wood.
b. Build Garden Features
Using the development plan, start construction on structural features like
a pergola, an arbor, benches, etc., as well as functional features like compost
bins and rainwater barrels. You can create them using technical designs you
have drawn or found in construction manuals. You can also let your imagina-
tion take over when the task is at hand. Several features can be bought.
c. Construct Growers
Decide what type of grower is suited to your needs. Here are some cri-
teria to consider:
dimensions (height, width, depth)
shape
productivity (depth of growing mix according to plant
choice, water reservoir, dimensions, etc.)
durability and maintenance of material
mobility (weight, wheels)
aesthetics (color, style, material)
Build the number of growers needed according to your feeding needs
and the available space.
See chapter six for models and for construction plans.
d. Put the Various Features into Place
With your development plan in hand, put the features into place and
watch your garden grow! It is sometimes useful to trace the lines of the draw-
ing on the ground to transpose your plan onto the area. Strings or chalk are
particularly efficient.
•
•
•
•
•
•
Engineer’s Verification
If the project calls for changes
to the structure or significant addi-
tions during construction, having
the structural engineer check the
completed construction is recom-
mended to get his or her final ap-
proval.
This is particularly impor-
tant if you install a pergola, a shade
structure or a wind breaker on a
high roof because strong winds
could blow the panels off making
the installation dangerous.
coordingating the garden 25
4. COORDINATING THE GARDEN
How do I coordinate a group of gardeners?
There are several different ways to garden in the city. You can choose to garden by yourself at home or with a group.
Group gardening involves special coordination and offers rich opportunities. Here are some ideas that will guide
you in this task.
If you would like a concrete example, see The Roulant Garden Experience in Annex B.
4.1 Find out about Group Gardening Models in Montreal
Here are some gardening and leadership models that might help you
cultivate techniques for managing a group in the garden.
A few ideas…
a. Two Basic Models
Community Gardening
A community space is divided into gardening plots of equal size that are
managed individually by a gardener or by a family. Maintaining the plot and
harvesting are the gardener’s responsibility. The gardener works during varied
hours. Activities are subject to regulations and overseen by a committee.
Pros: autonomy of gardeners, flexible hours, material
provided, possibility of keeping the plot for several years.
Cons: rigid framework of regulations, restricted choice of
vegetables, little technical aid, difficult to personalize the
space, waiting lists, high maintenance.
Reference :
Community Gardens of the City of Montreal, www.ville.montreal.qc.ca
Collective Gardening
A group of people garden together during regular gardening sessions.
Harvests are divided in an equitable way and according to gardeners’ needs.
In many cases, part of the harvest is distributed to a local organization (meals-
on-wheels, soup kitchens, food banks). A specialized leader sometimes coor-
dinates gardening sessions.
Pros: creates links in the community, a feeling of solidarity,
shared upkeep, strong feeling of belonging.
•
•
•
I told myself that garden-
ing might be an activity to do
with my 10 year-old daughter.
I wasn’t looking for anything
in particular, but gardening is
a fun activity that she might
like and that is related to so-
cial engagement and ecology.
The Rooftop Garden Project
brought together recreational
activity and social engagement.
Volunteer, age 52
26 guide to setting up your own edible rooftop garden
Cons: fixed times, little continuity, rarity of available spaces,
complex procedure to start new gardens.
References :
Jardins collectifs de la maison de quartier Villeray, www.mqv.qc.ca
Action communiterre, www.actioncommuniterre.qc.ca
b. Leadership Possibilities in the Garden
With social and environmental aims, leadership in the garden enables
horticultural knowledge to be passed on and energy to be injected in the
group through social and recreational activities.
Leadership activities can have different goals and target different groups:
therapeutic gardening for elderly people in institutions, educational garden-
ing for young people in day camps and schools, a production garden and
socialization for a community, etc. Local, specialized organizations can offer
different group workshops.
For more information on models, see our project examples in Annex A.
4.2. Launch and Recruit
Once your project has been defined and your site has been chosen, you
can organize your first gardening season and mobilize the community. Here
are two steps that will help you get the season started off on the right foot!
a. Form an Organizational Committee
Create a small group that will take responsibility for the garden launch
or opening/inauguration and coordinating the gardening season: recruitment,
coordination of group meetings, respect for rules, conflict management, cal-
endar, etc.
b. Spread the Word and Mobilize
Spread word about the garden project in the targeted community: infor-
mational meetings, message boards, posters, emails in a network, advertise-
ments or articles in a local newspaper, door-to-door visits, telephone calls.
Offer flexibility in terms of involvement. Make a list of people who are inter-
ested; then, organize the meetings to plan:
the choice of times for gardening sessions:
you should consider the regular needs of plants, the
constraints of mid-day heat for plants and gardeners,
availability of clients;
the garden launch, designing the garden (see step 3), the
choice of plants and fertilizers;
how group work will function;
the management of harvest division;
horticultural workshops and activities;
and much more.
•
•
•
•
•
•
•
coordingating the garden 27
4.3 Ensure Good Communication throughout the Season
You will quickly notice that sustained and varied communication is es-
sential to maintain the energy and health of the garden community.
Determine the best way(s) to communicate within the group
(message board, email, regular meetings, log, Internet site, etc.).
Update information concerning the garden frequently (upcoming
events, times, rules, contact lists).
Avoid sources of conflict by being clear on rules and by opening
a space for dialogue.
Encourage social activities that favor group cohesion (see section
4.5).
4.4 Ensure Horticultural Follow-up
As the garden is a place to produce food, it is important to succeed in
producing harvests that satisfy everyone. Here are ideas to help you:
encourage the sharing and transferring of horticultural knowledge
in the group (in an informal way and/or through workshops) in
order to obtain a harvest that is worthwhile for everyone and to
avoid errors, conflicts and disappointment. When necessary, ask
for help from expert organizations or hire an organizer.
maintain an up-to-date horticultural log that informs gardeners
of the health and development of the garden: care given to plants,
observations, harvests and things to do (watering, fertilizing,
harvesting, pruning, treating, inspecting, etc.)
prepare an annual calendar of tasks linked to the garden (from
starting seedlings to closing the garden) so as not to forget steps
and not to cause delays in the season.
4.5 Multiply Garden Activities
In addition to providing a space for flora and fauna to live, the garden is
also a social space. It can be a place for:
contemplation and observation of nature in the city
recreational and artistic activities (mediation, creative workshops,
outdoor cooking, making art objects, bird houses, kites, soaps,
etc.)
meetings and events (discussion and spreading information on
urban gardening, film projections, harvest parties, BBQs and
family picnics)
education and therapy, the garden is a privileged area for building
awareness to nature, to food and to healthy life styles and also for
discovering the physical and psychological benefits of gardening.
Gardens open new spaces for the community. They are spaces for every-
one to enjoy!
•
•
•
•
•
•
•
•
•
•
•
This project creates a space in
my life where I let myself “play
outside in the sun” while giving
my time to something bigger
–helping one another within a
community.
Volunteer, age25
Playing in the garden, something that is enjoyable every time!
making healthy choices 29
5. MAKING HEALTHY CHOICES
How to grow in order to eat well
Ahealthy diet coupled with the exercise of gardening is an excellent start for good health. For even more benefits, you
should take several agricultural ideas into consideration to maximize the nutritional benefits (for the body and the
spirit) that you will take from your harvests. Take time to think about all aspects of your garden, from buying your seeds
and designing your garden at the beginning of the season, to fertilizing, treating diseases or controlling pests throughout
the season.
5.1 Gardening Ecologically
If you are worried about the quality of the food you are growing, you
can optimize nutritional value by gardening in an ecological way. To do
so, you have to avoid using chemical fertilizers, pesticides and herbicides
when taking care of the various problems in your garden. Instead, think
of solutions that are in harmony with nature (e.g. compost for fertilizer,
companion planting to maximize yield and natural pesticides, or purins,
made from fermented plants to keep harmful insects away). This is better
for your health and for that of the environment. You can also get certified
organic seeds. Don’t forget that in gardening for yourself, you have the
privilege of controlling the quality of what you eat.
5.2 Diversifying Edible Plants
Diversification of plants in the garden is a guarantee for success in a
healthy and varied diet. In fact, it will enable you to have access to a higher
number of nutritional elements as each food has different characteristics. You
will, therefore, have easy access to vitamins, fibers and minerals.
The variety in your garden will certainly lead you to eat more fruits and
vegetables and will increase your interest in them. This keeps with recommen-
dations from the Canada Food Guide, which suggests five to 20 portions of
fruits and vegetables a day.
If you are looking for particular benefits for your health or if you have a
special diet, gardening for yourself is a good occasion to focus on foods that are
good for you.
Diversification of crops and of the foods you eat will also contribute to
reducing certain risks for diseases and to maintaining ecological biodiversity.
Tomatoes are an excellent source of vitamins A
and C, potassium and fiber.
Green vegetables like spinach are a good source
of vitamins A and E, folic acid, calcium, copper
and iron.
30 guide to setting up your own edible rooftop garden
5.3 Putting Medicinal Plants in the Garden
In addition to fruits and vegetables, think of putting medicinal plants in
your garden. For centuries, knowledge about the medicinal virtues of plants
and how to prepare them has been cultivated. Your grandmothers probably
have a few recipes! The therapeutic effects of plants are numerous and should
be rediscovered so that current generations can benefit from them. There is
a wide range of books that you can find in stores or at the local library that
discuss the benefits of plants and of growing them.
This is also a way of bringing indigenous species from our region and
other forgotten wild species into the garden. Several fine herbs also have in-
credible virtues. Inform yourself.
5.4 Understanding Risks Associated with Urban Pollution
Several risks related to soil, air and water pollution raise questions about
the quality of food cultivated in the city. Though there are currently few stud-
ies on this subject, container gardening makes an interesting alternative to
avoid certain risks of contamination. In fact, it will enable you to minimize
the possible negative consequences because its versatility offers greater leeway
in terms of the medium for agriculture, site selection and choices in water
sources.
a. Soil Pollution
Urbanization and the changing use of soils in the city have led us to build
upon ground that has already been used for industrial activity and has never
been decontaminated. The concentration of heavy metals, a major contami-
nant, above all in places where the population is in direct and prolonged con-
A Healthy Recipe!
Succulent Ratatouille from the garden:
A Recipe from Santropol Roulant
A side dish frequently prepared by the meals-on-wheels program at Santropol
Roulant (see The Roulant Garden Experience in Annex B). Serves 4.
Ingredients
2 eggplants
4 tomatoes
2 zucchinis
2 onions
1 sprig of thyme
Salt and pepper to taste
Oil
Preparation
1. Clean the eggplants, tomatoes and zucchinis. Cut them into small pieces.
2. Peel the onions and cut them into small pieces.
3. Clean and chop the thyme.
4. Cook the onions on medium heat for 5 minutes.
5. Add the other vegetables and cook them for about 1½ hours on low heat.
6. Season with salt, pepper and thyme.					
Enjoy!
•
•
•
•
•
•
•
making healthy choices 31
tact with contaminants (residences, parks, schools, yards and playgrounds),
is a considerable risk for human health. Eating vegetables grown in contami-
nated soils could cause health problems because the plants generally absorb
heavy metals in their edible tissues (Chaney, Sterrett et Mielke, 1984).
While waiting for the desired decontamination of our soils, container
gardening shows itself to be an effective solution to get around this problem.
The gardener can also control the elements that make their way into the
grower. You can, therefore, avoid letting heavy metals make their way into
your food.
b. Air Pollution
The location of your garden can have an impact on the quality of the
fruits and vegetables that are produced. Gardens found near congested thor-
ough-fares or train tracks may be contaminated by air pollutants that come
from combustion. However, this risk has been greatly reduced since lead was
removed from fuels.
If you are doubtful of air quality in the area where you garden, it is al-
ways better to wash fruits and leaves with soap or a water and vinegar mixture
to remove most of the particles that are deposited on plants (Chaney, Sterrett
et Mielke, 1984; Armar-Klemesu, 1999).
c. Water Pollution
Clean water should be used to irrigate plants. If you can collect water on
your roof, rainwater is the best source of water for watering plants; it reduces
the pressure exerted on the municipal water network. The temperature of
rainwater is naturally warm and will not shock the plants, contrary to cold
water from the waterworks system. In addition, this water does not contain
chlorine, which inhibits plant growth.
If you choose to collect rainwater to irrigate your garden, make sure
that you store it properly, i.e. in an opaque container with a mosquito net to
avoid algae and mosquitoes. For more information, see section 6.5, Collecting
Rainwater.
Sources :
Armar-Klemesu, Margaret. Urban Agriculture and Food Security, Nu-
trition and Health, Growing Cities Growing Food International Workshop,
Havana, Cuba, thematic paper no
4, 1999.
Chaney, Rufus L., Susan B. Sterrett and Howard W. Mielke. The Po-
tential for Heavy Metal Exposure from Urban Gardens and Soils. In. J.R. Preer
(ed.) Proc. Symp. Heavy Metals in Urban Gardens. Univ. Dist. Columbia
Extension Service, Washington, DC, 1984.
Chamomile flowers (above) can be used for
treating stomachaches and insomnia in chil-
dren as well as for calming nerves. The tea
also has anti-inflammatory properties that
work against rheumatism and arthritis and
antispasmodic properties that calm men-
strual and intestinal pain. It also acts as a
mild laxative. A lightly steeped tea will com-
bat cold symptoms, the flu, and allergies. As
a compress, it will calm skin inflammations,
burns and sunburns. Added to the bath, it
has relaxing properties.
Mint tea is known to help digestive problems,
but also to combat fever, bronchitis, the flu,
headaches, morning sickness, stomach pain
and other minor pains.
Sage tea makes an excellent antiseptic for
treating mouth sores and sore throats when
used as a mouth wash. Used as a compress, it
soothes cuts and wounds.
Take out your tools! It’s time to build!
growing in containers on the rooftop: a technical guide 33
6. GROWING IN CONTAINERS ON THE ROOFTOP:
A TECHNICAL GUIDE
How to choose, construct and maintain growers
There are many different ways to garden on rooftops depending on what type of garden you choose: in concrete or
wooden containers or simply in growing medium spread on the roof that is irrigated by an automatic or manual
system. Here, we give you the approach we chose for our Rooftop Garden project, i.e. the construction of growers using
recycled containers.
Over the years, we experimented with different types of growers and different gardening techniques that went from
traditional containers to hydroponic agriculture. We finally chose growers with a water reservoir, which became our favorite
model. They are affordable, efficient in water autonomy, allow plants to be fertilized using homemade compost, movable
and adaptable. These qualities make them an excellent tool for gardening on rooftops, but also on balconies, terraces and
any other urban area where it is normally difficult to grow plants. To make starting your garden easier and to inspire those
who are not as good with their hands, the project team designed a pre-made ecological grower, our “Ready-to-Grow” kits.
You can communicate with us if you would like one (or more!).
Even though this technical guide focuses on certain details related to choosing plants, composting and fertilizing grow-
ers with water reservoirs, it is not a gardening guide per se, but rather a collection of information and examples assembled
to inspire you when you create your own above-ground gardening project. Each suggested type of agriculture responds to
a list of criteria (economic, ecological, lightweight, easy to build and maintain, water autonomy, and superior quality and
yield) to help you make choices. The guide ends with detailed instructions related to connecting your growers to a common
water system, collecting rainwater and setting up a seedling table!
6.1 Traditional Container Gardening
Economic
Ecological
Lightweight
Easy to build and maintain
Water autonomy
Superior quality and yield
This is where gardening at altitude starts. A container is perforated to ensure
good drainage and filled with potting soil enriched with compost and fertilizer.
Generally, the deeper and more voluminous the container, the more the garden
will yield. On the other hand, a 20 cm depth of 20 to 40 L of growing mix will be
sufficient for a determinant tomato. For lettuce varieties, a 15 cm depth of 6 to 10
L of growing mix will guarantee great results.
¸
¸
34 guide to setting up your own edible rooftop garden
Plants are irrigated at the surface until water overflows from the
drainage holes so that the growing mix stays moist at all times. Given the
heavy water consumption of vegetable plants, growers must be irrigated
every day and sometimes twice a day once plants have come to maturity.
Moreover, frequent traditional watering washes away nutrients and is tir-
ing for the gardener. This is where the idea to use water reservoirs came
from.
6.2 Classic Hydroponic Container
Economical
Ecological
Lightweight
Easy to build and maintain
Water autonomy
Superior quality and yields
In hydroponic agriculture, roots develop in a nutrient solution
made from soluble elements that are directly available to the plant. These
fertilizers are generally synthetic, but there are organic versions that are,
in comparison, expensive. Hydroponic agriculture refers to a mixture of
techniques that vary according to the needs of cultivars and the agricul-
tural environment in order ensure yield with optimal quality. This tech-
nique also has potential as it is lightweight and has great water economy.
However, it requires electricity, specialized parts and special knowledge.
Hydroponic gardening is generally done in a controlled environment
(cultivating room, green house, shade structure), but small amateur gar-
dens can flourish if gardeners have a flair for technology!
Several hydroponic grower models are for sale in specialized shops.
We, however, suggest you make them yourself for a fraction of the price.
Here are instructions for constructing a self-irrigating grower that works
using the Venturi system. This is a model that can be designed using
recycled materials and built relatively easily. It is activated with an air
pump rather than with a more costly water pump.
6.2.1 Recipe to Create a “Venturi” Hydroponic
Grower
This container will take the form of a bucket with inert substrate
suspended over a reservoir of nutrient solution. A small aquarium pump
will force air into a tube that is submerged in the solution. When bubbles
come up, they will transport small quantities of nutrient solution to the
surface. This solution will percolate through the substrate, feeding the
plant with water and nutrients before returning to the reservoir.
¸
¸
¸
A little more water …
A small reservoir can be added
to a container if it has not already
been perforated. You can cut holes
approximately ½ cm in diameter
2 to 3 cm from the bottom of the
container at 10 cm intervals. As the
bottom of the container will be satu-
rated with water after rain or after
watering, this technique only works
for demanding plants (such as toma-
toes, eggplants, squash, etc.).
growing in containers on the rooftop: a technical guide 35
Drilling and Cutting Tools
Putting together the growers we propose requires using an elec-
tric drill and, sometimes, even a jig-saw. If you have never worked
with these tools, ask a friend to show you how to use them safely. To
cut plastic with a jig-saw, use a blade for metal and wood that has
small teeth. If you prefer using a hand saw, chose a small hand saw
used for cutting wood. Depending on the size of holes to drill, you
can use one of the following drill bits:
Spur Point Bit
Bits for wood are different from bits for metal. The pointed
end stabilizes them in the material that is being drilled. They are
available in all diameters up to ½ in. Affordable and efficient, these
bits are ideal for making small holes in plastic. If you already have
a set of metal drill bits, these will probably do the trick, but you
will have to pay careful attention when you start drilling as the bit
will tend to slide on the surface.
Flat Wood Bit
Flat wood or spade bits have flat heads that can drill larger
holes than spur point bits (up to 2 in. wide). In addition to the
central spur, you should also make sure it has another point on the
left and the right sides. They are essential for cutting plastic. Only
get the necessary diameters as flat wood bits are more costly than
twisted bits.
Make sure that the container to be drilled is solidly tied to the
floor. Ask a friend to help you if necessary. Keep the bit perpen-
dicular to the surface you are drilling. Begin drilling gently until the
points on the sides trace the hole’s diameter on the surface. Then,
pick up speed near the end of the drilling. Let the bit go through the
surface completely so as not to damage it.
Hole Saw
You can use a hole saw if you aren’t able to cut holes over 2 in.
using a utility knife. Available in formats varying from ⅝ to 5 in.,
these drill bits are often very useful, but generally very expensive.
Get a basic kit from the hardware store or rent the largest formats
from a tool rental center. Use hole saws on a handheld drill follow-
ing the same guidelines as those for the spur point bit.
Hollow Punch
If you don’t want to use an electric drill, you can get a set of
hollow punches at specialized hardware stores or at the cobbler
shop. With a hammer, these tools will allow you to make holes up
to ¾ in. wide in flexible plastic less than 3 mm thick. Put the piece
on scrap wood, place the hollow punch at the desired spot and hit
it with a hammer until it goes through the plastic.
36 guide to setting up your own edible rooftop garden
Materials
1 - 20 L (5 gal.) bucket
1 - 8 to 12 L (2 to 3 gal.) bucket that will sit in the larger
one
1 aquarium air pump
1 to 2 m of air tube for the pump
1 rigid plastic tube, ¾ to 1 in. in diameter as long as the
height of the assembled buckets
1 m of black or very dark, flexible plastic tube, ⅜ in. in
diameter
1 - ⅜ in., tee fitting
8 to 12 L of inorganic and porous substrate (expanded clay
pellets, volcanic rocks, etc.)
4 small tie wraps (zip ties)
Hydroponic nutrient solution
Equipment
Drill
Scissors
Saw
Utility knife
Drill a hole slightly smaller than the exterior diameter of the rigid plastic
tube close to the edge of the bottom of the smaller bucket.
Drill 20 to 30 drainage holes using a ¼ in. bit in the bottom of the little
bucket.
Sit the small bucket in the large bucket, and drill the overflow in the side
of the large bucket 2 cm from the bottom to be sure there is an air space
between the two.
•
•
•
•
•
•
•
•
•
•
•
•
•
•
1.
2.
3.
The air pump.
overflow
substrate
small bucket
large bucket
tube
growing in containers on the rooftop: a technical guide 37
Cut the rigid tube 3 cm shorter than the level of the assembled buckets.
Cut one end at an angle to ease movement of water, and insert the tube in
the small bucket.
Insert the ⅜ in. flexible plastic tube in the central end of the tee fitting.
Insert this tube in the rigid tube so that the fitting is sitting on the flat end
(not the angled one). Cut the flexible tube at the level of the angled end, and
remove it from the rigid tube.
Cut the end of the flexible tube at an angle. Carefully make a small hole for
the air pump’s tube at 2 cm above the angled end using a drill or a utility
knife.
Cut the end of the air pump tube at an angle. Insert it into the hole cut in
the flexible tube while keeping the interior passage of the flexible tube free.
Carefully attach the two tubes together at 2 cm from the hole with a tie-
wrap, taking care not to block the movement of air in the tubes. Attach the
tubes in three more areas and cut off the excess.
Place the assembled tubes in the rigid tube in the bucket. Insert a supple ¼
in. tube in both ends of the tee fitting so as to create a hoop a few centimeters
smaller in diameter than the bucket.
Perforate it with irrigation holes measuring ⅛ in. at 5 cm intervals on the
bottom side of the hoop, facing the bucket using a drill or a utility knife.
Fill the small bucket with pre-washed substrate and the water reservoir by
watering the substrate at the surface. Connect the air tube to the air pump,
and turn it on.
Carefully wash the roots of a plantlet in water in order to remove any trace
of soil. Put it in the substrate in the center of the band so that the roots go
toward the bottom of the small bucket.
Add soluble hydroponic fertilizers in the reservoir following the
instructions.
To fill, prepare a nutrient solution in advance, and water the surface of the
substrate before the reservoir contains less than 5 cm of liquid.
Change the nutrient solution, and clean the reservoir with a brush one
to two times a month to prevent harmful accumulation of nutrients and
pathogens.
6.3 The Grower with Water Reservoir
Economical
Ecological
Lightweight
Easy to build and maintain
Water autonomy
Superior quality and yield
Adding a water reserve to a traditional container keeps gardening simple
while considerably reducing the frequency of watering. The perfect solution for
a hip balcony gardener!
4.
5.
6.
7.
8.
9.
10.
11.
12.
13.
14.
15.
16.
¸
¸
¸
¸
¸
Assembled tubes in the bucket’s rigid tube.
air tube
tie wrap
flexible tube
bucket’s rigid
tube
38 guide to setting up your own edible rooftop garden
A mature tomato plant can “sweat” out over 4 liters of water per day
through transpiration. Capillary movement created by the sweating of leaves
transports water and soluble nutrients in the plant. The constant presence of
water optimizes the growth and the health of the majority of vegetable plants
as long as it does not keep oxygen from being present in the soil.
The grower with a water reservoir is very simple. Allowing a small por-
tion of the growing mix to be in contact with the water in the reservoir is suf-
ficient to make the system work. A pot, a basket or a perforated tube installed
between two containers and filled with potting soil acts as a wick that trans-
ports water from the reservoir to the roots. A simple overflow hole separates
the water reservoir from the growing mix, ensuring adequate air to roots at all
times. The size and form of containers is left up to your imagination, as long
as the following criteria are respected.
Building Details for a Grower with Water Reservoir:
Percentage of the false bottom to be in contact with the reservoir: 5 to 15 %
Ideal (and maximum) length of the wick: 			 15 cm (20 cm)
Irrigation radius of the wick: 				 20 cm
Maximum distance between wicks: 			 40 cm
Air space (distance between the overflow and the false bottom): 1 to 3 cm
6.3.1 Recipe for a Bucket Grower with Water reservoir
Materials
2 – 20 L (5 gal) buckets
1 large tube or rigid container approximately 10 cm (4in.)
in diameter and 15 cm long (reused ABS or PVC tubes are
ideal)
1 pipe, 1 in. in diameter and 60 cm long
3 tie wraps
12 L of potting soil
10 L of compost
Organic fertilizer
•
•
•
•
•
•
•
overflow (water level)
filling tube
growing in containers on the rooftop: a technical guide 39
Equipment
Drill
Marker
Hand saw or jig-saw
Utility knife
If necessary, cut the large 15 cm pipe using a saw.
Cut the end of the small tube at an angle.
Turn the bucket over, and center the large tube on the bucket’s bottom.
Using a marker, draw the interior perimeter of the tube and three
attachment points between the bottom of the bucket and the pipe.
At 2 cm from the edge of the bottom, draw the exterior edge of the small
pipe.
Drill the attachment points in the pipe and to the bottom of the
bucket.
Drill at least 20 drainage holes in the bottom of the bucket using the
same bit.
Drill the two circles drawn with the marker using a flat wood bit and a
hole saw. If you do not have these specialized bits, drill a ½ in. hole on
the two circles drawn on the bottom of the bucket, and carefully cut
them out using a utility knife or a jig-saw.
Attach the large pipe to the bucket using tie wraps.
Place the perforated bucket into the second bucket, and insert the angled
end of the small pipe in the hole that was made for it.
Drill an overflow on the outside of the bucket at 1 cm below the bottom
of the inside bucket.
Fill the large tube with wet potting soil, and solidly compact it.
Fill the grower with 10 L of potting soil and 10 L of compost. Add ⅔ cup
•
•
•
•
1.
2.
3.
4.
5.
6.
7.
8.
9.
10.
11.
12.
13.
overflow
(water level)
perforated bucket
filling tube
“Ready-to-Grow” Start-up Kit
To inspire citizens that are not as good with their hands to
garden, the Rooftop Gardens team designed a pre-made ecologi-
cal grower, the “Ready-to-Grow” kit, made from 95% recycled
plastic. It has a 50 L growing mix capacity and its large 14 L
water reservoir will enable you to cultivate superb vegetables on
your balcony despite your many weekends spent away in the
countryside.
Don’t wait to start your garden, and support our project at
the same time!
Contact one of us now to get a grower.
http://www.rooftopgardens.ca
40 guide to setting up your own edible rooftop garden
of dolomitic lime to the soil if you are placing a fruiting plant in the
grower (tomatoes, peppers, etc.).
Mix 1/3 cup organic fertilizer in the first 10 to 15 cm of growing
mix.
Transplant the vegetable plant of your choice and water the surface of
the growing mix (do this only when you plant or if the growing mix
dries over the summer because of a prolonged lack of water to the
reserve).
Fill the water reservoir through the filling tube until the overflow spurts
out water to avoid washing away nutrient elements.
6.3.2 Recipe for a Half-Barrel with Water Reservoir
Materials
1 food grade barrel
1 – 8 to 20 L bucket
4 large tie wraps
2 – 50 cm long pieces of synthetic rope that is at least ¼
inch thick in diameter
14.
15.
16.
•
•
•
•
Tie Wraps
Tie Wraps (or zip ties) are indispensable tools for the builder-recycler.
These small, nylon fasteners enable you to assemble small parts in a solid
and permanent way. Make sure to insert the correct end into the opening
and firmly tighten.
growing in containers on the rooftop: a technical guide 41
If the barrel does not already have handles, 1 tube that is 1
in. in diameter and ¾ the height of the barrel (optional)
50 L of potting soil
30 to 50 L of compost
Materials
Measuring tape
Marker
Drill
Jig-saw
•
•
•
•
•
•
•
Where to find materials
Buckets
Scout streets and alleys the night before or very early in the morning of recycling and garbage days. Favor
business streets for larger quantities. Pay particular attention to the residues in the containers. If they do not seem
to be from food, leave them where you found them!
If you aren’t up for a treasure hunt, ask restaurant owners or bulk dealers to keep their empty containers for
you. Once you have explained your project, they will probably be pleased to help you. We had a lot of success
with companies specialized in selling grape juice for wine-making. Visit them during the fall, when they harvest
grapes.
Food Grade Barrels (Import Barrels)
These food-safe barrels are used to import large quantities of oils, sauces and bulk canned foods. Once the
barrels are empty, most bulk dealers give them to middlemen specialized in reselling the used containers and
palettes outside the city. If you have access to a car and travel regularly to the countryside, keep an eye out for
pyramids of empty barrels on the side of the road. These companies will sell you the barrels for the modest price
of $10-$25 per unit.
On the other hand, keep in mind that there are often barrels that get in the way of smaller bulk dealers
that don’t have large enough quantities to interest a middleman. Look in your phone book for bulk food stores
near you. Ask them to call you when they need to get rid of their barrels. They will probably give them to you
for free.
Specialized Parts
Though you can find the majority of parts for your growers in the hardware store, certain are more specific
and available only in stores specialized in hydroponics. These parts include: the float valve, Carlon tubing (vinyl
tubing), fittings and through-hulls. Give them a call before going to make sure they have everything you need
in store.
overflow
filling hole
42 guide to setting up your own edible rooftop garden
Remove the barrel’s lid.
Draw a line at half the barrel’s height with a marker.
Drill a hole that is approximately ½ in. wide at half the barrel’s
height.
Insert the blade of the jig-saw in the hole. Cut the barrel along the
line.
Turn the top part over, set it inside the bottom part and push it down
as far as you can.
Measure the height between the bottom of the barrel and the opening
for the lid. If the height is greater than 20 cm, cut the edge of the
lower part of the barrel to reduce the height to 15 to 20 cm.
Cut the top of the small bucket if necessary to get the same height
as the distance between the barrel’s bottom and the opening for the
lid.
Perforate the sides and the bottom of the small bucket at 5 cm
intervals using a ⅜ in. drill bit, and perforate four assembly holes at
equidistance on the top edge.
Draw a 20 cm circle in diameter in the middle of the barrel lid.
Drill a hole of approximately ½ in. wide on the line, and cut the
circle along the line using a jig-saw.
Put the edge of the bucket in the middle of the lid, trace the outline,
and mark the four assembly holes.
Remove the bucket, and drill a ¾ in. hole on each side of the line on
the lid facing the four assembly holes on the bucket.
Using tie wraps, solidly assemble the edge of the bucket to the top
of the lid.
If the barrel has handles, measure and mark their place on the
barrel facing the bottom part and, therefore, the outside of the
grower. Take out the top part of the barrel, and drill a filling hole at
least ¾ in. wide in the bottom part of the barrel. Drill two, ¼ in.
holes 15 cm from each side of the filling hole. Drill two identical
holes on the opposite side of the barrel. If the barrel does not have
handles, drill a hole approximately 1 in. wide in the edge of the
lid. Cut the other end of the optional rigid tube, and insert it in
the hole. Cut the other end of the filling tube if it is necessary and
according to your preference. Drill two ¼ in. holes 15 cm from
each side of the filling hole. Drill two ¼ in. identical holes on the
opposite side of the barrel.
Make a knot at one end of the rope. Put the rope through one of the
¼ in. holes keeping the knot inside the barrel. Put the second end
in the second hole, and knot it to create handle of the length you
choose. Install the other handle on the other side of the barrel.
Put the top part of barrel back in the bottom part. The bucket should
rest on the bottom of the barrel while the two halves of the barrel
hold it solidly in place.
1.
2.
3.
4.
5.
6.
7.
8.
9.
10.
11.
12.
13.
14.
15.
16.
The little bucket with its sides perforated.
growing in containers on the rooftop: a technical guide 43
Fill the bucket with wet potting soil. Compact solidly.
Fill the grower with a 1:1 or 2:1 ratio of wet potting soil and compost.
Add 1½ cups dolomitic lime to the soil if the grower is for a fruiting
plant (tomato, peppers, etc.). Mix 1 cup organic fertilizer in the top
10 to 15 cm of growing mix.
Fill the water reservoir through the hole or the filling tube until water
comes out of the overflow.
Transplant the vegetable plants of your choice, and water the surface
of the growing mix (only do this when planting or if the growing mix
dries out in the summer because of a prolonged lack of water to the
reservoir).
Fill the water reservoir regularly through the hole or the filling
tube until water comes out of the overflow to avoid washing away
nutrients.
17.
18.
19.
20.
21.
overflow
bottom part of the barrel
top part of the barrel
perforated bucket
44 guide to setting up your own edible rooftop garden
Standing Funnel
Manually filling your growers’ water reservoirs will be
a lot easier if you use a funnel. If you have several growers,
make life easier by building a self-supporting funnel. Hooray
for simplicity!
Materials
1 large funnel with a narrow cylinder
1 m of semi-rigid tube that is about ⅝ in. wide
(watering hose, Carlon tubing)
1 wooden rod or stiff bamboo around 1 m
long
1 hose clamp
3 or 4 self-blocking fasteners
Equipment
Marker
Scissors
Drill
Saw
Screwdriver
Determine the ideal height of the funnel on the rod, and
mark that spot with a marker.
Cut the wood.
Drill two holes with the diameter of the tie wraps in the
middle of the piece of wood at 3 to 5 inches from the end.
Insert the funnel’s cylinder in one end of the tube, and solidly
join them together using the hose clamp.
Attach the cylinder to the rod by placing the part of the
funnel where the cone and the cylinder meet on the drilled
end.
Insert a tie wrap in each hole, and pull them tight. If necessary,
use extra wraps to stabilize the funnel.
Cut the excess off the fasteners with the scissors.
To fill the reservoir, place the funnel tube in your grower’s
filling tube. Fill the funnel using a watering can.
•
•
•
•
•
•
•
•
•
•
1.
2.
3.
4.
5.
6.
7.
8.
6.3.3 Choosing Plants
A Few Selection Criteria
Environment
Opt for plants that will flourish in the conditions you give them. Pay
special attention to sunshine in your garden. Leafy plants need at least six
hours of sunshine, and eight hours are recommended for fruiting plants. De-
pending on the time of year you start your garden, it might already be too
growing in containers on the rooftop: a technical guide 45
late for certain varieties. For example, sun-loving plants (tomatoes, eggplants,
peppers) must be started from seeds inside at the beginning of April whereas
onions and peppers should be started as early as the end of February! If you
do not have the time or if you are not yet at ease with indoor seedlings, don’t
worry. Many varieties of plantlets are available in public markets and garden-
ing centers.
Space
Favor plants with high yield that take up less space to optimize available
resources. Think of the size of plants in relation to the expected harvest. Thus,
tomatoes, peppers, lettuce and fine herbs might be favored, for example, over
squash, broccoli, corn or artichokes.
Choose dwarf varieties whenever possible. Determinant tomatoes, for
example, will like your grower a lot more than their indeterminate cousins.
Along the same lines, dwarf beans and small summer carrots like the “Nantes”
or “Little Fingers” varieties will win you over because they are extremely well-
suited to container gardening.
Given that plant growth is limited by available space for roots, the bigger
the container, the better the harvest. Nevertheless, by planting fruiting plants
like tomatoes, eggplants, cucumbers, melons and squash in growers with a
depth of over 25 cm, you will be rewarded with a satisfying harvest. Therefore,
growers that are 20 cm deep can be used to plant peppers, carrots, peas and fine
herbs, and those that are 15 cm deep can be used for lettuce, spinach, onions
and beets.
Therefore, a plant must be chosen according to the container, but its
neighbors must also leave sufficient enough space for it to spread out. An over-
crowded garden will produce fragile plants that are not as productive as pos-
sible. Avoid making your little ones fight one another for fertilizer and sunshine
by giving them enough space in the soil. Consult the table below to get a better
idea of the number of plants that a grower can host without compromising
their growth.
Type Variety
“Ready-to-
grow” kit
Bucket 
reservoir
Half-barrel
 reservoir
Fruiting plants
Determinant tomato 1 to 2 1 3 to 4
Pepper 3 1 4 to 6
Cherry tomato 2 1 2 to 3
Dwarf beans 4 1-2 6 to 8
Non-fruiting
plants
Basil 4 1 8
Lettuce 6 to 8 3 10 to 14
Edible flowers 4 to 6 2-3 8 to 10
Fine herbs 4 to 6 1-3 6 to 10
Recommended Quantity of Plants for a Grower with Reservoir
46 guide to setting up your own edible rooftop garden
Availability
Favor varieties of vegetables that are more rare and costly. You’ll
maximize your savings and impress your friends with your extraordinary
dishes. Think arugula, basil, chives, nasturtium, cherry tomatoes and
purple peppers!
Taste
Of course, don’t forget about your personal preferences. Though a gar-
den allows you to explore new flavors, there is nothing better than growing
and harvesting your favorite vegetable.
6.3.4 Growing Mix and Compost
Growing mix is a lightweight alternative to soil sold in the spring at
gardening centers, hardware stores and supermarkets. It is comes in two cat-
egories: garden soil and potting soil.
Garden soil is composed mainly of black soil and is not recommended
for containers since it tends to get compacted. It is sold under the names
black soil, miracle soil and peat moss.
Potting soil is a mixture of peat moss, vermiculite, perlite and compost
that is specially formulated to ensure good water retention and good drainage
in pots and containers. This product is also sold under the names potting mix,
starting mix, growing mix or transplanting mix. Give priority to mixtures that
are very lightweight and do not contain chemical fertilizers.
Compost is a fertilizer made from the decomposition of organic waste.
Homemade compost or vermicompost is the ideal addition to your new
grower since it will allow you to complete the food cycle at your own home.
Make sure that the compost is ripe because a young mixture will absorb the
nitrogen that is necessary for good plant growth. Many commercial varieties
are also available (shrimp, sea weed, sheep and cow manure, etc.), and all of
them are effective. Compost should make up 50% to 30% of the mixture’s
volume in order to ensure sufficient fertilization in micronutrients. A small
quality of perlite (5 to 10%) can be added to guarantee good drainage if the
compost is very dense.
6.3.5 Fertilization
Though plants get their energy from the sun, their growth is subject
to the presence of a range of nutrients available in the growing medium.
Compost provides most nutrient elements, but fruiting plants will need sup-
plements of the major nutrients like nitrogen, phosphorous, potassium and
calcium.
There are several quality organic fertilizers on the Quebec market. The
major nutrients of fertilizing products are analyzed in laboratories and identi-
fied by three numbers on the tag. The numbers stand for the percentage in
weight of available nitrogen, phosphorous and potassium, respectively. Prod-
ucts with a higher nitrogen content stimulate leaf growth while products rich
in phosphorous encourage root, flower and fruit growth. As for potassium, it
ensures vigorous growth and a healthy immune system.
If you are a beginner gardener, chose a balanced fertilizer for which the
three numbers are similar and register between 2 and 8 (e.g. 4-4-2, 5-5-5,
growing in containers on the rooftop: a technical guide 47
An Overview
of Composting at Home
The average Quebecer generates 1.5 tons of waste per year but transforms only 43% of it. About one third of
residential waste could be composted. In a sanitary landfill, this biodegradable matter decays anaerobically, produc-
ing greenhouse gases and toxic liquids capable of contaminating our sub-surface water tables. On the contrary, when
these precious resources are composted, they are transformed into a quality supplement for your garden. Reduce
your ecological footprint now by taking up the art of home composting.
If you have access to ground space, learn about the subject before talking with your landlord and other build-
ing residents. Then, get a garden compost bin from your city, from the hardware store, or make one yourself using
easy-to-build models that are available on the Internet. Keep brown organic materials (dead leaves, straw, shredded
cardboard, etc.) to mix with kitchen waste and green garden waste. Start the process with the help of one of the
many guides on the topic. Keep in mind that the larger the mass of compost produced, the better the result will be.
So, invite your neighbors to participate in this social project!
Composting can also be done on a balcony, but it requires more careful management to make up for the lack
of microorganisms in the soil and drier climatic conditions than in a garden. The balcony compost bin essentially
works the same way as a garden compost bin, but it is generally smaller and has a false bottom for collecting excess
liquids.
If you do not have a back yard or a balcony, don’t be discouraged. You can get worms to do the work in your
own kitchen! Vermicomposting transforms the year’s kitchen waste inside the house. Once the red worms have been
acquired and multiply to fit your needs, this technique becomes very efficient, pleasant and odorless. You must,
however, acquire special worms from a vermicomposting friend, from an exchange network or from a company
specialized in vermicomposting.
The worms are put in a bed of paper and moist compost in a container that is at least 30 cm x 40 cm and
that has air holes and drains for excess liquids. Once or twice a week, a quantity of waste equal to the weight of
worms is added to the vermicomposter. For more details, consult the many resources available on the topic on
the Internet. Here is a challenge for enthusiasts: when your container is functional and overflowing with worms,
double or triple your capacity so as to compost 100% of your waste. The worms will rapidly multiply to reach your
vermicomposter’s capacity.
48 guide to setting up your own edible rooftop garden
Type Variety
“Ready-to-
grow” kit
Bucket 
reservoir
Half-barrel
 reservoir
Fruiting plants
Determinant tomato 2/3 cup
fertilizer at the
beginning of
the season +
1/2 cup per
month
1/3 cup
fertilizer at
the begin-
ning of the
season +
1/4 cup per
month
1 1/2 cup
fertilizer at the
beginning of
the season +
1/2 cup per
month
Pepper
Cherry tomato
Dwarf bean
Non-fruiting
plants
Basil
2/3 cup
fertilizer at the
beginning of
the season
1/3 cup
fertilizer
at the
beginning
of the
season
1 1/2 cup
fertilizer
at the
beginning of
the season
Lettuce
Edible flowers
Fine Herbs
4-6-8, 8-5-4). Generally, fertilizers richer in nitrogen are preferable for leafy
plants and growth that leads up to flowering for fruiting plants. On the other
hand, fertilizers with higher phosphorus and potassium contents are better
for roots and flowering, fructification and maturation of fruiting plants (i.e.,
tomatoes, zucchinis, peppers, eggplants, etc.). Follow the instructions and
the quantities recommended by the supplier. Even though they come from
organic sources, these fertilizers can damage or even kill your plants if the
concentration is too high.
Fertilizing a grower with water reservoir using organic fertilizers can be
done in at least three ways: by adding dry fertilizers to the soil, by placing a
fertilizing strip on the surface and by adding a soluble fertilizer to the water
reservoir. Depending on the needs of the plants, these techniques may be used
alone or in some combination.
1. Dry Fertilizers
Dry fertilizers cost less and last longer. They are generally mixed in the
growing medium and kept moist as their availability depends on the presence
of microorganisms that are able to break them down into nutrients.
Calcium
For fruiting plants like tomatoes and peppers, a calcium supplement at
the beginning of the season will encourage abundant fructification and will
prevent stem rot. Dolomitic lime is made of minerals and adds noticeable
quantities of calcium and magnesium to the growing without throwing the
pH out of balance. In spring, mix ½ to 1 cup of dolomitic lime for 25 L of
growing mix before planting and repeat once during the season.
Basic Fertilization
As a general rule, you should follow the supplier’s instructions for veg-
etable plants. The first fertilization will be done in the spring before planting;
then supplements will be added throughout the season. Here is what we have
learned from our experience: basic fertilization is sufficient for non-fruiting
plants (basil, flowers, lettuce, arugula, etc.), but fruiting plants need addi-
tional nutrients provided by a fertilizer strip or liquid fertilizers. Consult the
Basic Fertilization Program for Dry Organic Filters
growing in containers on the rooftop: a technical guide 49
table we have provided for information on the fertilization program that we
recommend for different types of growers with water reservoirs.
Fertilization Strips
Most vegetable plants are selected for their capacity to produce an abun-
dance of tasty vegetables in very little time. Therefore, they have a very fast
metabolism and need relatively large quantities of water and nutrients in
comparison to indoor plants. Consequently, the success of a vegetable garden
in containers demands generous quantities of fertilizers as well as sharp at-
tention from the gardener. Moreover, our experiences showed us that most
plants with high fruit yields needed more nutrients than compost or dry
fertilizers could provide for growing in a container.
One effective, alternative solution is to create a reserve of fertilizer in the
grower that will be released progressively throughout the season. In growers
with reservoirs, a dry fertilizer strip can be placed on the surface so that it will
slowly dilute and transport fertilizers through the growing mix thanks to the
capillary action of water.
To use this fertilization technique successfully, spread 1 to 1 ½ cups of
dry organic fertilizer per fruiting plant on a strip that is 3 to 5 cm wide and
the length of the grower after adding the dolomitic lime and the basic first-
time fertilizers. Then, cover the strip lightly with a layer of growing mix to
conserve moisture. Plants must be arranged so that they are approximately
10 to 15 cm from the fertilizer strip. In this way, their roots can easily spread
without the risk of being burned by coming into direct contact with a high
concentration of fertilizers.
A waterproof plastic mulch must be used with this technique because it
prevents the fertilizer strip from being washed away by rain and will ensure a
constant capillary movement of water in the growing mix. We will discuss the
advantages of plastic mulch in more detail later on (see section 6.3.6).
Depending on the fertilizer used and the chosen plant varieties, there
may be plants that could benefit from a change of fertilizer strip at mid-sea-
son. If plants show nutrient deficiency after one or two months of abundant
growth, the mulch should be pulled back and the strip replaced by a new dose
of dry fertilizers. Ideally, this second and last supplement should be done with
a fertilizer that has low nitrogen content and is rich in phosphorus and potas-
sium (e.g. 4-6-8, 2-5-8) because nitrogen encourages the growth of branches
and leaves rather than the production of flowers and fruits that are expected
at the middle of the season.
Soluble Fertilizers
Organic soluble fertilizers differ from dry forms by their quick action and
higher cost. They are often sold as concentrated solutions in hardware stores
and in gardening centers and are generally made of fish and seaweed extracts.
A soluble fertilizer can ensure healthy growth in fruiting plants on its own, but
the high cost favors occasional use in combination with dry fertilizers. It is also
possible to experiment with your own nutrient solutions using wild plant and
vegetable waste liquid extracts created at home.
If you want to give an extra nutrient supplement to your plants, mix half
the recommended dose of soluble fertilizer with the water you use to fill your
grower. Repeat fertilization two times more often than recommended to give
the total dose to your favorite plants. This program will enable plants to have
permanent access to nutrients without risking damage to their roots. For the
50 guide to setting up your own edible rooftop garden
Purins and Compost Teas
Purins are biostimulating, liquid fertilizers that come from healthy fermentation of organic materials. Choose
your ingredients according to the plants’ needs and stage of growth. Look at the grid below for ideas, but be cre-
ative. Prepare mixtures, inform yourself and experiment with what you have on hand.
To make a plant purin, put about 1 kg of freshly picked and chopped plants in a plastic bucket and add 10 L
of water. Keep the bucket covered, away from the sun. Vigorously stir the mixture one or two times a day in order
to guarantee healthy fermentation. It may let off unpleasant odors the first few days, but they will subside at the
end of fermentation. In two or three days, you should see bubbles come up to the surface when stirring. When
these disappear, approximately seven to 21 days later depending on air temperature, fermentation is finished. The
liquid plant extract is ready for use.
To store purin, filter it and put it away from light in a sealed container.
Purin must be diluted by 10 to 20 percent before use. If you are doing traditional container gardening, fertil-
ize with diluted plant extract instead of normal watering. If you use growers with water reservoirs, fill the reservoir
with diluted purin. Use this fertilizer according to your plants’ needs, once or twice a week.
To make compost tea, place a given quantity of compost and 3 or 4 times its volume of water in a plastic
bucket. Mix well and let sit for one or two days. Next, filter, store and use the tea according to recommendations
given for purins.
best results in fruiting plants, given the quick action of soluble fertilizer, you
can replace your basic fertilization by a solution richer in phosphorous and in
potassium after the first flowers have appeared. It will rarely be necessary to use
soluble fertilizer in addition to a fertilizer strip.
6.3.6 Mulch
In natural conditions, soil is protected from bad weather by a layer of
organic matter. When there is not a layer of freely growing plants, plant resi-
dues slowly decay under the careful attention of benevolent fungi and bacte-
ria. There are numerous advantages to mulch. First, it retains moisture in the
soil and, because of this, protects the surface roots and maintains the balance
of organisms (worms, bacteria, etc.) that work to provide air to the soil and
release nutrients that are indispensable for good plant growth. Second, it re-
duces erosion of the growing mix, moderates the temperature of roots and, in
Ingredient Fertilizing composition
Burdock
Compost
Comfrey
Cabbage leaves
Nettles
Dandelions
Goldenrod
N, K, Calcium
N, P, K
N, K
N
N, Fer
N, P, K, Calcium, Magnesium
P, K, Calcium
growing in containers on the rooftop: a technical guide 51
the case of organic mulches, adds nutrients and organic matter to the soil.
In container agriculture, organic mulches (dead leaves, straw, wood
chips, cocoa shell) are very beneficial if the grower can be placed in a way
to prevent the mulch from blowing away. A layer 2 to 3 cm thick should be
placed on the surface after the first seedlings sprout or when plantlets are
transplanted. When the time comes to add fertilizer to the growing mix, sim-
ply lift the mulch and mix fertilizer with the first 2 or 3 cm of growing mix.
If you are using a fertilizer strip or are simply looking to maximize dry
fertilizers added to the growing mix, you should use waterproof mulch to
keep nutrients from being lost to the rain. After preparing the growing mix
and completing the first fertilization, simply cover your grower with a gar-
bage bag or a plastic tarp and solidly attach it by tying a cord around the
container. Cut 10 cm “X”s in the plastic where you would like and plant
your plants through the mulch. Avoid mulch made of transparent plastic as
it can overheat the roots. Use black plastic for heat-loving plants (tomatoes,
zucchinis, melons, eggplants, etc.) and white plastic for cool weather plants
(peas, parsley, etc.). You can also be creative as it has been proven that red
mulch improves productivity in tomatoes! If you have to replace the fertilizer
strip during the season, undo the cord and lift up the plastic for easy access
to the growing mix.
6.3.7 Closing the Garden in the Fall
Here are some guidelines to help you prepare your grower for the cold
season.
Once the harvest has ended and winter is in sight, stop filling
your grower’s water reservoir.
Once the reservoir has been emptied and the plants have dried
out from lack of water and the change of season, simply cut
the plants to the level of the soil and incorporate the remains
into your compost pile.
To reduce the weight of your grower and accelerate the
defrosting of the growing mix in the spring, empty the
reservoir by turning it on the side of the overflow. Then, turn
it upright, and cover it with a plastic tarp. Your grower is now
ready to survive the winter!
If you have to move the grower, this is the ideal moment to do
so since it will now be a lot lighter.
6.3.8 Next Spring
Here are some suggestions to help you re-start your grower after the last
frost.
After one growing season, the plants have consumed most of the nutri-
ents of the compost in the growing mix. Root action and the microscopic life
that accompanies it have also started to break down growing mix particles.
Potting soil generally has a lifespan of two to four years after which its capac-
ity for water retention and drainage will be reduced to the point that that the
plants’ health will be compromised. To guarantee good results every year and
to extend the life of the growing mix, we suggest fertilizing it each spring.
•
•
•
•
fertilizer strip
plastic cover
52 guide to setting up your own edible rooftop garden
	 To enrich the growing mix:
remove approximately 10 to 20% of the growing mix from
your container;
prepare a mix of compost and soil similar to this one:
	 80:75% compost
	 20:25% perlite (to improve drainage);
mix the contents of the grower to untangle and spread out
roots from the previous year;	
fill the grower with the new compost mixture, and mix it in
with the existing growing mix.
6.4 A Garden of Connected Containers
Economical
Ecological
Lightweight
Easy to build and maintain
Water autonomy
Superior quality and yield
Like any living thing, a garden grows quickly and reproduces. If you have
caught the urban gardening bug, you are probably already planning to set up
new growers. That’s great! However, if daily filling of numerous hydroponic
growers or growers with water reservoirs is bogging down your initiative, you
should consider the advantages of a garden of connected containers.
	 All of your growers can be connected to a central water reservoir
equipped with a control valve that will ensure automatic filling. Not only can
this system function on its own, it can also be connected to a rainwater collec-
tion system. Your balcony or terrace will be turned into a true urban oasis. Able
to drink on their own, your plants will be free to feed as they please and will sing
your praises as a master of permaculture.
	 The success of your connected garden depends on the efficiency of
the valve and on airtight joints. Here, we suggest you construct a control box
equipped with a float valve and fittings available at several hydroponics stores.
You can also find the rest of the supplies at the hardware store.
6.4.1 Recipe for Constructing a Garden of
	 Connected Containers
Materials
Control Box
1 flexible storage box or a plastic bucket with a lid that can
hold a float valve
1 - ¾ in. automatic float valve
1 retaining nut for a countertop faucet
1 – ¾ in. female fitting and 1 – ½ in. male fitting
1 eyelet
1 - ⅝ in. elbow or tee fitting for Carlon tubing depending
on the connecting system
•
•
•
•
¸
¸
¸
•
•
•
•
•
•
growing in containers on the rooftop: a technical guide 53
Reservoir
11 food grade barrel or a large plastic container with a lid
that can be perforated
1 – ⅝ in. through-hull and two washers
Network
1 - ⅝ in. eyelet per grower
Straight, elbow or tee fittings for ⅝ in. Carlon tubing depending
on the connecting system
Stainless steel hose clamps for a ⅝ in. tube
Equipment
Drill and ¾ in. and ⅝ in. drill bits
Multiple slip joint pliers
Screwdriver
Knife or scissors
Design Plan
Do a sight check on the surface of the ground (or roof). It should seem
level to you. No matter what surface the connected growers are meant
to cover, any difference in levels should always be less than the height of
the reservoirs of growers. If the difference in levels is greater than the
height of the reservoirs, water will not circulate between communicating
recipients as it should. However, if the difference in levels is acceptable,
you can compensate for the slope after installing the series by putting
bricks or wood blocks under individual growers in the series. If you do
not trust your sight judgment, check if the surface is level as indicated on
the following page.
•
•
•
•
•
•
•
•
•
1.
Eyelet.
Tee fitting.
Elbow fitting.
Hose clamp.
54 guide to setting up your own edible rooftop garden
Checking the Surface Level
Get a small transparent plastic tube that is at least 5 m long and two measuring tapes. Ask a friend to help you.
Fill the tube with water and hold one end at the corner of the garden. Ask your friend to pull the tube along the
ground to the other corner while stopping up the other end with their thumb. Measure the distance of the water
level in each tube from the ground. The difference between the two levels represents the total difference in levels.
If the garden is bigger than the tube, repeat the steps in the same direction starting from the ending point and add
the differences in level to calculate the total difference. Then, repeat the steps in the other directions of the garden
to check the entire surface.
If you have not already done so, draw up a design plan for the garden
on paper by drafting out the general floor plan as well as the placement
of growers and the water reservoir (see section 3.2). The plans will show
the network junctions and the link to each grower. It is important to
place the Carlon tubing network strategically in order to minimize
the number of joints and the risk of stepping on the tubes while
gardening. Buy a few extra meters of Carlon tubing in case changes
must be made.
In the garden, set up the reservoir, your growers and the control box
as indicated on the plan. If necessary, don’t hesitate to modify the
design.
Control Box
Fill the container that will be used as a control box up to the level of
your growers’ overflow holes.
Put the float valve on the water, keep the valve in a horizontal position
and push it down until the float’s arm stops and tries to submerge the
float. The controller is then full and the valve closed. It will open only
when the water level goes down. Mark the height of the float valve’s
joint on the container and empty it.
Drill a ¾ in. hole on the joint mark.
Insert the fitting for the valve in the hole, and screw it in all the way
making sure that the float valve’s movement is vertical.
Tighten the valve’s joint to the container wall using a retaining nut.
The joint does not necessarily have to be air tight, but it should be
solid.
Drill a ⅝ in. hole on one side of the control box at 2 cm from the
ground.
Insert an eyelet in the hole and put the correct Carlon tubing connector
on it according to the design.
	
2.
3.
1.
2.
3.
4.
5.
6.
7.
The Design Plan.
Guide to Setting Up Your Own Edible Rooftop Garden

Mais conteúdo relacionado

Mais procurados

Proposal to implement single stream at pasadena plaza
Proposal to implement single stream at pasadena plazaProposal to implement single stream at pasadena plaza
Proposal to implement single stream at pasadena plazaCandy Bryant
 
Vertical farming concepts for india
Vertical farming concepts for indiaVertical farming concepts for india
Vertical farming concepts for indiaKukku Joseph Jose
 
Southern SAWG, What is urban farming, 2014
Southern SAWG, What is urban farming, 2014Southern SAWG, What is urban farming, 2014
Southern SAWG, What is urban farming, 2014edwinmarty
 
Iot based vertical farming
Iot based vertical farmingIot based vertical farming
Iot based vertical farmingVanya Balan
 
Capsule proposal in Waste Segregation: It's Benefits to the Enviroment
Capsule proposal in Waste Segregation: It's Benefits to the EnviromentCapsule proposal in Waste Segregation: It's Benefits to the Enviroment
Capsule proposal in Waste Segregation: It's Benefits to the EnviromentKate Sevilla
 
Dott 07 Urban Farming Project
Dott 07 Urban Farming ProjectDott 07 Urban Farming Project
Dott 07 Urban Farming ProjectDavid Barrie
 
Kitchen community gardening By Allah Dad Khan
Kitchen community gardening By Allah Dad Khan Kitchen community gardening By Allah Dad Khan
Kitchen community gardening By Allah Dad Khan Mr.Allah Dad Khan
 
Community Garden
Community GardenCommunity Garden
Community GardenPui Ki Lam
 
2018 Ambassador Leaders Community Action Plan - Compost Collectors
2018 Ambassador Leaders Community Action Plan - Compost Collectors2018 Ambassador Leaders Community Action Plan - Compost Collectors
2018 Ambassador Leaders Community Action Plan - Compost CollectorsAmbassador Leaders
 
Benefits Of Urban Farming
Benefits Of Urban FarmingBenefits Of Urban Farming
Benefits Of Urban FarmingRobin Low
 
Waste Management - What and Why
Waste Management - What and Why Waste Management - What and Why
Waste Management - What and Why Pratima Pandey
 
Innovation Assignment
Innovation Assignment Innovation Assignment
Innovation Assignment Gavin Teggart
 
Ecotecnias: Arquitectura del futuro
Ecotecnias: Arquitectura del futuroEcotecnias: Arquitectura del futuro
Ecotecnias: Arquitectura del futurokevinalonsoo
 
Vertical farming - Hydroponics Seminar report
Vertical farming - Hydroponics Seminar reportVertical farming - Hydroponics Seminar report
Vertical farming - Hydroponics Seminar reportAbdulqadirNulwalla
 

Mais procurados (20)

Vertical farming
Vertical farming Vertical farming
Vertical farming
 
Urban Farming Trends
Urban Farming TrendsUrban Farming Trends
Urban Farming Trends
 
Proposal to implement single stream at pasadena plaza
Proposal to implement single stream at pasadena plazaProposal to implement single stream at pasadena plaza
Proposal to implement single stream at pasadena plaza
 
Vertical farming concepts for india
Vertical farming concepts for indiaVertical farming concepts for india
Vertical farming concepts for india
 
Vertical farming
Vertical farming  Vertical farming
Vertical farming
 
Southern SAWG, What is urban farming, 2014
Southern SAWG, What is urban farming, 2014Southern SAWG, What is urban farming, 2014
Southern SAWG, What is urban farming, 2014
 
Planning and Zoning for Commercial Urban Agriculture
Planning and Zoning for Commercial Urban AgriculturePlanning and Zoning for Commercial Urban Agriculture
Planning and Zoning for Commercial Urban Agriculture
 
Iot based vertical farming
Iot based vertical farmingIot based vertical farming
Iot based vertical farming
 
Capsule proposal in Waste Segregation: It's Benefits to the Enviroment
Capsule proposal in Waste Segregation: It's Benefits to the EnviromentCapsule proposal in Waste Segregation: It's Benefits to the Enviroment
Capsule proposal in Waste Segregation: It's Benefits to the Enviroment
 
Dott 07 Urban Farming Project
Dott 07 Urban Farming ProjectDott 07 Urban Farming Project
Dott 07 Urban Farming Project
 
Kitchen community gardening By Allah Dad Khan
Kitchen community gardening By Allah Dad Khan Kitchen community gardening By Allah Dad Khan
Kitchen community gardening By Allah Dad Khan
 
Use Waste
Use WasteUse Waste
Use Waste
 
Community Garden
Community GardenCommunity Garden
Community Garden
 
Vertical farming concepts
Vertical farming concepts Vertical farming concepts
Vertical farming concepts
 
2018 Ambassador Leaders Community Action Plan - Compost Collectors
2018 Ambassador Leaders Community Action Plan - Compost Collectors2018 Ambassador Leaders Community Action Plan - Compost Collectors
2018 Ambassador Leaders Community Action Plan - Compost Collectors
 
Benefits Of Urban Farming
Benefits Of Urban FarmingBenefits Of Urban Farming
Benefits Of Urban Farming
 
Waste Management - What and Why
Waste Management - What and Why Waste Management - What and Why
Waste Management - What and Why
 
Innovation Assignment
Innovation Assignment Innovation Assignment
Innovation Assignment
 
Ecotecnias: Arquitectura del futuro
Ecotecnias: Arquitectura del futuroEcotecnias: Arquitectura del futuro
Ecotecnias: Arquitectura del futuro
 
Vertical farming - Hydroponics Seminar report
Vertical farming - Hydroponics Seminar reportVertical farming - Hydroponics Seminar report
Vertical farming - Hydroponics Seminar report
 

Destaque

Farming and Gardening Products
Farming and Gardening ProductsFarming and Gardening Products
Farming and Gardening Productsfarmandgarden
 
A Dyslexic's A-Z of Urban Gardening
A Dyslexic's A-Z of Urban GardeningA Dyslexic's A-Z of Urban Gardening
A Dyslexic's A-Z of Urban Gardeningaltyler
 
A Guide to Roof Top Gardening, Chicago
A Guide to Roof Top Gardening, ChicagoA Guide to Roof Top Gardening, Chicago
A Guide to Roof Top Gardening, ChicagoFarrah85p
 
Otg workshop jan 2016
Otg workshop jan 2016Otg workshop jan 2016
Otg workshop jan 2016nandhu_dn5
 
Organic Gardening Week 1
Organic Gardening Week 1Organic Gardening Week 1
Organic Gardening Week 1guest6e1a8d60
 
Organic vegetable gardening
Organic vegetable gardening Organic vegetable gardening
Organic vegetable gardening Theresa Lam
 
Bakker Press Conference Presentation - Walter Devenuto January 2015
Bakker Press Conference Presentation - Walter Devenuto January 2015Bakker Press Conference Presentation - Walter Devenuto January 2015
Bakker Press Conference Presentation - Walter Devenuto January 2015Walter Devenuto
 
THE RISE OF ROOFTOP GARDENS IN INFORMALLY DEVELOPED AREAS IN EGYPT: EXPLORING...
THE RISE OF ROOFTOP GARDENS IN INFORMALLY DEVELOPED AREAS IN EGYPT: EXPLORING...THE RISE OF ROOFTOP GARDENS IN INFORMALLY DEVELOPED AREAS IN EGYPT: EXPLORING...
THE RISE OF ROOFTOP GARDENS IN INFORMALLY DEVELOPED AREAS IN EGYPT: EXPLORING...Iman Gawad
 
Exotic Vegetables using Hydroponics By Farmer Gouri Jadhav
Exotic Vegetables using Hydroponics By Farmer Gouri JadhavExotic Vegetables using Hydroponics By Farmer Gouri Jadhav
Exotic Vegetables using Hydroponics By Farmer Gouri JadhavGouri Jadhav
 
A4 Aquaponics - plant and commercial
A4 Aquaponics - plant and commercialA4 Aquaponics - plant and commercial
A4 Aquaponics - plant and commercialAloha House
 
Rooftop garden at city hall
Rooftop garden at city hallRooftop garden at city hall
Rooftop garden at city hallDeadEyeMcH
 

Destaque (16)

Farming and Gardening Products
Farming and Gardening ProductsFarming and Gardening Products
Farming and Gardening Products
 
A Dyslexic's A-Z of Urban Gardening
A Dyslexic's A-Z of Urban GardeningA Dyslexic's A-Z of Urban Gardening
A Dyslexic's A-Z of Urban Gardening
 
Syracuse hydroponics 2
Syracuse hydroponics 2Syracuse hydroponics 2
Syracuse hydroponics 2
 
A Guide to Roof Top Gardening, Chicago
A Guide to Roof Top Gardening, ChicagoA Guide to Roof Top Gardening, Chicago
A Guide to Roof Top Gardening, Chicago
 
Otg workshop jan 2016
Otg workshop jan 2016Otg workshop jan 2016
Otg workshop jan 2016
 
Organic Gardening Week 1
Organic Gardening Week 1Organic Gardening Week 1
Organic Gardening Week 1
 
Garden
GardenGarden
Garden
 
Organic vegetable gardening
Organic vegetable gardening Organic vegetable gardening
Organic vegetable gardening
 
Bakker Press Conference Presentation - Walter Devenuto January 2015
Bakker Press Conference Presentation - Walter Devenuto January 2015Bakker Press Conference Presentation - Walter Devenuto January 2015
Bakker Press Conference Presentation - Walter Devenuto January 2015
 
Urban farming 10
Urban farming 10Urban farming 10
Urban farming 10
 
THE RISE OF ROOFTOP GARDENS IN INFORMALLY DEVELOPED AREAS IN EGYPT: EXPLORING...
THE RISE OF ROOFTOP GARDENS IN INFORMALLY DEVELOPED AREAS IN EGYPT: EXPLORING...THE RISE OF ROOFTOP GARDENS IN INFORMALLY DEVELOPED AREAS IN EGYPT: EXPLORING...
THE RISE OF ROOFTOP GARDENS IN INFORMALLY DEVELOPED AREAS IN EGYPT: EXPLORING...
 
Exotic Vegetables using Hydroponics By Farmer Gouri Jadhav
Exotic Vegetables using Hydroponics By Farmer Gouri JadhavExotic Vegetables using Hydroponics By Farmer Gouri Jadhav
Exotic Vegetables using Hydroponics By Farmer Gouri Jadhav
 
Rooftop Gardening
Rooftop GardeningRooftop Gardening
Rooftop Gardening
 
A4 Aquaponics - plant and commercial
A4 Aquaponics - plant and commercialA4 Aquaponics - plant and commercial
A4 Aquaponics - plant and commercial
 
Green Terrace
Green TerraceGreen Terrace
Green Terrace
 
Rooftop garden at city hall
Rooftop garden at city hallRooftop garden at city hall
Rooftop garden at city hall
 

Semelhante a Guide to Setting Up Your Own Edible Rooftop Garden

Edible-Rooftop-Gardening
Edible-Rooftop-Gardening Edible-Rooftop-Gardening
Edible-Rooftop-Gardening umer878931
 
Roots Around the World
Roots Around the WorldRoots Around the World
Roots Around the WorldFarrah85p
 
Sustainable Garden Project: The Need to Assist Frail Elderly People
Sustainable Garden Project: The Need to Assist Frail Elderly PeopleSustainable Garden Project: The Need to Assist Frail Elderly People
Sustainable Garden Project: The Need to Assist Frail Elderly PeopleElisaMendelsohn
 
Ici final project
Ici final projectIci final project
Ici final projectdeantkc
 
ACitizensGuideToGrowingFoodInBeaconsfield
ACitizensGuideToGrowingFoodInBeaconsfieldACitizensGuideToGrowingFoodInBeaconsfield
ACitizensGuideToGrowingFoodInBeaconsfieldSibeal McCourt
 
Urban-Gardening-Presentation.pptx
Urban-Gardening-Presentation.pptxUrban-Gardening-Presentation.pptx
Urban-Gardening-Presentation.pptxMarchieCamillo
 
Rethinking lawns: natural climate solutions
Rethinking lawns: natural climate solutionsRethinking lawns: natural climate solutions
Rethinking lawns: natural climate solutionsJoyce Hostyn
 
Community Gardens Program Toolkit - Toronto Parks
Community Gardens Program Toolkit - Toronto ParksCommunity Gardens Program Toolkit - Toronto Parks
Community Gardens Program Toolkit - Toronto ParksGeoAnitia
 
Growth f rom growth
Growth f rom growthGrowth f rom growth
Growth f rom growthfonzy56
 
Urban Roots (an exploration about urban agricolture)
Urban Roots (an exploration about urban agricolture)Urban Roots (an exploration about urban agricolture)
Urban Roots (an exploration about urban agricolture)Nicola Mattina
 
Institute for Drought Research and Global Greening in Africa, Europe and Sout...
Institute for Drought Research and Global Greening in Africa, Europe and Sout...Institute for Drought Research and Global Greening in Africa, Europe and Sout...
Institute for Drought Research and Global Greening in Africa, Europe and Sout...MdSaifulIslam289
 
Carrot City: The impact of food on the design of cities and buildings - Mark ...
Carrot City: The impact of food on the design of cities and buildings - Mark ...Carrot City: The impact of food on the design of cities and buildings - Mark ...
Carrot City: The impact of food on the design of cities and buildings - Mark ...SBCBreakfastSessions
 
Community Seeds: Building Community Through Gardening - University of Michigan
Community Seeds: Building Community Through Gardening - University of MichiganCommunity Seeds: Building Community Through Gardening - University of Michigan
Community Seeds: Building Community Through Gardening - University of MichiganAliki85w
 
Ecoagricultre
EcoagricultreEcoagricultre
Ecoagricultreukendayo
 
67 .Kitchen gardening ( community gardening) A Series of Lectures By Mr. Alla...
67 .Kitchen gardening ( community gardening) A Series of Lectures By Mr. Alla...67 .Kitchen gardening ( community gardening) A Series of Lectures By Mr. Alla...
67 .Kitchen gardening ( community gardening) A Series of Lectures By Mr. Alla...Mr.Allah Dad Khan
 

Semelhante a Guide to Setting Up Your Own Edible Rooftop Garden (20)

Edible-Rooftop-Gardening
Edible-Rooftop-Gardening Edible-Rooftop-Gardening
Edible-Rooftop-Gardening
 
Roots Around the World
Roots Around the WorldRoots Around the World
Roots Around the World
 
Sustainable Garden Project: The Need to Assist Frail Elderly People
Sustainable Garden Project: The Need to Assist Frail Elderly PeopleSustainable Garden Project: The Need to Assist Frail Elderly People
Sustainable Garden Project: The Need to Assist Frail Elderly People
 
Urban Agriculture
Urban AgricultureUrban Agriculture
Urban Agriculture
 
Poster
PosterPoster
Poster
 
Sustainable Garden Project: Helping the Elderly to Remain Living Independently
Sustainable Garden Project: Helping the Elderly to Remain Living IndependentlySustainable Garden Project: Helping the Elderly to Remain Living Independently
Sustainable Garden Project: Helping the Elderly to Remain Living Independently
 
Ici final project
Ici final projectIci final project
Ici final project
 
ACitizensGuideToGrowingFoodInBeaconsfield
ACitizensGuideToGrowingFoodInBeaconsfieldACitizensGuideToGrowingFoodInBeaconsfield
ACitizensGuideToGrowingFoodInBeaconsfield
 
Title.pdf
Title.pdfTitle.pdf
Title.pdf
 
Urban-Gardening-Presentation.pptx
Urban-Gardening-Presentation.pptxUrban-Gardening-Presentation.pptx
Urban-Gardening-Presentation.pptx
 
Rethinking lawns: natural climate solutions
Rethinking lawns: natural climate solutionsRethinking lawns: natural climate solutions
Rethinking lawns: natural climate solutions
 
Community Gardens Program Toolkit - Toronto Parks
Community Gardens Program Toolkit - Toronto ParksCommunity Gardens Program Toolkit - Toronto Parks
Community Gardens Program Toolkit - Toronto Parks
 
Setting Up African Permaculture School Gardens
Setting Up African Permaculture School GardensSetting Up African Permaculture School Gardens
Setting Up African Permaculture School Gardens
 
Growth f rom growth
Growth f rom growthGrowth f rom growth
Growth f rom growth
 
Urban Roots (an exploration about urban agricolture)
Urban Roots (an exploration about urban agricolture)Urban Roots (an exploration about urban agricolture)
Urban Roots (an exploration about urban agricolture)
 
Institute for Drought Research and Global Greening in Africa, Europe and Sout...
Institute for Drought Research and Global Greening in Africa, Europe and Sout...Institute for Drought Research and Global Greening in Africa, Europe and Sout...
Institute for Drought Research and Global Greening in Africa, Europe and Sout...
 
Carrot City: The impact of food on the design of cities and buildings - Mark ...
Carrot City: The impact of food on the design of cities and buildings - Mark ...Carrot City: The impact of food on the design of cities and buildings - Mark ...
Carrot City: The impact of food on the design of cities and buildings - Mark ...
 
Community Seeds: Building Community Through Gardening - University of Michigan
Community Seeds: Building Community Through Gardening - University of MichiganCommunity Seeds: Building Community Through Gardening - University of Michigan
Community Seeds: Building Community Through Gardening - University of Michigan
 
Ecoagricultre
EcoagricultreEcoagricultre
Ecoagricultre
 
67 .Kitchen gardening ( community gardening) A Series of Lectures By Mr. Alla...
67 .Kitchen gardening ( community gardening) A Series of Lectures By Mr. Alla...67 .Kitchen gardening ( community gardening) A Series of Lectures By Mr. Alla...
67 .Kitchen gardening ( community gardening) A Series of Lectures By Mr. Alla...
 

Mais de School Vegetable Gardening - Victory Gardens

Mais de School Vegetable Gardening - Victory Gardens (20)

Behind Enemy Lines - Marthe Cohn - One Woman against Nazi Germany
Behind Enemy Lines - Marthe Cohn - One Woman against Nazi GermanyBehind Enemy Lines - Marthe Cohn - One Woman against Nazi Germany
Behind Enemy Lines - Marthe Cohn - One Woman against Nazi Germany
 
Classical Art School Gardening Posters
Classical Art School Gardening PostersClassical Art School Gardening Posters
Classical Art School Gardening Posters
 
One Teacher Saves her School & her Students
One Teacher Saves her School & her StudentsOne Teacher Saves her School & her Students
One Teacher Saves her School & her Students
 
Coconut Oil helps Heal Children's ADHD - ADD Disease, Autism & Alzheimer Disease
Coconut Oil helps Heal Children's ADHD - ADD Disease, Autism & Alzheimer DiseaseCoconut Oil helps Heal Children's ADHD - ADD Disease, Autism & Alzheimer Disease
Coconut Oil helps Heal Children's ADHD - ADD Disease, Autism & Alzheimer Disease
 
One Teacher Makes Students into Champions
One Teacher Makes Students into ChampionsOne Teacher Makes Students into Champions
One Teacher Makes Students into Champions
 
Good Books help Students Excel in Life & School
Good Books help Students Excel in Life & SchoolGood Books help Students Excel in Life & School
Good Books help Students Excel in Life & School
 
Greening & Restoring the Sahara Desert with the Groasis Waterboxx
Greening & Restoring the Sahara Desert with the Groasis WaterboxxGreening & Restoring the Sahara Desert with the Groasis Waterboxx
Greening & Restoring the Sahara Desert with the Groasis Waterboxx
 
Groasis Waterboxx Lets Trees Grow Up in Unfriendly Places
Groasis Waterboxx Lets Trees Grow Up in Unfriendly PlacesGroasis Waterboxx Lets Trees Grow Up in Unfriendly Places
Groasis Waterboxx Lets Trees Grow Up in Unfriendly Places
 
Explanation of the Groasis Technology for Growing Food in Desert Regions
Explanation of the Groasis Technology for Growing Food in Desert RegionsExplanation of the Groasis Technology for Growing Food in Desert Regions
Explanation of the Groasis Technology for Growing Food in Desert Regions
 
Groasis Waterboxx & the Agua, Vida Naturaleza Project for Growing Food in Des...
Groasis Waterboxx & the Agua, Vida Naturaleza Project for Growing Food in Des...Groasis Waterboxx & the Agua, Vida Naturaleza Project for Growing Food in Des...
Groasis Waterboxx & the Agua, Vida Naturaleza Project for Growing Food in Des...
 
Groasis Waterboxx Handbook on Planting Instructions for Trees & Crops in Dese...
Groasis Waterboxx Handbook on Planting Instructions for Trees & Crops in Dese...Groasis Waterboxx Handbook on Planting Instructions for Trees & Crops in Dese...
Groasis Waterboxx Handbook on Planting Instructions for Trees & Crops in Dese...
 
Groasis Waterboxx Manual for Growing Vegetables in Arid Lands
Groasis Waterboxx Manual for Growing Vegetables in Arid LandsGroasis Waterboxx Manual for Growing Vegetables in Arid Lands
Groasis Waterboxx Manual for Growing Vegetables in Arid Lands
 
Water Saving Measures of Using the Groasis Waterboxx in Organic Gardening in ...
Water Saving Measures of Using the Groasis Waterboxx in Organic Gardening in ...Water Saving Measures of Using the Groasis Waterboxx in Organic Gardening in ...
Water Saving Measures of Using the Groasis Waterboxx in Organic Gardening in ...
 
Making a Week’s Worth of Rain Last the Whole Year
Making a Week’s Worth of Rain Last the Whole YearMaking a Week’s Worth of Rain Last the Whole Year
Making a Week’s Worth of Rain Last the Whole Year
 
Using the Groasis Waterboxx to Plant New Trees in Desert Regions
Using the Groasis Waterboxx to Plant New Trees in Desert RegionsUsing the Groasis Waterboxx to Plant New Trees in Desert Regions
Using the Groasis Waterboxx to Plant New Trees in Desert Regions
 
Greening the World - Desert Restoration, Reduce CO2, Feed the People & Create...
Greening the World - Desert Restoration, Reduce CO2, Feed the People & Create...Greening the World - Desert Restoration, Reduce CO2, Feed the People & Create...
Greening the World - Desert Restoration, Reduce CO2, Feed the People & Create...
 
Groasis Technology Compared to Drip Irrigation
Groasis Technology Compared to Drip IrrigationGroasis Technology Compared to Drip Irrigation
Groasis Technology Compared to Drip Irrigation
 
Groasis Waterboxx - Palm Springs Students Test New Planter Designed to Fight ...
Groasis Waterboxx - Palm Springs Students Test New Planter Designed to Fight ...Groasis Waterboxx - Palm Springs Students Test New Planter Designed to Fight ...
Groasis Waterboxx - Palm Springs Students Test New Planter Designed to Fight ...
 
Groasis Waterboxx Handbook for Planting Methods & Sample of Crop Test Results...
Groasis Waterboxx Handbook for Planting Methods & Sample of Crop Test Results...Groasis Waterboxx Handbook for Planting Methods & Sample of Crop Test Results...
Groasis Waterboxx Handbook for Planting Methods & Sample of Crop Test Results...
 
Groasis Waterboxx Technology Offers Possible Cure for the Deserts
Groasis Waterboxx Technology Offers Possible Cure for the DesertsGroasis Waterboxx Technology Offers Possible Cure for the Deserts
Groasis Waterboxx Technology Offers Possible Cure for the Deserts
 

Último

DBMSArchitecture_QueryProcessingandOptimization.pdf
DBMSArchitecture_QueryProcessingandOptimization.pdfDBMSArchitecture_QueryProcessingandOptimization.pdf
DBMSArchitecture_QueryProcessingandOptimization.pdfChristalin Nelson
 
Tree View Decoration Attribute in the Odoo 17
Tree View Decoration Attribute in the Odoo 17Tree View Decoration Attribute in the Odoo 17
Tree View Decoration Attribute in the Odoo 17Celine George
 
BIOCHEMISTRY-CARBOHYDRATE METABOLISM CHAPTER 2.pptx
BIOCHEMISTRY-CARBOHYDRATE METABOLISM CHAPTER 2.pptxBIOCHEMISTRY-CARBOHYDRATE METABOLISM CHAPTER 2.pptx
BIOCHEMISTRY-CARBOHYDRATE METABOLISM CHAPTER 2.pptxSayali Powar
 
CHUYÊN ĐỀ ÔN THEO CÂU CHO HỌC SINH LỚP 12 ĐỂ ĐẠT ĐIỂM 5+ THI TỐT NGHIỆP THPT ...
CHUYÊN ĐỀ ÔN THEO CÂU CHO HỌC SINH LỚP 12 ĐỂ ĐẠT ĐIỂM 5+ THI TỐT NGHIỆP THPT ...CHUYÊN ĐỀ ÔN THEO CÂU CHO HỌC SINH LỚP 12 ĐỂ ĐẠT ĐIỂM 5+ THI TỐT NGHIỆP THPT ...
CHUYÊN ĐỀ ÔN THEO CÂU CHO HỌC SINH LỚP 12 ĐỂ ĐẠT ĐIỂM 5+ THI TỐT NGHIỆP THPT ...Nguyen Thanh Tu Collection
 
Blowin' in the Wind of Caste_ Bob Dylan's Song as a Catalyst for Social Justi...
Blowin' in the Wind of Caste_ Bob Dylan's Song as a Catalyst for Social Justi...Blowin' in the Wind of Caste_ Bob Dylan's Song as a Catalyst for Social Justi...
Blowin' in the Wind of Caste_ Bob Dylan's Song as a Catalyst for Social Justi...DhatriParmar
 
4.11.24 Poverty and Inequality in America.pptx
4.11.24 Poverty and Inequality in America.pptx4.11.24 Poverty and Inequality in America.pptx
4.11.24 Poverty and Inequality in America.pptxmary850239
 
Healthy Minds, Flourishing Lives: A Philosophical Approach to Mental Health a...
Healthy Minds, Flourishing Lives: A Philosophical Approach to Mental Health a...Healthy Minds, Flourishing Lives: A Philosophical Approach to Mental Health a...
Healthy Minds, Flourishing Lives: A Philosophical Approach to Mental Health a...Osopher
 
BÀI TẬP BỔ TRỢ TIẾNG ANH 11 THEO ĐƠN VỊ BÀI HỌC - CẢ NĂM - CÓ FILE NGHE (GLOB...
BÀI TẬP BỔ TRỢ TIẾNG ANH 11 THEO ĐƠN VỊ BÀI HỌC - CẢ NĂM - CÓ FILE NGHE (GLOB...BÀI TẬP BỔ TRỢ TIẾNG ANH 11 THEO ĐƠN VỊ BÀI HỌC - CẢ NĂM - CÓ FILE NGHE (GLOB...
BÀI TẬP BỔ TRỢ TIẾNG ANH 11 THEO ĐƠN VỊ BÀI HỌC - CẢ NĂM - CÓ FILE NGHE (GLOB...Nguyen Thanh Tu Collection
 
An Overview of the Calendar App in Odoo 17 ERP
An Overview of the Calendar App in Odoo 17 ERPAn Overview of the Calendar App in Odoo 17 ERP
An Overview of the Calendar App in Odoo 17 ERPCeline George
 
Q-Factor HISPOL Quiz-6th April 2024, Quiz Club NITW
Q-Factor HISPOL Quiz-6th April 2024, Quiz Club NITWQ-Factor HISPOL Quiz-6th April 2024, Quiz Club NITW
Q-Factor HISPOL Quiz-6th April 2024, Quiz Club NITWQuiz Club NITW
 
4.9.24 School Desegregation in Boston.pptx
4.9.24 School Desegregation in Boston.pptx4.9.24 School Desegregation in Boston.pptx
4.9.24 School Desegregation in Boston.pptxmary850239
 
Geoffrey Chaucer Works II UGC NET JRF TGT PGT MA PHD Entrance Exam II History...
Geoffrey Chaucer Works II UGC NET JRF TGT PGT MA PHD Entrance Exam II History...Geoffrey Chaucer Works II UGC NET JRF TGT PGT MA PHD Entrance Exam II History...
Geoffrey Chaucer Works II UGC NET JRF TGT PGT MA PHD Entrance Exam II History...DrVipulVKapoor
 
The role of Geography in climate education: science and active citizenship
The role of Geography in climate education: science and active citizenshipThe role of Geography in climate education: science and active citizenship
The role of Geography in climate education: science and active citizenshipKarl Donert
 
Unit :1 Basics of Professional Intelligence
Unit :1 Basics of Professional IntelligenceUnit :1 Basics of Professional Intelligence
Unit :1 Basics of Professional IntelligenceDr Vijay Vishwakarma
 
Q-Factor General Quiz-7th April 2024, Quiz Club NITW
Q-Factor General Quiz-7th April 2024, Quiz Club NITWQ-Factor General Quiz-7th April 2024, Quiz Club NITW
Q-Factor General Quiz-7th April 2024, Quiz Club NITWQuiz Club NITW
 
BÀI TẬP BỔ TRỢ TIẾNG ANH 8 - I-LEARN SMART WORLD - CẢ NĂM - CÓ FILE NGHE (BẢN...
BÀI TẬP BỔ TRỢ TIẾNG ANH 8 - I-LEARN SMART WORLD - CẢ NĂM - CÓ FILE NGHE (BẢN...BÀI TẬP BỔ TRỢ TIẾNG ANH 8 - I-LEARN SMART WORLD - CẢ NĂM - CÓ FILE NGHE (BẢN...
BÀI TẬP BỔ TRỢ TIẾNG ANH 8 - I-LEARN SMART WORLD - CẢ NĂM - CÓ FILE NGHE (BẢN...Nguyen Thanh Tu Collection
 
How to Uninstall a Module in Odoo 17 Using Command Line
How to Uninstall a Module in Odoo 17 Using Command LineHow to Uninstall a Module in Odoo 17 Using Command Line
How to Uninstall a Module in Odoo 17 Using Command LineCeline George
 

Último (20)

DBMSArchitecture_QueryProcessingandOptimization.pdf
DBMSArchitecture_QueryProcessingandOptimization.pdfDBMSArchitecture_QueryProcessingandOptimization.pdf
DBMSArchitecture_QueryProcessingandOptimization.pdf
 
Tree View Decoration Attribute in the Odoo 17
Tree View Decoration Attribute in the Odoo 17Tree View Decoration Attribute in the Odoo 17
Tree View Decoration Attribute in the Odoo 17
 
BIOCHEMISTRY-CARBOHYDRATE METABOLISM CHAPTER 2.pptx
BIOCHEMISTRY-CARBOHYDRATE METABOLISM CHAPTER 2.pptxBIOCHEMISTRY-CARBOHYDRATE METABOLISM CHAPTER 2.pptx
BIOCHEMISTRY-CARBOHYDRATE METABOLISM CHAPTER 2.pptx
 
CHUYÊN ĐỀ ÔN THEO CÂU CHO HỌC SINH LỚP 12 ĐỂ ĐẠT ĐIỂM 5+ THI TỐT NGHIỆP THPT ...
CHUYÊN ĐỀ ÔN THEO CÂU CHO HỌC SINH LỚP 12 ĐỂ ĐẠT ĐIỂM 5+ THI TỐT NGHIỆP THPT ...CHUYÊN ĐỀ ÔN THEO CÂU CHO HỌC SINH LỚP 12 ĐỂ ĐẠT ĐIỂM 5+ THI TỐT NGHIỆP THPT ...
CHUYÊN ĐỀ ÔN THEO CÂU CHO HỌC SINH LỚP 12 ĐỂ ĐẠT ĐIỂM 5+ THI TỐT NGHIỆP THPT ...
 
Blowin' in the Wind of Caste_ Bob Dylan's Song as a Catalyst for Social Justi...
Blowin' in the Wind of Caste_ Bob Dylan's Song as a Catalyst for Social Justi...Blowin' in the Wind of Caste_ Bob Dylan's Song as a Catalyst for Social Justi...
Blowin' in the Wind of Caste_ Bob Dylan's Song as a Catalyst for Social Justi...
 
Introduction to Research ,Need for research, Need for design of Experiments, ...
Introduction to Research ,Need for research, Need for design of Experiments, ...Introduction to Research ,Need for research, Need for design of Experiments, ...
Introduction to Research ,Need for research, Need for design of Experiments, ...
 
4.11.24 Poverty and Inequality in America.pptx
4.11.24 Poverty and Inequality in America.pptx4.11.24 Poverty and Inequality in America.pptx
4.11.24 Poverty and Inequality in America.pptx
 
Healthy Minds, Flourishing Lives: A Philosophical Approach to Mental Health a...
Healthy Minds, Flourishing Lives: A Philosophical Approach to Mental Health a...Healthy Minds, Flourishing Lives: A Philosophical Approach to Mental Health a...
Healthy Minds, Flourishing Lives: A Philosophical Approach to Mental Health a...
 
BÀI TẬP BỔ TRỢ TIẾNG ANH 11 THEO ĐƠN VỊ BÀI HỌC - CẢ NĂM - CÓ FILE NGHE (GLOB...
BÀI TẬP BỔ TRỢ TIẾNG ANH 11 THEO ĐƠN VỊ BÀI HỌC - CẢ NĂM - CÓ FILE NGHE (GLOB...BÀI TẬP BỔ TRỢ TIẾNG ANH 11 THEO ĐƠN VỊ BÀI HỌC - CẢ NĂM - CÓ FILE NGHE (GLOB...
BÀI TẬP BỔ TRỢ TIẾNG ANH 11 THEO ĐƠN VỊ BÀI HỌC - CẢ NĂM - CÓ FILE NGHE (GLOB...
 
Mattingly "AI & Prompt Design" - Introduction to Machine Learning"
Mattingly "AI & Prompt Design" - Introduction to Machine Learning"Mattingly "AI & Prompt Design" - Introduction to Machine Learning"
Mattingly "AI & Prompt Design" - Introduction to Machine Learning"
 
Spearman's correlation,Formula,Advantages,
Spearman's correlation,Formula,Advantages,Spearman's correlation,Formula,Advantages,
Spearman's correlation,Formula,Advantages,
 
An Overview of the Calendar App in Odoo 17 ERP
An Overview of the Calendar App in Odoo 17 ERPAn Overview of the Calendar App in Odoo 17 ERP
An Overview of the Calendar App in Odoo 17 ERP
 
Q-Factor HISPOL Quiz-6th April 2024, Quiz Club NITW
Q-Factor HISPOL Quiz-6th April 2024, Quiz Club NITWQ-Factor HISPOL Quiz-6th April 2024, Quiz Club NITW
Q-Factor HISPOL Quiz-6th April 2024, Quiz Club NITW
 
4.9.24 School Desegregation in Boston.pptx
4.9.24 School Desegregation in Boston.pptx4.9.24 School Desegregation in Boston.pptx
4.9.24 School Desegregation in Boston.pptx
 
Geoffrey Chaucer Works II UGC NET JRF TGT PGT MA PHD Entrance Exam II History...
Geoffrey Chaucer Works II UGC NET JRF TGT PGT MA PHD Entrance Exam II History...Geoffrey Chaucer Works II UGC NET JRF TGT PGT MA PHD Entrance Exam II History...
Geoffrey Chaucer Works II UGC NET JRF TGT PGT MA PHD Entrance Exam II History...
 
The role of Geography in climate education: science and active citizenship
The role of Geography in climate education: science and active citizenshipThe role of Geography in climate education: science and active citizenship
The role of Geography in climate education: science and active citizenship
 
Unit :1 Basics of Professional Intelligence
Unit :1 Basics of Professional IntelligenceUnit :1 Basics of Professional Intelligence
Unit :1 Basics of Professional Intelligence
 
Q-Factor General Quiz-7th April 2024, Quiz Club NITW
Q-Factor General Quiz-7th April 2024, Quiz Club NITWQ-Factor General Quiz-7th April 2024, Quiz Club NITW
Q-Factor General Quiz-7th April 2024, Quiz Club NITW
 
BÀI TẬP BỔ TRỢ TIẾNG ANH 8 - I-LEARN SMART WORLD - CẢ NĂM - CÓ FILE NGHE (BẢN...
BÀI TẬP BỔ TRỢ TIẾNG ANH 8 - I-LEARN SMART WORLD - CẢ NĂM - CÓ FILE NGHE (BẢN...BÀI TẬP BỔ TRỢ TIẾNG ANH 8 - I-LEARN SMART WORLD - CẢ NĂM - CÓ FILE NGHE (BẢN...
BÀI TẬP BỔ TRỢ TIẾNG ANH 8 - I-LEARN SMART WORLD - CẢ NĂM - CÓ FILE NGHE (BẢN...
 
How to Uninstall a Module in Odoo 17 Using Command Line
How to Uninstall a Module in Odoo 17 Using Command LineHow to Uninstall a Module in Odoo 17 Using Command Line
How to Uninstall a Module in Odoo 17 Using Command Line
 

Guide to Setting Up Your Own Edible Rooftop Garden

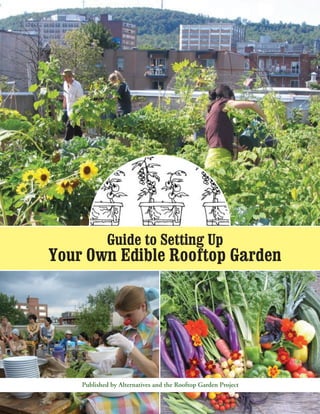
  • 1. Guide to Setting Up Your Own Edible Rooftop Garden Published by Alternatives and the Rooftop Garden Project
  • 2.
  • 3. Guide to Setting Up Your Own Edible Rooftop Garden Published by Alternatives and the Rooftop Garden Project
  • 4. Published by Alternatives and the Rooftop Gardens Project 3720, avenue du Parc, suite 300 Montreal, QC H2X 2J1 www.alternatives.ca/www.rooftopgardens.ca Contributing Authors Amélie Germain, landscape architect Benjamin Grégoire, biologist Ismaël Hautecoeur, landscape architect Rotem Ayalon, urban planning consultant André Bergeron, engineer Layout and Illustrations: Todd Stewart Correction Julie Lanctôt (French) Rotem Ayalon, Benjamin Grégoire (English) Translation: Jamie Herd Photography : Rooftop Gardens Project; Page 10: Anne Whiteside Special thanks to Alex Hill, Jane Rabinowicz, Vanessa Reid, Sanou Issiaka, Megan Thom, Emmanuelle Brunet, Sam Makgoka, Gerardo Sierra, Emily Doyle, Sarah Finley and many others for their inspired and inspiring involvement and their support for the project. A warm thank you as well to our two founding partners, Santropol Roulant and Maison de quartier Villeray (MQV) with whom we dream of turning the city into a vast garden, and to our institutional partners, Université du Québec, the Patro le Prévost, the Institut de tourisme et d’hôtellerie du Québec (ITHQ), UQAM and McGill University who loaned us their roofs. Finally, we’d like to express our abounding gratitude to our community of volunteer gardeners, without whom our rooftop gardening experiment, which lead up to the writing of this guide, would not have been so rich and stimulating. This publication was realized thanks to financing from the Public Health Agency of Canada (PHAC). The opinions expressed in this publication are those of the authors and do not necessarily reflect the official standpoint of the Public Health Agency of Canada. © 2008. Any reproduction, in part or in total, is desirable on the condition that the source is indicated. This document was printed on recycled paper with vegetal ink. 978-2-9809931-1-4 Legal deposit – Bibliothèque et Archives nationales du Québec, 2008 Legal deposit – Library and Archives Canada, 2008
  • 5. table OF CONTENTS Preface Introduction Why garden on rooftops in the city? Forgotten spaces rendered fertile for healthy communities Why take up urban agriculture? A simple source of joy and a socially engaged life style Why did we create a guide? A tool to encourage the spreading of rooftop vegetable gardens 1. Defining Your Project Where should we start in order to launch our garden project? 1.1 Describe the Roles and Goals of the Garden 1.2 Define the Scale and Document the Project Site 1.3 Select the Type of Garden 1.4 Make a List of People Involved in the Project 1.5 Evaluate the Project according to Accessible Resources 2. Choosing the Site What factors should be examined when choosing a site? 2.1 Loading Capacity 2.2 Municipal Regulations 2.3 Sunlight and Wind Exposure 2.4 Access and Security 2.5 Specific Needs 2.6 Other Options 3. Designing the Garden Two Possible Choices a. Hire a design professional b. Do it yourself 7 9 11 11 12 12 13 14 15 15 16 16 17 17 18 19
  • 6. How do I design and construct a garden on my own? 3.1 Prepare the Rooftop for Setting up the Garden 3.2 Imagine and Draw the Garden a. Site Analysis Plan b. Garden Uses c. Conceptual Plan d. Development Plan 3.3 Build the Infrastructure and Lay out the Garden a. Building the core infrastructure b. Build Garden Features  c. Construct Growers d. Put the Various Features into Place 4. Coordinating the Garden How to coordinate a group of gardeners? 4.1 Find out about Group Gardening Models in Montreal a. Two basic models Community Gardening Collective Gardening b. Leadership possibilities in the garden 4.2. Launch and Recruit a. Form an organizational committee b. Spread the word and mobilize 4.3 Ensure Good Communication throughout the Season 4.4 Ensure horticultural follow-up 4.5 Multiply Garden Activities 5. Making Healthy Choices How to grow in order to eat well 5.1 Gardening Ecologically 5.2 Diversifying Edible Plants 5.3 Putting Medicinal Plants in the Garden 5.4 Understanding Risks Associated with Urban Pollution a. Soil Pollution b. Air Pollution c. Water Pollution 6. Growing in Containers on the Rooftop: A Technical Guide How to choose, construct and maintain growers 6.1 Traditional Container Gardening 6.2 Classic Hydroponic Container 6.2.1 Recipe to Create a “Venturi” Hydroponic Grower 6.3 The Grower with Water Reservoir 6.3.1 Recipe for a Bucket Grower with Water reservoir 6.3.2 Recipe for a Half-Barrel with Water Reservoir 19 20 22   23 23 24 25 25 25 27 27 27 28 28 31 31 32 36
  • 7. 6.3.3 Choosing Plants 6.3.4 Growing Mix and Compost 6.3.5 Fertilization 6.3.6 Mulch 6.3.7 Closing the Garden in the Fall 6.3.8 Next Spring 6.4 A Garden of Connected Containers 6.4.1 Recipe for Constructing a Garden of Connected Containers 6.5 Collecting Rainwater 6.5.1 Recipe for Constructing a Rainwater Collection System 6.6 Seedling Table with Water Reservoir 6.6.1 Recipe for Building a Seedling Table with Water Reservoir References Annex A : Descriptions of Our Garden Projects Annex B : The Santropol Roulant Garden Experience Annex C : Pamphlet on the Rooftop Gardens and Green Roofs Annex D : Moveable Panel Model Annex E : Media Coverage 50 55 58 61 63 66 71 72 73
  • 8. Summer Team 2006 Standing, from left to right: Sanou Issiaka, Amélie Germain, Sam Makgoka, Alex Hill, Megan Thom and Rotem Ayalon. In front, from left to right: Benjamin Grégoire, Ismaël Hautecoeur and Emmanuel Brunet.
  • 9. preface PREFACE After five seasons of gardening and experimenting, the Rooftop Garden project team is happy to share the fruits of its labor with you. The Guide to Setting up Your Own Edible Rooftop Garden comes from our wish to see new gardens and partners take root in the fertile soil of Montreal but also in other parts of the world. By exploring new ways to interact with each other, with the built environment, the urban ecosystem and the food chain, we have discovered that change can happen in a manner that is participative, pleasant and inclusive. This observa- tion comes from designing and participating in different rooftop gardens with the community. Each garden is a unique space that is maintained with care by volunteers from a meals-on-wheels program, meticulously cultivated by seniors, ex- perimented on and brought to life by young urbanites or appropriated by families. Together, we strive for a better world, cities that breathe, a slower pace, sustainable management of resources and a more respectful and ecological way of life. In our opinion, the renewed and infinite amazement that edible gardening brings is an excellent starting point on the path to that better world. The pleasure of discovering how the world that surrounds us works, how things like rain, wind, sun, the seasons, insects, migrations and new varieties of plants are interrelated brings us closer to the land, even from the extraordinary heights of rooftops. A greater understanding of urban ecosystems can only motivate us to culti- vate diversity and appreciate complexity. We hope that our humble acts of planting, upkeeping, harvesting, eating and sharing will bring as much pleasure to you as they have brought to our community of gardeners. Ismaël Hautecoeur Project Manager
  • 10. The gardener’s tool box, a garden in the making!
  • 11. introduction 11 INTRODUCTION Why garden on rooftops in the city? Forgotten spaces rendered fertile for healthy communities Gardening on rooftops in ever-increasingly dense and sprawling cities is an original way to take back unused and sterile spaces like rooftops, patios and balconies and to transform them into livable spaces that are lush, productive and purifying. In addition to embellishing the urban landscape with food-producing gardens at the tops of buildings and producing fresh food, these new spaces for the community enable us to reduce the ecological footprint of the houses and institutions of which we are an integral part. Recovering and decontaminating water, cultivating organic food, compost- ing organic waste as well as filtering and cooling down air are all part of a mindset to make our established landscape more sustainable. Therefore, in the current context of environmental degradation, over-consumption and junk food culture, taking care of ourselves and our environment enables us to take a step down the path to healthy cities and com- munities. Rooftop gardening means taking up an inspiring, ecological and productive activity, and developing new links with the food chain, the seasons, the environment and the community. This utopia’s vision is to turn the city into a garden and its inhabitants into gardeners. Why take up urban agriculture? A simple source of joy and a socially engaged life style The daily pleasures of gardening are simple, inexpensive and profoundly satisfying: eating a head of lettuce that was cultivated with care among friends, taking in the morning perfume of a flower clinging to the banister of a balcony, biting into a strawberry warmed by the sun. Urban agriculture is a veritable way of life and enables the population, col- lectively or individually, to take pleasure in new, green spaces that meet its needs for relaxation and leisure. Far from a marginal expression or an anachronism doomed to disappear, urban agriculture is destined to play an ever greater role in feeding city dwellers. It currently feeds 700 million people, a fourth of the world’s urban population (FAO, 2005). It provides an answer to food insecurity and an avenue for cultural expression and citizen involvement. It also enables people get a taste of the pure enchantment of growing food for themselves and for the community. In this time of climatic changes and the multiple, harmful consequences of urban living on health and the environment, we need to rethink the way we live. In light of this, urban gardening is a powerful agent for change.
  • 12. 12 guide to setting up your own edible rooftop garden Why did we create a guide? A tool to encourage the spreading of rooftop vegetable gardens The Rooftop Garden Project team presents this step-by-step guide to help you start and maintain your own edible rooftop garden both socially and horiculturally. This guide is for groups, individuals and institutions that would like to set up an urban rooftop garden for educational, social, therapeutic or environmental ends and do not have the ground space necessary to do so. The guide is divided into six chapters that cover the main factors to consider when developing a rooftop garden project: project definition, choice of site, setting up the garden, coordination of gardening activity, health choices and a detailed technical guide on rooftop container gardening. Depending on your goals and your gardening experience, you may be more interested in and nourished by the first chapters than by the technical guide on container gardening and vice versa. In the annexes, you will find descriptions of our gardens and some additional information. Our goal is to make planting these oases of edible nature in the city easier so that more and more people will start gardening on rooftops and discovering its benefits. A smile says a lot about the sheer joy of picking the first broccoli of the season on the roof. A way of life to be cultivated!
  • 13. defining your project 13 1. DEFINING YOUR projet The first thing to do when you want to start a garden is to develop and refine the idea behind the project. This is the step where we describe our intentions and expectations, choose the scope of the project, select the type of garden, target the garden’s community and partners and evaluate the project according to accessible resources. The five steps sug- gested below may be carried out simultaneously. The reflection necessary for one step can often nourish or be nourished by other steps. Here’s to the beginning of a beautiful project. Where should we start in order to launch our garden project? 1.1 Describe the Roles and Goals of the Garden You should make an outline of your garden here. Think about its goals and what factors motivate the project. There are many possibilities. For ex- ample, you can create a garden with aims that are: social and community-based: Gardening favors contacts and exchanges and betters the quality of life. For seniors, gardens stimulate social encounters, physical activity. It can mean getting back to the earth for some and participating in a lively project that comes with various therapeutic benefits. The community in contact with the garden will benefit from the feeling that comes from helping others, commitment to a project and socializing with one another; educational: As a place for experimentation with nature, the garden can be a space for pedagogical and recreational activities that will reinforce scholastic materials or themes from day camps (ecology, botany, health, alimentation, cooking, gardening, biology, etc.) and increase the spirit of initiative, teamwork, patience, etc.; based on food security: Gardening will favor the production of food for a meals-on- wheels program or a food bank, or for personal use; economic : A rooftop garden can improve a building’s energy efficiency and increase its value for little cost by expanding the useable space. Food cultivation also diminishes expenses related to acquiring food; • • • •
  • 14. 14 guide to setting up your own edible rooftop garden environmental: Here, we are referring of the improvement of air quality through the absorption of carbon dioxide and the production of oxygen by plants.The consequent increase in humidity and evaporation will bring down the ambient temperature, biodiversity will attract birds and insects; and plants will absorb ambient noise. Using rainwater to irrigate plants will reduce pressure on the municipal waterworks and can be integrated in a system that uses household wastewater. Eating organic and local will reduce the quantity of chemical products used to grow plants and to transport food; horticultural:Experimentingwithnewgardeningtechniques or developing a new model for urban gardening to spread urban agriculture could be on the menu; personal: Te simple pleasure of gardening and being able to benefit from a relaxing space at home will be the foremost motivation. Groups should clearly mark out their project goals when planning be- gins to ensure that all the concerned participants have the same expectations. Plan discussion sessions. They will enable you to work efficiently at building the project. It is also recommended that you involve the team that will use and look after the garden as early as possible to get their ideas, know their needs and stimulate their interest! 1.2 Define the scale and document the project site Determining the project scale to be developed is important: a temporary project, a project that will evolve over a few years or a project that will put in place permanently. This decision may be influenced by available resources (see section 1.5). Your site choice may also influence the scale of the project, or it could be in- fluenced by the scale if a decision has not been made yet (see Chapter 2). To help you document your site, examine the envisioned project’s real conditions: site characteristics (geographical situation, clientele, type of neighborhood, hardiness zone, etc.); description of the targeted building: height, access, barriers, type of roofing, etc.; and of neighboring buildings: adjoining areas, facade, back, alleys, streets, traffic, etc.; implications and consequences of implementing the project in the neighborhood. 1.3 Select the type of garden Rooftop gardens may be designed in various ways.The most well-known are green or vegetated roofs as well as balcony gardening in containers. Green roofs, whether intensive or extensive (accessible or not), are covered with soil in which plants take root. Container gardens refer to ornamental and edible plants grown in containers. The costs, ecological advantages and versatility of crops differ according to each type of organization (see Annex C). • • • • • • I am involved in the garden to meet people that have interest- ing social values. I find that it is also a zen activity that does not require you to be productive as in most types of work. Volunteer, age 41
  • 15. defining your project 15 As this guide is based on our expertise, it deals mainly with gardens cul- tivated in containers. If you are interested in green roofs, we suggest you get in touch with professionals in green roof construction (see references). 1.4 Make a List of People Involved in the Project a. Pick the team of gardeners (and the beneficiaries) Who will the project managers and participants be? To start the project correctly, form a design team (resource people) that will, if possible, bring together architects, landscape architects, struc- tural engineers, construction professionals, roofing professionals, commu- nicators, etc. Define who will do the gardening: volunteers, beneficiaries, residents, a group of friends, neighbors, an organization, etc. You must know the size of group as it will influence needs and garden organization. Within the group, you should clearly determine who will tend the gar- den and who will receive the harvests. These groups might be the same, or they could be two different groups. You must also know the people who will take care of the garden well. Are they specialists, amateurs or beginners in gardening? This will influence how you coordinate gardening activity. (see chapter 4). b. Determine who your partners are Who should we contact? When you define the project, be sure to talk with the various partners (site owner, management, community, benefactors, unions, employees, etc.). When you have to negotiate with a group, prepare good arguments ahead of time in order to sell the project. Be convinced and convincing; the potential partner must quickly understand the advantages to investing in such a proj- ect. When possible, find an ally within the group you are negotiating with to get support. The step can be laborious. Therefore, be prepared, patient and persistent. 1.5 Evaluate the Project according to Accessible Resources You should take inventory of your human, financial and material re- sources. To accomplish this task, create a calendar of required resources for the different project phases: setting up, beginning of activities, period of use, end of activities, winter clean up. Think of what is needed to get the project on its feet and to set up and take care of the garden in terms of space, volun- teer labor, outside expertise, gardening equipment and material for cultiva- tion, for fixtures, for financial sources, etc. Next, sort materials in order to make a list of resources in your posses- sion and resources you have to find. You can then decide, according to the
  • 16. 16 guide to setting up your own edible rooftop garden group’s energy, what missing resources can be found easily (recovery, recy- cling, volunteer time, rentals, fundraising, etc.). Once inventory is finished, you may feel the need to upscale or downscale the goals and size of the project. The goal is to launch a realistic project that matches accessible resources. This will avoid disappointments along the way. I simply love being on the roof- top, gardening and learning new things about gardening. Volunteer, age 10. Discover the great surprises hiding in the soil! An extraordinary way to get in touch with nature in the city.
  • 17. choosing the site 17 2. CHOOSING THE site Once the project has been well defined, you can choose the site. Several factors should be considered. The possible site or sites must be evaluated to verify safety levels and to make sure gardening activities could be functional and pleasant in the area. Keep your eyes open! What factors should be examined when choosing a site? 2.1 Loading Capacity The first step is to evaluate the roof’s loading capacity, the load that the roof can support. This is important as the weight of crops, equipment and people that the garden will take on must be considered. To undertake this structural analysis, you must call on a structural en- gineer. You should inform the engineer of the type (container or green roof) and surface area of the garden you would like to create. This will greatly influ- ence the structural needs. The engineer can: determine the type of roof (flat or having different levels) and the framework used; determine the type of construction (wood, steel, concrete); evaluate the possibility of carrying out the project; determine the influence of obstacles and the possibility of getting rid of or moving them (vents, chimneys, vent ducts, etc.); study existing plans or make a survey sketch and map out the current conditions; verify the real load capacity according to the survey sketch or plans provided. After studying the situation, the engineer can either mark out certain parts of the roof where the garden can be set up or propose a framework for reinforcement. The latter solution will undoubtedly mean costs that may lead you to turn to another site. Therefore, proceeding with a structural analysis at the very beginning of the project is recommended. • • • • • •
  • 18. 18 guide to setting up your own edible rooftop garden 2.2 Municipal Regulations  Before starting construction of a rooftop garden, you must get infor- mation on regulations from your city. Regulations vary from city to city and sometimes from borough to borough. In addition to building codes that regulate materials and ensure con- formity to the building code norms, you must also check the zoning regu- lations for setbacks, use of space and maximum height of the building. Certain buildings may also be classified as historical monuments or as being part of a historical sector, which also limits some types of possible actions. Get information concerning railing, access and security limits. These are important points you should pay attention. Very often, railing must not be visible from the street at a distance equivalent to two times the height from the edge. Height from the edge is also regulated. Access is often regu- lated by fire codes (emergency exits). You should make sure regulations do not require two exits for this particular project, in which case you may need to add a staircase. There may also be restrictions on flammable materials and on the height of structures like pergolas and pavilions. In certain cases, you may be able to request an exemption from local authorities that would allow you to carry out the project even if it is not ex- actly up to municipal codes. This will, however, add extra delays and costs, and there is no guarantee you will obtain the exemption. Architects and architectural technicians are professionals who are qualified to do this research and verify project conformity to norms and regulations in force. 2.3 Sunlight and Wind Exposure Sunlight Light is a fundamental need for plants. A study on the hours of sunlight on the roof must be carried out. As roofs are elevated, they generally offer sunlight conditions superior to most urban areas on the ground. Food culti- vation necessitates long hours of daily sunlight, meaning ten hours a day for the most heliophilous plants (e.g. tomatoes). Depending on the chosen plants and features you would like to incor- porate in your garden (reading corner, composting area, etc. – see section 3.2), you should plan the garden in the area(s) (full sun, part shade) that cor- respond to your needs. If you observe a quantity of sunlight that is too great for the plants you would like to grow, you can decrease it by creating structures that produce lighter or darker shade: a shade wall, an arbor, a trellis, a row of tall plants, etc. Wind Wind is often stronger at rooftop heights than at ground level. A light breeze is very pleasant for gardeners, but strong winds could seriously damage plants. Creating a wind breaker (vegetal walls, structures, canvases, etc.) is recommended if there are strong winds or gusts of wind. If the structure must be attached to the roof, you should make sure the parts of the frame are resistant. The structure must be sturdy but must not change the roof’s water resistance or framework.
  • 19. choosing the site 19 2.4 Access and Security Several elements related to gardener’s access and safety must be analyzed before choosing the site. Access Practical Access and Roof Safety There should be an official access to the roof (stairway, elevator) to make the garden accessible to everyone. This access should be functional for transporting material to the garden. Access to Water for Plants Like sun, water is a fundamental need for plants. As rain does not al- ways come on time, an access to municipal water is essential. You can also install a rainwater collection system by rerouting a gutter to a reservoir, for example. This solution will create a heavy load of water on the roof at random times, and the structural engineer should check the loading capacity in the designated place. Access to Electricity An electrical source is very practical for construction work and develop- ment or for the simple pleasure of listening to music in the garden. Access to a Storage Area Plan an access to an area sheltered from inclement weather to store equipment, material and gardening tools. Safety Peripheral Surveillance Informal (neighboring windows, passersby) or official (security guards, security cameras) surveillance will ensure the safety of gardeners and help avoid incidents in the garden (e.g. vandalism). Installation of an Enclosure or a Banister An enclosure or a banister should be 42 inches (1067 mm) tall and encircle the space designated as a garden. These protections must conform to regulations as mentioned in section 2.2 2.5 Specific Needs If the garden’s clientele has specific needs, you must account for them from the beginning. Easy access will be an important issue if the garden is destined for elderly people or people with handicaps. Installing shady areas is recommended if seniors or young children use the garden. 2.6 Other Options Note that if you plan a garden somewhere other than a roof, such as a terrace or a balcony, you must consider the same factors but on a smaller scale. A good start means having a structure that is up to norms, a space that is safe and functional and plenty of water and sun.
  • 20. 20 guide to setting up your own edible rooftop garden Don’t forget to plant perennials in your garden! They’ll attract helpful insects.
  • 21. designing the garden 21 3. DESIGNING THE garden Once the project has been defined and the site has been chosen, you can think about how to set up your garden. This step calls for the most imagination and creativity because your garden will take form at this time. Get out your pens and paper! Two possible choices a. Hire a design professional who is part of an association or an order, such as : L’Association des architectes paysagistes du Québec (AAPQ), www.aapq.org; L’Association des paysagistes professionnels du Québec (APPQ), www.appq.org; L’Ordre des architectes du Québec (OAQ), www.oaq.com; L’Ordre des technologues professionnels du Québec (OTPQ), www.otpq.qc.ca Using the engineer’s plans and estimate, a professional, such as a land- scape architect, can: create an aesthetic and functional development plan based on the possibilities and constraints of the site, according to your tastes, your needs, and your budget; advise you on the choices of flowering and food producing plants; draw up plans and a labor estimate; supervise work that will be carried out by the professional of your choice. b. Do it Yourself If you would like to do this step yourself, here are some notions to guide you in creating your garden. How do I design and construct a garden on my own? • • • • • • • •
  • 22. 22 guide to setting up your own edible rooftop garden 3.1 Prepare the Rooftop for Setting up the Garden If necessary, make a building plan (plans and general estimates) to pre- pare the rooftop for the garden and for gardening activities and to make cer- tain it fits your budget. As this step must conform to certain building and safety norms, we suggest you call on professionals (see step 2). The plan must be designed in direct relation to the framing plan. The distribution of weight should be approved by the structural engineer, who can, if needed, identify structural modifications to be made. The framing plan is often completed by a short estimate that shows construction to be car- ried out, materials to be used and norms to be respected. As a general rule, heavy loads must be located near columns and beams located on the existing roof plans as they were drawn by the engineer. Once the plans have been drawn up (terrace site, access, construction details, location of equipment to be used, etc.) and approved by the structural engineer or completed using separate plans by the engineer, you must obtain a building permit from the city. Get information from your insurance company about changes to be made to your home insurance. Ideally, this step should be done simultaneously with step 3.2. Each phase will give you food for thought on the other. 3.2 Imagine and Draw the Garden a. Site Analysis Plan On paper or using drafting software, place the basic features as well as possibilities for and constraints of the site: sun areas (full sun, partial sun, shade), access to water and electricity, interior and exterior access, circulation areas, railing, special features related to safety, etc. Step 2 will be useful for creating the site analysis plan. b. Garden Uses Make up a list of utilitarian and recreational uses that you would like to have in your garden: food production, relaxation and contemplation, gather- ings, storage, rainwater recovery, area for doing manual labor, composting, etc. You can also use general concepts (permaculture, ecosystems, education- al garden) as inspiration or create thematic spaces (herbs, medicinal plants, children, horticultural experiments, First Nations, production, etc.). c. Conceptual Plan On the analysis plan, place different uses and thematic spaces you have chosen for the garden by drawing and annotating areas or bubbles. Determine the size of areas according to your needs and priorities. Make sure that the finished product is functional and, or course, inspiring. d. Development Plan You now have everything you need to give shape to your garden. On a new drawing, copy the conceptual plan and draw the real shape and loca- tion of different spaces (production, relaxation and storage areas; butterfly garden, etc.) and features (benches, compost bin, pergola, etc.) in detail.
  • 23. designing the garden 23 Conceptual Plan and Design Plan Be creative! Think about the unity and balance of the garden, about how to highlight features, about lines and forms, about textures and colors. You can create an overall theme or personalized spaces. Work to scale. The most common scales are: ¼ in. = 1 ft. or 1:50 in metric values. You can use grid paper when you are doing the rough sketches to make the task easier. Leave sufficient space around gar- den beds or containers to make garden- ing easier. Take the location of a drain on the roof into account. It should be accessible at all times to drain water from the sur- face. Water must not be obstructed from reaching the drain. Make several drawings while brain- storming. Don’t hesitate to work in groups. Choose the most stimulating and most functional plan afterward. Keep in mind that you can always change the de- sign as things progress if necessary. There is a wide selection of books on landscaping and garden design. Visit your library or a local bookstore for in- spiration. Conceptual plan Avoid overdoing it Your garden can be developed in different steps, spread out over several months or years. Be careful not to over- estimate your time and energy. Keep in mind that gardening should be a source of enjoyment! storage relaxation area experimental production zone composting area seedlings railing climbing plants gathering area circulation garden’s central walkway food production area hydro- ponic system climbing plants climbing plants rainwater recovery rows of growers with water reservoir central walkway garden of connected containers seedling table compost garden shed 2 garden shed 1 pergola rainwater barrel benches climbing plant dome rainwater barrels wall covered in plants Development plan
  • 24. 24 guide to setting up your own edible rooftop garden 3.3 Build the Infrastructure and Lay Out the Garden a. Building the core infrastructure Start construction using plans approved by your city. If major work on the access, the terrace or the railing is to be done, we recommend you hire a building professional (a general contractor that will take care of all the con- struction). It is always preferable to request bids from three contractors to ensure you get a fair market price. If you do not have a contractor, look for a person with experience in construction or someone who is handy that can supervise and coordinate volunteers’ work. Sometimes it is very practical to establish a construction schedule so that combined efforts converge on an opening date for the garden. Look out for late work, delays, bad surprises, extra costs and other unexpected problems. The infrastructure could be made of modular, detachable parts to allow access to the rooftop at all times in case there is a leak or maintenance must be done. You will find an example of such parts in Annex D. To optimize use of materials and reduce costs, use recycled or reused materials as often as possible. For better longevity, use treated wood. b. Build Garden Features Using the development plan, start construction on structural features like a pergola, an arbor, benches, etc., as well as functional features like compost bins and rainwater barrels. You can create them using technical designs you have drawn or found in construction manuals. You can also let your imagina- tion take over when the task is at hand. Several features can be bought. c. Construct Growers Decide what type of grower is suited to your needs. Here are some cri- teria to consider: dimensions (height, width, depth) shape productivity (depth of growing mix according to plant choice, water reservoir, dimensions, etc.) durability and maintenance of material mobility (weight, wheels) aesthetics (color, style, material) Build the number of growers needed according to your feeding needs and the available space. See chapter six for models and for construction plans. d. Put the Various Features into Place With your development plan in hand, put the features into place and watch your garden grow! It is sometimes useful to trace the lines of the draw- ing on the ground to transpose your plan onto the area. Strings or chalk are particularly efficient. • • • • • • Engineer’s Verification If the project calls for changes to the structure or significant addi- tions during construction, having the structural engineer check the completed construction is recom- mended to get his or her final ap- proval. This is particularly impor- tant if you install a pergola, a shade structure or a wind breaker on a high roof because strong winds could blow the panels off making the installation dangerous.
  • 25. coordingating the garden 25 4. COORDINATING THE GARDEN How do I coordinate a group of gardeners? There are several different ways to garden in the city. You can choose to garden by yourself at home or with a group. Group gardening involves special coordination and offers rich opportunities. Here are some ideas that will guide you in this task. If you would like a concrete example, see The Roulant Garden Experience in Annex B. 4.1 Find out about Group Gardening Models in Montreal Here are some gardening and leadership models that might help you cultivate techniques for managing a group in the garden. A few ideas… a. Two Basic Models Community Gardening A community space is divided into gardening plots of equal size that are managed individually by a gardener or by a family. Maintaining the plot and harvesting are the gardener’s responsibility. The gardener works during varied hours. Activities are subject to regulations and overseen by a committee. Pros: autonomy of gardeners, flexible hours, material provided, possibility of keeping the plot for several years. Cons: rigid framework of regulations, restricted choice of vegetables, little technical aid, difficult to personalize the space, waiting lists, high maintenance. Reference : Community Gardens of the City of Montreal, www.ville.montreal.qc.ca Collective Gardening A group of people garden together during regular gardening sessions. Harvests are divided in an equitable way and according to gardeners’ needs. In many cases, part of the harvest is distributed to a local organization (meals- on-wheels, soup kitchens, food banks). A specialized leader sometimes coor- dinates gardening sessions. Pros: creates links in the community, a feeling of solidarity, shared upkeep, strong feeling of belonging. • • • I told myself that garden- ing might be an activity to do with my 10 year-old daughter. I wasn’t looking for anything in particular, but gardening is a fun activity that she might like and that is related to so- cial engagement and ecology. The Rooftop Garden Project brought together recreational activity and social engagement. Volunteer, age 52
  • 26. 26 guide to setting up your own edible rooftop garden Cons: fixed times, little continuity, rarity of available spaces, complex procedure to start new gardens. References : Jardins collectifs de la maison de quartier Villeray, www.mqv.qc.ca Action communiterre, www.actioncommuniterre.qc.ca b. Leadership Possibilities in the Garden With social and environmental aims, leadership in the garden enables horticultural knowledge to be passed on and energy to be injected in the group through social and recreational activities. Leadership activities can have different goals and target different groups: therapeutic gardening for elderly people in institutions, educational garden- ing for young people in day camps and schools, a production garden and socialization for a community, etc. Local, specialized organizations can offer different group workshops. For more information on models, see our project examples in Annex A. 4.2. Launch and Recruit Once your project has been defined and your site has been chosen, you can organize your first gardening season and mobilize the community. Here are two steps that will help you get the season started off on the right foot! a. Form an Organizational Committee Create a small group that will take responsibility for the garden launch or opening/inauguration and coordinating the gardening season: recruitment, coordination of group meetings, respect for rules, conflict management, cal- endar, etc. b. Spread the Word and Mobilize Spread word about the garden project in the targeted community: infor- mational meetings, message boards, posters, emails in a network, advertise- ments or articles in a local newspaper, door-to-door visits, telephone calls. Offer flexibility in terms of involvement. Make a list of people who are inter- ested; then, organize the meetings to plan: the choice of times for gardening sessions: you should consider the regular needs of plants, the constraints of mid-day heat for plants and gardeners, availability of clients; the garden launch, designing the garden (see step 3), the choice of plants and fertilizers; how group work will function; the management of harvest division; horticultural workshops and activities; and much more. • • • • • • •
  • 27. coordingating the garden 27 4.3 Ensure Good Communication throughout the Season You will quickly notice that sustained and varied communication is es- sential to maintain the energy and health of the garden community. Determine the best way(s) to communicate within the group (message board, email, regular meetings, log, Internet site, etc.). Update information concerning the garden frequently (upcoming events, times, rules, contact lists). Avoid sources of conflict by being clear on rules and by opening a space for dialogue. Encourage social activities that favor group cohesion (see section 4.5). 4.4 Ensure Horticultural Follow-up As the garden is a place to produce food, it is important to succeed in producing harvests that satisfy everyone. Here are ideas to help you: encourage the sharing and transferring of horticultural knowledge in the group (in an informal way and/or through workshops) in order to obtain a harvest that is worthwhile for everyone and to avoid errors, conflicts and disappointment. When necessary, ask for help from expert organizations or hire an organizer. maintain an up-to-date horticultural log that informs gardeners of the health and development of the garden: care given to plants, observations, harvests and things to do (watering, fertilizing, harvesting, pruning, treating, inspecting, etc.) prepare an annual calendar of tasks linked to the garden (from starting seedlings to closing the garden) so as not to forget steps and not to cause delays in the season. 4.5 Multiply Garden Activities In addition to providing a space for flora and fauna to live, the garden is also a social space. It can be a place for: contemplation and observation of nature in the city recreational and artistic activities (mediation, creative workshops, outdoor cooking, making art objects, bird houses, kites, soaps, etc.) meetings and events (discussion and spreading information on urban gardening, film projections, harvest parties, BBQs and family picnics) education and therapy, the garden is a privileged area for building awareness to nature, to food and to healthy life styles and also for discovering the physical and psychological benefits of gardening. Gardens open new spaces for the community. They are spaces for every- one to enjoy! • • • • • • • • • • • This project creates a space in my life where I let myself “play outside in the sun” while giving my time to something bigger –helping one another within a community. Volunteer, age25
  • 28. Playing in the garden, something that is enjoyable every time!
  • 29. making healthy choices 29 5. MAKING HEALTHY CHOICES How to grow in order to eat well Ahealthy diet coupled with the exercise of gardening is an excellent start for good health. For even more benefits, you should take several agricultural ideas into consideration to maximize the nutritional benefits (for the body and the spirit) that you will take from your harvests. Take time to think about all aspects of your garden, from buying your seeds and designing your garden at the beginning of the season, to fertilizing, treating diseases or controlling pests throughout the season. 5.1 Gardening Ecologically If you are worried about the quality of the food you are growing, you can optimize nutritional value by gardening in an ecological way. To do so, you have to avoid using chemical fertilizers, pesticides and herbicides when taking care of the various problems in your garden. Instead, think of solutions that are in harmony with nature (e.g. compost for fertilizer, companion planting to maximize yield and natural pesticides, or purins, made from fermented plants to keep harmful insects away). This is better for your health and for that of the environment. You can also get certified organic seeds. Don’t forget that in gardening for yourself, you have the privilege of controlling the quality of what you eat. 5.2 Diversifying Edible Plants Diversification of plants in the garden is a guarantee for success in a healthy and varied diet. In fact, it will enable you to have access to a higher number of nutritional elements as each food has different characteristics. You will, therefore, have easy access to vitamins, fibers and minerals. The variety in your garden will certainly lead you to eat more fruits and vegetables and will increase your interest in them. This keeps with recommen- dations from the Canada Food Guide, which suggests five to 20 portions of fruits and vegetables a day. If you are looking for particular benefits for your health or if you have a special diet, gardening for yourself is a good occasion to focus on foods that are good for you. Diversification of crops and of the foods you eat will also contribute to reducing certain risks for diseases and to maintaining ecological biodiversity. Tomatoes are an excellent source of vitamins A and C, potassium and fiber. Green vegetables like spinach are a good source of vitamins A and E, folic acid, calcium, copper and iron.
  • 30. 30 guide to setting up your own edible rooftop garden 5.3 Putting Medicinal Plants in the Garden In addition to fruits and vegetables, think of putting medicinal plants in your garden. For centuries, knowledge about the medicinal virtues of plants and how to prepare them has been cultivated. Your grandmothers probably have a few recipes! The therapeutic effects of plants are numerous and should be rediscovered so that current generations can benefit from them. There is a wide range of books that you can find in stores or at the local library that discuss the benefits of plants and of growing them. This is also a way of bringing indigenous species from our region and other forgotten wild species into the garden. Several fine herbs also have in- credible virtues. Inform yourself. 5.4 Understanding Risks Associated with Urban Pollution Several risks related to soil, air and water pollution raise questions about the quality of food cultivated in the city. Though there are currently few stud- ies on this subject, container gardening makes an interesting alternative to avoid certain risks of contamination. In fact, it will enable you to minimize the possible negative consequences because its versatility offers greater leeway in terms of the medium for agriculture, site selection and choices in water sources. a. Soil Pollution Urbanization and the changing use of soils in the city have led us to build upon ground that has already been used for industrial activity and has never been decontaminated. The concentration of heavy metals, a major contami- nant, above all in places where the population is in direct and prolonged con- A Healthy Recipe! Succulent Ratatouille from the garden: A Recipe from Santropol Roulant A side dish frequently prepared by the meals-on-wheels program at Santropol Roulant (see The Roulant Garden Experience in Annex B). Serves 4. Ingredients 2 eggplants 4 tomatoes 2 zucchinis 2 onions 1 sprig of thyme Salt and pepper to taste Oil Preparation 1. Clean the eggplants, tomatoes and zucchinis. Cut them into small pieces. 2. Peel the onions and cut them into small pieces. 3. Clean and chop the thyme. 4. Cook the onions on medium heat for 5 minutes. 5. Add the other vegetables and cook them for about 1½ hours on low heat. 6. Season with salt, pepper and thyme. Enjoy! • • • • • • •
  • 31. making healthy choices 31 tact with contaminants (residences, parks, schools, yards and playgrounds), is a considerable risk for human health. Eating vegetables grown in contami- nated soils could cause health problems because the plants generally absorb heavy metals in their edible tissues (Chaney, Sterrett et Mielke, 1984). While waiting for the desired decontamination of our soils, container gardening shows itself to be an effective solution to get around this problem. The gardener can also control the elements that make their way into the grower. You can, therefore, avoid letting heavy metals make their way into your food. b. Air Pollution The location of your garden can have an impact on the quality of the fruits and vegetables that are produced. Gardens found near congested thor- ough-fares or train tracks may be contaminated by air pollutants that come from combustion. However, this risk has been greatly reduced since lead was removed from fuels. If you are doubtful of air quality in the area where you garden, it is al- ways better to wash fruits and leaves with soap or a water and vinegar mixture to remove most of the particles that are deposited on plants (Chaney, Sterrett et Mielke, 1984; Armar-Klemesu, 1999). c. Water Pollution Clean water should be used to irrigate plants. If you can collect water on your roof, rainwater is the best source of water for watering plants; it reduces the pressure exerted on the municipal water network. The temperature of rainwater is naturally warm and will not shock the plants, contrary to cold water from the waterworks system. In addition, this water does not contain chlorine, which inhibits plant growth. If you choose to collect rainwater to irrigate your garden, make sure that you store it properly, i.e. in an opaque container with a mosquito net to avoid algae and mosquitoes. For more information, see section 6.5, Collecting Rainwater. Sources : Armar-Klemesu, Margaret. Urban Agriculture and Food Security, Nu- trition and Health, Growing Cities Growing Food International Workshop, Havana, Cuba, thematic paper no 4, 1999. Chaney, Rufus L., Susan B. Sterrett and Howard W. Mielke. The Po- tential for Heavy Metal Exposure from Urban Gardens and Soils. In. J.R. Preer (ed.) Proc. Symp. Heavy Metals in Urban Gardens. Univ. Dist. Columbia Extension Service, Washington, DC, 1984. Chamomile flowers (above) can be used for treating stomachaches and insomnia in chil- dren as well as for calming nerves. The tea also has anti-inflammatory properties that work against rheumatism and arthritis and antispasmodic properties that calm men- strual and intestinal pain. It also acts as a mild laxative. A lightly steeped tea will com- bat cold symptoms, the flu, and allergies. As a compress, it will calm skin inflammations, burns and sunburns. Added to the bath, it has relaxing properties. Mint tea is known to help digestive problems, but also to combat fever, bronchitis, the flu, headaches, morning sickness, stomach pain and other minor pains. Sage tea makes an excellent antiseptic for treating mouth sores and sore throats when used as a mouth wash. Used as a compress, it soothes cuts and wounds.
  • 32. Take out your tools! It’s time to build!
  • 33. growing in containers on the rooftop: a technical guide 33 6. GROWING IN CONTAINERS ON THE ROOFTOP: A TECHNICAL GUIDE How to choose, construct and maintain growers There are many different ways to garden on rooftops depending on what type of garden you choose: in concrete or wooden containers or simply in growing medium spread on the roof that is irrigated by an automatic or manual system. Here, we give you the approach we chose for our Rooftop Garden project, i.e. the construction of growers using recycled containers. Over the years, we experimented with different types of growers and different gardening techniques that went from traditional containers to hydroponic agriculture. We finally chose growers with a water reservoir, which became our favorite model. They are affordable, efficient in water autonomy, allow plants to be fertilized using homemade compost, movable and adaptable. These qualities make them an excellent tool for gardening on rooftops, but also on balconies, terraces and any other urban area where it is normally difficult to grow plants. To make starting your garden easier and to inspire those who are not as good with their hands, the project team designed a pre-made ecological grower, our “Ready-to-Grow” kits. You can communicate with us if you would like one (or more!). Even though this technical guide focuses on certain details related to choosing plants, composting and fertilizing grow- ers with water reservoirs, it is not a gardening guide per se, but rather a collection of information and examples assembled to inspire you when you create your own above-ground gardening project. Each suggested type of agriculture responds to a list of criteria (economic, ecological, lightweight, easy to build and maintain, water autonomy, and superior quality and yield) to help you make choices. The guide ends with detailed instructions related to connecting your growers to a common water system, collecting rainwater and setting up a seedling table! 6.1 Traditional Container Gardening Economic Ecological Lightweight Easy to build and maintain Water autonomy Superior quality and yield This is where gardening at altitude starts. A container is perforated to ensure good drainage and filled with potting soil enriched with compost and fertilizer. Generally, the deeper and more voluminous the container, the more the garden will yield. On the other hand, a 20 cm depth of 20 to 40 L of growing mix will be sufficient for a determinant tomato. For lettuce varieties, a 15 cm depth of 6 to 10 L of growing mix will guarantee great results. ¸ ¸
  • 34. 34 guide to setting up your own edible rooftop garden Plants are irrigated at the surface until water overflows from the drainage holes so that the growing mix stays moist at all times. Given the heavy water consumption of vegetable plants, growers must be irrigated every day and sometimes twice a day once plants have come to maturity. Moreover, frequent traditional watering washes away nutrients and is tir- ing for the gardener. This is where the idea to use water reservoirs came from. 6.2 Classic Hydroponic Container Economical Ecological Lightweight Easy to build and maintain Water autonomy Superior quality and yields In hydroponic agriculture, roots develop in a nutrient solution made from soluble elements that are directly available to the plant. These fertilizers are generally synthetic, but there are organic versions that are, in comparison, expensive. Hydroponic agriculture refers to a mixture of techniques that vary according to the needs of cultivars and the agricul- tural environment in order ensure yield with optimal quality. This tech- nique also has potential as it is lightweight and has great water economy. However, it requires electricity, specialized parts and special knowledge. Hydroponic gardening is generally done in a controlled environment (cultivating room, green house, shade structure), but small amateur gar- dens can flourish if gardeners have a flair for technology! Several hydroponic grower models are for sale in specialized shops. We, however, suggest you make them yourself for a fraction of the price. Here are instructions for constructing a self-irrigating grower that works using the Venturi system. This is a model that can be designed using recycled materials and built relatively easily. It is activated with an air pump rather than with a more costly water pump. 6.2.1 Recipe to Create a “Venturi” Hydroponic Grower This container will take the form of a bucket with inert substrate suspended over a reservoir of nutrient solution. A small aquarium pump will force air into a tube that is submerged in the solution. When bubbles come up, they will transport small quantities of nutrient solution to the surface. This solution will percolate through the substrate, feeding the plant with water and nutrients before returning to the reservoir. ¸ ¸ ¸ A little more water … A small reservoir can be added to a container if it has not already been perforated. You can cut holes approximately ½ cm in diameter 2 to 3 cm from the bottom of the container at 10 cm intervals. As the bottom of the container will be satu- rated with water after rain or after watering, this technique only works for demanding plants (such as toma- toes, eggplants, squash, etc.).
  • 35. growing in containers on the rooftop: a technical guide 35 Drilling and Cutting Tools Putting together the growers we propose requires using an elec- tric drill and, sometimes, even a jig-saw. If you have never worked with these tools, ask a friend to show you how to use them safely. To cut plastic with a jig-saw, use a blade for metal and wood that has small teeth. If you prefer using a hand saw, chose a small hand saw used for cutting wood. Depending on the size of holes to drill, you can use one of the following drill bits: Spur Point Bit Bits for wood are different from bits for metal. The pointed end stabilizes them in the material that is being drilled. They are available in all diameters up to ½ in. Affordable and efficient, these bits are ideal for making small holes in plastic. If you already have a set of metal drill bits, these will probably do the trick, but you will have to pay careful attention when you start drilling as the bit will tend to slide on the surface. Flat Wood Bit Flat wood or spade bits have flat heads that can drill larger holes than spur point bits (up to 2 in. wide). In addition to the central spur, you should also make sure it has another point on the left and the right sides. They are essential for cutting plastic. Only get the necessary diameters as flat wood bits are more costly than twisted bits. Make sure that the container to be drilled is solidly tied to the floor. Ask a friend to help you if necessary. Keep the bit perpen- dicular to the surface you are drilling. Begin drilling gently until the points on the sides trace the hole’s diameter on the surface. Then, pick up speed near the end of the drilling. Let the bit go through the surface completely so as not to damage it. Hole Saw You can use a hole saw if you aren’t able to cut holes over 2 in. using a utility knife. Available in formats varying from ⅝ to 5 in., these drill bits are often very useful, but generally very expensive. Get a basic kit from the hardware store or rent the largest formats from a tool rental center. Use hole saws on a handheld drill follow- ing the same guidelines as those for the spur point bit. Hollow Punch If you don’t want to use an electric drill, you can get a set of hollow punches at specialized hardware stores or at the cobbler shop. With a hammer, these tools will allow you to make holes up to ¾ in. wide in flexible plastic less than 3 mm thick. Put the piece on scrap wood, place the hollow punch at the desired spot and hit it with a hammer until it goes through the plastic.
  • 36. 36 guide to setting up your own edible rooftop garden Materials 1 - 20 L (5 gal.) bucket 1 - 8 to 12 L (2 to 3 gal.) bucket that will sit in the larger one 1 aquarium air pump 1 to 2 m of air tube for the pump 1 rigid plastic tube, ¾ to 1 in. in diameter as long as the height of the assembled buckets 1 m of black or very dark, flexible plastic tube, ⅜ in. in diameter 1 - ⅜ in., tee fitting 8 to 12 L of inorganic and porous substrate (expanded clay pellets, volcanic rocks, etc.) 4 small tie wraps (zip ties) Hydroponic nutrient solution Equipment Drill Scissors Saw Utility knife Drill a hole slightly smaller than the exterior diameter of the rigid plastic tube close to the edge of the bottom of the smaller bucket. Drill 20 to 30 drainage holes using a ¼ in. bit in the bottom of the little bucket. Sit the small bucket in the large bucket, and drill the overflow in the side of the large bucket 2 cm from the bottom to be sure there is an air space between the two. • • • • • • • • • • • • • • 1. 2. 3. The air pump. overflow substrate small bucket large bucket tube
  • 37. growing in containers on the rooftop: a technical guide 37 Cut the rigid tube 3 cm shorter than the level of the assembled buckets. Cut one end at an angle to ease movement of water, and insert the tube in the small bucket. Insert the ⅜ in. flexible plastic tube in the central end of the tee fitting. Insert this tube in the rigid tube so that the fitting is sitting on the flat end (not the angled one). Cut the flexible tube at the level of the angled end, and remove it from the rigid tube. Cut the end of the flexible tube at an angle. Carefully make a small hole for the air pump’s tube at 2 cm above the angled end using a drill or a utility knife. Cut the end of the air pump tube at an angle. Insert it into the hole cut in the flexible tube while keeping the interior passage of the flexible tube free. Carefully attach the two tubes together at 2 cm from the hole with a tie- wrap, taking care not to block the movement of air in the tubes. Attach the tubes in three more areas and cut off the excess. Place the assembled tubes in the rigid tube in the bucket. Insert a supple ¼ in. tube in both ends of the tee fitting so as to create a hoop a few centimeters smaller in diameter than the bucket. Perforate it with irrigation holes measuring ⅛ in. at 5 cm intervals on the bottom side of the hoop, facing the bucket using a drill or a utility knife. Fill the small bucket with pre-washed substrate and the water reservoir by watering the substrate at the surface. Connect the air tube to the air pump, and turn it on. Carefully wash the roots of a plantlet in water in order to remove any trace of soil. Put it in the substrate in the center of the band so that the roots go toward the bottom of the small bucket. Add soluble hydroponic fertilizers in the reservoir following the instructions. To fill, prepare a nutrient solution in advance, and water the surface of the substrate before the reservoir contains less than 5 cm of liquid. Change the nutrient solution, and clean the reservoir with a brush one to two times a month to prevent harmful accumulation of nutrients and pathogens. 6.3 The Grower with Water Reservoir Economical Ecological Lightweight Easy to build and maintain Water autonomy Superior quality and yield Adding a water reserve to a traditional container keeps gardening simple while considerably reducing the frequency of watering. The perfect solution for a hip balcony gardener! 4. 5. 6. 7. 8. 9. 10. 11. 12. 13. 14. 15. 16. ¸ ¸ ¸ ¸ ¸ Assembled tubes in the bucket’s rigid tube. air tube tie wrap flexible tube bucket’s rigid tube
  • 38. 38 guide to setting up your own edible rooftop garden A mature tomato plant can “sweat” out over 4 liters of water per day through transpiration. Capillary movement created by the sweating of leaves transports water and soluble nutrients in the plant. The constant presence of water optimizes the growth and the health of the majority of vegetable plants as long as it does not keep oxygen from being present in the soil. The grower with a water reservoir is very simple. Allowing a small por- tion of the growing mix to be in contact with the water in the reservoir is suf- ficient to make the system work. A pot, a basket or a perforated tube installed between two containers and filled with potting soil acts as a wick that trans- ports water from the reservoir to the roots. A simple overflow hole separates the water reservoir from the growing mix, ensuring adequate air to roots at all times. The size and form of containers is left up to your imagination, as long as the following criteria are respected. Building Details for a Grower with Water Reservoir: Percentage of the false bottom to be in contact with the reservoir: 5 to 15 % Ideal (and maximum) length of the wick: 15 cm (20 cm) Irrigation radius of the wick: 20 cm Maximum distance between wicks: 40 cm Air space (distance between the overflow and the false bottom): 1 to 3 cm 6.3.1 Recipe for a Bucket Grower with Water reservoir Materials 2 – 20 L (5 gal) buckets 1 large tube or rigid container approximately 10 cm (4in.) in diameter and 15 cm long (reused ABS or PVC tubes are ideal) 1 pipe, 1 in. in diameter and 60 cm long 3 tie wraps 12 L of potting soil 10 L of compost Organic fertilizer • • • • • • • overflow (water level) filling tube
  • 39. growing in containers on the rooftop: a technical guide 39 Equipment Drill Marker Hand saw or jig-saw Utility knife If necessary, cut the large 15 cm pipe using a saw. Cut the end of the small tube at an angle. Turn the bucket over, and center the large tube on the bucket’s bottom. Using a marker, draw the interior perimeter of the tube and three attachment points between the bottom of the bucket and the pipe. At 2 cm from the edge of the bottom, draw the exterior edge of the small pipe. Drill the attachment points in the pipe and to the bottom of the bucket. Drill at least 20 drainage holes in the bottom of the bucket using the same bit. Drill the two circles drawn with the marker using a flat wood bit and a hole saw. If you do not have these specialized bits, drill a ½ in. hole on the two circles drawn on the bottom of the bucket, and carefully cut them out using a utility knife or a jig-saw. Attach the large pipe to the bucket using tie wraps. Place the perforated bucket into the second bucket, and insert the angled end of the small pipe in the hole that was made for it. Drill an overflow on the outside of the bucket at 1 cm below the bottom of the inside bucket. Fill the large tube with wet potting soil, and solidly compact it. Fill the grower with 10 L of potting soil and 10 L of compost. Add ⅔ cup • • • • 1. 2. 3. 4. 5. 6. 7. 8. 9. 10. 11. 12. 13. overflow (water level) perforated bucket filling tube “Ready-to-Grow” Start-up Kit To inspire citizens that are not as good with their hands to garden, the Rooftop Gardens team designed a pre-made ecologi- cal grower, the “Ready-to-Grow” kit, made from 95% recycled plastic. It has a 50 L growing mix capacity and its large 14 L water reservoir will enable you to cultivate superb vegetables on your balcony despite your many weekends spent away in the countryside. Don’t wait to start your garden, and support our project at the same time! Contact one of us now to get a grower. http://www.rooftopgardens.ca
  • 40. 40 guide to setting up your own edible rooftop garden of dolomitic lime to the soil if you are placing a fruiting plant in the grower (tomatoes, peppers, etc.). Mix 1/3 cup organic fertilizer in the first 10 to 15 cm of growing mix. Transplant the vegetable plant of your choice and water the surface of the growing mix (do this only when you plant or if the growing mix dries over the summer because of a prolonged lack of water to the reserve). Fill the water reservoir through the filling tube until the overflow spurts out water to avoid washing away nutrient elements. 6.3.2 Recipe for a Half-Barrel with Water Reservoir Materials 1 food grade barrel 1 – 8 to 20 L bucket 4 large tie wraps 2 – 50 cm long pieces of synthetic rope that is at least ¼ inch thick in diameter 14. 15. 16. • • • • Tie Wraps Tie Wraps (or zip ties) are indispensable tools for the builder-recycler. These small, nylon fasteners enable you to assemble small parts in a solid and permanent way. Make sure to insert the correct end into the opening and firmly tighten.
  • 41. growing in containers on the rooftop: a technical guide 41 If the barrel does not already have handles, 1 tube that is 1 in. in diameter and ¾ the height of the barrel (optional) 50 L of potting soil 30 to 50 L of compost Materials Measuring tape Marker Drill Jig-saw • • • • • • • Where to find materials Buckets Scout streets and alleys the night before or very early in the morning of recycling and garbage days. Favor business streets for larger quantities. Pay particular attention to the residues in the containers. If they do not seem to be from food, leave them where you found them! If you aren’t up for a treasure hunt, ask restaurant owners or bulk dealers to keep their empty containers for you. Once you have explained your project, they will probably be pleased to help you. We had a lot of success with companies specialized in selling grape juice for wine-making. Visit them during the fall, when they harvest grapes. Food Grade Barrels (Import Barrels) These food-safe barrels are used to import large quantities of oils, sauces and bulk canned foods. Once the barrels are empty, most bulk dealers give them to middlemen specialized in reselling the used containers and palettes outside the city. If you have access to a car and travel regularly to the countryside, keep an eye out for pyramids of empty barrels on the side of the road. These companies will sell you the barrels for the modest price of $10-$25 per unit. On the other hand, keep in mind that there are often barrels that get in the way of smaller bulk dealers that don’t have large enough quantities to interest a middleman. Look in your phone book for bulk food stores near you. Ask them to call you when they need to get rid of their barrels. They will probably give them to you for free. Specialized Parts Though you can find the majority of parts for your growers in the hardware store, certain are more specific and available only in stores specialized in hydroponics. These parts include: the float valve, Carlon tubing (vinyl tubing), fittings and through-hulls. Give them a call before going to make sure they have everything you need in store. overflow filling hole
  • 42. 42 guide to setting up your own edible rooftop garden Remove the barrel’s lid. Draw a line at half the barrel’s height with a marker. Drill a hole that is approximately ½ in. wide at half the barrel’s height. Insert the blade of the jig-saw in the hole. Cut the barrel along the line. Turn the top part over, set it inside the bottom part and push it down as far as you can. Measure the height between the bottom of the barrel and the opening for the lid. If the height is greater than 20 cm, cut the edge of the lower part of the barrel to reduce the height to 15 to 20 cm. Cut the top of the small bucket if necessary to get the same height as the distance between the barrel’s bottom and the opening for the lid. Perforate the sides and the bottom of the small bucket at 5 cm intervals using a ⅜ in. drill bit, and perforate four assembly holes at equidistance on the top edge. Draw a 20 cm circle in diameter in the middle of the barrel lid. Drill a hole of approximately ½ in. wide on the line, and cut the circle along the line using a jig-saw. Put the edge of the bucket in the middle of the lid, trace the outline, and mark the four assembly holes. Remove the bucket, and drill a ¾ in. hole on each side of the line on the lid facing the four assembly holes on the bucket. Using tie wraps, solidly assemble the edge of the bucket to the top of the lid. If the barrel has handles, measure and mark their place on the barrel facing the bottom part and, therefore, the outside of the grower. Take out the top part of the barrel, and drill a filling hole at least ¾ in. wide in the bottom part of the barrel. Drill two, ¼ in. holes 15 cm from each side of the filling hole. Drill two identical holes on the opposite side of the barrel. If the barrel does not have handles, drill a hole approximately 1 in. wide in the edge of the lid. Cut the other end of the optional rigid tube, and insert it in the hole. Cut the other end of the filling tube if it is necessary and according to your preference. Drill two ¼ in. holes 15 cm from each side of the filling hole. Drill two ¼ in. identical holes on the opposite side of the barrel. Make a knot at one end of the rope. Put the rope through one of the ¼ in. holes keeping the knot inside the barrel. Put the second end in the second hole, and knot it to create handle of the length you choose. Install the other handle on the other side of the barrel. Put the top part of barrel back in the bottom part. The bucket should rest on the bottom of the barrel while the two halves of the barrel hold it solidly in place. 1. 2. 3. 4. 5. 6. 7. 8. 9. 10. 11. 12. 13. 14. 15. 16. The little bucket with its sides perforated.
  • 43. growing in containers on the rooftop: a technical guide 43 Fill the bucket with wet potting soil. Compact solidly. Fill the grower with a 1:1 or 2:1 ratio of wet potting soil and compost. Add 1½ cups dolomitic lime to the soil if the grower is for a fruiting plant (tomato, peppers, etc.). Mix 1 cup organic fertilizer in the top 10 to 15 cm of growing mix. Fill the water reservoir through the hole or the filling tube until water comes out of the overflow. Transplant the vegetable plants of your choice, and water the surface of the growing mix (only do this when planting or if the growing mix dries out in the summer because of a prolonged lack of water to the reservoir). Fill the water reservoir regularly through the hole or the filling tube until water comes out of the overflow to avoid washing away nutrients. 17. 18. 19. 20. 21. overflow bottom part of the barrel top part of the barrel perforated bucket
  • 44. 44 guide to setting up your own edible rooftop garden Standing Funnel Manually filling your growers’ water reservoirs will be a lot easier if you use a funnel. If you have several growers, make life easier by building a self-supporting funnel. Hooray for simplicity! Materials 1 large funnel with a narrow cylinder 1 m of semi-rigid tube that is about ⅝ in. wide (watering hose, Carlon tubing) 1 wooden rod or stiff bamboo around 1 m long 1 hose clamp 3 or 4 self-blocking fasteners Equipment Marker Scissors Drill Saw Screwdriver Determine the ideal height of the funnel on the rod, and mark that spot with a marker. Cut the wood. Drill two holes with the diameter of the tie wraps in the middle of the piece of wood at 3 to 5 inches from the end. Insert the funnel’s cylinder in one end of the tube, and solidly join them together using the hose clamp. Attach the cylinder to the rod by placing the part of the funnel where the cone and the cylinder meet on the drilled end. Insert a tie wrap in each hole, and pull them tight. If necessary, use extra wraps to stabilize the funnel. Cut the excess off the fasteners with the scissors. To fill the reservoir, place the funnel tube in your grower’s filling tube. Fill the funnel using a watering can. • • • • • • • • • • 1. 2. 3. 4. 5. 6. 7. 8. 6.3.3 Choosing Plants A Few Selection Criteria Environment Opt for plants that will flourish in the conditions you give them. Pay special attention to sunshine in your garden. Leafy plants need at least six hours of sunshine, and eight hours are recommended for fruiting plants. De- pending on the time of year you start your garden, it might already be too
  • 45. growing in containers on the rooftop: a technical guide 45 late for certain varieties. For example, sun-loving plants (tomatoes, eggplants, peppers) must be started from seeds inside at the beginning of April whereas onions and peppers should be started as early as the end of February! If you do not have the time or if you are not yet at ease with indoor seedlings, don’t worry. Many varieties of plantlets are available in public markets and garden- ing centers. Space Favor plants with high yield that take up less space to optimize available resources. Think of the size of plants in relation to the expected harvest. Thus, tomatoes, peppers, lettuce and fine herbs might be favored, for example, over squash, broccoli, corn or artichokes. Choose dwarf varieties whenever possible. Determinant tomatoes, for example, will like your grower a lot more than their indeterminate cousins. Along the same lines, dwarf beans and small summer carrots like the “Nantes” or “Little Fingers” varieties will win you over because they are extremely well- suited to container gardening. Given that plant growth is limited by available space for roots, the bigger the container, the better the harvest. Nevertheless, by planting fruiting plants like tomatoes, eggplants, cucumbers, melons and squash in growers with a depth of over 25 cm, you will be rewarded with a satisfying harvest. Therefore, growers that are 20 cm deep can be used to plant peppers, carrots, peas and fine herbs, and those that are 15 cm deep can be used for lettuce, spinach, onions and beets. Therefore, a plant must be chosen according to the container, but its neighbors must also leave sufficient enough space for it to spread out. An over- crowded garden will produce fragile plants that are not as productive as pos- sible. Avoid making your little ones fight one another for fertilizer and sunshine by giving them enough space in the soil. Consult the table below to get a better idea of the number of plants that a grower can host without compromising their growth. Type Variety “Ready-to- grow” kit Bucket reservoir Half-barrel reservoir Fruiting plants Determinant tomato 1 to 2 1 3 to 4 Pepper 3 1 4 to 6 Cherry tomato 2 1 2 to 3 Dwarf beans 4 1-2 6 to 8 Non-fruiting plants Basil 4 1 8 Lettuce 6 to 8 3 10 to 14 Edible flowers 4 to 6 2-3 8 to 10 Fine herbs 4 to 6 1-3 6 to 10 Recommended Quantity of Plants for a Grower with Reservoir
  • 46. 46 guide to setting up your own edible rooftop garden Availability Favor varieties of vegetables that are more rare and costly. You’ll maximize your savings and impress your friends with your extraordinary dishes. Think arugula, basil, chives, nasturtium, cherry tomatoes and purple peppers! Taste Of course, don’t forget about your personal preferences. Though a gar- den allows you to explore new flavors, there is nothing better than growing and harvesting your favorite vegetable. 6.3.4 Growing Mix and Compost Growing mix is a lightweight alternative to soil sold in the spring at gardening centers, hardware stores and supermarkets. It is comes in two cat- egories: garden soil and potting soil. Garden soil is composed mainly of black soil and is not recommended for containers since it tends to get compacted. It is sold under the names black soil, miracle soil and peat moss. Potting soil is a mixture of peat moss, vermiculite, perlite and compost that is specially formulated to ensure good water retention and good drainage in pots and containers. This product is also sold under the names potting mix, starting mix, growing mix or transplanting mix. Give priority to mixtures that are very lightweight and do not contain chemical fertilizers. Compost is a fertilizer made from the decomposition of organic waste. Homemade compost or vermicompost is the ideal addition to your new grower since it will allow you to complete the food cycle at your own home. Make sure that the compost is ripe because a young mixture will absorb the nitrogen that is necessary for good plant growth. Many commercial varieties are also available (shrimp, sea weed, sheep and cow manure, etc.), and all of them are effective. Compost should make up 50% to 30% of the mixture’s volume in order to ensure sufficient fertilization in micronutrients. A small quality of perlite (5 to 10%) can be added to guarantee good drainage if the compost is very dense. 6.3.5 Fertilization Though plants get their energy from the sun, their growth is subject to the presence of a range of nutrients available in the growing medium. Compost provides most nutrient elements, but fruiting plants will need sup- plements of the major nutrients like nitrogen, phosphorous, potassium and calcium. There are several quality organic fertilizers on the Quebec market. The major nutrients of fertilizing products are analyzed in laboratories and identi- fied by three numbers on the tag. The numbers stand for the percentage in weight of available nitrogen, phosphorous and potassium, respectively. Prod- ucts with a higher nitrogen content stimulate leaf growth while products rich in phosphorous encourage root, flower and fruit growth. As for potassium, it ensures vigorous growth and a healthy immune system. If you are a beginner gardener, chose a balanced fertilizer for which the three numbers are similar and register between 2 and 8 (e.g. 4-4-2, 5-5-5,
  • 47. growing in containers on the rooftop: a technical guide 47 An Overview of Composting at Home The average Quebecer generates 1.5 tons of waste per year but transforms only 43% of it. About one third of residential waste could be composted. In a sanitary landfill, this biodegradable matter decays anaerobically, produc- ing greenhouse gases and toxic liquids capable of contaminating our sub-surface water tables. On the contrary, when these precious resources are composted, they are transformed into a quality supplement for your garden. Reduce your ecological footprint now by taking up the art of home composting. If you have access to ground space, learn about the subject before talking with your landlord and other build- ing residents. Then, get a garden compost bin from your city, from the hardware store, or make one yourself using easy-to-build models that are available on the Internet. Keep brown organic materials (dead leaves, straw, shredded cardboard, etc.) to mix with kitchen waste and green garden waste. Start the process with the help of one of the many guides on the topic. Keep in mind that the larger the mass of compost produced, the better the result will be. So, invite your neighbors to participate in this social project! Composting can also be done on a balcony, but it requires more careful management to make up for the lack of microorganisms in the soil and drier climatic conditions than in a garden. The balcony compost bin essentially works the same way as a garden compost bin, but it is generally smaller and has a false bottom for collecting excess liquids. If you do not have a back yard or a balcony, don’t be discouraged. You can get worms to do the work in your own kitchen! Vermicomposting transforms the year’s kitchen waste inside the house. Once the red worms have been acquired and multiply to fit your needs, this technique becomes very efficient, pleasant and odorless. You must, however, acquire special worms from a vermicomposting friend, from an exchange network or from a company specialized in vermicomposting. The worms are put in a bed of paper and moist compost in a container that is at least 30 cm x 40 cm and that has air holes and drains for excess liquids. Once or twice a week, a quantity of waste equal to the weight of worms is added to the vermicomposter. For more details, consult the many resources available on the topic on the Internet. Here is a challenge for enthusiasts: when your container is functional and overflowing with worms, double or triple your capacity so as to compost 100% of your waste. The worms will rapidly multiply to reach your vermicomposter’s capacity.
  • 48. 48 guide to setting up your own edible rooftop garden Type Variety “Ready-to- grow” kit Bucket reservoir Half-barrel reservoir Fruiting plants Determinant tomato 2/3 cup fertilizer at the beginning of the season + 1/2 cup per month 1/3 cup fertilizer at the begin- ning of the season + 1/4 cup per month 1 1/2 cup fertilizer at the beginning of the season + 1/2 cup per month Pepper Cherry tomato Dwarf bean Non-fruiting plants Basil 2/3 cup fertilizer at the beginning of the season 1/3 cup fertilizer at the beginning of the season 1 1/2 cup fertilizer at the beginning of the season Lettuce Edible flowers Fine Herbs 4-6-8, 8-5-4). Generally, fertilizers richer in nitrogen are preferable for leafy plants and growth that leads up to flowering for fruiting plants. On the other hand, fertilizers with higher phosphorus and potassium contents are better for roots and flowering, fructification and maturation of fruiting plants (i.e., tomatoes, zucchinis, peppers, eggplants, etc.). Follow the instructions and the quantities recommended by the supplier. Even though they come from organic sources, these fertilizers can damage or even kill your plants if the concentration is too high. Fertilizing a grower with water reservoir using organic fertilizers can be done in at least three ways: by adding dry fertilizers to the soil, by placing a fertilizing strip on the surface and by adding a soluble fertilizer to the water reservoir. Depending on the needs of the plants, these techniques may be used alone or in some combination. 1. Dry Fertilizers Dry fertilizers cost less and last longer. They are generally mixed in the growing medium and kept moist as their availability depends on the presence of microorganisms that are able to break them down into nutrients. Calcium For fruiting plants like tomatoes and peppers, a calcium supplement at the beginning of the season will encourage abundant fructification and will prevent stem rot. Dolomitic lime is made of minerals and adds noticeable quantities of calcium and magnesium to the growing without throwing the pH out of balance. In spring, mix ½ to 1 cup of dolomitic lime for 25 L of growing mix before planting and repeat once during the season. Basic Fertilization As a general rule, you should follow the supplier’s instructions for veg- etable plants. The first fertilization will be done in the spring before planting; then supplements will be added throughout the season. Here is what we have learned from our experience: basic fertilization is sufficient for non-fruiting plants (basil, flowers, lettuce, arugula, etc.), but fruiting plants need addi- tional nutrients provided by a fertilizer strip or liquid fertilizers. Consult the Basic Fertilization Program for Dry Organic Filters
  • 49. growing in containers on the rooftop: a technical guide 49 table we have provided for information on the fertilization program that we recommend for different types of growers with water reservoirs. Fertilization Strips Most vegetable plants are selected for their capacity to produce an abun- dance of tasty vegetables in very little time. Therefore, they have a very fast metabolism and need relatively large quantities of water and nutrients in comparison to indoor plants. Consequently, the success of a vegetable garden in containers demands generous quantities of fertilizers as well as sharp at- tention from the gardener. Moreover, our experiences showed us that most plants with high fruit yields needed more nutrients than compost or dry fertilizers could provide for growing in a container. One effective, alternative solution is to create a reserve of fertilizer in the grower that will be released progressively throughout the season. In growers with reservoirs, a dry fertilizer strip can be placed on the surface so that it will slowly dilute and transport fertilizers through the growing mix thanks to the capillary action of water. To use this fertilization technique successfully, spread 1 to 1 ½ cups of dry organic fertilizer per fruiting plant on a strip that is 3 to 5 cm wide and the length of the grower after adding the dolomitic lime and the basic first- time fertilizers. Then, cover the strip lightly with a layer of growing mix to conserve moisture. Plants must be arranged so that they are approximately 10 to 15 cm from the fertilizer strip. In this way, their roots can easily spread without the risk of being burned by coming into direct contact with a high concentration of fertilizers. A waterproof plastic mulch must be used with this technique because it prevents the fertilizer strip from being washed away by rain and will ensure a constant capillary movement of water in the growing mix. We will discuss the advantages of plastic mulch in more detail later on (see section 6.3.6). Depending on the fertilizer used and the chosen plant varieties, there may be plants that could benefit from a change of fertilizer strip at mid-sea- son. If plants show nutrient deficiency after one or two months of abundant growth, the mulch should be pulled back and the strip replaced by a new dose of dry fertilizers. Ideally, this second and last supplement should be done with a fertilizer that has low nitrogen content and is rich in phosphorus and potas- sium (e.g. 4-6-8, 2-5-8) because nitrogen encourages the growth of branches and leaves rather than the production of flowers and fruits that are expected at the middle of the season. Soluble Fertilizers Organic soluble fertilizers differ from dry forms by their quick action and higher cost. They are often sold as concentrated solutions in hardware stores and in gardening centers and are generally made of fish and seaweed extracts. A soluble fertilizer can ensure healthy growth in fruiting plants on its own, but the high cost favors occasional use in combination with dry fertilizers. It is also possible to experiment with your own nutrient solutions using wild plant and vegetable waste liquid extracts created at home. If you want to give an extra nutrient supplement to your plants, mix half the recommended dose of soluble fertilizer with the water you use to fill your grower. Repeat fertilization two times more often than recommended to give the total dose to your favorite plants. This program will enable plants to have permanent access to nutrients without risking damage to their roots. For the
  • 50. 50 guide to setting up your own edible rooftop garden Purins and Compost Teas Purins are biostimulating, liquid fertilizers that come from healthy fermentation of organic materials. Choose your ingredients according to the plants’ needs and stage of growth. Look at the grid below for ideas, but be cre- ative. Prepare mixtures, inform yourself and experiment with what you have on hand. To make a plant purin, put about 1 kg of freshly picked and chopped plants in a plastic bucket and add 10 L of water. Keep the bucket covered, away from the sun. Vigorously stir the mixture one or two times a day in order to guarantee healthy fermentation. It may let off unpleasant odors the first few days, but they will subside at the end of fermentation. In two or three days, you should see bubbles come up to the surface when stirring. When these disappear, approximately seven to 21 days later depending on air temperature, fermentation is finished. The liquid plant extract is ready for use. To store purin, filter it and put it away from light in a sealed container. Purin must be diluted by 10 to 20 percent before use. If you are doing traditional container gardening, fertil- ize with diluted plant extract instead of normal watering. If you use growers with water reservoirs, fill the reservoir with diluted purin. Use this fertilizer according to your plants’ needs, once or twice a week. To make compost tea, place a given quantity of compost and 3 or 4 times its volume of water in a plastic bucket. Mix well and let sit for one or two days. Next, filter, store and use the tea according to recommendations given for purins. best results in fruiting plants, given the quick action of soluble fertilizer, you can replace your basic fertilization by a solution richer in phosphorous and in potassium after the first flowers have appeared. It will rarely be necessary to use soluble fertilizer in addition to a fertilizer strip. 6.3.6 Mulch In natural conditions, soil is protected from bad weather by a layer of organic matter. When there is not a layer of freely growing plants, plant resi- dues slowly decay under the careful attention of benevolent fungi and bacte- ria. There are numerous advantages to mulch. First, it retains moisture in the soil and, because of this, protects the surface roots and maintains the balance of organisms (worms, bacteria, etc.) that work to provide air to the soil and release nutrients that are indispensable for good plant growth. Second, it re- duces erosion of the growing mix, moderates the temperature of roots and, in Ingredient Fertilizing composition Burdock Compost Comfrey Cabbage leaves Nettles Dandelions Goldenrod N, K, Calcium N, P, K N, K N N, Fer N, P, K, Calcium, Magnesium P, K, Calcium
  • 51. growing in containers on the rooftop: a technical guide 51 the case of organic mulches, adds nutrients and organic matter to the soil. In container agriculture, organic mulches (dead leaves, straw, wood chips, cocoa shell) are very beneficial if the grower can be placed in a way to prevent the mulch from blowing away. A layer 2 to 3 cm thick should be placed on the surface after the first seedlings sprout or when plantlets are transplanted. When the time comes to add fertilizer to the growing mix, sim- ply lift the mulch and mix fertilizer with the first 2 or 3 cm of growing mix. If you are using a fertilizer strip or are simply looking to maximize dry fertilizers added to the growing mix, you should use waterproof mulch to keep nutrients from being lost to the rain. After preparing the growing mix and completing the first fertilization, simply cover your grower with a gar- bage bag or a plastic tarp and solidly attach it by tying a cord around the container. Cut 10 cm “X”s in the plastic where you would like and plant your plants through the mulch. Avoid mulch made of transparent plastic as it can overheat the roots. Use black plastic for heat-loving plants (tomatoes, zucchinis, melons, eggplants, etc.) and white plastic for cool weather plants (peas, parsley, etc.). You can also be creative as it has been proven that red mulch improves productivity in tomatoes! If you have to replace the fertilizer strip during the season, undo the cord and lift up the plastic for easy access to the growing mix. 6.3.7 Closing the Garden in the Fall Here are some guidelines to help you prepare your grower for the cold season. Once the harvest has ended and winter is in sight, stop filling your grower’s water reservoir. Once the reservoir has been emptied and the plants have dried out from lack of water and the change of season, simply cut the plants to the level of the soil and incorporate the remains into your compost pile. To reduce the weight of your grower and accelerate the defrosting of the growing mix in the spring, empty the reservoir by turning it on the side of the overflow. Then, turn it upright, and cover it with a plastic tarp. Your grower is now ready to survive the winter! If you have to move the grower, this is the ideal moment to do so since it will now be a lot lighter. 6.3.8 Next Spring Here are some suggestions to help you re-start your grower after the last frost. After one growing season, the plants have consumed most of the nutri- ents of the compost in the growing mix. Root action and the microscopic life that accompanies it have also started to break down growing mix particles. Potting soil generally has a lifespan of two to four years after which its capac- ity for water retention and drainage will be reduced to the point that that the plants’ health will be compromised. To guarantee good results every year and to extend the life of the growing mix, we suggest fertilizing it each spring. • • • • fertilizer strip plastic cover
  • 52. 52 guide to setting up your own edible rooftop garden To enrich the growing mix: remove approximately 10 to 20% of the growing mix from your container; prepare a mix of compost and soil similar to this one: 80:75% compost 20:25% perlite (to improve drainage); mix the contents of the grower to untangle and spread out roots from the previous year; fill the grower with the new compost mixture, and mix it in with the existing growing mix. 6.4 A Garden of Connected Containers Economical Ecological Lightweight Easy to build and maintain Water autonomy Superior quality and yield Like any living thing, a garden grows quickly and reproduces. If you have caught the urban gardening bug, you are probably already planning to set up new growers. That’s great! However, if daily filling of numerous hydroponic growers or growers with water reservoirs is bogging down your initiative, you should consider the advantages of a garden of connected containers. All of your growers can be connected to a central water reservoir equipped with a control valve that will ensure automatic filling. Not only can this system function on its own, it can also be connected to a rainwater collec- tion system. Your balcony or terrace will be turned into a true urban oasis. Able to drink on their own, your plants will be free to feed as they please and will sing your praises as a master of permaculture. The success of your connected garden depends on the efficiency of the valve and on airtight joints. Here, we suggest you construct a control box equipped with a float valve and fittings available at several hydroponics stores. You can also find the rest of the supplies at the hardware store. 6.4.1 Recipe for Constructing a Garden of Connected Containers Materials Control Box 1 flexible storage box or a plastic bucket with a lid that can hold a float valve 1 - ¾ in. automatic float valve 1 retaining nut for a countertop faucet 1 – ¾ in. female fitting and 1 – ½ in. male fitting 1 eyelet 1 - ⅝ in. elbow or tee fitting for Carlon tubing depending on the connecting system • • • • ¸ ¸ ¸ • • • • • •
  • 53. growing in containers on the rooftop: a technical guide 53 Reservoir 11 food grade barrel or a large plastic container with a lid that can be perforated 1 – ⅝ in. through-hull and two washers Network 1 - ⅝ in. eyelet per grower Straight, elbow or tee fittings for ⅝ in. Carlon tubing depending on the connecting system Stainless steel hose clamps for a ⅝ in. tube Equipment Drill and ¾ in. and ⅝ in. drill bits Multiple slip joint pliers Screwdriver Knife or scissors Design Plan Do a sight check on the surface of the ground (or roof). It should seem level to you. No matter what surface the connected growers are meant to cover, any difference in levels should always be less than the height of the reservoirs of growers. If the difference in levels is greater than the height of the reservoirs, water will not circulate between communicating recipients as it should. However, if the difference in levels is acceptable, you can compensate for the slope after installing the series by putting bricks or wood blocks under individual growers in the series. If you do not trust your sight judgment, check if the surface is level as indicated on the following page. • • • • • • • • • 1. Eyelet. Tee fitting. Elbow fitting. Hose clamp.
  • 54. 54 guide to setting up your own edible rooftop garden Checking the Surface Level Get a small transparent plastic tube that is at least 5 m long and two measuring tapes. Ask a friend to help you. Fill the tube with water and hold one end at the corner of the garden. Ask your friend to pull the tube along the ground to the other corner while stopping up the other end with their thumb. Measure the distance of the water level in each tube from the ground. The difference between the two levels represents the total difference in levels. If the garden is bigger than the tube, repeat the steps in the same direction starting from the ending point and add the differences in level to calculate the total difference. Then, repeat the steps in the other directions of the garden to check the entire surface. If you have not already done so, draw up a design plan for the garden on paper by drafting out the general floor plan as well as the placement of growers and the water reservoir (see section 3.2). The plans will show the network junctions and the link to each grower. It is important to place the Carlon tubing network strategically in order to minimize the number of joints and the risk of stepping on the tubes while gardening. Buy a few extra meters of Carlon tubing in case changes must be made. In the garden, set up the reservoir, your growers and the control box as indicated on the plan. If necessary, don’t hesitate to modify the design. Control Box Fill the container that will be used as a control box up to the level of your growers’ overflow holes. Put the float valve on the water, keep the valve in a horizontal position and push it down until the float’s arm stops and tries to submerge the float. The controller is then full and the valve closed. It will open only when the water level goes down. Mark the height of the float valve’s joint on the container and empty it. Drill a ¾ in. hole on the joint mark. Insert the fitting for the valve in the hole, and screw it in all the way making sure that the float valve’s movement is vertical. Tighten the valve’s joint to the container wall using a retaining nut. The joint does not necessarily have to be air tight, but it should be solid. Drill a ⅝ in. hole on one side of the control box at 2 cm from the ground. Insert an eyelet in the hole and put the correct Carlon tubing connector on it according to the design. 2. 3. 1. 2. 3. 4. 5. 6. 7. The Design Plan.