

Mais conteúdo relacionado
Mais procurados
Semelhante a Setup audio, record consent & explore Sense UI
Semelhante a Setup audio, record consent & explore Sense UI (20)
Mais de Nigel Gibson
Mais de Nigel Gibson (20)
Último
Último (20)
Setup audio, record consent & explore Sense UI
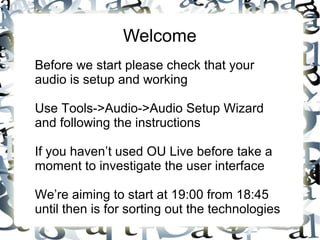
- 1. Welcome Before we start please check that your audio is setup and working Use Tools->Audio->Audio Setup Wizard and following the instructions If you haven’t used OU Live before take a moment to investigate the user interface We’re aiming to start at 19:00 from 18:45 until then is for sorting out the technologies
- 2. BEFORE WE START........... • I’d like to record this session for those unable to attend • If you would rather the session was not recorded, i.e. if you do not consent, please click the red cross. Otherwise click the green tick • The session will only be recorded if everyone agrees to it
- 3. Sense and Sense Ability Online session II TU100 13J
- 4. We’re going to cover..... • Palettes and where to find the various blocks • Saving and loading scripts • Distinguishing between types of block • Creating and running scripts • Editing scripts • Troubleshooting • We’re not doing loops and variablesWe’re not doing loops and variables
- 5. Multi task • Open Sense in the background – I’ll leave time for experimenting and looking around as we work through this tutorial • We’re going to take it slowly so don’t worry • By all means play but show consideration for others • Let me know that you are ready to continue by showing a green tick
- 6. Naming of the parts • The next slide shows the names for some of the bits of the UI (user interface) • If I use any term which you don’t understand you must stop me and ask! • Note that the UI has a number of right-click menus; if you can’t see what you need try the right-click • You won’t see a sprite just yet but don’t worry.........
- 8. Saving and loading • As with most applications use the “Save” or “Save as” options to save the project • Use the “About this project” section to keep a note of what the project is about • Load projects using the “Open” option • As we work through this session you might want to save your scripts….
- 9. Creating a sprite Give the sprite a name At this stage you will draw your sprite using “Paint” Use “Show” (on the right-click menu) to put your sprite on the stage
- 10. An exercise • Create, name and paint your sprite • Green tick when you’ve finished http://screenr.com/SR4s
- 11. Now we can look at the palettes
- 12. Making them do something • Drag components from the palette to the “scripts” tab • Create a “Start” event • Add actions • Tell it to stop • String them together and run the script http://screenr.com/qm4s
- 13. Tracking progress • If you want to see where the cursor has been use the pen • Start the pen drawing by putting it down • Stop it by lifting it and get rid of the lines by using “clear”
- 14. An exercise • Put it together a script to draw a line for 50 steps
- 16. Space and time • Use the “go to” to set the sprite position – handy to reset the script........ • Use the speed slider to control how quickly the script runs • Show and hide are applied to the sprite and do just that
- 17. An exercise • Make your line start at 0,0 and hide the sprite when the line is complete • Green tick when you’ve done that – shout if you have problems
- 19. Using blocks • Duplicating a block • Right click • Deleting a block • Right click • Splitting a block • Click and drag down
- 20. Planning the programme • As the programs become more complex it’s important to plan them first • Use “plain language” Start Draw Sprite – circle? Place sprite in the right place Move it X steps Rotate Y degrees Do something else Stop
- 21. An exercise • Draw a square with a side length of 75 steps and starting at 0,0 • Green tick when it’s done
- 23. Troubleshooting • Stepping through the code – use “Single step” • Take out sections and run without them to see what breaks • Walk through the code (bench test) looking at what you’ve asked it to do
- 24. Futures • Heather Morris's R13 room • 12th December at 19:00 and repeated on 14th December at 10:30 • Iteration and conditions
- 25. Q&A • Hope this has been of use • This presentation is available online at